LulzBot Mini 2 User manual

LulzBot Mini 2 User Manual
Congratulations on joining the ranks of our amazing LulzBot 3D Printer useres!
Refer to the LulzBot Mini Quick Start Guide for detailed unpacking instructions and
step-bystep guides wthrough your first 3D print.

2
Table of Contents
Warnings & Safety Information
Regulatory Statements
Recommended Software
Cura LulzBot Edition
Filament Guide
Graphical LCD Controller
Maintenance
Advanced Usage
Source
Support
Warranty & Return Policies
Contact
Glossary

3
Warnings & Safety Information
WARNING!
READ THIS COMPLETELY BEFORE UNPACKING AND POWERING UP YOUR PRINTER.
Hazards and Warnings
Your LulzBot 3D printer has motorized and heated parts. Always be aware of possible hazards
when the printer is operational.
Electric Shock Hazard
Never open the electronics case when the printer is powered on. Before removing the electron-
ics case cover, always power down the printer and completely turn off and unplug the printer.
Allow the printer to discharge for at least one minute.
Burn Hazard
Never touch the hot end nozzle or heater block without first turning off the hot end and allow-
ing it to completely cool down. The hot end can take up to 20 minutes to completely cool. Never
touch recently extruded plastic. The plastic can stick to your skin and cause burns. The print
surface can reach high temperatures that are capable of causing burns.
Fire Hazard
Never place flammable materials or liquids on or near the printer when it is powered on or
operational. Liquid acetone, alcohol, or other chemicals may release vapors that are extremely
flammable.
Pinch Hazard
When the printer is operational take care to never put your fingers near any moving parts in-
cluding belts, pulleys, or gears. Tie back long hair or clothing that can get caught in the moving
parts of the printer.
Age Warning
For users under the age of 18, adult supervision is recommended. Beware of choking hazards
around small children.
Modifications and Repairs Warning
At FAME3D, we respect your freedom to modify your LulzBot Desktop 3D Printer. However any
modifications or attempted repairs that cause damage are not covered under the Warranty.
Questions? Contact Technical Support by visiting LulzBot.com/Support, by emailing support@
lulzbot.com, or by calling +1-701-809-0800.

4
Regulatory Statements
Regulatory Compliance Statemetn Class B
Federal Communications Commision Statement
This device complies with part 15 class B of the FCC Rules. Operation is subject to the following
two conditions:
1. This device may not cause harmful interference and
2. This device must accept any interference received, including interference that may cause
undesired operation.
NOTE: This equipment has been tested and found to comply with the limits for a Class B digital
device, pursuant to part 15 of the FCC Rules.
These limits are designed to provide reasonable protection against harmful interference in a
residential installation. This equipment generates, uses and can radiate radio frequency energy
and, if not installed and used in accordance with the instructions, may cause harmful inter-
ference to radio communications. However, there is no guarantee that interference will not
occur in a particular installation. If this equipment does cause harmful interference to radio or
television reception, which can be determined by turning the equipment off and on, the user is
encouraged to try to correct the interference by one or more of the following measures:
1. Reorient or relocate the receiving antenna.
2. Increase the separation between the equipment and receiver.
3. Connect the equipment into an outlet on a circuit different from that
to which the receiver is connected.
4. Consult the dealer or an experienced radio/TV technician for help.
FCC Warning: Changes or modifications not approved by the party responsible for compliance
could void the users authority to operate the equipment.
Industry Canada Statement
CAN ICES-3 (B)/NMB-3(B) Cet appareil numérique de la classe B est conforme à la norme ICES-
003 du Canada. This device complies with Canadian ICES-003 Class B.
Australian Communications and Media Authority Statement
This device has been tested and found to comply with the limits for a Class B digital device,
pursuant to the Australian/New Zealand standard AS/NZS CISPR 22:2009 + A1:2010.

5
Recommended Software
All of the following Free/Libre Software packages are available for GNU/Linux, Windows, and
Mac OS X. We highly recommend using these programs on GNU/Linux.
3D Printer Hosts
A 3D printer host communicates to a 3D printer and can be used to manually move the printer
along all the axes of motion, set temperatures manually, send commands, and receive
feedback/error messages from the onboard control electronics.
Cura LulzBot Edition
Cura LulzBot Edition is the recommended software for your LulzBot 3D Printer. Download the
latest version today, for free, from LulzBot.com/Cura.
Cura LE is a Free Software program that both prepares your files for printing by converting your
model into G-code and allows you to control the operation of your LulzBot 3D printer.
Keep Cura LE updated to have the latest filament slicing profiles, developed and tested by the
LulzBot team to ensure the best performance out of your LulzBot!
Cura LE: Automatic LulzBot Driver Installation
Cura LulzBot Edition will automatically install the required drivers for Windows users during the
installation process. GNU/Linux and OS X users will not need to install drivers to communicate
with the LulzBot Mini 2 3D printer. If your school or workplace requires a manual driver
installation process, the drivers can be downloaded from LulzBot.com/downloads.
Alternative Printer Host Software
OctoPrint
Available at OctoPrint.org:
OctoPrint is the leading networked 3D printer host that uses a web-based interface to ac-
cess and control your 3D printer. Added web-cam functionality allows for time-lapse videos
and even a live stream. OctoPrint will run on GNU/Linux, Windows, and Mac OS X operating
systems, and can even run well on a Beagle Bone Black or a RaspberryPi (inexpensive busi-
ness-card sized computers).

6
MatterControl
Available at MatterHackers.com/MatterControl:
MatterControl is another printer host that currently runs on GNU/Linux, Windows, and OS X. It
features 2D and 3D model viewing, a print queue, and print file organization and searching.
Slicers & Slicing Engines
Slicers determine the ideal 3D printer tool path based on the options selected and desired finish
to turn a 3D model (typically STL/OBJ/etc) into your desired object.
The slicing engine uses the nozzle diameter, movement speeds, layer height, and other
variables to determine the coordinates needed to move the tool head, and the rates at which
it will do so. This information is exported out of the program as a G-code file. This G-code file
is a plain-text file with a series of letter-based codes and a list of the complete X,Y, and Z-axis
coordinates used for printing the 3D model.
We recommend using Cura LulzBot Edition as it includes a slicing engine and pre-set filament
slicing profiles.
Cad and 3D Modeling Software
A Free/Libre slicer like Cura LulzBot Edition will support many of the 3D model file types
generated by Free/Libre Software design applications. Other Common non-free CAD and 3D
modeling software options may be capable of exporting the required 3D model file types.
Recommended 3D Model Parameters
• Design Units: Millimeters
• Output File: STL
Some design applications do not use millimeters by default and stead use imperial or
application specific units of measure. If you are unable to change the program’s units of
measure, scale the model by 25.40 to compensate for inch-based design units. The
recommended design software options listed below use millimeters by default.
FreeCAD
From FreeCAD.org:
“FreeCAD is a parametric 3D modeler made primarily to design real-life objects of any size.
Parametric modeling allows you to easily modify your design by going back into your model
history and changing its parameters. FreeCAD is open-source and highly customizable,
scriptable and extensible.”

7
Your LulzBot Mini 2 was designed in FreeCAD! Find the design files in the Source files included
with your 3D printer.
OpenSCAD
From OpenSCAD.org:
“OpenSCAD is software for creating solid 3D CAD models. It is free software and available for
Linux/UNIX, Windows and Mac OS X. Unlike most free software for creating 3D models (such
as Blender) it does not focus on the artistic aspects of 3D modelling but instead on the CAD
aspects. Thus it might be the application you are looking for when you are planning to create
3D models of machine parts but pretty sure is not what you are looking for when you are more
interested in creating computer-animated movies.
OpenSCAD is not an interactive modeler. Instead it is something like a 3D-compiler that reads
in a script file that describes the object and renders the 3D model from this script file. This gives
you (the designer) full control over the modeling process and enables you to easily change any
step in the modeling process or make designs that are defined by configurable parameters.”
BlocksCAD
From BlocksCAD.org:
“BlocksCAD is based on the open-source programming language OpenSCAD, a powerful and
popular language in the 3D maker community. BlocksCAD’s block-based interface makes
programming accessible to students as young as 3rd grade (8 years old), but is powerful
enough to continue making sophisticated designs through high school.”
Blender
From Blender.org:
“Blender is the free and open source 3D creation suite. It supports the entirety of the 3D
pipeline—modeling, rigging, animation, simulation, rendering, compositing and motion tracking,
even video editing and game creation.”
Blender is the most widely used Free/Libre Software 3D modeling software, so much so that
we are able to use Blender to create 3D models, and as our video editing suite. Blender is well
documented with tutorials available through Blender.org and more.

8
Cura LulzBot Edition
Cura LulzBot Edition is the recommended software for your LulzBot 3D Printer. Download the
latest version today, for free, from LulzBot.com/Cura.
Cura LE is a Free Software program that can be utilized by many 3D printers using the Fused
Filament Fabrication (FFF) process. Fused Filament Fabrication is the term for the process of
laying down successive layers of extruded filament to create a three dimensional object. As
each layer of molten plastic is extruded into place, it fuses with the previous layer.
Cura LE prepares your 3D model for printing by converting your design into G-code and allows
you to control the operation of your LulzBot 3D printer.
Keep Cura LE updated to have the latest filament slicing profiles, developed and tested by the
LulzBot team to ensure the best performance out of your LulzBot!
Automatic LulzBot Driver Installation
Cura LulzBot Edition will automatically install the required drivers for Windows users during the
installation process. GNU/Linux and OS X users will not need to install drivers to communicate
with the LulzBot Mini 2 3D printer. If your school or workplace requires a manual driver
installation process, the drivers can be downloaded from LulzBot.com/downloads.
This basic guide is designed to outline the fundamentals of using Cura LulzBot Edition software
with your LulzBot 3D Printer. Want more information? In Cura LulzBot Edition, hover over each
option to view the details on individual settings.
Cura LulzBot Edition: Quick Start Guide
Watch the Cura LulzBot Edition Quick Start Guide at LulzBot.com/cura-qsg or on the LulzBot
YouTube channel
Cura LulzBot Edition: Installation Overview
Download and install Cura LE by following the detailed download, installation, and removal
instructions for your computer’s operating system at LulzBot.com/Cura.
Uninstall any previous versions of Cura you may have been using when upgrading. Follow the
instructions available at LulzBot.com/Cura.
Start Cura LE by launching it from your list of installed applications. If this is the first time that
Cura LE has been installed on this computer, the Configuration Wizard window will open.
It is important to select the correct printer as Cura LE uses pre-set filament slicing profiles and
machine settings based upon the 3D printer model selected.
9
Select LulzBot Mini 2.
Click Next through the remaining windows. End the setup process by clicking Finish.
Using Cura LulzBot Edition
After setting up Cura LE for the first time,
a 3D model of the LulzBot Rock2pus will
load onto the cirtual print bed. This model
can also be accessed by selecting the
File > Open Recent
and selecting
Rock2pus
.
Load the Rock2pus model now.
Supported File Types
Cura LulzBot Edition supports many of the file types used by many popular 3D modeling and design
applications.
Currently, Cura LE supports the following 3D model file types:
3MF, G, G-code, STL, OBJ, X3D
Cura LE can also convert the following image types into a height map, for 3D printed lithographs.
BMP, GIF, JPEG, JPG, PNG

10
Navigating Within Cura LE
1. Virtual Print Surface
2. Axis Indicator
3. Print Area
4. Prepare Tab
5. Monitor Print Tab
6. Open File
7. Move
8. Scale
9. Rotate
10. Mirror
11. Per-model Settings
12. Multiply Object
13. G-code File Name Text Box
14. Edit G-code File Name
15. 3D Model Dimensions

11
Controlling the Cura LE Viewpoint
Use your mouse or trackpad to move
the camera view. Hold down the right
mouse button on GNU/Linux and Windows,
or Control on Mac OSX, and move your
mouse to rotate the virtual print bed.
Hold the middle button, or shift while
clicking to pan up, down, left, and right.
3D Model Manipulation
The buttons on the left-hand side of the Cura LE interface are used to manipulate the 3D model
on the virtual print surface.
Move
Cure LE adds more precision to positioning your objects on the virtual print bed. Move your
model using a handle for each axis (red for X, green for Y, blue for Z) or by entering in the
position for each axis for more precise movement.
Values entered are relative to the current
displayed postion. Negative Z-axis
movements can be used to cut off the
bottom of the model and start the print
where it intersects the virtual print bed,
useful for improving adhesion on models
without flat bases.
Note: The Lock Model check box prevents
mouse-based movements. Manual
numerical axis movements are still allowed
when checked.

12
Scale
Adjust the size of the model using values
entered in millimeters or percentages.
Snap Scaling uses increments of 10%
when using the red/blue/green axis boxes
to drag and scale. Uniform scaling is
selected by default, to keep the 3D model
aspect ratio the same.
Restore the original scaling by pressing
the Reset button.
The Scale To Max button will enlarge a
model to fill the maximum build area.
Rotate
Orient your model along all three axes by
clicking the Rotate button. Three colored
circles will surround your model, centered
along the model midpoint. The Blue circle
will allow you to rotate around the Z axis.
The Green circle is used to rotate around
the Y axis. The Red circle will rotate around
the X axis.
The Lay Flat button will attempt to place
the model onto the print surface using the
flattest portion.
The Snap Rotation button will use 15° increments.
Restore the original orientation by pressing the Reset button.
Mirror
Use the red, green, and blue arrows to
mirror the model along that axis.
Right click using your mouse and select
Reset All Model Transformations to undo
these changes.

13
Per-model Settings
Change or assign model-specific slicing
settings when printing more than one
model at a time.
NOTE: This button will only be enabled
when in Custom Mode, and when the
Special Mode of Print Sequence: One at
time is active. This setting is only
recommended for expert users.
Multiply Object
Select the desired model. Press the
Multiply Object button to open the
Multiply Selected Model window.
Enter the amount of desired additional
models.
Camera Positions
The buttons along the top of the Cura LE
interface include five preset camera
positions
• 3D View
• Front
• Top
• Left
• Right

14
View Type
Change your view type by selecting an
option from the top dropdown menu:
Solid view: The default viewing mode
X-Ray view: View any interior structures
of the model
Layer view: Also known as G-code Preview,
scroll through each layer of your print by
changing to this view.
Using Layer View for G-code Previews
Use Layer View to visualize the movements generated by Cura LE, or contained within a G-code
file. Layer View even includes an animated layer-by-layer printing preview.
Note: Some users with legacy video hardware may not be able to use the more complex visual
display options.
Material Color
This option shows the extrusion paths
and movements using the default
color for the material selected.

15
Line Type
Use Line Type to show the movements
in different colors.
Feedrate
This option will use a color gradient
to display the movement speed
throughout each layer.
Layer Thickness
The Layer Thickness option uses a color
gradient to show the different layer heights
used throughout the model. This is
especially helpful when using the
experimental adaptive layer feature.

16
Print Setup
The right-hand side of the Cura LE window contains the Print Setup interface. The options here
allow for switching between 3D printers, materials sorted by ease of use and by name, and
preset slicing profiles of varying qualities and options.
1. 3D Printer Selection and Management
2. Tool Head Info
3. Printer Info
4. Filament Recommended Skill Level
5. Filament List
6. Filament Product Page & Information
7. Slicing Profiles
8. Recommended vs Custom Selection
9. Infill Slider
10. Gradual Support Checkbox
11. Support Material Checkbox
12. Build Plate Adhesion
13. Slicing Progress Indicator
14. Estimated Print Time
15. Estimated Required Filament Length
16. Estimated Required Filament Weight
17. Save File Button

17
Filament Categories
The Category dropdown is used to organize the many
supported and experimental filament types by
user skill level.
The categories are:
All: This category includes all supported filament materials and brands.
Beginner: These materials require little-to-no additional steps or equipment to print cleanly,
reliably, and provide a balance between cost and strength.
Intermediate: The filaments included in this category have specialized characteristics such as
strength, finish, or post-processing needs, and may include additional recommended
equipment like enclosures.
Advanced: These materials may require treating the PEI print surface for improved adhesion
or release. These materials may also require additional post-processing to achieve the desired
final finish.
Expert: Some materials may warp at larger scales, require print surface treatment, or may need
to be printed on the bare glass surface of the Modular Print Bed System.
Experimental: Find even more out of the box compatibility in this category from new
third-party vendors, exciting new materials, and more. Note: These materials may not be
actively supported by the LulzBot technical support team at this time.
Material
Different manufacturers have different
formulations for their specific brand. These
different formulations may have different ideal
settings. We highly recommend using the
filament brands listed in Cura LulzBot Edition.
Beautiful 3D printed objects start with reliable
and consistent filament. These slicing profiles will be good starting points for other
manufacturers, but they may not be ideal.
Choose your filament here. While some materials may be similar, each brand may require
different speed and temperature settings.
Click on the informational link to view filament details and specifications at LulzBot.com.
Some materials can benefit from treating the print surface with PVA-based glue stick. Any
filament with this characteristic will have that noted in a new Adhesion Info information box.

18
Choosing a Print Profile
Choose your desired print quality or characteristics
with the Profile dropdown. Some specializd
filaments may only have a single profile.
The value listed after the profile name is the
average layer height used for the print.
Standard: A balance of speed, surface finish, and detail, this setting is recommended for most
3D prints.
High Detail: A smaller layer height and slower speeds are used to maximize part appearance
while leading to longer print times.
High Speed: Perfect for prototypes, or when printing time matters most. These profiles use a
larger layer height.
High Strength: Strong, dependable parts can be achieved by balancing excellent layer adhesion
with wide extrusion widths and walls.
High Clarity: Translucent materials can look even better when printed at large, or even
excessively large layer heights.
Recommended vs Custom
These built-in recommended settings have been tested by 3D printing experts and are
designed to offer reliable, great looking prints, reel after reel, model after model.
At times, you may want to adjust specific settings to achieve challenging geometries or
features. Switching to Custom mode will display many of the hundreds of individual settings,
special modes, and experimental features. Switch back to Recommended mode to restore the
expert-developed built-in slicing profiles.
Tip: Access more information on each setting by hovering each setting.
Tip: Change only one setting at a time, and print your object to see the result. By minimizing
your variables, you’ll learn how each setting can influence your final print outcome.
Tip: Looking for a particular slicing setting among all the options? Use the search bar above the
list of settings to quickly find what you need.

19
Infill
Balance material use, print speed, and print
weight with the recommended print infill
setting of 20%. A higher infill percentage
can result in stronger object, for example
your LulzBot 3D Printer is built with ABS
parts 3D printed with a 60% or higher infill.
Generate Support
The LulzBot Mini 2 3D printer is able to
print models that have angles and
overhangs, even without support material.
Turn this option on if sections of the model
extend out away from the model. This will
build up material underneath the portion
extending in mid-air, preventing drooping
or sagging.
Build Plate Adhesion
The slicing profiles included within Cura LE
will use a skirt to prime the hot end to
ensure that sufficient material is being
extruded prior to starting on the actual
object.
The Brim option can improve printed part
adhesion to the print surface by increasing
the surface area of the first layer.
The Raft option uses a larger, multi-layered
base to improve part adhesion. In general,
Skirt is preferred.

20
Save to File | Print via USB
If a printer is not connected to the computer, this button will be labeled with Save to File. If an
SD card is mounted, you will also see a Save to Removable Drive option which will save the
G-code file to your SD card using the 3D model file name. A progress bar will reach 100% when
the file has been saved to your SD card.
If the LulzBot Mini 2 is connected through the USB cable to a computer this button will display
Print via USB. Click on the drop down arrow to access the file save options.
Cura LE Video Quick Start Guides
Is this your first time printing with the LulzBot Mini 2? Follow the LulzBot Mini 2 Quick Start
Guide video for a step-by-step guide.
Watch the video and refer to the Cura LulzBot Edition Quick Start Guide, available at LulzBot.
com/Cura-QSG,for a general guide on 3D printing through Cura LulzBot Edition.
Table of contents
Other LulzBot 3D Printer manuals

LulzBot
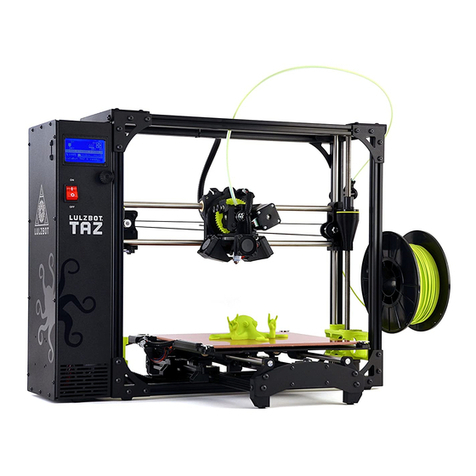
LulzBot TAZ 3.0 User manual

LulzBot
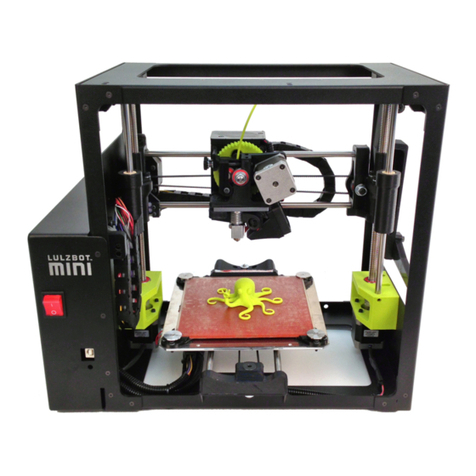
LulzBot Mini User manual

LulzBot
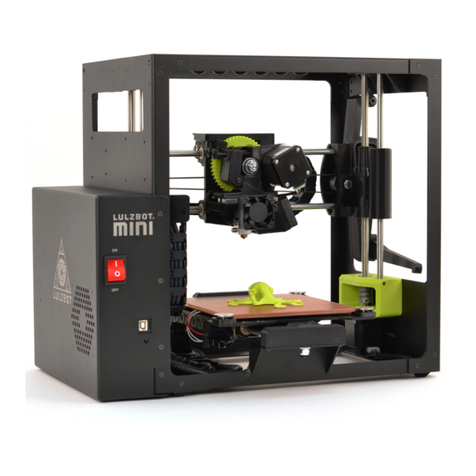
LulzBot Mini User manual

LulzBot
LulzBot TAZ 5 User manual

LulzBot
LulzBot TAZ 5 User manual

LulzBot
LulzBot TAZ Instruction Manual

LulzBot
LulzBot TAZ User manual

LulzBot
LulzBot TAZ 6 User manual

LulzBot
LulzBot TAZ SideKick User manual

LulzBot
LulzBot Mini User manual

LulzBot
LulzBot TAZ 4 User manual

LulzBot
LulzBot TAZ 6 Instruction Manual

LulzBot
LulzBot TAZ Pro S Instruction Manual

LulzBot
LulzBot TA Instruction Manual

LulzBot
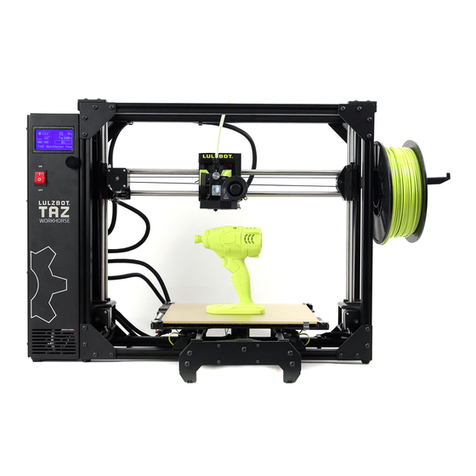
LulzBot TAZ Workhorse User manual

LulzBot
LulzBot TAZ 5 User manual

LulzBot
LulzBot TAZ 6 Instruction Manual

LulzBot
LulzBot Mini User manual

LulzBot
LulzBot TAZ 5 User manual

LulzBot
LulzBot TAZ User manual