manuals.online logo
Brands
  1. Home
  2. •
  3. Brands
  4. •
  5. luminii
  6. •
  7. Lighting Equipment
  8. •
  9. luminii Optic Arts KILO Channel User manual

luminii Optic Arts KILO Channel User manual

REV1.0 June 19, 2020 2:47 PM
KILO Channel - Installation Instructions
Page 1 of 3
*LUMINII RESERVES THE RIGHTS TO CHANGE SPECIFICATION & INSTRUCTION WITHOUT NOTICE
7777 N. Merrimac Ave
Niles, IL 60714
T 224.333.6033
F 224.757.7557
[email protected]
www.luminii.com
Please read complete instruction prior to installation and keep for future reference!
1. Product should be installed by a qualified electrician.
2. Prior to installation ensure power is off at fuse box to prevent electrical shock.
3. If extrusion is installed facing up and in a wet location, ensure proper drainage and silicone endcaps and diffuser lens.
1 2
extrusion
1.1
1.1 Snap the lens into the extrusion, then align & center the extrusion to the
determined location. Make any reference marks to install the extrusion.
2.1 If necessary, extrusion and lens can be cut in the field. Using the proper
blade for aluminum cut the extrusion to the desired length. Then cut the lens
using utility shears leaving an extra 0.08” to overlap the onto the endcaps.
Note: Prior to install, 24VDC power must be present for wiring. Also review
and account for all parts necessary to install properly.
Caution: Safety equipment is recommended, when modifications are being
made to the extrusion & lens.
lens
reference mark
measure measure
2.1
miter saw
extrusion with lens
extrusion
lens
3If joining multiple extrusions. Insert the KILO Joiner (sold separately) half way into one of the extrusion ends & tighten using the proper allen wrench. Followed
by pushing one of the KILO extrusion next to the other KILO extrusion and tighten the set screws. Repeat step for any additional connections.
Joiner
Flat Corner Joiner
Inside or Outside
Corner Joiner
KILOC-JOINER
Kilo Channel Joiner
KILOC-FL JOINER
Kilo Channel Flat Corner Joiner
KILOC-INJOINER
Kilo Channel Inside or Outside
Corner Joiner
KILO Channel
KILO Joiner
KILO Channel
KILO Joiner
KILO Channel
KILO Joiner
0.04”
One each side
REV1.0 June 19, 2020 2:47 PM
KILO Channel - Installation Instructions
Page 2 of 3
*LUMINII RESERVES THE RIGHTS TO CHANGE SPECIFICATION & INSTRUCTION WITHOUT NOTICE
7777 N. Merrimac Ave
Niles, IL 60714
T 224.333.6033
F 224.757.7557
[email protected]
www.luminii.com
Please read complete instruction prior to installation and keep for future reference!
1. Product should be installed by a qualified electrician.
2. Prior to installation ensure power is off at fuse box to prevent electrical shock.
3. If extrusion is installed facing up and in a wet location, ensure proper drainage and silicone endcaps and diffuser lens.
6
6.1
mounting brackets
every 20”
extrusion
6.1 Mounting bracket must be installed every 20”, secure using the provided screw. Snap the extrusion into the mounting brackets.
6.2 To remove the extrusion from the mounting brackets, carefully insert a flat screwdriver to the bottom edge of the extrusion then pull up until the extrusion pops up.
screw
7.1 Snap the lens into the extrusion to secure in place.
7.2 If extrusion going to be installed outside, add silicone to the endcaps & the full length of the lens. To help avoid getting water inside the extrusion, but will not make waterproof.
7
7.1
diffuser
lens
end cap
If shortening LineLED, cut down in between the two rows of solder pads. Always cut
LineLED from the end without connector/wire leads. Ensure that LineLED strip/s fit
completely inside the extrusion and the solder pads do not touch the metal endcaps
to avoid shorting of circuit.
4
wire
leads
solder
pads
LineLED strip
Ensure aluminum extrusion is
clean from dust before taping
the LineLED strip/s. If necessary
wipe extrusion and let dry before
installing.
Install the LineLED strip/s as close
as possible to extrusion ends to
avoid dark spots.
5feed LineLED
wire leads
through one of
drilled holes
remove LineLED
paperbacking
from adhesive
tape before
installing into
extrusion
MB-KILOC-SS
Stainles steel screw-in
mounting bracket
7. 2
REV1.0 June 19, 2020 2:47 PM
KILO Channel - Installation Instructions
Page 3 of 3
*LUMINII RESERVES THE RIGHTS TO CHANGE SPECIFICATION & INSTRUCTION WITHOUT NOTICE
7777 N. Merrimac Ave
Niles, IL 60714
T 224.333.6033
F 224.757.7557
[email protected]
www.luminii.com
Please read complete instruction prior to installation and keep for future reference!
1. Product should be installed by a qualified electrician.
2. Prior to installation ensure power is off at fuse box to prevent electrical shock.
3. If extrusion is installed facing up and in a wet location, ensure proper drainage and silicone endcaps and diffuser lens.
88.1 Connect +24 VDC red wire from the fixture to the power supply +24V DC red wire with a wire nut. Connect -24V DC black wire from the
fixture to power supply -24V DC black wire with a wire nut.
8.1
class II power supply
12 0 V A C 24 VDC to fixture
+24 VDC RED
-24 VDC BLACK -24 VDC BLACK
+24 VDC RED

Other luminii Lighting Equipment manuals
luminii Level User manual

luminii

luminii Level User manual

luminii Optic Arts K45RC Series User manual

luminii

luminii Optic Arts K45RC Series User manual

luminii Optic Arts KM Series User manual

luminii

luminii Optic Arts KM Series User manual

luminii Matrix Plus Series User manual

luminii

luminii Matrix Plus Series User manual

luminii Teava Suspension TEA-S Series User manual

luminii

luminii Teava Suspension TEA-S Series User manual

luminii Kurba Pixel KBL-F-V-SPI User manual

luminii

luminii Kurba Pixel KBL-F-V-SPI User manual

luminii Katana KAT User manual

luminii

luminii Katana KAT User manual

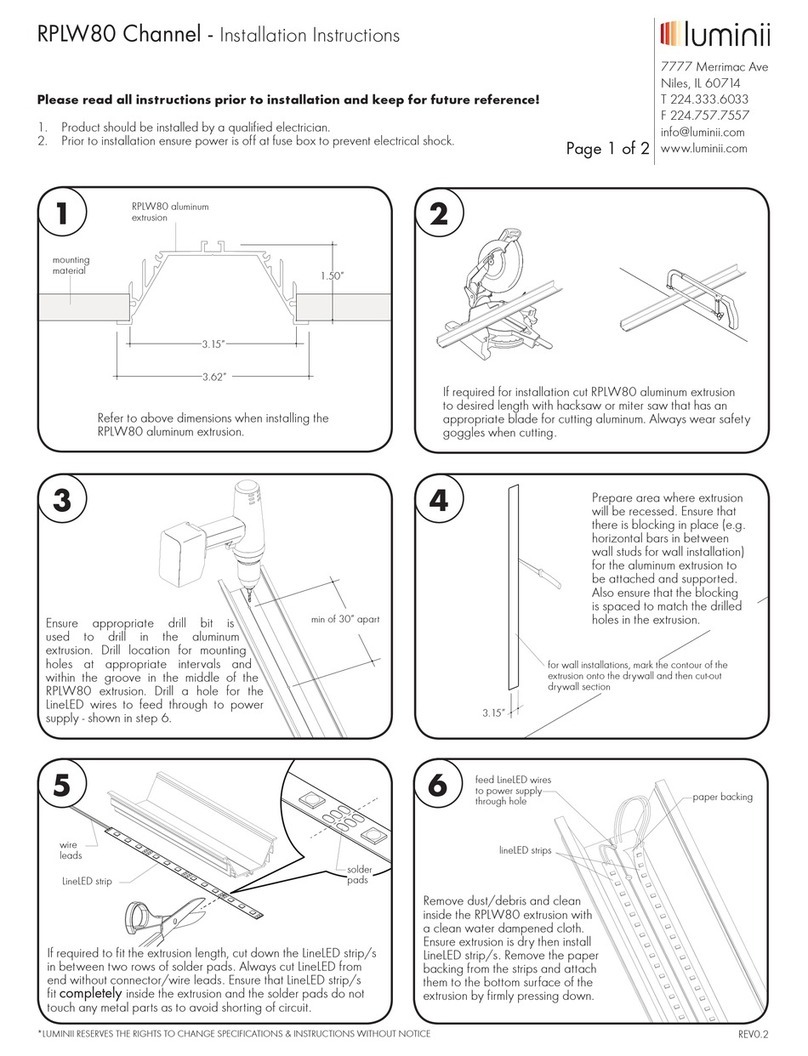
luminii RPLW80 Channel User manual

luminii

luminii RPLW80 Channel User manual

luminii QUE Channel User manual

luminii

luminii QUE Channel User manual

luminii Kendo Closet Rod User manual

luminii

luminii Kendo Closet Rod User manual

luminii Optic Arts PS010TW-96-24 User manual

luminii

luminii Optic Arts PS010TW-96-24 User manual

luminii RSLW8 Channel User manual

luminii

luminii RSLW8 Channel User manual

luminii Matrix Plus MP-DO-DW-22K-60K User manual

luminii

luminii Matrix Plus MP-DO-DW-22K-60K User manual

luminii KMC Series User manual

luminii

luminii KMC Series User manual

luminii mCove M User manual

luminii

luminii mCove M User manual

luminii Explorer Wall EXPW Series User manual

luminii

luminii Explorer Wall EXPW Series User manual

luminii CLTC Series User manual

luminii

luminii CLTC Series User manual

luminii Optic Arts CH-MD-LS-SF Series User manual

luminii

luminii Optic Arts CH-MD-LS-SF Series User manual

luminii Optic Arts PLAS Channel User manual

luminii

luminii Optic Arts PLAS Channel User manual

luminii PS010WD-96-24 User manual

luminii

luminii PS010WD-96-24 User manual

luminii senso LETO 4 User manual

luminii

luminii senso LETO 4 User manual
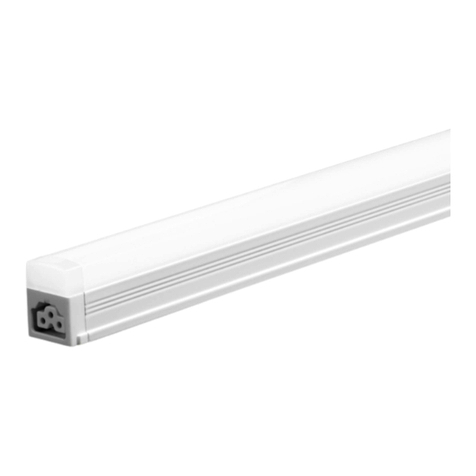
luminii TOVE-G Series User manual

luminii

luminii TOVE-G Series User manual
Popular Lighting Equipment manuals by other brands

LIGMAN PARAGON 1 PR-50001 installation manual

LIGMAN

LIGMAN PARAGON 1 PR-50001 installation manual

Ayra ITA3D 80 user manual

Ayra

Ayra ITA3D 80 user manual

LumX LED FT-50 instruction manual

LumX

LumX LED FT-50 instruction manual

PLG VENUS R user manual

PLG

PLG VENUS R user manual

Exo Terra PT4251 user manual

Exo Terra

Exo Terra PT4251 user manual

Anslut 422-858 installation instructions

Anslut

Anslut 422-858 installation instructions

Griven Parade Graphic user manual

Griven

Griven Parade Graphic user manual

Lithonia Lighting EDGR installation instructions

Lithonia Lighting

Lithonia Lighting EDGR installation instructions

Conrad LF-24 user manual

Conrad

Conrad LF-24 user manual

Light Sky IPL1015BEAM user manual

Light Sky

Light Sky IPL1015BEAM user manual

Green Creative 36TROFKIT24DIM/277V Series installation guide

Green Creative

Green Creative 36TROFKIT24DIM/277V Series installation guide

Occasions AIRFLOWZ instructions

Occasions

Occasions AIRFLOWZ instructions

Briteq BTX 300 Beam Operation manual

Briteq

Briteq BTX 300 Beam Operation manual

emaux FSP350-6W Installation & operating instruction

emaux

emaux FSP350-6W Installation & operating instruction

American DJ Flat Par QWH12 User instructions

American DJ

American DJ Flat Par QWH12 User instructions

Chauvet Professional ROGUER1ESPOT Operating instructions & parts manual

Chauvet Professional

Chauvet Professional ROGUER1ESPOT Operating instructions & parts manual

Boost BOOST-COMBILED-20 user manual

Boost

Boost BOOST-COMBILED-20 user manual

FlashPoint MONOLIGHT DG-400 quick start guide

FlashPoint

FlashPoint MONOLIGHT DG-400 quick start guide

manuals.online logo
manuals.online logoBrands
  • About & Mission
  • Contact us
  • Privacy Policy
  • Terms and Conditions

Copyright 2025 Manuals.Online. All Rights Reserved.