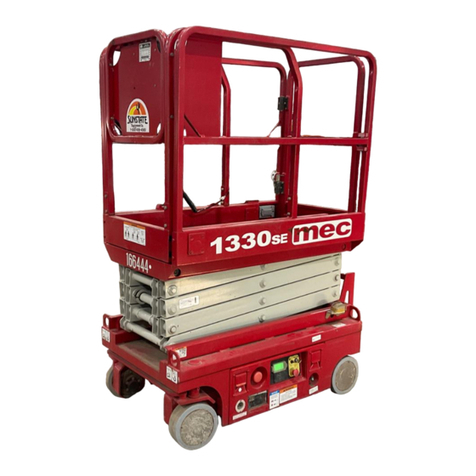
Mec 4907 Guide

Part # 94123
April 2023
Serial Number Range
16300001 - 16307699
Service & Parts Manual
1330SE
ART_4907

Page i 1330SE - Service & Parts Manual
April 2023
Revision History
Date Reason for Update
June 2016 New Release
July 2017 New Style Ground Control
April 2019 Platform Controls Update
May 2019 Steering Components Correction, Lift Cylinder Assembly Update
August 2019 Continuous Update
November 2019 Added Hindley Platform Controls
December 2019 Added Vent Kit
February 2020 Added Platform Control Box, From Serial #16305919
Updated Platform Extension Assembly
March 2020 Added 41932 to Hydraulic Power Unit
August 2020 Corrections and Update
1401 S. Madera Avenue, Kerman, CA93630 USA
Toll Free: 1 - 877 - 632 - 5438
Phone: 1 - 559 - 842 - 1500
Fax: 1 - 559 - 842 - 1520
www.MECawp.com
MEC Aerial Work Platforms

Page ii 1330SE - Service & Parts Manual
April 2023
Table of Contents
Chapter 1 - Service � � � � � � � � � � � � � 1
Service Introduction. . . . . . . . . . . . . . . . . 1
Section 1 - MEC Operator Policy . . . . . . . . . . . . . 2
MEC Operator Policy � � � � � � � � � � � � � � � � � � � 2
Section 2 - Safety Symbols & General Safety Tips . . . . . . . . 3
Safety Symbols & General Safety Tips � � � � � � � � � � � � � � 3
Section 3 - Specications . . . . . . . . . . . . . . . 4
Specications � � � � � � � � � � � � � � � � � � � � � 4
Section 4 - Torque Specications . . . . . . . . . . . . . 5
Bolt Torque Specication - American Standard � � � � � � � � � � � � 5
Bolt Torque Specication - Metric Standard � � � � � � � � � � � � � 6
Hydraulic Components Torque Table � � � � � � � � � � � � � � � 7
Section 5 - Maintenance Lock . . . . . . . . . . . . . . 8
Maintenance Lock � � � � � � � � � � � � � � � � � � � � 8
Section 6 - Hydraulic, Electrical and Total System . . . . . . . . 9
Hydraulic, Electrical and Total System � � � � � � � � � � � � � � 9
Section 7 - Primary Machine Components. . . . . . . . . . . 10
Primary Machine Components � � � � � � � � � � � � � � � � 10
Section 8 - Emergency Systems And Procedures . . . . . . . . 11
Emergency Systems And Procedures � � � � � � � � � � � � � � � 11
Free-Wheel Conguration For Winching Or Towing � � � � � � � � � � � 12
Lift And Support The Machine � � � � � � � � � � � � � � � � � 13
Section 9 - Maintenance. . . . . . . . . . . . . . . . 14
Machine Maintenance – General � � � � � � � � � � � � � � � � 14
Pre-Start Inspection Checklist � � � � � � � � � � � � � � � � � 15
Frequent Inspection Checklist � � � � � � � � � � � � � � � � � 16
Annual Inspection Checklist � � � � � � � � � � � � � � � � � 22
Section 10 - Control System . . . . . . . . . . . . . . 25
Control Component Locations� � � � � � � � � � � � � � � � � 25
Fault Codes � � � � � � � � � � � � � � � � � � � � � 26
Troubleshooting Table � � � � � � � � � � � � � � � � � � � 30
Parameter Adjustment � � � � � � � � � � � � � � � � � � � 31
Menu Screen Display � � � � � � � � � � � � � � � � � � � 32
Calibration Screen Display � � � � � � � � � � � � � � � � � 33
Section 11 - Schematics. . . . . . . . . . . . . . . . 38
Hydraulic Schematic � � � � � � � � � � � � � � � � � � � 38
Hydraulic Unit � � � � � � � � � � � � � � � � � � � � � 39

Page iii 1330SE - Service & Parts Manual
April 2023
Electrical Schematic � � � � � � � � � � � � � � � � � � � 40
Control Harness, 1 Of 2 � � � � � � � � � � � � � � � � � � 41
Control Harness, 2 Of 2 � � � � � � � � � � � � � � � � � � 42
Pin Identication, ECU Harness Plug � � � � � � � � � � � � � � � 43
Pin Identication, Motor Controller ECU2 Harness Plug � � � � � � � � � � 44
Pin Identication, Main Harness Plugs � � � � � � � � � � � � � � 45
Pin Identication, Platform Controls, COM Cable � � � � � � � � � � � � 46
Pin Identication, Chassis Connections � � � � � � � � � � � � � � 47
Wiring Diagram � � � � � � � � � � � � � � � � � � � � 48
Chapter 2 - Parts � � � � � � � � � � � � � � 49
Parts Introduction . . . . . . . . . . . . . . . . . 49
Section 12 - Chassis. . . . . . . . . . . . . . . . . 50
Chassis Assembly � � � � � � � � � � � � � � � � � � � � 50
Pothole Protection Assembly � � � � � � � � � � � � � � � � � 52
Steering Components � � � � � � � � � � � � � � � � � � � 54
Drive Wheel Assembly� � � � � � � � � � � � � � � � � � � 56
Component Tray - To Serial #16300001-16301160 � � � � � � � � � � � 58
Component Tray - From Serial #16301161 � � � � � � � � � � � � � 60
Hydraulic Power Unit � � � � � � � � � � � � � � � � � � � 62
Lower Controls - From Serial #16301161 � � � � � � � � � � � � � � 64
Section 13 - Scissor . . . . . . . . . . . . . . . . . 66
Scissor Installation� � � � � � � � � � � � � � � � � � � � 66
Scissor Assembly � � � � � � � � � � � � � � � � � � � � 68
Section 14 - Platform . . . . . . . . . . . . . . . . 70
Platform Installation � � � � � � � � � � � � � � � � � � � 70
Main Platform Assembly � � � � � � � � � � � � � � � � � � 72
Platform Extension Assembly � � � � � � � � � � � � � � � � � 74
Platform Extension Lock � � � � � � � � � � � � � � � � � � 76
Platform Controls � � � � � � � � � � � � � � � � � � � � 78
Hindley Platform Controls � � � � � � � � � � � � � � � � � � 80
Platform Control Box, From Serial #16305919 � � � � � � � � � � � � 82
Section 15 - Hydraulics . . . . . . . . . . . . . . . . 84
Lift Cylinder Assembly � � � � � � � � � � � � � � � � � � � 84
Hoses & Fittings � � � � � � � � � � � � � � � � � � � � 86
Electrical Harness � � � � � � � � � � � � � � � � � � � � 88
Section 16 - Decals . . . . . . . . . . . . . . . . . 90
Decals � � � � � � � � � � � � � � � � � � � � � � � 90

Page 1 1330SE - Service & Parts Manual
April 2023
Service Introduction
This Service section is designed to provide you, the customer, with the instructions needed to
properly maintain the MEC self-propelled aerial work platform. When used in conjunction with the
illustrated Parts section in this manual and the Operator’s Manual (provided separately), this manual
will assist you in making necessary adjustments and repairs, and identifying and ordering the correct
replacement parts.
All parts represented here are manufactured and supplied in accordance with MEC quality
standards. We recommend that you use genuine MEC parts to ensure proper operation and reliable
performance.
To obtain maximum benets from your MEC Aerial Work Platforms, always follow the proper
operating and maintenance procedures. Only trained authorized personnel should be allowed to
operate or service this machine. Service personnel should read and study the Operator’s, and the
Service and Parts Manuals in order to gain a thorough understanding of the unit prior to making any
repairs.
Chapter 1 - Service

Page 2 1330SE - Service & Parts Manual
April 2023
MEC Operator Policy
Note: The best method to protect yourself and others from injury or death is to use common sense.
If you are unsure of any operation, don’t start until you are satised that it is safe to proceed
and have discussed the situation with your supervisor.
Service personnel and machine operators must understand and comply with all warnings and
instructional decals on the body of the machine, at the ground controls, and platform control console.
MODIFICATIONS OF THIS MACHINE FROM THE ORIGINAL DESIGN
AND SPECIFICATIONS WITHOUT WRITTEN PERMISSION FROM MEC
ARE STRICTLY FORBIDDEN. A MODIFICATION MAY COMPROMISE THE
SAFETY OF THE MACHINE, SUBJECTING OPERATOR(S) TO SERIOUS
INJURY OR DEATH.
MEC’s policies and procedures demonstrate our commitment to Quality and our relentless ongoing
eorts towards Continuous Improvement, due to which product specications are subject to change
without notice.
Any procedures not found within this manual must be evaluated by the individual to assure oneself
that they are “proper and safe.”
Your MEC Aerial Work Platform has been designed, built, and tested to provide many years of safe,
dependable service. Only trained, authorized personnel should be allowed to operate or service the
machine.
MEC, as manufacturer, has no direct control over machine application and operation. Proper safety
practices are the responsibility of the user and all operating personnel.
If there is a question on application and/or operation, contact MEC Aerial Work Platforms:
1401 S. Madera Avenue, Kerman, CA93630 USA
Toll Free: 1 - 877 - 632 - 5438
Phone: 1 - 559 - 842 - 1500
Fax: 1 - 559 - 842 - 1520
www.MECawp.com
MEC Aerial Work Platforms
MEC Operator Policy
Section 1 - MEC Operator Policy

Page 3 1330SE - Service & Parts Manual
April 2023
Safety Symbols & General Safety Tips
MEC manuals and decals use symbols, colors and signal words to help you recognize important
safety, operation and maintenance information.
RED and the word DANGER – Indicates an imminently hazardous
situation which, if not avoided, will result in death or serious injury.
ORANGE and the word WARNING – Indicates a potentially hazardous
situation which, if not avoided, could result in death or serious injury.
YELLOW with alert symbol and the word CAUTION – Indicates a
potentially hazardous situation which, if not avoided, may result in minor
or moderate injury.
YELLOW without alert symbol and the word CAUTION – Indicates a
potentially hazardous situation which, if not avoided, may result in
property damage.
GREEN and the word NOTICE – Indicates operation or maintenance
information.
Regular inspection and constant maintenance is the key to ecient economical operation of your
aerial work platform. It will help to assure that your equipment will perform satisfactorily with a
minimum of service and repair.
The actual operating environment of the machine governs the inspection schedule. Correct lubrication
is an essential part of the preventative maintenance to minimize wear on working parts and ensure
against premature failure. By maintaining correct lubrication, the possibility of mechanical failure and
resulting downtime is reduced to a minimum.
• Never leave hydraulic components or hoses open. They must be protected from contamination
(including rain) at all times.
• Never open a hydraulic system when there are contaminants in the air.
• Always clean the surrounding area before opening hydraulic systems.
• Use only recommended lubricants. Improper lubricants or incompatible lubricants may be as
harmful as no lubrication.
• Watch for makeshift “xes” which can jeopardize safety as well as lead to more costly repair.
Safety Symbols & General Safety Tips
Section 2 - Safety Symbols & General Safety Tips

Page 4 1330SE - Service & Parts Manual
April 2023
Specications
Working Height* 19 ft 6 m
Platform Height 13 ft 4 m
Maximum Drive Height 13 ft 4 m
Stowed Height Top Guardrail 74 in 1.9 m
Platform Floor 35 in 0.9 m
Guardrail Height 39 in 1 m
Toeboard Height 6 in 15 cm
Machine Weight** (Unloaded) 1,900 lb 860 kg
Lift Capacity Total 530 lb 240 kg
Deck Extension Capacity 1 Person / 250lb (113 kg)
Maximum Occupants 2
Length-Stowed (Overall) 58 in 1.5 m
Length-Stowed (Ladder Removed) 51 in 1.3 m
Platform Length (Extended) 75 in 1.9 m
Platform Length (Retracted) 51 in 1.3 m
Width (Overall) 30 in 76 cm
Platform Width (Outside) 27.5 in 70 cm
Wheel Base 41 in 1 m
Turning Radius - Inside 18 in 45 cm
Ground Clearance - Stowed 2.5 in 6 cm
Ground Clearance - Elevated 0.6 in 1.5 cm
Drive Speed (Proportional) Stowed 0-2.5 mph 0-4 km/h
Raised or Extended 0-0.7 mph 0-1.1 km/h
Gradability 25%/14°
Maximum Side Slope - Stowed 5°
Ground Pressure/Wheel 112 psi 7.9 kg/cm2
Maximum Wheel Load 730 lb 331 kg
Occupied Floor Pressure 234 psf 1,138 kg/m2
Maximum Operating Wind Speed 28 mph / 12.5 m/sec (45 km/h)
Tire Size 9 × 3 inch/230 × 80mm
Lug Nut Torque 19 ft-lb / 25.5 Nm, secured with cotter pin
Hydraulic Pressure 2250 psi/ 155 bar
Power System Voltage 24 Volt DC
Battery Charger Input 110-230 VAC, 50-60 Hz
Output 24 Volt DC
Batteries Two 12-Volt deep cycle; 85Ah
Meets applicable requirements of ANSI A92.6-2006.
*Working Height adds 6 feet (2 m) to platform height. **Weight may increase with certain options.
*** Uniform Pressure of 1330SE can be reduced to 111.2 (542.93 kg/sq.M) (unloaded) to 142.2 (694.3 kg/
sq.M) (loaded) by extending the slide out platform
Section 3 - Specications
Specications

Page 5 1330SE - Service & Parts Manual
April 2023
Bolt Torque Specication - American Standard
Fasteners
Use the following values to apply torque unless a specic torque value is called out for the part being
used.
American Standard Cap Screws
SAE Grade 5 8
Cap Screw
Size (inches) Torque Torque
Ft. Lbs Nm Ft. Lbs Nm
Min Max Min Max Min Max Min Max
1/4 - 20 6.25 7.25 8.5 10 8.25 9.5 11 13
1/4 - 28 8 9 11 12 10.5 12 14 16
5/16 - 18 14 15 19 20 18.5 20 25 27
5/16 - 24 17.5 19 12 26 23 25 31 34
3/8 - 16 26 28 35 38 35 37 47.5 50
3/8 - 24 31 34 42 46 41 45 55.5 61
7/16- 14 41 45 55.5 61 55 60 74.5 81
7/16 - 20 51 55 69 74.5 68 75 92 102
1/2 - 13 65 72 88 97.5 86 96 116 130
1/2 - 20 76 84 103 114 102 112 138 152
9/16 - 12 95 105 129 142 127 140 172 190
9/16 - 18 111 123 150 167 148 164 200 222
5/8 - 11 126 139 171 188 168 185 228 251
5/8 - 18 152 168 206 228 203 224 275 304
3/4 - 10 238 262 322 255 318 350 431 474
3/4 - 16 274 302 371 409 365 402 495 544
7/8 - 9 350 386 474 523 466 515 631 698
7/8 - 14 407 448 551 607 543 597 736 809
1- 8 537 592 728 802 716 790 970 1070
1 - 14 670 740 908 1003 894 987 1211 1137
Torque values apply to fasteners as received from the supplier, dry or when lubricated with
normal engine oil.
If special graphite grease, molydisulphide grease, or other extreme pressure lubricants are
used, these torque values do not apply.
Section 4 - Torque Specications
Bolt Torque Specication - American Standard

Page 6 1330SE - Service & Parts Manual
April 2023Section 4 - Torque Specications
Bolt Torque Specication - Metric Standard
Fasteners
Use the following values to apply torque unless a specic torque value is called out for the part being
used
Metric Cap Screws
Metric Grade 8.8 10.9
Cap Screw Size
(Millimeters)
8.8 9.01
Torque Torque
Ft. Lbs Nm Ft. Lbs Nm
Min Max Min Max Min Max Min Max
M6 × 1.00 68811 911 12 15
M8 × 1.25 16 20 21.5 27 23 27 31 36.5
M10 × 1.50 29 35 39 47 42 52 57 70
M12 × 1.75 52 62 70 84 75 91 102 123
M14 × 2.00 85 103 115 139 120 146 163 198
M16 × 2.50 130 158 176 214 176 216 238 293
M18 × 2.50 172 210 233 284 240 294 325 398
M20 × 2.50 247 301 335 408 343 426 465 577
M22 × 2.50 332 404 450 547 472 576 639 780
M24 × 3.00 423 517 573 700 599 732 812 992
M27 × 3.00 637 779 863 1055 898 1098 1217 1488
M30 × 3.00 872 1066 1181 1444 1224 1496 1658 2027
Torque values apply to fasteners as received from the supplier, dry or when lubricated with
normal engine oil.
If special graphite grease, molydisulphide grease, or other extreme pressure lubricants are
used, these torque values do not apply.

Page 7 1330SE - Service & Parts Manual
April 2023Section 4 - Torque Specications
Hydraulic Components Torque Table
Note:Always lubricate threads with clean hydraulic uid prior to installation.
Use the following values to torque hydraulic components when a specic value is not available.
Always check for torque values in the following places before relying on the Hydraulic Components
Torque Table.
• Parts drawings and service instructions in this manual.
• Packaging and instruction sheets provided with new parts.
• Instruction manuals provided by the manufacturer of the component being serviced.
Type: SAE Port Series Cartridge Poppet Fittings Hoses
Ft. lbs Nm Ft. lbs Nm In. lbs Nm
#4 N/A N/A N/A N/A 135 - 145 15 - 16
#6 N/A N/A 10 - 20 14 - 27 215 - 245 24 - 28
#8 25 - 30 31 - 41 25 - 30 34 - 41 430 - 470 49 - 53
#10 35 - 40 47 - 54 35 - 40 47 - 54 680 - 750 77 - 85
#12 85 - 90 115 - 122 85 - 90 115 - 122 950 - 1050 107 - 119
#16 130 - 140 176 - 190 130 - 140 176 - 190 1300 - 1368 147 - 155

Page 8 1330SE - Service & Parts Manual
April 2023
Maintenance Lock
DEATH OR SERIOUS INJURY HAZARD!
NEVER PERFORM WORK OR INSPECTION ON THE MACHINE WITH
THE PLATFORM ELEVATED WITHOUT FIRST BLOCKING THE SCISSOR
ASSEMBLY WITH THE MAINTENANCE LOCK.
1. Raise the platform approximately 7.2ft / 2.2m from the ground.
2. Rotate the Maintenance Lock away from the machine and let it hang down.
3. Lower the platform until the Maintenance Lock rests securely on the link. Keep clear of the
Maintenance Lock when lowering the platform.
ART_4995
Maintenance
Lock
Maintenance Lock
Section 5 - Maintenance Lock

Page 9 1330SE - Service & Parts Manual
April 2023
Hydraulic, Electrical and Total System
Hydraulic System
HYDRAULIC FLUID UNDER PRESSURE CAN PENETRATE AND BURN
SKIN, DAMAGE EYES, AND MAY CAUSE SERIOUS INJURY, BLINDNESS,
AND EVEN DEATH.
CORRECT LEAKS IMMEDIATELY.
Hydraulic uid leaks under pressure may not always be visible. Check for
pin hole leaks with a piece of cardboard, not your hand.
Electrical System
Prevent damage to battery and/or electrical system;
• Always disconnect the negative battery cable rst.
• Always connect the positive battery cable rst.
When the negative cable is installed, a spark will occur if contact is made between the positive side
of the battery and a metal surface on the machine. This can cause damage to the electrical system,
battery explosion, and personal injury.
Total System
FAILURE TO PERFORM PREVENTIVE MAINTENANCE AT
RECOMMENDED INTERVALS MAY RESULT IN THE UNIT BEING
OPERATED WITH A DEFECT THAT COULD RESULT IN INJURY OR
DEATH OF THE OPERATOR.
IMMEDIATELY REPORT TO YOUR SUPERVISOR ANY DEFECT OR
MALFUNCTION. ANY DEFECT SHALL BE REPAIRED PRIOR TO
CONTINUED USE OF THE AERIAL WORK PLATFORM.
INSPECTION AND MAINTENANCE SHOULD BE PERFORMED BY
QUALIFIED PERSONNEL FAMILIAR WITH THE EQUIPMENT.
Section 6 - Hydraulic, Electrical and Total System
Hydraulic, Electrical and Total System

Page 10 1330SE - Service & Parts Manual
April 2023
Primary Machine Components
ART_5229
Platform
Controls
Platform
Deck Extension
Deck Extension
Release
Lift Cylinder
Chassis
Tie-Down/
Lift Points
Entry Gate
Lower Controls / ECU
Emergency
Lowering
Knob
Batteries
Motor Controller
Hydraulic Unit
Entry Ladder
Forklift Pocket
Forklift Pocket
Component
Tray
Maintenance
Lock
Battery
Charger
Main Power/
Lower Emergency
Stop Switch
Manuals Case
Guard
Rails
Primary Machine Components
Section 7 - Primary Machine Components

Page 11 1330SE - Service & Parts Manual
April 2023
Emergency Systems And Procedures
IF THE CONTROL SYSTEM FAILS WHILE THE PLATFORM IS ELEVATED,
HAVE AN EXPERIENCED OPERATOR USE THE EMERGENCY LOWERING
PROCEDURE TO SAFELY LOWER THE PLATFORM.
DO NOT ATTEMPT TO CLIMB DOWN ELEVATING ASSEMBLY.
Emergency Stop
ART_3353
The machine is equipped with an EMERGENCY STOP switch at the base
controls and the platform control box.
• Press the EMERGENCY STOP switch at any time to stop all machine
functions.
• Pull switch to reset.
• Either switch will stop all machine functions.
• Both switches must be reset or machine will not operate.
Emergency Lowering
IF THE CONTROL SYSTEM FAILS WHILE THE PLATFORM IS ELEVATED,
USE THE EMERGENCY LOWERING PROCEDURE TO SAFELY LOWER
THE PLATFORM.
DO NOT CLIMB DOWN THE ELEVATING ASSEMBLY OR EXIT THE
PLATFORM.
The Emergency Lowering System is used to lower the platform in case
of power failure.
To lower the platform, pull the Emergency Lowering Knob, located near
the Base Control panel.
ART_4986
Emergency
Lowering
Knob
Section 8 - Emergency Systems And Procedures
Emergency Systems And Procedures

Page 12 1330SE - Service & Parts Manual
April 2023Section 8 - Emergency Systems And Procedures
Free-Wheel Conguration For Winching Or Towing
RUNAWAY HAZARD!
AFTER RELEASING THE BRAKES THERE IS NOTHING TO STOP
MACHINE TRAVEL. MACHINE WILL ROLL FREELY ON SLOPES.
ALWAYS CHOCK THE WHEELS BEFORE MANUALLY RELEASING THE
BRAKES.
The machine can be winched or towed short distances at speeds not to exceed 2.5 MPH (4 km/h).
Before towing or winching the machine, it is necessary to release the brakes. Reset the brakes after
towing or winching.
ART_4998
Push Down
& Hold
Turn to
Ground
Disengage Brakes Before Towing Or Winching
1. Chock the wheels.
2. Turn the Key Switch to the OFF position.
3. Turn the red Emergency Stop button clockwise to the on position at both
the ground and platform controls.
4. At the Ground Controls panel, press and hold the Lift/Lower Switch to the
DOWN position, then turn on the Key Switch to the “Ground” position.
5. Hold the Lift/Lower Switch in this position until a continuous alarm
sounds, signalling that the brake has been released.
Engage Brakes Before Driving
1. Turn the Key Switch to the OFF position to reset the brake.
BE SURE THAT THE BRAKES ARE ENGAGED BEFORE REMOVING THE
WHEEL CHOCKS.

Page 13 1330SE - Service & Parts Manual
April 2023Section 8 - Emergency Systems And Procedures
Lift And Support The Machine
DEATH OR SERIOUS PERSONAL INJURY MAY RESULT FROM THE USE
OF SUBSTANDARD LIFTING DEVICES AND/OR JACK STANDS. ENSURE
THAT ALL LIFTING DEVICES AND JACK STANDS ARE OF ADEQUATE
CAPACITY AND IN GOOD WORKING CONDITION BEFORE USE.
The following are needed to safely lift and support the machine;
• A jack with a lifting capacity of two (2) tons or more.
• Jack stands with a rating of two (2) tons or more.
To Raise The Machine
1. Move machine to a rm level surface capable of supporting the weight of the machine.
2. Chock tires on one end of machine and raise the other end of machine.
3. Position a jack at the end of the machine to be lifted, under a solid lifting point in the center of
the frame.
4. Raise the machine and place two (2) suitable jack stands under solid support points at the outer
ends of the frame.
5. Lower the machine to rest on the jack stands and inspect for stability.
To Lower The Machine
1. Raise machine slightly and remove jack stands.
2. Lower the machine and remove the jack.
3. Remove chocks.

Page 14 1330SE - Service & Parts Manual
April 2023
Machine Maintenance – General
Instructions in this portion of the manual are to be used in conjunction with the Pre-Start, Frequent
and Annual Inspection checklists found in this machine’s Operator’s Manual.
IMPORTANT: Scheduled maintenance inspection checklists are included in the Operator’s
Manual for use only by qualied service technicians. Only qualied service
technicians may perform repairs to the machine. After repairs are completed,
the operator must perform a Pre-Start Inspection before proceeding to the
Functions Test.
HYDRAULIC FLUID UNDER PRESSURE CAN PENETRATE AND BURN
SKIN, DAMAGE EYES, AND MAY CAUSE SERIOUS INJURY, BLINDNESS,
AND DEATH. REPAIR LEAKS IMMEDIATELY. FLUID LEAKS UNDER
PRESSURE MAY NOT ALWAYS BE VISIBLE. CHECK FOR PIN HOLE
LEAKS WITH A PIECE OF CARDBOARD, NOT YOUR HAND.
NEVER PERFORM WORK OR INSPECTION ON THE MACHINE WITH
THE PLATFORM ELEVATED WITHOUT FIRST BLOCKING THE SCISSOR
ASSEMBLY WITH THE MAINTENANCE LOCK (SEE THE INTRODUCTION
PORTION OF THIS MANUAL).
PERFORM SCHEDULED MAINTENANCE AT RECOMMENDED
INTERVALS. FAILURE TO PERFORM SCHEDULED MAINTENANCE
AT RECOMMENDED INTERVALS MAY RESULT IN A DEFECTIVE OR
MALFUNCTIONING MACHINE AND MAY RESULT IN INJURY OR DEATH
OF THE OPERATOR. KEEP MAINTENANCE RECORDS CURRENT AND
ACCURATE.
IMMEDIATELY REPORT ANY DAMAGE, DEFECT, UNAUTHORIZED
MODIFICATION OR MALFUNCTION TO YOUR SUPERVISOR. ANY
DEFECT MUST BE REPAIRED PRIOR TO CONTINUED USE. DO NOT USE
A DAMAGED, MODIFIED OR MALFUNCTIONING MACHINE.
Never leave hydraulic components or hoses open. Plug all hoses and
tting immediately after disassembly to protect the system from outside
contamination (including rain).
Never open a hydraulic system when there are contaminants in the air.
Always clean the surrounding area before opening hydraulic systems.
Use only recommended lubricants. Improper lubricants or incompatible
lubricants may cause as much damage as no lubrication.
Watch for makeshift “xes” which can jeopardize safety as well as lead
to more costly repair.
Inspection and maintenance should be performed by qualied personnel
familiar with the equipment.
Section 9 - Maintenance Machine Maintenance – General

Page 15 1330SE - Service & Parts Manual
April 2023Section 9 - Maintenance Pre-Start Inspection Checklist
Items on this checklist should be inspected before each work shift. Refer to the
Operator’s Manual.
30-Day Service
The 30 day maintenance procedure is a one-time procedure to be performed after the rst 30 days
or 40 hours of usage. This procedure is normally performed every 150 hours or quarterly, whichever
comes rst.
Maintaining the tires and wheels in good condition is essential to safe operation and good
performance. Tire and/or wheel failure could result in a machine tip-over. Component damage may
also result if problems are not discovered and repaired in a timely fashion.
1. Check the tire surface and sidewalls for cuts, cracks, punctures and unusual wear.
2. Check each wheel for damage, bends and cracks.
3. Remove the wheel covers and check each center lock nut for proper torque.
Castle Nut Torque, Dry 19 ft-Ibs / 26 Nm
Castle Nut Torque, Lubricated 14 ft-Ibs / 20 Nm

Page 16 1330SE - Service & Parts Manual
April 2023Section 9 - Maintenance Frequent Inspection Checklist
THIS CHECKLIST MUST BE USED AT 3-MONTH INTERVALS OR EVERY
150 HOURS OF MACHINE USE, WHICHEVER OCCURS FIRST. FAILURE
TO DO SO COULD RESULT IN DEATH OR SERIOUS INJURY.
Frequent Maintenance Inspections should be conducted by qualied service technicians only.
Photocopy the Frequent Inspection Checklist page from the Operator’s Manual to keep record of
this inspection. Keep inspections records up to date. Record and report all discrepancies to your
supervisor.
Perform all checks listed on Pre-Start Inspection, then proceed with the following checks.
Hydraulic Fluid
Inspect the condition of hydraulic uid in the reservoir.
Oil should be a clear and amber in color.
Batteries
Proper battery condition is essential to good machine performance and operational safety. Improper
or damaged cables and connections can result in component damage and hazardous conditions.
ELECTROCUTION / BURN HAZARD. CONTACT WITH ELECTRICALLY
CHARGED CIRCUITS COULD RESULT IN DEATH OR SERIOUS INJURY.
REMOVE ALL RINGS, WATCHES AND OTHER JEWELRY.
BODILY INJURY HAZARD. BATTERIES CONTAIN ACID. AVOID SPILLING
OR CONTACTING BATTERY ACID. NEUTRALIZE BATTERY ACID SPILLS
WITH BAKING SODA AND WATER.
1. Put on protective clothing and eye wear.
2. Slide out the component tray from the chassis.
3. Be sure that the battery cable connections are free of corrosion.
NOTE: Adding terminal protectors and a corrosion preventative sealant will help eliminate
corrosion on the battery terminals and cables.
4. Be sure that the battery retainers and cable connections are tight.
5. Fully charge the batteries. Allow the batteries to rest 24 hours before performing this procedure
to allow the battery cells to equalize.
This manual suits for next models
1
Table of contents
Other Mec Lifting System manuals

Mec
Mec 34-J Diesel Guide

Mec
Mec 3072ES Building instructions

Mec
Mec 1532ES Building instructions

Mec
Mec 2047ES User manual

Mec
Mec Mast Series Guide

Mec
Mec Nano10-XD User manual

Mec
Mec 45-J Diesel User manual

Mec
Mec TITAN Boom 40-S User manual

Mec
Mec 4069RT User manual

Mec
Mec Speed Level 84RT Series User manual
Popular Lifting System manuals by other brands

Rotary
Rotary 100 Series Operation and maintenance manual

rav
rav KPH 370.70 LIKT Translation of the original instructions

BraunAbility
BraunAbility Under-Vehicle Lift NUSP34S31X48RWO Operator's manual

Limora
Limora 492893 Instruction to use

Aichi
Aichi SP12C Operation manuals

Norco
Norco 82990C Setup, operating, maintenance instructions