manuals.online logo
Brands
  1. Home
  2. •
  3. Brands
  4. •
  5. MKS
  6. •
  7. Measuring Instrument
  8. •
  9. MKS Ophir NOVA II User manual

MKS Ophir NOVA II User manual

Other MKS Measuring Instrument manuals

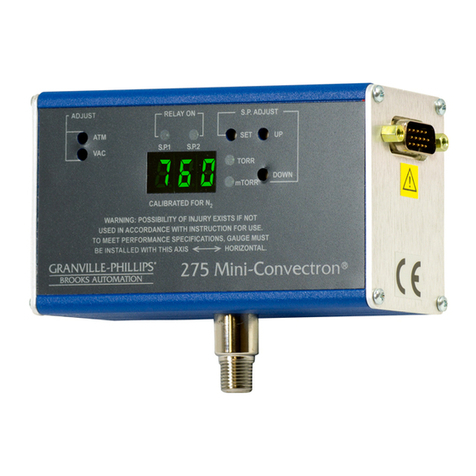
MKS Granville-Phillips Mini-Convectron 275... User manual

MKS

MKS Granville-Phillips Mini-Convectron 275... User manual

MKS HPQ3 User manual

MKS

MKS HPQ3 User manual

MKS Spectra-Physics HighQ-2 User manual

MKS

MKS Spectra-Physics HighQ-2 User manual

MKS e-Vision+ User manual

MKS

MKS e-Vision+ User manual

MKS Ophir Nova User manual

MKS

MKS Ophir Nova User manual

MKS 903 Series User manual

MKS

MKS 903 Series User manual

MKS Granville-Phillips Series 275 User manual

MKS

MKS Granville-Phillips Series 275 User manual

MKS Mass-Flo 1179A User manual

MKS

MKS Mass-Flo 1179A User manual

MKS Spectra-Physics Tsunami User manual

MKS

MKS Spectra-Physics Tsunami User manual

MKS DX 345 User manual

MKS

MKS DX 345 User manual

MKS Spectra Vision 2000-P User manual

MKS

MKS Spectra Vision 2000-P User manual

MKS Granville-Phillips Mini-Convectron 275... User manual

MKS

MKS Granville-Phillips Mini-Convectron 275... User manual

MKS HPQ2 User manual

MKS

MKS HPQ2 User manual

MKS Ophir BeamWatch AM Quick start guide

MKS

MKS Ophir BeamWatch AM Quick start guide

MKS Microvision2 User manual

MKS

MKS Microvision2 User manual

MKS RGA Series User manual

MKS

MKS RGA Series User manual

MKS Granville-Phillips Mini-Convectron 275... User manual

MKS

MKS Granville-Phillips Mini-Convectron 275... User manual

MKS Ophir Centauri User manual

MKS

MKS Ophir Centauri User manual

MKS Vision 2000-C User manual

MKS

MKS Vision 2000-C User manual

MKS Ophir Nova User manual

MKS

MKS Ophir Nova User manual

MKS Baratron DMA Series User manual

MKS

MKS Baratron DMA Series User manual

MKS 146C User manual

MKS

MKS 146C User manual

MKS Ophir Spiricon BeamWatch Standard Quick start guide

MKS

MKS Ophir Spiricon BeamWatch Standard Quick start guide

MKS Spectra-Physics User manual

MKS

MKS Spectra-Physics User manual

Popular Measuring Instrument manuals by other brands

Powerfix Profi 278296 Operation and safety notes

Powerfix Profi

Powerfix Profi 278296 Operation and safety notes

Test Equipment Depot GVT-427B user manual

Test Equipment Depot

Test Equipment Depot GVT-427B user manual

Fieldpiece ACH Operator's manual

Fieldpiece

Fieldpiece ACH Operator's manual

FLYSURFER VIRON3 user manual

FLYSURFER

FLYSURFER VIRON3 user manual

GMW TG uni 1 operating manual

GMW

GMW TG uni 1 operating manual

Downeaster Wind & Weather Medallion Series instruction manual

Downeaster

Downeaster Wind & Weather Medallion Series instruction manual

Hanna Instruments HI96725C instruction manual

Hanna Instruments

Hanna Instruments HI96725C instruction manual

Nokeval KMR260 quick guide

Nokeval

Nokeval KMR260 quick guide

HOKUYO AUTOMATIC UBG-05LN instruction manual

HOKUYO AUTOMATIC

HOKUYO AUTOMATIC UBG-05LN instruction manual

Fluke 96000 Series Operator's manual

Fluke

Fluke 96000 Series Operator's manual

Test Products International SP565 user manual

Test Products International

Test Products International SP565 user manual

General Sleep Zmachine Insight+ DT-200 Service manual

General Sleep

General Sleep Zmachine Insight+ DT-200 Service manual

Sensa Core Lacto Spark user manual

Sensa Core

Sensa Core Lacto Spark user manual

VOLTCRAFT UTS-1980 operating instructions

VOLTCRAFT

VOLTCRAFT UTS-1980 operating instructions

EBCHQ 94915 Operation manual

EBCHQ

EBCHQ 94915 Operation manual

Balluff BIP LD2-T017-01-EP-S4 Series user guide

Balluff

Balluff BIP LD2-T017-01-EP-S4 Series user guide

Pulsar IMP Lite Series instruction manual

Pulsar

Pulsar IMP Lite Series instruction manual

ETCR 6800 user manual

ETCR

ETCR 6800 user manual

manuals.online logo
manuals.online logoBrands
  • About & Mission
  • Contact us
  • Privacy Policy
  • Terms and Conditions

Copyright 2025 Manuals.Online. All Rights Reserved.

4.2. Changing Chosen Wavelengths (metallic type only)
1. Select “Laser” and enter.
2. Select the wavelength you wish to use and enter. If you wish to save
this wavelength as the startup default, press save before exiting.
3. If you wish to modify one of the wavelengths, select the closest
wavelength, press the right navigation key.
4. Now, using the up/down keys to change the numbers and the right/left
keys to move to the next number, modify to the wavelength you want.
5. When finished, press “save” and exit. If you only want a temporary
change, exit without “save”.
4.3. To Set Type of Laser Being Used
From main measurement screen, select “Laser” and enter. Choose the
desired laser type or wavelength. If you want this one to be the startup
wavelength, press save before exiting.
4.4. Setting Startup Configuration
1. Turn on the Nova II with the sensor connected, select “Menu” and
enter. Select “Configure”.
2. Now, with the navigation keys select “Startup Mode”, select “power”
or “energy” as the startup mode. Press enter to exit.
3. Now, with the navigation keys select “Display Mode”. Press the enter
key and select the type of screen you wish to start up with. Press
save and exit. If you do not want to save this as the startup mode but
only change for now, exit without save. (This choice is saved in the
instrument and not the sensor so the Nova II will start up from the
screen selected for all sensors).
4. Now select “Energy Range”, press enter and choose the manual energy
range you wish to be the default.
5. Now select “Average” to select what period you wish to average power
over or select the default, “none”.
6. If the sensor is a diffuser sensor, now select diffuser in or out.
7. Now select “Max Pulse Len” and choose the shortest pulse length
setting longer than your laser’s pulse length.
Warning: Incorrect readings will result if pulse length is not set up correctly.
8. Select “Laser” and select the laser type you wish to be the default.
9. Press “save” to save all present settings then “exit” to get back to the
main measurement screen.
Note: Some sensors have only the long pulse setting for all pulse lengths. In
that case N/A appears. For further details on configuration see Sections 6.2
and 6.3 of the manual.
4.5. Energy or Average Power Measurement
Warning:
Do not exceed maximum sensor limits for power, energy, power density and
energy density as listed in tables 5 and 6 section 10.2 of the manual, Sensor
Specifications. Otherwise, there is a risk of damaging the absorber.
With the pyroelectric sensor, you have been supplied a test slide with the
same coating as on your pyroelectric detector. You can also obtain this slide
from your dealer. You should use this slide to test the damage threshold
with your laser pulses. If the slide is damaged, then either enlarge your
beam or lower the laser energy until damage is no longer seen.
4.6. To choose Energy or Average Power Measurement
To switch from the main energy measurement screen to power
measurement, press “power”. To switch from the main power measurement
screen to energy measurement, press “energy”.
Nova II Quick Reference
NOVA II
Quick Reference
Ophir Optronics Solutions LTD.
Science Based Industry Park P.O.B. 45021, Jerusalem 9145001, Israel
Phone +972-2-5484444
https://www.ophiropt.com/photonics
rev 1.45-5/17.Feb.19/be Ophir P/N 1J06036
1Getting Started
The Nova II is equipped with “soft keys”. That is, the functions
of the keys change as indicated by the legend above each key.
It is also equipped with 4 navigation keys and a round enter key
in the center.
To connect sensor to the Nova II meter:
Insert the 15 pin D type connector of the measuring sensor
cable into the socket marked “Head Input“ on the rear panel of
the Nova II meter.
To switch the Nova II on:
To switch on, briefly press the on/off/backlight switch (leftmost
key). The unit will switch on, and the display will appear. Note
that the sensor must be plugged in before the unit is switched
on. To switch the backlight on or off, press the on/off/backlight
switch briefly again. To switch the Nova II off, press the on/off/
backlight switch and hold it for ~ 3 seconds until the display
blanks.
If you wish to save the current Nova II configuration, use the
“configure” function. (See section 2.3.2.).
To set the display modes:
1. Disconnect the sensor and switch off then on again. “Head
Disconnected” will appear.
2. Select “Display Mode” and enter. Choose the desired mode,
press save. The Nova II will now be in this display mode for
all sensors.
3. Select “Date” and press the enter button. Using the
navigation keys set to the correct date. Press save.
4. Select “Time” and enter. Using the navigation keys, set to
the correct time. Press save.
5. For adjusting RS232 baud rate and An. Output voltage see
the main manual.
To choose manual or automatic ranging or dBm in power measurement:
1. Press “Range” and then select the appropriate manual range,
autorange or dBm (logarithmic scale).
2. Press enter to return to the main measurement screen. If you wish to
save the selected range as the startup default, press “save” before
exiting.
3.2. Setting the Startup Configuration
1. Select menu and press enter. Select “configure” and enter.
2. Select “Filter” and enter. Choose filter in or out to be the default.
3. Now select “Display Mode” and choose which screen you want the
instrument to start up in. Press enter. (Note that this is an instrument
setting and will be valid for all sensors.)
4. Now select “Power Range” and choose the manual power range you
wish to be the default or choose autorange or dBm.
5. Now select “Average” and choose which period to average power
over or leave the default “NONE”.
6. Now select “Laser” to choose the startup laser wavelength. When
you are finished, if you want to save this as default startup, press save.
If you only want to change for now, exit without saving. For further
details on configuration see Section 5.3 of the main manual.
3.3. Power Measurement
Warning:
Do not exceed maximum sensor limits for power, energy, power density
and energy density as listed in tables 5 and 6 section 10.2 of the manual,
Sensor Specifications. Otherwise, there is a risk of damaging the absorber.
To expand the bargraph scale ±5x about the present reading:
1. From the main power measurement screen, press the “Zoom” button.
2. Press the “Zoom” button again to return to the ordinary bargraph.
To subtract background and set current reading to zero:
1. From the main power measurement screen press the “Offset” button.
2. Press “Offset” again to cancel. See Section 5.4.5. of the main manual
for details.
To use the Nova II to fine-tune laser power:
1. From the main power measurement screen select “Menu” and enter.
Now select “Tune” and enter.
2. Set the percentage range of the power scale to be displayed by
repeatedly pressing the ±50% key.
3. Now select the horizontal sweep time you desire by selecting “Graph”
and choosing the time scale.
4. You may now use the screen to tune the laser power. Press “power”
to exit to the main measurement screen. See Section 4.4.2.3. of the
manual for details.
4
Pyroelectric or Photodiode Energy Sensors
4.1. Zeroing Instrument Against Sensor
For most accurate calibration, you should zero the pyroelectric sensor
against the Nova II it is being used with. Proceed as follows:
Make sure the sensor is in a quiet environment and not subject to pulsed
radiation. Plug sensor into Nova II and turn on. Press “menu”, select
“zero” and enter. Press “start”. When “zeroing completed” appears, press
“save”.
To zero instrument:
1. Disconnect the sensor, turn off then on again. “Head Disconnected” will
be displayed.
2. Make sure instrument is not in an electrically noisy environment and is
undisturbed.
3. Press “zero” and “start”. Wait until “zeroing completed” appears. For
more details, see main manual section 3.5.5.
2Thermal Sensors
2.1. Use of Nova II with Thermal Type Sensors
To set type of laser being used:
1. While the Nova II is off, plug in the sensor then switch it on again.
2. Press the navigation keys until “laser” is highlighted. Press the enter
key and select the appropriate laser wavelength.
3. If you want to save this new wavelength as the startup default, press
“save”.
4. Return to main screen by pressing the enter key.
To choose manual or automatic ranging in power measurement:
1. Select “Range” with the navigation keys. Press the enter key.
2. Select the appropriate manual range or AUTO.
3. If you want to save this new range as the startup default, press “save”.
4. Press the enter key to return to the main measurement screen.
To choose power or energy measurement:
To go from the main power measurement screen to the energy
measurement screen, press the lower left soft key “energy”. To go from the
energy measurement screen to power measurement, press “power”.
2.2. Setting and Saving the Startup Configuration
1. From the main screen, select “Menu” and enter. Select “Configure”.
2. Now, with the navigation keys select “Startup Mode”, press the enter
key and select “power” or “energy” as the startup mode. Press Enter to
return to screen.
3. Now, select “Display Mode”. Press enter and select the startup type of
screen. Save if you wish or exit by pressing enter (This choice is saved
in the instrument so the Nova II will start up from the screen selected
for all sensors).
4. Now select “Power Range”, press enter and choose the manual power
range you wish to be the default or choose autorange.
5. Now select “Average” to select what period you wish to average
power over or select the default, “none”. See section 4.4.2.4 of the main
manual for details.
6. Now select “Energy Range” and choose the default energy range.
7. Now select “Threshold” if you wish to change the energy threshold.
Select “Laser” to select the laser type you wish to be the default. Press
save if you want to save this configuration, then press exit to return to
the main measurement screen.
Further details on configuration in section 4.3. of the main manual.
2.3. Power or Single Shot Energy Measurement:
Warning:
Do not exceed maximum sensor limits for power, energy, power density and
energy density as listed in tables 5 and 6 in section 10.2. of the main manual.
Otherwise, there is a risk of damaging the absorber.
To use the Nova II to measure laser power:
Verify that the display shows “Menu: Power” in the upper right hand side of
the display. If the display shows “Menu: Energy” and units of J, mJ etc. then
press “power” to switch to the power measurement mode.
To select an analog needle type display for the Nova II:
Select “Menu” and enter. Select “Needle” and enter. The display will now
show a simulated analog needle type display. In order to expand the display,
press “Expand”.
To expand the bargraph scale ±5x about the present reading:
1. From the main power measurement screen press the “Zoom” button.
2. Press the “Zoom” button again to return to the ordinary bargraph.
To subtract background and set current reading to zero:
1. From the main power measurement screen press the “Offset” button.
2. Press “Offset” again to cancel. See Section 4.4.2.2. of the main manual
for full details.
To use the Nova II to fine-tune laser power:
1. From the main power measurement screen select “Menu” and enter.
Now select “Tune” and enter.
2. Set the percentage range of the power scale to be displayed by
repeatedly pressing the ±50% key.
3. Now select the horizontal sweep time you desire by selecting “Graph”
and choosing the time scale.
4. You may now use the screen to tune the laser power. See Section
4.4.2.3. of the main manual for full details.
5. Press “power” to exit to the main measurement screen.
To use the Nova II to measure laser energy:
1. Verify that the display shows “energy” in the upper right hand side of
the display. If the display shows “power” and units of W, mW etc. then
press “energy“ to switch to the energy measurement mode.
2. The energy mode is manual ranging. Select “Range“, enter then use
the navigation keys to select the proper range. Press save if you want
this range to be the startup default. The correct range is the lowest one
that is larger than the pulse energy measured. Note that the range will
be displayed in the lower right corner of the main display.
3. When the Nova II screen flashes “ready”, on and off, fire the laser. See
Section 4.5 of the main manual for full details.
3Photodiode Sensors
3.1. Selecting Chosen Wavelengths
1. While the Nova II is off, plug in the sensor then switch it on again. From
the main measurement screen, press “Laser” to select the correct laser
wavelength. If you want to save this new wavelength as the startup
default, press “save” before exiting.
2. If the wavelength you want is not among the wavelengths in the
six wavelength list and you want to change or add a wavelength,
then move to the wavelength you wish to change or add. Press the right
navigation key.
3. Using the up/down keys to change each number and the right left keys
to move to the next number, key in the wavelength you want. Press
enter twice. If you wish to save this new wavelength as a startup
default, press “save”, then press enter.
4. Follow the directions on configuration in section 3.2. below.