manuals.online logo
Brands
  1. Home
  2. •
  3. Brands
  4. •
  5. Mocka
  6. •
  7. Indoor Furnishing
  8. •
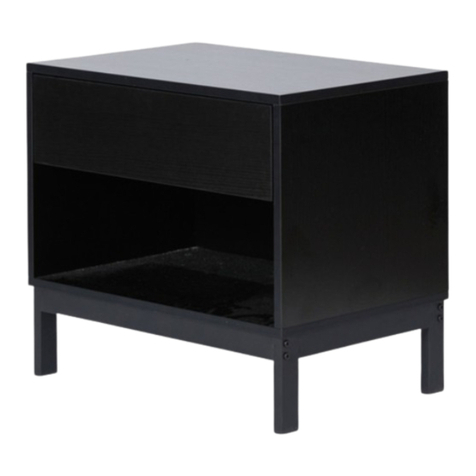
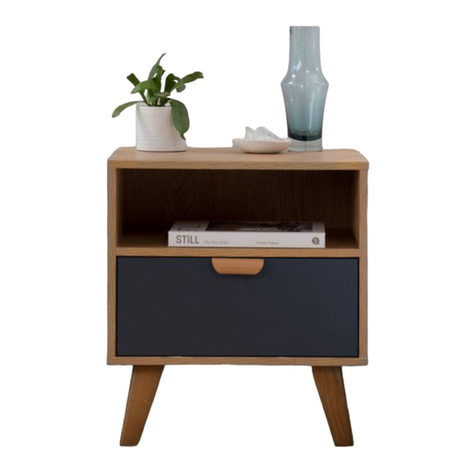
  9. Mocka Eros Bedside Table User manual

Mocka Eros Bedside Table User manual

mocka.co.nz I mocka.com.au
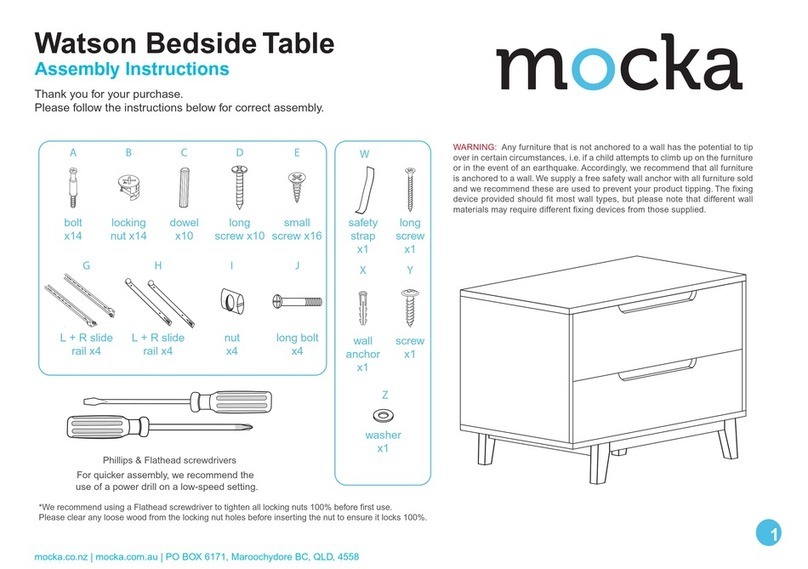
ASSEMBLY INSTRUCTIONS
Eros Bedside Table
Thank you for your purchase.
Please follow the instructions below for correct assembly.
A
18 x
bolt
B
18 x
locking nut
C
20 x
dowel
W
1x
safety
strap
HARDWARE SUPPLIED
D
4 x
long screw
E
8 x
small screw
40 mm
12 mm
F
10 x
G
4x
H
6 x
long screw
I
4 x
wedge
45 mm
1x
long
screw
XY
Z
1x
wall
anchor
1x
screw
1x
washer
Long screw L+R
Slde rail
30 mm
WARNING: Any furniture that is not anchored to a wall has the potential to
tip over in certain circumstances, i.e. if a child attempts to climb up on the
furniture or in the event of an earthpuake. Accordingly, we recommend that
all furniture is anchored to a wall. We supply a free safety wall anchor with
all furniture sold and we recommend these are used to prevent your product
tipping. The fixing device provided should fit most wall types, but please note
that dierent wall materials may require dierent fixing devices from those
supplied.
*We recommend using a Flathead screwdriver to tighten all locking nuts 100% before first use.
Phillips & Flathead screwdrivers and hammer required
mocka.co.nz I mocka.com.au
ASSEMBLY INSTRUCTIONS
Eros Bedside Table
1 2
Insert 4 x bolts (A) into panel [1]. Attach 1 x wall strap (W) to panel [1] using 1 x
using 1 x screw (Y). Tighten with a srewdriver.
A
1
Y
W
Attach 2 x left slide rails (G) to panel [3] and secure with 4 x small screws (E). Attach
2 x right slide rails (G) to panel [4] and secure with 4 x small screws (E). Tighten with
a screwdriver.
A
A
A
A
G
E
E
E
E
E
E
E
E
E
G
GG
G
4
3
mocka.co.nz I mocka.com.au
ASSEMBLY INSTRUCTIONS
Eros Bedside Table
3 4
Insert 4 x dowels (C) into panels [3] and [4]. Attach panels [3] and [4] to panel
[1] and secure with 4 x locking nuts (B). Tighten with a screwdriver.
B
4
3
C
C
C
C
B
B
B
B
1
Slide panel [13] between the grooves on panels [3] and [4] to form the back of the unit
as shown. Insert 4 x dowel (C) into panels [3] and [4]. Attach panel [2] to panels [3] and
[4], secure with 4 x long screws (D). Tighten with a screwdriver.
2
3
4
13
C
C
CC
D
D
D
D
mocka.co.nz I mocka.com.au
ASSEMBLY INSTRUCTIONS
Eros Bedside Table
5 6
Panel piece x 2
Attach 4 x bolts (A) into panels [5]. Tighten with a screwdriver.
Insert 8 x dowels (C) to panels [6] and attach panels [5]. Insert 4 x
locking nuts (B) into panels [6]. Tighten with a screwdriver.
B
A
5
A
A
6
6
5
5
C
C
C
C
B
B
B
B
C
C
C
C
mocka.co.nz I mocka.com.au
ASSEMBLY INSTRUCTIONS
Eros Bedside Table
7 8
Insert 4 x dowels (C) into panels [5] and [6]. Attach panels [5] and [6] to
panel [2] and secure with 6 x long screws (H). Tighten with a screwdriver.
3
4
2
C
C
CC
6
6
5
H
H
H
H
H
H
Drawer x 2
Insert 10 x bolts (A) into panel [7]. Attach panels [8], [9] and [11] to panels
[7] and secure with 8 x locking nuts (B). Tighten with a screwdriver.
7
9
8
B
B
B
B
A
A
A
A
A
A
mocka.co.nz I mocka.com.au
ASSEMBLY INSTRUCTIONS
Eros Bedside Table
9 10
Drawer x 2 Drawer x 2
B
8
9
B
10
11
Slide panels [10] between the grooves on panels [8] and [9] to
form thebase of the drawer as shown. Attach panels [11] to
panels [7] and secure with 2 x locking nuts (B).
F
F
F
F
F
11 10
12
9
8
Attach panels [12] to panels [8], [9] and [11] secure with 10 x medium screws (F).
Tighten with a screwdriver.
mocka.co.nz I mocka.com.au
ASSEMBLY INSTRUCTIONS
Eros Bedside Table
11
Now both drawers are made up, slide them into rails in the bedside table.
Tighten with a screwdriver.
F
Ⅲ
Ⅰ
Ⅱ
Ⅳ
L
L
L
L
7
8
8
12
8
7
7
mocka.co.nz I mocka.com.au
ASSEMBLY INSTRUCTIONS
Eros Bedside Table
12 13
Attach 4 xwedges (I) to panel [13]. Tighten with a screwdriver.
Once assembled lift furniture into place, do not drag. Use a drill to create a
small hole lining up with the top of the safety stap (W). Fasten to wall using
wall anchor (X), washer (Z) and screw. Ensure the unit is balaced and steady
before use. You’re done, enjoy!
I
Strap
Washer
Wall
anchor
Wall
screw
X
Z
Wall
screw
13
I
I
I
I

Other Mocka Indoor Furnishing manuals

Mocka Theo User manual

Mocka

Mocka Theo User manual

Mocka Luka Velvet Queen Bed User manual

Mocka

Mocka Luka Velvet Queen Bed User manual

Mocka Hamptons User manual

Mocka

Mocka Hamptons User manual

Mocka Olwyn User manual

Mocka

Mocka Olwyn User manual

Mocka Hamptons Tallboy User manual

Mocka

Mocka Hamptons Tallboy User manual

Mocka Georgia Entertainment Unit User manual

Mocka

Mocka Georgia Entertainment Unit User manual

Mocka Darby Cot User manual

Mocka

Mocka Darby Cot User manual

Mocka Mischa Bookcase User manual

Mocka

Mocka Mischa Bookcase User manual

Mocka Portia User manual

Mocka

Mocka Portia User manual

Mocka Aspen User manual

Mocka

Mocka Aspen User manual

Mocka Kenny Desk User manual

Mocka

Mocka Kenny Desk User manual

Mocka Sadie Six Drawer User manual

Mocka

Mocka Sadie Six Drawer User manual

Mocka Brixton User manual

Mocka

Mocka Brixton User manual

Mocka Denham User manual

Mocka

Mocka Denham User manual

Mocka Eden Tall Shelf User manual

Mocka

Mocka Eden Tall Shelf User manual

Mocka Chelsea Low Sideboard User manual
Mocka

Mocka Chelsea Low Sideboard User manual

Mocka Sadie Entertainment Unit - Large User manual

Mocka

Mocka Sadie Entertainment Unit - Large User manual

Mocka Mischa User manual

Mocka

Mocka Mischa User manual

Mocka Jesse Change Table User manual

Mocka

Mocka Jesse Change Table User manual

Mocka Eclipse User manual

Mocka

Mocka Eclipse User manual

Mocka Zara User manual

Mocka

Mocka Zara User manual

Mocka Sintra Buffet User manual

Mocka

Mocka Sintra Buffet User manual

Mocka Hudson User manual

Mocka

Mocka Hudson User manual

Mocka Vancouver Cot User manual

Mocka

Mocka Vancouver Cot User manual

Popular Indoor Furnishing manuals by other brands

Hillsdale Furniture 1560-010A quick start guide

Hillsdale Furniture

Hillsdale Furniture 1560-010A quick start guide

Bentley Designs PROVENCE SLATTED CHAIR manual

Bentley Designs

Bentley Designs PROVENCE SLATTED CHAIR manual

Canaa 30480 Manual instructions

Canaa

Canaa 30480 Manual instructions

Costway HV10204 manual

Costway

Costway HV10204 manual

Furniture of America CM2667 Assembly instructions

Furniture of America

Furniture of America CM2667 Assembly instructions

PotteryBarn LOGAN DOUBLE LATERAL FILE Assembly instruction

PotteryBarn

PotteryBarn LOGAN DOUBLE LATERAL FILE Assembly instruction

Jahnke CGL C 140 AEU manual

Jahnke

Jahnke CGL C 140 AEU manual

U-Line H-3703 quick start guide

U-Line

U-Line H-3703 quick start guide

rst brands CALA KITCHEN ISLAND Assembly instructions

rst brands

rst brands CALA KITCHEN ISLAND Assembly instructions

Songmics Vasagle LCD811 manual

Songmics

Songmics Vasagle LCD811 manual

OVE TAHOE II-60 installation manual

OVE

OVE TAHOE II-60 installation manual

Next 688457 Assembly instructions

Next

Next 688457 Assembly instructions

MARCKERIC 14362 Assembly instructions

MARCKERIC

MARCKERIC 14362 Assembly instructions

Coalesse Bix Table installation instructions

Coalesse

Coalesse Bix Table installation instructions

ZINUS OPSST2-16-2 Assembly instruction

ZINUS

ZINUS OPSST2-16-2 Assembly instruction

DeFehr 13153 Assembly

DeFehr

DeFehr 13153 Assembly

fantastic furniture Montana manual

fantastic furniture

fantastic furniture Montana manual

DTY INDOOR LIVING Cortez IF-1060 quick start guide

DTY

DTY INDOOR LIVING Cortez IF-1060 quick start guide

manuals.online logo
manuals.online logoBrands
  • About & Mission
  • Contact us
  • Privacy Policy
  • Terms and Conditions

Copyright 2025 Manuals.Online. All Rights Reserved.