manuals.online logo
Brands
  1. Home
  2. •
  3. Brands
  4. •
  5. Mocka
  6. •
  7. Indoor Furnishing
  8. •
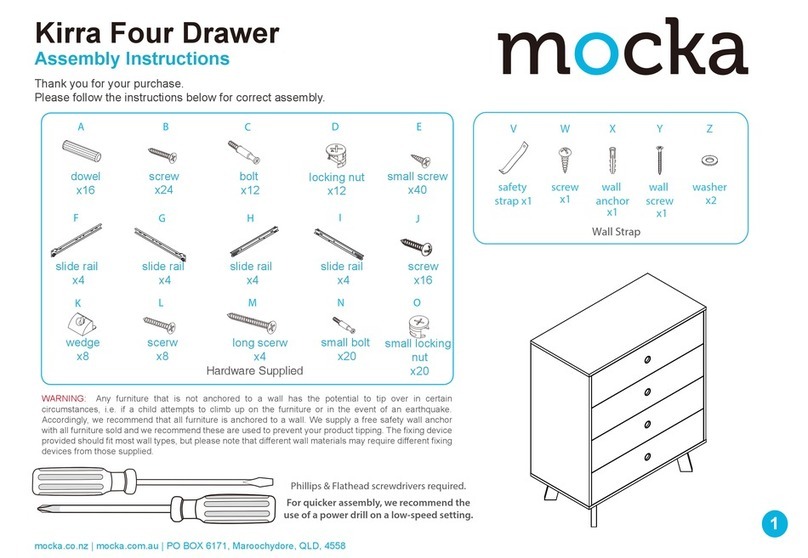
  9. Mocka Scarborough Tallboy User manual

Mocka Scarborough Tallboy User manual

Scarborough Tallboy
Assembly Instructions
Thank you for your purchase.
Please follow the instructions below for correct assembly.
mocka.co.nz | mocka.com.au | PO BOX 6171, Maroochydore, QLD, 4558
1
bolt
x50
leg bracket
x4
bolt
x4
allen
key x1
screw
x8
long
screw x5
plug
x6
cover
x6
screw
x28
ABCD E F G
H J K LMN
I
OPQR
dowel
x18
screw
x78
slide
rail x6
slide
rail x6
slide
rail x6
slide
rail x6
bracket
x6
locking
nut x50
T
felt pad
x4
small bolt
x16
SU
Wall Strap
x2
washer
Z
Y
wall
anchor
x1
X
safety
strap x1
WV
screw
x1
wall
screw
x1
WARNING: Any furniture that is not anchored to a wall has the potential to tip over in certain
circumstances, i.e. if a child attempts to climb up on the furniture or in the event of an earthquake.
Accordingly, we recommend that all furniture is anchored to a wall. We supply a free safety wall anchor
with all furniture sold and we recommend these are used to prevent your product tipping. The fixing device
provided should fit most wall types, but please note that different wall materials may require different fixing
devices from those supplied.
For quicker assembly, we recommend the
use of a power drill on a low-speed setting.
Hardware Supplied
Phillips & Flathead screwdrivers
x8
wedge
screw
x8
Scarborough Tallboy
Assembly Instructions
mocka.co.nz | mocka.com.au | PO BOX 6171, Maroochydore, QLD, 4558
2
12
1
3
Insert 6x bolts (C) into panel [1] and tighten with a screwdriver. Attach 5x slide rails (F) to panel [3] as shown with 15x screws (E).
Tighten with a screwdriver. Insert 8x bolts (C) into panel [3] and
tighten with a screwdriver.
F
CL
E
C
C
C
C
C
C
E
E
E
E
E
E
E
E
E
E
E
E
E
E
E
C
C
C
C
C
C
C
F
F
F
F
F
C
Scarborough Tallboy
Assembly Instructions
mocka.co.nz | mocka.com.au | PO BOX 6171, Maroochydore, QLD, 4558
3
34
4
5
5
Attach 5x slide rails (G) to panel [4] as shown with 15x screws (E).
Tighten with a screwdriver. Insert 8x bolts (C) into panel [4] and
tighten with a screwdriver.
Attach 1x slide rail (G) and 1x slide rail (F) to panel [5] as shown
with 6x screws (E). Tighten with a screwdriver.
G
CR
E
F
CL
E
G
CR
E
C
C
C
C
C
C
C
C
E
E
EE
E
EE
E
EE
E
EE
E
E
G
F
E
E
E
FLIP
E
E
E
Scarborough Tallboy
Assembly Instructions
mocka.co.nz | mocka.com.au | PO BOX 6171, Maroochydore, QLD, 4558
4
56
5
6
2
7
1
Attach panel [5] to panel [1] with 2x dowels (A) and
secure with 2x locking nuts (D). Tighten with a screwdriver.
Attach 6x brackets (J) to panels [2], [6] and [7] secure with 12x screws (E).
Tighten with a screwdriver. Place 6x covers (K) over the brackets
(J) as shown.
EE
K
JJ
The round head
is aligned with the
direction of the arrow
EE
J
x3
EE
J
EE
J
EE
J
A
DA
D
D
Scarborough Tallboy
Assembly Instructions
mocka.co.nz | mocka.com.au | PO BOX 6171, Maroochydore, QLD, 4558
5
78
8
88
9
8
6
7
7
7
Attach panels [6], [7] and [8] to panel [3] with 4x dowels (A) and
secure with 8x locking nuts (D). Tighten with a screwdriver.
Slide panel [9] down along the grooves between panels [8] as shown.
A
D
A
D
A
D
A
D
D
D
3
Scarborough Tallboy
Assembly Instructions
mocka.co.nz | mocka.com.au | PO BOX 6171, Maroochydore, QLD, 4558
6
910
Attach panel [4] to panels [6], [7] and [8] with 4x dowels (A) and
secure with 8x locking nuts (D). Tighten with a screwdriver.
Slide panel [9] down along the grooves between panels [3]
and [4].
6
8
4
3
4
9
8
A
A
D
D
D
D
A
D
D
A
7
7
7
Scarborough Tallboy
Assembly Instructions
mocka.co.nz | mocka.com.au | PO BOX 6171, Maroochydore, QLD, 4558
7
11 12
Attach panel [2] to the unit with 4x dowels (A) and secure
with 4x long screws (B). Tighten with a screwdriver.
Attach a leg bracket (P) to each leg [10] using 2x screws (R) and
1x bolt (Q). Tighten with a screwdriver and Allen key (O). Attach
each leg [10] to panel [2] using 4x small bolts (S) as shown. Tighten
with the Allen key (O). Attach 4x felt pads (T) to the ends of the legs.
3
4
2
2
B
A
B
A
B
B
A
10
front
back
Q
R
P
R
O
front
B
S
S
S
T
10
10
10
10
ST
T
S
O
x4
T
SSS
T
1
3
3
4
4
Scarborough Tallboy
Assembly Instructions
mocka.co.nz | mocka.com.au | PO BOX 6171, Maroochydore, QLD, 4558
8
13 14
Slide panel [9] down along the grooves between panels [3] and [4]
as shown.
Attach panel [1] to panels [3] and [4] with 4x dowels (A) and
secure with 4x locking nuts (D). Tighten with a screwdriver.
Attach panel [5] to panel [6] secure with 1x long screw (B).
Tighten with a screwdriver.
A
D
D
B
D
A
A
6
5
9
Scarborough Tallboy
Assembly Instructions
mocka.co.nz | mocka.com.au | PO BOX 6171, Maroochydore, QLD, 4558
9
15 Drawer x 2 16 Drawer x 2
Insert 4x bolts (C) into panels [11] and [12]. Attach 1x plug (L) to
panels [11] and [12] and secure with 1x screw (E). Tighten with a
screwdriver.
Attach panels [13], [14] and [16] as shown using 4x screws (M).
Tighten with a screwdriver.
11
12
13
14
16
C
C
C
C
E
L
M
M
M
M
Scarborough Tallboy
Assembly Instructions
mocka.co.nz | mocka.com.au | PO BOX 6171, Maroochydore, QLD, 4558
10
17 Drawer x 2 18 Drawer x 2
Slide panel [15] down along the grooves between panels [13]
and [14].
Attach panels [11] and [12] to panels [13] and [14] using 4x locking nuts (D).
Tighten with a screwdriver.
11
12
13
13
14
14
15
D
D
DD
Scarborough Tallboy
Assembly Instructions
mocka.co.nz | mocka.com.au | PO BOX 6171, Maroochydore, QLD, 4558
11
19 Drawer x 2 20 Drawer x 4
Attach slide rails (H) and slide rails (I) to the underside of the side panels
as shown. Secure with 4x screws (E) and tighten with a screwdriver.
Insert 5x bolts (C) into panel [17]. Attach 1x plug (L) to panel [17]
and secure with 1x screw (E). Tighten with a screwdriver.
17
CC
C
CC
E
L
13
14
HE
E
I
E
E
Scarborough Tallboy
Assembly Instructions
mocka.co.nz | mocka.com.au | PO BOX 6171, Maroochydore, QLD, 4558
12
21 Drawer x 4 22 Drawer x 4
Attach panels [13], [14], [18] and [20] as shown using 5x screws (M).
Tighten with a screwdriver.
Slide panel [19] down along the grooves between panels [13]
and [14].
19
20
14
14
18
13 13
M
M
M
M
M
14
13
17
Scarborough Tallboy
Assembly Instructions
mocka.co.nz | mocka.com.au | PO BOX 6171, Maroochydore, QLD, 4558
13
23 Drawer x 4 24 Drawer x 4
Attach panel [17] to panels [13], [14] and [18] using 5x locking nuts (D).
Tighten with a screwdriver.
Attach slide rails (H) and slide rails (I) to the underside of the side panels
as shown. Secure with 4x screws (E) and tighten with a screwdriver.
HE
E
I
E
E
14
13
18
D
D
DD
D
17
17
17
17
11
12
Scarborough Tallboy
Assembly Instructions
mocka.co.nz | mocka.com.au | PO BOX 6171, Maroochydore, QLD, 4558
14
25 26
Insert the drawers into the unit as shown. If the door is not catching or
sitting flush, twist the end of the cover (K) until it catches on the plug (L).
Attach 8x wedges (U) to the back of the unit as shown, and secure
with 8x screws (N). Now attach 1x safety strap (V) to the back edge
of panel [1] using 1x washer (Z) and 1x screw (W). Tighten with a
screwdriver.
V
Z
W
V
Z
W
N
N
U
U
9
9
9
K
Scarborough Tallboy
Assembly Instructions
mocka.co.nz | mocka.com.au | PO BOX 6171, Maroochydore, QLD, 4558
15
27 28
Once assembled lift furniture into place, do not drag. Use a drill to
create a small hole lining up with the top of the safety strap (V).
Fasten to the wall using 1x washer (Z), 1x wall anchor (X) and
1x wall screw (Y). Ensure unit is balanced and steady before use.
You’re done, enjoy!
X
Y
Z
wall
anchor
screw
strap
washer

Other Mocka Indoor Furnishing manuals

Mocka Tasman User manual

Mocka

Mocka Tasman User manual

Mocka Bronte User manual

Mocka

Mocka Bronte User manual

Mocka Tahoe Series User manual

Mocka

Mocka Tahoe Series User manual

Mocka Georgia Entertainment Unit User manual

Mocka

Mocka Georgia Entertainment Unit User manual

Mocka Jolt Six Drawer - Wide User manual

Mocka

Mocka Jolt Six Drawer - Wide User manual

Mocka Sonata User manual

Mocka

Mocka Sonata User manual

Mocka Aspen Cot User manual

Mocka

Mocka Aspen Cot User manual

Mocka Orlando User manual

Mocka

Mocka Orlando User manual

Mocka Olwyn User manual

Mocka

Mocka Olwyn User manual

Mocka Pippin User manual

Mocka

Mocka Pippin User manual

Mocka Chelsea Tallboy Drawers User manual

Mocka

Mocka Chelsea Tallboy Drawers User manual

Mocka Jesse Buffet User manual

Mocka

Mocka Jesse Buffet User manual

Mocka Zara User manual

Mocka

Mocka Zara User manual

Mocka Hamptons User manual

Mocka

Mocka Hamptons User manual
Mocka Inca Six Drawer User manual

Mocka

Mocka Inca Six Drawer User manual

Mocka Nava Coffee Table User manual

Mocka

Mocka Nava Coffee Table User manual

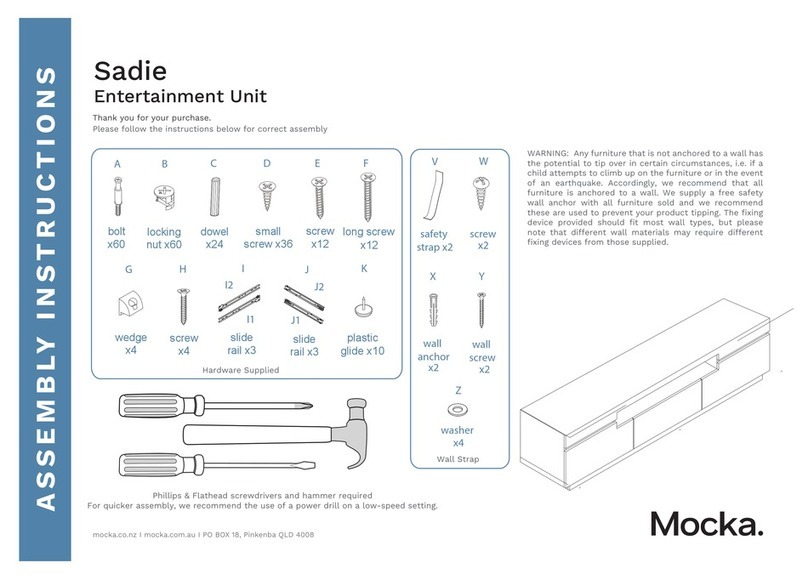
Mocka Sadie User manual

Mocka

Mocka Sadie User manual

Mocka Theo User manual

Mocka

Mocka Theo User manual

Mocka Jack User manual

Mocka

Mocka Jack User manual

Mocka Mischa User manual

Mocka

Mocka Mischa User manual

Mocka Watson 8 User manual

Mocka

Mocka Watson 8 User manual

Mocka Kris Chair User manual

Mocka

Mocka Kris Chair User manual

Mocka Sadie User manual

Mocka

Mocka Sadie User manual

Mocka Urban User manual

Mocka

Mocka Urban User manual

Popular Indoor Furnishing manuals by other brands

Seura Lighted Mirror user manual

Seura

Seura Lighted Mirror user manual

Bouclair 9400265 Assembly instructions

Bouclair

Bouclair 9400265 Assembly instructions

PHI VILLA THD9-305-102 Use and care guide

PHI VILLA

PHI VILLA THD9-305-102 Use and care guide

Elle Decor Lemont EC-LE52D Assembly

Elle Decor

Elle Decor Lemont EC-LE52D Assembly

fantastic furniture NIVA Bookcase 1 Drawer manual

fantastic furniture

fantastic furniture NIVA Bookcase 1 Drawer manual

Panasonic TY-S42PX700W Service manual

Panasonic

Panasonic TY-S42PX700W Service manual

Amart Furniture KIDZ MK2 64838 Assembly instructions

Amart Furniture

Amart Furniture KIDZ MK2 64838 Assembly instructions

Sibel Maeva 6000779 quick start guide

Sibel

Sibel Maeva 6000779 quick start guide

East West Furniture CN6 Assembly instruction

East West Furniture

East West Furniture CN6 Assembly instruction

OBaby Disney Baby Minnie Mouse Under Drawer instruction manual

OBaby

OBaby Disney Baby Minnie Mouse Under Drawer instruction manual

Bestar 93501-1139 Assembly instructions

Bestar

Bestar 93501-1139 Assembly instructions

Office Star Products Ave Six WALLSTREET WST17 manual

Office Star Products

Office Star Products Ave Six WALLSTREET WST17 manual

MAVAULAR moveis Fone 32 quick start guide

MAVAULAR moveis

MAVAULAR moveis Fone 32 quick start guide

MADRAS 1D Wardrobe 19 Assembly manual

MADRAS

MADRAS 1D Wardrobe 19 Assembly manual

modway EEI-5744 Assembly instructions

modway

modway EEI-5744 Assembly instructions

HARDWARE RESOURCES CAN-TMDSC-15 installation instructions

HARDWARE RESOURCES

HARDWARE RESOURCES CAN-TMDSC-15 installation instructions

Habitat Romain 823917 manual

Habitat

Habitat Romain 823917 manual

caem S50 Operating and maintenance manual

caem

caem S50 Operating and maintenance manual

manuals.online logo
manuals.online logoBrands
  • About & Mission
  • Contact us
  • Privacy Policy
  • Terms and Conditions

Copyright 2025 Manuals.Online. All Rights Reserved.