manuals.online logo
Brands
  1. Home
  2. •
  3. Brands
  4. •
  5. Monacor
  6. •
  7. Microphone
  8. •
  9. Monacor img Stage Line HSE-72 User manual

Monacor img Stage Line HSE-72 User manual

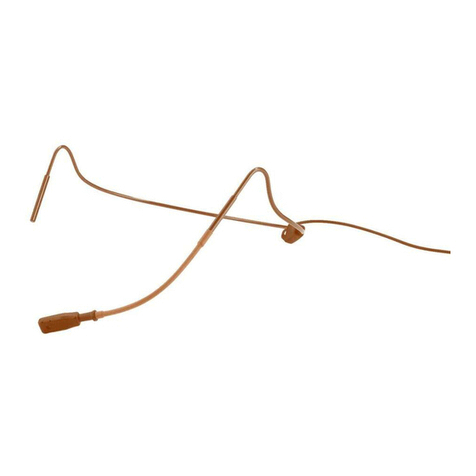
Kopfbügelmikrofon
Bitte lesen Sie diese Bedienungsanleitung vor dem Betrieb
gründlich durch und heben Sie sie für ein späteres Nach-
lesen auf.
1 Einsatzmöglichkeiten
Dieses Kopfbügelmikrofon ist für den Betrieb mit einem
Taschensender eines drahtlosen Audio-Übertragungs-
systems vorgesehen (z. B. ein Taschensender TXS-...HSE
mit 3-poligem Mini-XLR-Anschluss von „img Stage Line“).
Es eignet sich damit optimal für Gesangs- und Sprach-
anwendungen, die viel Bewegungsfreiheit erfordern, z. B.
auf der Bühne.
Alternativ zum Betrieb mit einem Taschensender lässt
sich das Mikrofon auch über einen Speiseadapter (z. B.
EMA-1 von „img Stage Line“), der die Mikrofonversor-
gungsspannung bereitstellt, mit einem Audiogerät, z. B.
Mischpult, verbinden.
2 Wichtige Hinweise für den Gebrauch
Das Mikrofon entspricht allen relevanten Richtlinien der
EU und ist deshalb mit gekennzeichnet.
GDas Mikrofon ist nur zur Verwendung im Innenbereich
geeignet. Schützen Sie es vor Feuchtigkeit und Hitze
(zulässiger Einsatztemperaturbereich 0 – 40 °C).
GVerwenden Sie für die Reinigung nur ein trockenes, wei-
ches Tuch, niemals Chemikalien oder Wasser.
GWird das Mikrofon zweckentfremdet, falsch ange-
schlossen oder nicht fachgerecht repariert, kann keine
Haftung für daraus resultierende Sach- oder Personen-
schäden und keine Garantie für das Mikrofon übernom-
men werden.
3 Inbetriebnahme
Den beiliegenden Schaumstoff-Poppschutz über das
Mikrofon ziehen. Den Kopfbügel aufsetzen und das
Mikrofon in eine günstige Sprechposition bringen. Dazu
lässt sich der Mikrofonarm in alle Richtungen biegen.
Das Mikrofon an den Eingang des Taschensenders
anschließen oder über einen Speiseadapter mit einem
Mikrofoneingang des Audiogeräts verbinden.
4 Technische Daten
Typ: . . . . . . . . . . . . . . . . . . . Back-Elektret
Richtcharakteristik: . . . . . . . Niere
Frequenzbereich: . . . . . . . . 50 – 16 000 Hz
Impedanz: . . . . . . . . . . . . . . 2 kΩ
Empfindlichkeit: . . . . . . . . . 5,6 mV/Pa bei 1 kHz
Maximaler Schalldruck: . . . 130 dB
Stromversorgung: . . . . . . . . 1,5–9V
über
Taschensender oder
Speiseadapter
Gewicht: . . . . . . . . . . . . . . . 28 g
Anschluss: . . . . . . . . . . . . . Mini-XLR, 3-polig
Kontaktbelegung: . . . . . . 1 = Masse,
2 = Audiosignal,
3 = Stromversorgung
Änderungen vorbehalten.
Soll das Mikrofon endgültig aus dem Betrieb ge-
nommen werden, übergeben Sie es zur umwelt-
gerechten Entsorgung einem örtlichen Recyc-
lingbetrieb.
Headband Microphone
Please read these operating instructions carefully prior to
operation and keep them for later use.
1 Applications
This headband microphone is designed to be used in com-
bination with a pocket transmitter of a wireless audio trans-
mission system (e. g. pocket transmitter TXS-…HSE with
3-pole mini XLR connection from “img Stage Line”). It is
ideally suited for vocal sound and speech applications that
require much freedom of movement, e. g. on stage.
As an alternative to the operation with a pocket trans-
mitter, the microphone may be connected to an audio unit,
e. g. mixer, by means of a power supply adapter (e. g.
EMA-1 from “img Stage Line”) that provides the micro-
phone with power.
2 Important Notes
The microphone corresponds to all relevant directives of
the EU and is therefore marked with .
GThe microphone is suitable for indoor use only. Protect
it against humidity and heat (admissible ambient tem-
perature range: 0 – 40 °C).
GFor cleaning only use a dry, soft cloth; never use water
or chemicals.
GNo guarantee claims for the microphone and no liability
for any resulting personal damage or material damage
will be accepted if the microphone is used for other pur-
poses than originally intended, if it is not correctly con-
nected, or if it is not repaired in an expert way.
3 Setting into Operation
Place the foam pop protection supplied onto the micro-
phone. Put on the headband and bring the microphone to
an optimum position; the microphone arm will bend in any
direction.
Connect the microphone to the input of the pocket trans-
mitter or connect it to a microphone input of the audio unit,
using a power supply adapter.
4 Specifications
Type: . . . . . . . . . . . . . . . . . . back electret
Pick-up characteristic: . . . . cardioid
Frequency range: . . . . . . . . 50 – 16 000 Hz
Impedance: . . . . . . . . . . . . . 2 kΩ
Sensitivity: . . . . . . . . . . . . . 5.6 mV/Pa at 1 kHz
Maximum SPL: . . . . . . . . . . 130 dB
Power supply: . . . . . . . . . . . 1.5–9V
via
pocket transmitter or
power supply adapter
Weight: . . . . . . . . . . . . . . . . 28 g
Connection: . . . . . . . . . . . . mini XLR, 3 poles
Pin configuration: . . . . . . 1 = ground,
2 = audio signal,
3 = power supply
Subject to technical modification.
If the microphone is to be put out of operation
definitively, take it to a local recycling plant for a
disposal which is not harmful to the environment.
Microphone serre-tête
Veuillez lire la présente notice avec attention avant le fonc-
tionnement et conservez-la pour pouvoir vous y reporter
ultérieurement.
1 Possibilités dʼutilisation
Ce microphone serre-tête est conçu pour un fonctionne-
ment avec un émetteur de poche dʼun système de trans-
mission audio sans fil (p. ex. un émetteur de poche TXS-
…HSE avec mini XLR 3 pôles de “img Stage Line”). Il est
ainsi adapté pour des applications de chant et de discours
où une grande liberté de mouvements est nécessaire,
p. ex. sur scène.
A la place du fonctionnement avec un émetteur de
poche, le microphone peut être relié à un appareil audio,
p. ex. table de mixage, via un adaptateur dʼalimentation
(p. ex. EMA-1 de “img Stage Line”) qui met à disposition
lʼalimentation pour le microphone.
2 Conseils importants dʼutilisation
Le microphone répond à toutes les directives nécessaires
de lʼUnion européenne et porte donc le symbole .
GLe microphone nʼest conçu que pour une utilisation
en intérieur. Protégez-le de lʼhumidité et de la chaleur
(température ambiante admissible 0 – 40 °C).
GPour le nettoyage, utilisez un chiffon sec et doux, en
aucun cas de produits chimiques ou dʼeau.
GNous déclinons toute responsabilité en cas de dom-
mages corporels ou matériels résultants si le micro-
phone est utilisé dans un but autre que celui pour lequel
il a été conçu, sʼil nʼest pas correctement branché ou ré-
paré par une personne habilitée ; en outre, tout droit à la
garantie deviendrait caduque.
3 Fonctionnement
Placez la bonnette anti-pop en mousse livrée sur le mi-
crophone. Placez le serre-tête et mettez le microphone
dans une position optimale. Vous pouvez orienter le bras
du microphone dans toutes les positions.
Reliez le microphone à lʼentrée de lʼémetteur de poche
ou, via un adaptateur dʼalimentation, à une entrée micro-
phone de lʼappareil audio.
4 Caractéristiques techniques
Type : . . . . . . . . . . . . . . . . . . . back-électret
Caractéristique : . . . . . . . . . . cardioïde
Bande passante : . . . . . . . . . . 50 – 16 000 Hz
Impédance : . . . . . . . . . . . . . . 2 kΩ
Sensibilité : . . . . . . . . . . . . . . 5,6 mV/Pa à 1 kHz
Pression sonore maximale : . 130 dB
Alimentation : . . . . . . . . . . . . . 1,5–9V
via
émetteur de poche ou
adaptateur alimentation
Poids : . . . . . . . . . . . . . . . . . . 28 g
Branchement : . . . . . . . . . . . . mini XLR 3 pôles
Configuration des contacts : 1 = masse,
2 = signal audio,
3 = alimentation
Tout droit de modification réservé.
Lorsque le microphone est définitivement retiré
du service, vous devez le déposer dans une
usine de recyclage de proximité pour contribuer
à son élimination non polluante.
MONACOR INTERNATIONAL GmbH & Co. KG • Zum Falsch 36 • 28307 Bremen • Germany
Copyright ©by MONACOR INTERNATIONAL. All rights reserved. A-1560.99.01.05.2014
®
HSE-72
Bestellnummer 23.6410
ELECTRONICS FOR SPECIALISTS ELECTRONICS FOR SPECIALISTS ELECTRONICS FOR SPECIALISTS ELECTRONICS FOR SPECIALISTS ELECTRONICS FOR SPECIALISTS ELECTRONICS FOR SPECIALISTS ELECTRONICS FOR SPECIALISTS
D A CH GB F B CH
Microfono headset
Vi preghiamo di leggere attentamente le presenti istruzioni
prima della messa in funzione e di conservarle per un uso
futuro.
1 Possibilità d'impiego
Questo microfono headset è previsto per l'uso con il tra-
smettitore tascabile di un sistema wireless di trasmissione
audio (p. es. un trasmettitore tascabile TXS-...HSE con
contatto mini XLR a 3 poli di “img Stage Line”). Pertanto è
adatto in modo ottimale per applicazioni di canto e di voce
parlata che richiedono molta libertà di movimento, per
esempio per spettacoli.
In alternativa al funzionamento con un trasmettitore
tascabile, il microfono può essere collegato anche con un
apparecchio audio, p. es. un mixer, per mezzo di un adat-
tatore di alimentazione (p. es. EMA-1 di “img Stage Line”),
che mette a disposizione l'alimentazione del microfono.
2 Avvertenze importanti per l'uso
Il microfono è conforme a tutte le direttive rilevanti dellʼUE
e pertanto porta la sigla .
GIl microfono è adatto solo per lʼuso allʼinterno di locali.
Proteggerlo dall'umidità dell'aria e dal calore (tempera-
tura dʼimpiego ammessa fra 0 e 40 °C).
GPer la pulizia usare solo un panno morbido, asciutto; non
impiegare mai acqua o prodotti chimici.
GNel caso dʼuso improprio, di collegamenti sbagliati o di
riparazione non a regola dʼarte del microfono, non si as-
sume nessuna responsabilità per eventuali danni con-
sequenziali a persone o a cose e non si assume nes-
suna garanzia per il microfono.
3 Messa in funzione
Coprire il microfono con la cuffia antivento di materiale
espanso in dotazione. Sistemare l'archetto in testa e por-
tare il microfono in una buona posizione per parlare. A tale
scopo è possibile piegare il braccio del microfono in tutte
le direzioni.
Collegare il microfono con l'ingresso del trasmettitore
tascabile oppure collegarlo con l'ingresso microfono di un
apparecchio audio servendosi di un adattatore d'alimenta-
zione.
4 Dati tecnici
Tipo: . . . . . . . . . . . . . . . . . . back-electret
Caratteristica direzionale: . . cardioide
Gamma di frequenze: . . . . . 50 – 16 000 Hz
Impedenza: . . . . . . . . . . . . . 2 kΩ
Sensibilità: . . . . . . . . . . . . . 5,6 mV/Pa con 1 kHz
Pressione sonora max.: . . . 130 dB
Alimentazione: . . . . . . . . . . 1,5–9V
tramite
trasmettitore tascabile o
adattatore d'alimentazione
Peso: . . . . . . . . . . . . . . . . . 28 g
Contatto: . . . . . . . . . . . . . . . XLR mini, 3 poli
Piedinatura: . . . . . . . . . . . 1 = massa,
2 = segnale audio,
3 = alimentazione
Con riserva di modifiche tecniche.
Se si desidera eliminare il microfono definitiva-
mente, consegnarlo per lo smaltimento ad un'isti-
tuzione locale per il riciclaggio.
Micrófono de Cabeza
Lea atentamente estas instrucciones de funcionamiento
antes de utilizar el aparato y guárdelas para usos poste-
riores.
1 Aplicaciones
Este micrófono de cabeza está diseñado para utilizarse en
combinación con un emisor de petaca de un sistema de
transmisión de audio inalámbrico (p. ej. un emisor de pe-
taca TXS-…HSE con conexión mini XLR de 3 polos de
“img Stage Line”). Está diseñado especialmente para
sonido vocal y discursos que necesiten mucha libertad de
movimiento, p. ej. para escenario.
Como alternativa para el funcionamiento con un emisor
de petaca, el micrófono se puede conectar a un aparato de
audio, p. ej. un mezclador, mediante un adaptador de ali-
mentación (p. ej. EMA-1 de “img Stage Line”) que sumi-
nistre corriente al micrófono.
2 Notas Importantes
El micrófono cumple con todas las directivas relevantes
de la UE y por lo tanto está marcado con el símbolo .
GEl micrófono está adecuado sólo para utilizarlo en inte-
riores. Protéjalo de la humedad y del calor (temperatura
ambiente admisible: 0 – 40 ºC).
GUtilice sólo un paño suave y seco para la limpieza; no
utilice nunca ni agua ni productos químicos.
GNo podrá reclamarse garantía o responsabilidad alguna
por cualquier daño personal o material resultante si el
micrófono se utiliza para otros fines diferentes a los ori-
ginalmente concebidos, si no se conecta adecuada-
mente o no se repara por expertos.
3 Puesta en Marcha
Coloque la espuma de protección entregada en el micró-
fono. Póngase la diadema y coloque el micrófono en una
posición óptima; el brazo del micrófono se doblará en cual-
quier dirección.
Conecte el micrófono a la entrada del emisor de petaca
o conéctelo a la entrada de micrófono del aparato de
audio, utilizando un adaptador de alimentación.
4 Especificaciones
Tipo: . . . . . . . . . . . . . . . . . . Back electret
Captación: . . . . . . . . . . . . . Cardioide
Banda pasante: . . . . . . . . . 50 – 16 000 Hz
Impedancia: . . . . . . . . . . . . 2 kΩ
Sensibilidad: . . . . . . . . . . . . 5,6 mV/Pa a 1 kHz
SPL máximo: . . . . . . . . . . . 130 dB
Alimentación: . . . . . . . . . . . 1,5–9V
mediante
emisor de petaca o
adaptador de alimentación
Peso: . . . . . . . . . . . . . . . . . 28 g
Conexión: . . . . . . . . . . . . . . Mini XLR, 3 polos
Configuración de pines: . . 1 = masa,
2 = señal de audio,
3 = alimentación
Sujeto a modificaciones técnicas.
Si va a poner el micrófono definitivamente fuera
de servicio, llévelo a la planta de reciclaje más
cercana para que su eliminación no sea perjudi-
cial para el medioambiente.
Mikrofon nagłowny
Przed rozpoczęciem pracy proszę zapoznać się z niniejszą
instrukcją a następnie zachować ją do wglądu.
1 Zastosowanie
Mikrofon nagłowny przystosowany jest do współpracy z
nadajnikiem kieszonkowym bezprzewodowego systemu
transmisji audio (np. nadajnikiem TXS-…HSE marki “img
Stage Line”, wyposażonym w 3-pinowe złącze mini XLR).
Przeznaczony jest do zastosowań muzycznych oraz kon-
ferencyjnych, wymagających dużej swobody ruchu np.
przy występach na scenie.
Alternatywnie, możliwe jest podłączenie mikrofonu do
wejścia w urządzeniu audio np. mikserze. Wymagany do
tego jest adapter z zasilaniem phantom (np. EMA-1 marki
“img Stage Line”).
2 Środki bezpieczeństwa
Mikrofon spełnia wszystkie wymagania norm UE i dlatego
został oznaczony symbolem .
GMikrofon przeznaczony jest do użytku jedynie wewnątrz
pomieszczeń. Należy chronić go przed działaniem wil-
goci oraz wysokiej temperatury (dopuszczalna tempe-
ratura otoczenia: 0 – 40 °C).
GDo czyszczenia urządzenia należy używać suchej, mięk-
kiej tkaniny. Nie stosować wody, ani chemicznych środ-
ków czyszczących.
GProducent ani dostawca nie ponoszą odpowiedzialności
za wynikłe szkody (uszkodzenie sprzętu lub obrażenia
użytkownika), jeśli urządzenie było używane niezgodnie
z przeznaczeniem, nieprawidłowo podłączone bądź
poddane nieautoryzowanej naprawie.
3 Przygotowanie do pracy
Założyć piankowy wiatrochron na wkładkę mikrofonową.
Założyć uchwyt mikrofonu na głowę i umieścić wkładkę
mikrofonową w pobliżu ust. Ramię wkładki może być
wyginane w dowolną stronę.
Podłączyć mikrofon do wejścia w nadajniku kieszonko-
wym lub do wejścia mikrofonowego w urządzeniu audio
– poprzez adapter z zasilaniem.
4 Specyfikacja
Typ: . . . . . . . . . . . . . . . . . . . back electret
Charakterystyka
kierunkowa: . . . . . . . . . . . . kardioida
Pasmo przenoszenia: . . . . . 50 – 16 000 Hz
Impedancja: . . . . . . . . . . . . 2 kΩ
Czułość: . . . . . . . . . . . . . . . 5,6 mV/Pa przy 1 kHz
Max poziom SPL: . . . . . . . . 130 dB
Zasilanie: . . . . . . . . . . . . . . 1,5–9V
z nadajnika
kieszonkowego lub
adaptera zasilania
Waga: . . . . . . . . . . . . . . . . . 28 g
Złącze: . . . . . . . . . . . . . . . . mini XLR, 3-pinowy
Konfiguracja pinów: . . . . . 1 = masa,
2 = sygnał audio,
3 = zasilanie
Z zastrzeżeniem możliwości zmian.
Po całkowitym zakończeniu eksploatacji, urzą-
dzenie należy oddać do punktu utylizacji odpa-
dów, aby zostało zniszczone bez szkody dla śro-
dowiska.
MONACOR INTERNATIONAL GmbH & Co. KG • Zum Falsch 36 • 28307 Bremen • Germany
Copyright ©by MONACOR INTERNATIONAL. All rights reserved. A-1560.99.01.05.2014
®
HSE-72
Bestellnummer 23.6410
ELECTRONICS FOR SPECIALISTS ELECTRONICS FOR SPECIALISTS ELECTRONICS FOR SPECIALISTS ELECTRONICS FOR SPECIALISTS ELECTRONICS FOR SPECIALISTS ELECTRONICS FOR SPECIALISTS ELECTRONICS FOR SPECIALISTS
I E PL

This manual suits for next models

1

Other Monacor Microphone manuals

Monacor DH-95N User manual

Monacor

Monacor DH-95N User manual

Monacor ECM-450 User manual

Monacor

Monacor ECM-450 User manual

Monacor HSE-100 User manual

Monacor

Monacor HSE-100 User manual

Monacor HSE-140/SK User manual

Monacor

Monacor HSE-140/SK User manual

Monacor ECM-450 User manual

Monacor

Monacor ECM-450 User manual

Monacor JTS KA-8TH /1 User manual

Monacor

Monacor JTS KA-8TH /1 User manual

Monacor PAM-10 User manual

Monacor

Monacor PAM-10 User manual

Monacor HSE-90 User manual

Monacor

Monacor HSE-90 User manual

Monacor HSE-80 User manual

Monacor

Monacor HSE-80 User manual

Monacor img Stage Line ECM-16N User manual

Monacor

Monacor img Stage Line ECM-16N User manual

Monacor HSE-72 User manual

Monacor

Monacor HSE-72 User manual

Monacor EMG-250P User manual

Monacor

Monacor EMG-250P User manual

Monacor IMG Stageline DM-3SET User manual

Monacor

Monacor IMG Stageline DM-3SET User manual

Monacor TXM-48 User manual

Monacor

Monacor TXM-48 User manual

Monacor DMS-1 User manual

Monacor

Monacor DMS-1 User manual

Monacor img Stage Line ECM-285 User manual

Monacor

Monacor img Stage Line ECM-285 User manual

Monacor Stage Line ECM-925P Operator's manual

Monacor

Monacor Stage Line ECM-925P Operator's manual

Monacor img Stage Line ECM-250 User manual

Monacor

Monacor img Stage Line ECM-250 User manual

Monacor HSE-86 User manual

Monacor

Monacor HSE-86 User manual

Monacor IMG Stageline DM-1800 User manual

Monacor

Monacor IMG Stageline DM-1800 User manual

Monacor img Stage Line EMG-450 User manual

Monacor

Monacor img Stage Line EMG-450 User manual

Monacor JTS MH-950/2 User manual

Monacor

Monacor JTS MH-950/2 User manual

Monacor HSE-100 User manual

Monacor

Monacor HSE-100 User manual

Monacor IMG STAGELINE HM-30 User manual

Monacor

Monacor IMG STAGELINE HM-30 User manual

Popular Microphone manuals by other brands

Gooseneck ST-5000 manual

Gooseneck

Gooseneck ST-5000 manual

MXL Revelation user manual

MXL

MXL Revelation user manual

Audio Technica ATR1200x quick start guide

Audio Technica

Audio Technica ATR1200x quick start guide

TDK T5919 manual

TDK

TDK T5919 manual

Earthworks TC25 owner's manual

Earthworks

Earthworks TC25 owner's manual

royer R-122 Operation instructions manual & user guide

royer

royer R-122 Operation instructions manual & user guide

TTS Easi-Speak Pro user guide

TTS

TTS Easi-Speak Pro user guide

smart acoustic SUM2020 Operation manual

smart acoustic

smart acoustic SUM2020 Operation manual

Audio Technica unipoint U857Q Specifications

Audio Technica

Audio Technica unipoint U857Q Specifications

Redback A 4580 operating manual

Redback

Redback A 4580 operating manual

Telefunken SDC Series product manual

Telefunken

Telefunken SDC Series product manual

Yealink VCM36-W Connection manual

Yealink

Yealink VCM36-W Connection manual

Shure Centraverse Series Installation

Shure

Shure Centraverse Series Installation

Sennheiser MEG 14-40 Specifications

Sennheiser

Sennheiser MEG 14-40 Specifications

Siemens VoiceLink user guide

Siemens

Siemens VoiceLink user guide

Inter-m RMC-02 Operation manual

Inter-m

Inter-m RMC-02 Operation manual

PRYME SPM-2200 TrooperII manual

PRYME

PRYME SPM-2200 TrooperII manual

Samson CL7 owner's manual

Samson

Samson CL7 owner's manual

manuals.online logo
manuals.online logoBrands
  • About & Mission
  • Contact us
  • Privacy Policy
  • Terms and Conditions

Copyright 2025 Manuals.Online. All Rights Reserved.