manuals.online logo
Brands
  1. Home
  2. •
  3. Brands
  4. •
  5. Monacor
  6. •
  7. Power Supply
  8. •
  9. Monacor PSS-1200 User manual

Monacor PSS-1200 User manual

Switch Mode Power Supply Unit
1 Applications
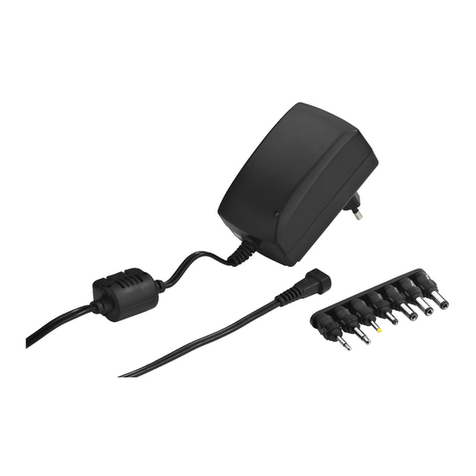
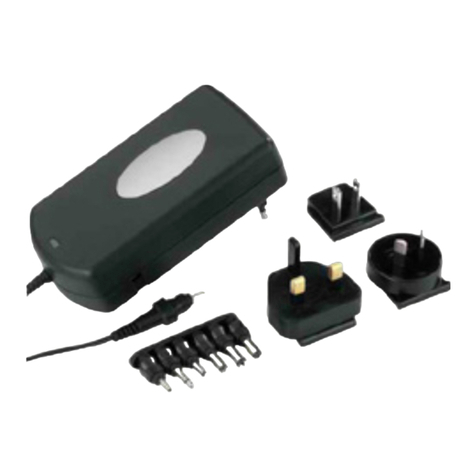
This switch mode power supply unit with switchable out-
put voltage serves for direct current supply of electric
low-voltage units, e.g. portable CD players or cassette
players.Fortheuseabroaditisequippedwithexchange-
able mains plug adapters. The unit is short circuit-proof
and protected against overload and overheating.
2 Safety Notes
The unit corresponds to the directive for electromagnet-
ic compatibility 89/336/EEC and to the low voltage
directive 73/23/EEC.
●The unit is suitable for indoor use only. Protect it
against dripping water and splash water, high air
humidity, and heat (admissible ambient temperature
range 0–40°C).
●Do not operate the power supply unit or immediately
disconnect it from the mains socket
1. if there is visible damage to the unit,
2. if a defect might have occurred after the unit was
dropped or suffered a similar accident,
3. if malfunctions occur.
In any case the unit must be repaired by skilled per-
sonnel.
Attention!
The unit is supplied with hazardous mains voltage.
Leave servicing to skilled personnel only. Inexpert
handling may cause an electric shock hazard. Further-
more, any guarantee claim will expire if the unit has
been opened.
●For cleaning only use a dry, soft cloth; never use
chemicals or water.
●No guarantee claims for the unit and no liability for any
resulting personal damage or material damage will be
accepted if the unit is used for other purposes than
originally intended, if it is not correctly connected, if it
is overloaded, or not repaired in an expert way.
●If the unit is to be put out of operation definitively, take
it to a local recycling plant for a disposal which is not
harmful to the environment.
3 Operation
Do not overload the power supply unit: The current con-
sumption of the low-voltage unit connected must not
exceed 1.2A.
1) Adjust the required operating voltage for the low-volt-
age unit: Use the supplied adjusting key to set the
yellow voltage selector switch to the required voltage
value.
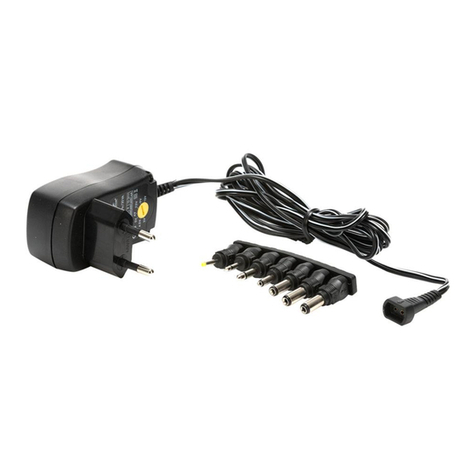
2) Select the matching plug for the low-voltage unit from
the 7 low-voltage plugs supplied and connect it to the
inline jack of the cable of the power supply unit. In
any case observe the required polarity for the low-
voltage unit. To determine the polarity, always turn
the inline jack in such a way that the arrows of inline
jack and plug face each other (see figures below).
3) Connect the power supply unit via the low-voltage
plug to the power supply connection of the low-volt-
age unit.
4) Select the matching plug from the 4 mains plug
adapters for the respective country (the continent of
Europe, Great Britain, USA/Japan, Australia), con-
nect it to the jack on the power supply unit and have
it locked into place.
GB
Schaltnetzgerät
1 Einsatzmöglichkeiten
Dieses Schaltnetzgerät mit umschaltbarer Ausgangs-
spannung dient zur Gleichstromversorgung von elek-
trischen Kleinspannungsgeräten wie z.B. tragbare CD-
oder Kassetten-Player. Für den Einsatz im Ausland ist
es mit austauschbaren Netzstecker-Adaptern ausge-
stattet. Das Gerät ist kurzschlussfest und gegen Über-
last und Überhitzung geschützt.
2 Hinweise für den sicheren Gebrauch
Das Gerät entspricht der Richtlinie für elektromagneti-
sche Verträglichkeit 89/336/EWG und der Niederspan-
nungsrichtlinie 73/23/EWG.
●Verwenden Sie das Gerät nur im Innenbereich. Schüt-
zen Sie es vor Tropf- und Spritzwasser, hoher Luft-
feuchtigkeit und Hitze (zulässiger Einsatztemperatur-
bereich 0–40°C).
●Nehmen Sie das Netzgerät nicht in Betrieb bzw. zie-
hen Sie es sofort aus der Steckdose, wenn:
1. sichtbare Schäden am Gerät vorhanden sind,
2. nach einem Sturz oder Ähnlichem der Verdacht auf
einen Defekt besteht,
Achtung!
Das Gerät wird mit lebensgefährlicher Netzspannung
versorgt. Nehmen Sie deshalb niemals selbst Eingriffe
im Gerät vor. Durch unsachgemäßes Vorgehen be-
steht die Gefahr eines elektrischen Schlages. Außer-
dem erlischt beim Öffnen des Geräts jeglicher Ga-
rantieanspruch.
3. Funktionsstörungen auftreten.
Geben Sie das Gerät in jedem Fall zur Reparatur in
eine Fachwerkstatt.
●Verwenden Sie zum Reinigen nur ein trockenes, wei-
ches Tuch, niemals Wasser oder Chemikalien.
●Wird das Gerät zweckentfremdet, nicht richtig an-
geschlossen, überlastet oder nicht fachgerecht repa-
riert, kann keine Haftung für daraus resultierende
Sach- oder Personenschäden und keine Garantie für
das Gerät übernommen werden.
●Soll das Gerät endgültig aus dem Betrieb genommen
werden, übergeben Sie es zur umweltgerechten Ent-
sorgung einem örtlichen Recyclingbetrieb.
3 Inbetriebnahme
Das Netzgerät nicht überlasten: Die Stromaufnahme
des angeschlossenen Kleinspannungsgeräts darf 1,2A
nicht überschreiten.
1) Die benötigte Betriebsspannung für das Kleinspan-
nungsgerät einstellen: Mit dem beiliegenden Einstell-
schlüssel den gelben Spannungswahlschalter auf
den erforderlichen Spannungswert drehen.
2) Aus den beiliegenden 7 Kleinspannungssteckern
den für das Kleinspannungsgerät passenden aus-
wählen und in die Kupplung des Netzgerätkabels
stecken. Dabei unbedingt die für das Kleinspan-
nungsgerät erforderliche Polarität beachten. Zum
Bestimmen der Polarität die Kupplung immer so dre-
hen, dass die Pfeile von Kupplung und Stecker auf-
einander zeigen (siehe Abbildungen unten).
3) Das Netzgerät über den Kleinspannungsstecker mit
dem Stromversorgungsanschluss des Kleinspan-
nungsgeräts verbinden.
4) Aus den 4 Netzstecker-Adaptern den passenden für
das jeweilige Land (Kontinentaleuropa, Großbritanni-
en, USA/Japan, Australien) auswählen, in die Buch-
se am Netzgerät stecken und einrasten lassen.
Um den eingesteckten Adapter wieder abzuneh-
men und gegen einen anderen auszutauschen, die
darunter liegende Entriegelungstaste in Pfeilrichtung
nach oben schieben. Der Adapter rastet dann aus
und kann entnommen werden.
5) Zum Schluss das Netzgerät in eine Steckdose
(100–240V~, 50/60Hz) stecken. Die LED am Gerät
leuchtet im Betrieb rot.
Auch wenn das angeschlossene Gerät ausgeschaltet
ist, verbraucht das Netzgerät einen geringen Strom. Da-
rum sollte es aus der Steckdose gezogen werden, wenn
es längere Zeit nicht gebraucht wird.
4 Technische Daten
Stromversorgung: . . . 100–240V~, 50/60Hz, 20VA
Ausgangsspannungen: 3/4,5/6/7,5/9/12V
Ausgangsstrom:. . . . . 1,2A
Maße, Gewicht: . . . . . 60x 40x 105mm, 320g
4 Netzstecker-Adapter: für Kontinentaleuropa, Großbri-
tannien, USA/Japan, Australien
7 Kleinspannungsstecker
2 Klinkenstecker: . . Ø 2,5mm (A) und 3,5mm (B)
5 Hohlstecker: . . . . Ø Außen-/Innenmaß in mm:
2,35/0,75 (S), 3,5/1,35 (H),
5,0/2,1 (D), 5,5/2,1 (E),
5,5/2,5 (G)
Laut Angaben des Herstellers.
Änderungen vorbehalten.
PSS-1200 Best.-Nr. 27.1830
®
Copyright©by MONACOR INTERNATIONAL GmbH & Co. KG, Bremen, Germany. All rights reserved. A-0270.99.01.07.2004
®
D A CH
3.5
+
-
5.5X2.1
+
-
B
+
-
+
-
E
Pluspol an der Spitze/am Innenkontakt ●Positive pole at the tip/at the inner contact Minuspol an der Spitze/am Innenkontakt ●Negative pole at the tip/at the inner contact
To remove the plug-in adapter and exchange it
against another one, slide the unlocking button locat-
ed below upwards in the direction of the arrow. Then
the adapter will be released and can be removed.
5) Finally connect the power supply unit to a mains
socket (100–240 V~, 50/60 Hz).The LED on the unit
shows red during operation.
Even with the unit connected switched off, the power
supply unit has a low current consumption. Therefore, it
is recommended to disconnect it from the mains socket
if it is not used for a longer period.
4 Specifications
Power supply: . . . . . . 100–240V~, 50/60Hz, 20VA
Output voltages:. . . . . 3/4.5/6/7.5/9/12V
Output current:. . . . . . 1.2A
Dimensions, weight:. . 60 x 40 x 105 mm, 320g
4 mains plug adapters: for the continent of Europe,
Great Britain, USA/Japan,
Australia
7 low-voltage plugs
2 plugs: . . . . . . . . . Ø 2.5mm (A) and 3.5mm (B)
5 hollow plugs: . . . . Ø ext./int. in mm:
2.35/0.75 (S), 3.5/1.35 (H),
5.0/2.1 (D), 5.5/2.1 (E);
5.5/2.5 (G)
According to the manufacturer.
Subject to technical modification.
Alimentation à découpage
1 Possibilités d’utilisation
Cette alimentation à découpage avec tension de sortie
commutable sert à l’alimentation courant continu d’ap-
pareils électriques basse tension par exemple lecteur
CD portable ou lecteur cassettes. Pour une utilisation à
l’étranger, elle est équipée d’adaptateurs secteur inter-
changeables. Elle est protégée contre les courts-cir-
cuits, surcharges et surchauffes.
2 Conseils d’utilisation et de sécurité
L’appareil répond à la norme européenne 89/336/CEE
relative à la compatibilité électromagnétique et à la
norme européenne 73/23/CEE portant sur les appareils
à basse tension.
●L’appareil n’est conçu que pour une utilisation en
intérieur. Protégez-le de tout type de projections
d’eau, des éclaboussures, d’une humidité élevée et
de la chaleur (plage de température de fonctionne-
ment autorisée : 0–40°C).
●Ne faites pas fonctionner l’alimentation ou débran-
chez-la immédiatement du secteur lorsque :
1. des dommages apparaissent sur l’appareil,
2. après une chute ou un cas similaire, vous avez un
doute sur l’état de l’appareil,
3. des dysfonctionnements apparaissent.
Faites toujours appel à un technicien spécialisé pour
effectuer les réparations.
Attention ! L’appareil est alimenté par une tension dan-
gereuse. Ne touchez jamais l’intérieur de l’appareil car
en cas de mauvaise manipulation, vous pouvez subir
une décharge électrique. En outre, l’ouverture de l’ap-
pareil rend tout droit à la garantie caduque.
●Pour nettoyer l’appareil, utilisez uniquement un chif-
fon sec et doux, en aucun cas, de produits chimiques
ou d’eau.
●Nous déclinons toute responsabilité en cas de dom-
mages corporels ou matériels résultants si l’appareil
est utilisé dans un but autre que celui pour lequel il a
été conçu, s’il n’est pas correctement branché, s’il y a
surcharge ou s’il n’est pas réparé par une personne
habilitée, de même, la garantie deviendrait caduque.
●Lorsque l’appareil est définitivement retiré du service,
vous devez le déposer dans une usine de recyclage
adaptée pour contribuer à son élimination non pol-
luante.
3 Fonctionnement
Ne surchargez pas l’alimentation ; la consommation de
courant de l’appareil basse tension relié ne doit pas
dépasser 1,2A.
1) Réglez la tension de fonctionnement nécessaire
pour l’appareil à basse tension : avec la clé livrée,
tournez le sélecteur de tension jaune sur la valeur
nécessaire.
2) Sélectionnez l’adaptateur correspondant à l’appareil
basse tension parmi les 7 adaptateurs basse tension
livrés et branchez-le dans la prise du cordon de l’ali-
mentation. Pour ce faire, respectez impérativement
la polarité nécessaire pour l’appareil basse tension.
Pour déterminer la polarité, tournez toujours la prise
de telle sorte que la flèche de la prise et celle de la
fiche se fassent face (voir dessins ci-dessous).
3) Reliezl’alimentationvia l’adaptateur basse tensionàla
connexion d’alimentation sur l’appareil basse tension.
4) Parmi les 4 adaptateurs secteur livrés, sélectionnez
celui correspondant au pays concerné (Europe con-
tinentale, Grande-Bretagne, USA/Japon, Australie)
et mettez-le dans la fiche sur l’alimentation jusqu’à
encastrement.
Pour retirer l’adaptateur inséré, et le remplacer
par un autre, poussez vers le haut dans le sens de la
flèche, la touche de déverrouillage se trouvant au-
dessous ; l’adaptateur sort et peut être retiré.
5) Enfin reliez l’alimentation à une prise secteur 100–
240V~, 50/60Hz. La LED sur l’appareil brille en
rouge pendant le fonctionnement.
Même lorsque l’appareil relié est éteint, l’alimentation a
une faible consommation. Il est recommandé de la dé-
brancher du secteur si elle ne doit pas être utilisée pen-
dant une longue période.
4 Caractéristiques techniques
Alimentation : . . . . . . . 100–240V~, 50/60Hz, 20VA
Tensions de sortie : . . 3/4,5/6/7,5/9/12V
Courant de sortie : . . . 1,2A
Dimensions, poids : . . 60 x 40 x 105 mm, 320g
4 adaptateurs secteur : pour Europe continentale,
Grande-Bretagne, USA/Japon,
Australie
7 adaptateurs basse tension
2 fiches jack : . . . . . Ø 2,5mm (A) et 3,5 mm (B)
5 fiches
alimentation: . . . . . Ø ext./int. en mm:
2,35/0,75 (S), 3,5/1,35 (H),
5,0/2,1 (D), 5,5/2,1 (E),
5,5/2,5 (G)
D’après les données du constructeur.
Tout droit de modification réservé.
Alimentatore switching
1 Possibilità d’impiego
Questo alimentatore switching con tensione d’uscita
commutabile serve per alimentare apparecchi elettrici a
tensione bassa come lettori CD portatili o a cassette con
corrente continua. Per l’impiego all’estero, è equipag-
giato con diversi adattatori di rete. L’apparecchio è resi-
stente ai cortocircuiti e protetto contro sovraccarico e
surriscaldamento.
2 Avvertenze di sicurezza
Quest’apparecchio è conforme alle direttive CE 89/336/
CEE sulla compatibilità elettromagnetica e 73/23/CEE
per apparecchi a bassa tensione.
●Far funzionare l’apparecchio solo all’interno di locali.
Proteggerlo dall’acqua gocciolante e dagli spruzzi
d’acqua, da alta umidità dell’aria e dal calore (tempe-
ratura d’impiego ammessa fra 0 e 40°C).
●Non mettere in funzione l’apparecchio e staccarlo
subito dalla presa di rete se:
1. l’apparecchio presenta dei danni visibili;
2. dopo una caduta o dopo eventi simili sussiste il
sospetto di un difetto;
3. l’apparecchio non funziona correttamente.
Per la riparazione rivolgersi sempre ad un’officina
competente.
Attenzione!
L’apparecchio funziona con tensione di rete pericolosa.
Non intervenire mai al suo interno; la manipolazione
scorretta può provocare delle scariche pericolose.
Se l’apparecchio viene aperto, cessa ogni diritto di
garanzia.
●Per la pulizia usare solo un panno morbido, asciutto;
nonimpiegare in nessun caso prodotti chimici o acqua.
●Nel caso d’uso improprio, di collegamenti sbagliati, di
sovraccarico o di riparazione non a regola d’arte
dell’alimentatore, non si assume nessuna responsabi-
lità per eventuali danni consequenziali a persone o a
cose e non si assume nessuna garanzia per lo stru-
mento.
●Se si desidera eliminare l’apparecchio definitivamen-
te, consegnarlo per lo smaltimento ad un’istituzione
locale per il riciclaggio.
3 Messa in funzione
Non sovraccaricare l’alimentatore: la corrente assorbita
dell’apparecchio a tensione bassa non deve superare
1,2A.
1) Impostare la tensione d’esercizio richiesta per l’ap-
parecchio a tensione bassa: posizionare il selettore
giallo della tensione sul valore necessario servendo-
si della chiave in dotazione.
2) Fra i 7 spinotti per alimentazione DC in dotazione
scegliere quello adatto per l’apparecchio a tensione
bassa ed inserirlo nel connettore femmina del cavo
dell’alimentatore rispettando assolutamente la
polarità come è richiesta dall’apparecchio a tensio-
ne bassa. Per determinare la polarità girare il con-
nettore femmina in modo che le frecce dei connetto-
ri maschio e femmina corrispondano (vedi le illustra-
zioni in basso).
3) Collegare l’alimentatore con il contatto di alimenta-
zione dell’apparecchio a tensione bassa servendosi
del connettore per alimentazione DC.
4) Fra i 4 adattatori rete scegliere quello adatto per il
relativo paese (Europa continentale, Gran Bretagna,
USA/Giappone, Australia), inserirlo fino allo scatto
nella presa dell’alimentatore.
Per sfilare l’adattatore e sostituirlo con un altro,
spostare il tasto di sblocco sottostante in direzione
dellafreccia verso l’alto. L’adattatoresi sgancia e può
essere tolto.
5) Alla fine inserire l’alimentatore in una presa di rete
(100–240V~
,
50/60Hz). Il LED dell’alimentatore è
acceso di colore rosso durante il funzionamento.
Anche se l’apparecchio collegato è spento, l’ali-
mentatore consuma un po’ di corrente. Perciò con-
viene staccarlo dalla presa se non serve per un peri-
odo prolungato.
4 Dati tecnici
Alimentazione: . . . . . . 100–240V~, 50/60Hz, 20VA
Tensioni d’uscita: . . . . 3/4,5/6/7,5/9/12V
Corrente d’uscita:. . . . 1,2A
Dimensioni, peso: . . . 60 x 40 x 105mm, 320g
4 adattatori
per spina rete: . . . . . . per Europa continentale, Gran
Bretagna, USA/Giappone,
Australia
7 spine per
alimentazione DC
2 jack: . . . . . . . . . . Ø 2,5mm (A) e 3,5mm (B)
5 spinotti: . . . . . . . . Ø esterno/interno in mm:
2,35/0,75 (S), 3,5/1,35 (H),
5,0/2,1 (D), 5,5/2,1 (E),
5,5/2,5 (G)
Dati forniti dal produttore.
Con riserva di modifiche tecniche.
PSS-1200 Best.-Nr. 27.1830
®
Copyright©by MONACOR INTERNATIONAL GmbH & Co. KG, Bremen, Germany. All rights reserved. A-0270.99.01.07.2004
®
3.5
+
-
5.5X2.1
+
-
B
+
-
+
-
E
Pôle plus à la pointe/au contact intérieur ●Polo positivo alla punta/al contatto interno Pôle moins à la pointe/au contact intérieur ●Polo negativo alla punta/al contatto interno
F B CH
I
Alimentador
1 Aplicaciones
Este alimentador con voltaje de salida conmutable se uti-
liza par alimentación de corriente continua de unidades
eléctricas de bajo voltaje, p.ej. un lector CD portátil o un
magnetófono a cassette. Para el uso en el exterior está
equipado con tomas de red adaptadas intercambiables.
El alimentador está probado contra los cortocircuitos y
protegidocontra las sobrecargas y el sobrecalentamiento.
2 Consejos de utilización y de seguridad
El aparato cumple con la normativa europea 89/336/
CEE relacionada con la compatibilidad electromagnéti-
ca y con la normativa 73/23/CEE relacionada con los
aparatos de baja tensión.
●El aparato está fabricado solo para una utilización en
interior. No lo exponga a las proyecciones de agua,
salpicaduras, a una fuerte humedad y al calor (tem-
peratura de funcionamiento aconsejada 0–40°C).
●No haga nunca funcionar el alimentador y desconéc-
telo inmediatamente cuando:
1. Aparecen daños en el aparato.
2. Después de una caída o accidente similar..., el
aparato pueda presentar un defecto.
3. Aparece mal funcionamiento.
En todos los casos, los daños deben repararse por un
técnico cualificado y especializado.
¡Atención! Este aparato está alimentado par una ten-
sión peligrosa. No manipule nunca el interior del apa-
rato, podría en caso de manipulación inadecuada,
sufrir una descarga eléctrica mortal. Además, la aper-
tura del aparato niega todo derecho de garantía.
●Para limpiarlo utilizar sólo un trapo seco y suave;
nunca utilizar productos químicos o agua.
●Rechazamos todo tipo de responsabilidad en caso de
daños materiales o corporales resultandos si el apa-
rato se utiliza en otro fin para el cual ha sido fabrica-
do, si no está correctamente conectado o reparado
por una persona habilitada o si hay sobrecarga; por
estosmismos motivos carecería todo tipo de garantía.
●Cuando el aparato está definitivamente sacado del
servicio, debe depositarlo en una fábrica de reciclaje
de proximidad para contribuir a una eliminación no
contaminante.
3 Funcionamiento
No sobrecargar el alimentador: el consumo de la unidad
de bajo voltaje conectada no debe exceder los 1,2A.
1) Ajustar el voltaje operativo necesario para la unidad
de bajo voltaje: Utilizar la llave proporcionada para
colocar el selector de voltaje amarillo hasta el valor
de voltaje necesario.
2) Seleccionar la toma adecuada para la unidad de bajo
voltaje de las 7 tomas de bajo voltaje entregadas y
conectarla a la toma de entrada del cable del alimen-
tador. En todo caso observar la polaridad necesaria
para la unidad de bajo voltaje. Para determinar la
polaridad, siempre girar la toma de entrada de mane-
ra que las flechas de la toma de entrada y de la toma
macho estén cara a cara (ver figuras debajo).
3) Conectar el alimentador a través de la toma de bajo
voltaje a la conexión de alimentación de la unidad de
bajo voltaje.
4) Seleccionar la toma adecuada entre las 4 tomas
adaptadas principales para el respectivo país (Euro-
pa continental, Gran Bretaña, USA/Japón, Austra-
lia), conectarla a la toma del alimentador y tenerla
conectada en su lugar.
Para sacar la toma adaptada conectada y cam-
biarla por otra, deslizar el botón desbloqueado locali-
zado debajo en la dirección de la flecha hacia arriba.
Luego, el adaptador quedará libre y podrá sacarse.
5) Finalmente conectar el alimentador al enchufe princi-
pal (100–240V~, 50/60Hz). El LED en el alimenta-
dor se ilumina de color rojo durante el funcionamiento.
Incluso con la unidad eléctrica apagada, el alimentador
tiene un pequeño consumo. Así que es recomendable
desconectar el alimentador de la toma principal si no se
utiliza durante un largo periodo.
4 Especificaciones
Alimentación: . . . . . . . 100–240V~, 50/60Hz, 20VA
Voltaje de salida: . . . . 3/4,5/6/7,5/9/12V
Corriente de salida: . . 1,2A
Dimensiones, peso: . . 60 x 40 x 105mm, 320g
4 tomas adaptadas
principales: . . . . . . . . . para Europa continental, Gran
Britaña, USA/Japón, Australia
7 tomas de bajo voltaje
2 tomas: . . . . . . . . . Ø 2,5mm (A) y 3,5mm (B)
5 agujeros tomas: . Ø ext./int. en mm:
2,35/0,75 (S), 3,5/1,35 (H),
5,0/2,1(D), 5,5/2,1 (E);
5,5/2,5 (G)
Datos según fabricante.
Sujeto a modificaciones técnicas.
Zasilacz regulowany
1Zastosowanie
PSS-1200 posiada przełączane napięcie wyjściowe i
służy do zasilania urządzeń elektronicznyc wymaga-
jącyc do pracy niskiego napięcia zasilającego (np.
discman, odtwarzacz kasetowy). Zasilacz posiada
układy przeciwzwarciowe, oraz obwody c roniące
przed przeciążeniem oraz przegrzaniem.
2Środki ostrożności
Urządzenie jest zgodne z wymaganiami normy o zgod-
ności elektromagnetycznej 89/336/EEC oraz normy
dotyczącej urządzeń niskonapięciowyc 73/23/EEC.
●Urządzenie jest przeznaczone tylko do użytku
wewnątrz pomieszczeń. Należy c ronić przed dosta-
niem się jakiejkolwiek cieczy do środka urządzenia,
dużą wilgotnością oraz ciepłem (temperatura oto-
czenia powinna wynosić od 0 – 40 °C).
●Nie wolno używać urządzenia lub natyc miast
odłączyć główną wtyczkę zasilającą z gniazda:
1. Jeśli występują widoczne uszkodzenia urządze-
nia.
2. Uszkodzenie urządzenia może wystąpić w wyniku
upadku lub innego podobnego zdarzenia.
Uwaga! Urządzenie jest zasilane niebezpiecznym dla
życia napięciem zmiennym. Aby uniknąć porażenia
elektrycznego nie wolno otwierać urządzenia. Jego
naprawą powinien zajmować się tylko przeszkolony
personel.
3. Jeśli urządzenie działa nieprawidłowo.
W takim przypadku naprawą urządzenia powinien
zajmować się tylko przeszkolony personel.
●Do czyszczenia obudowy należy używać tylko
suc ej, miękkiej ściereczki. Nie wolno używać wody
ani żadnyc środków c emicznyc .
●Nie ponosi się odpowiedzialności za wynikłe uszko-
dzenia sprzętu lub obrażenia użytkownika w przy-
padku gdy urządzenie jest wykorzystywane w innyc
celac niż to się przewiduje lub jeśli jest nieodpo-
wiednio zainstalowane, podłączane, użytkowane lub
naprawiane.
●Aby nie zaśmiecać środowiska po całkowitym
zakończeniu eksploatacji urządzenia należy je oddać
do punktu recyklingu.
3Obsługa
Uwaga! Nie wolno dopuścić do przeciążenia zasilacza:
Maksymalny pobór prądu przez odbiornik nie może
przekraczać 1,2 A.
1) Ustawić wymagane napięcie zasilające w
zależności od podłączanego urządzenia: Ustawić
przełącznik na odpowiedniej pozycji, wskazującej
napięcie wyjściowe.
2) Wybrać spośród dołączonyc końcówek odpo-
wiednią dla zasilanego urządzenia. Podłączyć ją do
gniazda nakablowego zasilacza. Należy uważać
na odpowiednią polaryzacj : strzałki na gnieździe
nakablowym oraz końcówce muszą być po tej
samej stronie (zob. rys. poniżej).
3) Podłączyć końcówkę zasilacza do urządzenia.
4) Wybrać odpowiednia końcówkę sieciową (w
zależności od typu wykorzystywanego gniazdka
sieciowego).
Aby zamienić końcówkę należy przesunąć przy-
cisk blokujący w kierunku zgodnym z kierunkiem
strzałki i wyjąć końcówkę.
5) Podłączyć zasilacz do sieci (100 –240 V~, 50/60 Hz).
Zapali się czerwona dioda LED.
Nawet jeśli zasilane urządzenie jest wyłączone, zasi-
lacz będzie pobierał z sieci nieznaczną ilość energii.
Dlatego też, przy dłuższym czasie nieużytkowania,
zasilacz należy odłączyć od sieci.
4Dane techniczne
Zasilanie: . . . . . . . . . . 100– 240 V~, 50/60 Hz, 20 VA
Napięcie wyjściowe: . 3/4,5/6/7,5/9/12 V
Prąd wyjściowy: . . . . . 1,2 A
Wymiary, waga: . . . . . 60 x 40 x 105 mm, 320 g
Końcówki sieciowe:. . dla Europy, Wielkiej Brytanii,
USA/Japonii, Australii
Końcówki zasilacza
2 końcówki: . . . . . . Ø2,5 mm (A) oraz 3,5 mm (B)
5 końcówek: . . . . . Øzew./wew. mm:
2,35/0,75 (S), 3,5/1,35 (H),
5,0/2,1 (D), 5,5/2,1 (E);
5,5/2,5 (G)
Zgodnie z danymi producenta.
Z zastrzeżeniem do możliwyc zmian.
PSS-1200 Best.-Nr. 27.1830
®
Copyright©by MONACOR INTERNATIONAL GmbH & Co. KG, Bremen, Germany. All rights reserved. A-0270.99.01.07.2004
®
3.5
+
-
5.5X2.1
+
-
B
+
-
+
-
E
Polo positivo a la punta/al contacto interior ●Styk dodatni na czubku/wewnętrzny Polo negativo a la punta/al contacto interior ●Styk ujemny na czubku/wewnętrzny
PL
E

This manual suits for next models

1

Other Monacor Power Supply manuals

Monacor PSS-90NUSB User manual

Monacor

Monacor PSS-90NUSB User manual

Monacor PSS-510DC User manual

Monacor

Monacor PSS-510DC User manual

Monacor PS-532 User manual

Monacor

Monacor PS-532 User manual

Monacor PS-1005 USB User manual

Monacor

Monacor PS-1005 USB User manual

Monacor PS-970AC User manual

Monacor

Monacor PS-970AC User manual

Monacor PS-128A User manual

Monacor

Monacor PS-128A User manual

Monacor PSS-510 DC User manual

Monacor

Monacor PSS-510 DC User manual

Monacor IMG STAGELINE EMA-3 User manual

Monacor

Monacor IMG STAGELINE EMA-3 User manual

Monacor PSS-1005USB User manual

Monacor

Monacor PSS-1005USB User manual

Monacor PSS-600E User manual

Monacor

Monacor PSS-600E User manual

Monacor PSS-1500SV User manual

Monacor

Monacor PSS-1500SV User manual

Monacor PSS-5000 User manual

Monacor

Monacor PSS-5000 User manual

Monacor PSS-5000 User manual

Monacor

Monacor PSS-5000 User manual

Monacor security PS-120WP User manual

Monacor

Monacor security PS-120WP User manual

Monacor PSS-1005USB User manual

Monacor

Monacor PSS-1005USB User manual

Monacor PSS-600E User manual

Monacor

Monacor PSS-600E User manual

Monacor PA-24ESP User manual

Monacor

Monacor PA-24ESP User manual

Monacor PSS-510DC User manual

Monacor

Monacor PSS-510DC User manual

Monacor IMG STAGELINE EMA-3 User manual

Monacor

Monacor IMG STAGELINE EMA-3 User manual

Monacor PSS-1500SV User manual

Monacor

Monacor PSS-1500SV User manual

Monacor PSS-800 User manual

Monacor

Monacor PSS-800 User manual

Monacor PS-500XC User manual

Monacor

Monacor PS-500XC User manual

Monacor PS-120WP User manual

Monacor

Monacor PS-120WP User manual

Monacor PSS-2405USB User manual

Monacor

Monacor PSS-2405USB User manual

Popular Power Supply manuals by other brands

Solar Stik 24VDC PRO-VERTER 5000-220 AGS Programming instructions

Solar Stik

Solar Stik 24VDC PRO-VERTER 5000-220 AGS Programming instructions

Matsusada Precision EGS Series Basic instruction manual

Matsusada Precision

Matsusada Precision EGS Series Basic instruction manual

Poppstar 1008824 Instructions for use

Poppstar

Poppstar 1008824 Instructions for use

Lambda pmn instruction manual

Lambda

Lambda pmn instruction manual

urmet domus 1083 Installation handbook

urmet domus

urmet domus 1083 Installation handbook

Matsusada Precision PSS2en-DCPS instruction manual

Matsusada Precision

Matsusada Precision PSS2en-DCPS instruction manual

D-Link DMC-1001 - Power Supply - hot-plug user guide

D-Link

D-Link DMC-1001 - Power Supply - hot-plug user guide

B.E.G. LUXOMAT PS-DALISYS-USB-REG Mounting instructions

B.E.G.

B.E.G. LUXOMAT PS-DALISYS-USB-REG Mounting instructions

Azure Aqua AC4203 user manual

Azure

Azure Aqua AC4203 user manual

Puls PIM90.241 manual

Puls

Puls PIM90.241 manual

Sentey LTP 550 SM series user manual

Sentey

Sentey LTP 550 SM series user manual

Rohde & Schwarz NGA100 user manual

Rohde & Schwarz

Rohde & Schwarz NGA100 user manual

EDS PowerAll PS13V610-8O-D installation manual

EDS

EDS PowerAll PS13V610-8O-D installation manual

Devine MPS 1000 user manual

Devine

Devine MPS 1000 user manual

Emerson SAG581126000 System application guide

Emerson

Emerson SAG581126000 System application guide

Puls XT40.241 installation manual

Puls

Puls XT40.241 installation manual

Matsusada Precision CD Series Basic instruction manual

Matsusada Precision

Matsusada Precision CD Series Basic instruction manual

Amada CL-P115A Operation manual

Amada

Amada CL-P115A Operation manual

manuals.online logo
manuals.online logoBrands
  • About & Mission
  • Contact us
  • Privacy Policy
  • Terms and Conditions

Copyright 2025 Manuals.Online. All Rights Reserved.