Montiss Atlantic CSC811 User manual

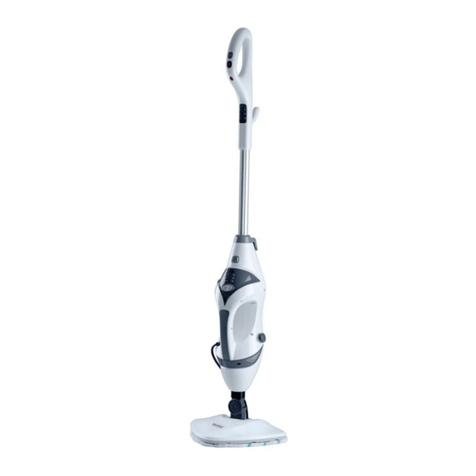
Steam Cleaner Atlantic
CSC811
Gebruiksaanwijzing
User manual
Bedienungsanleitung
Mode d’emploi
návod k použití

Version: 1.0
Voorzichtig:
De boiler staat onder druk.
Trek de stekker uit het stopcontact.
Houd de stoomdoseerhendel ingedrukt om de stoom te laten ontsnappen.
Het apparaat 5 minuten af laten koelen alvorens u de dop opendraait om evt. na te vullen.
Attention:
Water tank is under pressure.
Pull the plug from the wall socket.
Keep the trigger pressed to allow the steam to escape.
Allow the device to cool down for five minutes before refilling.
Achtung:
Wassertank ist unter Druck.
Ziehen Sie den Stecker aus der Steckdose.
Drücken Sie den Knopf um den Dampf abzulassen.
Vor der Nachfüllung mit Wasser 5 Minuten warten bis der Tank sich abgekühlt hat.
Attention:
Le réservoir d'eau est sous pression.
Retirez la fiche de la prise de courant.
Tenez l’interrupteur de la vapeur pressé de manière que l’appareil perd la pression.
Laissez refroidir l’appareil pendant 5 minutes avant remplissage.
Pozor:
Vodní nádrž je pod tlakem.
Vytáhněte zástrčku ze zásuvky ve zdi.
Držte spouštěč, aby mohla pára unikat.
Před znovunaplněním přístroje jej nechte 5 minut zchladit.
VERBRANDINGSGEVAAR
DANGER OF SCALDING
VERBRÜHUNGSGEFAHR
AVERTISSEMENT
NEBEZPEČÍ OPAŘENÍ

Version: 1.0
Index
Nederlands .............................................................................................................................................. 4
Deutsch.................................................................................................................................................. 14
English ................................................................................................................................................... 24
Français.................................................................................................................................................. 34
Tsjechisch............................................................................................................................................... 44

VEILIGHEIDSVOORSCHRIFTEN
Waarschuwing:
Bij het gebruik van ieder elektrisch apparaat, dienen basisvoorzorgsmaatregelen inzake veiligheid
altijd nageleefd te worden. Onderstaande instructies dienen opgevolgd te worden om het risico van
brand, elektrische schok of verwonding te reduceren.
Algemeen
1. Lees deze gebruiksaanwijzing zorgvuldig door voordat u het apparaat gaat gebruiken. Bewaar
de gebruiksaanwijzing om deze indien nodig te kunnen raadplegen.
2. Gebruik het apparaat uitsluitend zoals in deze gebruiksaanwijzing staat beschreven.
3. Controleer of de aangegeven netspanning op het apparaat overeenkomt met de plaatselijke
netspanning voordat u het apparaat aansluit.
4. Dit apparaat dient te worden aangesloten op een geaard stopcontact.
5. Controleer regelmatig of het apparaat intact is. Gebruik het apparaat niet indien de
stroomkabel of de stekker beschadigd is, of wanneer enig onderdeel van het apparaat is
gevallen of beschadigd is geraakt. Indien de stroomkabel beschadigd is, moet u het laten
vervangen door Montiss of een door Montiss geautoriseerd servicecentrum om gevaar te
voorkomen.
6. Repareer om gevaren te vermijden het apparaat nooit zelf.
7. Dit apparaat is niet geschikt voor gebruik door kinderen of personen met verminderde
lichamelijke, zintuiglijke of geestelijke vermogens, of die gebrek aan ervaring of kennis
hebben, tenzij iemand die verantwoordelijk is voor hun veiligheid toezicht op hen houdt of
hen heeft uitgelegd hoe het apparaat dient te worden gebruikt. Nauwlettend toezicht is
vereist als het apparaat in nabijheid van kinderen, huisdieren of planten wordt gebruikt.
8. Laat kinderen nooit met het verpakkingsmateriaal spelen, er bestaat verstikkingsgevaar.
9. Laat het apparaat nooit onbeheerd achter als de stekker in het stopcontact zit.
10. Schakel het apparaat uit voordat u de stekker uit het stopcontact verwijdert of voordat u de
stekker op het stopcontact aansluit.
11. Schakel het apparaat uit en neem de stekker uit het stopcontact wanneer u het apparaat vult,
leegt, reinigt of als u het apparaat niet gebruikt.
12. Trek nooit aan de stroomkabel, maar aan de stekker zelf om deze uit het stopcontact te
nemen.
13. Gebruik het apparaat niet met behulp van een verlengsnoer, tenzij dit verlengsnoer
gecontroleerd en getest is door een gekwalificeerde monteur.
14. Til het apparaat nooit op aan de stroomkabel, gebruik de stroomkabel niet als handvat, trek
de stroomkabel niet om scherpe randen of hoeken.
15. Laat het apparaat niet over de stroomkabel rijden en laat de stroomkabel niet op enige wijze
knikken of omkrullen.
16. Houd het apparaat, de stekker en de stroomkabel uit de buurt van vuur en hete
oppervlakken.
17. Zorg ervoor dat het apparaat volledig afgekoeld is wanneer u accessoires bevestigt of
losmaakt of voordat u het apparaat opbergt.
18. Gebruik geen accessoires die niet zijn aanbevolen door Montiss, in het bijzonder geen
accessoires die niet bij het apparaat zijn geleverd.
19. Gebruik het apparaat nooit in ruimtes waar bepaalde dampen aanwezig kunnen zijn
(verfverdunner, brandbare stof, verf en lakken op oliebasis, ontvlambare vloeistoffen en
gassen). Dit i.v.m. explosiegevaar.
20. Niet buiten gebruiken.
21. Dompel het apparaat en/of de stroomkabel nooit in water of andere vloeistoffen.
22. Kom niet met natte handen aan het apparaat of de stekker. Pak het apparaat nooit op indien
het in water of een andere vloeistof is gevallen. Neem in dit geval meteen de stekker uit het
stopcontact.

5
23. Wees extra voorzichtig bij het reinigen van trappen of andere ongelijke oppervlakken.
24. Berg het apparaat binnenshuis op.
25. Schade veroorzaakt door verkeerd gebruik van stoom aan objecten, materialen, personen
en/of dieren of door het niet naleven van de instructies in deze gebruiksaanwijzing wordt
uitgesloten van garantie.
Dit apparaat is alleen bestemd voor huishoudelijk gebruik, NIET voor bedrijfsmatig gebruik.
Stoomfunctie
Waarschuwing:
De kracht en warmte van de stoom kunnen nadelige gevolgen hebben voor bepaalde materialen.
Controleer altijd voordat u het apparaat in gebruik neemt, of een oppervlak of materiaal ook
daadwerkelijk geschikt is voor behandeling met stoom. Doe dit door een test uit te voeren op een
verborgen oppervlak van het te behandelen materiaal.
1. De kracht en de hitte van de stoom kunnen nadelige uitwerkingen hebben op sommige
materialen. Voorbeelden: gelakt hout of leer kan als gevolg van de stoom worden gebleekt.
Glanzende kunststof kan door behandeling met stoom dof worden. Acryl, fluweel en linnen
reageren zeer gevoelig op stoom.
2. Het apparaat niet gebruiken op ongelakte vloeren of vloeren die behandeld zijn met was.
3. Plaats het apparaat nooit lang op één plek! Dit kan beschadigingen aan het te behandelen
materiaal veroorzaken!
4. Contact met hete onderdelen, heet water of stoom kan brandwonden tot gevolg hebben.
Wees daarom ook zeer voorzichtig wanneer u het apparaat na gebruik leeg laat lopen, er kan
nog heet water in het apparaat zitten.
5. Het apparaat warmt op tijdens gebruik. Raak daarom tijdens gebruik alleen handvat en
knoppen aan.
6. Richt de stoomstraal nooit op mensen, dieren of planten.
7. Richt de stoomstraal nooit rechtstreeks op zeer koude glasoppervlakten, elektrische
apparaten of op delen van apparaten waar zich de elektrische componenten bevinden, denk
aan de onderdelen in de oven.
8. Bewerk geen kledingstukken, die zich op het lichaam bevinden.
9. Let er op, dat u op tijd water bijvult.
10. Voeg geen schoonmaakmiddelen, parfum, olie of andere chemicaliën toe aan het water dat u
gebruikt in uw apparaat, aangezien dit schade kan veroorzaken aan het apparaat of het
apparaat onveilig kan maken in gebruik.
11. Overschrijd niet de maximum voorgeschreven vulhoeveelheid van 1200 ml.
12. Gebruik kraanwater of gedestilleerd/gezuiverd water als het kraanwater een hoog gehalte
aan mineralen heeft.
13. De tank staat onder druk. De tanksluiting mag tijdens het gebruik niet worden geopend.
14. Tijdens het gebruik mag het apparaat niet meer dan 45° worden gekanteld.
15. Het apparaat is uitgerust met een thermostaat en een thermische beveiliging als bescherming
tegen oververhitting.
16. Schade veroorzaakt door verkeerd gebruik van stoom aan objecten, materialen, personen
en/of dieren of door het niet naleven van de instructies in deze gebruiksaanwijzing wordt
uitgesloten van garantie.

6
HET PRODUCT
1. Basiseenheid 12. Verlengbuizen
2. Vuldop 13. Maatbeker
3. Draaghandvat 14. Vultrechter
4. Aan/uit schakelaar 15. Vloerdoek
5. Stoomindicator 16. Accessoire adapter
6. Aan/Uit-indicator 17. Kleine borstel
7. Accessoire opbergvak 18. Grote borstel
8. Flexibele slang 19. Stoomspuitstuk
9. Stoomspuit 20. Aansluiting vloerborstel
10. Stoomtrekker 21. Vloerborstel
11. Vergrendelingsknop 22. Raamwisser

7
HET GEBRUIK
Voor gebruik
Verwijder alle verpakkingsmaterialen.
Reinig het apparaat, indien nodig, met een vochtige doek en eventueel wat reinigingsmiddel
(zie hiervoor ook de paragraaf "onderhoud en reiniging").
Controleer het apparaat op schade voor elk gebruik. Gebruik het apparaat niet indien het
apparaat of de stroomkabel beschadigd is of niet goed werkt.
Vullen van de watertank
Zorg ervoor dat het apparaat niet is aangesloten op het stroomnet. Verwijder de vuldop (2) van de
watertak door deze tegen de klok in draaien. Vul de tank met maximaal 1200 ml water via de
trechter (14) en maatbeker (13) zoals getoond in figuur 1. De vuldop (2) terugplaatsen en goed
sluiten door met de klok mee aan te draaien.
Let op: voeg geen schoonmaakmiddelen, parfum, olie of andere chemicaliën toe aan het water,
aangezien dit schade kan veroorzaken aan de unit dan wel het apparaat onveilig maakt in gebruik.
Let op: overschrijd niet de maximum voorgeschreven vulhoeveelheid van 1200 ml.
Let op: voor uw veiligheid wordt de vuldop vergrendeld wanneer de watertank onder druk staat.
Wacht totdat de watertank is afgekoeld om de vuldop veilig te verwijderen.
Figuur 1
Gebruik van accessoires
Let op:
Neem de stekker uit het stopcontact en laat het apparaat volledig afkoelen voordat u
accessoires plaatst of verwijdert.
De accessoires worden heet tijdens gebruik.
Verlengbuizen (12)
Afhankelijk van de uit te voeren werkzaamheden kunt u één of twee verlengbuizen aanbrengen. De
buizen op elkaar aansluiten en zover mogelijk op de stoomspuit (9) drukken totdat ze hoorbaar
vastklikken, zoals getoond in figuur 2.
De verlengbuizen kunnen worden gebruikt met de vloerborstel (21) en andere accessoires in
combinatie met de adapter voor accessoires (16).
Figuur 2

8
Vloerborstel (21)
De vloerborstel wordt geleverd met een aparte vloerborstel aansluiting (20). Om de vloerborstel te
gebruiken, drukt u op de aansluiting van de vloerborstel op de achterkant hiervan. Draai deze 180
graden naar boven zoals aangegeven in figuur 3. De vloerborstel is nu volledig gemonteerd. De
vloerborstel is geschikt voor het reinigen van vloeroppervlakken en grote afwasbare muren. De
vloerborstel kan worden gebruikt met of zonder de reinigingsdoek (15). Het wordt aanbevolen de
vloerborstel te gebruiken zonder reinigingsdoek voor desinfecteren en schoonmaken van tapijten.
De reinigingsdoek kan wel gebruikt worden voor het reinigen van gladde vloeren. Voor het reinigen
van sterk vervuilde plekken dient u de vloerborstel langzaam over het oppervlak te bewegen om de
reinigende werking van de stoom te verhogen.
Let op: het apparaat is niet geschikt voor houten vloeren zonder beschermlaag, zachte kunststoffen
en houten meubelen.
Figuur 3
Vloerdoek (15)
Plaats de vloerborstel (21) op de reinigingsdoek en trek het doek onder de klemmen aan beide
zijden van de borstel zoals getoond in figuur 4. De reinigende werking van de reinigingsdoek kan
wordt verbeterd door het doek regelmatig om te draaien en regelmatig te wisselen. Voor het
reinigen van sterk vervuilde plekken, de vloerborstel langzaam over het oppervlak bewegen om de
reinigende werking van de stoom te verhogen.
Figuur 4
Adapter voor accessoires(16)
Schuif de adapter op het mondstuk van de stoomspuit (9) totdat deze vastklikt. De adapter kan
gebruikt worden met verschillende accessoires zoals de kleine borstel (17), grote borstel (18),
stoomspuitstuk (19) en raamwisser (22).
Om de adapter aan de stoomspuit te bevestigen, aanduwen totdat deze vastklikt zoals
weergegeven in Figuur 5.
Figuur 5

9
Stoomspuitstuk (19)
Het stoomspuitstuk kunt u gebruiken voor de reiniging van hoeken, voegen, jaloezieën, centrale
verwarmingen, toiletten, armaturen, roestvrij staal, ruiten, spiegels, geëmailleerde oppervlakken,
oplossen van vlekken. Bevestig de stoomspuitstuk op de adapter ( 16 ) zoals getoond in figuur 6.
Figuur 6
Kleine ronde borstel (17) en grote ronde borstel (18)
De borstels kunnen worden gebruikt voor het reinigen van voegen tussen tegels, keramiek en
marmer en het verwijderen van hardnekkige vlekken. De plastic borstels kunnen worden
aangebracht op de adapter (16) zoals getoond in figuur 7.
Figuur 7
Raamwisser (22)
Bevestig de raamwisser op de adapter (16) zoals weergegeven in figuur 8.
De raamwisser is perfect voor het reinigen van ruiten, spiegels, keramische tegels en andere
poriënvrije, gladde oppervlakken.
Let op: bij een warmteschok kunnen glasoppervlakken springen. Verwarm het glasoppervlak voor
de stoomreiniging voor, door het opbrengen van zeer uitgespreide stoom op een afstand van 20 tot
25 cm van het oppervlak. Verminder de afstand bij de opwarming van het glas op 10 tot 15 cm.
Figuur 8
Opbergvak voor accessoires (7)
Het opbergvak openen door op de knop aan de voorkant te drukken en het deksel omhoog trekken
zoals aangegeven in figuur 9.
De volgende accessoires kunnen worden opgeborgen in het accessoirevak.
-Adapter (16)
-Kleine borstel (17)

10
-Grote borstel (16)
-Spuitmondstuk (19)
Figuur 9
Het gebruik
Aan/uit schakelaar (4)
Wanneer de watertank gevuld is en eventuele accessoires zijn bevestigd, stopt u de stekker in het
stopcontact. Schakel het apparaat in met de Aan/Uit schakelaar. De aan/uit-indicator (6) en stoom
indicatielampje (5) gaan branden.
Indicatielampje stoom (5)
Het indicatorlampje stoom gaat uit zodra de bedrijfstemperatuur bereikt is. Het apparaat is nu klaar
voor gebruik.
Het indicatorlampje stoom schakelt herhaaldelijk in en uit tijdens het gebruik terwijl het apparaat
op temperatuur blijft.
Stoomspuit (9)
De stoomspuit is voorzien van een veiligheidsslot (11). In de "uit"-stand zal de stoomspuit geen
stoom uitstoten, ook niet wanneer het apparaat in werking is. Om veiligheidsredenen altijd de
stekker van de vergrendeling op "uit" zetten wanneer het apparaat niet wordt gebruikt, zoals
weergegeven in figuur 10.
Om de stoom te gebruiken, de vergrendeling op "aan" zetten zoals weergegeven in figuur 10.
Bevestig een accessoire naar keuze. De stoomreiniger is nu klaar voor gebruik.
Druk op de stoomtrekker (10) om stoom uit het mondstuk te spuiten. Houd de stoomtrekker
ingedrukt en richt de stoom op het te reinigen oppervlak. Beweeg de stoomreiniger achteruit en
vooruit; de stoom niet langere tijd op dezelfde plek concentreren.
Opmerking: Eerste uitstoot van stoom kan condensatie van waterdruppels bevatten; wij adviseren
de eerste paar seconden de stoom te richten op een doek of de gootsteen.
Opmerking: alleen op de stoomtrekker drukken wanneer u het oppervlak wilt reinigen.
Opmerking: de vergrendeling altijd in de vergrendelde positie zetten wanneer het apparaat niet
wordt gebruikt.
Figuur 10

11
Bijvullen van de watertank
Als de watertank tijdens gebruik moet worden bijgevuld, schakelt u het apparaat uit en haalt u de
stekker uit het stopcontact. Voor u de vuldop opent, dient u de stoomdruk te laten ontsnappen
door op de stoomschakelaar op het stoompistool te drukken of het apparaat volledig te laten
afkoelen. De watertank kan aansluitend als volgt worden bijgevuld: maak de vuldop los door er op
te drukken en het tegen de wijzers van de klok in los te draaien. Vul de tank met behulp van de
trechter en maatbeker, met 1200 ml water. Plaats de vuldop weer op het apparaat en draai de dop
vast door deze met de wijzers van de klok mee te draaien.
Let op:
Ook na een afkoelfase van 5 minuten zijn het resterende water in de tank en de vuldop nog
steeds heet. Schroef de vuldop zeer voorzichtig van de tank, omdat hete stoom kan
ontsnappen en omdat men zich aan de hete schroefdraad kan verbranden.
Voeg geen schoonmaakmiddelen, parfum, olie of andere chemicaliën toe aan het water,
aangezien dit schade kan veroorzaken aan het apparaat dan wel het apparaat onveilig maakt
in gebruik.
Overschrijd niet de maximum voorgeschreven vulhoeveelheid van 1200 ml.
In gebieden met hard water wordt het gebruik van gedistilleerd water aanbevolen, om te
vermijden dat kalk wordt afgezet.
Na gebruik
Schakel het apparaat uit door op de aan/uit-schakelaar te drukken en de stekker van het apparaat
uit het stopcontact te verwijderen. Laat het apparaat volledig afkoelen.
Laat stoomdruk ontsnappen door op de stoomtrekker (10) op het handvat te drukken en zet het
vergrendelingsslot (11) op de “uit"-stand. De watertank legen door het apparaat om te draaien.
Opmerking: altijd voorzichtig zijn omdat het water nog heet kan zijn.
ONDERHOUD EN REINIGING
Let op:
Schakel het apparaat altijd uit en neem de stekker uit het stopcontact wanneer u het
apparaat reinigt.
Dompel het apparaat en/of de stroomkabel nooit in water of andere vloeistoffen.
Reinigen
Schakel het apparaat uit en laat het volledig afkoelen voordat u het apparaat gaat reinigen. Reinig
het apparaat en de accessoires met een vochtige doek en eventueel wat reinigingsmiddel en maak
goed droog.
Let op: gebruik nooit schuurmiddelen, bleekmiddelen of staalwol om het apparaat te reinigen. Dit
kan beschadigingen aan het materiaal veroorzaken.
Uitspoelen van de watertank
Voor het reinigen van de tank, kunt u deze met water vullen en krachtig schudden. Hierdoor
worden eventuele kalkresten, die zich op de bodem van de tank hebben afgezet, losgemaakt. Giet
het water vervolgens weer uit de tank, door het apparaat om te keren.
Ontkalken
Om een langere levensduur van uw apparaat te garanderen dient u de watertank ca. eens per 6
maanden te ontkalken. Schakel het apparaat uit, haal de stekker uit het stopcontact en giet het
resterende water uit het apparaat zoals hierboven beschreven staat. Vul de tank met 1200 ml heet
water (50°C) en voeg één of maximaal twee ontkalkingtabletten bij het water. Na een inwerktijd van
ca. 30 minuten kunt u het water uit de tank gieten. Nog beter is het apparaat te ontkalke met azijn.

12
Reinigen vloerdoek
Was de vloerdoek voor het eerste gebruik in de wasmachine op 40°C. Gebruik alleen vloeibaar
wasmiddel. Gebruik nooit waspoeder omdat de korrels niet altijd volledig oplossen en vast gaan
zitten in de doek. Dit kan krassen achterlaten op het oppervlak dat u schoon wilt maken.
Let op: niet bleken of gebruikmaken van een waterontharder.
Laat de vloerdoek aan de lucht drogen.
Let op: niet in de droogtrommel drogen.
Opbergen
Schakel het apparaat uit en neem de stekker uit het stopcontact. Laat het apparaat en de
accessoires volledig afkoelen. De watertank legen door het apparaat om te draaien. Bewaar op een
droge plaats op kamertemperatuur.
RECYCLEN
1. Als het symbool met de doorgekruiste verrijdbare afvalbak op een product staat, betekent dit
dat het product valt onder de Europese Richtlijn 2002/96/EC.
2. Elektrische en elektronische producten mogen niet worden meegegeven met het
huishoudelijke afval, maar moeten worden ingeleverd bij speciale inzamelingspunten die
door de lokale of landelijke overheid zijn aangewezen.
3. De correcte verwijdering van uw oude apparaat helpt negatieve gevolgen voor het milieu en
de menselijke gezondheid voorkomen.
4. Wilt u meer informatie over de verwijdering van uw oude apparaat? Neem dan contact op
met uw gemeente, de afvalophaaldienst of de winkel waar u het product gekocht heeft.
TECHNISCHE GEGEVENS
Modelnummer CSC811
Vermogen 1500W
Nominale spanning 220- 240V~
Nominale frequentie 50/60Hz
UW GARANTIEBEWIJS
Dit garantiebewijs dekt uw apparaat voor een periode van 24 maanden vanaf de datum van
aankoop op defecten aan het apparaat, op voorwaarde dat u het apparaat correct heeft gebruikt
zoals omschreven in de gebruiksaanwijzing.
Gebreken die ontstaan door ondeskundige behandeling, beschadiging of reparatiepogingen van
derden, vallen niet onder de garantie.
De garantie geldt niet voor de bijgeleverde accessoires, en andere delen van het apparaat die aan
slijtage onderhevig zijn. Mocht u deze willen nabestellen, dan is dat mogelijk via www.muppa.nl.

13
Dit apparaat is alleen bestemd voor huishoudelijk gebruik. Schade en/of storingen door
bedrijfsmatig gebruik worden uitgesloten van garantie.
U kunt gebruik maken van de garantie indien:
Het apparaat volgens de gebruiksaanwijzing is gebruikt;
U in het bezit bent van een geldig origineel aankoopbewijs welke niet is veranderd of
onleesbaar is gemaakt;
Er geen ingrepen zijn verricht door niet bevoegde personen of werkplaatsen;
De schade aan het apparaat niet is te wijten aan een oorzaak vreemd aan het apparaat, zoals:
brandschade, waterschade, transportschade, atmosferische ontladingen of verkeerd of
onvoldoende onderhoud.
Om ongerief te voorkomen, raden wij u aan de gebruiksaanwijzing zorgvuldig na te lezen alvorens
u tot ons te wenden.
Service
Als u na het lezen van deze gebruiksaanwijzing nog vragen heeft over het product, kunt u contact
opnemen met de Montiss klantenservice:
Telefoonnummer: +31 (0)45 5280 380
E-mail: info@montiss.com
Trebs
Montiss Cleaning Solutions
Thermiekstraat 1a
6361HB Nuth
Nederland

14
SAFETY REGULATIONS
Warning:
When using any electrical appliance, always observe basic safety precautions. The following
instructions should be followed to reduce the risk of fire, electric shock or injury.
General:
1. Read this manual carefully before using the appliance. Keep this manual in a safe place for
future reference.
2. Use the appliance only as described in this manual.
3. Check if the voltage indicated on the device corresponds to the local voltage before you
connect the device.
4. Always use an earthed socket.
5. Check the device regularly for damage. Do not use the device in case the power cord or plug
is damaged, or when any component of the device has been dropped or damaged. If the
power cord is damaged, you must have it replaced by Montiss or a service centre authorized
by Montiss in order to avoid safety hazards.
6. Do not attempt to repair the device yourself.
7. This appliance is not suitable for use by children or persons with reduced physical, sensory or
mental capabilities, or lack of experience and knowledge, unless someone responsible for
their safety is supervising them or explains how the appliance must be used. Close
supervision is required if the appliance is used near children, pets or plants.
8. Never allow children to play with the packaging as there is the risk of suffocation.
9. Do not leave the device unattended when the plug is in the socket.
10. Turn the appliance off before you pull the plug from the wall socket or before placing the plug
in the wall socket.
11. Always take the plug from the socket when you fill, empty or clean the device or when you
are not using the device.
12. Never pull the power cord to disconnect the plug from the socket; instead, hold the plug and
gently pull to disconnect.
13. Do not use the device with an extension cord unless this extension cord has been checked
and tested by a qualified technician.
14. Do not pull or carry the device by its power cord and do not use the power cord as a handle.
Do not close the door on the power cord or pull it around sharp edges or corners.
15. Do not allow the power cord to be compressed or curled.
16. Keep the device, the plug and the power cord away from flames and hot surfaces.
17. Make sure the device is completely cooled down before attaching or removing accessories or
before storing the device.
18. Do not use attachments that are not recommended by Montiss, in particular accessories that
are not supplied with the device.
19. Never use the device in areas where certain vapours may be present (paint thinner,
flammable material, oil based paint and varnish, flammable liquids and gases) for risk of an
explosion.
20. Do not use the device outdoors.
21. Never immerse the device and/or the power cord in water or other liquids.
22. Do not touch the device or the plug with wet hands.
23. Never attempt to grasp an electric device if it has fallen in water or other liquids. If this occurs
disconnect the plug immediately.
24. Be extra careful when cleaning staircases or other uneven surfaces.
25. Store the appliance indoors.
26. Damage caused by improper use of steam on objects, materials, persons and/or animals or by
not observing the instructions in these directions for use is excluded from guarantee.

15
This appliance is only intended for domestic use; do NOT use for commercial purposes.
Steam function
Warning:
The force and heat of the steam output may have a harmful effect on certain materials. Before
switching on the device, check whether a surface or material is suitable for treatment with steam.
You can do this by performing a test on a hidden part of the material you wish to treat.
1. The force and heat of the steam output may damage certain materials. Some fabrics may
react to the temperature of steam. For example: unpainted wood or leather can be bleached
by steam action. Shiny plastic materials may become dull by treatment with steam. Acrylic
fibre, velvet and linen are very sensitive to high steam temperature.
2. Do NOT use the device on unpainted or waxed floors.
3. Do not keep the device too long on one spot. This can cause damage to materials.
4. Burns can occur from touching hot parts, hot water or steam. Be cautious when draining the
device after use as there may be hot water left in the device.
5. The device heats up during operation, therefore only touch handle or buttons.
6. Never direct steam towards people, animals or plants.
7. Do not apply steam directly to very cold glass surfaces, electric devices or at parts containing
electrical components such as the electrical components inside an oven.
8. Never attempt to clean clothes which are still being worn.
9. Ensure that the device does not operate on an empty water tank.
10. Do not add cleaning solutions, scented perfumes, oils or any other chemicals to the water
used in this device, as this may damage the device and make it unsafe for use.
11. Do not exceed the maximum prescribed fill of 1200 ml for the water tank.
12. Use tap water or distilled/purified water if the tap has a high mineral content.
13. The water tank is under pressure. The tank lid must not be opened during use.
14. The device should not be tilted at an angle of more than 45° during use.
15. The device is equipped with a thermostat and a thermal safety device to protect against
overheating.
16. Damage caused by improper use of steam on objects, materials, persons and/or animals or by
not observing the instructions in this manual is excluded from guarantee.

16
THE PRODUCT
1. Main unit 12. Extension tubes
2. Filling cap 13. Measuring cup
3. Carrying handle 14. Funnel
4. On / off switch 15. Cleaning cloth
5. Steam Indicator 16. Accessory adaptor
6. On/off Indicator 17. Small brush
7. Accessories Compartment 18. Large brush
8. Flexible hose 19. Concentrator nozzle
9. Steam jet 20. Floor brush connector
10. Steam trigger 21. Floor brush
11. Safety lock 22. Window squeegee

17
THE USE
Before use
Remove all packaging materials.
Clean the device, if necessary, with a wet cloth and some detergent (also see the paragraph
"maintenance and cleaning").
Check the device for damage before each use. Do not use the device if the power cord or the
device is damaged or not working properly.
Filling the water tank
Do not fill the unit while plugged to the power supply. Remove the filling cap (2) of the water tank
by turning it anti-clockwise. Fill the tank with a maximum of 1200 ml of water using the funnel (14)
and measuring cup (13) as shown in figure 1. Replace the filling cap (2) and close it tightly by
turning in clockwise direction.
Note: do not add cleaning solutions, scented perfumes, oils or any other chemicals to the water
used in this device, as this may damage the device and make it unsafe for use.
Note: do not exceed the maximum prescribed fill of 1200 ml for the water tank.
Note: for your safety, the filling cap will lock when the water tank is pressurised. Please wait for the
water tank to cool down to safely remove the filling cap.
Figure 1
Use of accessories
Note:
Unplug the appliance and let it cool down completely before you attach or remove
accessories.
The accessories will become hot during use.
Extension tubes (12)
Depending on the task at hand, you can attach one or two extension tubes. Connect the tubes
together and push them onto the steam jet (9) as far as it will go until you hear it click into place as
shown in figure 2.
The extension tubes can be fitted with the floor brush (21) and all other accessories in combination
with the accessory adaptor (16). .
Figure 2

18
Floor brush (21)
The floor brush is supplied with a separate floor brush connector (20). To use the floor brush, push
the floor brush connector in the rear side of the floor brush and turn it 180 degrees upward as
shown in figure 3. The floor brush is now fully assembled. The floor brush is suitable for the
cleaning of floor areas and large washable walls. The floor brush can be used with or without the
cleaning cloth (15). It is recommended to use the floor brush without the cloth for disinfecting and
refreshing carpets while the cleaning cloth needs to be used for the cleaning of all smooth floors. To
clean very dirty areas, move the floor brush over the surface slowly in order to increase the
cleaning action of the steam.
Note: the device is not suitable for cleaning unsealed wooden floors, soft plastics or wooden
furniture.
Figure 3
Cleaning cloth (15)
Place the floor brush (21) on top of the cleaning cloth and pull the cloth under the clips on each
side of the brush as shown in figure 4. The cleaning effect of the cleaning cloth can be improved by
turning and changing the cloth regularly. To clean very dirty areas, move the floor brush over the
surface slowly in order to increase the cleaning action of the steam.
Figure 4
Accessory adaptor (16)
Slide the adaptor onto the nozzle of the steam jet (9) until it clicks into place. The adaptor can be
used with various accessories such as the small brush (17), large brush (18), concentrator nozzle (19)
and window squeegee (22).
To attach the accessory adaptor to the steam jet, push until it clicks into place as shown in Figure 5.
Figure 5

19
Concentrator nozzle (19)
The concentrator nozzle can be used for cleaning hard to reach areas such as corners, joints, blinds,
radiators, toilet bowls and taps but also for the cleaning of stainless steel, windows, mirrors,
enamelled surfaces as well as removal of stubborn stains. Attach the concentrator nozzle onto the
accessory adaptor (16) as shown in figure 6.
Figure 6
Small round brush (17) and large round brush (18)
The brushes can be used for cleaning grouting between tiles, ceramic and marble as well as the
removal of tough stains. The plastic brushes can be fitted onto the accessory adaptor (16)as shown
in figure 7.
Figure 7
Window squeegee (22)
Attach the window squeegee onto the accessory adaptor (16) as shown in figure 8.
Perfect for cleaning windows, mirrors, ceramic tiles and non-porous, smooth surfaces.
Note: glass surfaces can be shattered by the sudden application of excessive heat. Before cleaning
such glass surfaces with the steam-cleaner, warm them up by applying steam to the surface from a
distance of 20-25 cm. Continue by applying steam from a distance of 10-15 cm.
Figure 8
Accessory Compartment (7)
The accessory compartment can be opened by pressing the button on the front and pulling the
cover lid up as shown in figure 9.
The following accessories can be stored in the accessory compartment.
-Accessory adaptor (16)
-Small Brush (17)
-Large Brush (16)
-Concentrator nozzle (19)

20
Figure 9
The use
On/off switch (4)
Once the water tank is filled, insert the plug into the socket. Switch the device on by pressing the
ON/OFF switch to ON. The on/off indicator light (6) and steam indicator light (5) will light up.
Steam indicator light (5)
The steam indicator light switches off as soon as the operating temperature is reached. The device
is now ready for use.
The steam indicator light will switch on and off repeatedly during use while the boiler maintains the
temperature.
Steam Jet (9)
The steam jet is equipped with a safety lock (11). In the “off” position the steam gun will not emit
steam even when the unit is in operation. For safety reasons always switch the safety lock to the
“off” position when not using the device as shown in figure 10.
To use the steam jet, push the safety lock to the “on” position as shown in figure 10. Attach the
accessory of choice, if any. The steam cleaner is now ready for use.
Press the steam trigger (10) and steam will be emitted from the nozzle. Keep the steam trigger
pressed and direct the steam at the surface to be cleaned. Move the steam cleaner backwards en
forwards over the area; do not hold the steam jet concentrated in one place for too long.
Note: Initial emissions of steam can contain water condensation droplets; we advise the first few
seconds steam to be directed onto a cloth or the sink.
Note: only press the steam trigger when you intend to clean a surface.
Note: always push the safety lock into the locked position when not cleaning.
Figure 10
Table of contents
Languages:
Other Montiss Steam Cleaner manuals

Montiss
Montiss CSC630 User manual

Montiss
Montiss CSC631 User manual

Montiss
Montiss Breeze CSM5760M User manual

Montiss
Montiss CSC5681M User manual

Montiss
Montiss CSC620 User manual

Montiss
Montiss CSC623 User manual

Montiss
Montiss CSC632 User manual

Montiss
Montiss CSC5803M User manual

Montiss
Montiss CSM5763M User manual

Montiss
Montiss CSC5623M User manual