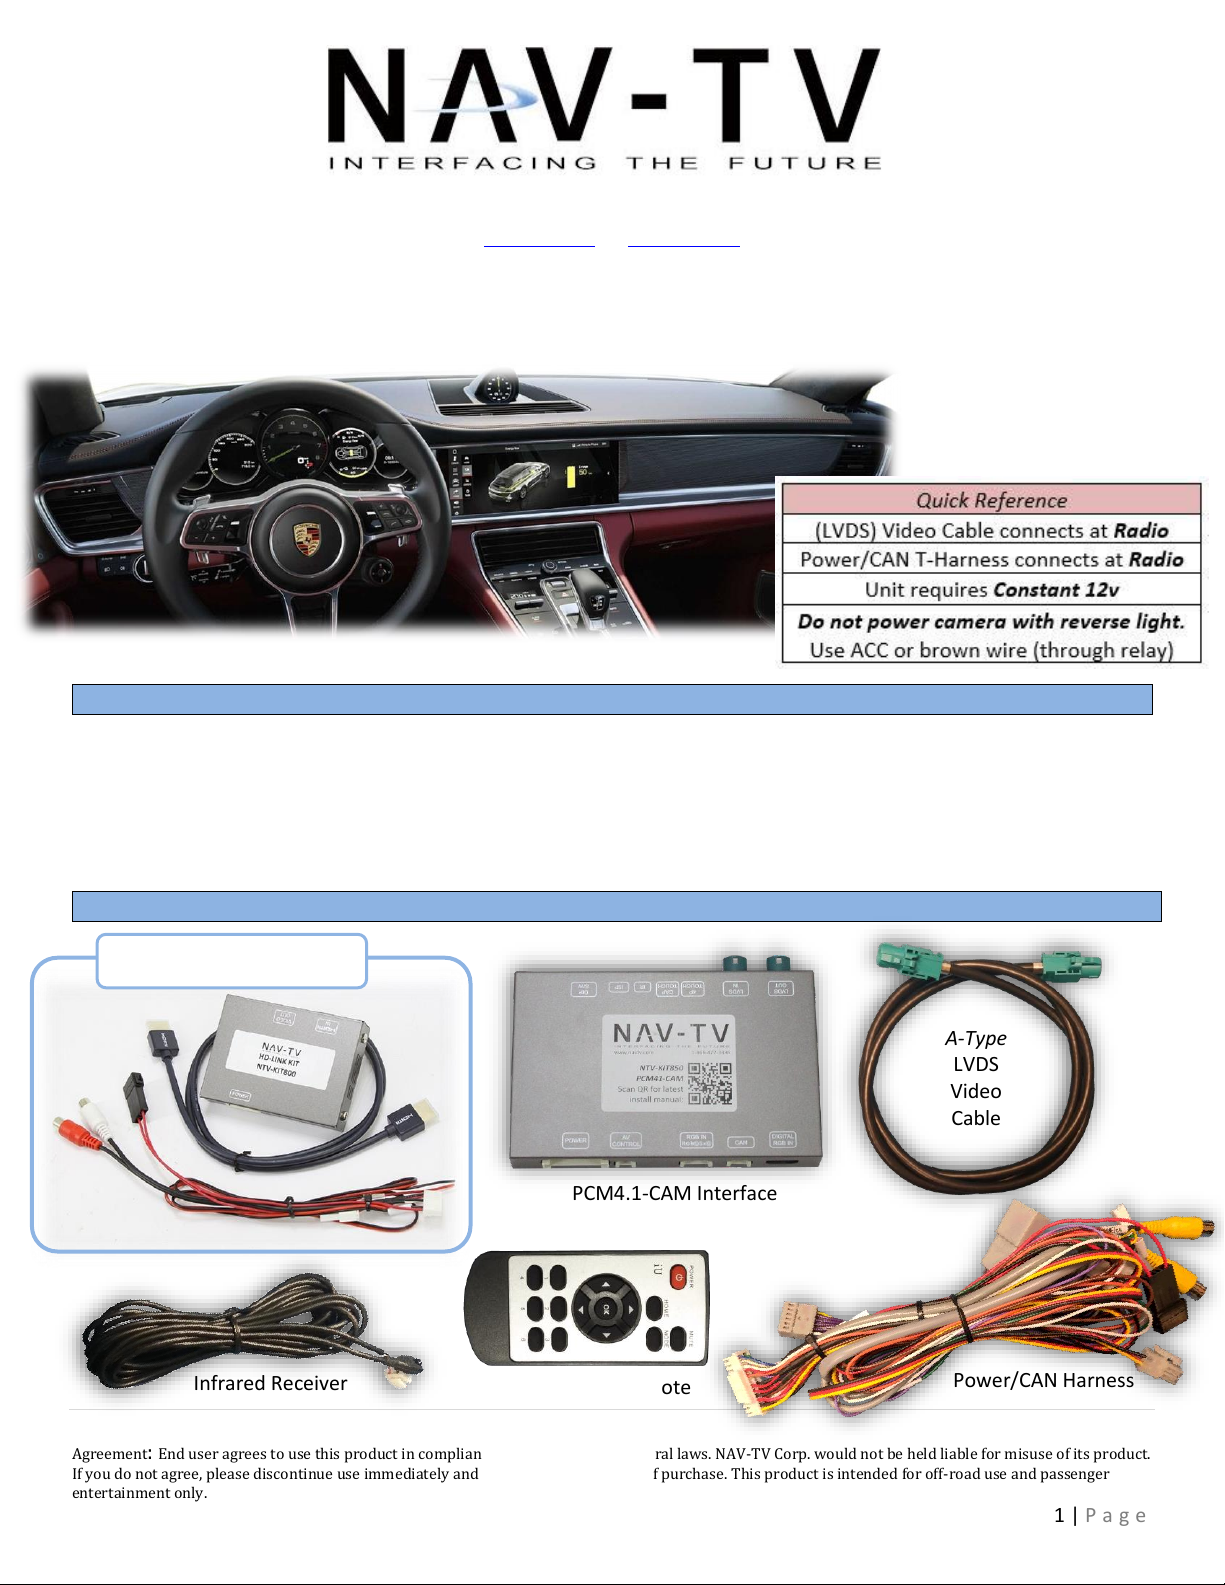
Nav TV PCM41-CAM Manual
Other Nav TV Automobile Accessories manuals

Nav TV
Nav TV AUDI A6 User manual

Nav TV
Nav TV OPV-2BMW User manual

Nav TV
Nav TV TOYCAM NTV-KIT057 Manual

Nav TV
Nav TV Ford 4 UNI-CAM NTV-KIT600 User manual

Nav TV
Nav TV NTV-KIT187 User manual

Nav TV
Nav TV NAV-INREN User manual

Nav TV
Nav TV BMW56-CAN User manual

Nav TV
Nav TV UCI-11C NTV-KIT331 User manual

Nav TV
Nav TV PCM3CAM Manual

Nav TV
Nav TV POR-PCM3BT User manual

Nav TV
Nav TV TOOKI-MB User manual

Nav TV
Nav TV NTV-KIT899 User manual

Nav TV
Nav TV AVBMW User manual

Nav TV
Nav TV V2P-II User manual

Nav TV
Nav TV BNT-Audio V2 User manual

Nav TV
Nav TV GVIF-JAG User manual

Nav TV
Nav TV NTV-KIT422 User manual

Nav TV
Nav TV MOST-H.U.R. NTV-KIT155 User manual

Nav TV
Nav TV MY-CUE User manual

Nav TV
Nav TV BMW12-DYNAMIC KIT Manual