BHM
12/24/14
NTV-DOC143
rB6
Agreement: End user agrees to use this product in compliance with all State and Federal laws. NAV-TV Corp. would not be held liable for
misuse of its product. If you do not agree, please discontinue use immediately and return product to place of purchase. This product is
intended for off-road use and passenger entertainment only.
9 | P a g e
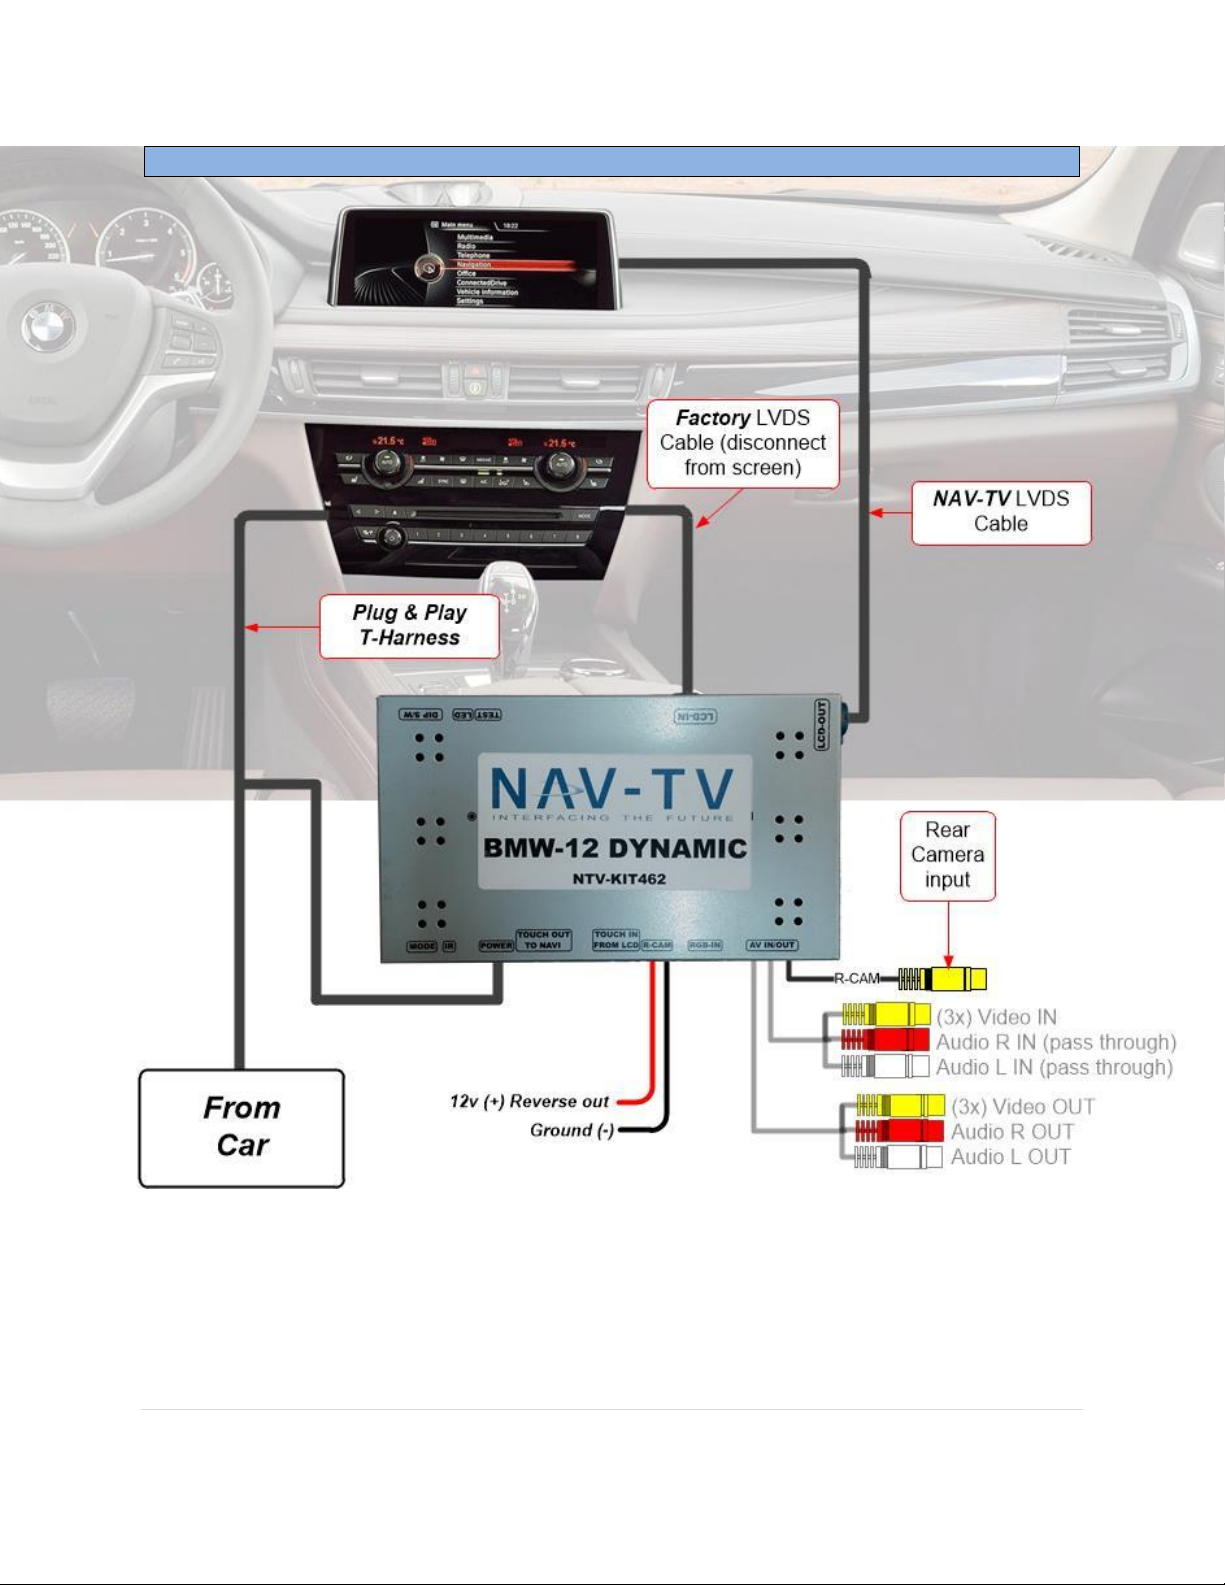
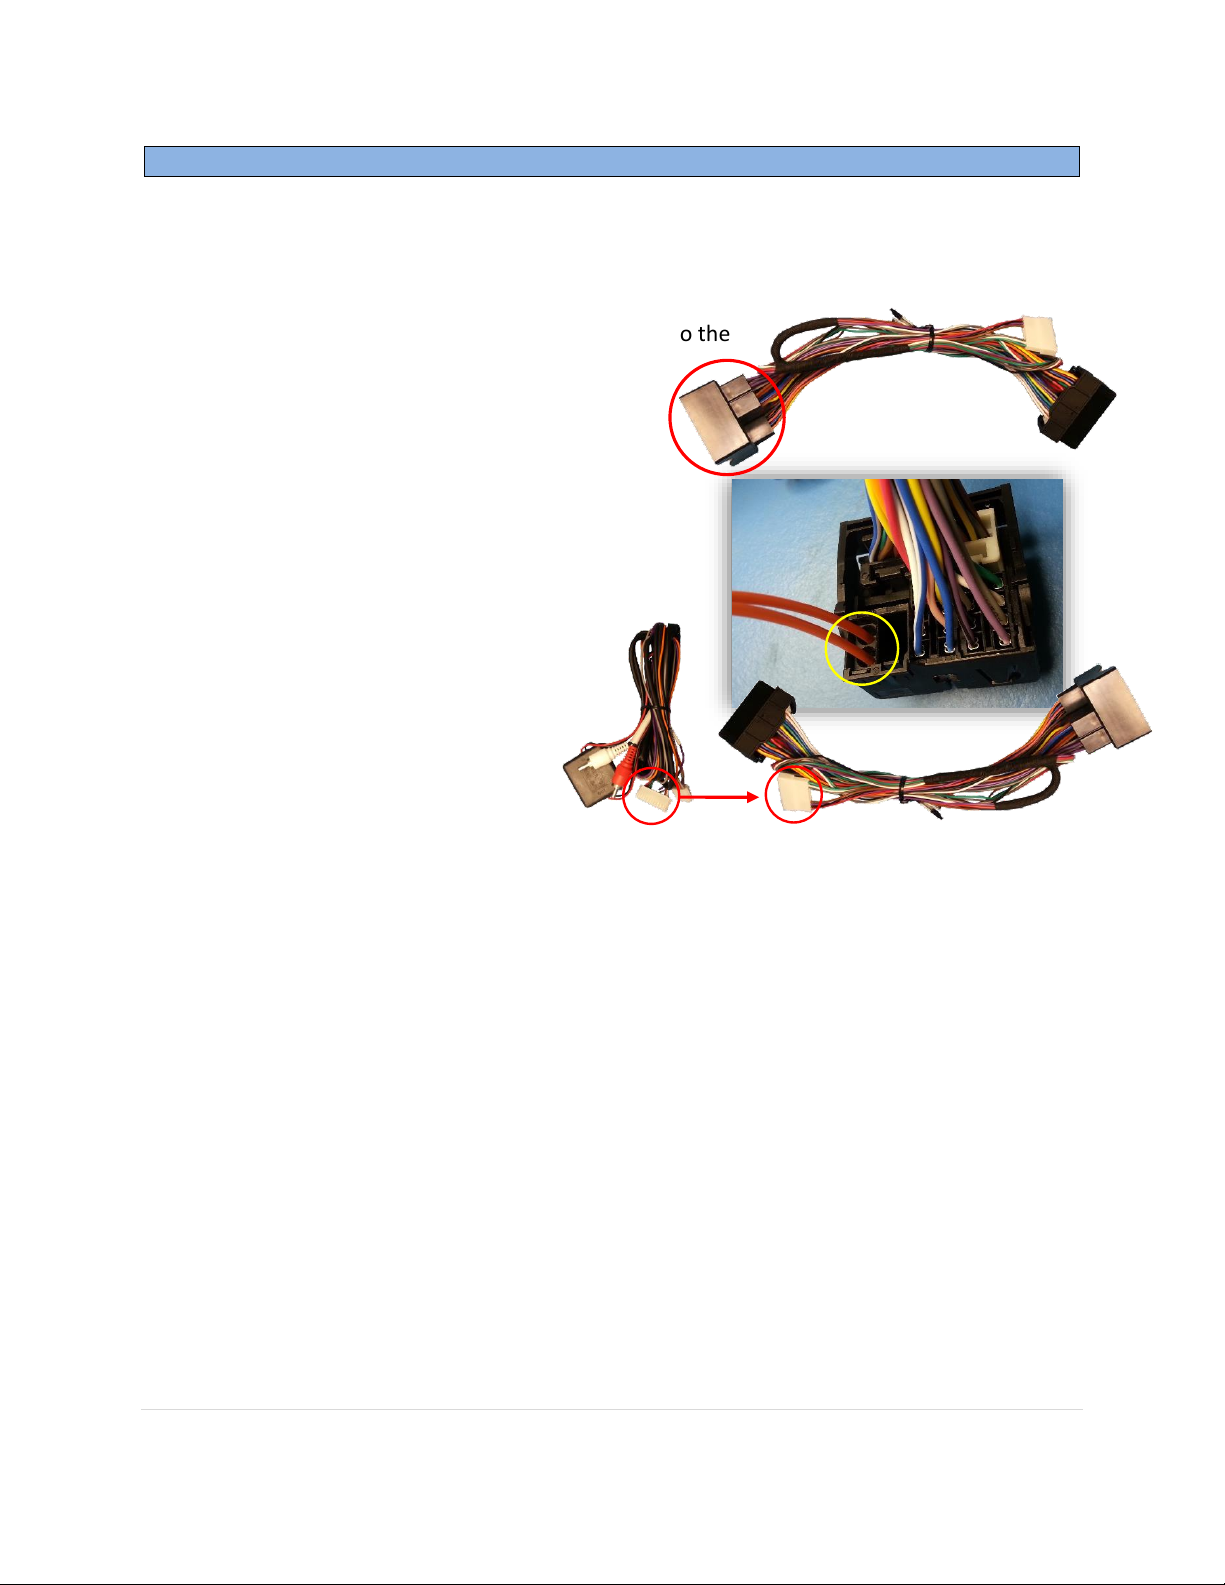
4. Connect the provided LVDS video cable to the factory BMW
screen. Run the other end of the LVDS behind the vents and
connect it to the BMW12 interface at the port labeled ‘LCD-
OUT’.
5. Connect the AV Input cable to the port on the BMW12 interface labeled ‘AV
IN/OUT’. If you’re only connecting a reverse camera (and
no other inputs), the signal input from the camera
must connect to the RCA labeled ‘REAR-C’. Refer
to the dip-switch settings chart to skip/enable
AV sources upon toggle switch presses
(optional. Page 2).
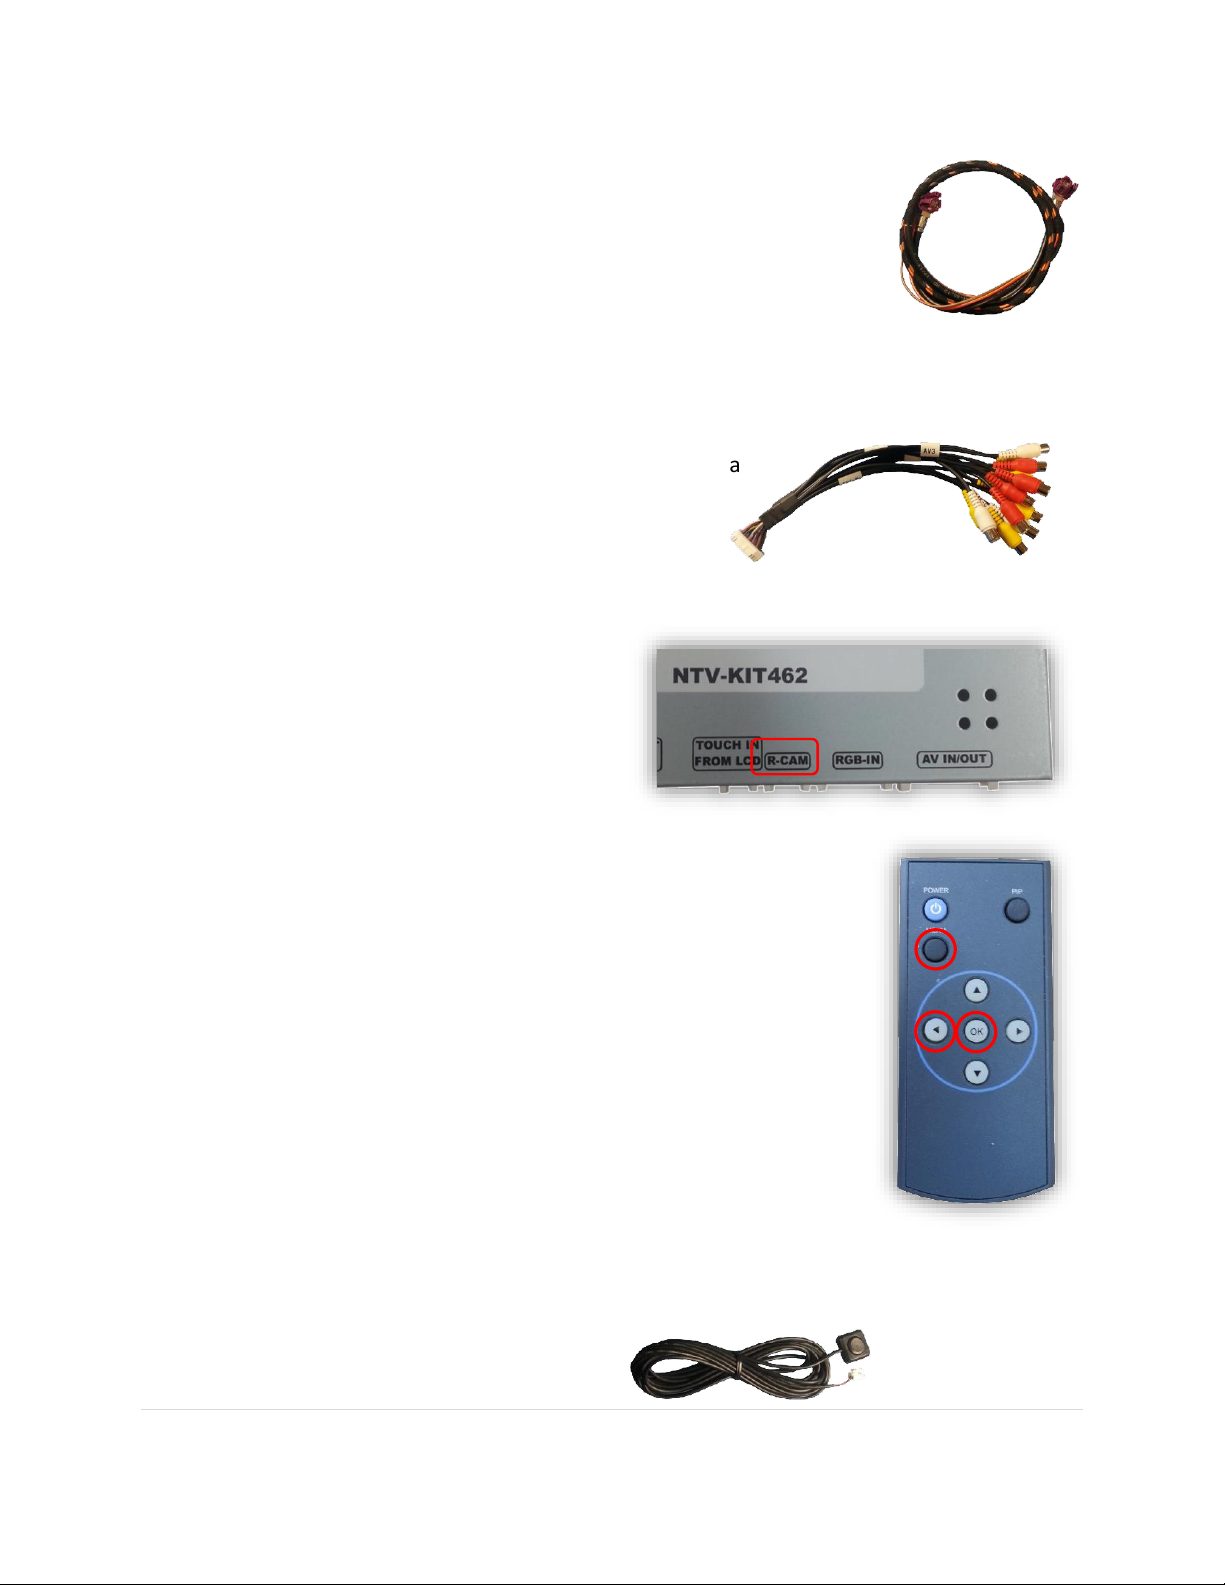
a. If you’re installing a NAV-TV
CAM 6 or Handle Cam as
well, the power connector
plugs directly into the
BMW12 interface port
labeled ‘R-CAM’:
6. Optional: Connect the remote eye to the port labeled ‘IR’
and leave it in clear view of the driver (often it can be stuck
inside a vent). This connection would be necessary if you
want to be able to adjust anything from the BMW12
interface’s menu.
a. While in any AV mode other than factory (on the
display screen), press the MENU button for Menu 1 ,
or hold the left arrow to enter MENU 2.
b. To switch between AV modes, press the ‘OK’ button.
7. Optional: Connect the provided momentary toggle switch to the port on the
BMW12 interface labeled ‘MODE’. Pressing this switch with the ignition on will cycle
the screen modes as follows: factory screen > NAVI (RGB) > AV1 > AV2 > AV3 >
factory screen.