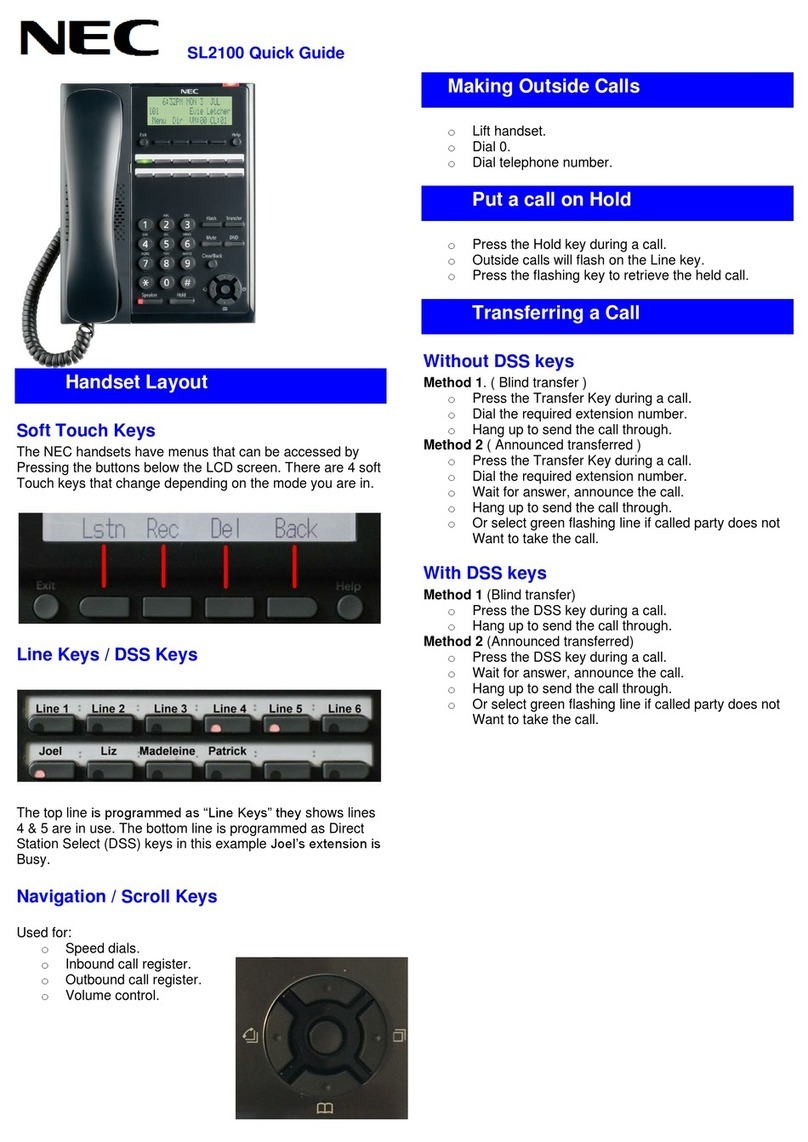
NEC UNIVERGE SL2100 User manual

The SL2100
Quick Install Guide:
SLNet
www.nec-enterprise.com

NEC SL2100 Communication System
Quick Install Guide –SL2100 SLNet rev1.0 2
This guide explains the installation, configuration and operation of SLNet for the SL2100 Telephone System
including the exchange line and telephone connections.
Further information is available on BusinessNet.
Please keep all information supplied for future reference.
Regulatory Notice.
Refer to the Declaration of Conformity shown in the SL2100 Hardware Manual
Warning: This is a class A product. In a domestic environment this product may cause radio interference in
which case the user may be required to take adequate measures.

NEC SL2100 Communication System
Quick Install Guide –SL2100 SLNet rev1.0 3
Contents
What is the SL2100?...............................................................................................................................................4
SLNet included in this guide...............................................................................................................................4
Parts available for the SL2100...........................................................................................................................5
SLNet Overview ......................................................................................................................................................6
SL2100 SLNet Channel Capacity.......................................................................................................................6
SLNet Numbering Plan.......................................................................................................................................6
SL2100 VOIP Resource Capacity......................................................................................................................7
SL2100 Configuration.........................................................................................................................................7
Network Requirements.......................................................................................................................................8
Conditions...........................................................................................................................................................9
1- Unpack the SL2100 System.............................................................................................................................10
2- Install the VOIPDB card (Optional) .................................................................................................................11
Removing the Plastic Knockouts......................................................................................................................11
3- SLNet Configuration.........................................................................................................................................13
SLNet Licenses ................................................................................................................................................13
SLNet Network Plan.........................................................................................................................................14
Ethernet sockets for VOIP................................................................................................................................15
4- Connect the Power & System Start Up ..........................................................................................................16
5- Configure the SL2100.......................................................................................................................................17
Connecting PCPro to the SL2100....................................................................................................................17
SL2100 PCPro..................................................................................................................................................18
Change your PC IP Address............................................................................................................................19
PCPro Initial Setup Wizard...............................................................................................................................20
SLNet Setup.....................................................................................................................................................21
SLNet VoIP Media Resource IP Address.........................................................................................................21
SLNet Address for Remote Nodes...................................................................................................................22
SLNet CODEC Settings ...................................................................................................................................23
DTMF Relay Mode ...........................................................................................................................................23
SLNet Numbering Plan –System Numbering..................................................................................................24
SLNet Numbering Plan –Extension Numbers.................................................................................................25
SLNet Numbering Plan –F-Route....................................................................................................................26
SLNet Remote Trunk Access...........................................................................................................................28
SLNet Busy Lamp Information .........................................................................................................................31
Centralised Voicemail.......................................................................................................................................32
What to do if you make errors within the SL2100 Configuration......................................................................34
6- Security..............................................................................................................................................................35

NEC SL2100 Communication System
Quick Install Guide –SL2100 SLNet rev1.0 4
What is the SL2100?
The SL2100 system consists of a chassis unit with a dedicated slot for the CPU
card and four universal slots for interface cards. Each universal slot supports an
extension interface card, optionally each extension interface card can have a trunk
interface daughter card mounted.
The chassis unit is ventilation cooled (no fan) and can be wall mounted or rack
mounted with the optional rack mount shelf.
Up to three chassis units can be connected together to provide a total of twelve
universal slots.
Interface cards are available for Analogue and ISDN trunks, proprietary SL2100
terminals and analogue telephones.
SIP Trunks, SLNet and IP terminals are supported without the need for additional
system hardware as eight VoIP resources are built in to the CPU card. VoIP
resources can be expanded to 16 by adding the optional VOIPDB card and further
to 128 with licenses.
InMail voicemail is also available either using the built in storage of the CPU-C1-A or by adding the optional SD
card.
The built in InMail with the CPU-C1-A card provides 4channels and 2hours of storage, this can be expanded to
15hour or 120hour by adding the SD card to the CPU.
The CPU-C1 requires the SD card installed to provide InMail voicemail.
Both CPU’s have built in VRS with 4 channels and 100 messages with 2hours message storage.
All equipment will operate in the default/factory setting when the SL2100 is installed.
With the default settings:
Each telephone will function and is assigned an extension number.
Calls received on the trunk lines will ring at telephone number 200.
Each telephone can make outside calls by dialling 9.
Each trunk line is presented at a Function Key with busy lamp indication.
SLNet is not configured
SLNet included in this guide
Only the configuration of SLNet is covered in this guide.
SLNet provides these networking features:
Centralised InMail voicemail
Desk to Desk calling with Caller ID and name display
Sharing trunk lines with remote systems
Extension busy lamp information
Shared Park Hold orbits
SLNet is available for SL2100 systems only, each system should have the same level of Main Software installed.
SLNet is supported with Main Software R1.5 or later.

NEC SL2100 Communication System
Quick Install Guide –SL2100 SLNet rev1.0 5
Parts available for the SL2100
Not all parts are included within this guide, please refer to the other SL2100 Quick Install Guides or the SL2100
Hardware Manual for a full description and installation instructions of all parts available.
IP7WW-4KSU-C1
SL2100 Chassis unit
Included within this guide
IP7EU-CPU-C1
SL2100 CPU card
IP7EU-CPU-C1-A
SL2100 CPU card with pre-
installed IP licenses and 2hour
InMail
IP7WW-VOIPDB-C1
VOIP card
SL2100 ASPIRENET-01
Lic
SLNET channel license (1ch)
SL2100 IP Channel-16
Lic
VIP channel license (16 ch)
IP7WW-EXIFB-C1
Expansion interface card
Interface card required to connect to the
expansion chassis
IP7WW-EXIFE-C1
Expansion interface card
Interface card installed into the expansion
chassis
IP7WW-SDVMS-C1
IP7WW-SDVML-C1
InMail voicemail
Provides 15/120 hour voicemail
IP7WW-3COIDB-C1
Analogue trunk daughter card
3 analogue trunks, max. 4 per unit
IP7WW-2BRIDB-C1
2BRI card
2 x BRI circuits, 4 trunks
IP7WW-1PRIDB-C1
ISDN PRI card
1 PRI circuit, up to 30 trunks
IP7WW-000U-C1
Trunk carrier card
Require when 082E or 008E card is not
available to install the 2BRIDB,1PRIDB or
3COIDB card
IP7WW-082U-B1
8 Digital Extension (2wire) and 2
SLT extension card
8 digital and 2 SLT extension interfaces, max
3 per unit
IP7WW-308U-A1
8 Hybrid Extension (4wire)
extension card
8 hybrid extension interfaces, max 4 per unit
IP7WW-008U-C1
8 Analogue extension card
8 analogue extension interfaces, max 4 per
unit
IP4WW-Battery Box
Battery box
External battery box for power fail backup
(batteries not included)
161893001-A
Rack mount shelf
Rack mount for SL2100 chassis unit
Refer to Prophix for all parts and licenses available in your region.
SL2100 Terminals are included in separate Quick Install Guides

NEC SL2100 Communication System
Quick Install Guide –SL2100 SLNet rev1.0 6
SLNet Overview
SLNet allows for networking between up to 50 SL2100 systems. Interconnected with VOIP, each phone system
becomes a node on the network that can communicate with any other phone system node. Systems can be
installed separately in the same building, or in remote locations connected via a suitable network.
SL2100 SLNet Channel Capacity
The capacity of SLNet channels is not limited by the quantity of IP or TDM ports installed.
The SL2100 supports up to 128 SLNet channels per network node (licenses required for each node).
Each SL2100 system within the SLNet Network must have sufficient SLNet channel licenses BE116748 installed
to provide the quantity of simultaneous voice calls required by the customer.
Each SL2100 system will also require sufficient VOIP resources to support the simultaneous calls.
SLNet Numbering Plan
The numbering plan must be unique for all nodes within the SLNet Network, each node must have a unique
extension number range, this is defined by the leading two digits unless you intend to use F-Route.
F-Route can be used to create a numbering plan that can use any number length to define the remote extension
numbers

NEC SL2100 Communication System
Quick Install Guide –SL2100 SLNet rev1.0 7
SL2100 VOIP Resource Capacity
The SL2100 CPU cards have 8 VOIP resources built in, these can be expanded further by adding the VOIPDB
card (BE116500) and VOIP channel licenses (BE116744).
Adding the VOIPDB card provides 16 VOIP resources, the VOIP channel license provides an additional 16
resources up to 128 channels maximum.
Note - The VOIPDB card must be installed in order to use the VOIP channel license.
CPU Only
CPU with
VOIPDB
CPU with
VOIPDB + 1 x
VOIP channel lic
CPU with
VOIPDB + 2 x
VOIP channel lic
CPU with VOIPDB +
7 x VOIP channel lic
VOIP
Channels
SRTP /
Non-SRTP
8 ch
16 ch
32 ch
48 ch
128 ch
The quantity of VoIP resources required is determined by the end-point type: IP or TDM, as shown below.
Quantity of VOIP resources required
SLNet channel
SIP Trunk
Digital/Analog/Hybrid
Terminal
IP Terminal
SLNet channel
2
2
1
2
This example shows the minimum quantity of VOIP resources for each SL2100 system if the customer requires
the maximum quantity of simultaneous SLNet calls to be available between each node.
No trunk channels are included in the example.
SL2100 Configuration
Currently only PCPro supports the setup of SLNet configuration items, System Phone or WebPro does not
support SLNet items.

NEC SL2100 Communication System
Quick Install Guide –SL2100 SLNet rev1.0 8
Network Requirements
SLNet should be deployed on networks connected by some form of Point-to-Point connection such as a VPN,
MPLS, or other Point-to-Point circuit.
The voice quality of VoIP depends on variables such as available bandwidth, network latency, and
quality of service initiatives (QoS), all of which are controlled by the network and internet service
providers. Because these variables are not within NEC's control, the performance of the user’s IP based
voice solution cannot be guaranteed. Therefore, NEC recommends connecting the VoIP
equipment through a fully managed data network with Quality of Service (QOS) implemented.
For a network to be suitable for VoIP it must pass specific requirements.
The requirements are:
• One way delay must not exceed 150 ms
• Round trip delay must not exceed 300 ms
• Packet loss must not exceed 1 %
• Data switches must be manageable
• No half-duplex equipment may be present in the network
• Routers must provide QOS
Depending upon how the QOS policies are built in the network, assignments may be needed in the CPU
(PRG 84-10).
• Adequate bandwidth for the estimated VoIP traffic must be available
See below chart for bandwidth calculations.
Below is a chart that shows the average bandwidth per VoIP call over Ethernet
Codec
Packet size
Bandwidth used
Codec
Packet size
Bandwidth used
G.711
10 mS
110.4 kbps
G.729
10 mS
54.4 kbps
G.711
20 mS
87.2 kbps
G.729
20 mS
31.2 kbps
G.711
30 mS
79.5 kbps
G.729
30 mS
23.5 kbps
G.711
40 mS
75.6 kbps
G.729
40 mS
19.6 kbps
G.722
10 mS
110.4 kbps
G.729
50 mS
17.3 kbps
G.722
20 mS
87.2 kbps
G.729
60 mS
15.7 kbps
G.722
30 mS
79.5 kbps
G.723
30 mS
20.8 kbps
G.722
40 mS
75.6 kbps
G.723
60 mS
13.2 kbps
As an example, if one site plans on making a maximum of 16 calls across the network using G.729 with
a 30 ms packet size, there must be a minimum of 376 kbps available for voice traffic. The QOS policy
for this network should allow for 376 kbps to be set aside for voice prioritization.

NEC SL2100 Communication System
Quick Install Guide –SL2100 SLNet rev1.0 9
Conditions
1. SLNet is not supported through NAT, only Point-to-Point connection such as a VPN, MPLS, or other
Point-to-Point circuit.
2. SLNet is only for networking SL2100 systems together.
3. Hold, Transfer, and Park recall timers will follow the timer of the system where the call is on hold (Trunk
and Station). For example, a user in Site A calls a user in Site B. Site B answers the call and places the
call on hold. The hold recall time is based on Site A because the call on hold is in Site A and not site B.
4. The allowing or denying of Class of Service features in an SLNet Network must be performed network
wide. For example, if users in Class of Service 1 at site 1 want to block the Camp On feature a change
will have to be made in Class of Service 1 of all systems in the network.
5. When a terminal or trunk is placed on hold, the Music on Hold comes from the system where the
terminal or trunk resides.
6. When Multiple Voice Mails are installed in the network, each site must have a unique Voice Mail pilot
number. The pilot number assigned must be within the routable extension number range in all sites
throughout the network.
7. When each site has its own Voice Mail system, a user in one location cannot call the Voice Mail pilot
number that resides in another system.
8. When each site has its own Voice Mail system, a Voice Mail Message Line key (Program 15-07 : key 77)
cannot be programmed for an extension in a Remote system.
9. Virtual Loopback trunks are not supported across SLNet
10. SMDR information is collected in the system where the trunk resides. If a user in Site A accesses a CO
trunk out of Site B, this call is reported in Site B's SMDR and not in Site A's SMDR.
11. When a networked internal call forwards to Voice Mail (Centralized or Individual Voice Mail) the user will
not be able to perform any dialing options to dial out of the mailbox. The associated dial action table
cannot be accessed unless the call originates from a CO trunk
12. Built-in Automated Attendant and Centralized Voice Mail cannot be used in the same system
13. Calls (Intercom or Trunk) routed across the SLNet network cannot be answered by the Built-In
Automated Attendant
14. Directory Dialing will not list extension numbers in remote SLNet systems
15. An operator extension (Program 20-17) cannot be assigned to an extension in a Remote SLNet system.
The operator for each site must reside in their own local system
16. Mobile Extension is not supported for calls across the SLNet network
17. When transferring a caller to a remote SLNet extension via the press of a DSS key on a 60 button DSS
console, without pressing Transfer first, you must press the DSS key twice to complete the transfer.

NEC SL2100 Communication System
Quick Install Guide –SL2100 SLNet rev1.0 10
1- Unpack the SL2100 System
SL2100 Chassis unit
1 x SL2100 system
1 x Wall mounting template
1 x Power cord (selected regions)
4 x Fixing screws (M4.1 x 25mm)
SL2100 CPU card
1 x CPU card
1 x Lithium battery (CR2032)
SL2100 VOIPDB Card (optional)
1 x VOIPDB card
4 x Screw & washer
Additional Items Required:
Cross head screwdriver.
Utility knife or small cutters to remove the plastic knockouts
4 Wall fixing plugs suitable for the type of wall.
Solid wire for extending telephone cabling:
Recommended cable type: Twisted pair (CW1308 or similar specification)
Conductor diameter: 0.4 to 0.6 mm
Maximum cable length: (with 0.5 mm diameter cable)
SL2100 system telephone –300 metres
Normal telephone (SLT) –1125 metres
Requirements for SLNet:
A static IP address is required on the WAN interface –This is usually a chargeable extra on business
internet connections
You will need administrative access to the WAN router/modem/firewall device. NEC will not provide support
in configuration of this device

Install the CPU Card
Quick Install Guide –SL2100 SLNet rev1.0 11
2- Install the VOIPDB card (Optional)
The VOIPDB card is optional and is only required when more than the 8 VOIP resources built into the CPU card
are required.
Remove the plastic knockout from the front panel of the CPU card.
Install the VOIPDB card to connector J2 on the CPU card and tighten the 4 screws
Removing the Plastic Knockouts
Card knockouts
Use small cutters with a flush cutting jaw, ensure the flush side of the cutter is towards the front panel of the
card.
Cut the three connection points for the knockout
Remove any sharp edges with a utility knife
Ensure the flush side of the
cutter is towards the front
panel of the card

Install the CPU Card
Quick Install Guide –SL2100 SLNet rev1.0 12
Note –If you are also installing the EXIFB card the 4 screws are
replaced by the 4 metal spacers supplied with the EXIFB card.
Insert the CPU card mounted into the SL2100 CPU slot S0, ensure the card slides into the guide rails and
tighten the two screws to secure the card.

Connect the Exchange Lines
Quick Install Guide –SL2100 SLNet rev1.0 13
3- SLNet Configuration
The SL2100 includes on-board DSP resources for connection to VoIP service providers. There are 8 x VoIP
resources on board the CPU. It is possible to increase this to a maximum of 128 by adding the VOIPDB
hardware and licenses.
This table shows the quantity of resources required for common call scenarios.
Quantity of DSP resources required
SIP
Trunk
Digital/Analog/Hybrid
Phone
VoIP
Phone
SLNet
channel
SIP Trunk
2
1
2
2
Digital/Analog/Hybrid Phone
1
0
1
1
VoIP Phone
2
1
0
2
SLNet Channel
2
1
2
2
SLNet Licenses
The SL2100 requires licenses BE116748 for SLNet channel availability.
Refer to the licensing manual for further information on licenses and the LMS (NEC’s License Server).
Configuration Procedure
Before starting you will need to know the following information:
The LAN settings to configure the SL2100 to join the customers network or voice LAN. The SL2100 will require
two IP addresses in the customers network
oIP Address & Subnet Mask
oIP Address for VoIP media resource
oDefault Gateway IP address
The remote node addresses;
oIP addresses of each remote SLNet node
Network Numbering Plan
oThe complete numbering plan for all SLNet nodes & will F-Route be used
oTrunk access/routes, if using trunks at remote nodes
Centralised Voicemail
oThe voicemail Pilot number must be within the SLNet Numbering Plan
.

Connect the Exchange Lines
Quick Install Guide –SL2100 SLNet rev1.0 14
SLNet Network Plan
Plan your SLNet Network before stating the system configuration, use the example below.
Node ID
1~50
IP Address
Extension number
range
Centralised
Voice Mail Pilot
number
Trunk Route
Access
(Route number)
1
172.16.0.10
200~209
-
2
2
172.16.0.20
3100~3200
599
-
3
172.16.0.30
210~229
-
-
4
5
6
etc
The Remote Node selection for call routing is summarised below:
1. User at Node ID 1 dials extension number 3104
2. The numbering plan at Node ID 1 defines the number dialled as SLNet remote Node ID 2
3. Node ID 2 is reached using IP Address 172.16.0.20
4. At Node ID 2 the numbering plan defines the destination as a local extension number

Connect the Exchange Lines
Quick Install Guide –SL2100 SLNet rev1.0 15
Ethernet sockets for VOIP
There are two Ethernet sockets available with the SL2100: CPU card and optional VOIPDB card.
The IP Address of either socket use the same setup for VOIP settings.
Only CPU card installed
When the CPU card is installed –Use the Ethernet socket of the CPU.
8 VOIP resources built in with the CPU card are available
Use the VOIP IP address settings for VOIP devices
Note –do not use the CPU IP address settings as these will not support VOIP devices
SL2100 IP address
172.16.0.10
Subnet Mask
255.255.0.0
Supports
Data (eg PCPro/WebPro, SMDR etc)
VOIP
LAN speed
100 Mbps Full Duplex
Use the IP address and Subnet mask setup in PCPro Easy Edit - Quick Install + Cards + CPU Settings + CPU
IP Address
CPU card with VOIPDB daughter card installed
When the optional VOIPDB card is installed –Use the Ethernet socket of the VOIPDB card
16~128 VOIP resources provided by the VOIPDB card + VOIP channel licenses are available
Use the VOIP IP address settings for VOIP devices
SL2100 IP address
172.16.0.10
Subnet Mask
255.255.0.0
Supports
Data (eg PCPro/WebPro, SMDR etc)
VOIP
LAN speed
100/1000 Mbps Full Duplex
Use the IP address and Subnet mask setup in PCPro Easy Edit - Quick Install + Cards + CPU Settings + CPU
IP Address
CPU card
Ethernet socket
VOIPDB card
Ethernet socket

Connect the Power & Start Up
Quick Install Guide –SL2100 SLNet rev1.0 16
4- Connect the Power & System Start Up
The power cable is plugged into the left side (wall mounted) or rear (when rack mounted) of the unit via an IEC-
C13 connector.
Before connecting the power:
Ensure the power switch is OFF
Ensure the power is switched off at the source
All cards are installed and secured correctly
System Start Up –First Time
!The first time you start up the SL2100 it is important to clear the system memory. This will ensure that the
system is set to the default/factory configuration.
1. Push and hold the LOAD Button located on the front of the CPU card.
2. Turn the power switch on
3. Continue holding the LOAD Button for approximately 10 seconds or until the ALM lamp on the CPU card
lights.
4. Release the LOAD Button
5. When the system has completed reloading the system software (about one minute) the RUN LED is
flashing green on the CPU card and the system phones will display the Time and Date.
Switching the SL2100 OFF
!Be sure that no calls are in progress otherwise they will be cut off.
Turn the power switch OFF at the SL2100 chassis.
System Start Up –Retain Customer Configuration
This is the normal operation for powering the SL2100 on.
Turn the power switch ON at the SL2100 chassis
Also referred to as ‘COLD Start’
can also be used at any time to
delete the customer’s
configuration.
Warning –COLD Start should
only be used when you want to
delete the customer’s
configuration from the SL2100
CPU card.
AC Power
cable
Power
switch

Configure the SL2100
Quick Install Guide –SL2100 SLNet rev1.0 17
5- Configure the SL2100
This Quick Install guide will cover SLNet configuration. For other system configuration please refer to the
relevant SL2100 Quick Install Guide.
You must have SL2100 PCPro installed to your laptop/PC, this can be downloaded from BusinessNet, refer to
the Quick Install Guide –SL2100 PCpro.
Note - SLNet can only be configured via SL2100 PCPro, System phone or WebPro interface is not
currently available for SLNet items.
Before you configure your system it is important that you:
Have a diagram of your SLNet nodes and the exchange lines and telephones at each node.
The IP addresses and numbering plan of each node (extension numbering must be unique at each
node)
Plan your requirements before you start.
While you configure your system it is advised that you:
Make a record of your configuration as you make each change.
Make small changes, upload to the SL2100 and test the changes. Avoid making all your changes at
once as this can make testing more difficult.
With the default/factory settings:
SLNet is not configured
Connecting PCPro to the SL2100
Connection default IP Address:
172.16.0.10 / 255.255.0.0
You can check the IP address at any SL2100 system phone:
Press the centre Navigation Key and dial 841
Direct to Ethernet connector on the SL2100 CPU card.
Via the customer’s LAN.

Configure the SL2100
Quick Install Guide –SL2100 SLNet rev1.0 18
SL2100 PCPro
Installer level access:
User Name: tech
Password: 12345678
On first install you may need to setup the default sliding panes if you wish to use these.
Select View tab and click Default

Configure the SL2100
Quick Install Guide –SL2100 SLNet rev1.0 19
Change your PC IP Address
You will need to reconfigure your PC to have an IP address in the same subnet as the SL2100 during system
commissioning. You will be able to change the IP address of the SL2100 during this process.
Your IP Address is adjusted in Windows Control Panel, select ‘View network status and tasks’
Edit the properties of your Ethernet adaptor
You will need to define an IP address in the same network as the SL2100. Recommended values are
172.16.0.100 / 255.255.0.0
Gateway and DNS addresses are not necessary. Once commissioning of the SL2100 is completed you can
return to this area and reconfigure your network adaptor to the previous values.

Configure the SL2100
Quick Install Guide –SL2100 SLNet rev1.0 20
PCPro Initial Setup Wizard
Provides the basic setup for a newly installed SL2100.
SLNet is not included within the Initial Setup Wizard, use Easy Edit to configure SLNet.
Select Advanced level view then Advanced Items + VoIP + SLNet
Other manuals for UNIVERGE SL2100
29
Table of contents
Other NEC Telephone manuals

NEC
NEC SL1000 User manual

NEC
NEC Aspire User manual

NEC
NEC UNIVERGE SL2100 User manual

NEC
NEC Univerge SV8100 User guide

NEC
NEC NEC Dterm Series E User manual

NEC
NEC ELECTRA ELITE User manual

NEC
NEC SL1100 User manual

NEC
NEC Univerge SV8100 Use and care manual

NEC
NEC DHT-32D Setup guide

NEC
NEC Univerge SV8100 User manual

NEC
NEC Dterm Series i User manual

NEC
NEC XN120 Vision User manual

NEC
NEC Univerge SV9100 User manual

NEC
NEC 2000 PBX User manual

NEC
NEC NEAX 2000IVS2 User manual

NEC
NEC DS2000 IntraMail User manual

NEC
NEC AspireX User manual

NEC
NEC Mobile Handset 110 User manual

NEC
NEC UX5000 Owner's manual

NEC
NEC Univerge SV9100 Product information sheet