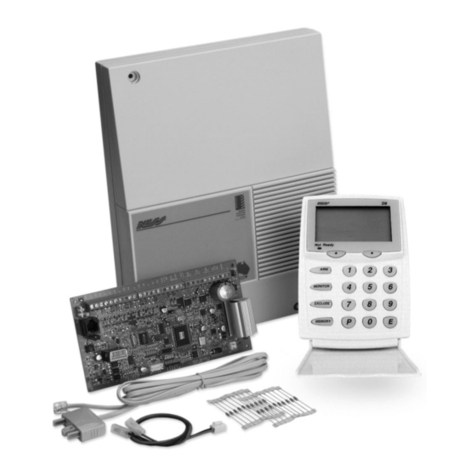
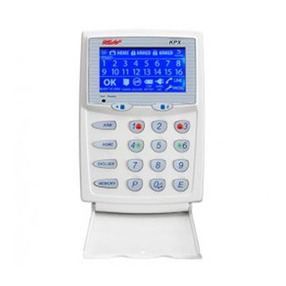
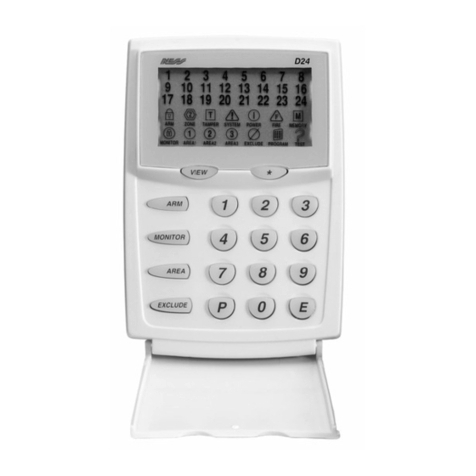
Ness M1 Cross Platform Control User manual

INSTALLATION
MANUAL
M1 Cross Platform Control™
Specifications, Installation and programming
Rev 2.1

NESS - M1 Installation and Programming Manual
Page 2
Introduction
LIMITATION
The NESS ELK-M1G and ELK-M1 Controls are designed to warn against unauthorized entry and other situations. However, it is not a guarantee
of protection against the occurrence of burglary, fire, or other emergency. Any alarm system is subject to compromise or failure to warn for
various reasons. For example:
- Unauthorized access can be gained through unprotected points or by disarming or bypassing protected points.
-Sensing devices are power driven and do not operate without electrical power. Battery-operated devices will not work without batteries, with
dead batteries, or if the batteries are not put in properly. Devices powered solely by AC will not work if their AC power supply is cut off for any
reason, however briefly.
-Telephone lines over which alarm signals are transmitted may be out of service or rendered inoperable by an intruder.
- Even if the system responds to the emergency as intended, occupants may have insufficient time to protect themselves from the emergency
situation. In the case of a monitored alarm system, authorities may not respond appropriately.
-Smoke detectors have limitations and cannot detect all types of fires. According to data published by the Federal Emergency Management
Agency, while smoke detectors have played a key role in reducing residential fire deaths in Australia, they may not activate or provide early
warning for a variety of reasons in as many as 35% of all fires, . Some of the reasons some detectors used in conjunction with this System
may not work are as follows. Smoke detectors may have been improperly installed and positioned. Smoke detectors may not sense fires that
start where smoke cannot reach the detectors, such as in chimneys, in walls, or roofs, or on the other side of closed doors. Smoke detectors
also may not sense a fire on another level of a residence or building. A second floor detector, for example, may not sense a first floor or
basement fire. Finally, smoke detectors have sensing limitations. No smoke detector can sense every kind of fire every time. In general,
detectors may not always warn about fires caused by carelessness and safety hazards like smoking in bed, violent explosions, escaping gas,
improper storage of flammable materials, overloaded electrical circuits, children playing with matches, or arson. Depending an the nature of the
fire, and/or location of the smoke detectors, the detector, even if it operates as anticipated, may not provide sufficient warning to allow all
occupants to escape in time to prevent injury or death..
-Signals sent by wireless transmitters may be blocked or reflected by metal before they reach the alarm receiver. Even if the signal path has
been recently checked during a weekly test, blockage can occur if a metal object is moved into the path.
-Wireless transmitters (used in some systems) are designed to provide long battery life under normal operating conditions. Longevity of
batteries may be as much as 4 to 7 years, depending on the environment, usage, and the specific wireless device being used. External
factors such as humidity, high or low temperatures, as well as large swings in temperature, may all reduce the actual battery life in a given
installation. This wireless system, however, can identify a true low battery situation, thus allowing time to arrange a change of battery to
maintain protection for that given point within the system.
-Installing an alarm system may make the owner eligible for a lower insurance rate, but an alarm system is not a substitute for insurance.
Homeowner, property owners and renters should continue to act prudently in protecting themselves and continue to insure their lives and
property.
-A user may not be able to reach a panic or emergency button quickly enough.
- Passive Infrared Motion Detectors can only detect intrusion within the designed ranges as diagrammed in their installation manual. Passive
Infrared Detectors do not provide volumetric area protection. They do create multiple beams of protection, and intrusion can only be detected
in unobstructed areas covered by those beams. They cannot detect motion or intrusion that takes place behind walls, ceilings, floors, closed
doors, glass partitions, glass doors, or windows. Mechanical tampering, masking, painting or spraying of any material on the mirrors, windows
or any part of the optical system can reduce their detection ability. Passive Infrared Detectors sense changes in temperature; however, as the
ambient temperature of the protected area approaches the temperature range of 32 to 40C (90 to 105F), the detection performance can
decrease.
-Alarm warning devices such as sirens, bells or horns may not alert people or wake up sleepers if they are located on the other side of
closed or partly open doors. If warning devices are located on a different level of the residence from the bedrooms, they are less likely to
waken or alert people inside the bedrooms. Even persons who are awake may not hear the warning if the alarm is muffled by noise from a
stereo, radio, air conditioner or other appliance, or by passing traffic. Finally, alarm warning devices, however loud, may not warn hearing-
impaired people.
-This equipment, like other electrical devices, is subject to component failure. Even though this equipment is designed to last for many years,
the electronic components could fail at any time.
-The most common cause of an alarm system not functioning when an intrusion or fire occurs is inadequate maintenance. This alarm
system should be tested weekly to make sure all sensors and transmitters are working properly.
ALL RIGHTS RESERVED
No part of this publication may be reproduced, stored in a retrieval system, or transmitted in any form or by any means, electronic, mechanical,
photocopying, recording, or otherwise without the prior written permission of the manufacturer. The material in this publication is for information
purposes and subject to change without notice. The manufacturer assumes no responsibility for any errors which may appear in this publication.
Use of this control for fire detection and/or annunciation may not be permitted by certain states, counties, municipalities or local jurisdiction. It is
the responsibility of the installing alarm company to check with the local A.H.J. (Authority Having Jurisdiction) or State Fire Marshal’s office prior
to using this control for fire detection.

NESS - M1 Installation and Programming Manual Page 3
Table of Contents
Specifications, Features, and Benefits ..................................................................................................... 5
Wiring & Hookup Diagram ........................................................................................................................... 6
Section 1 - Installation and Wiring ............................................................................................................. 8
1.1 Planning the Installation ...................................................................................................................... 8
1.2 Parts Diagram & Descriptions ........................................................................................................... 8
1.3 Mounting and Wiring Preparation ....................................................................................................... 8
1.4 Control Wiring .................................................................................................................................... 9
Data Bus E.O.L. Termination - VERY IMPORTANT! .............................................................................. 12
Section 2 - Operating the System ............................................................................................................ 14
2.1 Introduction ....................................................................................................................................... 14
2.2 Powering Up (One Keypad) ............................................................................................................. 14
2.3 User Codes and Authorities .............................................................................................................. 14
2.4 Installer Program Code and Authorities ............................................................................................ 14
2.5 Keypad Overview ............................................................................................................................. 15
Keypad Menus........................................................................................................................................ 16
Multi-area (Partition) Operation ............................................................................................................... 20
Section 3 - Programming The Control ..................................................................................................... 21
3.1 Introduction ....................................................................................................................................... 21
3.2 Local Keypad Programming ............................................................................................................. 21
3.3 Local or Remote Computer Programming (Ness-RP) and Anti-Takeover ........................................ 21
3.4 Area Partitioning ................................................................................................................................ 21
3.5 Communicator Setup Checklist ....................................................................................................... 22
3.6 Entering Installer Level Programming ............................................................................................... 22
Menu 01 - Bus Module Enrollment .......................................................................................................... 24
Menu 02 - User Code Options ................................................................................................................ 25
Menu 03 - Area Definitions ...................................................................................................................... 26
Menu 04 - Keypad Definitions ................................................................................................................. 28
Menu 05 - Zone Definitions ..................................................................................................................... 30
Menu 06 - Alarm Duration Timers ........................................................................................................... 33
Menu 07 - Global System Definitions ..................................................................................................... 34
Menu 08 - Telephone Account Setup ...................................................................................................... 38
Menu 09 - Area Reporting Codes ........................................................................................................... 40
Menu 10 - Zone Reporting Codes ........................................................................................................... 42
Menu 11 - Keypad F-Key Reporting Codes ............................................................................................ 43
Menu 12 - Sys Report Code Options & Codes ...................................................................................... 44
Menu 13 - User Report Codes ................................................................................................................ 46
Menu 14 - Wireless Definitions - (For future product release) ..................................................................... 47
Section 4 - PC Programming and Automation Capabilities.................................................................... 49
4.1 NESS-RP Software ......................................................................................................................... 49
4.2 Update/Verify Firmware in the Control and Peripherals ................................................................... 50
4.3 Automation Rules and Attributes ...................................................................................................... 51
Appendix A - Event Codes ........................................................................................................................ 58
Appendix B - Telephone Remote Control ............................................................................................... 60
Appendix C - Voice Message Vocabulary *RP only * ............................................................................. 62
Appendix D - Two Way “Listen-in/Talk” Interface (optional) ................................................................. 64
Appendix E - SIA CP-01 Compliance ........................................................................................................ 65
Appendix F - Regulatory Agency Statements .......................................................................................... 66
Appendix G - Additional Keypad Information .......................................................................................... 68
Index ...................................................................................................................................................... 70

NESS - M1 Installation and Programming Manual
Page 4
J-16 Programmable Outputs
See No
te 1
& Note 5
Lighting
Interface Conn.
J4
1 WAY (PL513/PSC04)
Select PLC Mode
2 WAY (TW523/PSC05)
JP2
. NNOC 2 3 2 SR
J5
Voice & Siren
Dry Contact Relay
3 T UO1 T UO
N/C
COM
N/O
2 T UO
RED
BLACK
WHITE
GREEN
+VAUX
+12VDC Auxiliary
Power (3)
1.25 Amp PTC
protected
Z1
NEG
Z2
Z3
NEG
Z5
NEG
Z7
Z6
Z4
NEG
Z8
Z9
NEG
Z10
Z11
NEG
Z13
NEG
Z15
Z14
Z12
NEG
Z16
+SAUX
NEG
+VAUX
NEG
+VAUX
NEG
+VAUX
NEG
AC
16.5 V
AC
+VKP
DATA B
DATA A
NEG
OUT 16
OUT 15
OUT 14
OUT 13
OUT 12
OUT 11
OUT 10
OUT 9
OUT 8
OUT 7
+12V
NEG
T1 R1
RING
TIP
Aux Data Bus
Serial Port for
J3
B
A
-
C
+
Audio Network Interface
1
Keypad &
Data Bus
J2 J1
16 Zones expandable to 208
DO NOT
Connect to
a Phone
Line!
Not Used
BATTERY
ON
SW1
+-
12V Battery
7 to 18 Ah
See Note 3
See Note 4
+ SAUX
+12VDC Switched
Smoke Power
1.1 Amp PTC
protected
NEG
DATA B
+12V
3PJ
LED indicates OUT3 is on
Example wiring for strobe
100-171
Speaker
Jumper to start with
no AC - See No t e 7.
Power
Status
Reverse
Bat Leads
NORMAL
ZONE 16
JP1 SMOKE
2WIRE
TELCO SEIZED
DIALLER ACTIVE
1
N.C. N.O.
ZONE
2200
Ohm
EOL
2
N.C. N.O.
ZONE
2200
Ohm
EOL
3
N.C. N.O.
ZONE
2200
Ohm
EOL
4
N.C. N.O.
ZONE
2200
Ohm
EOL
5
N.C. N.O.
ZONE
2200
Ohm
EOL
6
N.C. N.O.
ZONE
2200
Ohm
EOL
7
N.C. N.O.
ZONE
2200
Ohm
EOL
8
N.C. N.O.
ZONE
2200
Ohm
EOL
9
N.C. N.O.
ZONE
2200
Ohm
EOL
10
N.C. N.O.
ZONE
2200
Ohm
EOL
11
N.C. N.O.
ZONE
2200
Ohm
EOL
12
N.C. N.O.
ZONE
2200
Ohm
EOL
13
N.C. N.O.
ZONE
2200
Ohm
EOL
14
N.C. N.O.
ZONE
2200
Ohm
EOL
15
N.C. N.O.
ZONE
2200
Ohm
EOL
16
N.C. N.O.
ZONE
2200
Ohm
EOL
DATA A
+
-
+
-See Note 2
Data Bus Terminating Resistor
See Note 1.
Data Bus
See Note 1
J7
1.25 Amp PTC
prot ected
1
1
Cross Platform Control
PSC05 or
Equivalent
O - I - B A +
(Supervised)
TM
Computer/NESSRP
Ness M1
NEG+VAUX
+
www.ness.com.au
Serial number located below on base.
Horn speaker*
or 12V siren
*Default
PHONE
LINE
HOUSE
PHONES
Red
Yell o w
Mode 3
socket
Green
Black
1
526
NOTICE: ADSL broadband can interfere with
the operation of your alarm dialler. It is
recommended that a quality ADSL filter be
installed as per the filter's installation
guidelines.
Use Ness ADSL Filters 100-044 or 100-045.
NOTE 1
NOTE 2
NOTE 3
NOTE 4
NOTE 5
NOTE 6
NOTE 7
. Maximum COMBINED continuous
current drain from terminals +SAUX,
+VAUX, +VKP, OUT2 and J16 is 1.5A. Under
alarm the combined outputs should not
exceed 2.5A
. OUT 1 is for speakers 4 to 8 Ohms.
If using more than 2 speakers, use
series/parallel wiring to avoid going below a
4 ohm total load.
. OUT 2 may be set for speaker OR
voltage. Speaker Mode is set by default. In
Speaker Mode avoid going below 4 ohms
total load. In Voltage Mode (switched to
ground, 1A max.) use a 12V siren or
screamer. OUT 2 is supervised against open
circuit (in both Speaker and Voltage modes).
If not used, install a 2.2k Ohm resistor across
the terminals to avoid Output 2 Trouble
condition.
. OUT 3 is a NO/NC dry contact relay
rated 5A.
. OUT 7 to 16 are +12V switched
POSITIVE VOLTAGE outputs rated at 50mA
max.
. Do not connect any neg terminal to
earth ground.
. If AC fails, low battery disconnect
shuts down the control at 10.2 volts. To start
the control with a good battery and no AC,
short the silver pads momentarily. Replace
the battery every 3-5 years and test it
regularly with the NESS-BLT Battery Life
Tester.
Testing of this system should be performed
regularly. Control panel specifications are subject
to change without notice. Figures not to scale.
Document Part No. 440-426
17VDC 3A power
supply. Non-polarity

NESS - M1 Installation and Programming Manual Page 5
General:
Communications
Keypad options

NESS - M1 Installation and Programming Manual
Page 6
+
+SAUX
NEG
+VAUX
NEG
+VAUX
NEG
+VAUX
NEG
AC/DC
NORMAL
ZONE 16
JP1
SW1
JUMPER TO START
WITH NO AC
POWER
TELCO SEIZED
AC/DC
Z9
NEG
Z10
Z11
NEG
Z13
NEG
Z15
Z14
Z12
NEG
Z16
Z2
Z3
NEG
Z5
NEG
Z7
Z6
Z4
NEG
Z8
Auxiliary +12VDC Power Outputs protected by
1.25A PTC NOTE:Maximum continuous current
drain from +VAUX,+VKP and J16 combined
must not exceed 900 mA or 2.5 Amps in alarm.
Test battery regularly with
ELK-BLT Battery Life Tester.
Re
p
lace ever
y
3-5
y
ears
DIALER ACTIVE
SMOKE
2WIRE
STATUS
REVERSE
BAT LEADS
+-
12V Battery
5 to 18Ah
7
N.C. N.O.
ZONE
2200
Ohm
EOL8
N.C. N.O.
ZONE
2200
Ohm
EOL
5
N.C. N.O.
ZONE
2200
Ohm
EOL6
N.C. N.O.
ZONE
2200
Ohm
EOL
3
N.C. N.O.
ZONE
2200
Ohm
EOL4
N.C. N.O.
ZONE
2200
Ohm
EOL
1
N.C. N.O.
ZONE
2200
Ohm
EOL2
N.C. N.O.
ZONE
2200
Ohm
EOL
Sealed
Lead Acid
Control requires AC power to start. However, for testing purposes it can
be started from battery ONLY by momentarily shorting these two pads.
NEG
Z1
15
N.C. N.O.
ZONE
2200
Ohm
EOL16
N.C. N.O.
ZONE
2200
Ohm
EOL
13
N.C. N.O.
ZONE
2200
Ohm
EOL14
N.C. N.O.
ZONE
2200
Ohm
EOL
11
N.C. N.O.
ZONE
2200
Ohm
EOL12
N.C. N.O.
ZONE
2200
Ohm
EOL
9
N.C. N.O.
ZONE
2200
Ohm
EOL10
N.C. N.O.
ZONE
2200
Ohm
EOL
Master Power Switch (SW1) , disconnects AC and Battery power from control
This unit provides Residential fire alarm service when installed according to ANSI/
NFPA 72-1993. This unit provides Grade A Residential Burglar alarm service. In
conjunction with the enclosure, this unit also provides the following Commercial
Burglar alarm service: Grade A Local, Police Connect with Basic Line Security, and
Grades B & C Central Station. Transmission of the fire alarm signal to a fire alarm
headquarters or central station shall be permitted only with the approval of the authority
having jurisdiction. The burglar alarm signal shall not be transmitted to a police
emergency number, e quipment is to be installed in accordance with NF PA
(985,55.1.P)
2-Wire
Smoke Detector
680
Ohm
EOL
+
-
Dialer/Modem is idle. If ON, Dialer/Modem is in use (communicating).
1 blink with equal On and Off times is Normal. 2 fast blinks = Control running on
bootloader only. 4 fast blinks = Control is re-initializing it's EEPROM memory after
a firmware flash. 5 fast blinks = Memory/Operation overflow
Battery is connected correctly. If ON, check battery lead connections.
AC Voltage is present and power switch is turned ON. If OFF, check AC power.
Phone line is good and house phones are connected. If ON constantly, the phone
line may be bad.During remote mode this LED will be ON since the house phones
are then disconnected from the outside line & are being powered from control.
TELCO
SEIZED
DIALER
ACTIVE OFF
OFF
LEDS
Indicators
Power
Regular 1
sec. Blink
ON
Battery
Reversed OFF
Status
4-Wire
Smoke Detector
2200
Ohm
EOL
To Zone Input
N.O. Alarm
Contacts
+
-
+
-
Zone 16 can be configured as a 2-wire smoke zone.
Set JP1 to "2 WIRE SMOKE" and use 680 Ohm EOL
resistor, part # ELK-ER680
Use Only Compatible Detectors:
System Sensor: 1151, 2100, 2100T, 2151
GE: 429AT, 521BXT, 521B.
Hochiki America: SLK-835.
Detection Systems: DS250, DS250TH, DS282,
DS282TH, DS282THS, DS282THC.
Maximum Number = 20 Do not mix models.
Switched +12 VDC Output
protected by 1.1A PTC.
BATTERY
To Zone NEG
(Left Side Terminals)
2-Wire Smoke Circuit
NEG
Z16
Normal
State Descriptions
2200 Ohm
EOL Resistors are
part # ELK-ER2200
All circuits are current limited excepttelephone line and Battery leads.
Testing of this system should be performed regularly.
Control panel specifications are subject to change without
notice.
Wiring & Hookup Diagram
2200 (2k2) Ohm
EOL Resisters are
Ness part # 605-
222
16.5 V
17VDC 3A power
supply. Non-polarity

NESS - M1 Installation and Programming ManualPage 7
M1 Navigator and LCD keypads available
Keypad 2
Keypad 3
Keypad 1

NESS - M1 Installation and Programming Manual
Page 8
1.1 Planning the Installation
The first step in any multi-zone security system installation is planning the job.
1. Read this entire manual to familiarize yourself with all system features and procedures before actually beginning the
installation. Read all the information regarding Underwriters Laboratories (UL) and NFPA requirements.
2. Perform a physical survey of the installation site. Use the diagrams below as a guide in planning the installation.
3. Discuss the installation requirements and applications with the customer.
4. Compare the installation requirements and applications with the factory default settings to determine what customized
programming is needed to meet the specific installation requirements.
5. Bench test the system prior to installation.
1.2 Parts Diagram & Descriptions
See Wiring & Hookup Diagram on pages 6 & 7.
1.3 Mounting and Wiring Preparation
Control Mounting
Remove all packing material and compare the system components with those in the figure above to familiarize yourself with
the part names. Mount the control in a secure, dry location where the ambient temperature inside the control box can remain
at 0’ to +49’ C (32‘ to 120°F). Choose a location that allows easy wiring to an unswitched power outlet and to a grounding
conductor for the control. A central location makes running system wiring easier. Remove control box knockouts that best suit
your wiring needs. Mount the control using the upper center slotted hole to level. Install and connect all necessary wiring for
the power transformer, detection loops, keypads and siren outputs.
Section 1 - Installation and Wiring
Legend
- Main Control
- Audible Alarm
- Smoke Detector
- Contact
- Keypad
M
A
S
C
K
Bedroom 1Bedroom 2
Bedroom 3 Living Room
Kitchen / Dining
TYPICAL BURGLARY INSTALLATION LAYOUT
M
A
K
Bedroom 1Bedroom 2
Bedroom 3 Living Room
Kitchen / Dining
TYPICAL FIRE INSTALLATION LAYOUT
M
A
K
C
CCCCC
S
SS
S
Basement
First Floor
All perimeter openings below 18" should be provided with protection.
A Smoke Detector shall be located in each sleeping area and between
the sleeping areas and the main living area.
Early warning fire detection is best achieved by the installation of fire
detection equipment in the location shown above.
In homes basements or multiple levels at least one smoke detector
shall be on each level.

NESS - M1 Installation and Programming Manual Page 9
Keypad Mounting and Wiring
Ideal keypad height is 1.2 - 1.5 Meters above the floor. Select a location with an ambient temperature range between 0’ and
+49’ C (32° and 120° F). Avoid direct sunlight if possible. Fasten mounting plate to electrical box (or directly to wall) using flat
head screws to prevent shorts to the back of the circuit board. Keypads have a removable wiring plug for connecting to the M1
4-wire data bus. CAT5 or CAT6 eight (8) conductor cable is recommended for all Data Bus cables. The extra wires provide
data return paths. Splice the Black, Red, White, and Green wires from the removable wiring plug to the Data Bus cable. Plug
the connector into the back of the keypad. Tuck wires neatly into back plate and install Keypad on mounting plate. Each
keypad has connections for an optional programmable output and a programmable zone input.
Splice 6 pin Keypad wiring assembly to the Data cable using Ness 101-289 “B” connnectors
NOTE: Refer to the section titled Data Bus E.O.L. Termination for important information about how to handle multiple
homerun cables. NEVER SPLICE OR CONNECT WIRE WITH CONTROL POWER ON. Minimum cabling should be four
conductor 22 or 24 gauge. Maximum resistance per wire is 25 Ohms. Device placement beyond 300 mts is not
recommended.
1.4 Control Wiring
Zones 1 Thru 16
The zone input terminals on the control board are labeled Z1, Z2, thru Z16. There are 8 common negative terminals mixed
between every two zones with each negative to be shared by those two zones. Through programming each zone may be
configured for standard EOL supervised (end-of-line resistor) function, as well as normally closed or normally open with no
resistor required. By default each zone requires a 2,200 Ohm EOL supervision resistor at the furthest most remote end of the
detection device wiring. A combination of N/C (normally closed) and/or N/O (normally open) devices may be connected to an
EOL supervised zone.
Tip: The condition of any zone can be checked using a voltage meter across the zone and com terminals. A non-violated
zone should measure approximately 7.0 Volts DC. If the circuit is violated in an open condition, the voltage should rise to
13.8 VDC. If the circuit is shorted across the EOL resistor, the voltage should be 0 VDC. One of the Keypad Menus also
allows zone voltage to be viewed on the LCD screen. See Keypad Menus, “86-System Diagnostics” on [page 19].
1. Connect all alarm sensors to the zone wiring per the instructions provided by the sensor manufacturer and wiring
diagram on pages 6 & 7.
2. Connect each zone wire to the appropriate terminal. Each zone has an input terminal and a common (negative) return.
NOTE: A negative terminal is shared by every two zones and all negatives are common to each other.
Z1
NEG
Z2
Z3
1
N.C. N.O.
ZONE
2200
Ohm
EOL 2
N.C. N.O.
ZONE
2200
Ohm
EOL
1
See Note about
Data Bus
Termination
6
BLACK
WHITE
GREEN
RED
Keypad
Wiring
Assembly
Data Bus Cable
CAT5 or CAT6 Recommended
Optional programmable Zone Input from Keypad
Hookup Diagram for Keypad
Splice 6 Pin Keypad Wiring Assembly to the Data Bus cable using ELK-900-2 "B" Connectors.
BROW N
Optional programmable Output from Keypad
The optional Zone Input # or Output # is
determined by the Keypad Address.
Load (50mA max)
I.E. LED, Relay
-
+
To BLACK (Neg) Wire
To BROWN Wi r e
N.C. N. O.
2200
Ohm
EOL
To BLACK (Neg) Wire
BLUE
To BLUE W i re
NOTE: The first batch of M1KP Keypads provided a switched
negative (pull to ground) output. Connect per diagram above.
These units have the letter "E" at the end of the ID number on the
lower back side of the board. EG: PC096E Boards with a letter
"F" or later provide the output as a switched positive.
Load (50mA max)
i.e. Relay, LED
-
+
To Red (Pos) Wire
To Brown Wire
KP Zone Output
Address # #
1 193 193
2 194 194
3 195 195
4 196 196
5 197 197
6 198 198
7 199 199
8 200 200
KP Zone Output
Address # #
9 201 201
10 202 202
11 203 203
12 204 204
13 205 205
14 206 206
15 207 207
16 208 208

NESS - M1 Installation and Programming Manual
Page 10
Two-Wire Smoke Zones (Zone 16)
To enable the use of two-wire smoke detectors on Zone 16, move Jumper JP1 (located just below Zone 16 terminals) to the
right side so that the two right hand pins are covered. Go to the installer programming mode, Menu 05 - Zone Definitions, and
program Zone 16 as a Fire zone (Def=10). Step to the next location and program Wire Type=6. NOTE Use only compatible
two-wire detectors. When jumper JP1 is set for two-wire operation, a 680 Ohm EOL resistor (furnished in the hardware
pack) must be used instead of the 2,200 Ohm. Maximum wire resistance must not exceed 60 Ohms.
Switched Power Connection (+SAUX)
Four-wire smoke detector and other devices that require a temporary power disruption in order to reset or unlatch from the
alarm state (i.e. smoke detectors, etc.) should be connected to the +SAUX 12 Volt DC switched power terminal. When a
smoke reset is performed, the operating voltage to these devices is momentarily interrupted.
Auxiliary Power Connections (+VAUX)
Motion detectors, glass breaks, etc. and other devices requiring unswitched 24-hour power should be connected to one of the
auxiliary terminals, +VAUX. All negative terminals on the terminal strip are at the same reference and may be used whenever
a common (circuit ground) negative is required. Use caution when wiring the control to distribute the load devices among the
supply and the negative terminals evenly. NOTE: Circuit ground refers to any negative terminal connection on this control.
This does not refer to the earth ground terminal or to the common terminals of Relay Output 3. These terminals are not at
the same voltage potential and should not be wired so that they are electrically connected to a negative.
PTC (Positive Temperature Coefficient) Circuit Breakers
The +VAUX Auxiliary power and J16 power output terminals are protected against shorts and overloads by a 1.25A PTC. A PTC
is a solid state, auto-restoring type of circuit breaker. The +SAUX Switched (Smoke) power output is protected by a 1.1A PTC.
The +VKP Keypad power output is protected by a 1.25A PTC. Output 2 is protected by a 1.25A PTC. NOTE: Sometimes it may
be necessary to remove power (unplug the outputs) for approx. 20 seconds after a short, to allow the PTC to reset. Even
if the short is no longer present, the remaining residual current draw may be so high that the PTC cannot determine that
the short is gone. If the PTC re-trips, check the field wiring and repair.
Primary Power Input (17V DC)
The control is powered by a 17VDC 3A switch mode power supply. The power supply must remain connected at all times to power
the system and maintain battery charge.
Do not extend the length of the power supply’s power leads. Keep the power supply unpowered and backup battery disconnected
until all other connections have been made.
Standby Battery Connection
Connect the BLACK wire to the Neg (-) terminal on the battery, the connect the RED wire to the Pos (+) terminal on the battery.
The control is designed to operate with and recharge a 12 volt, sealed lead acid battery from 7Ah up to 18 Ah for backup of the
primary power supply. The control maintains a float charge for the battery of 13.8 VDC at 100 mA. This is in addition to the
continuous output of 1.5 Amps that the power supply maintains (see maximum current drains for UL Listed Systems).
+VAUX
NEG
AC/DC
SW1
16.5 V
JUMPER TO START
WITH NO AC
POWER
AC/DC
BATTERY
+-
ELK-1280
12V Battery
Sealed Lead Acid
STATUS
REVERSE
BAT LEADS
RED BLK
+-
17VDC 3A power
supply. Non-polarity
This panel is supplied with a 17VDC
switch mode power supply.
M1 V5.1.22 and later firmware
supports 17VDC power input.
The DC power supply will not harm
earlier M1 versions however
the panel will give a continuous
Mains Fail warning.

NESS - M1 Installation and Programming Manual Page 11
CAUTION: Do not reverse the battery leads! The control has special circuitry which helps protect it from battery reversal
damage for short durations. However, prolonged reversal of the battery leads may cause permanent damage. A reverse
battery warning LED is located to the left of the power On/Off switch. If this light is ON, turn the power off immediately
and correct the battery lead connections.
AC Failure, Low Battery, and Automatic Low Voltage Shutdown
During an AC power failure the battery automatically takes over and AC Fail trouble annunciates at the keypad. The
communicator can be programmed to report AC Fail to the Central Station after a time delay (see Menu 12, System Option 01).
If the battery voltage falls below 11.2 VDC a Low Battery Trouble condition will occur. The communicator can be programmed
to report Low Battery to the Central Station. The battery will continue to run the control until its voltage reaches 10.5 VDC, at
which time the control will disconnect and shut down to prevent a false alarm and damage to the battery. The AC Fail trouble
display will clear if the AC restores. However, the Low Battery Trouble requires a manual or automatic battery load test before
it will clear. An automatic battery load test is performed every 24 hours. See Section 2.2 for powering up the control.
Telephone Line Connection (R1,T1,T,R)
The telephone interface is connected by the use of an approved Mode 3 socket. This device allows the subscriber to
disconnect the control/communicator from the public switched telephone network in the event of a malfunction. The control is
equipped with line seizure so that the premises telephone service is interrupted during communication to the central station.
Connection to the approved socket is done with a Ness Dialler cord (Part # 450 -200) which connects the control terminals to
the mode 3 socket.
Outputs
There are 13 outputs on the main board. Outputs may be expanded utilizing output expander boards connected to the RS-485
4-wire Keypad data bus. Outputs 1 & 2 trip when any alarm is activated. All others must be enabled through the RP Rules
Programming and can be triggered by multiple conditions “events”. Do not exceed the current limits on voltage only outputs.
Output 1 is driven by an Audio Amplifier. It is designed to handle standard 8 ohm alarm speakers (never go below a total
connected load of 2 Ohms) for inside or outside use. This output is the source for voice announcements such as: Zone 1 not
ready, System Armed, Alarm Activated, etc., as well as alarm siren sounds. The initial start volume and the final volume can be
adjusted in programming to suit the application.
Output 2 is a traditional Alarm output. It is factory set to produce alarm siren sounds into standard 8 Ohm speakers (never go
below a total connected load of 4 Ohms). It can be alternately programmed to produce voltage only (12VDC) for driving self-
contained sirens or siren driver boards
Output 3 is a Single Pole Double Throw Relay with form “C” contacts (Com, N/O, and N/C).
Outputs 7, 8, 9, 10, 11, 12, 13, 14, 15, and 16 are low current, positive (+) voltage only, for driving LEDs, relays, etc. Outputs 4,
5, and 6 ARE NOT available from the main board. They can only be accessed with a data bus Output expander set to
address 1. This expander will replicate all the main board outputs, including outputs 4, 5, and 6.
Earth Grounding
Tests and studies have determined that the best results against lightning and transients are obtained by isolating the control
from ground. Do NOT connect any of the M1 terminals, especially the Neg. terminals to earth ground. Early production M1
circuit boards had a terminal marked “earth ground”. This terminal is no longer used on circuit board revision I or later.
However, ancilliary devices such as the ELK-950 Surge Protector on the incoming Telephone circuit are still recommended.
Keypad & Expanders on the RS-485 Data Bus (+VKP, Data A, Data B, Neg)
Keypads and data bus expander devices connect to the four terminals marked +VKP, Data A, Data B, and Neg. The keypad
plug-in wire harness color code is: Red +VKP, Green Data A, White Data B, and Black (-) Neg. The +VKP power terminal is
protected by an auto reset PTC device. In the event of a short circuit or malfunction, power will be removed from all devices
until the problem is resolved. Two (2) quick connect header pin plugs (J1 and J2) along the bottom of the board may be used
for temporary purposes I.E. bench testing using a four conductor ribbon cable. Do not use for permanent connections.
Using Output 7 (low current) with a sensitive relay to switch 24V AC to a Door Strike
24V AC
Transformer
+-
Door
Strike
ELK-924
POS
NEG
-T+T
N/OCOMN/C
D3
24V OPEN
N/OCOMN/C
+12V
NEG
16
15
14
13
12
11
10
9
8
7
J16
OUTPUTS
Programmable Outputs (J16) OUT 7 - 16 are +12V switched
positive general purpose outputs rated at 50mA.
+12V Red
Black
White
Green
Brown
Blue
Yellow
Violet
Pink
Tan
Orange
Grey
+VAUX
NEG
OUT 16
OUT 15
OUT 14
OUT 13
OUT 12
OUT 11
OUT 10
OUT 9
OUT 8
OUT 7

NESS - M1 Installation and Programming Manual
Page 12
NEG -
DATA B
+12V
DATA BUS
+VKP
DATA B
DATA A
NEG
EGND
J1J2
RE: Data Bus Termination Note
DATA BUS TERMINATION IS VERY IMPORTANT!!
Ideal setup is 2 home run cables (4 wire) with daisy chained devices along each. The last device on each cable MUST have
a Terminating resistor installed (activated) via the 2 pin header/jumpers marked JP1
Place a black shorting cap (see hardware pack) onto the 2 pins to install a 120 Ohm resistor across data lines A & B.
NOTE: Place a shorting cap on JP3 of Main Board it there is only 1 data bus cable. See diagrams on multiple cables.
Temporary Connection "Plug-in" jacks for RS-485 Data Bus (J1 & J2)
Local connection for Data Bus Devices ie: Keypads, etc. for testing purposes only.
BLACK
WHITE
GREEN
JP3 Teminating Jumper
(Located beneath cover)
RS-485 Data Bus (Max. length is 4000 ft.
Max. bus devices vary by control.)
WARNING! The RS485 Data Bus must NEVER have more that two (2) terminating resistors
header/jumpers installed. Reliability and response will be negatively affected!
RS-485 DATA BUS
DATA A
RED
ELK-M1XIN
ELK-M1XOV
Jumper
Terminate
these two
devices.
DO NOT Jumper
Keypad 1
Terminate these devices.
If home running 3 or more cables, use 6 conductor cables. At the device, make a three way splice of the data A wire, device A wire orterminal, and a
return data A1 wire (using one of theextra wires). Do the same for the data B wire. At the control, make a two way spliceofthe dataA1 return wire (series
connection) to the outgoing data A wire of the next cable. Repeat for the data B wire. Terminate at the last device and the control JP3 ONLY!
Install Teminating Jumper
Cap on this last device AND
on the control JP3.
6conductorcables
+VKP
DATA A
DATA B
NEG
DATA
A1 A
B1 B
DATA
A1 A
B1 B
DATA
A1 A
B1 B
WHITE
GREEN
BLACK
RED
A
-
+
B
SPARE
PAIR
See Diagram on next page for connection
of Optional Output and Zone Input
WHITE
GREEN
BLACK (-)
RED +12
BLUE
BROWN
6
Conductor
Cable
DATA
A1
B1
Forfuture
devices
A1
B1
Diagram for Daisy Chain Connection of Data Bus Devices Using Two (2) Home Run Cables
Diagram for Daisy Chain Connection of Data Bus Devices Using 3 or More Home Run Cables.
NOTE: The power wires are parallel
connected to the +VKP & Neg terminals.
RS-485 DATA BUS
Data Bus E.O.L. Termination - VERY IMPORTANT!
The M1 features a true RS-485 “differential” data bus operating at 38,400 baud (bits per second). This is a relatively
high speed by industry standards and was designed to ensure fast, accurate communications. As a result of this
high speed, data bus terminating resistors (120 Ohm resistors) are recommended in order to eliminate the possibility
Every M1 data bus device; keypad, zone, output expander, etc. and the control board has a built-in bus terminating
resistor (120 Ohm). Each terminating resistor is installed (activated) via a 2 pin header/jumper using a small black
shorting cap. The 2 pin header is marked JP1 on keypads and expanders (except KP1 keypad, marked JP2).
From the factory, no terminating resistors are installed (activated). The control hardware pack includes two of the
small black shorting caps. When a shorting cap is placed on the two pins, it installs (activates) the built-in 120 Ohm
terminating resistor across Data Lines A & B.
WARNING! The RS-485 Data Bus must NEVER have more than 2 terminating resistors header/jumpers
installed. Reliability and response will be negatively affected. See diagrams on opposite page.
Ideally, there should be no more than two home run data bus cables, with devices daisy chain connected along the
two cables and a terminating resistor (header/jumper) installed on the last device of each cable. However, if you
prefer to home run everything (3 or more), we highly recommend using 6 or 8 conductor cabling (CAT5 or CAT6
cable is ideal). At each device, splice data wires A & B to 2 of the extra conductors so they return back to the control
as A1 & B1. At the control, splice the returning data wires A1 & B1 in series to data wires A & B going back out to the
next device. Remember to install a terminating header/jumper on the last wired device. Electrically the data wires
are now in one long series circuit. Connect the POS (+) and Neg (-) power wires of each device directly to the M1’s
+VKP and Neg terminals. DO NOT SERIES THE POWER WIRES as this will cause unnecessary voltage loss.
, (JP2 on the KP1 keypad).
Keypad 2
Keypad 3

NESS - M1 Installation and Programming Manual Page 13
The ideal way to connect multiple home run cables is with an ELK-M1DBH Data Bus Hub. It accepts CAT5 or CAT6 cable with RJ45 plugs on the ends. It
does all the work of series connecting the DATA lines A & B. Terminate at the hub using the included RJ45 Terminating Plug in the first unused jack.
8 - Brn/Wht
7 - Wht/Brn
6 - Org/Wht
5 - Wht/Blue
4 - Blue/Wht
3 - Wht/Org
2 - Grn/Wht
1 - Wht/Grn
RED +12V
BLACK (-)
GREEN (A)
WHITE (B)
BROWN
Pin1
RJ45 Plug
A Grn/Wht
A1 Org/Wht
-
Wht/Brn
+
Brn/Wht
B1 Wht/Org
B Wht/Grn
Spare
Spare
ELK-M1DBH Data Bus Hub
CAT5 or
CAT6 Cable
COLOR CODE for CAT5 or CAT6 Data Bus Cable to ELK-M1DBH Data Bus Hub.
Pin1
Mount M1DBH inside control.
Connect it to the M1 Data Bus
terminals using a 4 conductor cable.
J2 J4 J6 J8
J1 J3 J5 J7 J9
RJ45 Terminating Plug
Insert in first unused jack and
terminate the control at JP3.
DO NOT TERMINATE AT
ANY OF THE DEVICES!
CAT5 Cables
Front view
Daisy Chain Connection of Data Bus Devices
Using ELK-M1DBH And CAT5 Cables.
RS-485 DATA BUS
Optional programmable Zone Input from Keypad
Optional programmable Output from Keypad
Load (50mA max)
I.E. LED, Relay
-
+
To BLACK (Neg) Wire
To BROWN Wire
N.C. N.O.
2200
Ohm
EOL
To BLACK (Neg) Wire
To BLUE Wire
BLUE
Setting the Data Bus Address and Enrolling Device(s) into the System
Keypads and expander devices communicate with the M1 over the RS-485 4-wire data bus. Each device must have a unique
address setting (from 1 to 16) within it's device type. Keypads are device TYPE 1, input (zone) expanders TYPE 2, output
expanders TYPE 3, etc. The purpose of device types is so that the address numbers can be re-used in each different device
type. It is OK to have a Keypad, a Zone Expander, and a Output Expander all set to address 2 and on the same data bus since
each device is a different device type. It is NOT OK to have duplications of addresses within the same device type. I.E.
Multiple keypads on the same control cannot be set to 'like' addresses.
ADDRESS: From the factory all keypads are set to address 1. Valid keypad addresses are 1 to 4 for the ELK-M1, or 1 to 16 for
the ELK-M1G. The first keypad on the system (Keypad 1) is automatically enrolled upon power up. Each additional keypad must
be assigned a unique address and then manually enrolled from “Menu 1 - Bus Module Enrollment”. (See M1 Instruction
Manual, Menu 01, for complete instructions on Bus Module Enrollment)
1. Press and hold the " * " key, followed by the F5 key . HOLD BOTH keys pressed for 5-10 seconds or until the LCD displays:
Exit when done. F1 Set Addr. (This is Keypad setup mode)
NOTE: This mode may also be accessed by removing power from the keypad (unplugging the data bus cable) and then
applying power while holding any key pressed.
2. Press the F1 key to display the current address setting.
3. Set the desired address by entering a number from 1 to X.
4. Press the Exit key when done.
Auth. Required
Enter Valid Pin
01-Bus Module
Enrollment
ENROLLING:
1. Press the ELK key, then press 9 (or scroll up) to display 9 - Installation Programming. Press the
RIGHT arrow key to select this menu. The Installer Program Code (PIN) must be entered to access
this menu.
2. Enter the Installer Program Code. (See M1 Manual for the default Code)
3. The first Installer Programming menu displayed will be "Bus Module Enrollment"
4. Press the RIGHT arrow key to select this menu. "Enrolling Bus Modules" will display
5. The M1 transmit an enrollment message to all data bus devices, following by a display showing the
total Bus Modules that are enrolled. To view the enrolled devices and/or remove a device press the
RIGHT arrow key next to the word Edit.
6. Press the * or Exit keys to exit Installer Programming.
XX Bus Modules
Enrolled, Edit r

NESS - M1 Installation and Programming Manual
Page 14
2.1 Introduction
For best operation during bench testing, all zones should be terminated with end of line resistors and the correct transformer
and battery should be connected to the unit. The control comes with factory default programming, allowing it to be bench
tested prior to installation. The factory default code for user 1 is 3456. This code is authorized to operate all user related
features of the system. The control is designed to accommodate the grouping of specific zones into partitions called areas
and by default, all zones are assigned to area #1. This is the most common mode in which the system operates. This section
of the manual gives an overview of powering up and basic keypad functioning.
2.2 Powering Up (One Keypad)
After all other connections have been made and checked thoroughly, the controls AC transformer and battery may be
connected. The Master Power Switch located on the lower left corner can then be turned on which will complete the AC and
battery connections into the control. Upon power up the control will perform self-diagnostics and auto-enroll the first keypad
(Keypad Address #1). Any additional keypads or expanders must be manually enrolled using Installer Level Programming.
See “Menu 01 - Bus Module Enrollment”.
NOTE: It is very important to make certain that every keypad, input expander, output expander, or any other data bus
device be assigned a unique data bus address within its type. See “MENU 01 - Bus Module Enrollment” for instructions
on setting keypad and expander addresses.
System Startup on Battery Only
Ordinarily, the control will not startup without AC power. However, if AC power is not available (new construction sites, field
testing, etc.) it is possible to start the control on battery ONLY! Locate the two silver pads on the lower left corner of the circuit
board. Take a small blade screwdriver and short these two pads. This will temporarily bypass the AC sensing circuit and
allow the control to startup. The On/Off power switch must be in the On position.
2.3 User Codes and Authorities
The control has 99 user passcodes plus one installer passcode. Each user code may be assigned specific authorities as to
what it is allowed to do. The authorities are assigned from the Installer level programming, however the code numbers and
user name is assigned from the keypad user menu 6 - Change User Codes. Only a Master authority level code or the
Installer code is allowed to access keypad user menu 6. The User’s Guide contains a description of panel
operations accessible to the user codes. Control operations accessed by the installer passcode are slightly different.
The Factory Default Code for User Code 1 is: 3 4 5 6 (Master Code)
(If the six digit code option is enabled, User Code 1 default will then be: 1 2 3 4 5 6)
The user code may be used for functions in a specific area or system-wide. Some options may be performed at any time,
even while the control is fully or partially armed. The menu system is designed to be next-step-oriented. After a brief
explanation of the options, the user should be able to begin operating the system immediately. For purposes of discussion,
the installer and the end consumer are both considered users, but have different capabilities.
2.4 Installer Program Code and Authorities
The installer code can access all the keypad user menus, including of course menu 9 - Installation Programming. The
Installer code also has limited arm/disarm privileges. It may be used to arm any area and may be used to disarm any area,
so long as that area was armed specifically by the installer code. The Installer code cannot disarm if an area was armed by
any user code. The Installer code may be used to silence 24hr alarms or a Burglary alarm in an area that was armed by the
installer or in an area that is not armed. The installer code may also be used to silence a trouble condition in a disarmed
area. See User’s Guide for a full description of arming and disarming procedures.
The Factory Default Installer Program Code is: 1 7 2 8 3 9
Section 2 - Operating the System

NESS - M1 Installation and Programming Manual Page 15
Ready Light - This light is ON when all burglar zones are secure and the system is OK for arming. If this light is OFF, one or more zones are
violated (not secure). For maximum security, all zones should be secured before the system is armed.
If FLASHING, one or more force-armable zones are violated. Force arming temporarily excludes violated zone(s) from the system. However, if
a force armed zone becomes secure while the system is armed, it will automatically restore to service. This is handy for a garage door. The
system may be armed with the door up, but once the car is backed out and the door is closed, it will become secured.
Armed Light- This light will be ON when the system is armed. The mode of arm will be indicated by the LCD display and the Exit or Stay
lighted pushbuttons. This light will be OFF when the system is disarmed.
Exit Key - This lighted key may be programmed for single or double press arming to the AWAY (not occupied) mode. If the Exit light is ON the
system is armed and all perimeter sensors and interior motions are active. The Away key may be pressed during the exit delay time t to
convert from Away mode to Away Vacation mode. The Away Vacation mode is primarily for use with the Whenever/And/Then Rules program-
ming of Elk-RP to invoke long term energy savings.
Stay Key - This lighted key may be programmed for single or double press arming to the STAY (occupied) mode. If the Stay light is ON the
system is armed and all interior zones are excluded (bypassed). Only perimeter doors and windows are active in the Stay mode. This key
may also be programmed to change to other Stay modes such as: Stay Instant, Stay Night, and Stay Night Instant. Since interior zones are
automatically excluded once the Stay mode is activated, the M1 allows this key to Stay arm even while one or more interior zones are
violated, provided they are programmed for “force arming”. The Stay Night mode re-activates any interior night zones. To prevent a false
alarm the control will not allow change to the Stay Night mode when a interior night zone is violated unless it is programmed for “Force arm”.
Chime Key - Chime produces an audible alert whenever certain doors, windows, or other selected zones are violated. There are four
different selections: Tone only, Voice, Tone/Voice, and Off. In the programming mode this key also functions as an insert character key for
text programming. The key light indicated when Chime is On.
Bypass Key - Pressing this key followed by a zone number and the bypass key again will exclude or bypass the selected zone. This
key may also be used to delete a character during text programming. When the Bypass key is lit, one or more zones are bypassed.
* Key - This key serves as a clear or reset key. If an error is made while entering digits, pressing this key clears the error. Three presses is
a master clear.
# Key - This key is currently a duplicate of the Bypass key.
Numerical Keys - These keys are used for entry of passcodes, programming, etc. Keys 2 - 9 also have an assigned alpha character
which are used for entering text.
Arrow Keys - The menu and arrow keys have powerful functionality used for both normal operation and programming. Pressing the Menu
key displays relative information according to each application. The arrow keys allow scrolling through all available options. The user can
activate or select the displayed option by pressing the right arrow key. Once an option has been selected, the user may be prompted for
a passcode. Additional sub-menu options may appear to assist. The user may return to the status screen by pressing the * key.
2.5 Keypad Overview

NESS - M1 Installation and Programming Manual
Page 16
Access to menus 1 to 5 can be restricted via programming to only Users that have “User Code Option 8” set. Menus 6 & 8
required a Master or Installer Code. Menu 9 requires the Installer Code. Press ELK to begin, then press the UP or DOWN
arrow key to select a menu. Enter a code if prompted. To select a menu press the RIGHT arrow key.
Keypad Menus
Allows viewing or controlling of the automation functions such as Tasks, Lighting, Outputs,
Temperature Sensor, Keypad Temperature, and Thermostats. Press the RIGHT arrow key to
select, then choose the desired function using the UP or DOWN arrow keys.
NOTE: The automation functions must be assigned and named using the NESS-RP software.
In most cases they cannot do anything unless they have been written into one of the
“Whenever/And/Then” automation rules.
Tasks are like 1 button macros, performing multiple jobs with one push. To activate a task
press the RIGHT arrow key and press UP or DOWN to scroll through the list of available tasks.
To jump directly to a particular task, enter it’s two digit number. Once the task is displayed, all
it takes to activate it is to press the # key. A rule to use the “Water the Lawn” task might be:
WHENEVER “Water the Lawn” IS ACTIVATED THEN TURN ON Valve 19 FOR 5 MINUTES, etc.
Lighting allows the individual control of lights and/or appliances which have been assigned
through the Ness-RP software. Press the RIGHT arrow key to select Lighting, then press the
UP or DOWN arrow keys to scroll through the list. If you know the three digit number, you may
enter it to jump directly to that Lighting/Appliance. The current state of the unit will be
displayed. Press the # key to toggle (change) the unit from on > off or from off > on.
Outputs might be relays or voltages used to actuate something like a motor, fan, pump, etc.
Outputs can be turned on or turned off from this menu. Press the RIGHT arrow key to select
Outputs, then press the UP or DOWN arrow keys to scroll through the list. If you know the
three digit number, you may enter it to jump directly to that Output. The current state of the
output will display. Press the # key to toggle (change) the output from on > off or from off > on.
Remote “Zone” Temperature Sensors can be read from this menu. Press the RIGHT arrow
key to select this menu, then press the UP or DOWN arrow keys to scroll through the list of
available sensors. To jump directly to a particular sensor enter it’s two digit number. The
current temperature will be displayed. Press the * key to exit.
Keypad Temperature Sensors can be read from this menu. Press the RIGHT arrow key to
select this menu, then press the UP or DOWN arrow keys to scroll through the list of available
keypads. To jump directly to a particular keypad enter it’s two digit number. The current
temperature at the keypad will be displayed. Press the * key to exit.
Thermostats can be read from this menu. Press the RIGHT arrow key to select this menu,
then press the UP or DOWN arrow keys to scroll through the list of available thermostats. To
jump directly to a particular thermostat enter it’s two digit number. The current temperature at
the thermostat will be displayed. Press the * key to exit.
Used for resetting latched smoke detectors after a fire alarm activation..
Press the RIGHT arrow key to actuate the Reset Smoke Detector feature. This causes the
power to smoke detectors to be removed for 5 seconds. During this time all fire zones will be
ignored to keep an accidental alarm from occurring.
1-View/Control
Automation Fncts
2-Reset
Smoke Detectors
READY TO ARM
9:00AM 08/01/03
Continued on next page..
3-Outputs
Pump Motor Cntrl
001:=Off, # to Chg
2-Lighting
1-Tasks
Water The Lawn
01: # Activates
Kitchen Lights
001:=Off, # to Chg
5 Seconds Smoke
Output Reset
The control offers extended Menu Options via the center navigation “ELK” key. Some menus
may require a valid code to authorize. The Factory Default Code for USER Code 1 is: 3 4 5 6
(1 2 3 4 5 6 if the six digit code option is enabled)
4-Temperature
Sensor
Outside
S01:=032 Degrees
5-Keypad
Temperature
Keypad 01
K01:=073 Degrees
6-Thermostat
Temperature
Hallway
T01:=072 Degrees

NESS - M1 Installation and Programming Manual Page 17
3-Walk Test Area
< Area? Name >
4-View History
Log
6-Change
User Codes
Requires Master or
Installer Code
Menu 3 permits a local walk test of all zones assigned to this keypad’s area. The siren(s) and
communicator are disabled during a walk test. Press the RIGHT arrow key to begin a Walk
Test. The keypad displays the total tested zones adjacent to the total number of zones involved.
When a zone is activated, it’s name is displayed across the bottom and can be audible if the
Chime mode is on.
Allows viewing of the past 512 activities stored in the history log. Press the RIGHT arrow key to
view the History Log. History activities include: Arm, Disarm, Alarm, Trouble, etc. The top line
displays the Log number, Mth/Day, Time, and event description.
L001 is always the most recent event. Press the UP or DOWN arrow keys to move forward and
back. Event 512 will be the oldest event. The bottom line displays the event description, the
extended data (zone, user, etc.) and the area number (A1-A8).
Allows viewing of the current status of all zones. Press the RIGHT arrow key to select. Press
UP or DOWN to scroll through the zones or enter a three digit number to jump directly to a
particular zone. I.E. for zone 16 enter 016. Press the * key to exit.
For changing a user code and/or name for codes which have been previously enabled by the
Installer. Only a Master code OR the installer code can access this menu. Press the RIGHT
arrow key to begin. Press UP or DOWN keys to locate a user, or enter 3 digits to jump. Press
RIGHT arrow key to view the existing code. To change, enter the new code digits and listen for 3
beeps to confirm. To edit the name, press the RIGHT arrow key once, then press the DOWN
arrow key. Enter the text using the letters on the keys. I.E. For “K” press the 5 key twice. Move
RIGHT or LEFT with the arrow keys. Press Chime to insert a space. Press Bypass to erases a
letter. The UP and DOWN arrow keys shift from upper to lower case letters. Press the ELK key
to save and exit.
.
Allows an end user to change up to 20 settings incorporated into an automation rule. These
settings can be: time of day, time duration (seconds), or a numeric value. Each custom setting
has a reference number (CS) and a text description: I.E. CS01: Sprkl On 00:00 [Time] implying
a time of day setting. Press the RIGHT arrow key to begin.
Press the UP or DOWN arrow keys to locate a setting, then press the RIGHT arrow key to
select. Enter the new value and press the ELK key to save and exit.
Menu 8 consists of 8 sub-menus used for advanced system settings. Press the right arrow key
and enter a valid user code. Press the UP or DOWN arrow keys to select a sub-menu or enter
the one digit number to jump directly to any sub-menu. I.E. enter 6 to jump to 86.
To set the system clock press the RIGHT arrow key, then press the UP or DOWN arrow key to
select the day. Next, press the RIGHT arrow key to move to Date/Time setting. Enter two digits
for month, date, year, hour, and min. To exit press the * key.
To set the volume for output 1 voice messages (non-alarm) press the RIGHT arrow key and set
desired volume with the UP or DOWN keys. There are 8 settings (0-7). WARNING: PROTECT
EARS! Each adjustment broadcasts a test message through Output 1. To exit press the * key.
To set keypad adjustments press the RIGHT arrow key. Then press the UP or DOWN keys to select
one of the three options.
8-System
Settings
83-Keypad
Adjustments
1:Set Keypad
Beep Tone
2:Set Keypress
Beep Volume
3:Set Backlight
Dim Level
82-Out1 Voice
Adjust Volume
81-Set Sys Clock
24hr format
000of016 Tested
A?-Violate Zones
L001:01/01 08:00
AreaArmed 103A1
001:Sel Prg
< User Name >
7--Automation
Custom Settings
CS01: 00:00Time
Sprklr On
Requires Master or
Installer Code
Requires Master or
Installer Code
5-View Status
of all zones
To set keypad beep tones press the RIGHT arrow key, then select the desired tone using the UP or
DOWN keys. There are 9 settings (0-8). When done, exit by pressing the * key.
To set key-press beep volume press the RIGHT arrow key, then select the desired volume using
the UP or DOWN keys. There are 7 volume levels (1-7) plus Off (0). To exit press the * key.
To set backlight dim level press the RIGHT arrow key, then select the desired level using the UP or
DOWN keys. There are 9 backlight levels (1-9) plus Off (0). The keypad automatically dims to this
setting after 30 seconds of no activity in order to save energy. To exit press the * key.

NESS - M1 Installation and Programming Manual
Page 18
To perform system tests press the right arrow key. Then press the up or down arrow keys to
select one of the three tests.
The control’s standby battery is load tested automatically every 24hrs. However, it can also be
manually load tested anytime using this option. Press the right arrow key to start the test. The
battery is placed under load for 30 seconds and the battery voltage and system current is
displayed. If the battery falls below a set level, a Low Battery trouble will occur. If it’s necessary
to replace the battery, this test should be used to test and clear a Low Battery Trouble condition.
To test the keypad’s LCD screen press the RIGHT arrow key. The entire screen should appear
black indicating all pixels are working. To exit press the * key.
To manually test the communicator (dialer) press the RIGHT arrow key. Testing is done using
the first phone number that is programmed to send a test code. If there is no phone number
programmed to send a test code, the test will end. To exit this menu press the * key.
There are two types of test, silent and monitored. To silently send a test press the right
arrow key from this display. To hear the test using the inside speakers (OUT1) press the up
or down arrow key to bring up the following display.
This unique feature permits you to hear or “monitor” a single communicator test using the
inside speakers (OUT1) eliminating the need for a telephone “Butt” set. Simply press the
right arrow key from this display to begin.
Similar to above, this works for multiple communicator tests. Press the right arrow key to
enable. Each communicator transmission will be monitored until mode is canceled. Press
the star (*) key three times to cancel. Canceled automatically after 24hr daily battery test.
This special option allows any pending (not reported) dialer communications to be cleared
or cancelled. Typically this will be used only for initial installation and testing.
NOTE: ALWAYS NOTIFY THE MONITORING STATION BEFORE TESTING THE DIALER! If the test
should fail, a Comm Fail trouble will occur. To clear a Comm Fail the dialer must be able to
complete a good communication.
To connect Ness’s Remote Program PC software (RP) via the user assisted method, press the
RIGHT arrow key and then select the connection mode with the UP or DOWN arrow keys.
1:Seize Line Attended Mode - 1) Allows RP connection to begin on an already established voice
connection between the control phone line and the RP Computer. 2) Also useful for manually
answering an incoming call from the RP Computer with programming Rings to Auto Answer.
2:Seize Line Unattended Mode - Pressing the RIGHT arrow key causes the control to dial the
programmed RP telephone number. The RP Computer must be in the “wait for call” mode.
This is a collection of tools for diagnosing system problems. Press the RIGHT arrow key and
enter a valid user code to begin. Press the UP or DOWN keys to select one of the four tools:
This tool is useful for determining if data bus errors are accumulating. It displays the device
type and number of retries accumulated since the last power-up.
This tool displays the control’s voltage and the average current being drawn from the power
supply.
This tool allows the voltage on each zone to be displayed in real time. It changes as contacts
or devices are violated. Press the RIGHT arrow key to begin.
Use the UP or DOWN keys to scroll through each zone. The displayed information consists of:
the present zone voltage, the L low and H high alarm thresholds, and the analog (A to D)
equivalent of the zone voltage..
This is a read only screen displaying the telephone line voltage during the last on-hook
condition. It is an approximate measurement accurate to only +-20%.
85-Connect ‘RP’
Remote Program
2:LCD Test
3:Communicator
Manual Test
1:Seize Line
Attended Mode
2:Seize Line
UnAttended Mode
86-System
Diagnostics
1:DataBusErrors
T2A1 Retry 00000
2:Sys Volt/Curr
13.8V 0.440Amps
3:Zone=001 Volts
Display Level
4:LastOnHookTele
Line V=57,+-20%
Zn=001 Volt=07.2
L04.6 H09.0 A132
1:Battery Test
for 30 Seconds
84-System
Tests
Send Test
Silently
Send Test w/
speaker monitor
Turn Butt Set
Monitor Mode On
Clear Pending
Dialer Reports

NESS - M1 Installation and Programming Manual Page 19
9-Installation
Programming (0)
87-Custom
Message Record
This option is used in conjuction with a house telephone (microphone) to record up to 10
custom voice messages. Each message occupies a 6 second block. Two or more
consecutive blocks may be linked together for longer times. Total record time cannot exceed
60 seconds. These messages require the Ness-RP software, which utilize these messages
together with the built-in 500+ word vocabulary to construct voice phrases for many uses,
including the voice dialer. Press the RIGHT arrow key to begin custom message record.
Selects any one of the custom messages (VM01-VM10) for playback or recording. Press the
UP or DOWN arrow keys to select. To Play the selected message press the RIGHT arrow key.
The message will play through Output 1 speakers. To record a new message press the LEFT
arrow key. To exit press the * key.
This sets the number of consecutive 6 sec. record blocks. The default is 01 blocks which is
normally long enough for most applications. However, to create a longer message press the
RIGHT arrow key and enter the number 01 to 02, etc. NOTE: Creating longer messages
reduces the total number of custom messages. This screen also allows all messages to be
played “PlayAll” by pressing the RIGHT arrow key. When ready to record press the LEFT arrow
key.
This is the prerecord screen. To begin recording: 1) lift the house phone (off hook), 2) press
the LEFT arrow key, 3) start speaking. To stop recording press the “0” key. If stop is not
pressed, recording will automatically end after 6 sec. (or the total number of blocks times 6
seconds).
NOTE: A local house phone is used as the microphone. Installer programming menu 07,
option 1, must be set to a 1 in order for the local phone to be recognized by the control.
This will display as soon as recording has stopped. To play the new message press the
RIGHT arrow key. To record the message again press the LEFT arrow key and follow the
same procedures again. To exit press the * key.
VM01 1 Block(s)
Record< Play>
6 Sec Blocks=01
Record< PlayAll>
6 Sec Blocks=01
Rec< LiftPhone!
VM01 1 Block(s)
Record< Play>
Step by step summary of procedures for recording a custom message:
1) Verify that a house telephone is connected to the control’s T1 and R1 terminals and that Installer menu 07, option 1
is set to a 1. This allows the control to recognize the telephone and allow it to be used as a microphone.
2) Go to the user menu 8-System Settings by pressing the ELK key and entering 8. Press the r key and enter a valid
user code. Press 87 to reach the custom message record screen.
3) Using the Up/Down arrow keys, select the voice message to record VM01 to VM10. There are 10 custom
messages.
4) Press the l key and select the number of 6 second blocks for your message. Hint-rehearse and time the message,
if it is greater than 6 seconds then increase the number of consecutive blocks as required.
5) Lift the telephone handset and press the l key to begin the recording. The recording will not start until the handset
is off-hook and the l key is pressed.
6) Record your message by speaking into the handset. If the message is shorter than the amount of time selected
then press 0 to stop recording. Otherwise, recording will stop when the number of blocks is reached.
7) Press the Right arrow key to play the message. The message will be heard through the telephone handset if it is
still off-hook. Otherwise the message will be directed to the amplifier connected to output 1.
Requires
Installer
Code
From this menu you may press the RIGHT arrow to enter Installation Level Programming. If
the Installer Programming Code has not already been entered it will be required at this time.
REFER TO PAGE 22 FOR PROGRAMMING INSTRUCTIONS
NOTE: The Remote Programming RP software can be used to lockout certain local program
capabilities for “anti-takeover” purposes. The number in the lower right corner of this menu will
indicate the level of lockout as follows:
(0) = No lockout,
(1)=Lockout Telephone number programming - view everything,
(2)=Lockout ALL programming - view everything,
(3)=Lockout ALL Programming and Viewing. This can only be set or removed from the Ness-
RP Remote Programming Software.

NESS - M1 Installation and Programming Manual
Page 20
This menu allows the keypad to be mapped temporarily to any other area, allowing multi-
area (partitioned) operation. The mapped area can be armed, disarmed, and otherwise
controlled just as if the keypad were permanently assigned to that area. It may also be
used to display a snapshot of all areas at once, showing the status of each area at once.
Press the RIGHT arrow key to select and display the following screen.
Enter a valid user code. The control does not allow (restricts) mapping or viewing of
areas that are not authorized for the user code. The following screen will be displayed:
MAPPING TO AN INDIVIDUAL AREA
Enter the area number to be mapped OR scroll UP and DOWN with the arrow keys.
Pressing the Exit or * key will map the Keypad to the area shown. The keypad will now
display the status, including LEDs and the LCD screen of the mapped area. For the next
1 minute it will be possible to arm, disarm, bypass, etc. the mapped area from this
keypad. The 1 minute will be extended with each keypress. The keypad will return to its
primary assigned area after 1 minute of no keypress activity.
MAPPING TO A CONSOLIDATED DISPLAY OF ALL AREAS
Pressing the r RIGHT arrow key will map the Keypad to a consolidated ‘snapshot’
display of all areas which the user code was authorized to operate. This display permits
quick arming and disarming only. If a area is not ready to arm it will be necessary to map
individually (see steps above) to that area to view the violated zone(s) and either secure or
bypass them prior to arming.
The example at left shows that the user code was authorized for all 8 areas, as indicated
by a letter beneath each of the 8 area numbers. The letters show the status of each area.
A lower case “r” means the area is Ready to Arm, a lower case “n” means Not Ready, a
upper case “A” means Armed, and a upper case “X” means that area is the primary area
assigned to the Keypad which cannot be operated from the consolidated display.
The example at left shows that the user code was only authorized for areas 1, 2, and 3.
The unauthorized area(s) have a “-” beneath them.
To change (toggle) the arm status of an area, press the number key representing the area
number. IMPORTANT: The area status is not “real time”. It is a snapshot taken when the
r RIGHT arrow key was pressed. If a zone has since become violated the area will still
be displaying “r”, however the letter will immediately change to “n” and the keypad will emit
an error tone when an attempt is made to arm by pressing the area number.
0-Select Keypad
Alternate Area
Auth. Required
Enter Valid Pin
Select Area- 1
[Area Name]
READY TO Arm
[Area Name]
Multi-area (Partition) Operation
Select Area- 1
[Area Name]
Area# 12345678
Status= Xr r r r r r r
Area# 12345678
Status= Xr r - - - - -
NOTE: This is a new feature which became available with firmware release version 4.2.5. The
firmware may be flash upgraded in older controls to add this capability.
This manual suits for next models
1
Table of contents
Other Ness Control Panel manuals

Ness
Ness 5000 Series User manual

Ness
Ness D-8 User manual
Ness
Ness D8X Assembly instructions
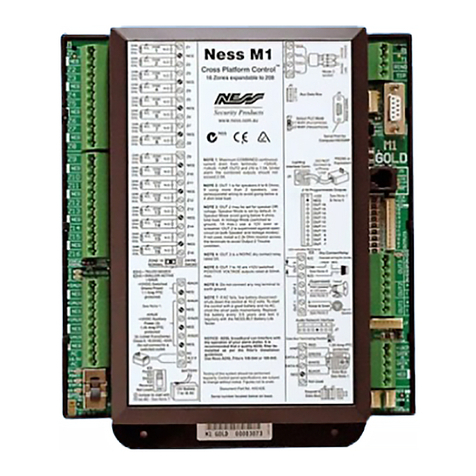
Ness
Ness M1 Navigator Instruction Manual
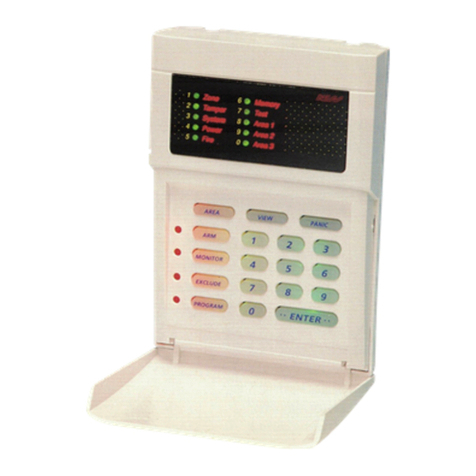
Ness
Ness pro-lx User manual
Ness
Ness L-8 User manual
Ness
Ness D-8 User manual

Ness
Ness D-8 Assembly instructions

Ness
Ness D-8 Assembly instructions
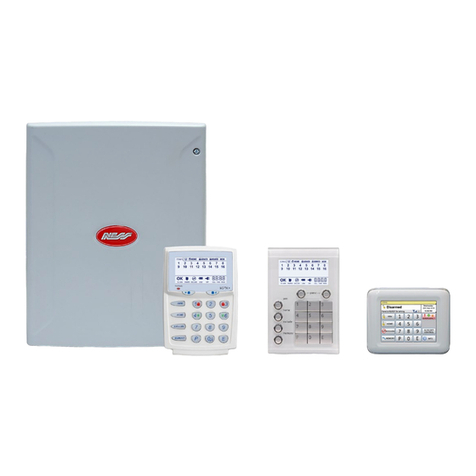
Ness
Ness D16 Assembly instructions
Popular Control Panel manuals by other brands
Siemens
Siemens FIREFINDER-XLS Installation, operation and maintenance manual

Tangent Wave
Tangent Wave CP300 user manual
Proteco
Proteco Q45 new instruction manual

Viessmann
Viessmann Vitotronic 200 GW1 operating instructions

American Standard
American Standard NEXIA ACONT624AS42DA user guide

Nordelettronica
Nordelettronica NE274-TVDL instruction manual
