manuals.online logo
Brands
  1. Home
  2. •
  3. Brands
  4. •
  5. New Holland
  6. •
  7. Farm Equipment
  8. •
  9. New Holland CX Series Reference guide

New Holland CX Series Reference guide

QUICK REFERENCE CARD – NEW HOLLAND CX COMBINES
Form 147074 Rev. E (E27025) Page 1 of 4
J
B
A
2
3
A B
1” to 2”
(25 to 50 mm)
DRUM
FLOATED UP
X = 225 mm
(
factor
y
settin
g)
.
X
Combine Initial Settings

Install feeder plate extension (G). Move feeder bottom
shaft to the front hole (Cereal Position) (H).

Adjust the bottom shaft float to 3-1/2” (90mm) at (A).
Adjust the feeder chain tension according to the gauge
on the spring (B).

Ensure feeder house output shaft speed is 575 rpm.

Fully retract header tilt cylinder and lower header until it
slightly contacts the ground. At this point adjust feeder
faceplate angle to align pendulum with rear face of
adapter (if applicable).

Remove all feeder house dust shields, enclosure panels, etc.
873 Adapter Initial Settings

Place adapter leg pin in proper hole for your header
model as follows:
•
963/972/973/974/84C headers in hole (B), (factory set)
with dust shields and hole (A) with dust shields
removed.

Place adapter down stop pin in proper hole for your
header model as follows:
•
973/974/84C headers in hole (2), (factory set).
•
963/972 headers in hole (3).

If mounting adapter to a header, ensure down stop pads are
orientated properly.
•963/972/973 header with dust shields removed and 973
with dust shields on, orientation is correct as shipped (D).
•963/972 with dust shields on, orient pads to position (F).
•974/84C headers, orient pads to position (E).

For 972/973/974/84C - Install skid plate on adapter feed pan so
dim. D = 4-11/32” (110 mm) in Hole B (dust shields installed). For
963 - Slide transition plate forward until feed pan bolts hit front of
slot.
For 972/973/974/84C – Install skid plate on adapter pan so
dim. D = 3-1/2” (90 mm) in Hole A (dust shields removed). For
963 - Slide transition plate rearward until feed pan bolts hit rear
of slot.
•Refer to 873 Operators Manual for adjustment details.

Adjust RTD position to achieve 1” to 2” dimension.
Note: To achieve this feed chain on combine may need to
be fully extended.
H
G
D
Pendulum must line
up with rear face of
adapter frame.
QUICK REFERENCE CARD – NEW HOLLAND CX COMBINES
Form 147074 Rev. E (E27025) Page 2 of 4
873 Adapter Initial Settings
(continued)
Set the center link between the header and
adapter to 19-1/4” (490 mm) length (pin to
pin).
Set the float to specs given on pages 3 & 4.
Set the draper speed flow control so number
“4” is at the 12 o’clock position.
Header Initial Settings
See page 4 for 963 Header
For 973/974/84C Model Headers: Set the
center delivery opening to 55.5” (1410 mm).
Position the decks so there is equal
overlap of adapter feed draper each
side.
Align the vertical edge of the rear deflectors
on the feed pan just inside the edge of the
feeder house opening to ensure smooth
crop flow.
Re-check skid plate clearance (set during
873 initial settings) with adapter inserted in
header. (see appropriate dimensions below)
Refer to 873 Operator’s Manual for further
details.
Gauge wheels are intended to help float the
header when cutting off the ground. For
such applications set gauge wheels in the
Short – Tall setting depending on cut height.
Note: When cutting on the ground place
gauge wheels in the storage position.
Pickup Reel Initial Settings

See page 4 for 963 Header

Install bolt (C) through the cam arm with head
inboard and torque to 120 ft. lbs. (162 N·m.)

Adjust the finger pitch to position 5.

Set the fore/aft position to between 4and 5on
the gauge decal at left reel support arms.

Reel finger to sickle guard minimum clearance with
reel fully lowered is 5/8” (15mm), measured at
both ends of the cutterbar for 973 headers. For
974/84C headers, flex to full frown when
checking clearance at hinge points.

Recommended reel speed is 10% above ground
speed.
C
55.5”
(
1410 mm
)
973/974/84C
QUICK REFERENCE CARD – NEW HOLLAND CX COMBINES
Form 147074 Rev. E (E27025) Page 3 of 4
973/2052 & 974/2062/84C Initial Set-up
Rice Soybeans
Average Cereal Crops
Normal Cutting Tough Cutting Dry Conditions Wet
Conditions
Sickle- Check daily that guards are
aligned. Clearance from hold down
to sickle 0.020” (0.5mm)
- - -
-
2100 reel Fore/Aft- 4 or 5 on decal
Finger Pitch Adjustment- Slot 5
Reel Clearance- 5/8” (15mm) for
973/2052 headers and at hinge
points for 974/2062/84C headers in
full frown. Refer to 973/974
Operator’s Manual.
Speed- +10 % ground speed.
5
-
-
-
7
-
-
-
6
Slot 7
½” (13mm)
-
6
Slot 7
½” (13mm)
-
Draper Speed- Dial position “4”.
Draper opening- 55” (1410 mm)
Reduce opening if side drapers are
back feeding.
-
-
Position 3 or 4
50.6” (1285 mm)
-
-
-
-
Guard Angle- center link 19-¼”
(490 mm) length (pin to pin).
Poly Skids- Optional on 973/2052
-
Yes
-
Yes
-
Yes
Center link fully
retracted.
Yes
Gauge Wheels (if equipped)-
Most cereals require “medium”
stubble height setting
Note: Gauge wheels should be in
storage position for on the ground
cutting applications.
Not Applicable Not Applicable Storage Storage
Float- Adjust float to achieve 0” gap
at downstop pad. (Refer to 873
Operator’s Manual)
½” gap ½” gap ½” gap ½” gap
QUICK REFERENCE CARD – NEW HOLLAND CX COMBINES
Form 147074 Rev. E (E27025) Page 4 of 4
963/2042 Initial Set-up. Field Peas Soybeans
Average Cereal Crops Dry Conditions Wet Condition Dry Conditions Wet Condition
Sickle-Check daily that guards are
aligned. Clearance from hold down
to sickle 0.020” (0.5mm) - - - -
2000B Reel Fore/ Aft-5
th
hole/frt.
Cam Arm-Y
Range Slot- P
Finger Pitch- L or M
Reel Clearance- 2” (50 mm)
Speed- +10% of ground speed
2
nd
from front
Y
Q
M
2” (50mm)
-
2
nd
from front.
Y
P
J
2” (50mm)
-
2
nd
from front
X
P
M
2” (50mm)
-
2
nd
from front.
X
P
M
2” (50mm)
-
Draper Speed- Dial position “4”.
Draper opening- 53.5” (1360 mm)
-
-
-
-
-
-
-
-
Guard Angle- 1.0” (25mm) of
threads showing on center link.
Poly Skids- None
-
Yes
-
Yes
-
Yes
Center link fully
retracted.
Yes
Gauge Wheels (if equipped)-
Most cereals require “position 2”
stubble height setting.
Note: Gauge wheels should be in
storage position for on the ground
cutting applications.
Storage Storage Storage Storage
Float- Adjust float to achieve 0” gap
at downstop pad. (Refer to 873
Operator’s Manual)
½” gap ½” gap ½” gap ½” gap
Y
53.5
(1360 mm)
963/2042
Storage position
for on ground
application

Other New Holland Farm Equipment manuals

New Holland MegaCutter 512 User manual
New Holland

New Holland MegaCutter 512 User manual

New Holland TT45A Operating instructions

New Holland

New Holland TT45A Operating instructions

New Holland D150B User manual

New Holland

New Holland D150B User manual

New Holland CornMaster 9208-22 User manual

New Holland

New Holland CornMaster 9208-22 User manual

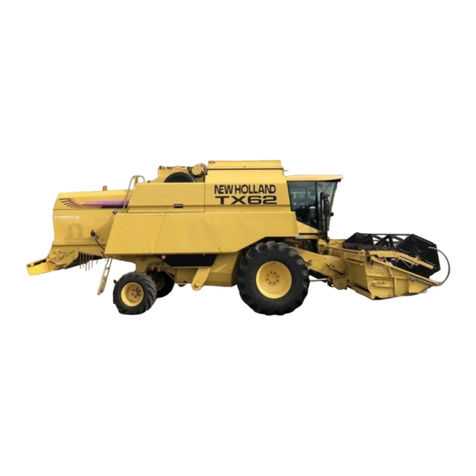
New Holland TX62 User manual

New Holland

New Holland TX62 User manual

New Holland MZ19H Operating instructions
New Holland

New Holland MZ19H Operating instructions

New Holland 1037 User manual

New Holland

New Holland 1037 User manual

New Holland Harvester 1900 User manual

New Holland

New Holland Harvester 1900 User manual

New Holland TH Telehandler User guide

New Holland

New Holland TH Telehandler User guide

New Holland TC48DA Operating instructions

New Holland

New Holland TC48DA Operating instructions

New Holland 130 User manual

New Holland

New Holland 130 User manual

New Holland W130D User manual

New Holland

New Holland W130D User manual

New Holland T7.175 User manual

New Holland

New Holland T7.175 User manual
New Holland FR Manual

New Holland

New Holland FR Manual

New Holland 140TL User manual

New Holland

New Holland 140TL User manual

New Holland FR480 Tier 4B User manual

New Holland

New Holland FR480 Tier 4B User manual

New Holland H8060 User manual

New Holland

New Holland H8060 User manual

New Holland 330GM User manual

New Holland

New Holland 330GM User manual

New Holland FR480 Forage Cruiser User manual
New Holland

New Holland FR480 Forage Cruiser User manual

New Holland Speedrower 200 User manual

New Holland

New Holland Speedrower 200 User manual

New Holland T8010 User manual

New Holland

New Holland T8010 User manual

New Holland Guardian SP.240R Tier 3 User manual

New Holland

New Holland Guardian SP.240R Tier 3 User manual

New Holland H9870 User manual

New Holland

New Holland H9870 User manual

New Holland SF110 Operating instructions

New Holland

New Holland SF110 Operating instructions

Popular Farm Equipment manuals by other brands

GREAT PLAINS YP4425A operating manual

GREAT PLAINS

GREAT PLAINS YP4425A operating manual

KUHN GMD16 Operator's manual

KUHN

KUHN GMD16 Operator's manual

TATU LTA 3000 instruction manual

TATU

TATU LTA 3000 instruction manual

MacDon FD75 Operator's manual

MacDon

MacDon FD75 Operator's manual

MacDon Swath Compressor Operation and parts manual

MacDon

MacDon Swath Compressor Operation and parts manual

BLU-JET GALAXY Assembly and operators manual

BLU-JET

BLU-JET GALAXY Assembly and operators manual

AGRO-MASZ POM2 instruction manual

AGRO-MASZ

AGRO-MASZ POM2 instruction manual

Smithco 1004 Operator's manual

Smithco

Smithco 1004 Operator's manual

Rabe Super Albatros 140 RMW+ operating instructions

Rabe

Rabe Super Albatros 140 RMW+ operating instructions

Landoll VT Plus 7431 Operator's manual

Landoll

Landoll VT Plus 7431 Operator's manual

Multiva DM300 Operation and maintenance manual

Multiva

Multiva DM300 Operation and maintenance manual

Ferrari F-MAX Operating and service manual

Ferrari

Ferrari F-MAX Operating and service manual

KIFCO Water-Reel T/E210L Assembly instructions

KIFCO

KIFCO Water-Reel T/E210L Assembly instructions

Hexagon Titanium7 user manual

Hexagon

Hexagon Titanium7 user manual

Omlet Eglu Go 2m Run instruction manual

Omlet

Omlet Eglu Go 2m Run instruction manual

Farmet SOFTER SF800PRO quick start

Farmet

Farmet SOFTER SF800PRO quick start

Michel's MIC210 instructions

Michel's

Michel's MIC210 instructions

Finn HydroSeeder T170 ML Operator Instructions And Parts Manual

Finn

Finn HydroSeeder T170 ML Operator Instructions And Parts Manual

manuals.online logo
manuals.online logoBrands
  • About & Mission
  • Contact us
  • Privacy Policy
  • Terms and Conditions

Copyright 2025 Manuals.Online. All Rights Reserved.