manuals.online logo
Brands
  1. Home
  2. •
  3. Brands
  4. •
  5. New Holland
  6. •
  7. Farm Equipment
  8. •
  9. New Holland TT45A Operating instructions

New Holland TT45A Operating instructions

87655301 3/07
1st Printing
©2007 CNH America LLC
Printed In U.S.A.
TT45A, TT50A
REPAIR MANUAL
COMPLETE CONTENTS
SECTION 00 - GENERAL 2............................................
SECTION 10 - ENGINE 3..............................................
SECTION 18 - CLUTCHES 10...........................................
SECTION 21 - TRANSMISSION SYSTEM 11..............................
SECTION 27 - MECHANICAL REAR WHEEL DRIVE 13....................
SECTION 31 - POWER TAKE-OFF 15....................................
SECTION 33 - BRAKING SYSTEM 16....................................
SECTION 35 - HYDRAULIC SYSTEM 16..................................
SECTION 41 - STEERING SYSTEMS 19..................................
SECTION 44 - FRONT AXLE 20.........................................
SECTION 55 - ELECTRICAL SYSTEM 21.................................
SECTION 90 - BODYWORK 27..........................................
The following pages are the collation of the contents pages from each section and
chapter of the TT45A, TT50A Repair manual. Complete Repair part # 87655297.
The sections used through out all New Holland product Repair manuals may not be
used for each product. Each Repair manual will be made up of one or several books.
Each book will be labeled as to which sections are in the overall Repair manual and
which sections are in each book.
The sections listed above are the sections utilized for the TT45A, TT50A Tractors.
SECTION 10 -- ENGINE -- CHAPTER 1
10-25
86071893
6
1
7
3
49
8
5
2
5
SEPARATING THE TRACTOR AT THE
CLUTCH HOUSING/ENGINE –
8x2TRANSMISSION
Disassembly
1. Disconnect the negative (--) battery cable, and
the positive (+) battery cable from the battery, 1.
2. Disconnect the headlight wiring harness, 2, and
remove the hood, 3.
3. If equipped, remove the remote loader control
valve, and all the connecting hydraulic tubes
from the right side loader tower.
4. Remove the LH and RH engine side covers, 4.
5. Remove the LH, RH and center rear hood
panels, 5.
6. Remove the steering wheel, 6.
7. Remove the instrument panel, 7, from the dash
housing. Disconnect all electrical connectors
from the instrument panel.
8. Remove the dash housing, 8, from the firewall.
Disconnect all electrical connectors from the
dash housing.
9. Disconnect electrical harness to the starter, 9.
SECTION 10 -- ENGINE -- CHAPTER 1
10-26
86071894
10 13
15
14
12
11
6
10. Disconnect and remove the throttle cable from
the dash mounted throttle control lever, 10.
11. Disconnect and remove the throttle cable from
the foot control pedal, 11.
12. Drain fuel from fuel tank, 12, into a suitable
container. Remove fuel tank from firewall.
13. Remove the firewall, 13, from the tractor.
14. Disconnect all hydraulic tubes 14, to the
hydraulic pump, 15.
SECTION 10 -- ENGINE -- CHAPTER 1
10-27
15. Attach a chain sling to the two hoist eyes, 1.
16. Attach a suitable hoist to the chain sling.
NOTE: The hoist is used for supporting the engine
and axle assembly, not necessarily for lifting.
17. Roll a floor jack under the rear of the tractor, and
place under the clutch housing. Raise the jack
enough to support the drive train.
86071896
1
7
18. Remove the buckle-up bolts, 1, and starter, 2,
that secure the engine, 3, to the clutch housing,
4.
NOTE: The hoist and/or floor jack may need to be
raised or lowered to allow for separation of the
engine and clutch housing.
19. Carefully roll the drive train away from the
engine, using the floor jack for support.
86071895
2
1
3
4
8
SECTION 10 -- ENGINE -- CHAPTER 1
10-28
SEPARATING THE TRACTOR AT THE
ENGINE/FRAME
Removal
1. Use jack stands under the frame rails to support
the front frame/engine assembly.
WARNING
Make sure the front frame/engine assembly is
securely supported before removing the engine.
2. Remove the chain sling from the two hoist eyes
on the engine.
3. Drain the hydraulic fluid from the power steering
reservoir, 1, into a suitable container. Remove
the reservoir, 1, and mounting bracket from the
engine.
1
86061281
9
4. Remove the air cleaner assembly, 1, from the
tractor.
5. Remove the muffler and tailpipe assembly, 2,
from engine.
6. Loosen the lower radiator hose, 3, and drain the
coolant into a suitable container.
7. Remove the lower, 3, and upper, 4, radiator
hoses.
8. Remove the radiator, 5, from the tractor.
86071897
5
1
3
2
4
10
SECTION 10 -- ENGINE -- CHAPTER 1
10-29
9. Attach a chain sling to the two hoist eyes, 1.
10. Attach a suitable hoist to the chain sling, and
raise the engine enough to support the engine.
86071896
1
11
11. Loosen and remove the engine mounting bolts,
1, on both sides of the frame.
12. Carefully lift the engine from the frame.
13. Attach the engine to a suitable engine stand.
14. With the engine securely attached to the engine
stand, remove the chain sling from the two
engine hoist eyes.
86071898
1
12
Installation
1. Attach a chain sling to the two hoist eyes.
2. Attach a suitable hoist to the chain sling, and
raise the engine enough to support the engine.
3. Remove the engine from the engine stand.
4. Using a hoist, position the engine in the frame,
aligning the mounting holes in the frame with the
mounting holes in the engine.
5. Install the engine mounting bolts, 1, on both sides
of the frame. Tighten the mounting bolts to 139 –
175 N⋅m (102 – 129 ft-lb).
6. With the engine securely installed into the frame,
remove the chain sling from the two engine hoist
eyes.
86071898
1
13
SECTION 10 -- ENGINE -- CHAPTER 1
10-30
7. Reinstall the radiator, 1, into the tractor.
8. Reinstall the lower, 2, and upper, 3, radiator
hoses.
9. 9. Fill the radiator, 1, with new coolant to the
proper level.
10. Reinstall the muffler and exhaust pipe, 4, onto
the exhaust manifold.
11. Reinstall the air cleaner assembly, 5, onto the
engine.
86071897
12
4
5
3
14
12. Reinstall the power steering reservoir and
mounting bracket, 1, onto the engine. Reconnect
the hydraulic lines to the reservoir.
13. Refill the reservoir to the proper level with Ambra
Multi G 134.
1
86061281
15
ATTACHING THE TRACTOR AT THE
CLUTCH HOUSING/ENGINE --
8x2TRANSMISSION
Assembly
WARNING
Do not use the buckle-up bolts to draw the drive
train together with the engine. Severe damage to
the drive train may result.
1. Attach a chain sling to the two hoist eyes, 1.
2. Attach a suitable hoist to the chain sling.
3. Carefully roll the drive train into alignment with
the engine. Align the splines on the 8 x 2 input
shaft with the clutch and the engine flywheel.
Rotate the engine fan to align the input shaft and
the clutch/flywheel. The floor jack or hoist may be
needed to raise or lower the engine to make
alignment possible.
86071896
1
16
SECTION 10 -- ENGINE -- CHAPTER 1
10-31
4. Connect the clutch housing, 1, to the engine, 2,
and install the bucket-up bolts, 3.
5. Reinstall the starter, 4, and secure with the
retaining nuts. Connect the wiring harness, 5, to
the starter.
6. Tighten the buckle-up bolts, 3, in a criss--cross
pattern. Torque the M10 bolts and nuts to 68 N⋅m
(50 ft-lb) Torque the two M12 bolts to 81 N⋅m(60
ft-lb).
7. Remove the chain hoist and sling from the engine
hoist eyes. Remove the floor jack from under the
tractor. 86071895
54
3
1
2
17
SECTION 10 -- ENGINE -- CHAPTER 1
10-32
86071894
1
63
2
4
5
18
8. Reconnect all hydraulic tubes, 1, to the hydraulic
pump, 2.
9. Reattach the firewall, 3, to the tractor.
10. Reattach the fuel tank, 4, to the firewall.
Reconnect fuel lines to the fuel shut--off valve
and tank vent.
11. Reattach the throttle cable to the foot control
pedal, 5.
12. Reattach the throttle cable to the dash mounted
throttle control lever, 6.
Thank you very much
for your reading.
Please click here to buy
After you pay.
Then, you can
download the complete
manual instantly.
No waiting.

Other manuals for TT45A

1

This manual suits for next models

1

Other New Holland Farm Equipment manuals
New Holland 140TL User manual

New Holland

New Holland 140TL User manual
New Holland MegaCutter 512 User manual
New Holland

New Holland MegaCutter 512 User manual

New Holland T7.175 User manual

New Holland

New Holland T7.175 User manual

New Holland P2350 User manual

New Holland

New Holland P2350 User manual

New Holland F106.6 User manual

New Holland

New Holland F106.6 User manual
New Holland T8010 User manual

New Holland

New Holland T8010 User manual

New Holland FR480 Tier 4B User manual

New Holland

New Holland FR480 Tier 4B User manual

New Holland CX720 User manual

New Holland

New Holland CX720 User manual

New Holland H9870 User manual

New Holland

New Holland H9870 User manual

New Holland W130D User manual

New Holland

New Holland W130D User manual

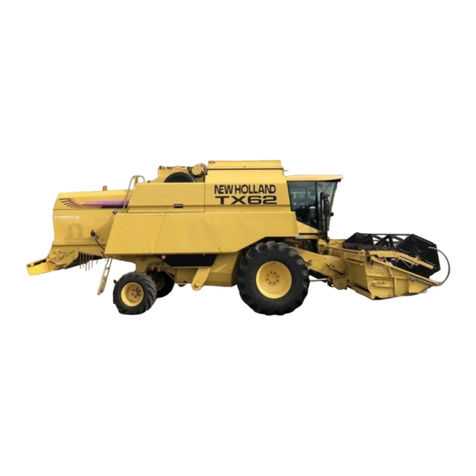
New Holland TX62 User manual

New Holland

New Holland TX62 User manual

New Holland CR8.90 User manual

New Holland

New Holland CR8.90 User manual

New Holland Haybine 499 User manual

New Holland

New Holland Haybine 499 User manual

New Holland FR9040 User manual

New Holland

New Holland FR9040 User manual

New Holland CR920 Operating instructions

New Holland

New Holland CR920 Operating instructions

New Holland 300FP User manual

New Holland

New Holland 300FP User manual

New Holland AutoCommand T7.275 User manual

New Holland

New Holland AutoCommand T7.275 User manual

New Holland SF110 Operating instructions

New Holland

New Holland SF110 Operating instructions

New Holland MZ19H Operating instructions

New Holland

New Holland MZ19H Operating instructions

New Holland 9090X User manual

New Holland

New Holland 9090X User manual

New Holland 16LA User manual

New Holland

New Holland 16LA User manual

New Holland T8010 User manual

New Holland

New Holland T8010 User manual

New Holland Guardian SP.240R Tier 3 User manual
New Holland

New Holland Guardian SP.240R Tier 3 User manual

New Holland P2070 User manual

New Holland

New Holland P2070 User manual
Popular Farm Equipment manuals by other brands

DALBO ROLLOMAXIMUM XL manual

DALBO

DALBO ROLLOMAXIMUM XL manual

Spraying Systems TeeJet Aeros 9040 user guide

Spraying Systems

Spraying Systems TeeJet Aeros 9040 user guide

Milky AR 140 E operating instructions

Milky

Milky AR 140 E operating instructions

Amazone AMASPRAY+ Operator's manual

Amazone

Amazone AMASPRAY+ Operator's manual

Outback STX Quick reference guide

Outback

Outback STX Quick reference guide

AGCO Glencoe DR8700 Operator's manual

AGCO

AGCO Glencoe DR8700 Operator's manual

Redexim MULTIVATOR 1800 user manual

Redexim

Redexim MULTIVATOR 1800 user manual

McHale F5000 RE-ASSEMBLY INSTRUCTIONS

McHale

McHale F5000 RE-ASSEMBLY INSTRUCTIONS

Farmet SOFTER 4P operating manual

Farmet

Farmet SOFTER 4P operating manual

Producer's PRIDE 1237322 manual

Producer's PRIDE

Producer's PRIDE 1237322 manual

LOFTNESS 61G4 Series Owner's manual and parts book

LOFTNESS

LOFTNESS 61G4 Series Owner's manual and parts book

MacDon 2000-B Operator's manual

MacDon

MacDon 2000-B Operator's manual

Redlands SBA 330 Operator's manual

Redlands

Redlands SBA 330 Operator's manual

Landoll 1230 Series Operator's manual

Landoll

Landoll 1230 Series Operator's manual

J&M 1326 Operator's manual

J&M

J&M 1326 Operator's manual

Unverferth PARKER 524 manual

Unverferth

Unverferth PARKER 524 manual

Vitax Supaturf BRITELINER 400 Series Operator's manual

Vitax

Vitax Supaturf BRITELINER 400 Series Operator's manual

Ferrari FX Operating and service manual

Ferrari

Ferrari FX Operating and service manual

manuals.online logo
manuals.online logoBrands
  • About & Mission
  • Contact us
  • Privacy Policy
  • Terms and Conditions

Copyright 2025 Manuals.Online. All Rights Reserved.