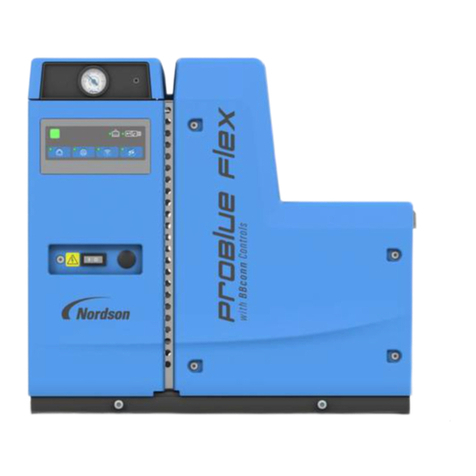
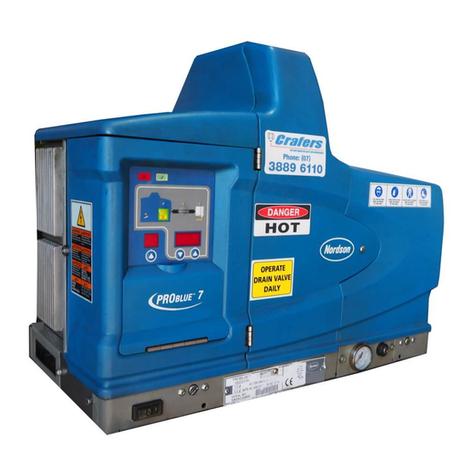
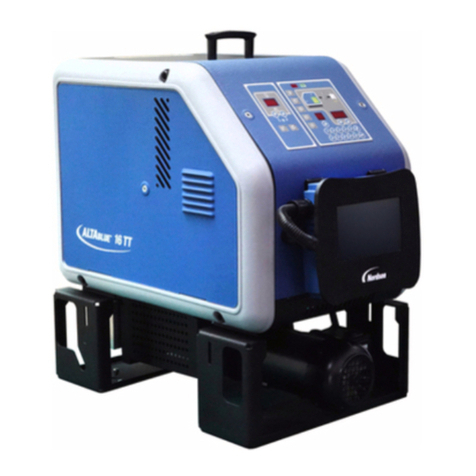
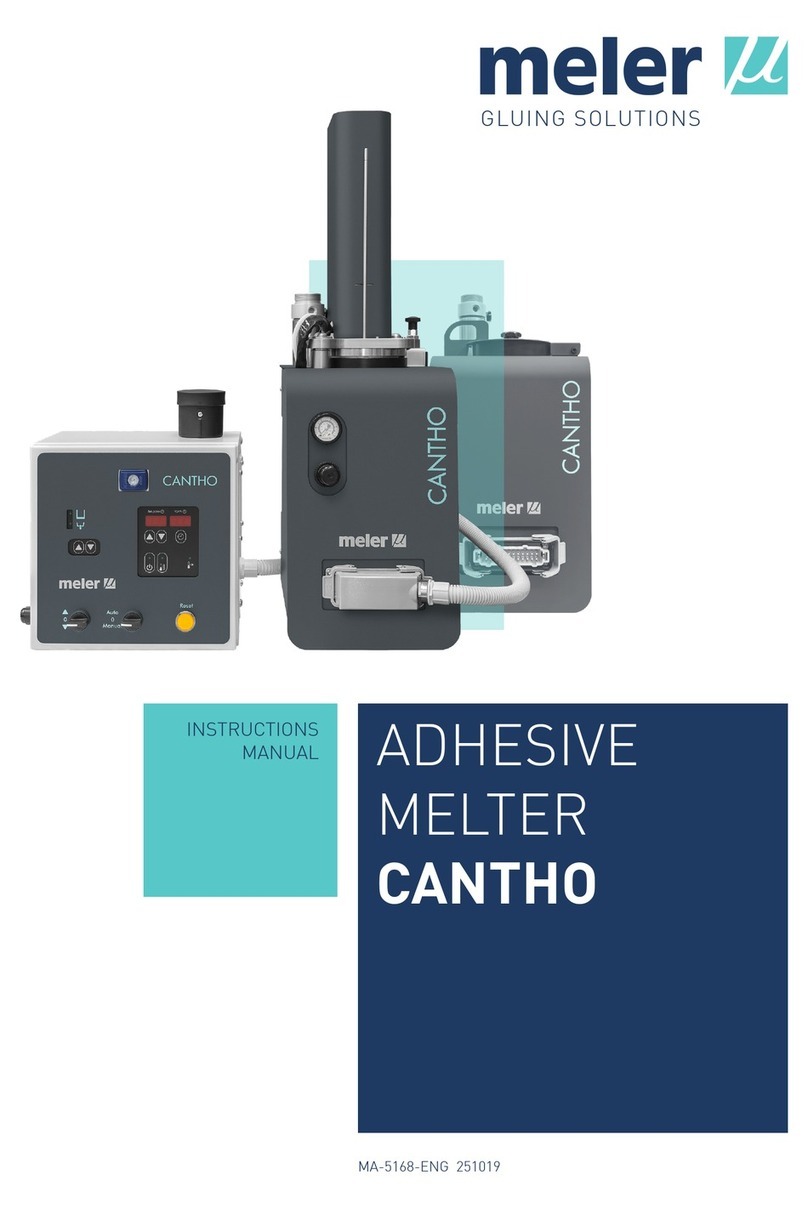
Nordson ProBlue Flex User manual

ProBlue Flex Adhesive Melter
with BBconn Controls
Core Customer Product Manual
Part 1128350_02
Issued 06/20
NORDSON CORPORATION DULUTH, GEORGIA USA
www.nordson.com
This document contains important safety information.
Be sure to read and follow all safety information in this
document and any other related documentation.

Part 1128350_02 E2020 Nordson Corporation
All rights reserved
Nordson Corporation welcomes requests for information, comments, and inquiries about its products. General information
about Nordson can be found on the Internet using the following address: http://www.nordson.com.
Address all correspondence to:
Nordson Corporation
Attn: Customer Service
11475 Lakefield Drive
Duluth, GA 30097
Notice
This is a Nordson Corporation publication which is protected by copyright. Original copyright date 2019.
No part of this document may be photocopied, reproduced, or translated to another language without the prior written
consent of Nordson Corporation. The information contained in this publication is subject to change without notice.
Trademarks
4800INTEGRA,Allegro,Apogee,Artiste,Asymtek,Automove,Avex,BaitGun,BKG,BlueBox,BM-32,BM-58,BM-63,Bowtie,
Build-A-Part, CF, Century, CleanSleeve, CleanSpray, Color-on-Demand, ColorMax, Conexis, Connections to Life, Contour, Control Coat,
Coolwave, Cross-Cut, CrystallCut, Dage, Dial-A-Dose, Dima, DispenseJet, DispenseMate, DuraBlue, DuraDrum, DuraPail, e.dot,
e-stylized,EasyCoat,Easymelt,Ecodry,Econo-Coat,EDI,EFD,Eliminator,Encore,Equatherm,Excel2000,Fibrijet,Flextrak,Fluidmove,
FoamMelt,FoamMelt-stylized,FoamMix,Freedom,Fulfill,HDLV,Heli-flow,iControl,iDry,iFlow,IntelliJet,Isocore,Iso-Flo,iTrax,KISS,
LeanCell,LogiComm,March,Matrix,MatriX,Maverick,MeasuringtheInvisible,MEG,Meltex,MicroCoat,MicroMark,Micromedics,
Micro-Meter, Microshot, Millennium, MiniBlue, Mini Squirt, NexJet, No-Drip, Nordson, Nordson - stylized, Nordson and Arc, NYTVision,
OptiMix,Optima,Optimum,Packageof Values,Paragon,PermaFlo,PICO,PicoPulsePlasmod,Poly-Check,PolymerSolutionCasting,
Porous Coat, Posi-Dose, PowderGrid, Precisecoat, PrintPlus, ProBlue, ProBlue Liberty, Prodigy, Pro-Flo, Program-A-Bead,
Program-A-Shot,Program-A-Stream,Program-A-Swirl,Pro-Meter,Pulsar,Quantum,Ratio-Pak,RBX,RediSet,Rhino,Saturn,
Saturn with Rings, Scoreguard, Sealant Equipment & Engineering, Inc., SEE (and design), See-Flo, Select Charge, Select Coat,
Select Cure, Servo-Flo, Shot-A-Matic, Signature - stylized, Slautterback,Smart-Coat,Smart-Gun,SolderPlus,Spectrum,Speed-Coat,
StediFlo,Stratablend,SureBead,SureCoat,SureWrap,Symphony,Tip-Seal,TRAK,Tribomatic,Trilogy,TrueBlue,TrueCoat,Turbo,
Ultra, u-TAH, Value Plastics, Vantage, Vention Medical, Vention Medical Advancing Your Innovations For Health, VersaBlue, Versa-Coat,
VersaDrum, VersaPail, Versa-Spray, VP stylized, When you expect more., X-Plane, Xaloy, Xaloy - stylized, YesTech, and
2 Rings (design) are registered trademarks of Nordson Corporation.
Accubar, Active Nozzle, Advanced Plasma Systems, AeroDeck, AeroWash, AirShield, AltaBlue, AltaSlot, Alta Spray, ATS, Auto-Flo,
Autoflex,AutoScan,Axiom,BBConn,BestChoice,BetterDispensing,BlueSeries,Bravura,CanPro,Champion,CheckMate,ClassicIX,
ClassicBlue, Clean Coat, Cobalt, Concert, ContourCoat, Control Weave, Controlled Fiberization, CPX, cScan+, cSelect, Cyclo-Kinetic,
DispensLink,DryCure,DuraBraid,DuraCoat,DuraPUR,e.dot+,Emerald,E-Nordson,EasyClean,EasyOn,EasyPW,Eclipse,EcoBead,
EdgeControl, Equalizer, EquiBead, FillEasy, Fill Sentry, FlexSeam, Flow Coat, FluxPlus, G-Net, G-Site, Genius, Get Green with Blue,
Horizon, Inspire, iON, Iso-Flex, iTrend, JetStream, Lacquer Cure, LightTite, LoadermoveTouch, Maxima, Mesa, MicroDot, MicroFin,
MicroMax, MicroSpray, Mikros, MiniEdge, Minimeter, MiniPUR, Multifill, MultiScan, Myritex, Nano, OmniScan, OptiStroke, Optix,
Partnership+Plus, PatternJet, PCI, PharmaLok, PicoDot, PicoTouch, Pinnacle, Powder Pilot, Powder Port, Powercure, Process Sentry,
PulseSpray,PURBlue,PUReOne,PURJet,Qadence,ReadyCoat,RediCoat,RollVIA,RoyalBlue,SelectSeries,Sensomatic,
Shaftshield, SheetAire, Smart, Smart Tune, Smartfil, SolidBlue, Spectral,SpeedKing,SprayWorks,StediTherm,StrokeControl,Summit,
SureFoam,SureMix,SureSeal,SwirlCoat,TAH,TradePlus,ThruCoat,ThruCure,ThruWave,Trio,TruFlow,Ultraflex,Ultrasaver,
Ultrasmart,Unity,UNITYMotion,Universal,UltraFoamMix,UltraMax,ValueMate,Versa,VersaPUR,Vista,VPQuickFit,
VPQuick-Fitstylized,WaferLock,WebCure,781Mini,and787MiniaretrademarksofNordsonCorporation.
Designations and trademarks stated in this document may be brands that, when used by third parties for their own purposes,
could lead to violation of the owners' rights.
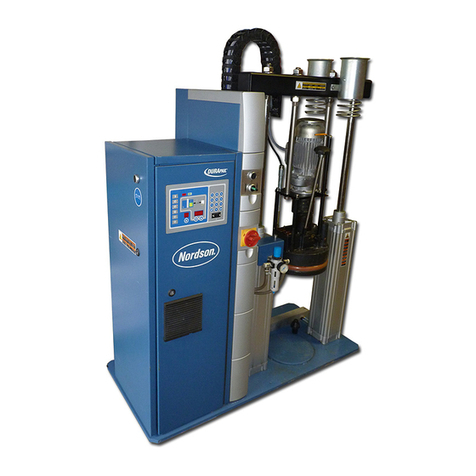
Table of Contents i
Part 1128350_02
E2020 Nordson Corporation
Table of Contents
Safety 1-1....................................................
Safety Alert Symbols 1-1........................................
Responsibilities of the Equipment Owner 1-2.......................
Safety Information 1-2........................................
Instructions, Requirements, and Standards 1-2..................
User Qualifications 1-3.......................................
Applicable Industry Safety Practices 1-3..........................
Intended Use of the Equipment 1-3.............................
Instructions and Safety Messages 1-4..........................
Installation Practices 1-4......................................
Operating Practices 1-4......................................
Maintenance and Repair Practices 1-5.........................
Equipment Safety Information 1-5................................
Equipment Shutdown 1-6.....................................
Relieving System Hydraulic Pressure 1-6.....................
De-energizing the System 1-6...............................
Disabling the Applicators 1-6................................
General Safety Warnings and Cautions 1-7......................
Other Safety Precautions 1-10..................................
First Aid 1-10.................................................
Safety Labels and Tags 1-11.....................................
Description 2-1...............................................
Key Components 2-2...........................................
Melter User Interface 2-3.....................................
Product Description 2-4.........................................
Intended Use 2-5............................................
Limitations of Use 2-5........................................
Electromagnetic Compatibility (EMC) 2-5.......................
Residual Risks 2-6...........................................
Experience of Installation Personnel 2-6.........................
Theory Of Operation 2-7........................................
Functional Blocks 2-8........................................
Low Voltage Controller (LVC) 2-8............................
Power Distribution and Control 2-9...........................
DC Power supply 2-9......................................
Temperature Control Modules 2-9...........................
User Interface(s) 2-10.......................................
Adhesive Level Sensor 2-10.................................
Optional Functional Blocks 2-10..............................
How the Blocks Operate as a System 2-11.......................
Melter Configuration Codes 2-12..................................
Melter Identification 2-13......................................
Other Sources of Information 2-14.................................
Installation Guide 2-14........................................
User Interface Quick Reference Guide 2-14......................
ProBlue Flex Manuals and Service Kit Instruction Sheets 2-14.......

Table of Contents
ii
Part 1128350_02 E2020 Nordson Corporation
Installation 3-1................................................
Overview 3-1..................................................
Quick-Start 3-2................................................
Additional Information 3-2.....................................
Experience of Installation Personnel 3-2.........................
Melter Installation 3-3...........................................
Installation Tasks 3-3........................................
Installation Requirements 3-4....................................
Melter Clearances 3-4........................................
Ventilation 3-6..............................................
Electrical Power 3-6..........................................
Compressed Air 3-7.........................................
Melter Mounting Considerations 3-8............................
Unpack the Melter 3-9..........................................
Contents of the Installation Kit 3-9..............................
Customer-Supplied Materials 3-10..............................
Mount the Melter 3-10...........................................
Removing the Melter from the Sub-base 3-11.....................
Mounting the Melter 3-15......................................
Connecting Incoming Power 3-16...............................
Configure the Electrical Service 3-17...............................
Melter Power Requirements 3-17...............................
4 Kg Tank (T04, X04) 3-17...................................
7 Kg and 10 Kg Tank (T07, X07, T10, X10) 3-18................
7 Kg/Hr MOD (M07, Z07) 3-18...............................
14 Kg/Hr MOD (M14, Z14) 3-19..............................
15 Kg Tank (T15, X15) 3-19..................................
21 Kg/Hr MOD (M21, Z21) 3-20..............................
Connecting Power Cables 3-21.................................
Connect a Pump Control Signal 3-25...............................
Connecting Power to the Solenoid Valve 3-26.....................
Single Acting Pump Operation Notes 3-27.......................
Connect a Compressed Air Supply 3-28............................
Connect Hoses and Applicators 3-31..............................
Connecting the Hoses 3-31....................................
Connecting the Applicators 3-34................................
Set Up the Melter 3-35...........................................
Using the OLED User Interface 3-35.............................
Set Up the Melter Inputs and Outputs (I/O) 3-36.....................
I/O Connections 3-36.........................................
Input Parameters 3-37.........................................
Output Parameters 3-38.......................................
Install Optional Accessories 3-40..................................

Table of Contents iii
Part 1128350_02
E2020 Nordson Corporation
Basic Melter Operation 4-1.....................................
Operator Level Tasks 4-1.......................................
Additional Information 4-1.......................................
Melter Operation 4-2..........................................
Filling the Melter Tank 4-2....................................
Starting the Melter for the First Time 4-4.........................
OLED User Interface 4-5........................................
Commissioning Setup Wizard 4-5..............................
DescribingtheHomeScreen 4-7..............................
Navigation Controls 4-8....................................
Master Controls 4-10.......................................
System LED Indicators 4-11.................................
System Status Chart 4-12......................................
Toggle Switch 4-13...........................................
Shutting Down the Melter 4-14..................................
Maintenance 5-1..............................................
Relieving System Pressure 5-2................................
Locking Out External Communications 5-3......................
Cleaning the Melter 5-3.......................................
Servicing the Pump 5-4.......................................
Supplies 5-4..............................................
Lubricating the Pump 5-5.....................................
Service Kit 5-5............................................
Replacing the Filter 5-5.......................................
Draining the Tank 5-6........................................
Cleaning the Tank 5-8........................................
Troubleshooting 6-1...........................................
About This Section 6-1.........................................
Safety 6-1.....................................................
Troubleshooting Checklist 6-2...................................
Overview 6-2...............................................
AC Power 6-2.............................................
DC Power 6-2............................................
Level 6-2.................................................
Fill 6-3..................................................
Lid Switch 6-3............................................
Temperature Control 6-3...................................
Pump, Pneumatics and Pressure Control 6-4..................
User Interface 6-4.........................................
Standard I/O 6-4..........................................
USB 6-5.................................................
Clock/Scheduler 6-5.......................................
Communications 6-5.......................................
Remote Color Touchscreen (if used) 6-5......................
Software 6-5.............................................
Melters with 480V Transformer Base 6-6.....................
Other Options, Accessories, Upgrades, Future
Product Enhancements 6-6.................................
400/480 Volt Melters 6-6......................................

Table of Contents
iv
Part 1128350_02 E2020 Nordson Corporation
About Built-in Diagnostics 6-7....................................
About Nordnet 6-8.............................................
Troubleshooting Nordnet 6-8..................................
Electrical Box - Internal Board Connections 6-9..................
Identifying Electrical Components 6-10..........................
Melter Pneumatic Flow Control 6-16.............................
Pressure Control and Pump Compatibility 6-17.................
Troubleshoot the Melter 6-20.....................................
Checking the Melt or Manifold RTD 6-20.........................
Checking the Operation of the Thermostats 6-20..................
Removing the Level Sensor, Melt RTD, or Melt Thermostat 6-21.....
Remove Melter Panels 6-21.................................
Access the Components 6-22................................
Removing the Manifold RTD 6-24...............................
Checking the Operation of the Power Relay 6-24..................
Checking the Operation of the Tank, Grid,
or Manifold TRIAC 6-25.......................................
Checking the Resistance of the Tank, Grid,
and Manifold Heaters 6-25.....................................
Troubleshoot the Fill System 6-29.................................
Fill Time Limit 6-29...........................................
Fill System Troubleshooting Table 6-30..........................
Calibrating the Level Sensor 6-31...............................
Cleaning Adhesive Bin Blockage 6-31...........................

Table of Contents v
Part 1128350_02
E2020 Nordson Corporation
Technical Data 7-1............................................
General Specifications 7-1....................................
Pump Specifications 7-2......................................
Melter Specifications 7-3.....................................
4, 7, 10 Kg Tank Melters 7-3...............................
7 and 14 Kg MOD Melters 7-3..............................
A and B Chassis for 240V and 480V Melters 7-3...............
Electrical Specifications 7-4...................................
Melter Power Requirements 7-4...............................
4 Kg Tank (T04, X04) 7-4...................................
7 Kg and 10 Kg Tank (T07, X07, T10, X10) 7-5................
7 Kg/Hr MOD (M07, Z07) 7-5...............................
14 Kg/Hr MOD (M14, Z14) 7-6..............................
15 Kg Tank (T15, X15) 7-6..................................
21 Kg/Hr MOD (M21, Z21) 7-7..............................
Discrete I/O 7-7.............................................
Standard Remote Input/Output 7-7..........................
Communication 7-8..........................................
Pressure Management 7-8....................................
Fill System Specifications 7-9.................................
Melter Dimensions 7-10.......................................
Melter Sub-base Dimensions 7-13..............................
Wiring Diagram - Electrical Box Enclosure Layout 7-14............
Wiring Diagram - Input Power 7-15..............................
Wiring Diagram - Power Distribution 7-16........................
Wiring Diagram - Power Distribution Expansion Board 7-17.........
Wiring Diagram - Low Voltage Control Board 7-18.................
Wiring Diagram - Melt and Manifold (Melt on Demand) 7-21........
Wiring Diagram - Hoses and Applicators 7-22.....................
Wiring Diagram - 4 Channel Power Module #2 7-24................
Wiring Diagram - TB3 Variations 7-25...........................
Wiring Diagram - Light Tower 7-26..............................
Wiring Diagram - Legacy Inputs/Outputs 7-27....................
Wiring Diagram - Chassis Ground 7-28..........................
Wiring Diagram - Hose/Applicator Expansion Base 7-29...........
Wiring Diagram - Hose/Applicator Ground Tree 7-30..............
Wiring Diagram - Hose/Applicator Expansion Power Module #3 7-31
Wiring Diagram - Hose/Applicator Expansion Power Module #4 7-32
Wiring Diagram - Adhesive Tracking Board 7-33..................

Table of Contents
vi
Part 1128350_02 E2020 Nordson Corporation
Parts 8-1.....................................................
Using the Illustrated Parts Lists 8-1...............................
ProBlue Flex Melter Assembly 8-2.............................
Chassis 8-6.................................................
4KgTankModule 8-8........................................
7KgTankModule 8-12........................................
10 Kg Tank Module 8-14.......................................
Melt On Demand Melter 8-16...................................
Additional Tank Components 8-19..............................
Manifold Modules 8-20........................................
Filter Manifold for Double Acting Pumps 8-24.....................
Filter Manifold for Single Acting Pumps 8-26......................
Hose Manifold 8-28..........................................
Pump Parts 8-29.............................................
Manifold Heater Module 8-30..................................
Heater Plate Parts 8-32.....................................
Lid Module 8-34.............................................
Fill Lid Module 8-36...........................................
Electrical Cabinet Assembly 8-38...............................
Blank Hose/Applicator Module 8-41.............................
4/6 Channel Hose/Applicator Module 8-41.......................
OLED Electrical Enclosure Door 8-42...........................
OEM Electrical Enclosure Door 8-43............................
Heater Harness 8-44.........................................
Standard Double Acting Regulator 8-45.........................
Double Acting Regulator with Transducer 8-46...................
Standard Double Acting Remote Run up Regulator 8-47..........
P1 Single Acting Pneumatic Panel Assembly Service Kit 8-48......
P2 Single Acting Pneumatic Panel Assembly Service Kit 8-48......
P1 and P2 Single Acting Airline Service Kit 8-48..................
Standard Single Acting Regulator Module with Gauge 8-49........
Standard Single Acting Regulator Module with Transducer 8-50....
Lid Switch Module 8-51.......................................
Lid Switch Replacement Parts 8-52.............................
Enclosure Module 8-54.......................................
4Kg/7MOD/14MODEnclosureModule 8-54..................
7 Kg Enclosure Module 8-56.................................
10 Kg Enclosure Module 8-57...............................
Electrical Cables and Fuses 8-58...............................
Ship-with Kit 8-60...............................................
Service Kits 8-61................................................
E-Box Enclosure Service Kits 8-61..............................
Assorted Jumper Harness Pack Kit 8-61.......................
OLED Electrical Door Service Kit 8-61.........................
OEM Electrical Door Service Kit 8-61.........................
E-Box Knockout Service Kit 8-61.............................
E-Box Full Replacement Service Kit 8-62......................
LVC Replacement Service Kit 8-62...........................
Power Supply Service Kit 8-62...............................
Power Distribution Replacement Service Kit 8-62...............
4-Channel Hose/Applicator Module Service Kit 8-63
.............
Temperature Control Module Service Kit 8-63..................
4-Channel Hose/Applicator Blank Service Kit 8-63..............
Power Distribution Expansion Service Kit 8-63..................
15 Amp Fuse Service Kit 8-64................................
20 Amp Fuse Service Kit 8-64................................
3.15 Amp Fuse Service Kit 8-64..............................
Pump Service Kits 8-65........................................
Pump Replacement Service Kit 8-65.........................

Table of Contents vii
Part 1128350_02
E2020 Nordson Corporation
Pump Service Kit 8-65......................................
High Output Double Acting Pump Replacement
Service Kit 8-66............................................
High Output Double Acting Pump Service Kit 8-67..............
Single Acting High Output Pump Replacement
Service Kit 8-67............................................
Single Acting High Output Pump Service Kit 8-68...............
Low Viscosity Pump Replacement Service Kit 8-68.............
Low Viscosity Pump Service Kit 8-69..........................
Low Pressure Pump Replacement Service Kit 8-69.............
Low Pressure Pump Service Kit 8-70..........................
Low Pressure/Low Viscosity Pump Replacement Service Kit 8-70.
Low Pressure Low Viscosity Pump Service Kit 8-71.............
Magnetic Actuator Service Kit 8-72...........................
Air Valve Assembly Service Kit 8-72..........................
Magnetic Fork Service Kit 8-72...............................
Airline Service Kit 8-72......................................
Pump and PDV Fittings Service Kit 8-73.......................
Single Acting Airline , P1 and P2 Service Kit 8-73...............
Lid Service Kits 8-73..........................................
Lid Switch Service Kit 8-73..................................
Fill Lid Filter Service Kit 8-73.................................
FF Inlet Tube Service Kit 8-74................................
Size A Replacement Lid Service Kit 8-74......................
Size B Replacement Lid Service Kit 8-74......................
Size A Fill Lid Replacement Service Kit 8-74...................
Size B Fill Lid Replacement Service Kit 8-75...................
Tank Service Kits 8-75........................................
4/7kg and 7/14 kg/hr MOD Level Sensor Service Kit 8-75........
10 Kg Level Sensor Service Kit 8-75..........................
4 Kg 230V Tank Service Kit 8-76.............................
7 Kg 230V Tank Service Kit 8-76.............................
10 Kg 230V Tank Service Kit 8-76............................
4 Kg 400/480V Tank Service Kit 8-77..........................
7 Kg 400/480V Tank Service Kit 8-77..........................
10 Kg 400/480V Tank Service Kit 8-77........................
Grid/Hopper Service Kits 8-78..................................
MOD 7 Kg, 700W, 230V Grid/Hopper Service Kit 8-78...........
MOD 14 Kg, 1200W, 230V Grid/Hopper Service Kit 8-78.........
MOD 7 Kg, 700W, 400/480V Grid/Hopper Service Kit 8-79.......
MOD 14 Kg, 1200W, 400/480V Grid/Hopper Service Kit 8-79.....
Manifold Service Kits 8-80.....................................
Standard Hose Manifold Service Kit 8-80......................
Manifold Filter Service Kit 8-80...............................
Manifold Center Service Kit 8-80.............................
Single Acting Pump Manifold Filter Service Kit 8-81.............
Heater Service Kits 8-81.......................................
480V, 2500W Heater Block Service Kit 8-81....................
230V, 2500W Heater Block Service Kit 8-81....................
480V, 1000W Heater Block Service Kit 8-82....................
230V, 1000W Heater Block Service Kit 8-82....................
Enclosure Service Kits 8-83
...................................
Mounting Plate (Sub-base) Service Kit,
4 Kg Tank and 7/14 MOD 8-83...............................
Mounting Plate (Sub-base) Service Kit, 7/10 Kg Tank 8-83.......
Insulation Service Kits 8-84....................................
4 Kg Tank Insulation Service Kit 8-84..........................
7 Kg Tank Insulation Service Kit 8-84..........................
10 Kg Tank Insulation Service Kit 8-84.........................
MOD Insulation Service Kit 8-84..............................

Table of Contents
viii
Part 1128350_02 E2020 Nordson Corporation
Manifold Insulation Service Kits 8-85............................
Standard Manifold Kit Guard Service Kit 8-85..................
Manifold Insulation Service Kit 8-85...........................
MOD Manifold Insulation Service Kit 8-85......................
Upgrade Kits 8-86...............................................
Fill Upgrade Kit, Size A 8-86....................................
Fill Upgrade Kit, Size B 8-86....................................
4 to 6 H/A Expansion Kit 8-87..................................
2 to 4 H/A Expansion Kit 8-87..................................
2 to 6 H/A Expansion Kit 8-87..................................
Legacy I/O Kit 8-88...........................................
External USB Kit 8-88.........................................
SizeATankLockKit 8-88......................................
SizeBTankLockKit 8-89......................................
MOD 14, 1200W, 400/480V Kit 8-89.............................
MOD 7, 700W, 400/480V Kit 8-89...............................
MOD 14, 1200W, 200/240V Kit 8-89.............................
MOD 7, 700W, 200/240V Kit 8-90...............................
App Module Upgrade Kit 8-90..................................
Pneumatic Assembly P2 Upgrade Kit 8-90.......................
Pneumatic Assembly P3 Upgrade Kit 8-91.......................
Spare Parts List 8-92............................................
Basic Spare Parts Service Kit 8-92..............................
Basic Expanded Spare Parts Service Kit 8-92....................
Pneumatic Filter Service Kit 8-92...............................
Pneumatic Filter and Bulkhead Bracket Service Kit 8-93............
Flex RTD Replacement Service Kit 8-93.........................
Pneumatic Transducer Service Kit 8-93..........................
Drain Chute Replacement Service Kit 8-93.......................
Drain Valve Replacement Service Kit 8-94.......................
Wireway Cover Service Kit 8-94................................
P4/P7/P10 Pressure Discharge Valve Service Kit 8-94.............
100 Mesh Saturn Filter Service Kit 8-94..........................
Pneumatic Panel Assembly Service Kit 8-95......................
P2 Pneumatic Panel Assembly Service Kit 8-95...................
P3 Pneumatic Panel Assembly Service Kit 8-95...................
Thermostat Service Kit 8-95....................................
Single Acting P1 Pneumatic Assembly Service Kit 8-96............
Single Acting P2 Pneumatic Assembly Service Kit 8-96............
General Parts 8-97.............................................
ProBlue Flex Common Hardware 8-97...........................
ProBlue Flex Jumper Pack, 3/PE, 200/240V, 25 8-97..............
ProBlue Flex Jumper Pack, 3/N/PE, 200/400V, 25 8-97............
ProBlue Flex Jumper Pack, 1/PE, 200/240V, 25 8-97..............
ProBlue Flex Jumper Pack, 1/N/PE, 200/240V, 25 8-98............
ProBlue Flex Jumper Pack, 3/PE, 200/240V, 10 8-98..............
ProBlue Flex Jumper Pack, 3/N/PE, 200/400V, 10 8-98............
ProBlue Flex Jumper Pack, 1/PE, 200/240V, 10 8-98..............
ProBlue Flex Jumper Pack, 1/N/PE, 200/240V, 10 8-98............
ProBlue Flex Assorted Jumper Pack 8-99.......................
Hydraulics Fittings,90 Degree, 10 8-99
..........................
Hydraulics Fittings, 90 Degree, 25 8-99..........................
Hydraulics Fittings, 45 Degree, 10 8-99..........................
Hydraulics Fittings, 45 Degree, 25 8-99..........................
Hydraulics Fittings Straight, 10 8-100............................
Hydraulics Fittings Straight, 25 8-100............................

Table of Contents ix
Part 1128350_02
E2020 Nordson Corporation
Appendix A
Calculating Melter Power Requirements A-1....................
Appendix B
SP Pump Diagnostics and Repair B-1...........................
Introduction B-1................................................
Available Pump Options B-1...................................
Pump Function B-2.............................................
Double Acting Pump B-2......................................
Pump Isolation Valve B-3...................................
Pressure Discharge Valve B-3...............................
Single Acting Pump B-3......................................
Pump Diagnostics B-4..........................................
Double Acting Pump Diagnostics B-4...........................
Single Acting Pump Diagnostics B-6............................
Pump Disassembly and Reassembly B-8..........................
Melter Preparation B-8.......................................
Required Tools and Materials B-8..............................
Tools B-8.................................................
Service Parts B-9..........................................
Supplies B-9..............................................
Remove the Pump from the Melter (All Pumps) B-10...............
Remove the Actuator Assembly
(Double Acting Pumps Only) B-13...............................
Remove the Magnetic Actuator Assembly
(Double Acting Pumps Only) B-13...............................
Remove the Air Valve Assembly (Double Acting Pumps Only) B-14..
Special Reassembly Instructions B-14.........................
Remove the Shifter Fork (Double Acting Pumps Only) B-15.........
Special Reassembly Instructions B-15.........................
Remove the Cylinder Head and Cylinder (All Pumps) B-15.........
Remove the Piston Cups (All Pumps) B-16.......................
Special Reassembly Instructions B-16.........................
Remove the Siphon Check Valve Assembly
and Hydraulic Piston Assembly (All Pumps) B-16.................
Remove the Pressure Check Valve for Double Acting Pumps B-17..
Special Reassembly Instructions B-17.........................
Remove the Pressure Check Valve for Single Acting Pumps B-17....
Replace the Hydraulic Piston Seal (All Pumps) B-18...............
Installing the Pump (All Pumps) B-19............................
Standard Double Acting Pump Assembly Parts List B-20...........
High Output Double Acting Pump Assembly Parts List B-22.........
Low Viscosity Double Acting Pump Assembly Parts List B-24.......
Low Pressure Double Acting Pump Assembly Parts List B-26.......
Low Pressure/Low Viscosity Double Acting Pump
Assembly Parts List B-28......................................
High Output Single Acting Pump Assembly Parts List B-30..........
Actuator Assembly Parts List B-32..............................
Piston Assembly Hydraulics Parts List B-34.......................
High Output Double Acting Hydraulic Piston Assembly B-35........
Low Viscosity Double Acting Hydraulic Piston Assembly B-36.......
Appendix C
The BBconn Cloud C-1........................................
Web Address C-1...........................................
List Of Browsers C-1..........................................
Key Functions C-1...........................................
Importing and Exporting Files C-2..............................

Table of Contents
x
Part 1128350_02 E2020 Nordson Corporation
Appendix D
Adhesive Tracking System D-1.................................
Overview D-1..................................................
Intended Use D-2............................................
Unintended Use D-2.........................................
Theory of Operation D-3.........................................
Technical Data D-5.............................................
Specifications D-5...........................................
Useful Calculations and Conversion Formulas D-6................
Specific Gravity Calculation D-6.............................
K-Factor Calculation D-6...................................
Conversions D-7..........................................
I/O Declarations on the ATS Board D-8............................
Flow Meter Assembly Parts Lists D-10.............................
Flow Meter and Sensor Parts D-10..............................
Flow Meter Parts D-12.........................................
ATS Service Kits D-14...........................................
ATS Upgrade Kit D-14.........................................
ATS Hose Manifold Kit D-14....................................
ATS PCA Kit D-15............................................
Inductive Sensor Cable Kit D-15................................
ATS Manifold Guard Kit D-15...................................
ATS Service Kit D-16..........................................
Appendix E
Optional Accessories E-1......................................
Available Accessories E-1.......................................
Air Pressure Relief Valve E-2....................................
Air Pressure Relief Valve Kit E-2...............................
Wi-Fi Module E-3..............................................
Wi-Fi Module Service Kit E-3..................................
Light Tower E-4................................................
Light Tower Board and Light Tower Service Kit E-5...............
Light Tower Board Only Service Kit E-5.........................
Communication Cards E-6......................................
Profibus Communication Service Kit E-6........................
EtherCAT Communication Service Kit E-6.......................
CC Link Communication Service Kit E-6........................
Sercos III Communication Service Kit E-6.......................
DeviceNet Communication Service Kit E-7......................
Powerlink Communication Service Kit E-7.......................
CC Link IE Communication Service Kit E-7......................
Remote Touchscreen User Interface E-8..........................
PB Touchscreen Service Kit
(Comes with 5m communication harness) E-8...................
5 m Communication Cable E-9................................
10 m Communication Cable E-9...............................
20 m Communication Cable E-9...............................
30 m Communication Cable E-9...............................
Remote Touchscreen T50 Service Kit E-9.......................

Table of Contents xi
Part 1128350_02
E2020 Nordson Corporation
Fulfill System E-10..............................................
Dimensions E-10.............................................
Adhesive Storage Bin Dimensions E-11........................
Fulfill System Specifications E-13...............................
Single-Feed Adhesive Storage Bin E-14..........................
Multi-Feed Adhesive Storage Bin E-16...........................
Sequencer E-18..............................................
Adhesive Transfer Hose Parts E-22.............................
Adhesive Bin Pump Parts E-24.................................
Suction Lance Kit E-26........................................
Transfer Hose Solenoid Harnesses E-28.........................
Quick Disconnect Kits (Optional) E-29...........................
Service Kits E-30..............................................
Field Install Kits E-30........................................
Appendix F
ProBlue Flex 400/480 Volt Transformer F-1.....................
Overview F-1..................................................
Intended Use F-2............................................
Unintended Use F-2.........................................
Transformer Function F-2.....................................
Installation F-3.................................................
Installation Tasks F-3........................................
Transformer Sizing F-4.......................................
Clearances F-6.............................................
Ship-with Kit Components F-8.................................
Preparing the Transformer for Installation F-9....................
Mounting the Transformer on the Parent Machine F-11.............
Connecting Electrical Service to the Transformer F-12.............
Preparing the 400/480V Melter for Installation
on the Transformer F-14.......................................
Sub-base Removal F-15....................................
Mounting the 400/480V Melter on the Transformer F-17............
Connecting Transformer to the Melter F-18.......................
Troubleshooting F-20............................................
Parts F-22.....................................................
3 KVA 480V Transformer Assembly, Size A F-22..................
3 KVA 480V Transformer Assembly, Size B F-24..................
Transformer PCA Tray Assembly F-25...........................
3 KVA 480V Transformer Top Assembly, Sizes A and B F-26.......
Ship-with Kit F-27.............................................
3 KVA Transformer PCA Service Kit F-27........................
3 KVA 400/480V Transformer Service Kit F-27....................
Transformer Solid State Relay Service Kit F-28...................
Transformer 8A Fuse Service Kit F-28...........................
Transformer 10A Fuse Service Kit F-28..........................
Wiring Diagrams F-29...........................................

Table of Contents
xii
Part 1128350_02 E2020 Nordson Corporation
Appendix G
Hose/Applicator Expansion Base G-1...........................
Overview G-1..................................................
Safety G-2..................................................
Intended Use G-2............................................
Unintended Use G-2.........................................
Melter Firmware Requirements G-2.............................
Installation G-2.................................................
Installation Clearances G-3....................................
Power Requirements G-4......................................
Removing the Melter from the Sub-Base G-4.....................
Mounting the Expansion Base to the Sub-Base G-7...............
Mounting the Melter to the Expansion Base G-8..................
Connecting Expansion Base and
Sub-base Wiring to the Melter G-10..............................
Using Melter with Expansion Base in a
Water Wash Environment G-12.................................
Troubleshooting G-13............................................
General Troubleshooting G-13..................................
Troubleshooting Specific to Expansion Base G-14..................
Expansion Base Circuit Board Indicators G-15..................
I/O Declarations for the 4 Channel Temperature Control
Expansion Board G-16......................................
Block Diagrams G-17.............................................
Expansion Base Selection G-19....................................
240 Voltage - Legacy and Standard Warmup G-19.................
480 Voltage - Legacy and Standard Warmup G-20.................
Expansion Base Parts G-22.......................................
Wiring Diagrams G-24...........................................

Safety 1-1
E2020 Nordson Corporation Issued 09-19
Section 1
Safety
Read this section before using the equipment. This section contains
recommendations and practices applicable to the safe installation, operation,
and maintenance (hereafter referred to as “use”) of the product described in
this document (hereafter referred to as “equipment”). Additional safety
information, in the form of task-specific safety alert messages, appears as
appropriate throughout this document.
WARNING! Failure to follow the safety messages, recommendations, and
hazard avoidance procedures provided in this document can result in
personal injury, including death, or damage to equipment or property.
Safety Alert Symbols
The following safety alert symbol and signal words are used throughout this
document to alert the reader to personal safety hazards or to identify
conditions that may result in damage to equipment or property. Comply with
all safety information that follows the signal word.
WARNING! Indicates a potentially hazardous situation that, if not avoided,
can result in serious personal injury, including death.
CAUTION! Indicates a potentially hazardous situation that, if not avoided,
can result in minor or moderate personal injury.
CAUTION! (Used without the safety alert symbol) Indicates a potentially
hazardous situation that, if not avoided, can result in damage to equipment or
property.

Safety
1-2
E2020 Nordson Corporation
Issued 09- 19
Responsibilities of the Equipment Owner
Equipment owners are responsible for managing safety information, ensuring
that all instructions and regulatory requirements for use of the equipment are
met, and for qualifying all potential users.
Safety Information
SResearch and evaluate safety information from all applicable sources,
including the owner-specific safety policy, best industry practices,
governing regulations, material manufacturer's product information, and
this document.
SMake safety information available to equipment users in accordance with
governing regulations. Contact the authority having jurisdiction for
information.
SMaintain safety information, including the safety labels affixed to the
equipment, in readable condition.
Instructions, Requirements, and Standards
SEnsure that the equipment is used in accordance with the information
provided in this document, governing codes and regulations, and best
industry practices.
SIf applicable, receive approval from your facility's engineering or safety
department, or other similar function within your organization, before
installing or operating the equipment for the first time.
SProvide appropriate emergency and first aid equipment.
SConduct safety inspections to ensure required practices are being
followed.
SRe-evaluate safety practices and procedures whenever changes are
made to the process or equipment.

Safety 1-3
E2020 Nordson Corporation Issued 09-19
User Qualifications
Equipment owners are responsible for ensuring that users:
Sreceive safety training appropriate to their job function as directed by
governing regulations and best industry practices
Sare familiar with the equipment owner's safety and accident
prevention policies and procedures
Sreceive equipment- and task-specific training from another qualified
individual
NOTE: Nordson can provide equipment-specific installation,
operation, and maintenance training. Contact your Nordson
representative for information
Spossess industry- and trade-specific skills and a level of experience
appropriate to their job function
Sare physically capable of performing their job function and are not
under the influence of any substance that degrades their mental
capacity or physical capabilities
Applicable Industry Safety Practices
The following safety practices apply to the use of the equipment in the
manner described in this document. The information provided here is not
meant to include all possible safety practices, but represents the best safety
practices for equipment of similar hazard potential used in similar industries.
Intended Use of the Equipment
SUse the equipment only for the purposes described and within the limits
specified in this document.
SDo not modify the equipment.
SDo not use incompatible materials or unapproved auxiliary devices.
Contact your Nordson representative if you have any questions on
material compatibility or the use of non-standard auxiliary devices.

Safety
1-4
E2020 Nordson Corporation
Issued 09- 19
Instructions and Safety Messages
SRead and follow the instructions provided in this document and other
referenced documents.
SFamiliarize yourself with the location and meaning of the safety warning
labels and tags affixed to the equipment. Refer to Safety Labels and Tags
at the end of this section.
SIf you are unsure of how to use the equipment, contact your Nordson
representative for assistance.
Installation Practices
SInstall the equipment in accordance with the instructions provided in this
document and in the documentation provided with auxiliary devices.
SEnsure that the equipment is rated for the environment in which it will be
used. This equipment has not been certified for compliance with the
ATEX directive nor as nonincendive and should not be installed in
potentially explosive environments.
SEnsure that the processing characteristics of the material will not create a
hazardous environment. Refer to theSafetyDataSheet(SDS)forthe
material.
SIf the required installation configuration does not match the installation
instructions, contact your Nordson representative for assistance.
SPosition the equipment for safe operation. Observe the requirements for
clearance between the equipment and other objects.
SInstall lockable power disconnects to isolate the equipment and all
independently powered auxiliary devices from their power sources.
SProperly ground all equipment. Contact your local building code
enforcement agency for specific requirements.
SEnsure that fuses of the correct type and rating are installed in fused
equipment.
SContact the authority having jurisdiction to determine the requirement for
installation permits or inspections.
Operating Practices
SFamiliarize yourself with the location and operation of all safety devices
and indicators.
SConfirmthattheequipment,including all safety devices (guards,
interlocks, etc.), is in good working order and that the required
environmental conditions exist.
SUse the personal protective equipment (PPE) specified for each task.
Refer to Equipment Safety Information or the material manufacturer's
instructions and SDS for PPE requirements.
SDo not use equipment that is malfunctioning or shows signs of a potential
malfunction.

Safety 1-5
E2020 Nordson Corporation Issued 09-19
Maintenance and Repair Practices
SAllow only personnel with appropriate training and experience to operate
or service the equipment.
SPerform scheduled maintenance activities at the intervals described in
this document.
SRelieve system hydraulic and pneumatic pressure before servicing the
equipment.
SDe-energize the equipment and all auxiliary devices before servicing the
equipment.
SUse only new Nordson-authorized refurbished or replacement parts.
SRead and comply with the manufacturer's instructions and the SDS
supplied with equipment cleaning compounds.
NOTE: SDSs for cleaning compounds that are sold by Nordson are
available at www.nordson.com or by calling your Nordson representative.
SConfirm the correct operation of all safety devices before placing the
equipment back into operation.
SDispose of waste cleaning compounds and residual process materials
according to governing regulations. Refer to the applicable SDS or
contact the authority having jurisdiction for information.
SKeep equipment safety warning labels clean. Replace worn or damaged
labels.
Equipment Safety Information
This equipment safety information is applicable to the following types of
Nordson equipment:
Shot melt and cold adhesive application equipment and all related
accessories
Spattern controllers, timers, detection and verification systems, and all
other optional process control devices

Safety
1-6
E2020 Nordson Corporation
Issued 09- 19
Equipment Shutdown
To safely complete many of the procedures described in this document, the
equipment must first be shut down. The level of shut down required varies by
thetypeofequipmentinuseandtheprocedurebeingcompleted.
If required, shut down instructions are specified at the start of the procedure.
The levels of shut down are:
Relieving System Hydraulic Pressure
Completely relieve system hydraulic pressure before breaking any hydraulic
connection or seal. Refer to the melter-specific product manual for
instructions on relieving system hydraulic pressure.
De-energizing the System
Isolate the system (melter, hoses, applicators, and optional devices) from all
power sources before accessing any unprotected high-voltage wiring or
connection point.
1. Turn off the equipment and all auxiliary devices connected to the
equipment (system).
2. To prevent the equipment from being accidentally energized, lock and
tag the disconnect switch(es) or circuitbreaker(s)thatprovideinput
electrical power to the equipment and optional devices.
NOTE: Government regulations and industry standards dictate specific
requirements for the isolation of hazardous energy sources. Refer to the
appropriate regulation or standard.
Disabling the Applicators
NOTE: Adhesive dispensing applicators are referred to as “guns” in some
previous publications.
All electrical or mechanical devices that provide an activation signal to the
applicators, applicator solenoid valve(s), or the melter pump must be
disabledbeforeworkcanbeperformedonoraroundanapplicatorthatis
connected to a pressurized system.
1. Turnoffordisconnecttheapplicatortriggering device (pattern controller,
timer, PLC, etc.).
2. Disconnect the input signal wiring to the applicator solenoid valve(s).
3. Reduce the air pressure to the applicator solenoid valve(s) to zero; then
relieve the residual air pressure between the regulator and the applicator.
Other manuals for ProBlue Flex
2
Table of contents
Other Nordson Melting Machine manuals

Nordson
Nordson ProBlue P4 Reference guide

Nordson
Nordson EP 30 User manual

Nordson
Nordson 3500 Series Parts list manual

Nordson
Nordson PURBlue 7156681A User manual

Nordson
Nordson 3400 User manual

Nordson
Nordson 3100 User manual

Nordson
Nordson 3930 User manual

Nordson
Nordson DuraDrum User manual

Nordson
Nordson AltaBlueA4TP Reference guide

Nordson
Nordson Mesa Fulfill Reference guide