5TRES instructions TRES instructions
EN
EN
6
Parts List
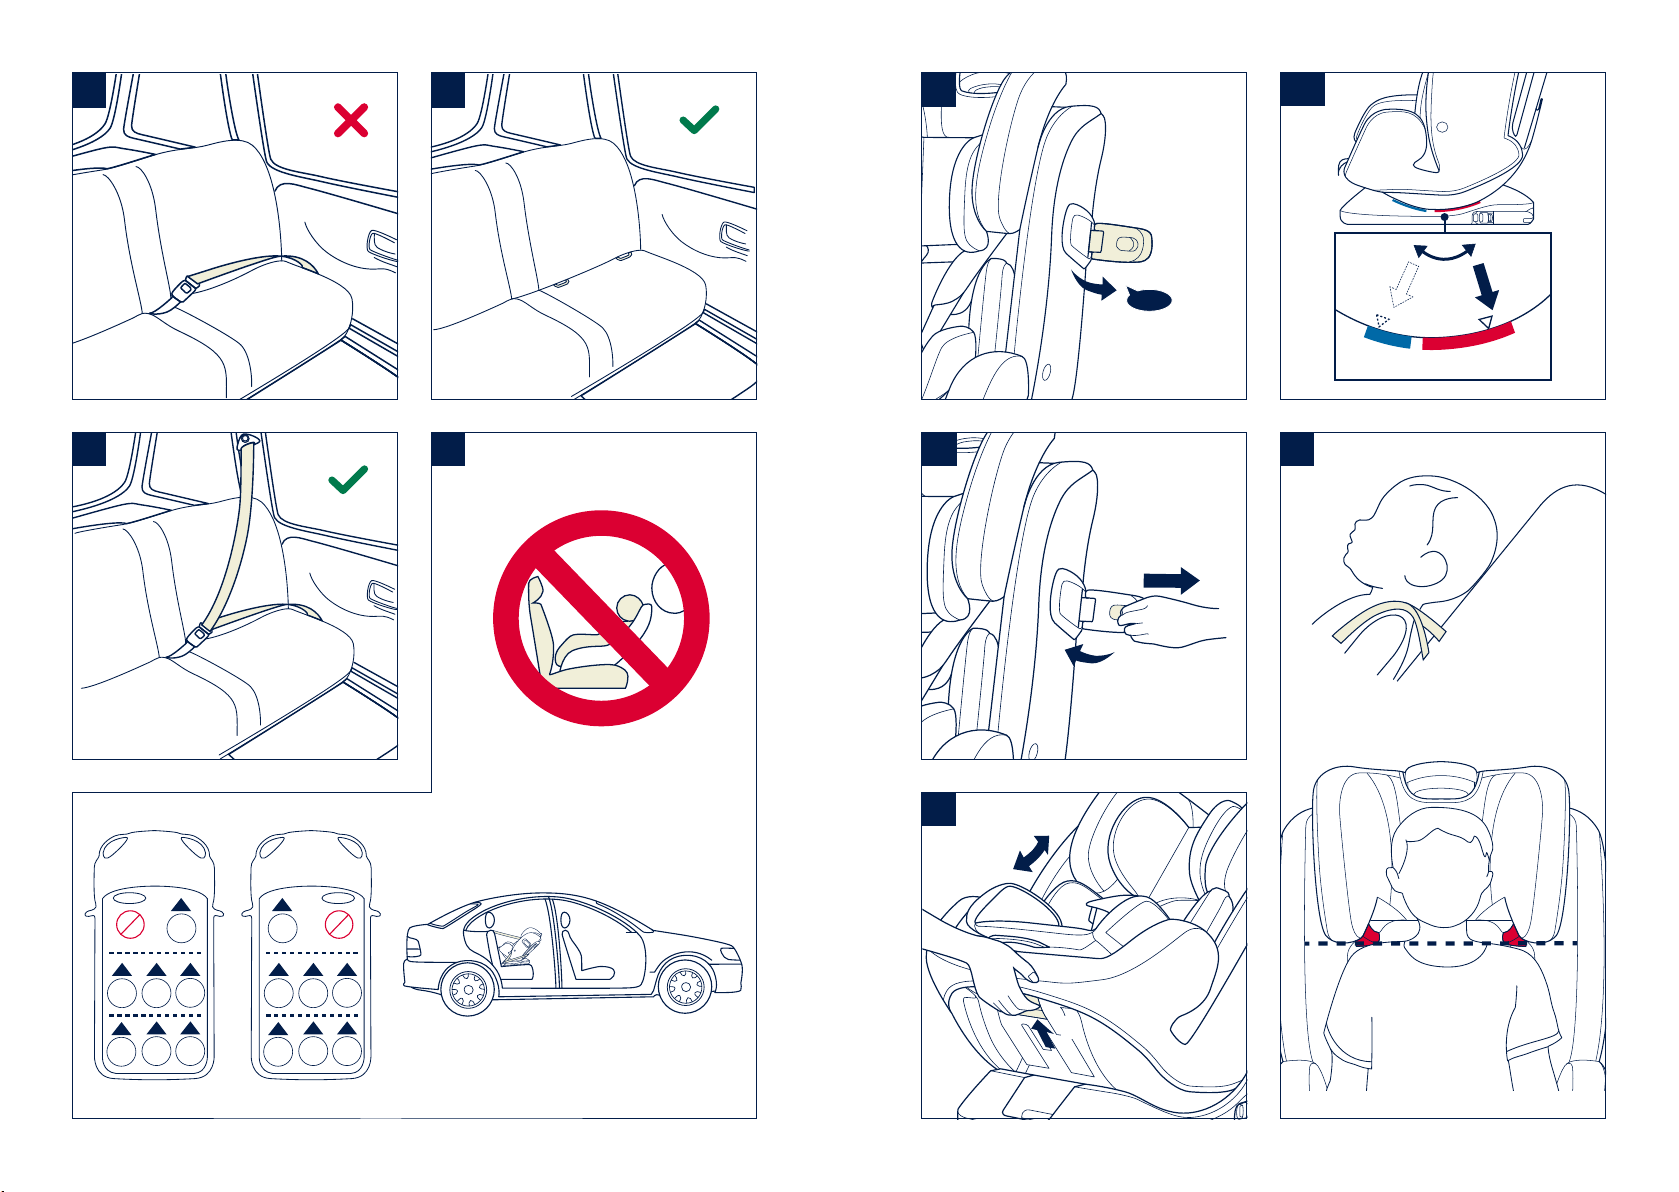
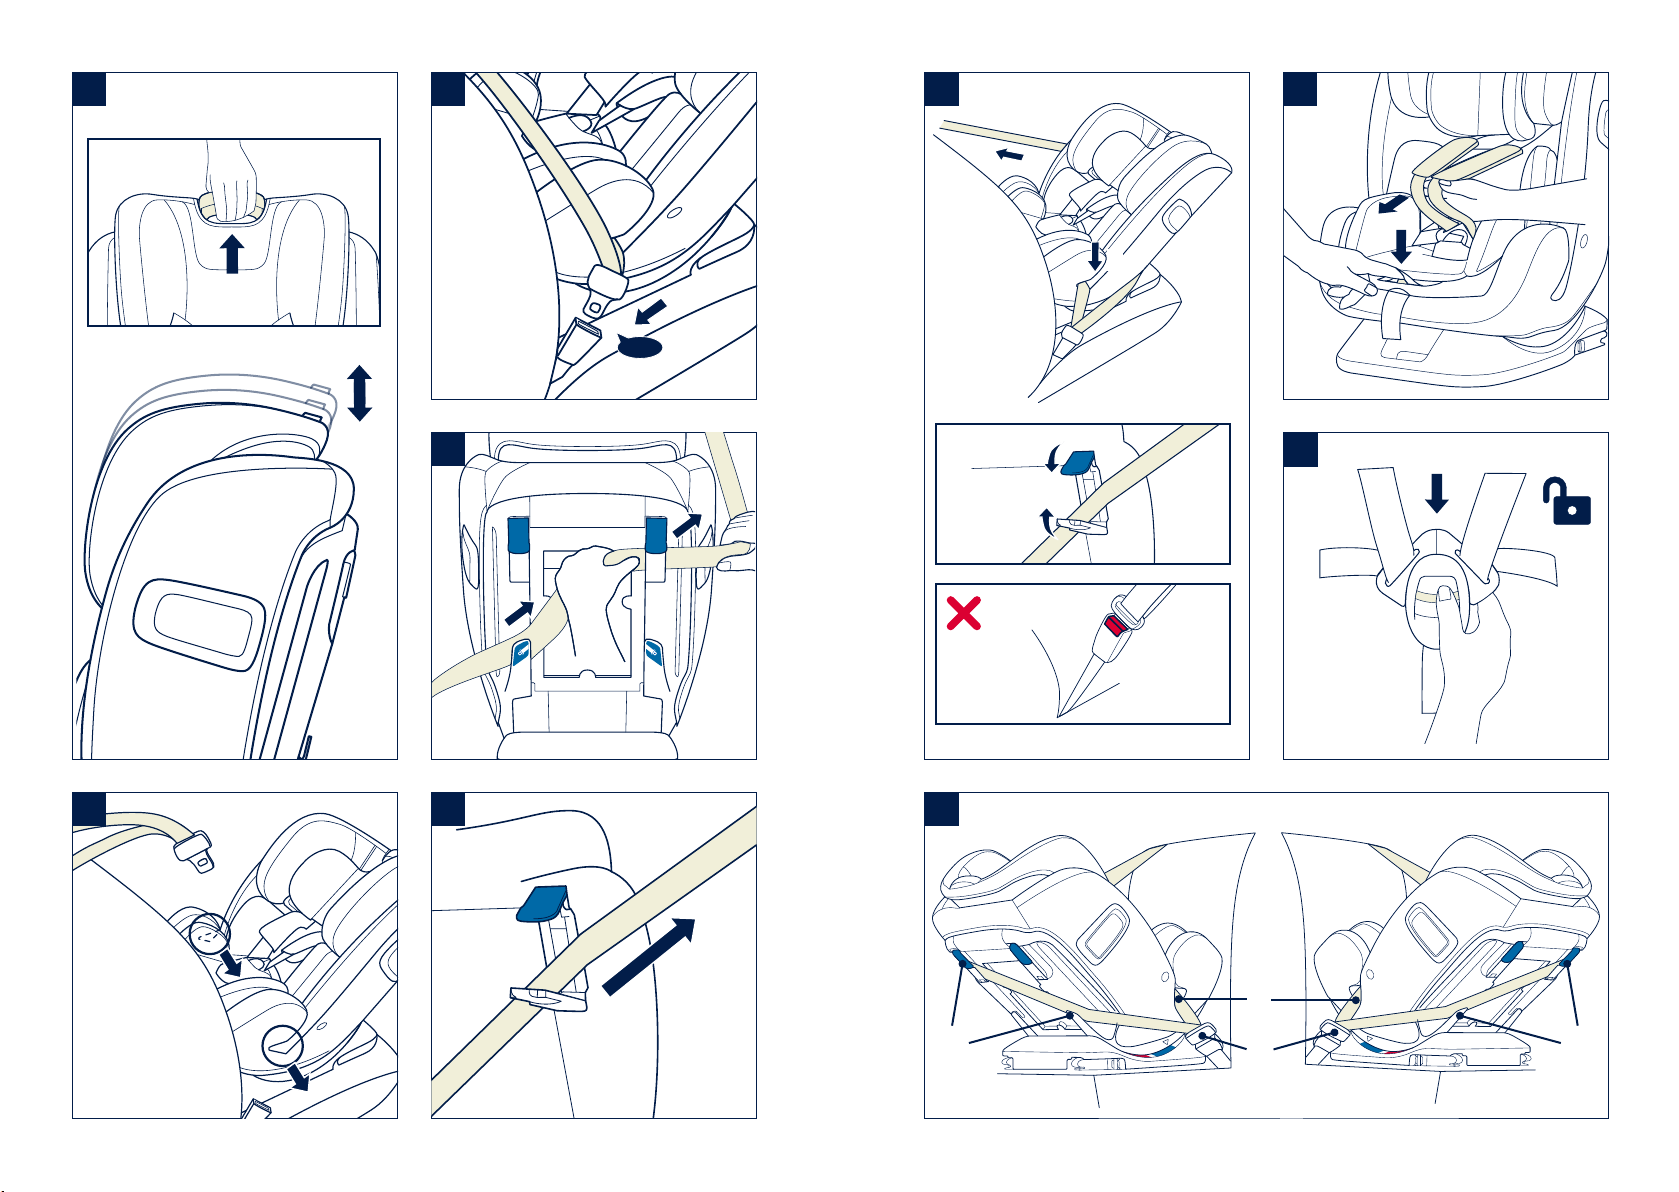
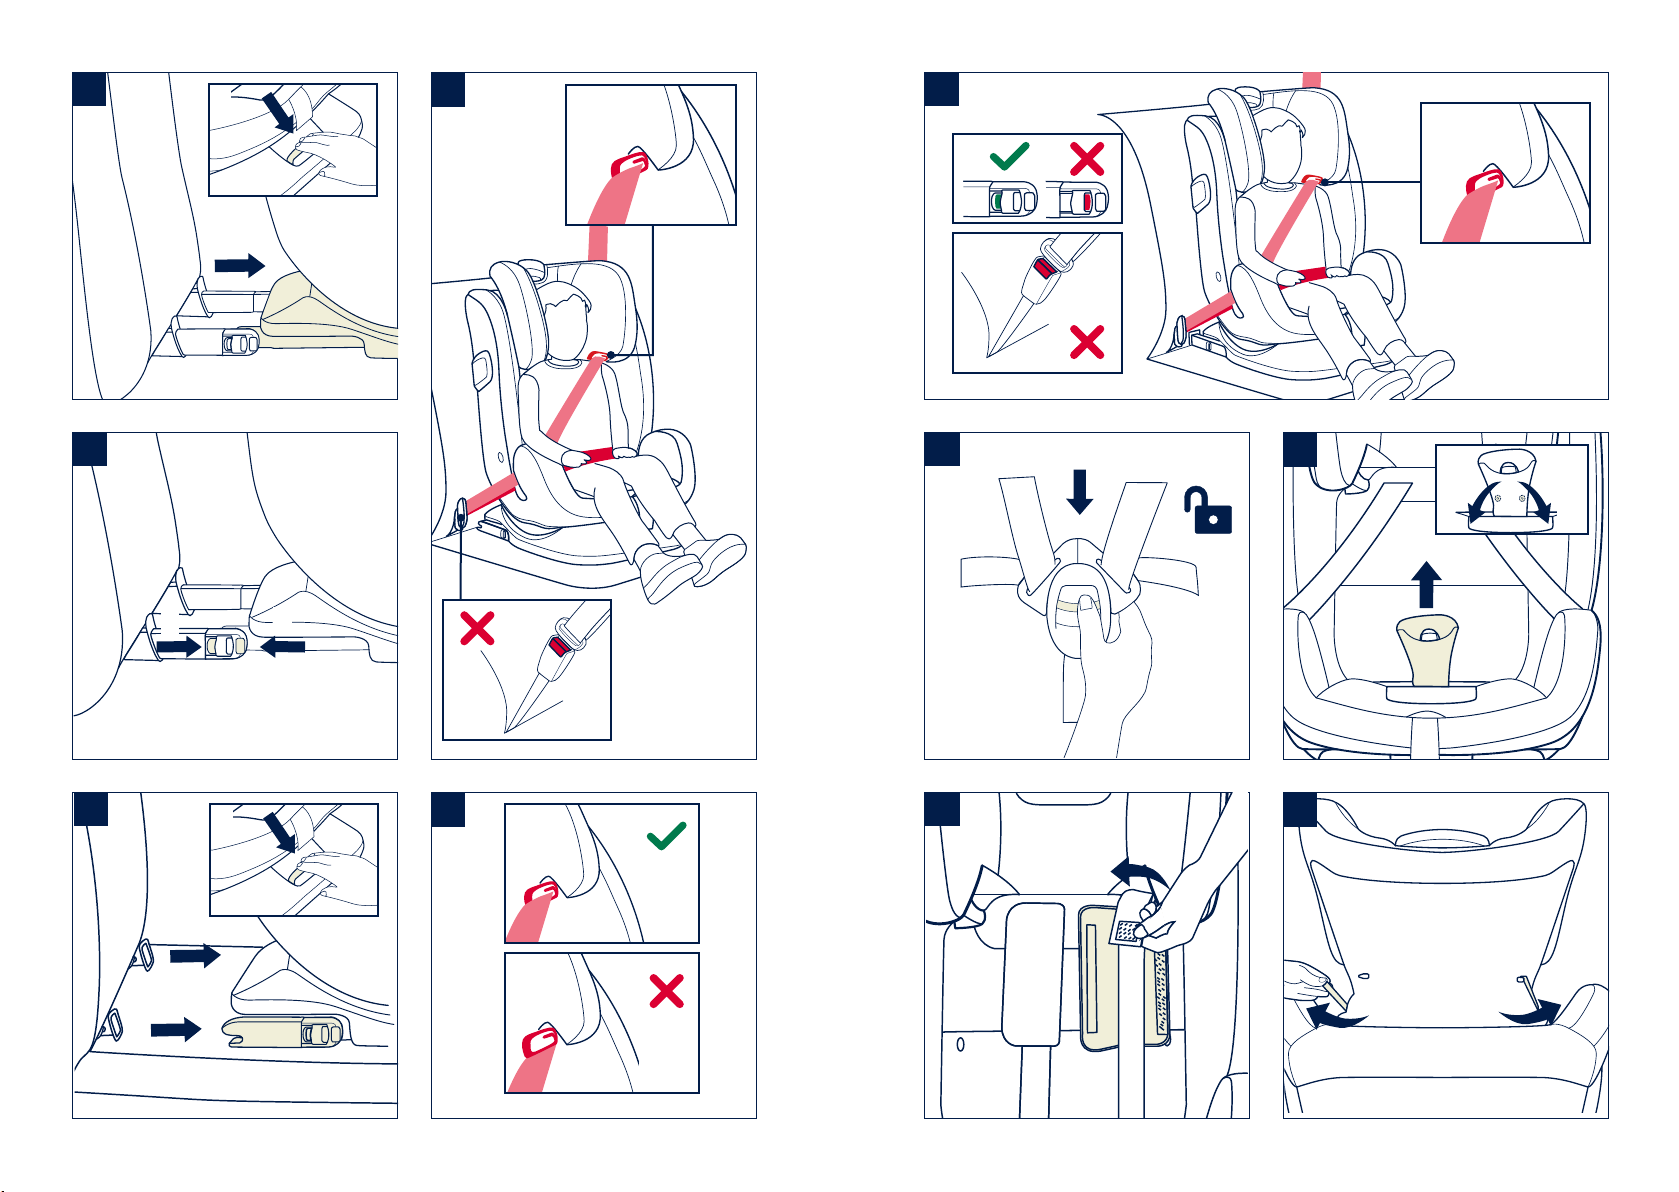
For installation with 3-point-belt
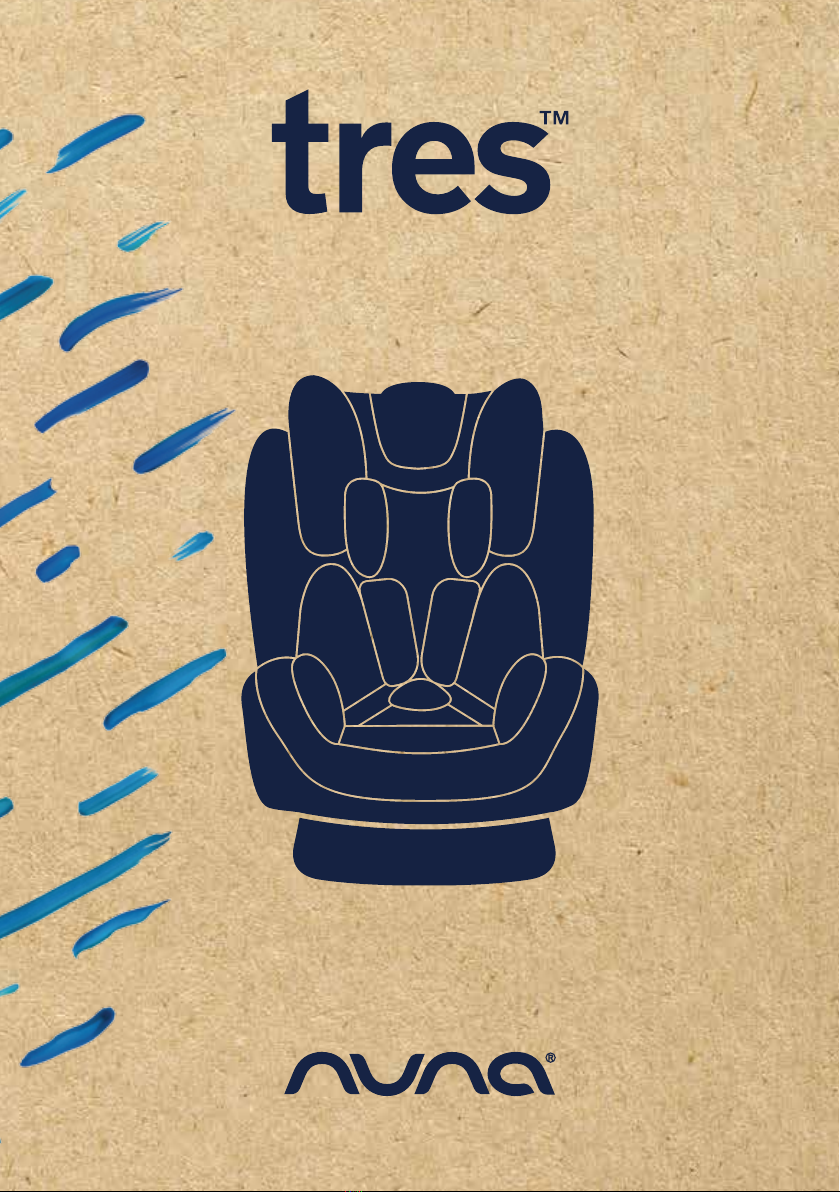
1 This is a “Universal” child restraint. It is approved to Regulation No. 44, 04
series of amendments, for general use in vehicles and it will fit most, but
not all, car seats.
2 A correct fit is likely if the vehicle manufacturer has declared in the vehicle
handbook that the vehicle is capable of accepting a “Universal” child
restraint for this age group.
3 This child restraint has been classified as “Universal” under more
stringent conditions than those which applied to earlier designs which do
not carry this notice.
4 If in doubt, consult either the child restraint manufacturer or the retailer.
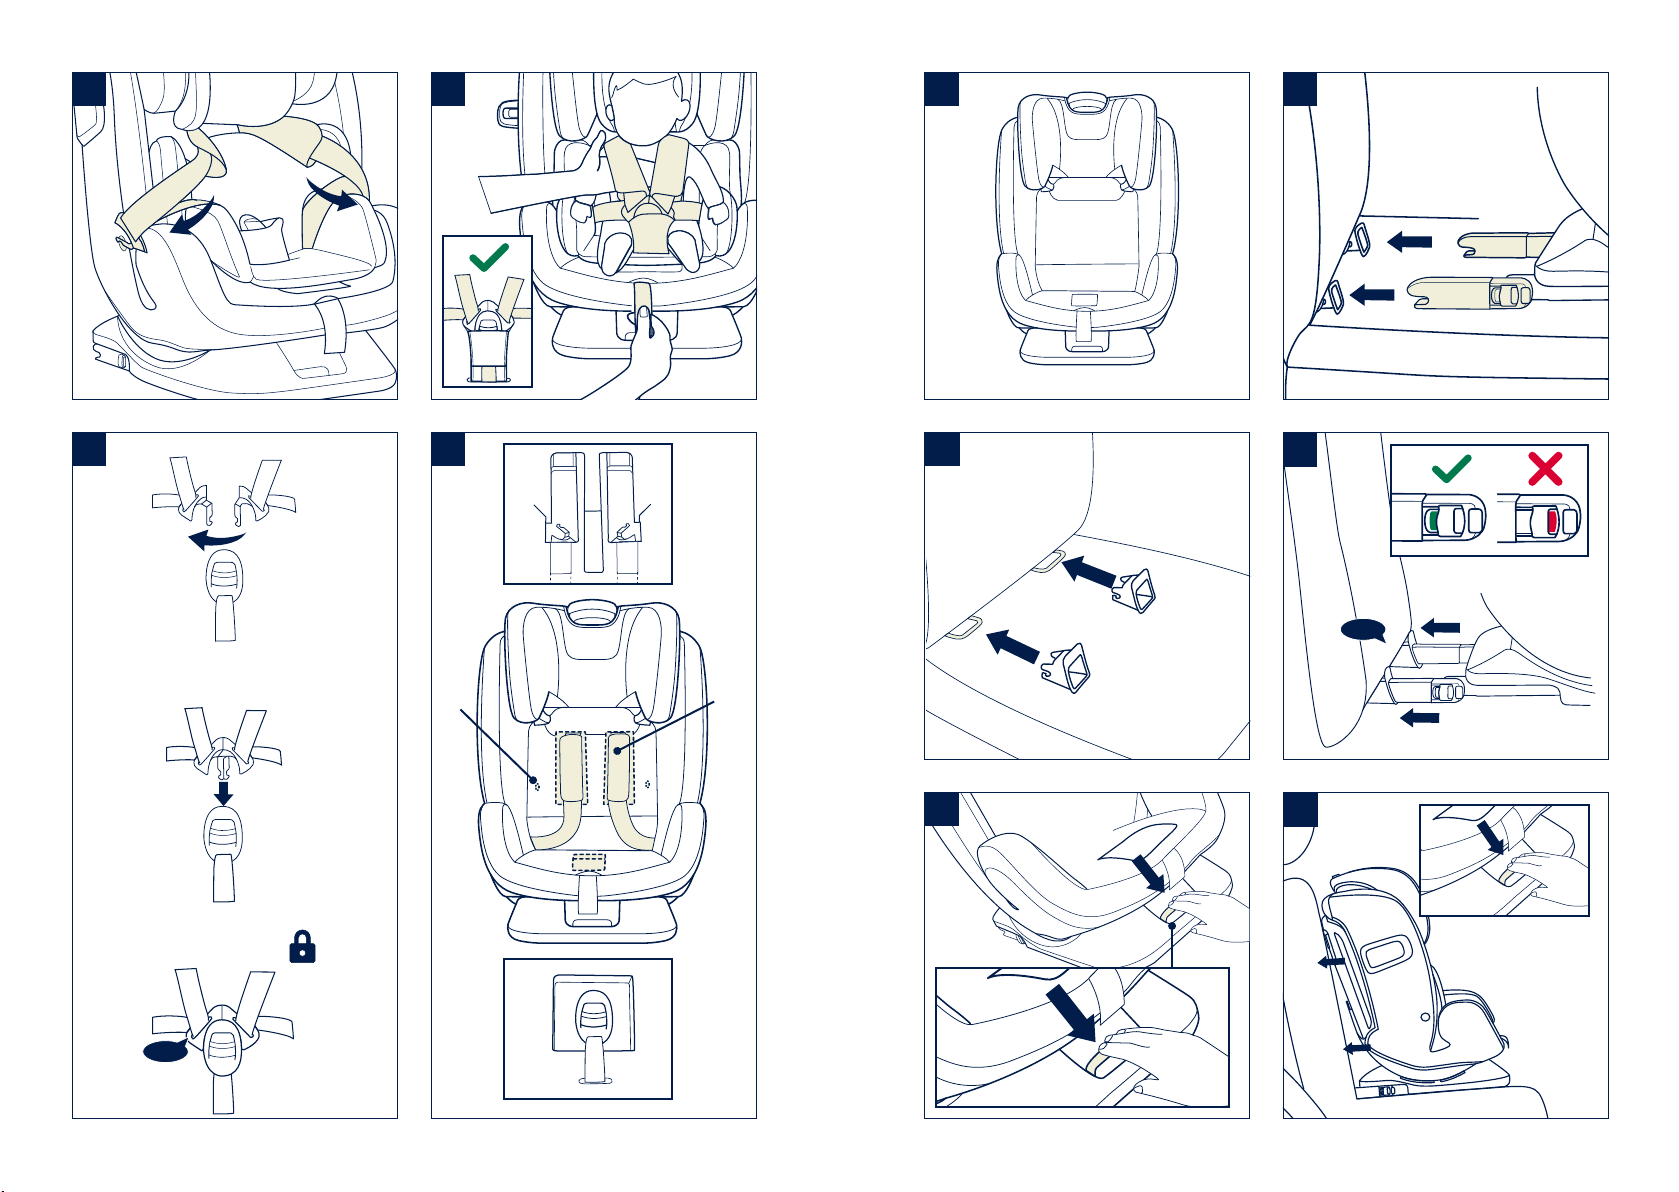
For installation with 3-point-belt and
ISO Connector™ attachment
1 This child restraint is classified for “Semi-Universal” use and is suitable
for fixing into the seat positions of the following cars. (Using a 3 point
retractable adult seat belt and ISO Connector™ at the same time while
using the child restraint in Group 2/3 mode).
2 Seat positions in other cars may also be suitable to accept this child
restraint. If in doubt, consult either the child restraint manufacturer or the
retailer.
3 Please refer to our vehicle fitting list (on-product as well as online at our
website).
1 Head Support
2 Seat Pad
3 Buckle
4 Webbing Adjuster
5 ISO Connector™ Adjuster Button
6 Recline Adjustment Handle
7 Crotch Harness Cover
8 Infant Insert
9 Shoulder Harness Covers
10 Head Support Adjustment Lever
11 Lock-off
12 Instruction Manual Storage
Compartment
13 Base
14 ISO Connector™ Attachment
15 Vehicle Waist Belt Slots
16 ISO Connector™ Guides
16
1315
10
11
12
14
1
2
3
4
67
9
8
5