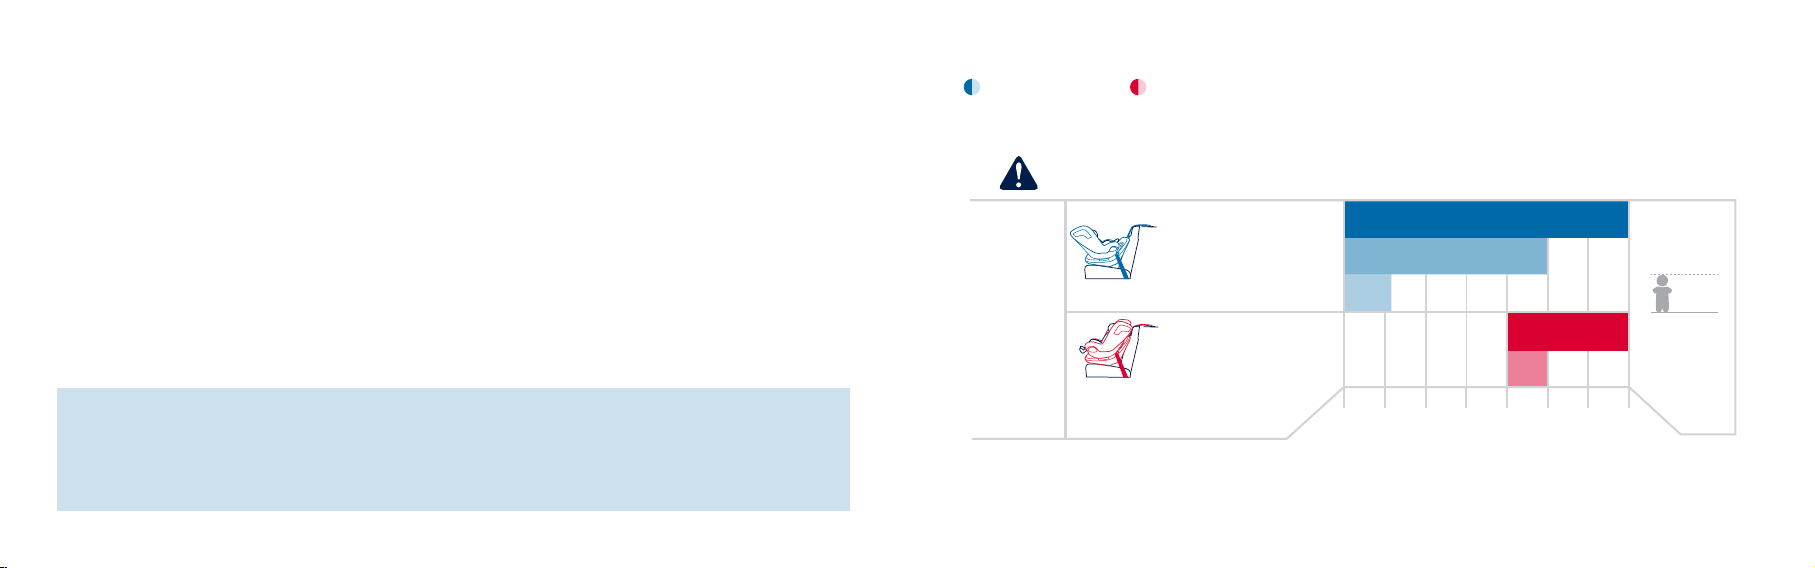
Vehicle Compatibility
This child restraint can ONLY be installed on vehicle seats that face forward. DO NOT
install in seats that face to the sides or rear of the vehicle.
WARNING: You MUST read and understand ALL child restraint related instructions
and warnings in your vehicle owner’s manual to correctly and safely use this child
restraint in your vehicle.
WARNING: SERIOUS INJURY
OR DEATH MAY OCCUR. NEVER
install this child restraint rear
facing in a vehicle seating position
with a frontal air bag unless it is
turned off. If your vehicle is equipped with
front passenger air bags, check your vehicle
owner's manual for child restraint installation
instructions.
IMPORTANT: According to accident
statistics, children are safer when
properly restrained in the rear
seating positions than in the front
seating positions.
12 REVV™instructions 13REVV™instructions
WARNING: DO NOT USE the lower anchors of the child restraint anchorage
system (LATCH system) to attach this child restraint when restraining a child weighing
more than 30 lb (13.6 kg) rear facing or forward facing.
Using LATCH
LATCH (Lower Anchors and Tether for CHildren) is a system for installing a child restraint
in a vehicle without using the vehicle belts. This child restraint can be installed without
vehicle belts by connecting the child restraint’s lower anchor belt to the lower anchorages in
your vehicle.
Refer to your vehicle owner’s manual to determine if your vehicle is equipped with LATCH,
and how to correctly use LATCH to install this child restraint in your vehicle.
The tether should ALWAYS be used in BOTH rear facing and forward facing installations,
even when installing the child restraint with the vehicle belt.
LATCH
This child restraint is designed to be used with lower LATCH anchors at the standard
spacing of 11 inches (28 cm). LATCH lower vehicle anchor points are defined as 11 inches
(28 cm) from the center of one LATCH anchor to the center of another LATCH anchor.