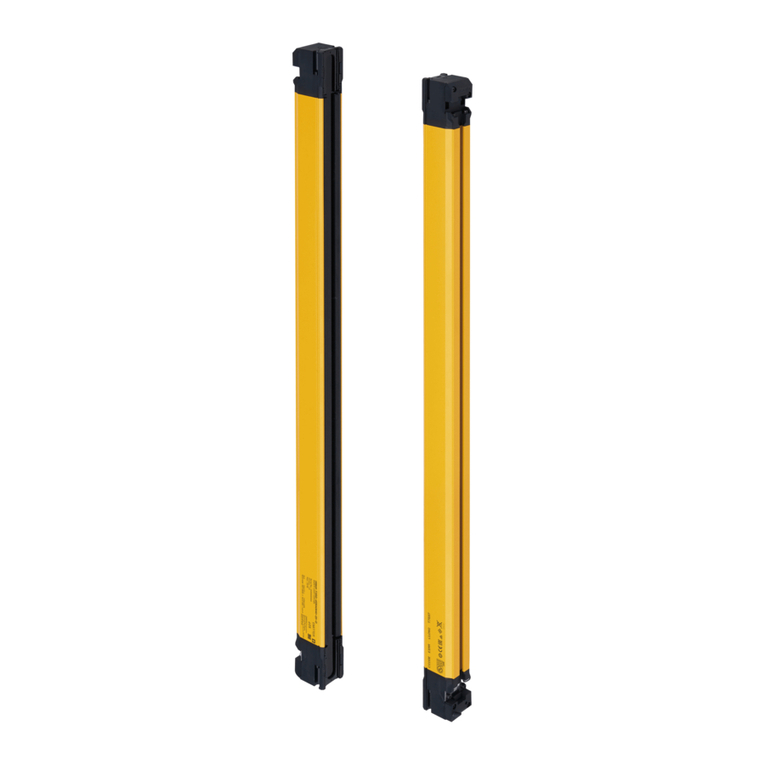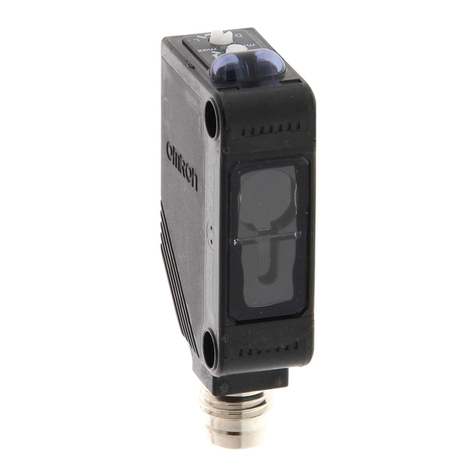
MULTI-BEAM SAFETY SENSOR
(Version 2)
ModelF3SJ-AM□P□□□
1. Application of a F3SJ sensor alone cannot receive type approval
provided by Article 44-2 of the Labour Safety and Health Law of Japan.
It is necessary to apply it in a system. Therefore, when using the F3SJ in
Japan as a "safety system for pressing or shearing machines" prescribed
in Article 42 of that law, the system must receive type approval.
2. The F3SJ is electro-sensitive protective equipment (ESPE) in accordance
with European Union (EU) Machinery Directive Index Annex V, Item 2.
3. EC Declaration of Conformity
OMRON declares that F3SJ is in conformity with the requirements of the
following EC Directives:
Machinery Directive 2006/42/EC
EMC Directive 2014/30/EU
4. F3SJ is in conformity with the following standards:
(1) European standards
EN61496-1 (Type 4 ESPE), EN 61496-2 (Type 4 AOPD), EN61508-1
through -3 (SIL3), EN ISO 13849-1:2015 (Category 4
,
PL e)
(2) International standards
IEC61496-1 (Type 4 ESPE), IEC61496-2 (Type 4 AOPD), IEC61508-1
through -3 (SIL3), ISO 13849-1:2015 (Category 4, PL e)
(3) JIS standards
JIS B 9704-1 (Type 4 ESPE), JIS B 9704-2 (Type 4 AOPD)
(4) North American Standards:
UL61496-1(Type 4ESPE), UL61496-2(Type 4AOPD), UL508, UL1998,
CAN/CSA C22.2 No.14, CAN/CSA C22.2 No.0.8
5. The F3SJ received the following approvals from the EU accredited body,
TÜV SÜD Product Service GmbH:
•EC Type-Examination in accordance with the EU Machinery Directive,
Type 4 ESPE (EN61496-1),Type 4 AOPD (EN 61496-2)
•TÜV SÜD Product Service Type Approval,Type 4 ESPE (EN61496-1),Type
4 AOPD (EN 61496-2), SIL1, 2, 3 (EN61508-1 through -3), EN ISO
13849-1:2015 (Category 4, PL e)
6. The F3SJ received the certicates of UL listing for US and Canadian safety
standards from theThird Party Assessment Body UL.
•Both are:Type 4 ESPE (UL61496-1),Type 4 AOPD (UL61496-2)
7. The F3SJ is designed according to the standards listed below.To make
sure that the nal system complies with the following standards and
regulations, you are asked to design and use it in accordance with all
other related standards, laws, and regulations. If you have any
questions, consult with specialized organizations such as the body
responsible for prescribing and/or enforcing machinery safety
regulations in the location where the equipment is to be used.
•European Standards: EN415-4, EN692, EN693
•U.S. Occupational Safety and Health Standards: OSHA 29 CFR 1910.212
•U.S. Occupational Safety and Health Standards: OSHA 29 CFR 1910.217
•American National Standards: ANSI B11.1 to B11.19
•American National Standards: ANSI/RIA 15.06
•Canadian Standards Association CSA Z142, Z432, Z434
•SEMI Standards SEMI S2
•Ministry of Health, Labour and Welfare "Guidelines for Comprehensive
Safety Standards of Machinery", Standard Bureau's Notication No. 501
dated June 1, 2001.
©OMRON Corporation
2006-2020
All Rights Reserved.
LEGISLATION AND STANDARDS
Alert Statements in this Manual
INSTRUCTION SHEET
Regarding the alert symbols and meanings used for the safe uses
In order for our customers to use the F3SJ in safety, precautions are
indicated in this manual with the alert symbols and statements such as the
followings. Those safety precautions relate to the important descriptions
that must be obeyed for the safe uses and operations. Be sure to obey the
precautions. The following indictions and symbols are used for the
When changes are made to each function using the setting tool
(F39-GWUM or F39-MC21), the administrator must manage the details of
the changes and perform the changes. Accidental functional setting
change may cause failure of human body detection, resulting in a serious
injury.
The F3SJ must be installed, congured, and incorporated into a machine
control system by a suciently trained and qualied person. An
unqualied person may not be able to perform these operations
properly, which may cause a person to go undetected, resulting in
Do not use this sensor for machines that cannot be stopped by
electrical control. For example, do not use it for a pressing machine
that uses full-rotation clutch. Otherwise, the machine may not stop
before a person reaches the hazardous part, resulting in serious injury.
Make sure to test the operation of the F3SJ after installation to verify
that the F3SJ operates as intended. Make sure to stop the machine
until the test is complete. Unintended function settings may cause a
person to go undetected, resulting in serious injury.
Install a protective structure so that the hazardous part of a machine can
only be reached by passing through the sensor's detection zone. Install
the sensors so that part of the person is always present in the detection
zone when working in a machine's hazardous areas. If a person is able
step into the hazardous area of a machine and remain behind the F3SJ's
detection zone, congure the system with an interlock function that
prevents the machine from being restarted. Failure to do so may result in
serious injury.
Do not use the auxiliary output or external indicator output for safety
applications. Human body may not be detected when F3SJ fails,
resulting in serious injury.
Make sure to install the F3SJ at the safe distance from the hazardous
part of the equipment. Otherwise, the machine may not stop before a
person reaches the hazardous part, resulting in serious injury.
Install the interlock reset switch in a location that provides a clear view
of the entire hazardous area and where it cannot be activated from
within the hazardous area.
The F3SJ cannot protect a person from an object ying from a
hazardous area. Install protective cover(s) or fence(s).
The muting and override functions disable the safety functions of the device.
You must ensure safety using other method when these functions are
Install muting sensors so that they can distinguish between the object that is
being allowed to pass through the detection zone and a person. If the muting
function is activated by the detection of a person, it may result in serious injury.
Muting lamps (external indicators) that indicate the state of the muting
and override functions must be installed where they are clearly visible
to workers from all the operating positions.
Use independent 2 input devices for muting inputs.
Muting related time must be properly congured for its application by a
suciently trained and qualied person, and the person must have
responsibility for settings, especially when setting the muting time limit to
innite.
You must install F3SJ, muting sensor, and physical barrier, and congure
time settings for muting so that an operator should not enter hazardous zone.
Install the sensor system so that it is not aected by the reective
surface of the F3SJ.
Make sure that the F3SJ is securely mounted and its cables and
connectors are properly connected.
Make sure that foreign material such as water, oil, or dust does not
enter the F3SJ or the connector while the cap is removed.
When using more than 1 set of F3SJ, install them so that mutual
interference does not occur, such as by conguring series connections
or using physical barriers between adjacent sets.
Do not use the sensor system with mirrors in a retro-reective
conguration. Doing so may hinder detection. It is possible to use
mirrors to "bend" the detection zone to a 90-degree angle.
Perform an inspection for all F3SJ as described in "Chapter 6
Checklists" of User’s manual.When using series connections,perform
inspections
Connect the load between the output and 0V line (PNP output).
Connecting the load between the output and +24V line will result in a
dangerous condition because operation is reversed to ON when
Do not short-circuit the output line to the +24V line. Otherwise, the
output is always ON. Also, the 0V of the power supply must be grounded
so that output does not turn ON due to grounding of the output line.
Congure the system by using the optimal number of safety outputs
that satisfy the requirements of the necessary safety category.
Do not connect each line of F3SJ to a DC power supply of more than
24VDC+20%. Also, do not connect to an AC power supply. Failure to
do so may result in electric shock.
Double or reinforced insulation from hazardous voltage must be applied
to all input and output lines. Failure to do so may result in electric shock.
Do not try to disassemble, repair, or modify this product. Doing so
may cause the safety functions to stop working properly.
Do not use the F3SJ in environments where ammable or explosive
gases are present. Doing so may result in explosion.
Perform daily and 6-month inspections for the F3SJ. Otherwise, the
system may fail to work properly, resulting in serious injury.
Extension of the cable must be within a specied length. If it isn't,
safety function may not work properly, resulting in danger.
To use the F3SJ in PSDI mode (Reinitiation of cyclic operation by the
protective equipment), you must congure an appropriate circuit between
the F3SJ and the machine. For details about PSDI, refer to OSHA1910.217,
IEC61496-1, and other relevant standards and regulations.
For the F3SJ to comply with IEC 61496-1 and UL 508, the DC power
supply unit must satisfy all of the following conditions:
• Must be within the rated power voltage (24V DC ± 20%)
• Must have tolerance against the total rated current of devices if it is
connected to multiple devices
• Must comply with EMC directives (industrial environment)
• Double or reinforced insulation must be applied between the primary
and secondary circuits
• Automatic recovery of overcurrent protection characteristics
(reversed L sagging)
• Output holding time must be 20ms or longer
• Must satisfy output characteristic requirements for class 2 circuit or
limited voltage current circuit dened by UL508
• Must comply with laws and regulations, regarding EMC and electrical
equipment safety, of the country or region where the F3SJ is used (Ex:
In EU, the power supply must comply with the EMC Directive and the
LowVoltageDirective.)
PRECAUTIONS ON SAFETY
Make sure to observe the following precautions that are necessary for ensuring
safe use of the product.
• Thoroughly read this manual and understand the installation procedures,
operation check procedures, and maintenance procedures before using the
product.
• Loads must satisfy both of the following conditions:
-Not short-circuited
-Not used with a current that is higher than the rating
• Do not drop the product.
• Dispose of the product in accordance with the relevant rules and regulations of
the country or area where the product is used.
PRECAUTIONS FOR SAFE USE
Observe the precautions described below to prevent operation failure,
malfunctions, or undesirable eects on product performance.
■Installation environment
Do not install the F3SJ in the following types of environments:
•Areas exposed to intense interference light, such as direct sunlight
•Areas with high humidity where condensation is likely to occur
•Areas where corrosive gases are present
•Areas exposed to vibration or shock levels higher than in the specication
provisions
•Areas where the product may come into contact with water
•Areas where the product may get wet with oil that can solve adhesive
Do not use radio equipment such as cellular phones, walkie-talkies, or
transceivers near the F3SJ.
This is a class A product. In residential areas it may cause radio interference.
in which case the Responsible Person may be required to take adequate
measures to reduce interference
■Wiring and installation
•Make sure to perform wiring while the power supply is OFF. Otherwise, the
F3SJ may fail to operate due to the diagnosis function.
•Do not short-circuit output lines to +24V line. Otherwise a fault of F3SJ
may occur.
•When extending the communication line with a cable (twisted-pair wire)
other than the dedicated cable (F39-JD**), use a cable with the same or
superior specication. Connect the shield to the 0V line.
•When replacing the cable connectors with other types of connectors, use
connectors that provide a protection grade of IP54 or higher.
•Properly perform the wiring after conrming the signal names of all the
terminals.
•Do not operate the control system until 2 seconds or more (2.2 seconds or
more in case of series connection) after turning ON the power of the F3SJ.
•Be sure to route the F3SJ cable separate from high-potential power lines or
through an exclusive conduit.
•When using a commercially available switching regulator power supply,
make sure to ground the FG terminal (frame ground terminal).
•Install the emitter and receiver so that their vertical direction should
match.
•If the protective height is 600 mm or more, use intermediate mounting
brackets of specied quantities and locations according to the dimensions.
If the brackets described above are not used, ratings and performance
cannot be not met.
•Sharing the power supply with other devices may cause the F3SJ to be
aected by noise or voltage drop. It is recommended that the F3SJ use a
dedicated power supply but do not share with other devices.
■Cleaning
Do not use thinner, benzene, or acetone for cleaning, because they aect
the product's resin parts and paint on the case.
■Object detection
The F3SJ cannot detect transparent and/or translucent objects.
PRECAUTIONS FOR CORRECT USE
RATINGS
Indicates a potentially hazardous situation
which, if not avoided, will result in minor or
moderate injury, or may result in serious
injury or death. Additionally there may be
signicant property damage.
WARNING
WARNING
WARNING
WARNING
WARNING
WARNING
For Users
■Ratings/Specications
In the type names in this table, the * contain the number of beams.
For Machines
For Installation
ForWiring
Other
F3SJ-AM*P300
Beamgap 300
Number of beams F3SJ-AM2P300 : 2 beams
F3SJ-AM3P300 : 3 beams
F3SJ-AM4P300 : 4 beams
Protective height
Lens diameter Diameter 5mm
Operating range 0.2 to 9m(Operating range can be reduced to 0.5m through the setting tool)
Response time ON to OFF: 10ms to 11ms max., OFF to ON: 40msto 44ms max. (when incidence is stable).
Refer to the reverse side for details.
Startup waiting time 2s max. (2.2s maxin case of series connection)
24VDC ± 20% (ripple p-p10% max.)
Power supply voltage(Vs)
Current
consumption (no load) Emitter 76 mA max.
Receiver 68 mA max.
Light source Infrared LED (870nm wavelength)
Within ±2.5 ° for the emitter and receiver at a detection distance of at least 3 maccording to IEC61496-2
Eective aperture angle (EAA)
Safety outputs(OSSD) PNP transistor outputs x 2, Loadcurrent300mA max, Residual voltage 2V max. (except for voltage drop due
to cable extension)(including inductance load), Maximum capacity load 2.2 μF, Leakage current 1mA max.
(This may be dierent from previously usedlogic (ON/OFF) because safety circuit is used.)
output)
Auxiliary output 1 (Non-safety
Auxiliary output 2 (non-safety
output, a function for a basic
PNP transistor output x 1, Load current 300mA max., Residual voltage 2V max. (except for voltage drop due
system)
PNP transistor output x 1, Load current 50mA or less, Residual voltage 2V or less (excluding inuence by
cable extension), Leakage current 1mA or less
to cable extension), Leakage current 1mA max.
External indicator output
(Non-safety output) Connectable external indicator
- Incandescent lamp : 24VDC, 3 to 7W
- LED lamp : Load current 10 to300mA max.
external indicator.)
Leakage current 1mA max.(An indicator cable F39-JJ3N or F39-A01P*PAC is required when using an
Output operation mode Safety outputs : ON when receiving light
Auxiliary output 1 : Reverse output of safety output (operation mode can be changed by the setting tool)
Auxiliary output 2: Turns ON when 30,000 hours of power-on time passes (operation mode can be changed
muting system)
by the setting tool)
External indicator output 1: Reverse outputof safety output(for basic system), ONduring muting/override (for
(Operation mode can be changed by the setting tool)
External indicator output 2: ON in lockout (for basic system), ON during muting/override (for muting system)
(operation mode can be changed by the setting tool)
Input voltage
Indicators
Test input, Interlock select input, Reset input, Muting input:
ON voltage: 9V to Vs* (short-circuit current: approx. 2.0mA)
OFF voltage: 0 to 1.5V, or open
External device monitoring input is:
OFF voltage: open
*The Vs indicates a voltage value in your environment.
ON voltage: 9V to Vs* (short-circuit current: approx. 3.5mA)
Emitter Error mode indicators (red LED x 3): Blink to indicate error details
Incident light level indicators (green LED x 2, orange LED x 3): ON based on the amount of incident light
Power indicator (green LED x 1): ON while power is ON
Interlock indicator (yellow LED x1): ON when in interlock/Blinks when in lockout
External device monitoring indicator [muting input 1 indicator], Test indicator [muting input 2
indicator] (green LED x2): ON/Blink according to function
Receiver Error mode indicators (red LED x 3): Blink to indicate error details
Incident light level indicators (green LED x 2, orange LED x3): ON based on the amount of incident light
OFF-state indicator (red LED x1): ON when safety outputs are OFF/ Blinks when in lockout
Muting error indicator, Test indicator (green LED x2): ON/Blink according to function
ON-state indicator (green LED x 1): ON when safety outputs are ON
Mutual interference prevention
function
Series connection Time division emission by series connection
- Number of connections: Up to 4 sets
- Total number of beams: Up to 400
- Cable length between sensors: 15 m max. (not including series connection cable (F39-JJR*L or F39-JJR3W) and power cable)
- Self-test (After power ON, and during operation)
- External test (light emission stop function by test input)
- External device monitoring
- Muting (Includes lamp breakage detection and override functions. F39-CN6 key cap for muting is required)
- Start interlock, restart interlock (The setting tool is required when muting function is used)
Interference light avoidance algorithm, Operating range change function
Test function
Safety-related functions
Connection method
Protection circuit Connector method (M12, 8-pin)
During operation: 35 to 85%RH (no condensation), During storage: 35 to 95%RH
During operation: -10 to 55°C (without freezing), During storage: -30 to 70°C
Ambient temperature Output short-circuit protection, and power supply reverse polarity protection
Ambient humidity
Ambientlight intensity of 10,000 Ix max.
Incandescent lamp: receiving-surfacelight intensity of 3,000 Ix max., Sunlight: receiving-surface light intensity
Insulation resistance 20MΩor higher(500VDC)
Dielectric strength voltage 1, 000VAC, 50/60Hz, 1min
Degree of protection IP65 (IEC60529)
Dia. 6 mm, 8-wire (0.15mm2 x 8) with braided shield, Allowable bending radius R5mm
Malfunction: 100m/s2, 1,000 times each in X, Y, and Z directions
Vibration resistance Malfunction: 10 to 55Hz, Multiple amplitude of 0.7mm, 20 sweeps each in X, Y, and Z directions
Shock resistance
Connection cable, Series
connection cable (F39-JJR*L,
JJR3W)
Extension cable
(F39-JD*A, JD*B,JC*C) bending radius of R36mm.
(To extend a cable, use an equivalent or higher-performance cable (twisted-pair wire) , and do not use the
Dia. 6.6 mm, 8-wire (0.3mm2 x 4P, conductor resistance 0.058 ohm/m), with braided shield,Allowable
cable in the same duct as that for high-voltage cables or power cables)
For details about extension lengths ( Power Cable Length), refer to next page
Material Cap: ABS resin
Cable: Oil resistant PVC
Weight (g) values can be:
Casing (including metal parts on both ends): Aluminum, zinc die-cast
Optical cover: PMMA resin (acrylic)
Weight (packaged) -F3SJ-AM2P300 :1550(g)
-F3SJ-AM3P300 :2370(g)
-F3SJ-AM4P300 :2790(g)
-F3SJ-AM2P400 :1690(g)
-F3SJ-AM3P400 :2650(g)
-F3SJ-AM4P400 :3710(g)
-F3SJ-AM2P500 :1830(g)
Accessories Instruction sheet, top and bottom mouting brackets,intermediate mounting brackets(*), error mode label,
Quick Installation Manual(QIM)
* The number of intermediate mounting brackets are as follows:
Applicable standards IEC61496-1, EN61496-1, UL61496-1Type 4ESPE (Electro-Sensitive Protective Equipment)
IEC61496-2, EN 61496-2, UL61496-2 Type4AOPD (Active Opto-electronic Protective Devices) IEC61508,
EN61508 SIL3, EN ISO 13849-1:2015 (Category 4, PL e), ISO 13849-1:2015 (Category 4, PL e)
F3SJ-AM2P300 : 300mm
F3SJ-AM3P300 : 600mm
F3SJ-AM4P300 : 900mm
F3SJ-AM*P400
400
F3SJ-AM2P400 : 2 beams
F3SJ-AM3P400 : 3 beams
F3SJ-AM4P400 : 4 beams
F3SJ-AM2P400 : 400mm
F3SJ-AM3P400 : 800mm
F3SJ-AM4P400 : 1200mm
F3SJ-AM*P500
500
F3SJ-AM2P500 : 2 beams
F3SJ-AM2P500 : 500mm
-F3SJ-AM2P300 : Not included
-F3SJ-AM3P300 : 1 set for each the emitter and receiver is included
-F3SJ-AM4P300 : 1 set for each the emitter and receiver is included
-F3SJ-AM2P400 : Not included
-F3SJ-AM3P400 : 1 set for each the emitter and receiver is included
-F3SJ-AM4P400 : 2 set for each the emitter and receiver is included
-F3SJ-AM2P500 : Not included
*Connection is not available with other models than F3SJ-AM□P□□□.
Original instructions
②
Indicates prohibited actions.
Indicates mandatory actions.
Indicates the risk of electric shock.
You must ensure that the system works as you intended after
conguring oating blanking.Failure to do so may result in serious injury.
Warning zone output is non-safety output. You must not include it to
calculation of safety distance. Otherwise safety distance may be reduced,
resulting in serious injury.
A switch to activate the override function must be a hold-to-run device
such as a spring return key switch and must be installed in a location that
provides a clear view of the entire hazardous zone and where it cannot
be activated from within the hazardous zone.Make sure that nobody is in
the hazardous area before activating the override function.
Omron Companies shall not be responsible for conformity with any standards,
codes or regulationswhich apply to the combination of the Product in the
Buyer’s application or use of the Product. At Buyer’s request, Omron will
provide applicable third party certication documents identifying ratings and
limitations of use which apply to the Product.This information by itself is not
sucient for a complete determination of the suitability of the Product in
combination with the end product, machine, system, or other application or
use. Buyer shall be solely responsible for determining appropriateness of the
particular Product with respect to Buyer’s application, product or system.
Buyer shall take application responsibility in all cases.
NEVER USE THE PRODUCT FOR AN APPLICATION INVOLVING SERIOUS RISKTO
LIFE OR PROPERTY OR IN LARGE QUANTITIES WITHOUT ENSURINGTHAT THE
SYSTEM AS AWHOLE HAS BEEN DESIGNED TO ADDRESSTHE RISKS, ANDTHAT
THE OMRON PRODUCT(S) IS PROPERLY RATED AND INSTALLED FOR THE
INTENDED USE WITHINTHE OVERALL EQUIPMENT OR SYSTEM.
Suitability for Use
Please read and understand this instruction sheet before
storing, installing, programming, operating, maintaining, or
disposing of the products. Please consult your OMRON
representative if you have any questions or comments.
Please refer to the User's Manual and the Quick Installation
Manual for detailed instructions on usage.
OMRON Corporation (Manufacturer)
Contact: www.ia.omron.com
Regional Headquarters
Shiokoji Horikawa, Shimogyo-ku, Kyoto, 600-8530 JAPAN
OMRON EUROPE B.V. (Importer in EU)
Wegalaan 67-69, 2132 JD Hoofddorp
The Netherlands
Tel: (31)2356-81-300/Fax: (31)2356-81-388
OMRON ELECTRONICS LLC
2895 Greenspoint Parkway, Suite 200
Homan Estates, IL 60169 U.S.A.
Tel: (1) 847-843-7900/Fax: (1) 847-843-7787
OMRON ASIA PACIFIC PTE. LTD.
No. 438A Alexandra Road # 05-05/08 (Lobby 2),
Alexandra Technopark,
Singapore 119967
Tel: (65) 6835-3011/Fax: (65) 6835-2711
OMRON (CHINA) CO., LTD.
Room 2211, Bank of China Tower,
200 Yin Cheng Zhong Road,
PuDong New Area, Shanghai, 200120, China
Tel: (86) 21-5037-2222/Fax: (86) 21-5037-2200
tFeb, 2020F
*9404086-2H*
