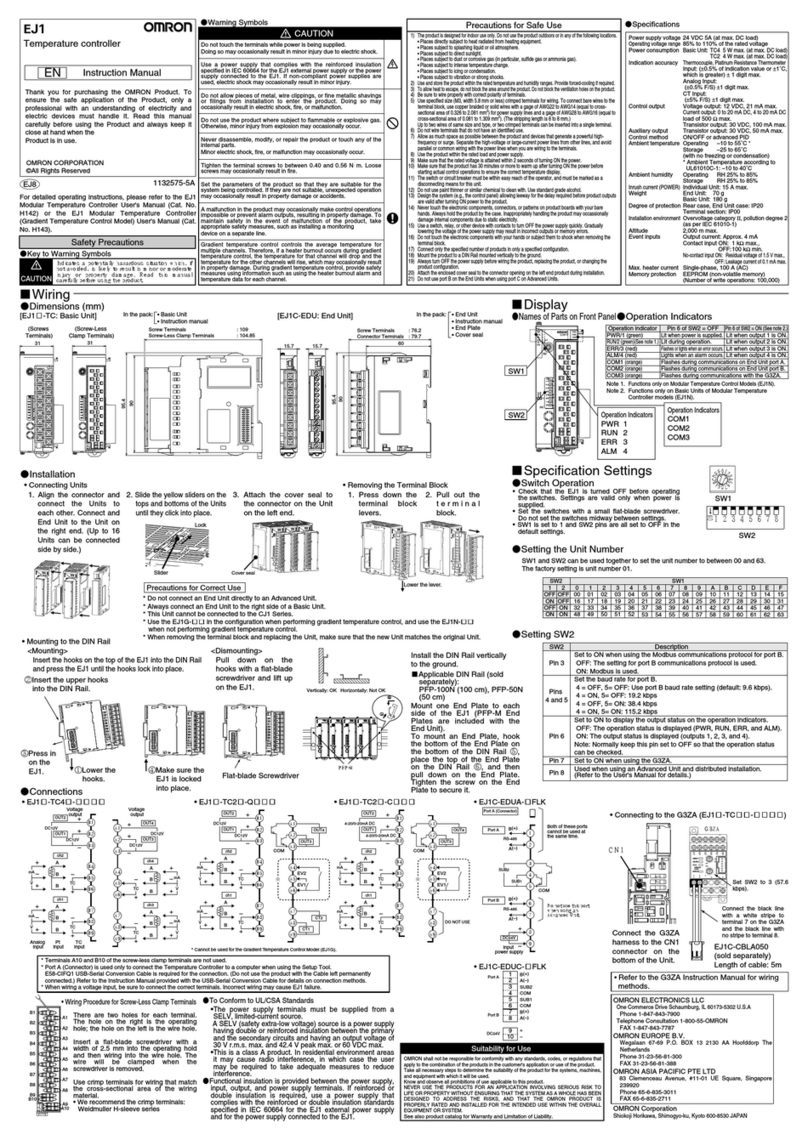
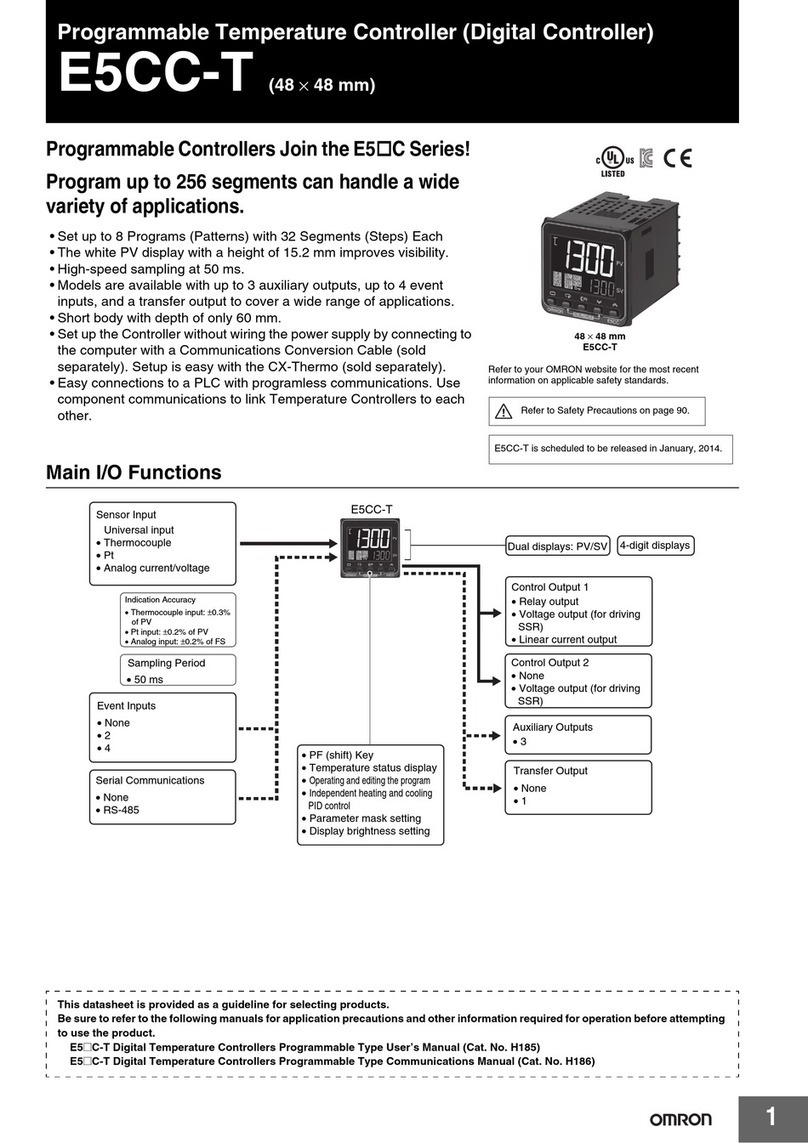
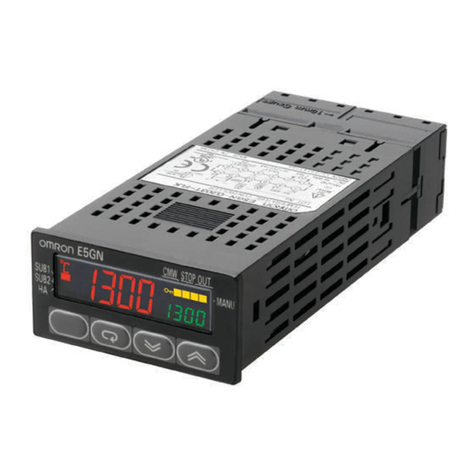
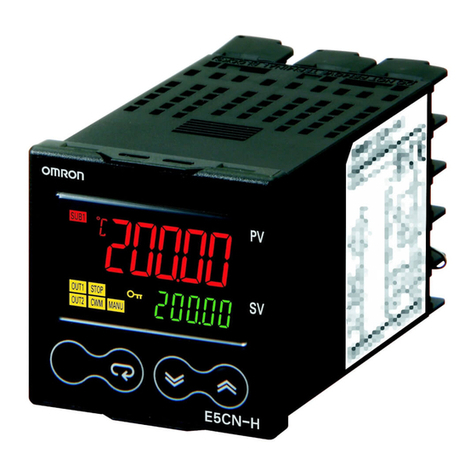
Omron EJ1N-TC4 User manual

CSM_EJ1_DS_E_4_2
1
Modular Temperature Controller
EJ1
In-panel Temperature Controller with Flexible
Modular Design and Wide Integration with
Host Devices
• The compact modular structure enables construction of temperature
systems optimally suited to the application.
• Connection can be made to a Programmable Controller without any
programming required, reducing the number of steps required in ladder
programming design.
• One fully universal-input Unit includes a thermocouple, platinum-
resistance thermometer, and analog input for easy selection and reduced
inventory requirements.
• Connect directly to the G3ZA Multi-channel Power Controller using
optimum cycle control for high-accuracy regulation with minimal noise.
• Autotuning (AT) can be used for independent heating/cooling PID control.
• Self-tuning (ST) can be used to calculate the PID constants with the step
response method.
• Up to 16 Temperature Controllers can be connected to a single
DeviceNet Communications Unit.
Ordering Information
Temperature Controller
Standard Control Models
*1. An End Unit is always required for connection to a Basic Unit or an HFU. An HFU cannot operate without a Basic Unit. External communications cannot be performed when using a Basic
Unit only.
*2. For heating/cooling control applications, control outputs 3 and 4 on the 2-point models are used for the cooling or heating control outputs.
On the 4-point models, heating/cooling control is performed for the two input points.
*3. When using the heater burnout alarm, purchase a Current Transformer (E54-CT1 or E54-CT3) separately.
Functional Upgrades
Refer to page 17 for details.
Upgrade functions are supported by the indicated version ("V1.1" or "V1.2") or a higher version of the software.
Supports DeviceNet Communications.
Refer to the “Safety Precautions” on
page 20.
Name
Power
supply
voltage
No. of
control
points
Control
outputs
1 and 2
Control
outputs
3 and 4
Auxiliary
output
Functions
Communications
functions Input type Terminal Model
Heater
burnout
alarm
Event
inputs
Basic Unit
(temperature
control) *1
24 VDC
supplied
from the
End Unit
2 Voltage
output:
2 points
(for SSR
drive) *2
Transistor
output: 2 points
(sinking)
None 2 *3 2 G3ZA connection
port: RS-485
From End Unit:
Port A or port B:
RS-485
Thermocouple,
platinum
resistance
thermometer,
analog
voltage, and
analog current
selectable for
each channel.
M3 terminal EJ1N-TC2A-QNHB
Screw-less
clamp EJ1N-TC2B-QNHB
4 Voltage output:
2 points (for
SSR drive) *2
None None M3 terminal EJ1N-TC4A-QQ
Screw-less
clamp EJ1N-TC4B-QQ
2Current
output:
2 points
Transistor
output: 2 points
(sinking)
2 M3 terminal EJ1N-TC2A-CNB
Screw-less
clamp EJ1N-TC2B-CNB
HFU with
Programless
Communications
*1
None None None Transistor
output:
4 points
(sinking)
4 Port C: RS-485 or
RS-232C
selectable.
From End Unit:
Port A: RS-485
No input M3 terminal EJ1N-HFUA-NFLK
Screw-less
clamp EJ1N-HFUB-NFLK
Port C: RS-422
From End Unit:
Port A: RS-485
M3 terminal EJ1N-HFUA-NFL2
Screw-less
clamp EJ1N-HFUB-NFL2
HFU with
DeviceNet
Communications
*1
None None DeviceNet
communications
Screw-less
clamp EJ1N-HFUB-DRT
End Unit *1 24 VDC Transistor
output:
2 points
(sinking)
None Port A or B: RS-
485
Connector: Port A
M3 terminal EJ1C-EDUA-NFLK
Detachable
connector EJ1C-EDUC-NFLK
V1.2
V1.2
Refer to the following manual for precautionary information and other information necessary to use the EJ1:
EJ1 Modular Temperature Controller User’s Manual (Cat. No. H142)

2
EJ1
Accessories (Order Separately)
Current Transformer (CT)
G3ZA Connecting Cable
Rail Mounting Equipment
CX-Thermo Support Software Ver. 4.1
USB-Serial Conversion Cable
Specifications
Ratings
*Inputs are fully universal. Therefore, platinum resistance thermometer, thermocouple, infrared thermosensor, and analog input can be selected.
Diameter Model
5.8 dia. E54-CT1
12.0 dia. E54-CT3
Cable length Model
5 m EJ1C-CBLA050
Name Model
Mounting Rail PFP-100N
PFP-50N
Model
EST2-2C-MV4
Model
E58-CIFQ1
Basic Unit/EJ1N-TC
Item Type EJ1N-TC4 EJ1N-TC2
Power supply voltage 24 VDC
Operating voltage range 85% to 110% of rated voltage
Power consumption 5 W max. (at maximum load) 4 W max. (at maximum load)
Input *
Thermocouple: K, J, T, E, L, U, N, R, S, B, W, PLII
ES1B Infrared Thermosensor: 10 to 70°C, 60 to 120°C, 115 to 165°C, 140 to 260°C
Analog input: 4 to 20 mA, 0 to 20 mA, 1 to 5 V, 0 to 5 V, 0 to 10 V
Platinum resistance thermometer: Pt100, JPt100
Input impedance Current input: 150 Ωmax., voltage input: 1 MΩmin.
Control
outputs
Voltage output Output voltage: 12 VDC ±15%, max. load current: 21 mA (PNP models with short-circuit protection circuit)
Transistor output
--- Max. operating voltage: 30 V, max. load current: 100 mA
Current output ---
Current output range: 4 to 20 mA or 0 to 20 mA DC
Load: 500 Ωmax. (including transfer output)
(Resolution: Approx. 2,800 for 4 to 20 mA DC, approx.
3,500 for 0 to 20 mA DC)
Event
inputs
Input points --- 2
Contact input --- ON: 1 kΩmax., OFF: 100 kΩmin.
Non-contact
input --- ON: Residual voltage: 1.5 V max.,
OFF: Leakage current: 0.1 mA max.
--- Outflow current: Approx. 4 mA per point
Number of input and control
points Input points: 4, Control points: 4 Input points: 2, Control points: 2
Setting method Via communications
Control method ON/OFF control or 2-PID (with autotuning, self-tuning)
Other functions Two-point input shift, digital input filter, remote SP, SP ramp, manual manipulated variable, manipulated variable
limiter, interference overshoot adjustment, loop burnout alarm, RUN/STOP, banks, I/O allocations, etc.
Ambient temperature range Operating: −10°C to 55°C, Storage: −25°C to 65°C (with no icing or condensation)
Ambient humidity range Operating: 25% to 85% (with no condensation)
V1.2

EJ1
3
Characteristics
*1. The indication of K thermocouples in the −200 to 1,300°C range, T and N thermocouples at a temperature of −100°C or less, and U and L
thermocouples at any temperature is ±2°C ±1 digit maximum. The indication of B thermocouples at a temperature of 400°C or less is
unrestricted. The indication of R and S thermocouples at a temperature of 200°C or less is ±3°C ±1 digit max.
W = (±0.5% of indication value (PV) or ±3°C, whichever is greater) ±1 digit max. PLII = (±0.5% of indication value (PV) or ±2°C, whichever is
greater) ±1 digit max.
The indication accuracy for K thermocouples in the −199.9 to 999.9°C range is (±0.5% of indication value (PV) or ±1°C, whichever is
greater) ±10 digit maximum. However, at a temperature of -100°C or less, it is ±2°C ±10 digit maximum.
*2. “EU” stands for Engineering Unit. The location of the decimal point depends on the type of sensor that is selected.
If the decimal point locations is set to 0 (****), however, it will be treated as if it were set to 1 (***.*).
*3. B, R, S, and W sensors: 0.2°C/Ωmax. (100 Ωmax.)
Indication accuracy
Thermocouple input/platinum resistance thermometer input:
(±0.5% of indication value (PV) or ±1°C, whichever is greater) ±1 digit max. *1
Analog input: ±0.5% FS ±1 digit max.
CT input: ±5% FS ±1 digit max.
Hysteresis 0.1 to 999.9 EU (in units of 0.1 EU) *2
Proportional band (P) 0.1 to 999.9 EU (in units of 0.1 EU) *2
Integral time (I) 0 to 3,999 s (in units of 1 s)
Derivative time (D) 0.0 to 999.9 s (in units of 0.1 s)
Control period 0.5 s, 1 to 99 s (in units of 1 s)
Manual reset value 0.0% to 100.0% (in units of 0.1%)
Alarm setting range −1,999 to 9,999 (decimal point position depends on input type)
Sampling period 250 ms
Influence of signal source
resistance
Thermocouple: 0.1°C (0.2°F)/Ωmax. (100 Ωmax per line) *3
Platinum resistance thermometer: 0.4°C (0.8°F)/Ωmax. (10 Ωmax per line)
Insulation resistance 20 MΩmin. (at 500 VDC)
Dielectric strength 600 VAC, 50/60 Hz for 1 min between current-carrying terminals of different polarity
Vibration resistance 10 to 55 Hz, 20 m/s2for 2 hours each in X, Y, and Z directions
Shock resistance 150 m/s2, 3 times each in 6 directions
Weight 180 g
Degree of protection Rear case: IP20, Terminal section: IP00
Memory protection EEPROM (non-volatile memory) (number of writes: 100,000)
Standards
Approved standards UL61010C-1, CSA C22.2 No.1010-1
Conformed standards
EN61010-1 (IEC61010-1): Pollution level 2, overvoltage category II
EMC Directive
EMI: EN61326
EMI Radiated: EN55011 Group1 class A
EMI Conducted: EN55011 Group1 class A
EMS: EN61326
ESD Immunity: EN61000-4-2
Electromagnetic Field Immunity: EN61000-4-3
Burst immunity/Noise Immunity: EN61000-4-4
Conducted Disturbance Immunity: EN61000-4-6
Surge Immunity: EN61000-4-5
V1.2

4
EJ1
Communications Specifications
*1. Connection from the EJ1C-EDU. When using an HFU, port B on the End Unit can be used for distributed placement only.
*2. A special cable (EJ1C-CBLA050) must be purchased separately for the G3ZA connection.
*3. For the number of Units that can be connected, refer to “Connection Precautions” on page 11.
*4. The Modbus protocol can be used with Basic Unit with version 1.1 or higher.
Current Transformer (CT) Rating Characteristics of the Heater Burnout
Alarm, SSR Failure Alarm, and Heater
Overcurrent Alarm (TC2@-QNHB Model
Only)
*1. When the control output ON time is less than 100 ms, heater
burnout detection, heater overcurrent detection, and heater
current measurement are not performed.
*2. When the control output OFF time is less than 100 ms, SSR
failure alarm and leakage current measurement are not
performed.
Item Port B *1Port A Terminal/ Port A Connector *1G3ZA Connection Port *2
Transmission path
connection RS-485 (multipoint)
Communications
method RS-485 (two-wire, half duplex)
Synchronization
method Start-stop synchronization
Communications
protocol CompoWay/F, Modbus *4 CompoWay/F
Baud rate 9.6, 19.2, 38.4, 57.6, or 115.2 kbps 38.4 kbps fixed 57.6 kbps fixed
Transmission
code CompoWay/F: ASCII, Modbus: RTU CompoWay/F: ASCII
Data bit length 7 or 8 bits 7 bits
Stop bit length 1 or 2 bits 2 bits
Error detection Vertical parity (none, even, or odd) Vertical parity (even)
Block check character (BCC): with CompoWay/F, CRC-16: (with Modbus)
Flow control None
Interface RS-485
Retry function None
Communications
response wait time 0 to 99 ms (default: 5 ms) 1 to 99 ms (default: 1 ms) ---
Number of Units
that can be
connected in
parallel *3
64 Units (model numbers with TC4: 256
channels, model numbers with TC2: 128
channels)
Communications connection via port B
on the End Unit
64 Units (model numbers with TC4: 256
channels, model numbers with TC2: 128
channels)
Communications connection via port A
on the End Unit
8 Units (Communications connection
via G3ZA port on the Basic Unit)
V1.1
V1.1
Dielectric
strength 1,000 VAC for 1 min
Vibration
resistance 50 Hz, 98 m/s2
Weight E54-CT1: Approx. 11.5 g, E54-CT3: Approx. 50 g
Accessories
(E54-CT3 only) Armatures (2), plugs (2)
Maximum
heater current 100 VAC
Input current
indication
accuracy
±5%FS ±1 digit max.
Heater
burnout alarm
setting range
0.1 to 99.9 A (in units of 0.1 A)
0.0 A: Heater burnout alarm output turns OFF.
100.0 A: Heater burnout alarm output turns ON.
Min. detection ON time: 100 ms *1
SSR failure
alarm setting
range
0.1 to 99.9 A (in units of 0.1 A)
0.0 A: SSR failure alarm output turns ON.
100.0 A: SSR alarm output turns OFF.
Min. detection OFF time: 100 ms *2
Heater
overcurrent
alarm setting
range
0.1 to 99.9 A (in units of 0.1 A)
0.0 A: Heater overcurrent alarm output turns ON.
100.0 A: Heater overcurrent alarm output turns OFF.
Min. detection ON time: 100 ms *1

EJ1
5
Input Ranges
Sensor inputs are fully universal. Therefore, platinum resistance thermometer, thermocouple, infrared thermosensor, and analog input can be selected.
Inputs can be set for each channel using universal inputs.
Input type Platinum resistance
thermometer Thermocouple ES1B Infrared
Thermosensor
Name Pt100 JPt100 K J T E L U N R S B W PL
II
10 to
70 °C
60 to
120 °C
115 to
165 °C
140 to
260 °C
Tempe
rature
range
(°C)
2300
1800
1700
1600
1500
1400
1300
1200
1100
1000
900
800
700
600
500
400
300
200
100
0
−
100.0
−
200.0
2300
1800
1700 1700
1300 1300 1300
850 850 850
600
500.0 500.0 500.0
400.0 400 400.0 400 400.0
260
120 165
100.0 100.0 90
100
0.0 0.0 0 0 0 0 0 0 0 0 0
−−− −
− − − − −− −−−
Setting number 0123456789101112131415161718192021 22 23 24
Input type Analog input Thermo
couple
Name 4 to
20 mA
0 to
20 mA
1 to
5 V
0 to
5 V
0 to
10 V K
Tempe
rature
range
(°C)
2300
1800
1700
1600
1500
1400
1300
1200
1100
1000
900
800
700
600
500
400
300
200
100
0
−
100.0
−
200.0
Any of the following ranges, by scaling:
−1999 to 9999
−199.9 to 999.9
−19.99 to 99.99
−1.999 to 9.999
−199.9
to 999.9
Setting number 25 26 27 28 29 30
Applicable standards by input type are as follows:
K, J, T, E, N, R, S, B: JIS C1602-1995, IEC584-1
L: Fe-CuNi, DIN 43710-1985
U: Cu-CuNi, DIN 43710-1985
W: W5Re/W26Re, ASTM E988-1990
PL II: According to Platinel II Electromotive Force
Table by Engelhard Corp.
JPt100: JIS C 1604-1989, JIS C 1606-1989
Pt100: JIS C 1604-1997 IEC 751
Shaded ranges indicate default settings.
V1.2

6
EJ1
Ratings
*Auxiliary outputs can be allocated using digital output allocations.
Characteristics
Communications Characteristics: Port C
*1. The communications method can be switched between RS-485 and RS-232C. A separate model must be used for RS-422 communications.
*2. For the number of Units that can be connected, refer to “Connection Precautions” on page 11.
HFU Unit/EJ1N-HFU@-NFL@
Power supply voltage 24 VDC
Operating voltage range 85% to 110% of rated voltage
Power consumption 2 W max. (at maximum load)
Auxiliary outputs
*
Outputs 4
Transistor outputs Max. operating voltage: 30 VDC, Max. load current: 50 mA
Event inputs
Inputs 4
Contact inputs ON: 1 kΩmax., OFF: 100 kΩmin.
Transistor inputs ON: residual voltage of 1.5 max., OFF: leakage current of 0.1 mA max.
Outflow current: Approx. 4 mA (per contact)
Programless
connection
Downloading
(EJ1 reads data from a PLC) Number of parameters that can be set: 1200
Uploading
(EJ1 writes data to a PLC) Number of parameters that can be set: 1200
Applicable PLCs
OMRON: SYSMAC CS/CJ/CP Series
Mitsubishi Electric: MELSEC-An/AnS/FX3UC Series
Mitsubishi Electric: MELSEC-Q/QnA/QnAS Series
Ambient temperature range Operating: −10°C to 55°C
Storage: −25°C to 65°C (with no icing or condensation)
Ambient humidity range Operating: 25% to 85% (with no condensation)
Insulation resistance 20 MΩmin. (at 500 VDC)
Dielectric strength 600 VAC, 50/60 Hz for 1 min between current-carrying terminals of different polarity
Vibration resistance 10 to 55 Hz, 20 m/s2for 2 hours each in X, Y, and Z directions
Shock resistance 150 m/s2, 3 times each in 6 directions
Weight 160 g
Degree of protection Rear case: IP20, Terminal section: IP00
Memory protection EEPROM (non-volatile memory) (number of writes: 100,000)
Standards Approved standards UL61010C-1, CSA C22.2 No.1010-1
Conformed standards EN61010-1 (IEC61010-1): Pollution level 2, overvoltage category II
EMC Directive Refer to page 3.
Transmission path connection RS-485/RS-422: Multi-point, RS-232C: Point-to-point *1
Communications method RS-485/RS-422 (two-wire, half duplex), RS-232C
Synchronization method Start-stop synchronization
Communications protocol
•OMRON PLC protocol (Connectable PLCs: SYSMAC CS/CJ/CP Series)
•AnA/AnU CPU common commands (Connectable PLCs: MELSEC-An/AnS/FX3UC Series)
•MC protocol (form 5) (Connectable PLCs: MELSEC-Q/QnA/QnAS Series)
Baud rate 9.6, 19.2, 38.4, 57.6, or 115.2 kbps
Transmission code Binary
Data bit length 8 bits
Stop bit length 1 bit
Error detection Depends on protocol selected for the programless communications protocol.
Flow control None
Interface RS-485, RS-422, RS-232C *1
Retry function Available
Communications response wait time 0 to 99 ms (default: 5 ms)
Number of Basic Units that can be connected in
parallel *232 Units (model numbers with TC4:128 channels max., model numbers with TC2:64 channels max.)
Number of HFUs that can be connected •SYSMAC CS/CJ/CP-series PLCs: 8 (EJ1-HFU@-NFLK)
•MELEC Q/QnA/QnAS-series PLCs: 8 (EJ1-HFU@-NFL2)
V1.2
V1.2
V1.1
V1.1
V1.1
V1.1

EJ1
7
Ratings
Characteristics
Communications Characteristics
*For the number of Units that can be connected, refer to “Connection Precautions” on page 11.
HFU Unit/EJ1N-HFUB-DRT
Power supply voltage DeviceNet power supply 24 VDC (for internal circuits)
EDU power supply 24 VDC (for RS-485 communications circuits and Temperature Controllers)
Operating voltage
range
DeviceNet power supply 11 to 25 VDC
EDU power supply 20.4 to 26.4 VDC
Power consumption (at maximum load) 1 W max. (at maximum load)
Main functions Remote I/O communications, explicit message communications, CompoWay/F command feed-through
function, parameter backup function, and configuration registration
Ambient temperature range Operating: −10°C to 55°C
Storage: −25°C to 65°C (with no icing or condensation)
Ambient humidity range Operating: 25% to 85% (with no condensation)
Insulation resistance 20 MΩmin. (at 500 VDC)
Dielectric strength 600 VAC, 50/60 Hz for 1 min
Vibration resistance 10 to 55 Hz, 10 m/s2for 2 hours each in X, Y, and Z directions
Shock resistance 150m/s2max. 3 times each in 3 axes, 6 directions
Weight 70 g max.
Degree of protection IP20
Memory protection EEPROM, 100,000 write operations (backup data)
Standards Approved standards UL61010-1, CSA C22.2 No.1010-1
Conformed standards EN61010-1 (IEC61010-1): Pollution level 2, overvoltage category II
EMC Directive Refer to page 3.
Communications protocol Conforms to DeviceNet.
Communications
functions
Remote I/O
communications
Master-slave connections (polling, COS, or cyclic)
Conforms to DeviceNet specifications.
I/O allocation
Input and output data can be allocated freely by user with the Configurator.
Allocations can be made to DeviceNet parameters or Temperature Controller parameters.
Two blocks for IN Area, up to 100 words
One block for OUT Area, up to 100 words (The first word is always allocated to the OUT Enable Bit.)
Message communications Explicit message communications
CompoWay/F communications commands can be sent (commands are sent in explicit message format).
Connection format Combination of multidrop and T-branch connections (for trunk and drop lines)
Baud rate DeviceNet: 500, 250, or 125 kbps, or automatic detection of master baud rate
Communications media Special 5-wire cable (2 signal lines, 2 power lines, and 1 shield line)
Communications distance
The values in parentheses apply when Thin Cables are used.
Communications power supply 11 to 25 VDC
Maximum number of nodes that can be connected 64 (includes Configurator when used.)
Maximum number of slaves that can be connected 63
Error control CRC error detection
DeviceNet power supply Power supplied from DeviceNet communications connector
Applicable Temperature Controllers
EJ1 Series (excluding the EJ1G)
TC4: EJ1N-TC4A-QQ and EJ1N-TC4B-QQ
TC2: EJ1N-TC2A-QNHB, EJ1N-TC2B-QNHB, EJ1N-TC2A-CNB, and EJ1N-TC2B-CNB
Maximum number of Temperature Controllers that
can be connected *16 Units (model numbers with TC4: 64 channels max., model numbers with TC2: 32 channels max.)
Baud rate Network length Drop line length Total drop line length
500 kbps 100 m max. (100 m max.) 6 m max. 39 m max.
250 kbps 250 m max. (100 m max.) 6 m max. 78 m max.
125 kbps 500 m max. (100 m max.) 6 m max. 156 m max.
8
EJ1
Ratings
*Auxiliary output can be allocated using the bus output allocation for each Basic Unit.
Characteristics
Communications
*1. Port B communications for the End Unit cannot be used when port C communications for the HFU is used.
*2. Port A connector communications and port A terminal communications cannot be used at the same time.
End Unit/EJ1C-EDU
Power supply voltage 24 VDC
Operating voltage range 85% to 110% of rated voltage
Auxiliary output
*
Outputs 2
Transistor outputs Max. operating voltage: 30 VDC, Max. load current: 50 mA
Ambient temperature range Operating: −10°C to 55°C
Storage: −25°C to 65°C (with no icing or condensation)
Ambient humidity range Operating: 25% to 85% (with no condensation)
Insulation resistance 20 MΩmin. (at 500 VDC)
Dielectric strength 600 VAC, 50/60 Hz for 1 min between current-carrying terminals of different polarity
Vibration resistance 10 to 55 Hz, 20 m/s2for 2 hours each in X, Y, and Z directions
Shock resistance 150 m/s2, 3 times each in 6 directions
Weight 70 g
Degree of protection End Unit case: IP20, Terminal section: IP00
Standards Approved standards UL61010C-1, CSA C22.2 No.1010-1
Conformed standards EN61010-1 (IEC61010-1): Pollution level 2, overvoltage category II
EMC Directive Same as for the Basic Unit. Refer to page 3.
Port B *1Basic Unit Communications (Refer to “Communications Specifications” on page 4.)
Port A Basic Unit Communications (Refer to “Communications Specifications” on page 4.)
Port A connector *2E58-CIFQ1

EJ1
9
Unit Configuration Example
Minimal Configuration
Small Systems with 2 Channels or 4 Channels Communicating with the Host Device via RS-485
(CompoWay/F Protocol)
•Alarms can be allocated to the auxiliary output for the End Unit.
•G3ZA/G3PW outputs can be used.
Multiple Units without an EJ1N-HFU
Building Systems Communicating with the Host Device, such as a PLC, PT, or Computer, via RS-485
(CompoWay/F Protocol)
•The 2 auxiliary alarm outputs provided on the End Unit can be used for integrated alarm systems.
•G3ZA/G3PW outputs can be used.
•Distributed placement is possible by using multiple EJ1C-EDU End Units.
Multiple Units with an EJ1N-HFU
Using the EJ1N-HFU@-NFL@to Build a System Communicating 1:1 with a PLC Using Programless
Communications
•The 2 auxiliary outputs provided on the End Unit can be used.
•The 4 event inputs and 4 auxiliary outputs of the HFU can also be used.
•G3ZA/G3PW outputs can be used.
•Distributed placement is possible by using multiple EJ1C-EDU End Units
COM1
COM2
COM3
PWR
RUN
ERR
ALM
SW1
ON
SW2
21345678
EJ1-TC4
0
1
2
3
4
5
6
7
8
9
A
B
C
D
E
F
PC
PLC PT PC
EJ1N-TC4
or
EJ1N-TC2 EJ1C-EDU
Port A (connector): USB connection can be made
with the E58-CIFQ1 (sold separately).
CX-Thermo for setting
Host devices
Port B: RS-485 (CompoWay/F)
SW2
SW1
ERROR
OCC
SD/RD
READY
G3ZA
PC
PLC PT PC
EJ1N-TC4
or
EJ1N-TC2 EJ1C-EDU
Port B: RS-485 (CompoWay/F)
COM1
COM2
COM3
PWR
RUN
ERR
ALM
SW1
ON
SW2
21345678
EJ1-TC4
0
1
2
3
4
5
6
7
8
9
A
B
C
D
E
F
COM1
COM2
COM3
PWR
RUN
ERR
ALM
SW1
ON
SW2
21345678
EJ1-TC4
0
1
2
3
4
5
6
7
8
9
A
B
C
D
E
F
COM1
COM2
COM3
PWR
RUN
ERR
ALM
SW1
ON
SW2
21345678
EJ1-TC4
0
1
2
3
4
5
6
7
8
9
A
B
C
D
E
F
SW2
SW1
ERROR
OCC
SD/RD
READY
SW2
SW1
ERROR
OCC
SD/RD
READY
G3ZAG3ZA
Host devices
G3ZA
connection
port
G3ZA
connection
port
G3ZA
connection
port
CX-Thermo for setting
Port A (connector): USB connection can be
made with the E58-CIFQ1 (sold separately).
SW2
SW1
ERROR
OCC
SD/RD
READY
G3ZA
SW2
SW1
ERROR
OCC
SD/RD
READY
SW2
SW1
ERROR
OCC
SD/RD
READY
G3ZAG3ZA
PC
EJ1N-HFU
PLC
EJ1N-TC4
or
EJ1N-TC2 EJ1C-EDU
Port B
RS-232C/RS-485
Port B is used for distributed placement.
Port A (connector): USB connection can be made
with the E58-CIFQ1 (sold separately).
COM1
COM2
COM3
PWR
RUN
ERR
ALM
SW1
ON
SW2
21345678
EJ1-TC4
0
1
2
3
4
5
6
7
8
9
A
B
C
D
E
F
COM1
COM2
COM3
PWR
RUN
ERR
ALM
SW1
ON
SW2
21345678
EJ1-TC4
0
1
2
3
4
5
6
7
8
9
A
B
C
D
E
F
COM1
COM2
COM3
PWR
RUN
ERR
ALM
SW1
ON
SW2
21345678
EJ1-TC4
0
1
2
3
4
5
6
7
8
9
A
B
C
D
E
F
COM1
COM2
COM3
PWR
RUN
ERR
ALM
SW1
ON
SW2
21345678
EJ1-HFU
0
1
2
3
4
5
6
7
8
9
A
B
C
D
E
F
CX-Thermo for setting
G3ZA
connecti-
on port
G3ZA
connection
port
Port C
G3ZA
connection
port

10
EJ1
Multiple Units with an EJ1N-HFU
Using the EJ1N-HFU@-NFL@to Build Systems Communicating 1:1 with a PLC Using Programless
Communications
•Up to eight HFUs can be connected to one port on a PLC.
•G3ZA/G3PW outputs can be used.
•Distributed placement is possible by using multiple EJ1C-EDU End Units.
•To connect more than one HFU, specific PLC and EJ1 models must be used.
Refer to “Connecting EJ1 Controllers 1:N to a PLC” on page 13.
Multiple Units with an EJ1N-HFU
Using the EJ1N-HFUB-DRT to Build a System Communicating with a PLC
•Up to 63 DeviceNet slaves can be connected to the DeviceNet Masters in one PLC.
•G3ZA/G3PW outputs can be used.
•Distributed placement is possible by using multiple EJ1C-EDU End Units.
V1.1
Up to eight HFUs can be connected.
PC
EJ1N-HFU
PLC
EJ1N-TC4
or
EJ1N-TC2 EJ1C-EDU
Port B
Port B is used for distributed placement.
Port A (connector): USB connection can be made with the
E58-CIFQ1 (sold separately).
CX-Thermo for setting
Port C
SYSMAC (OMRONPLC) RS-485
MELSEC (Mitsubishi Electric PLC) RS-422
EJ1N-HFU
EJ1N-TC4
or
EJ1N-TC2 EJ1C-EDU
Port C
Note: Set the EJ1N-TC to a communications unit number that is not being used by the EJ1N-HFU.
COM1
COM2
COM3
PWR
RUN
ERR
ALM
SW1
ON
SW2
21345678
EJ1-TC4
0
1
2
3
4
5
6
7
8
9
A
B
C
D
E
F
COM1
COM2
COM3
PWR
RUN
ERR
ALM
SW1
ON
SW2
21345678
EJ1-TC4
0
1
2
3
4
5
6
7
8
9
A
B
C
D
E
F
COM1
COM2
COM3
PWR
RUN
ERR
ALM
SW1
ON
SW2
21345678
EJ1-TC4
0
1
2
3
4
5
6
7
8
9
A
B
C
D
E
F
COM1
COM2
COM3
PWR
RUN
ERR
ALM
SW1
ON
SW2
21345678
EJ1-HFU
0
1
2
3
4
5
6
7
8
9
A
B
C
D
E
F
COM1
COM2
COM3
PWR
RUN
ERR
ALM
SW1
ON
SW2
21345678
EJ1-TC4
0
1
2
3
4
5
6
7
8
9
A
B
C
D
E
F
COM1
COM2
COM3
PWR
RUN
ERR
ALM
SW1
ON
SW2
21345678
EJ1-TC4
0
1
2
3
4
5
6
7
8
9
A
B
C
D
E
F
COM1
COM2
COM3
PWR
RUN
ERR
ALM
SW1
ON
SW2
21345678
EJ1-TC4
0
1
2
3
4
5
6
7
8
9
A
B
C
D
E
F
COM1
COM2
COM3
PWR
RUN
ERR
ALM
SW1
ON
SW2
21345678
EJ1-HFU
0
1
2
3
4
5
6
7
8
9
A
B
C
D
E
F
Up to 63 nodes (including other slaves)
PC
PLC
DeviceNet Configurator
or CX-Integrator
DeviceNet Serial communications
EJ1N
DRT
MS
NS
TS
MAX
No.
NODE
ADR
COPY
123456
EDS
UP/DN
MODE
TC2/4
NO
10
1
COM1
COM2
COM3
PWR
RUN
ERR
ALM
SW1
ON
SW2
21345678
EJ1-TC4
0
1
2
3
4
5
6
7
8
9
A
B
C
D
E
F
COM1
COM2
COM3
PWR
RUN
ERR
ALM
SW1
ON
SW2
21345678
EJ1-TC4
0
1
2
3
4
5
6
7
8
9
A
B
C
D
E
F
COM1
COM2
COM3
PWR
RUN
ERR
ALM
SW1
ON
SW2
21345678
EJ1-TC4
0
1
2
3
4
5
6
7
8
9
A
B
C
D
E
F
EJ1N-HFU
EJ1N-TC4
or
EJ1N-TC2 EJ1C-EDU
Port B
Port C
EJ1N-HFU
EJ1N-TC4
or
EJ1N-TC2 EJ1C-EDU
Port B is used for distributed placement.

EJ1
11
Connection Precautions
Communications Unit Number Setting
•Communications unit numbers 0 to 63 can be assigned to Basic
Units and HFUs.
Restrictions on the Number of Units That Can Be
Connected
Restrictions for HFUs
•One EJ1N-HFU can manage up to 32 Basic Units (EJ1N-TC4/
TC2).
•Up to 16 Units can be connected side by side including the EJ1N-
HFU. The End Unit is not included in the 16 Units.
Restrictions When Connecting with the G3ZA
•Up to 8 G3ZA Multi-channel Power Controllers can be connected
to one Basic Unit (EJ1N-TC4/TC2).
Restrictions for Basic Units
•When the system is configured of only Basic Units (EJ1N-TC4/
TC2), up to 64 Units can be connected.
•Distributed placement is possible by using End Units (EJ1C-EDU).
•Up to 16 Units can be connected side by side. The End Unit is not
included in the 16 Units.
Wiring for Distributed Placement
Note: Wire the dotted line when settings for all distributed Units are
being made from one port A connector.
If the dotted lines are not wired, make the settings for group A
using the port A connector for group A and make the settings
for group B using the port A connector for group B.
COM1
COM2
COM3
PWR
RUN
ERR
ALM
SW1
ON
SW2
21345678
EJ1-TC4
0
1
2
3
4
5
6
7
8
9
A
B
C
D
E
F
COM1
COM2
COM3
PWR
RUN
ERR
ALM
SW1
ON
SW2
21345678
EJ1-TC4
0
1
2
3
4
5
6
7
8
9
A
B
C
D
E
F
COM1
COM2
COM3
PWR
RUN
ERR
ALM
SW1
ON
SW2
21345678
EJ1-TC4
0
1
2
3
4
5
6
7
8
9
A
B
C
D
E
F
COM1
COM2
COM3
PWR
RUN
ERR
ALM
SW1
ON
SW2
21345678
EJ1-TC4
0
1
2
3
4
5
6
7
8
9
A
B
C
D
E
F
COM1
COM2
COM3
PWR
RUN
ERR
ALM
SW1
ON
SW2
21345678
EJ1-HFU
0
1
2
3
4
5
6
7
8
9
A
B
C
D
E
F
COM1
COM2
COM3
PWR
RUN
ERR
ALM
SW1
ON
SW2
21345678
EJ1-TC4
0
1
2
3
4
5
6
7
8
9
A
B
C
D
E
F
EJ1N-TC4 or
EJ1N-TC2
One HFU can manage up to 16 Basic Units
(when using the EJ1N-TC4: 4 channels ×16 Units = 64 channels)
EJ1C-EDU
EJ1C-EDU
Port B
Port B
EJ1N-HFU
Port C
EJ1N-TC4
or
EJ1N-TC2
Up to 16 Units can be connected side by side.
Note: End Units are not included in the number
of Units that can be connected.
To the host device
COM1
COM2
COM3
PWR
RUN
ERR
ALM
SW1
ON
SW2
21345678
EJ1-TC4
0
1
2
3
4
5
6
7
8
9
A
B
C
D
E
F
EJ1C-EDU
Up to 8G3ZA Power Controllers can be connected to one Basic Unit.
EJ1N-TC4 or EJ1N-TC2
G3ZA
G3ZA connection port
SW2
SW1
ERROR
OCC
SD/RD
READY
SW2
SW1
ERROR
OCC
SD/RD
READY
SW2
SW1
ERROR
OCC
SD/RD
READY
SW2
SW1
ERROR
OCC
SD/RD
READY
Port B
To the host device
Port B
COM1
COM2
COM3
PWR
RUN
ERR
ALM
SW1
ON
SW2
21345678
EJ1-TC4
0
1
2
3
4
5
6
7
8
9
A
B
C
D
E
COM1
COM2
COM3
PWR
RUN
ERR
ALM
SW1
ON
SW2
21345678
EJ1-TC4
0
1
2
3
4
5
6
7
8
9
A
B
C
D
E
COM1
COM2
COM3
PWR
RUN
ERR
ALM
SW1
ON
SW2
21345678
EJ1-TC4
0
1
2
3
4
5
6
7
8
9
A
B
C
D
E
COM1
COM2
COM3
PWR
RUN
ERR
ALM
SW1
ON
SW2
21345678
EJ1-TC4
0
1
2
3
4
5
6
7
8
9
A
B
C
D
E
F
COM1
COM2
COM3
PWR
RUN
ERR
ALM
SW1
ON
SW2
21345678
EJ1-TC4
0
1
2
3
4
5
6
7
8
9
A
B
C
D
E
F
COM1
COM2
COM3
PWR
RUN
ERR
ALM
SW1
ON
SW2
21345678
EJ1-TC4
0
1
2
3
4
5
6
7
8
9
A
B
C
D
E
F
EJ1C-EDU
EJ1N-TC4 or EJ1N-TC2
COM1
COM2
COM3
PWR
RUN
ERR
ALM
SW1
ON
SW2
21345678
EJ1-TC4
0
1
2
3
4
5
6
7
8
9
A
B
C
D
E
COM1
COM2
COM3
PWR
RUN
ERR
ALM
SW1
ON
SW2
21345678
EJ1-TC4
0
1
2
3
4
5
6
7
8
9
A
B
C
D
E
COM1
COM2
COM3
PWR
RUN
ERR
ALM
SW1
ON
SW2
21345678
EJ1-TC4
0
1
2
3
4
5
6
7
8
9
A
B
C
D
E
COM1
COM2
COM3
PWR
RUN
ERR
ALM
SW1
ON
SW2
21345678
EJ1-TC4
0
1
2
3
4
5
6
7
8
9
A
B
C
D
E
F
COM1
COM2
COM3
PWR
RUN
ERR
ALM
SW1
ON
SW2
21345678
EJ1-TC4
0
1
2
3
4
5
6
7
8
9
A
B
C
D
E
F
COM1
COM2
COM3
PWR
RUN
ERR
ALM
SW1
ON
SW2
21345678
EJ1-TC4
0
1
2
3
4
5
6
7
8
9
A
B
C
D
E
F
EJ1C-EDU
EJ1N-TC4 or EJ1N-TC2
Up to 64 Basic Units can be connected using distributed placement.
Using EJ1@-TC4 models: 4 channels ×64 Units = 256 channels
Using EJ1@-TC2 models: 2 channels ×64 Units = 128channels
Note: End Units are not included in the number of Units that can be connected.
COM1
COM2
COM3
PWR
RUN
ERR
ALM
SW1
ON
SW2
21345678
EJ1-TC4
0
1
2
3
4
5
6
7
8
9
A
B
C
D
E
F
COM1
COM2
COM3
PWR
RUN
ERR
ALM
SW1
ON
SW2
21345678
EJ1-TC4
0
1
2
3
4
5
6
7
8
9
A
B
C
D
E
F
1
2
3
4
5
6
7
8
9
Group A
Group B
COM1
COM2
COM3
PWR
RUN
ERR
ALM
SW1
ON
SW2
21345678
EJ1-TC4
0
1
2
3
4
5
6
7
8
9
A
B
C
D
E
F
COM1
COM2
COM3
PWR
RUN
ERR
ALM
SW1
ON
SW2
21345678
EJ1-TC4
0
1
2
3
4
5
6
7
8
9
A
B
C
D
E
F
1
2
3
4
5
6
7
8
9
Port A
Port B
Port A
Port B
Host
devices
FG
24 VDC
RS-485
RS-485
24 VDC

12
EJ1
Restrictions on Unit Placement
Always connect the HFU on the left side of the Basic Unit.
Insulation Blocks
Each EJ1 Unit is electrically insulated for each function block as shown in the following figures.
Functional insulation is applied between the power supply, input, output, and communications terminal sections.
If reinforced double insulation is required, use power supplies that comply with IEC60664 for reinforced double insulation for the EJ1's external
power supply and for power supplies connected to the EJ1.
Programless Communications
Communications with PLCs from OMRON (SYSMAC CS/CJ/CP Series) and Mitsubishi Electric (MELSEC-Q/QnA/QnAS/An/Ans/FX3UC Series) can
be performed without creating ladder programming.
Using programless communications enables monitoring and changing settings for the EJ1 by simply reading and writing to PLC memory.
The EJ1 automatically performs communications with the PLC, which reduces work hours spent programming for communications from the PLC
to the EJ1.
Connectable Devices
Connecting an EJ1 Controller 1:1 to a PLC
SYSMAC CS/CJ/CP Series
*Use only products manufactured on or after December 20, 1999.
For details, refer to the CS/CJ Series, Serial Communications Boards/Units Operation Manual (Cat. No. W336).
COM1
COM2
COM3
PWR
RUN
ERR
ALM
SW1
ON
SW2
21345678
EJ1-HFU
0
1
2
3
4
5
6
7
8
9
A
B
C
D
E
F
COM1
COM2
COM3
PWR
RUN
ERR
ALM
SW1
ON
SW2
21345678
EJ1-TC4
0
1
2
3
4
5
6
7
8
9
A
B
C
D
E
F
EJ1N-HFUEJ1N-TC4 or
EJ1N-TC2
Name Model No. Communications ports
Port 1 Port 2
Serial Communications Units
CJ1W-SCU21-V1 RS-232C RS-232C
CJ1W-SCU31-V1 RS-422A/485 RS-422A/485
CJ1W-SCU41-V1 RS-422A/485 RS-232C
CS1W-SCU21-V1 *RS-232C RS-232C
CS1W-SCU31-V1 RS-422A/485 RS-422A/485
Serial Communications Boards CS1W-SCB21-V1 *RS-232C RS-232C
CS1W-SCB41-V1 *RS-232C RS-422A/485
CPU Units
CJ Series --- RS-232C
CS Series --- RS-232C
CP Series RS-232C or RS-422A/485 can be used by adding an Option Board.
Power
supply Transistor outputs 1 to 4
Communications (Port B, port C)
Event inputs 1 to 4
Functional isolation
Power
supply
Transistor outputs 1 and 2
Communications (Port A, port B)
Functional isolation
EJ1N-HFU@-NFL@
Input 1
Power
supply
Input 2
Event inputs 1 and 2, CT1 and 2 *
Communications (Port A, port B, G3ZA)
Transistor outputs 3 and 4
Voltage outputs 1 and 2/Current outputs 1 and 2
Functional isolation
Input 1
Power
supply
Input 2
Input 4
Voltage outputs 1 to 4
Communications (Port A, Port B, G3ZA)
Input 3
Functional isolation
EJ1N-TC2 EJ1N-TC4
EJ1C-EDU
*Not provided on models with current outputs.
PV
PLC The read monitor value is
written to the PLC memory.
The read setting is written to the
setting for the EJ1N-TC4/TC2.
Manipulated variable
Status
SP
Monitor
Setting
Alarm value 1
Alarm value 2
EJ1N-HFU EJ1N-TC4/TC2
The EJ1N-HFU automatically
performs communications
with the PLC.
The EJ1N-HFU reads the value
written to the PLC memory.
The EJ1N-HFU reads the monitor
value for the EJ1N-TC4/TC2.
Monitoring can be
performed for the
EJ1 and the settings
can be changed by
simply reading and
writing to memory.
PV
Manipulated variable
Status
SP
Alarm value 1
Alarm value 2
PV
Manipulated variable
Status
SP
Alarm value 1
Alarm value 2

13
EJ1
MELSEC-Q/QnA/QnAS Series
Note: 1. Refer to the Mitsubishi Electric PLC documentation for information on MELSEC PLCs.
2. Direct connections to the EJ1 are possible only with RS-232C or RS-422.
3. More than one EJ1 Controller to one PLC is not possible even with RS-422 communications. Refer to Connecting EJ1 Controllers 1:N
to a PLC, below, for product combinations that support 1:N connections.
4. Connection ability has been verified for the above MELSEC models. Design changes and other factors, however, may prevent normal
connection. Always confirm operation in advance.
MELSEC-An/AnS Series
Note: Use a MELSEC-AnA/AnU CPU.
MELSEC-FX3UC Series
Connecting EJ1 Controllers 1:N to a PLC
The combinations of PLCs and HFUs that can be connected 1:N are listed below.
SYSMAC CS/CJ/CP Series
*Use only products manufactured on or after December 20, 1999.
For details, refer to the CS/CJ Series, Serial Communications Boards/Units Operation Manual (Cat. No. W336).
MELSEC-Q/QnA/QnAS Series
Note: Refer to the Mitsubishi Electric PLC documentation for information on MELSEC PLCs.
Name Model No. Communications ports
Channel 1 Channel 2
Q-compatible Serial Communications Unit
QJ71C24N
QJ71C24 RS-232C RS-422/485
QJ71C24N-R2
QJ71C24-R2 RS-232C RS-232C
QJ71C24N-R4 RS-422/485 RS-422/485
QnA-compatible Serial
Communications Unit
AJ71QC24N RS-232C RS-422/485
AJ71QC24N-R2 RS-232C RS-232C
AJ71QC24N-R4 RS-422 RS-422/485
QnAS-compatible Serial
Communications Unit
A1SJ71QC24N RS-232C RS-422/485
A1SJ71QC24N-R2 RS-232C RS-232C
Name Model No. Communications ports
An-compatible Computer Link Unit AJ71UC24 RS-232C or RS-422/485
AnS-compatible Computer Link Unit
A1SJ71UC24-R2 RS-232C
A1SJ71UC24-R4 RS-422/485
A1SJ71UC24-PRF RS-232C
Name Model No. Communications ports
Communications Adapter FX3U-232ADP RS-232C
FX3U-485ADP RS-485
Function Board FX3U-232-BD RS-232C
FX3U-485-BD RS-485
Name Model No. Communications ports
Serial Communications Units
CJ1W-SCU31-V1 Port 1 or 2
CJ1W-SCU41-V1 Port 1
CS1W-SCU31-V1 Port 1 or 2
Serial Communications Board CS1W-SCB41-V1 *Port 2
CPU Units CP Series RS-422A/485 can be used by adding an Option Board.
EJ1N-HFU EJ1N-HFUA-NFLK
EJ1N-HFUB-NFLK Port C
Name Model No.
Serial Communications Units
Channel 2 of QJ71C24N
QJ71C24N-R4
Channel 2 of A1SJ71QC24N
Channel 2 of AJ71QC24N
AJ71QC24N-R4
EJ1N-HFU EJ1N-HFUA-NFL2
EJ1N-HFUB-NFL2
V1.1
V1.1
V1.1

14
EJ1
Connection
External Connection
•Functional insulation is applied between the power supply and the I/O sections. If reinforced insulation is required, connect the input and output
terminals to devices without any exposed current-carrying parts or to devices with reinforced insulation suitable for the maximum operating
voltage of the power supply and I/O sections.
•To comply with the standards for noise terminal voltage for class A in EN 61326, install a noise filter (Densei Lamda MXB-1206-33 or the
equivalent) to the DC power line as close as possible to the Temperature Controller.
•Use an SELV power supply that provides overcurrent protection. An SELV circuit is one separated from the power supply with double insulation
or reinforced insulation, that does exceed an output voltage of 30 V r.m.s. and 42.4 V peak or 60 VDC max. The OMROM S8VM or S8VS Series
is recommended for the power supply.
EJ1N-TC4
EJ1N-HFU@-NFL@
EJ1C-EDUA
Model with Screw Terminals
EJ1N-TC2
EJ1N-HFUB-DRT
DeviceNet Connector
EJ1C-EDUC
Model with Connector Terminal Block
Note: 1. To connect to the G3ZA, separately purchase a G3ZA Connecting Cable (EJ1C-CBLA050) and connect it to the G3ZA connection port
(CN1) on the EJ1.
2. To connect to a computer using the port A connector, use a separately sold E58-CIFQ1 USB-Serial Conversion Cable. The Temperature
Controller can be connected to a computer using USB.
3. Models with screw-less clamp terminals have terminals A10 and B10, but they are not used. Do not connect anything to them.
12 VDC
12 VDC
OUT4
OUT3
12 VDC
12 VDC
OUT2
OUT1
B1
B2
B3
B4
B5
B6
B7
B8
B9
A1
A2
A3
A4
A5
A6
A7
A8
A9
CH4
CN1G3ZA connection port
Analog
input
Pt Thermo-
couple
A
B
B
mA
V
CH3 A
B
B
mA
V
CH2
A
B
B
mA
V
CH1
A
B
B
mA
V
RS-485RS-422
Not used
Not used
Not used
SUB2
SUB1
RS-232C
RS-422
SD
RD
SG
B1
B2
B3
B4
B5
B6
SUB4
SUB3
B7
B8
B9
B (+)
A (−)
RDB (+)
RDA (−)SDB (+)
SDA (−)
A1
A2
A3
A4
A5
A6
A7
A8
A9
Port C Port C
RS-485 for port C and RS-232C can be switched.
A separate EJ1 model must be used for
RS-422 communications.
EV2
EV1
EV4
EV3
Port A connector
B (+)
A (−)
B (+)
A (−)
+
−
RS-485
RS-485
1
2
3
4
5
6
7
8
9
Input power supply
24 VDC
Port B
Port A
These two ports
cannot be used at
the same time.
These terminals are
used for distributed
placement of Units
when an HFU is used.
SUB2
SUB1
OUT4
OUT3
B1
B2
B3
B4
B5
B6
12 VDC
Models with
pulse outputs
Models with
linear outputs
12 VDC
B7
B8
B9
CN1
OUT2
OUT1
4 to 20 mA DC/0 to 20 mA
OUT2
OUT1
A1
A2
A3
A4
A5
A6
EV2
EV1
A7
A8
A9
CT2
CT1
G3ZA connection port
CH2
A
B
B
mA
V
CH1
A
B
B
mA
V
Analog
input
Pt Thermo-
couple
Not provided
on models
with linear
output.
Provided only
on models
with pulse
output.
V+
CANH
CANL
V−
Power line
Communications line, high
Shield
Communications line, low
Power line
These two ports
cannot be used at
the same time.
These terminals are
used for distributed
placement of Units
when an HFU is used.
RS-485
RS-485
1
2
3
4
5
6
7
8
9
10
SUB2
SUB1
B (+)
A (−)
B (+)
A (−)
+
−
Input power supply
24 VDC
Port A connector
Port B
Port A

EJ1
15
Nomenclature and Specification Settings
Part Names
Operation Indicators
EJ1N-TC2/TC4
EJ1N-HFU@-NFL@
*Some time is required for the indicators to light after the power is
turned ON.
Specification Settings
Switch Operation
•Check that the EJ1 is turned OFF before operating any switch
other than pin 6 of SW2. Settings are read only when power is
turned ON.
•Set the switches with a small flat-blade screwdriver. Do not set the
switches midway between settings.
•SW1 is set to 1 and SW2 pins are all set to OFF in the default
settings.
Setting the Unit Number
SW1 and SW2 are used together to set the unit number to between
00 and 63. The factory setting is unit number 01.
SW2 Settings
EJ1N-TC2/TC4
Note: Make sure power to the Unit is turned OFF before making
settings for any pin other than pin 6.
Pin 6 can be turned ON or OFF while the power is ON.
EJ1N-HFU@-NFL@
COM1
COM2
COM3
PWR
RUN
ERR
ALM
1
2
3
4 OUT
SW2
6
OUT
OPN
21345678
EJ1N-TC
SW1
ON
OPN
0
1
2
3
4
5
6
7
8
9
A
B
C
D
E
F
SW1
SW2
Operation
Indicators
COM1
COM2
COM3
Operation
Indicators
PWR 1
RUN2
ERR 3
ALM 4
Operation Indicators Meaning: When SW2
No. 6 is OFF
Meaning: When SW2
No. 6 is ON
PWR/1 green Lights when the power
is ON. Lit when output 1 is ON.
RUN/2 green Lights during operation. Lit when output 2 is ON.
ERR/3 red Flashes or lights when
an error occurs. Lit when output 3 is ON.
ALM/4 red Lights when an alarm is
activated. Lit when output 4 is ON.
COM 1 orange Flashes during communications via port A on the
End Unit.
COM 2 orange Flashes during communications via port B on the
End Unit.
COM 3 orange Flashes during communications with the G3ZA.
Operation Indicators Meaning
PWR green Lit while the power is ON. *
RUN green ---
ERR red Flashes or lights when an error occurs.
ALM red Lights when an alarm is activated.
COM 1 orange Flashes during communications via port A
on the End Unit.
COM 2 orange Flashes when the EJ1 system is in
operation.
COM 3 orange Flashes during communications via port C.
V1.2
V1.2
V1.2
V1.2
V1.2
SW2 SW1
1 2 0 1 2 3 4 5 6 7 8 9 A B C D E F
OFF OFF
00 01 02 03 04 05 06 07 08 09 10 11 12 13 14 15
ON
OFF
16 17 18 19 20 21 22 23 24 25 26 27 28 29 30 31
OFF
ON 32 33 34 35 36 37 38 39 40 41 42 43 44 45 46 47
ON ON 48 49 50 51 52 53 54 55 56 57 58 59 60 61 62 63
0
1
2
3
4
5
6
7
8
9
A
B
C
D
E
F
ON
21345678
SW1SW2
SW2 Meaning
3
Set to ON when using the Modbus communications
protocol for port B.
OFF:
The setting for port B communications protocol is used.
ON: Modbus is used.
4 to 5
Set the baud rate of port B.
4 = OFF, 5 = OFF:Use the baud rate parameter setting
for port B (default: 9.6 kbps).
4 = ON, 5 = OFF: 19.2 kbps
4 = OFF, 5 = ON: 38.4 kbps
4 = ON, 5 = ON: 115.2 kbps
6
Set to ON to display the output status on the operation
indicators.
OFF: The operation status is displayed (PWR, RUN,
ERR, and ALM).
ON:
The output status is displayed (outputs 1, 2, 3, and 4).
Note: Normally keep this pin set to OFF so that the
operation status can be checked.
7ON: G3ZA Multi-channel Power Controller in operation
ON when using a G3PW Power Controller.
8Use when an HFU is used and Units are distributed.
(Refer to the User's Manual for details.)
SW2 Meaning
3 to 7 Not used (OFF)
8
•EJ1N-HFU@-NFLK
OFF: RS-485 is selected.
ON: RS-232C is selected.
•EJ1N-HFU@-NFL2
OFF (Not used.)
V1.2
V1.2
V1.2
V1.1

16
EJ1
Part Names (EJ1N-HFUB-DRT)
Operation Indicators
EJ1N-HFUB-DRT
Specification Settings
Switch Operation
•Always turn OFF the DeviceNet communications power supply and
EDU power supply before setting the Unit. *
•Set the switches with a small flat-blade screwdriver. Do not set the
switches midway between settings.
•The SW1 switches are set to 00, SW2 is set to 0, and SW3 pins are
all set to OFF in the default settings.
*The setting of pin 3 on SW3 can be changed while the power is ON.
SW1 Settings
Use these switches to set the node address as a slave in the
DeviceNet network between 00 and 63 decimal (node addresses 64
to 99 cannot be used).
SW2 Settings
Use this switch to set the highest communications unit number (0 to
F: 0 to 15 decimal) of the connected Temperature Controllers. This
setting is enabled only when DIP switch pin 1 is set to ON (simple I/O
allocations).
SW3 Settings
SW1
SW2
SW3
EJ1N
DRT
MS
NS
TS
MAX
No.
NODE
ADR
COPY
123456
EDS
UP/DN
MODE
TC2/4
NO
x 10
x 1
0
5
4
3
2
9
8
7
1
1
6
0
5
4
3
2
9
8
7
6
4
3
2
1
F
0
E
D
C
B
A
9
8
7
6
5
Indicators
Operation Indicators Meaning
MS
Module
status
Green
ON: The Unit condition is normal.
Flashing: The connection configuration
has not been set.
Red ON: Fatal error
Flashing: Non-fatal error
NS
Network
status
Green
ON: Communications established
Flashing: Communications not
established
Red ON: Fatal communications error
Flashing: Non-fatal communications error
TS
Temperature
Controller
communicat
ions status
Green
ON: Communicating with the
Temperature Controllers
Flashing: The copy operation is being
performed.
Red
Flashing: Communications error with a
Temperature Controller
Flashing: The copy operation failed.
NODE
ADR
x 10
x1
0
5
4
3
2
9
8
7
1
1
6
0
5
4
3
2
9
8
7
6
DeviceNet node
address setting
MAX
No.
4
3
2
1
F
0
E
D
C
B
A
9
8
7
6
5
Highest communications
unit number
DIP switch Meaning
6 (COPY) --- Upload/Download
OFF →ON (1 s min., 5 s max.) →OFF
5--- Not used.
4 (EDS)
OFF Use the OMRON Configurator.
ON Use universal Configurator. (EDS files
supported)
3 (UP/DN)
OFF Upload (from Temperature Controller to
DeviceNet Communications Unit)
ON
Download (from DeviceNet
Communications Unit to Temperature
Controller)
2 (TC2/4) OFF Simple allocation to TC2 Units.
ON Simple allocation to TC4 Units.
1 (MODE) OFF I/O Allocation from the Configurator.
ON Simple I/O Allocation
123456
NO

EJ1
17
Functional Upgrades
Functions depend on the version that you are using. The functional upgrades are given below. Refer to the User's Manual (Cat. No. H142) for
details.
Identifying Upgraded Models
The new functionality can be used with version 1.2 (V1.2). Check the label on the Temperature Controller or the box to determine the version.
Models not marked "Ver. 1.1" are version 1.0.
Note: The above example is for version 1.2.
Version
Applicable Unit V1.1 V1.2
Basic Units
(EJ1N-TC2/TC4)
•Modbus communications can be used on port B.
•Software version 2 of the G3ZA Multi-channel Power
Controller can be used.
Note: 1. When more than one G3ZA Multi-channel
Power Controller is connected, version 1 and
version 2 can be mixed. (Up to 8 G3ZA Multi-
channel Power Controllers can be
connected.)
2. Software version 2 of G3ZA Multi-channel
Power Controller can also be used with EJ1
version1.0.
•Autotuning is provided for heating/cooling control.
•Self-tuning has been added.
•A switch can be used to display the output status on
the operation indicators during operation.
•Modbus communications can be used to read and
write all parameters, and to execute any of the
operation commands.
•A switch setting can be changed to use Modbus
communications on port B.
•A switch setting can be used to set the baud rate of
port B.
•A C0/80 status has been added to the variable types.
•Up to eight G3PW Power Controllers can be
connected to one Basic Unit.
Note: 1. The G3PW can be connected to EJ1 V1.1.
2. The G3PW and G3ZA cannot be used
together.
Advanced Unit
(EJ1N-HFU@-NFL@)
•Programless communications can be used with 1: N
connections.
•The maximum number of parameters that can be
specified for programless upload/download settings
has been increased from 300 to 600 each.
•Connection is now possible to MELSEC-QnA/An/
AnS/FX3uc-series PLCs.
•A new setting read operation has been added to
programless communications: Setting Read 2.
•The speed of programless communications has
been increased.
•Either "continue" or "stop" can be selected for when
errors occur in programless communications.
•Bit specification operation commands have been
added to the parameters that can be specified for
programless download settings. This simplifies the
program when operation commands are executed.
•The G3ZA or G3PW Monitor parameter has been
added to the parameters that can be specified for
programless upload settings. Up to four G3ZA Multi-
channel Power Controllers or up to four G3PW
Power Controllers can be connected to one Basic
Unit.
•The maximum number of parameters that can be
specified for programless upload/download setting
has been increased from 600 to 1200 each.
•The maximum number of Basic Units that an HFU
with Programless Communications can control has
been increased from 16 to 32 Units.
•Communications unit numbers 32 to 39 can be used
in the HFU via programless communications.
This allows the communications unit numbers of
Basic Units connected to an HFU to be numbered
sequentially, making it easy to copy HFU and Basic
Unit settings to other HFUs and Basic Units.
Support Software CX-Thermo version 3.20 or higher CX-Thermo version 4.1 or higher
V1.1 V1.2
Box Label
Version
Temperature Controller Label
Version

18
EJ1
Dimensions
Note: All units are in millimeters unless otherwise indicated.
Temperature Controller
Bas
i
c Un
i
ts
EJ1N-TC
HFUs
EJ1N-HFU@-NFL@
109 (Models with screwterminal blocks)
104.85 (Models with screw-less clamp
terminal blocks)
Models with screw
terminal blocks
Models with screw-less
clamp terminal blocks
6
OUT
OPN
SW2
6
OUT
OPN
SW2
ON
21345678
ON
21345678
PWR
RUN
ERR
ALM
1
2
3
4
OPN
OUT
PWR
RUN
ERR
ALM
1
2
3
4
OPN
OUT
SW1 SW1
COM1
COM2
COM3
EJ1N-TC
COM1
COM2
COM3
EJ1N-TC
27.0
35.4
27.6
9095.4
31 31
0
1
2
3
4
5
6
7
8
9
A
B
C
D
E
F
0
1
2
3
4
5
6
7
8
9
A
B
C
D
E
F
EJ1N
DRT
MS
NS
TS
MAX
No.
NODE
ADR
COPY
123456
EDS
UP/DN
MODE
TC2/4
NO
10
1
0
5
4
3
2
9
8
7
1
1
6
0
5
4
3
2
9
8
7
6
4
3
2
1
F
0
E
D
C
B
A
9
8
7
6
5
20
90
24
29
90
65
82.2
HFUs
EJ1N-HFUB-DRT
60
9095.4
27.0
35.4
27.6
EDUC
Model with
Connector Terminal Block
EDUA
Model with
ScrewTerminals
76.2 (Model with ScrewTerminals)
79.7
(Model with Connector Terminal Block)
15.7 15.7
End Units
EJ1C-EDU

EJ1
19
Options
Current Transformer (Sold Separately)
40@
30
12 dia.
9
2.36 dia.
15
30
Two, M3 (depth: 4)
E54-CT3
Plug
Armature
Lead
30
21
15 5.8dia.
25 3
40
10.5
2.8
7.5
10
Two, 3.5 dia.
E54-CT1
Connection Example
Approx. 3 dia.
18
(22)
Approx. 6 dia.
E54-CT3 Accessory
•Armature
•Plug
Rail Mounting Equipment (Order Separately)
DIN Rail
PFP-100N
PFP-50N
*The figures in parentheses are
dimensions for the PFP-50N.
4.5
15 25 25
10 10
1000 (500) *
25 25 15 (5) *
35±0.3
7.3±0.15
27±0.15
1
50
11.5
10
M4 ×8
panhead
screw
M4 spring washer 4.8
1.3
1.8
1
10
6.2 1.8
35.5 35.3
End Plate
PFP-M
Note: Two screws are included with the EJ1C-EDU for the End Plate.
Always attach End Plates to both sides.

20
EJ1
Safety Precautions
!CAUTION Precautions for Safe Use
Observe the following points to ensure safe operation.
1. The product is designed for indoor use only. Do not use the
product outdoors or in any of the following locations.
•Places directly subject to heat radiated from heating equipment
•Places subject to splashing liquid or oil atmosphere
•Places subject to direct sunlight
•Places subject to dust or corrosive gas (in particular, sulfide gas
or ammonia gas)
•Places subject to intense temperature change
•Places subject to icing or condensation
•Places subject to vibration or strong shocks
2. Use and store the product within the rated temperature and
humidity ranges. Provide forced-cooling if required.
3. To allow heat to escape, do not block the area around the product.
Do not block the ventilation holes on the product.
4. Be sure to wire properly with correct polarity of terminals.
5. Use specified size (M3, width 5.8 mm or less) crimped terminals
for wiring. To connect bare wires to the terminal block, use copper
braided or solid wires with a gage of AWG22 to AWG14 (equal to
cross-sectional area of 0.326 to 2.081 mm2) for power supply lines
and a gage of AWG28 to AWG16 (equal to cross-sectional area of
0.081 to 1.309 mm2). (The stripping length is 6 to 8 mm.)
6. Do not wire terminals that do not have an identified use.
7. Allow as much space as possible between the product and
devices that generate a powerful high-frequency or surge.
Separate the high-voltage or large-current power lines from other
lines, and avoid parallel or common wiring with the power lines
when you are wiring to the terminals.
8. Use the product within the rated load and power supply.
9. Make sure that the rated voltage is attained within two seconds of
turning ON the power.
10.It takes 30 minutes from the time the Temperature Controller is
turned ON until the current temperature is displayed. Always turns
ON the power supply at least 30 minutes before starting
temperature control.
11.The switch or circuit breaker must be within easy reach of the
operator, and must be marked as a disconnecting means for this
unit.
12.Do not use paint thinner or similar chemical to clean with. Use
standard grade alcohol.
13.Design the system (e.g., the control panel) allowing leeway for the
delay required before product outputs are valid after turning ON
power to the product.
14.Never touch the electronic components, connectors, or patterns
on product boards with your bare hands. Always hold the product
by the case. Inappropriately handling the product may
occasionally damage internal components due to static electricity.
15.Use a switch, relay, or other device with contacts to turn OFF the
power supply quickly. Gradually lowering the voltage of the power
supply may result in incorrect outputs or memory errors.
16.Do not touch the electronic components with your hands or subject
them to shock when removing the terminal block.
17.Connect only the specified number of products in only a specified
configuration.
18.Mount the product to a DIN Rail mounted vertically to the ground.
19.Always turn OFF the power supply before wiring the product,
replacing the product, or changing the product configuration.
20.Attach the enclosed cover seal to the connector opening on the left
end product during installation.
21.Do not use port B on the end product when using port C on HFUs.
22.Install the product only after reading the manual provided with the
End Unit.
Do not touch the terminals while power is being supplied.
Doing so may occasionally result in minor injury due to
electric shock.
Use a power supply that complies with the reinforced
insulation specified in IEC 60664 for the EJ1 external
power supply or the power supply connected to the EJ1.
If non-compliant power supplies are used, electric shock
may occasionally result in minor injury.
Do not allow pieces of metal, wire clippings, or fine
metallic shavings or filings from installation to enter the
product. Doing so may occasionally result in electric
shock, fire, or malfunction.
Do not use the product where subject to flammable or
explosive gas. Otherwise, minor injury from explosion
may occasionally occur.
Never disassemble, modify, or repair the product or
touch any of the internal parts. Minor electric shock, fire,
or malfunction may occasionally occur.
Tighten the terminal screws to between 0.40 and
0.56 N·m. Loose screws may occasionally result in fire.
Set the parameters of the product so that they are
suitable for the system being controlled. If they are not
suitable, unexpected operation may occasionally result
in property damage or accidents.
A malfunction in the product may occasionally make
control operations impossible or prevent alarm outputs,
resulting in property damage. To maintain safety in the
event of malfunction of the product, take appropriate
safety measures, such as installing a monitoring device
on a separate line.
Other manuals for EJ1N-TC4
1
This manual suits for next models
1
Table of contents
Other Omron Temperature Controllers manuals

Omron
Omron E5EC-T User manual

Omron
Omron E5ZN Series User manual

Omron
Omron ES1B User manual

Omron
Omron E5CN User manual

Omron
Omron E5GN-QTD User manual

Omron
Omron E5CC User manual

Omron
Omron E5CC-800 User manual

Omron
Omron E5GN User manual

Omron
Omron E5ZE-8 E Series User manual

Omron
Omron E5CD-B-800 Series User manual