1. Unplug all cables from the rear of the computer.
2. Open the PC enclosure to gain access to the expansion slots.
3. Locate a suitable PCIe slot:
• use a minimum of x8 PCIe 2.0 slot, if you are unsure which slot is
correct, please consult the PC user manual.
4. Remove the ller bracket corresponding to the slot you intend to use.
5. Remove the CoaXPress card carefully from its protective ESD packaging and
insert the card connector fully into the expansion slot.
6. Ensure the card’s mounting bracket is ush with any other mounting or ller
brackets to either side of it, then secure the controller card in place.
7. Replace the computer cover and secure with mounting screws if applicable.
8. Reconnect any accessories you were using previously.
Installing the CoaXPress (PCIe) Card
4
Ensure your PC is powered off. Ensure anti-static precautions using anti-static strap
provided. Keep all screws safe.
1. Connect the cooling system (if using liquid cooling):
• The cooling system must be connected via its 2 coolant pipes and running before the camera is switched on.
• Ensure that the camera is operating within the environmental conditions stated in the hardware guide.
2. Insert the 15V DC power cable (aligning the RED dots) into the power connector at the rear of the camera until you
hear a click. To remove, pull the connector metal sleeve back. Never forcibly
insert or remove connector.
3. Now repeat step 2 for the 24V DC Camera cooler power cable.
4. Connect the CXP cable between the CoaXPress card and the camera.
5. If using an external trigger source, connect trigger cable to SMB connector
on the mounting bracket of the CoaXPress card or directly to the camera if
using the D-type connector.
6. Turn ON the PC.
7. Switch the camera ON using the ON/OFF switch You should hear an audible
conrmation, i.e a long beep followed ~40 seconds later by the sequence of
a short beep then two short beeps. The beeps may not be audible in a noisy
environment.
8. Please note that you should not start your application until the camera is
fully initialized. Note this could take 40 s from when the camera is switched
ON. Launch your camera control software.
9. Check the acquisition settings and adjust as required.
10. Note that camera system temperature may take up to 10 minutes to stabilize, conrm the temperature status in the
software.
11. Start acquiring data.
Troubleshooting
Camera buzzer does not sound on start-up
• The camera buzzer should be audible momentarily (as a long beep) when the camera is switched to ON. Note that
camera buzzer volume is low.
• If this does not occur, ensure that power is connected to the camera and the ON/OFF switch is set to ON.
Camera buzzer does not beep two times to indicate the software has initialized
• Note that camera buzzer volume is low.
Camera temperature has not stabilized
• Check the temperature status in the software.
• If using water cooling check the water chiller is functioning correctly, otherwise check air vents are clear.
• The system may take up to 10 minutes for temperature to stabilize.
Camera is not recognized by PC
• Ensure camera is switched to ON (the camera must be powered up before the software is started).
• Check that the camera cables are securely and correctly connected between the camera head and the
CoaXPress card on the PC.
• Check that the CoaXPress card and drivers have been installed properly. Green lights should illuminate on the
CoaXPress card.
Please see Section 6 of the Balor hardware guide for further information on troubleshooting.
Connecting your Camera and Switching it on
Please refer to the Balor Hardware Guide for mounting instructions. Ensure that the power to the
camera and PC is switched OFF.
6
MAN-13190
BALQS 0819 R2
NOTES:
• Andor does not support any other CoaXPress frame grabber than that provided with the system.
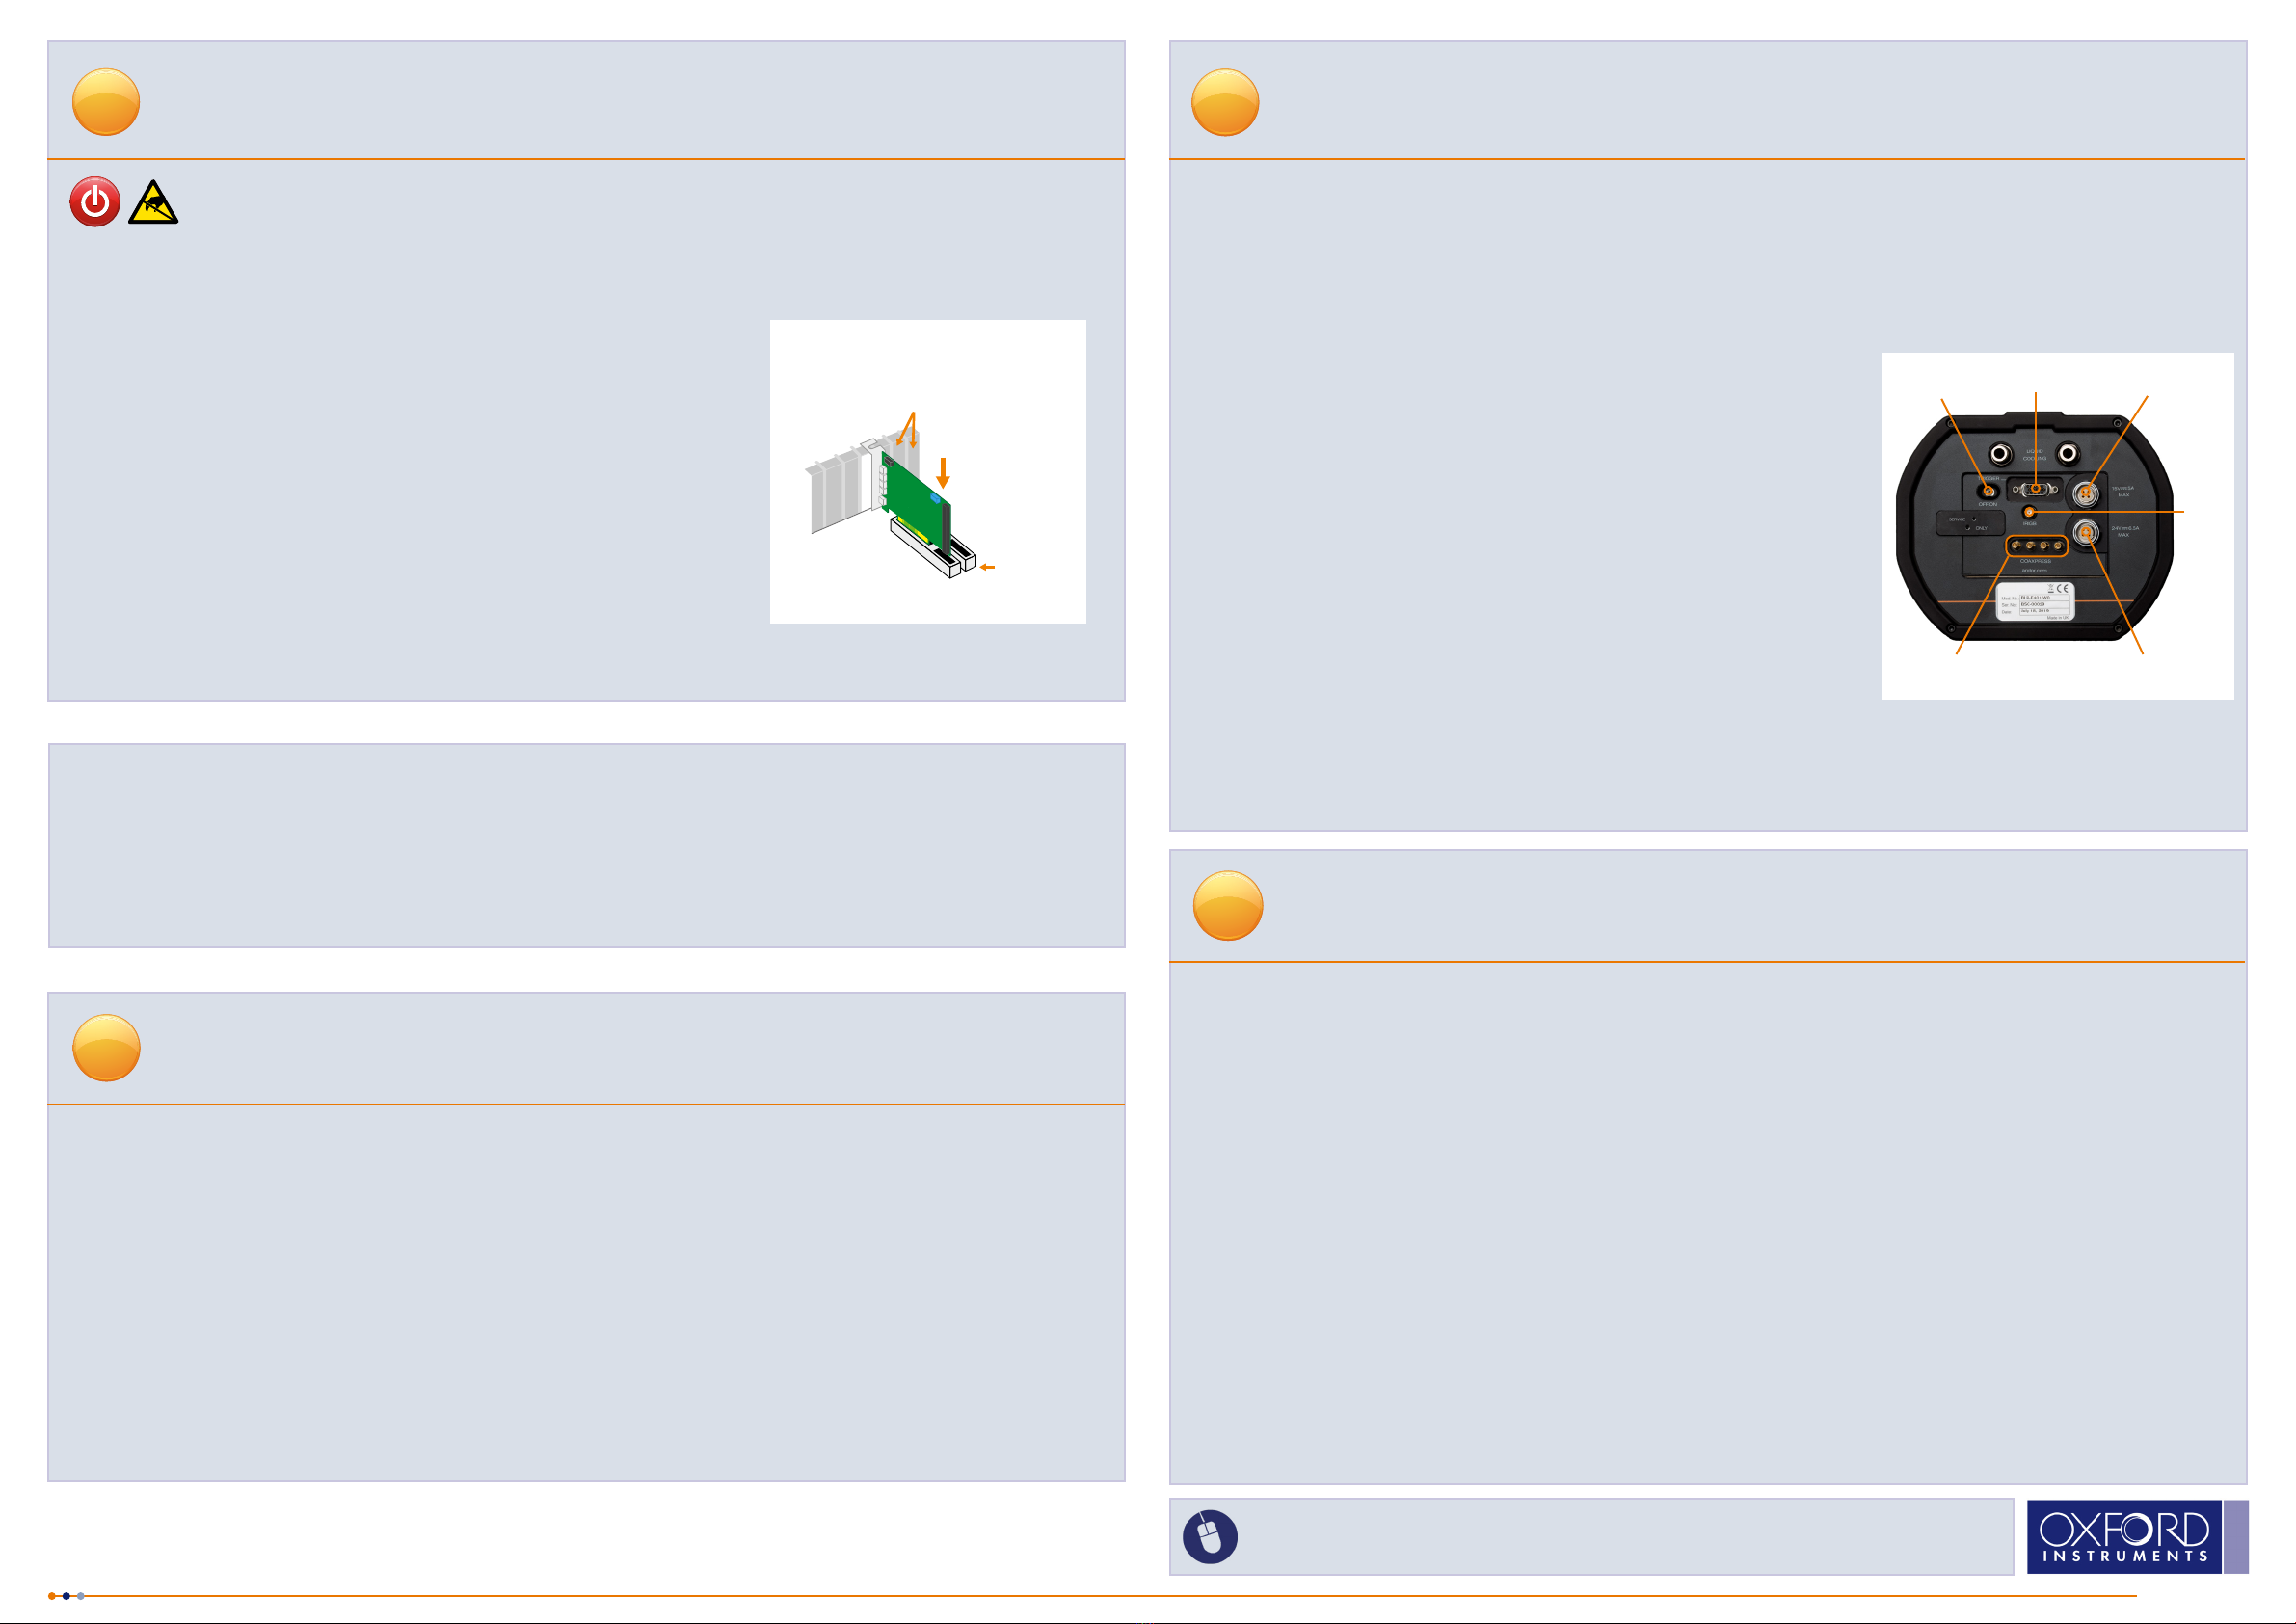
Fasten the Card
to the slot
Unused ller brackets
Gently press the
card into the slot
x8 PCIe
2.0 Slot
Camera
Power Input
CXP
connection
I/O 15 pin D-type
Power
Switch
Camera cooler
Power Input
For additional technical information go to: andor.com/scientic-cameras
Please check MyAndor for the latest manuals: my.andor.com/login.aspx
Camera Cooling Guidelines
5
When Liquid Cooling:
Before operation, the camera must be connected via its 2 coolant pipes to a re-circulating cooler or other liquid cooling
system. Always use coolant that is above the dew point of the ambient environment to prevent condensation from
occurring. Refer to the Hardware Guide for dew point information.
• Coolant temperature: We typically advise use of coolant temperature up to 16oC. However, to ensure non-
condensing conditions in humid environments higher temperatures may be necessary.
• Recommended coolant: water or water/glycol mix depending on the ambient environmental temperature
during operation.
• Ensure that all liquid coolant has been expelled from the camera after operation if it is to be stored.
When air cooling (Flexi model only):
• Ensure that ventilation slots are not obstructed when in air cooled mode.
IRIG-B
Checking & Setting BIOS options (for PCs not supplied by Andor)
Enter the BIOS menu when starting PC. For Dell workstations, press F12 at start-up and select System Setup in the
One Time Boot Menu. For Dell workstations 3 options in the Performance menu of the BIOS need to be checked/set:
• C-States Control – Disable C-States
• Intel Speed-step – Disable Speed-step
• Memory Node Interleaving – Set from NUMA to SMP. Note: This option is only available on larger workstations with
2 physical processors and may have a different name- ensure that NUMA is disabled.


