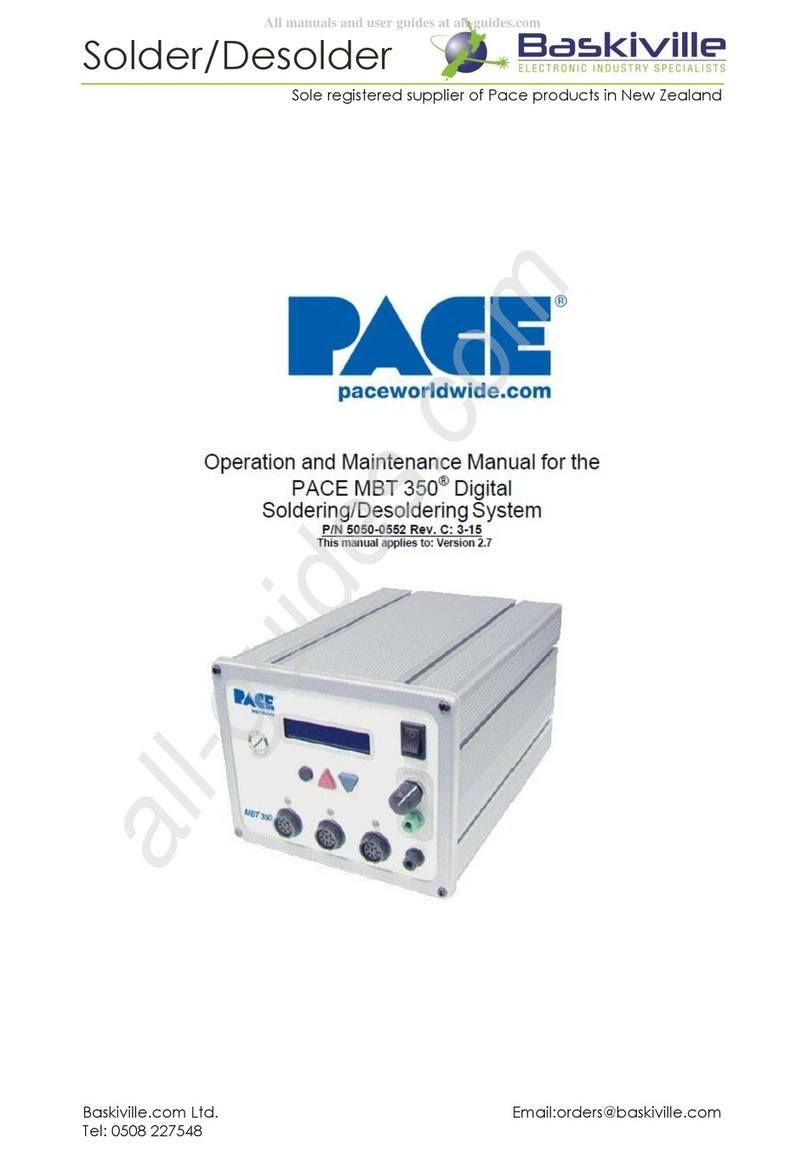
Pace WJS 100 User manual

Operation and Maintenance Manual for
WJS 100 Soldering System(s)
P/N 5050-0574 REV. A10
This manual applies to:
Model Part Number
WJS-100 8007-0558
WJS-100/E 8007-0559
WJS-100 w/ ISB 8007-0560
WJS-100/E w/ ISB 8007-0561

©2010 PACE Inc., Annapolis Junction, Maryland All Rights Reserved Page 2 of 11
TITLE PAGE
General Information
Introduction................................................................................................................3
Specifications ............................................................................................................3
Power Source Requirements.....................................................................................3
Temperature Specifications.......................................................................................3
EOS/ESD Specifications............................................................................................3
Power Supply Features .............................................................................................3
Safety
Safety Guidelines.......................................................................................................4
System Set-Up
Mounting Options.......................................................................................................4
Tip & Tool Stand Mounting Options...........................................................................5
Handpiece Connection ..............................................................................................5
System Power Up......................................................................................................5
Operation
Digital Control LED Operation ...................................................................................6
LED Display...............................................................................................................6
Customizing Your System .........................................................................................7
Introduction ............................................................................................................7
Entering Set-Up Mode............................................................................................7
Password...............................................................................................................7
Temperature Scale.................................................................................................7
Temperature Limits................................................................................................7
Temperature Setback.............................................................................................8
Auto Off..................................................................................................................8
Exiting Set-Up Mode..............................................................................................8
Default Factory Settings........................................................................................9
Available Tips………………………………………...................................................9
System Calibration .........................................................................................................9
Corrective Maintenance ................................................................................................10
Spare Parts.....................................................................................................................10
Service............................................................................................................................11
PACE LIMITED WARRANTY STATEMENT...................................................................11

©2010 PACE Inc., Annapolis Junction, Maryland All Rights Reserved Page 3 of 11
General Information
Introduction
Thank you for purchasing the WJS 100 Soldering System. This manual will provide you with the
information necessary to properly set up, operate, and maintain your system. Please read this manual
thoroughly before using the system.
The systems featured in this guide are available in either 115 VAC or 230 VAC versions. All of these
models incorporate Intelliheat™ technology. The 230 VAC version system bears the CE Conformity
Marking, which assures the user that it conforms to EMC 89/336/EEC. All models featured in this
manual are lead free compatible and comply with RoHS and WEEE directives.
Specifications
WJS-100 WJS-100/E
Operates on 97-127 VAC, 50/60Hz,
120 Watts maximum at 115 VAC,
60Hz
Operates on 197-253 VAC 50/60Hz,
120 Watts maximum at 230 VAC,
50Hz
Temperature Specifications (All Models)
Tip Heater Cartridge Handpiece Tip Temperature Range: 205 to 455°C (400 to 850°F) nominal.
Digital Readout Resolution: ±5° (°C or °F)
Tip Temperature Stability: ±1.1°C (2°F) at Idle from Set Tip Temperature.
Temperature Accuracy: Meets or exceeds ANSI JSTD 001
EOS/ESD Specifications (All Models)
Tip-To-Ground Resistance: Less than 2 ohms.
AC Leakage: Less than 2 Millivolts RMS from 50Hz to 100MHz.
Transient Level: Less than 500mV peak, out to 100MHz.
Power Supply Features
F
C
G
J
I
H
E
O
P
Q
ST 50
WJS 100

©2010 PACE Inc., Annapolis Junction, Maryland All Rights Reserved Page 4 of 11
Safety Guidelines
The following are safety precautions that personnel must understand and follow when using or servicing this
product.
1. POTENTIAL SHOCK HAZARD
- Repair procedures on PACE products should be performed by Qualified
Service Personnel only. Line voltage parts may be exposed when the equipment is disassembled.
Service personnel must avoid contact with these parts when troubleshooting the product.
2. All handpiece heaters and installed tips are hot when the handpiece is powered on and for a
period of time after power off.
DO NOT
touch either the heater or the tip. Severe burns may
result.
3. PACE Tip & Tool Stands and handpiece cubbies are designed specifically for use with the
associated handpiece and houses it in a manner that protects the user from accidental burns.
Always store the handpiece in its holder. Be sure to place the handpiece in its holder after use and
allow heater / tip to cool before storing.
4. Always use PACE systems in a well ventilated area. A fume extraction system such as those
available from PACE are highly, recommended to help protect personnel from solder flux
fumes.
5.
Exercise proper precautions when using chemicals (e.g., solder paste). Refer to the Material
Safety Data Sheet (MSDS) supplied with each chemical and adhere to all safety precautions
recommended by the manufacturer.
System Set-Up
Set up the Intelliheat™ system using the following steps.
1. Store the shipping container in a convenient location. Reuse of these
containers will prevent damage if you store or ship your system.
2. Place the Power Switch in the “OFF” or “0” position.
Mounting Options
The power supply can be placed directly on a workbench or it also can also
be mounted under a workbench or shelf to conserve space (optional
mounting P/N 1321-0609-P1 bracket sold separately). To mount the
system in this way:
Feature Description
C Power switch On /off control of power supply.
E Power Receptacle Front panel connection of handpiece.
F Program button For access and confirmation of program menu functions.
G Up arrow button Increase set temperature and scroll through program menu functions.
H Down arrow button Decrease set temperature and scroll through program menu functions.
I Digital control LED Indicates status of power supply.
J Digital display Displays temperature setting and menu functions.
O Ground jack For ground system to static safe work area.
P ISB connection Connection for Instant Set Back cubby.
Q Power inlet with fuse Connection for IEC power cord and fuse replacement.

©2010 PACE Inc., Annapolis Junction, Maryland All Rights Reserved Page 5 of 11
1. Mount the bracket in the desired location (fasteners not supplied).
2. Insert the 2 Mounting Screws (head first) into the power source mounting slots.
3. Place the washers over the screws.
4. Fit the power source between the bracket’s support arms and place the screws into the slots on
the support arms.
5. Place the nut on the screw and tighten by hand.
6. Angle the power source so the operator can see the front panel easily.
7. Tighten the nuts with a wrench or pliers.
Handpiece Connection
The WJS 100 is designed to work with Intelliheat compatible TD-100
Thermo-Drive ® Soldering handpieces and WJS 100 Tip heater
Cartridges with the gold end connector. Using other handpieces or
tips may damage your WJS system or the tips/handpeices.
Connect the handpiece connector plug into the Power Receptacle in the
following manner.
1. Align guide on connector with slot on power receptacle.
2. Insert connector into power receptacle.
3. Turn the connector housing clockwise to lock in place.
Instant Setback Cubby Connection
If you purchased the system with the Instant Setback Cubby, please follow the directions in the box
with the ISB Cubby to connect it to the system.
System Power Up
1. Insert the female end of the power cord into the AC Power Receptacle on the rear panel of
the power source.
2. Plug the prong end (male end) of the power cord into an appropriate 3 wire grounded AC
supply receptacle.
Setup and Operation
Operation
1. Ensure that the Set-Up procedure has been performed. Check for the following:
a) Handpiece connection to the power source.
b) Proper tip installed in handpiece.
c) Power cord connection between an appropriate AC supply and the power source.
2. Turn the Power Switch On ("I").
3. Press the Scroll Up Key. The Set Temperature is now displayed, immediately perform
step 4. If a Password has been previously programmed into the system, "EP0" will be appear
on the LED Display at this point. When this message appears, the operator must enter the
correct Password before adjusting the temperature.
4. Adjust the temperature by pressing and holding Scroll Up Key or Scroll Down key.
Observe the display as the Set Temperature increases first in increments of 5° and then in
increments of 10°. When the desired temperature is reached, release the key.

©2010 PACE Inc., Annapolis Junction, Maryland All Rights Reserved Page 6 of 11
NOTE: The Set Temperature can only be adjusted within the defined temperature limits. If
the upper limit has been reached, the display will read “HiL”, if the Lo limit is reached, the
display will read “OFF”. Temperature limits can be adjusted in the Set-Up menu
5. An offset may be entered if using massive tips. To enter an offset, simply press the program
key while the system is in normal operation mode and enter the offset using the keypad. The
display will return to normal display mode in 5-7 seconds.
Digital Control LED Operation
The colored LED on the power source front panel indicates calibration status.
LED Full On Red – A fault has occurred. Check handpiece and/or tip heater cartridge. Check
handpiece connection to front panel.
LED Full On Green – Calibration of the TD-100 Thermo-Drive Soldering Handpiece is complete.
LED Full On Amber – Calibration has not been completed.
LED Off - Unit is in setback or Instant Set Back (ISB) Cubby is activated.
LED Display, Normal Operation
The LED Display provides a 3-digit display of temperature information. The LED Display will show:
1. A display of "888" on initial power up to ensure that all LEDs on the display are working.
2. A display of the software version of the installed microprocessor (e.g., "1-2") for 2 seconds on
initial power up after the "888" is displayed.
3. Actual tip temperature of the connected handpiece during normal operation.
4 The tip temperature displayed will flash when the system is in Temperature Setback.
5. The displayed temperature will decrease and stabilize at 177°C (350°F) when the system is
in Temperature Setback.
6. "OFF" with stable display when the Set Tip Temperature has been set to Off (below minimum
set tip temperature).
7. "OFF" with flashing display when the unit has entered Auto Off. Refer to the "Set-Up Mode"
portion of this manual.
8 Error messages ("OSE", "SSE" or "OCE") if a system fault is detected. Refer to the
"Corrective Maintenance" portion of this manual.
LED Display, Temperature Adjust Mode
The LED Display will show the following when adjusting the desired Set Tip Temperature.
1. The Set Tip Temperature.
2. "HiL" (High Temperature Limit) when adjusting the set tip temperature and the
maximum allowable temperature is exceeded. Refer to the "Set-Up Mode" portion of
this manual.
3. "OFF" (Low Temperature Limit) when adjusting the set tip temperature and the
minimum allowable temperature is exceeded. Refer to the "Set-Up Mode" portion of this
manual.
4. "EP" will be displayed if a Set Tip Temperature adjustment is attempted and a
Password has been stored in system memory. As the Password is entered, the zero
will increase by one as each key entry is made.
5. "no" will be displayed if the entered password does not match the stored Password.

©2010 PACE Inc., Annapolis Junction, Maryland All Rights Reserved Page 7 of 11
Customizing Your System
Introduction
The menu driven LED Display of the systems allows you to easily customize your system. In Set-Up
Mode, you can:
• Enter, remove or change a Password.
• Set the Default Temperature scale to °F or °C.
• Change the Upper and Lower Temperature limits.
• Enable or disable the Temperature Setback feature and adjust the time-out period (if
enabled).
• Enable or disable the Auto Off feature and adjust the time-out period (if enabled).
Entering the Set-Up Menu
The following instructions should be performed to familiarize the operator with the system.
1. Place Power Switch in the “OFF” (“0”) position.
2. Press and hold the Program Key ( ) while turning on the Power Switch
(“I” position).
Password
3. The LED Display will display the version of the microprocessor and change to read “P--”
or "EP".
a) If the display reads "EP", a Password has been stored in system memory. The
password must be entered to access into the menu. If the wrong password is entered,
"no" will appear on the display and the system will return to normal operation. If this
occurs, repeat steps 1 & 2 and enter the correct Password.
b) The LED Display reads "P--". Choose one of the following options:
i. Press the Program Key ( ) to keep the currently stored Password (including
no Password).
ii. To enter a password, select a 3 digit number as the password using the keypad.
(1 to 999). Make a note of the entered Password.
Temperature Scale
4. The LED Display now shows the stored default Temperature Scale (°C or °F
temperature shown on LED Display). Choose one of the following:
a) Press the Program Key ( ) to keep the stored default Temperature Scale.
b) Use the keypad to change the default Temperature Scale.
c) Press and release the Program Key to proceed to the next step
Temperature Limits
5. The LED Display now shows the stored default High ("Hi") Temperature Limit
with the display alternating to show "Hi" and the stored limit. Choose one of the
following:
a) Press and release the Program Key ( ) to keep the stored High Temperature
Limit.
b) Adjust the stored High Temperature Limit using the keypad
c) Press and release the Program Key to proceed to the next step.
6. The LED Display now shows the stored default Low ("Lo") Temperature Limit
with the display alternating to show "Lo" and the stored limit. Choose one of the
following:

©2010 PACE Inc., Annapolis Junction, Maryland All Rights Reserved Page 8 of 11
a) Press and release the Program Key ( ) to keep the stored Low Temperature
Limit.
b) Adjust the stored Lo Temperature Limit (up to 482°C, 900°F) using the keypad.
c) Press and release the Program Key to proceed to the next step.
Temperature Setback
7. The LED Display now shows the stored Temperature Setback time as "S-X" (x=0 thru 9).
Time is shown as tens of minutes (e.g., "S-3" equals 30 minutes). A display of "S- 0"
indicates that Setback is disabled. Choose one of the following:
a) Press and release the Program Key ( ) to keep the currently stored
Temperature Setback time.
b) A adjust the stored Temperature Setback value using keypad.
c) Press and release the Program Key to proceed to the next step.
To preserve tip life and save energy, the system can be programmed to automatically set back its
Tip Temperature to 177°C (350°F) after a selected period of handpiece inactivity (adjustable 10-
90 minutes in Set-Up Mode). As received from the factory, this feature is enabled. There are 2
ways to exit Temperature Setback Mode:
7A1. Press and release Scroll up Key .
7A2. Cycle the Power Switch.
Set Tip Temperature and Tip Offset values will be simultaneously restored. For optimum
performance, do not attempt to use the attached handpiece until the Set Tip Temperature is
achieved.
Auto Off
8. The LED Display now shows the stored Auto Off time as "AOx" (x=0 thru 9).
Time is shown as tens of minutes (e.g., "AO8" equals 80 minutes). A display of
"AO0" indicates that Auto Off is disabled. Choose one of the following:
a) Press and release the Program Key ( ) to keep the currently stored Auto
Off time.
b) Adjust the Auto Off value using the keypad.
c) Press and release the Program Key to proceed to the next step.
8A. When enabled, the Auto Off safety feature turns off the power to the handpiece 10-90
minutes after entering Temperature Setback. When the system has entered
Temperature Setback, an Auto Off timer within the system circuitry will start running.
8A1. If any key is pressed during the selected time out period, the Auto Off and
Setback timers are reset. The system will return to normal operation.
8A2. At the end of the time out period, the system will enter Auto Off. Power is
turned off to the heater and the LED Display will show a flashing “OFF ”.
8B. Exiting Auto Off: Auto Off can be exited; returning to normal operation by:
8B1. Pressing and releasing a Key (either of the 3 keys), or
8B2 By turning the Power Switch OFF (“0”) and then back ON (“1”).
Exiting Set-Up Mode
9. The LED Display now reads "End". The Set-Up Mode procedure is now complete.
Choose one of the following steps:

©2010 PACE Inc., Annapolis Junction, Maryland All Rights Reserved Page 9 of 11
a) Press and release the Scroll Up Key to exit Set-Up Mode and return to normal
operation.
b) Press and release the Scroll Down Key to return to the start of the Set-Up Mode
procedure. Go back to step 4.
Default Factory Settings
The WJS-100 system comes equipped with a number of features, which may be adjusted by the user.
Listed below are the features and default settings of each. To change and/or learn about any of
these features, refer to the applicable part of the “Customizing Your System” section of this manual.
Available Tips – ONLY USE 1128 SERIES TIPS with GOLD END CONNECTORS
1128-0001-P1
T
WJS High Performance TIP, 1/32" Conical Sharp Extended
1128-0002-P1 WJS High Performance TIP 1/64" Conical Sharp
1128-0003-P1 WJS High Performance TIP 1/64" Conical, Sharp, Bent 30 Degree
1128-0008-P1 WJS High Performance TIP 3/64" 30 Degree Chisel
1128-0010-P1 WJS High Performance TIP 13/64" Chisel
1128-0012-P1 WJS High Performance TIP 1/32" 30 Degree Chisel
1128-0013-P1 WJS High Performance TIP 3/32" 30 Degree Chisel
1128-0019-P1 WJS High Performance TIP 1/16" 30 Degree Chisel
1128-0032-P1 WJS High Performance TIP MINIWAVE
1128-0037-P1 WJS High Performance TIP 0.25" Knife Blade
System Calibration
All systems are tested for temperature accuracy at the factory and can be checked for
calibration according to requirements. No internal adjustments can be made to the power
supply.
To Adjust Digital Temperature Control Systems
1. After the system/tip has stabilized, measure the tip temperature with whatever method
you use.
2. Turn off power source and turn it back on while holding down the program (round) key
and the up key.
3. The system will prompt you to enter the measured temperature using the keypad.
4. Press the program key and the system will restart.
5. To clear the calibration, remove the handpiece while the power source is ON.
Feature Factory Setting
Password None Entered
°F for 115 VAC Systems
Default Temperature Scale (°C/°F) °C for 230 VAC Systems
“HI” (Upper) Temperature Limit 454 °C (850 °F)
“LO” (Lower) Temperature Limit 204 °C (400 °F)
Set Temperature “OFF”
Tip Offset Constant “0”
Temperature Setback Enabled, 30 minutes
Auto Off Enabled, 30 minutes

©2010 PACE Inc., Annapolis Junction, Maryland All Rights Reserved Page 10 of 11
Corrective Maintenance
Digital Display Message Codes
Listed below are message codes, which, may be shown on the LED Display if a mistake were to be
made by the operator (e.g., wrong Password entry) or if the system has malfunctioned.
LED Display Message Description
The incorrect password has been entered. The displayed
message will time out after 6 seconds and revert to normal
operation. Enter the correct password.
“Open Sensor Error” No handpiece is connected to the power
receptacle. Connect handpiece.
The handpiece heater assembly sensor is open. Refer to the
appropriate handpiece manual
“ Shorted Sensor Error” The handpiece heater assembly sensor
is shorted. Refer to the appropriate handpiece manual.
“Over Circuit Error” The handpiece heater assembly may be
defective. Refer to the appropriate handpiece manual Contact
PACE or your authorized local representative for assistance.
Power Source
Most malfunctions are simple and easy to correct.
Symptom Probable Cause Solution
No power to
system Blown Fuse Check handpiece using Heater Assembly Checkout
Procedures in the appropriate handpiece manual.
Replace the fuse (located in the AC Receptacle Fuse
Holder) with one of the same rated value (see Table 4,
Spare Parts)
Defective Heater Refer to the appropriate handpiece manualHandpiece will
not heat Power Source Malfunction Contact PACE
Spare Parts
Service
Please contact PACE or your local distributor for service and repair.
Item # Description PACE Part Number
Fuse, 1.25 Amp Time Lag (Domestic) 1159-0251-P5
1 Fuse, 0.63 Amp Time Lag (Export Models) 1159-0214-P5

©2010 PACE Inc., Annapolis Junction, Maryland All Rights Reserved Page 11 of 11
PACE LIMITED WARRANTY STATEMENT
Limited Warranty
Seller warrants to the first user that products manufactured by it and supplied hereunder are free of
defects in materials and workmanship for a period of one (1) from the date of receipt by such user. This
Warranty as applied to blowers and motor pumps is limited to a period of six (6) months. Other brand
equipment supplied but not manufactured by PACE are covered under their respective manufacturer’s
warranty in lieu of this Warranty.
This warranty does not cover wear and tear under normal use, repair or replacement required as a result
of misuse, improper application, mishandling or improper storage. Consumable items such as tips,
heaters, filters, etc. which wear out under normal use are excluded. Failure to perform recommended
routine maintenance, alterations or repairs made other than in accordance with Seller’s directions, or
removal or alteration of identification markings in any way will void this warranty. This warranty is
available only to the first user, but the exclusions and limitations herein apply to all persons and entities.
SELLER MAKES NO OTHER WARRANTY, EXPRESS OR IMPLIED, AND MAKES NO WARRANTY OF
MERCHANTABILITY OR FITNESS FOR A PARTICULAR PURPOSE.
Seller will, at its option, repair or replace any defective products at its facility or other location approved by
it at no charge to user, or provide parts without charge for installation by the user in the field at user’s
expense and risk. User will be responsible for all costs of shipping equipment to Seller or other location
for warranty service.
EXCEPT FOR THE REMEDY ABOVE DESCRIBED, UNLESS OTHERWISE REQUIRED BY
APPLICABLE LAW, SELLER WILL HAVE NO OTHER OBLIGATION WITH REGARD TO ANY BREACH
OF WARRANTY OR OTHER CLAIM WITH RESPECT TO THE PRODUCTS, OR LIABILITY FOR ANY
DIRECT, INDIRECT, CONSEQUENTIAL, OR INCIDENTAL LOSS OR DAMAGE CAUSED BY OR
OCCURRING IN CONNECTION WITH ANY OF THE PRODUCTS.
Warranty service may be obtained by contacting the appropriate PACE Company or local Authorized
PACE distributor as set forth below to determine if return of any item is required, or if repairs can be made
by the user in the field. Any warranty or other claim with respect to the products must be made with
sufficient evidence of purchase and date of receipt, otherwise user’s rights under this warranty shall be
deemed waived.
PACE Contact information:
PACE, INCORPORATED
255 Air Tool Drive
Southern Pines, NC 28387
Tel. 910-695-7223
FAX. 910-695-1594
Alternatively, you may contact your local distributor for assistance.
Table of contents
Other Pace Soldering Gun manuals

Pace
Pace MicroBenchtop MBT-100 Troubleshooting guide

Pace
Pace SODRTEK ST 125 User manual

Pace
Pace ADS200 User manual

Pace
Pace Sodrtek HW50 User manual

Pace
Pace SX-100 User manual

Pace
Pace TD-100 User manual

Pace
Pace ST 45 User manual

Pace
Pace ST 25 User manual

Pace
Pace ST35 w/PS-90 Iron User manual

Pace
Pace ST 25 User manual