Penn A525 User manual

A525 Fermentation Tank Controller Installation
Guide
Application
Important: Use the A525 Fermentation Tank
Controller only as an operating control. Where
failure or malfunction of the A525 Controller could
lead to personal injury or property damage to the
controlled equipment or other property, additional
precautions must be designed into the control
system. Incorporate and maintain other devices,
such as supervisory or alarm systems or safety or
limit controls, intended to warn of or protect against
failure or malfunction of the A525 Controller.
Important: Utiliser ce A525 Fermentation Tank
Controller uniquement en tant que dispositif de
contrôle de fonctionnement. Lorsqu'une défaillance
ou un dysfonctionnement du A525 Régulateur risque
de provoquer des blessures ou d'endommager
l'équipement contrôlé ou un autre équipement, la
conception du système de contrôle doit intégrer des
dispositifs de protection supplémentaires. Veiller
dans ce cas à intégrer de façon permanente d'autres
dispositifs, tels que des systèmes de supervision
ou d'alarme, ou des dispositifs de sécurité ou de
limitation, ayant une fonction d'avertissement
ou de protection en cas de défaillance ou de
dysfonctionnement du A525 Régulateur.
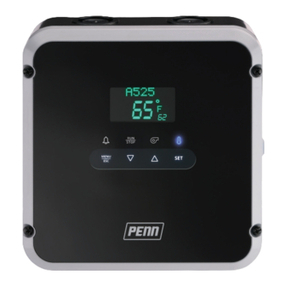
The A525 Series Electronic Fermentation Tank Controller
controls fermentation tanks that process wine and other
fermented beverages. The controller maintains the
temperature level, the pump-over, and the oxygen and
carbon dioxide supplies that maintain the appropriate
fermentation environment in the fermentation tank. The
controller uses five relays to control the following features:
• Cooling
• User-provided alarms
• Pump-over
• Air supply valve (ASV)
• Heating
Refer to the A525 Series Electronic Fermentation
Tank Controller Technical Bulletin (LIT-12013007) for
more information about setting up, operating, and
troubleshooting the A525 Fermentation Controller.
Parts included
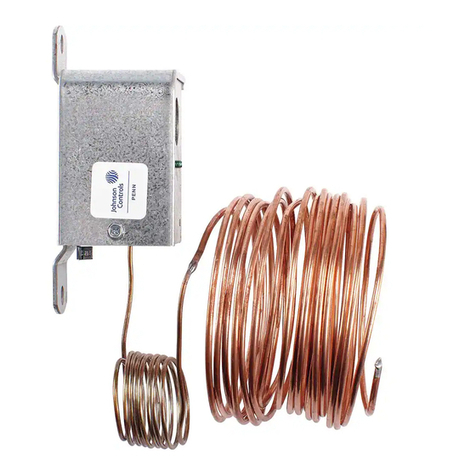
The A525 Fermentation Controller uses the TE-631AP-1
temperature sensor. For more information about
installation procedures and technical specifications for
the TE-631AP-1, see Sensor wiring, Table 7, and refer to
the TE-6300 Series Temperature Sensors Product Bulletin
(LIT-216320).
The controller includes an IP65 enclosure with holes in
the enclosure base for wall and surface mounting. You
can order an optional DIN rail mounting kit (part no.
BKT524-1K).
Dimensions
The following figure shows the dimensions of the A525
Fermentation Controller.
Figure 1: A525 Fermentation Controller with IP65
enclosure dimensions, mm (in.)
Mounting the A525 Fermentation
Controller
The following guidelines outline the best practices for
mounting the controller. See Figure 2, Table 1, and
Mounting the controller on a wall or flat surface for more
information.
Mounting guidelines
Observe the following location and mounting guidelines
for the A525 Fermentation Controller:
• Mount the controller on a flat surface.
• Ensure that the mounting surface can support the
controller assembly, mounting hardware, and any user-
supplied panel or enclosure.
• Ensure that the controller is in the proper orientation
for easy wiring, set up, and viewing.
• Allow enough space to connect and route wires, view
the LCD, and use the touchpad.
• Identify the appropriate mounting hardware.
• Mount the controller in locations free of corrosive
vapors. Observe the ambient operating conditions
listed in the A525 Series Electronic Fermentation
Tank Controller technical specifications for both the
A525 Fermentation Controller and the TE-631-AP-1
temperature sensor.
Part No. 24-07664-03426 Rev. C
2019-06-07
• Do not mount the controller on surfaces that are prone
to vibration.
• Do not mount the controller in a location where high-
voltage relays, motor starters, and other sources of
electromagnetic emissions or strong radio frequency
may cause electromagnetic interference (EMI).
• Do not install the controller in airtight enclosures.
• Do not install heat generating devices with the
controller in an enclosure that may cause the ambient
temperature to exceed 60°C (140°F).
Figure 2: A525 Fermentation Controller wall and
surface mounting
Table 1: A525 Fermentation Controller wall and surface
mounting callout table
Callout
Controller
view Description
1Front view Spring-loaded cover screw on
the controller cover
2Rear view Keyhole slot on the rear of the
enclosure base
3Interior
right view
Mounting screw hole on the
enclosure base
Mounting the controller on a wall or flat
surface
To mount the A525 Fermentation Controller on a wall or
other flat surface, complete the following steps:
1. To open the controller cover, loosen the four spring-
loaded cover screws. Be careful not to damage the
controller’s interior components.
2. Attach an appropriate fastener onto the wall or other
flat surface.
3. Position the keyhole slot on the rear of the enclosure
base over the fastener. Make sure that the controller
hangs securely on the fastener.
4. Use the four holes on the corners of the enclosure
base to mark the location for the mounting screws.
Remove the keyhole slot fastener from the wall or flat
surface.
5. Use four screws to mount the controller: M4 (#8)
pan-head screw; 12 mm (0.5 in.) or longer.
6. Tighten the screws. Use shims to prevent warping the
enclosure.
7. To seal the cover, close the front cover and tighten
the spring-loaded cover screws to 0.9–1.1 N·m (8–10
in·lbs).
DIN rail mounting
You can optionally order a DIN rail mount kit (BKT524-1K)
for the A525 Fermentation Controller. Attach the DIN rail
clip assembly to the five holes on the rear of the enclosure
base.
Refer to the installation instructions included with the DIN
rail kit for DIN rail mounting procedures.
Conduit plug removal and liquid
tight fitting
The following figure shows how to remove the conduit
plug and insert the liquid tight fitting.
Figure 3: Conduit plug removal and liquid tight fitting
Removing the conduit plug and inserting
the liquid tight fitting
To remove the conduit plug and insert the liquid tight
fitting, complete the following steps:
1. Use a cutting pliers to clip the conduit rib.
A525 Fermentation Tank Controller Installation Guide2

2. Place a flat blade screwdriver at the edge of the
knockout. Gently tap the screwdriver with a hammer
to carefully remove the conduit plug.
3. To maintain the IP65 moisture protection rating,
select an appropriate water tight conduit connector.
Wiring
See Figure 4 and Table 2 for electrical termination
locations, terminal labels, and wiring information for low-
voltage terminations.
See Figure 5 and Table 3 for electrical termination
locations, terminal labels, and wiring information for high-
voltage terminations.
See Table 8 to Table 12 for the high-voltage relay electrical
ratings.
WARNING
Risk of Electric Shock
Disconnect or isolate all power supplies before mak-
ing electrical connections. More than one disconnec-
tion or isolation may be required to completely de-en-
ergize equipment. Contact with components carrying
hazardous voltage can cause electric shock and may
result in severe personal injury or death.
AVERTISSEMENT
Risque de décharge électrique
Débrancher ou isoler toute alimentation avant de
réaliser un branchement électrique. Plusieurs iso-
lations et débranchements sont peut-être néces-
saires pour-couper entièrement l'alimentation de
l'équipement. Tout contact avec des composants con-
ducteurs de tensions dangereuses risque d'entraîner
une décharge électrique et de provoquer des
blessures graves, voire mortelles.
Important:
• Use copper conductors only. Make all wiring in
accordance with local, national, and regional
regulations.
• Do not exceed the A525 Fermentation Controller
electrical ratings. Exceeding controller electrical
ratings can result in permanent damage to the
controller and void any warranty.
• Run all low-voltage wiring and cables separate
from all high-voltage wiring and route wires for
National Electric Code or local electrical code
requirements. It is best practice to use shielded
cable for low-voltage cables that are exposed to
high electromagnetic or radio frequency noise.
• Electrostatic discharge can damage control
components. Use proper electrostatic discharge
precautions during installation, setup, and
servicing to avoid damaging the controller.
• Do not connect supply power to the controller
before you finish and check all wiring connections.
Short circuits or improperly connected wires can
result in damage to the controller and void any
warranty.
A525 Fermentation Tank Controller Installation Guide 3

Low-voltage wiring
The following figure and table provide information about the low-voltage wiring terminal blocks, wiring terminal labels,
and required wire sizes.
Figure 4: A525 Controller low-voltage terminal block connections (internal to control)
Table 2: A525 Controller low-voltage terminal block, terminals, and wire sizes
Terminal
block label
Terminal
label Description, function, and requirements Required wire sizes
+
-
The RS485 Modbus communications terminal block is
restricted to an optional variable-frequency drive (VFD) that
is used to control pump-over operations. Do not connect
another Modbus device to these terminals.
RS485
Modbus
REF The RS485 Modbus signal common or reference
• 0.20 mm2– 0.30 mm2
• (26 AWG–22 AWG)
• Stranded wires and
twisted-leads cable
Sn1 Sensor 1 (Sn1) is the main tank temperature sensor. Connect
either lead from the sensor to Sn1. Connect the other lead to
a common (C) terminal.
Note: Sensor wires for the A525 Controller are not
polarity sensitive.
C
The A525 Fermentation Controller includes four low-voltage
common terminals. All of the low-voltage C terminals are
connected together on the PC board.
Sn2 Sensor 2 (Sn2) is unused.
Sn3
You can use Sensor 3 (Sn3) with a current switch. The current
switch monitors the status of the pump motor. This is an
optional feature.
UI 4
You can use Universal Input 4 (UI 4) to monitor the speed of
a pump motor if the VFD provides this output signal to the
control. This is an optional feature.
UI 5
You can use Universal Input 5 (UI 5) to connect a remote
pump start or stop button. This input is intended for a
momentary push-button and can start or stop a pump-over.
This is an optional feature.
Analog input/
output
AO 1 AO 1 sets the speed of the VFD (0 V-10 V). This is an optional
feature.
• 0.30 mm2–1.50 mm2
• (22 AWG–16 AWG)
• Stranded wires and
twisted-leads cable
A525 Fermentation Tank Controller Installation Guide4

High-voltage wiring
The following figure and table describe the high-voltage wiring terminal blocks, wiring terminal labels, and wire sizes.
See Table 8 to Table 12 for the relay electrical ratings.
Note: When you install the controller, splice the neutral line L2/N from the power input TB1 and connect it to the
neutral input of the controlled device.
Figure 5: A525 Fermentation Controller high-voltage terminal block connections
Table 3: A525 Fermentation Controller high-voltage terminal blocks, terminals, and wire sizes
Terminal block
label
Terminal
voltage Description, function, and requirements Required wire sizes
L1
L2/N
Two terminals for supply power connection to the A525
Fermentation Controller Requires 90 VAC–240 VAC; 15 VA, (0.25 A
maximum)
90 VAC-
240 VAC
GND Earth ground connection terminal
• 0.75 mm2–2.50 mm2
• (18 AWG–14 AWG)
Cool Two terminals for line-voltage, single-pole, single-throw (SPST),
dry-contact relay control the cooling solenoid valve. The Cool icon
illuminates blue when the cooling relay is energized.
• 1.50 mm2– 6.0 mm2
• (16 AWG–10 AWG)
LC
LNO
Alarm
LNC
The common (LC), normally-open (LNO), and normally-closed (LNC)
terminals for line-voltage, single-pole, double-throw (SPDT), dry-
contact relay control the user-supplied alarm devices.
• 0.30 mm2–2.50 mm2
• (22 AWG–14 AWG)
Pump Two terminals with SPST, dry-contact relay to cycle the circulation
pump on and off. The pump relay connection is optional.
Note: The pump relay does not operate the pump directly.
The VFD uses the pump relay to control the pump operation.
• 0.30 mm2–2.50 mm2
• (22 AWG–14 AWG)
ASV Two terminals for purging excess fermentation gas from the tank.
The ASV relay connects to the solenoid of an air supply valve and is
optional.
• 0.75 mm2–2.50 mm2
• (18 AWG–14 AWG)
Heat Two terminals with SPST, dry-contact relay to control the heating
solenoid valve. The Heat icon illuminates red when the heating
relay is energized.
• 1.50 mm2–6.0 mm2
• (16 AWG–10 AWG)
A525 Fermentation Tank Controller Installation Guide 5

Using the RS485 output to communicate
with BACnet
You can optionally connect the A525 Fermentation
Controller to a supervisory controller through a BACnet
MS/TP bus for remote monitoring and programmability
within a building automation system (BAS).
The A525 Fermentation Controller uses the isolated
RS485 output on the BACnet expansion interface to
communicate with BACnet. See the following figure for
an example of the BACnet expansion interface on the
controller.
Figure 6: BACnet expansion interface on the A525
Fermentation Controller
Connect the network terminal block on the A525
Fermentation Controller to the other devices in a daisy-
chain configuration using three-wire twisted, shielded
cable.
The isolated cable shield drain (SHD) terminal on the
network terminal block splices the cable shields along the
daisy-chain. See the following figure for more information
about daisy-chain configurations.
Figure 7: Network devices in a daisy-chain
configuration
Table 4: Network devices in a daisy-chain
configuration callout table
Callout Description
1Terminating device on the RS485 network
trunk
2Daisy-chained devices on the RS485 network
trunk
3 Isolated shield connection terminal
4To the next device on the RS485 network
trunk
Set each network device that connects to the end of a
daisy-chain network trunk as a terminating device. The
A525 Fermentation Controller contains an end-of-line
(EOL) switch.
When you set the switch to on, the controller becomes
a terminating device. See the following figure for more
information.
Figure 8: EOL switch positions on network devices in a
daisy-chain network trunk
A525 Fermentation Tank Controller Installation Guide6

Table 5: EOL switch positions on network devices in a
daisy-chain network trunk callout table
Callout Description
1 Network device with EOL switch set to off
2 Network device with EOL switch set to off
3 Network device with EOL switch set to off
4 Master device
5 Network device with EOL switch set to off
6 Network device with EOL switch set to off
7Network device with EOL switch set to on to
create a terminating device
8Network device with EOL switch set to on to
create a terminating device
Adding the A525 Fermentation Controller to a
daisy-chain configuration for communication
with BACnet
To add the controller to a daisy-chain configuration for
communication with BACnet, complete the following
steps:
1. Connect the network terminal block on the A525
Fermentation Controller to the other devices in the
daisy-chain configuration using three-wire twisted,
shielded cable.
2. Determine the physical location of the controller
connection on the daisy-chain network trunk.
3. If the controller is a terminating device on the
network trunk, push the EOL switch upwards to set it
to on. If the controller is not a terminating device on
the network trunk, push the EOL switch downwards
to set it to off.
4. Configure the BACnet address in the A525
Fermentation Controller’s UI. Refer to the A525
Electronic Fermentation Tank Controller Technical
Bulletin (LIT-12013007) for more information.
Note:
- Make sure that the network cable SHDs
are spliced at all of the subordinate
devices on the trunk.
- Make sure that the cable shield connects
to the ground at the master device only.
- The EOL switch on the A525
Fermentation Controller is set to off by
factory default.
Figure 9: EOL switch positions to create terminating and
non-terminating devices
Table 6: EOL switch positions for terminating and non-
terminating devices callout table
Callout Description
1
The EOL switch is set to on to change
the A525 Fermentation Controller into a
terminating device on the BACnet bus.
2
The EOL switch is set to off to change the
A525 Fermentation Controller into a non-
terminating device on the BACnet bus.
A525 Fermentation Tank Controller Installation Guide 7

Sensor wiring
See Table 7 for information about wire gauge and
maximum sensor wire length. See Table 16 for
information about the temperature sensor’s technical
specifications.
Observe the following guidelines when you wire sensors
to the A525 Fermentation Controller:
• Sensor leads are not color coded or polarity-specific;
you can connect either of the two sensor leads to the
Sn1 terminal and a C terminal.
• Select only the sensor that operates in the ambient
operating range that your A525 Fermentation
Controller monitors and controls.
• Keep the sensor leads as short as possible in your
application. The additional resistance in long sensor
cables can create an offset between the actual
temperature and the displayed temperature. It is best
practice to solder or butt splice connections.
• Use 0.30 mm2 (22 AWG) stranded-wires and twisted-
leads cable with a cable shield to extend sensor cable
runs.
Table 7: Maximum recommended sensor cable lengths
and wire sizes
Wire gauge Maximum sensor cable length 1
1.3 mm2 (16 AWG) 150 m (492 ft)
0.82 mm2 (18 AWG) 100 m (328 ft)
0.52 mm2 (20 AWG) 60 m (196 ft)
0.33 mm2 (22 AWG) 40 m (131 ft)
1 At the listed cable lengths, there is less than 0.6°C (1°F) error
between the temperature sensed at the TE-631AP-1 sensor
and the temperature displayed on the LCD.1
Important: When you connect sensors with
shielded cable to a control, connect the cable shield
drain lead to one of the C terminals on the input
sensor terminal block. Do not connect the shield at
any other point along the cable. Isolate and insulate
the shield drain at the sensor end of the cable.
Connecting a cable shield at more than one point
can enable transient currents to flow through the
sensor cable shield, which can cause erratic control
operation.
Relay electrical ratings
Table 8 to Table 12 provide the electrical ratings for the
control relays in the A525 Fermentation Controller. See
Table 15 for the relay’s duty cycle ratings.
Table 8: SPST cooling solenoid relay electrical ratings
Agency and file UL EN
Applied AC
voltage at 50/60
Hz
24 VAC 120 VAC 240 VAC 240 VAC
Pilot duty VA
(N.O.)
125 VA at 24 VAC–240 VAC
Number of
cycles
100,000
Table 9: SPST heating solenoid relay electrical ratings
Agency and file UL EN
Applied AC
voltage at 50/60
Hz
24 VAC 120 VAC 240 VAC 240 VAC
Pilot duty VA
(N.O.)
125 VA at 24 VAC–240 VAC
Number of
cycles
100,000
Table 10: SPDT alarm relay electrical ratings
Agency and file UL EN
Applied AC
voltage at 50/60
Hz
24 VAC 120 VAC 240 VAC 240 VAC
Full load
amperes N.O.
(N.C)
-- 9.8 A 4.9 A 4.9 A
Locked rotor
amperes N.O.
(N.C.)
-- 58.8 A 29.4 A 29.4 A
Resistive
amperes N.O.
(N.C.)
10 A
Pilot duty VA
N.O. (N.C.)
125 VA at 24 VAC–240 VAC
Number of
cycles
30,000
Table 11: SPST pump-over relay electrical ratings
Agency and file UL EN
Applied AC
voltage at 50/60
Hz
24 VAC 120 VAC 240 VAC 240 VAC
Pilot duty VA
(N.O.)
125 VA at 24 VAC–240 VAC
Number of
cycles
30,000
Table 12: SPST ASV relay electrical ratings
Agency and file UL EN
Applied AC
voltage at 50/60
Hz
24 VAC 120 VAC 240 VAC 240 VAC
Pilot duty VA
(N.O)
125 VA at 24 VAC–240 VAC
Number of
cycles
30,000
Repair information
Do not attempt to repair the A525 Series Electronic
Fermentation Tank Controller. In case of a defective or
improperly functioning controller, contact your nearest
authorized Johnson Controls® or PENN® distributor or
sales representative.
A525 Fermentation Tank Controller Installation Guide8

When contacting your Johnson Controls or PENN
distributor, check the model number of the controller. You
can find the model number on the label inside the cover
of the controller.
Cleaning information
Remove any loose debris from the controller. Use a soft
cloth with a warm, mild detergent solution to wipe the
outside surface. Rinse the cloth with clean water and wipe
the controller until clean. Dry the controller with a soft
cloth.
Note:
• Do not use abrasive cleaning powders.
• Do not use abrasive cleaning pads or brushes.
• Do not use solvents or cleaning solutions that can
damage plastic.
USB port information
Note: After you use the USB port, install the USB
plug so that it mounts flush to the outside enclosure
surface. This action seals the USB port for IP65
protection.
Ordering information
The following table contains information about
accessories for the A525 Fermentation Controller.
For more information about TE-631AP-1 temperature
sensors, refer to the TE-6300 Series Temperature
Sensors Product Bulletin (LIT-216320) or contact your
nearest Johnson Controls or PENN distributor or sales
representative.
Table 13: A525 Fermentation Controller accessories
Product
code
Description
BKT287-1R 305 mm (12 in.) section of 35 mm DIN rail
BKT524-1K Bracket for mounting the A525
Fermentation Controller to 35 mm DIN
rail. Includes five mounting screws
A525 Fermentation Tank Controller Installation Guide 9

A525 Series Electronic Fermentation Tank Controller technical specifications
Table 14: A525 Series Electronic Fermentation Tank Controller technical specifications
Product A525
Power consumption 1.8 VA maximum
Supply power 84 VAC to 260 VAC, 50/60 Hz, 10 VA maximum
Ambient conditions Operating: -30°C to 60°C (-22°F to 140°F), 0% to 95% RH noncondensing
Shipping and storage: -40°C to 85°C (-40°F to 185°F), 0% to 95% RH noncondensing
Temperature sensing
range
-46°C to 104°C (-50°F to 220°F)
Input signal TE-631AP-1 1K ohm nickel temperature sensor, 6 in. well probe assembly
Input signal
(UI 4 and UI 5) 0 VDC–10 VDC input for leak detector status or dry contact binary input with a switch wired
between UI 4 or UI 5 and C.
Sensor offset range ± 3ºC or ± 5ºF
RS485 Modbus Maximum distance: 100 ft (30 m)
Default baud rate: 9.6K
Note: Also supports baud rate of 19.2K
RS485 BACnet expansion
interface
Maximum distance: 5,000 ft (1,524 m)
Baud rate: 38.4K
Address range: 1–127
Default address: 10
External USB Use a standard USB flash drive to upgrade firmware revision for future upgrades.
Enclosure IP65 watertight, corrosion-resistant, high-impact thermoplastic
Dimensions (H x W x D) 196.8 mm (7.75 in.) x 190.5 mm (7.5 in.) x 82.6 cm (3.25 in.)
Weight 1.1 kg (2.4 lb)
Compliance United States: cULus Listed; UL60730-1, UL60730-2-9, File SDFY.SA516;FCC Compliant to
CFR47, Part 15, Subpart B, Class B limits
Canada: cULus Listed; CAN/CSA-E60730-1:15, CAN/CSA-E60730-2-9:15, File SDFY7.SA516;
Industry Canada (IC) compliant to Canadian ICES-003, Class B limits
Europe: CE Mark – Johnson Controls declares that this product is in compliance with the
essential requirements and other relevant provisions of the EMC Directive and Low Voltage
Directive; RoHS Directive
Australia and New Zealand: RCM Mark, Australia/NZ emissions compliant
Table 15: UL Conformity declaration information
Information Description
Purpose of control Sensing control/operating control
Construction of control Electronic independently mounted control
Number of cycles Cooling relay: 100,000
Alarm relay: 30,000
Pump-over relay: 30,000
Air supply valve relay: 30,000
Heating relay: 100,000
Method of mounting control Four mounting screws or optional DIN rail mounting kit
Type 1C or type 2C action Micro-interruption
Heat and fire resistance category D
Rated impulse voltage 4,000 V
Ball pressure temperature 125°C (257°F)
A525 Fermentation Tank Controller Installation Guide10

Table 15: UL Conformity declaration information
Information Description
Cover screw torque requirements
instruction
To maintain type IP65 rating, tighten enclosure cover screws to 0.9–1.1 N·m (8–
10 in·lb)
Table 16: TE-631AP-1 temperature sensor
Information Description
Operating conditions Enclosure: -46°C to 50°C (-50°F to 122°F)
Sensor probe: -46°C to 104°C (-50°F to 220°F)
Reference resistance 1K ohms at 21°C (70°F)
Accuracy ±0.19C° at 21°C (±0.34°F at 70°F)
Sensor construction Probe: 127 mm (5 in.)
Well: 152 mm (6 in.)
Sensor cable sheath Plastic enclosure
The performance specifications are nominal and conform to acceptable industry standards. For application at conditions
beyond these specifications, Johnson Controls shall not be liable for damages resulting from misapplication or misuse of
its products.
North American emissions compliance
United States
This equipment has been tested and found to comply with the limits for a Class B digital device, pursuant to Part 15 of
the FCC Rules. These limits are designed to provide reasonable protection against harmful interference in a residential
installation. This equipment generates, uses and can radiate radio frequency energy and, if not installed and used
in accordance with the instructions, may cause harmful interference to radio communications. However, there is no
guarantee that interference will not occur in a particular installation. If this equipment does cause harmful interference
to radio or television reception, which can be determined by turning the equipment off and on, the user is encouraged to
try to correct the interference by one or more of the following measures:
• Reorient or relocate the receiving antenna.
• Increase the separation between the equipment and receiver.
• Connect the equipment into an outlet on a circuit different from that to which the receiver is connected.
• Consult the dealer or an experienced radio/TV technician for help.
Canada
This Class (B) digital apparatus meets all the requirements of the Canadian Interference-Causing Equipment Regulations.
Cet appareil numérique de la Classe (B) respecte toutes les exigences du Règlement sur le matériel brouilleur du Canada.
Single point of contact
APAC Europe NA/SA
JOHNSON CONTROLS
C/O CONTROLS PRODUCT MANAGEMENT
NO. 32 CHANGJIJANG RD NEW DISTRICT
WUXI JIANGSU PROVINCE 214028
CHINA
JOHNSON CONTROLS
WESTENDHOF 3
45143 ESSEN
GERMANY
JOHNSON CONTROLS
507 E MICHIGAN ST
MILWAUKEE WI 53202
USA
For more contact information, refer to www.johnsoncontrols.com/locations.
A525 Fermentation Tank Controller Installation Guide 11

© 2019 Johnson Controls. All rights reserved. All specifications and other information shown were current as of document revision and
are subject to change without notice.
www.penncontrols.com
Table of contents
Other Penn Controllers manuals