manuals.online logo
Brands
  1. Home
  2. •
  3. Brands
  4. •
  5. Petsafe
  6. •
  7. Pet Care Product
  8. •
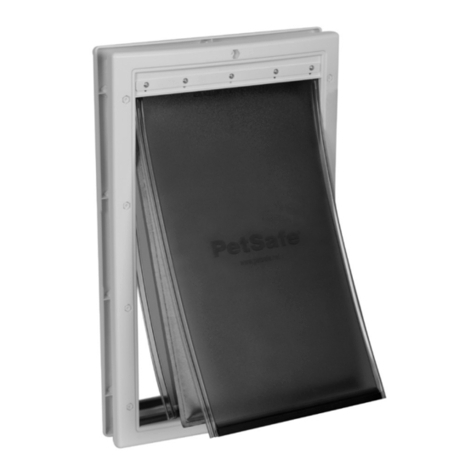
  9. Petsafe Staywell 200 series User manual

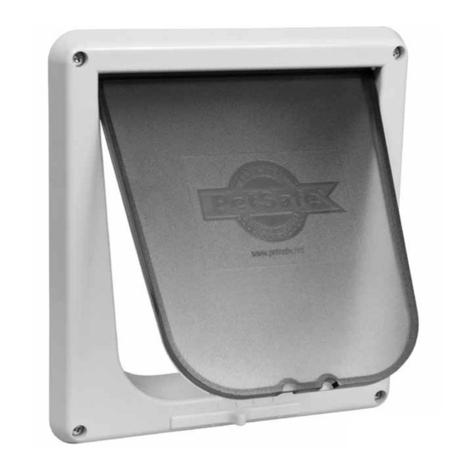
Petsafe Staywell 200 series User manual

Other manuals for Staywell 200 series

3

Other Petsafe Pet Care Product manuals
Petsafe PIF-150 User manual

Petsafe

Petsafe PIF-150 User manual

Petsafe Drinkwell CURRENT-S-BR-EU-19 User manual

Petsafe

Petsafe Drinkwell CURRENT-S-BR-EU-19 User manual

Petsafe PIG19-16412 User manual

Petsafe

Petsafe PIG19-16412 User manual

Petsafe PDT00-16030 User manual

Petsafe

Petsafe PDT00-16030 User manual

Petsafe PBC19-12443 User manual

Petsafe

Petsafe PBC19-12443 User manual

Petsafe Healthy Pet Simply Feed PFD19-15521 User manual

Petsafe

Petsafe Healthy Pet Simply Feed PFD19-15521 User manual

Petsafe Add-a-dog PAC00-12893 Setup guide

Petsafe

Petsafe Add-a-dog PAC00-12893 Setup guide

Petsafe PFD00-15788 User manual

Petsafe

Petsafe PFD00-15788 User manual

Petsafe CozyUp PTV00-17052 User manual

Petsafe

Petsafe CozyUp PTV00-17052 User manual

Petsafe PDT00-12470 Setup guide

Petsafe

Petsafe PDT00-12470 Setup guide

Petsafe RPA00-12510 Assembly instructions

Petsafe

Petsafe RPA00-12510 Assembly instructions

Petsafe ULTRALIGHT SONIC BARK CONTROL User manual

Petsafe

Petsafe ULTRALIGHT SONIC BARK CONTROL User manual

Petsafe PIF19-14186 Stay Plus Play Wireless Fence... User manual

Petsafe

Petsafe PIF19-14186 Stay Plus Play Wireless Fence... User manual

Petsafe PBC19-11794 User manual

Petsafe

Petsafe PBC19-11794 User manual

Petsafe PAWZ AWAY PDT00-11312 Setup guide

Petsafe

Petsafe PAWZ AWAY PDT00-11312 Setup guide

Petsafe CozyUp User manual

Petsafe

Petsafe CozyUp User manual

Petsafe Happy Ride User manual

Petsafe

Petsafe Happy Ride User manual

Petsafe PBC19-11794 User manual

Petsafe

Petsafe PBC19-11794 User manual

Petsafe ST-85 Spray Commander User manual
Petsafe

Petsafe ST-85 Spray Commander User manual

Petsafe PWM19-16770 User manual

Petsafe

Petsafe PWM19-16770 User manual

Petsafe PFD00-15956 User manual

Petsafe

Petsafe PFD00-15956 User manual

Petsafe IN-GROUND FENCE RFA-67 Setup guide

Petsafe

Petsafe IN-GROUND FENCE RFA-67 Setup guide

Petsafe Stubborn Dog Receiver User manual

Petsafe

Petsafe Stubborn Dog Receiver User manual

Petsafe Simply Clean Operating and safety instructions

Petsafe

Petsafe Simply Clean Operating and safety instructions

Popular Pet Care Product manuals by other brands

PitPat PP02 user manual

PitPat

PitPat PP02 user manual

Schwinn Rascal owner's manual

Schwinn

Schwinn Rascal owner's manual

K&H Small Animal quick start guide

K&H

K&H Small Animal quick start guide

SHOR-LINE 006.3230.00 Product guide

SHOR-LINE

SHOR-LINE 006.3230.00 Product guide

juwel Rio 240 instruction manual

juwel

juwel Rio 240 instruction manual

Datamars OMNI MAX user manual

Datamars

Datamars OMNI MAX user manual

Trixie 24444 instructions

Trixie

Trixie 24444 instructions

Roverpet 30DDPP Assembly instructions

Roverpet

Roverpet 30DDPP Assembly instructions

SportDOG SD-105S-C manual

SportDOG

SportDOG SD-105S-C manual

Staywell 400 Series Magnetic user guide

Staywell

Staywell 400 Series Magnetic user guide

Dogtek Sonic Birdhouse user guide

Dogtek

Dogtek Sonic Birdhouse user guide

Togfit Deluxe Trigger Lock Door Gate Instructions for use

Togfit

Togfit Deluxe Trigger Lock Door Gate Instructions for use

Girafus 227PA user manual

Girafus

Girafus 227PA user manual

ubbink KoiFeeder Solar operating instructions

ubbink

ubbink KoiFeeder Solar operating instructions

CADOCA Deuba 106911 instructions

CADOCA

CADOCA Deuba 106911 instructions

Dogtra RR Deluxe owner's manual

Dogtra

Dogtra RR Deluxe owner's manual

Carson CONVERTIBLE PET YARD 2200 owner's manual

Carson

Carson CONVERTIBLE PET YARD 2200 owner's manual

Creative Cedar Designs K-9 Kabin Assembly instruction

Creative Cedar Designs

Creative Cedar Designs K-9 Kabin Assembly instruction

manuals.online logo
manuals.online logoBrands
  • About & Mission
  • Contact us
  • Privacy Policy
  • Terms and Conditions

Copyright 2025 Manuals.Online. All Rights Reserved.

Replacement Flap Fitting
Instructions
Step 1. From the inside of the house, ensure that the 4 Way
Locks are in the off position (to allow entry and exit).
Step 2. Firmly but carefully, prise the hinges on the flap from the
inside of the frame.You may find it easier to remove the pet door
from your door to do this. If so, you should remove the blanking
plugs to reveal the screws and nuts, which you should unscrew.
Once removed, the inside frame will come away from your door
and the flap can be removed.
Step 3. Insert the new flap into the inside frame ensuring that
the word Staywell reads from left to right.
Step 4. If necessary, reposition the pet doorframes, into the hole
in your door and use the screws and nuts to clamp and secure
firmly back into place. Be careful not to over-tighten the screws.
Re-cover the screw holes with the blanking plugs.
Step 5. Finally, reposition the 4 Way Locks to the desired setting.
For further assistance, please contact our Customer Care Centre
on: 00 800 18 18 20 20.
www.staywell.co.uk
Registered design. Patented worldwide.
Battant de rechange
instructions de montage
Étape 1. Depuis l’intérieur de la maison, assurez-vous que
le verrou à quatre directions est en position arrêt (off) pour
permettre à l’animal d’entrer et de sortir.
Étape 2. Déboîtez fermement et soigneusement les charnières
de la trappe à partir de l’intérieur de l’encadrement. Il sera peut-
être plus pratique de retirer la chatière de votre porte pour faire
ceci. Si vous décidez de procéder ainsi, vous devez enlever les
bouchons d’obturation afin de retirer les vis et les écrous. Après
les avoir dévissés, l’encadrement intérieur pourra être retiré de la
porte et vous pourrez enlever la chatière.
Étape 3. Installez le nouveau battant dans l’encadrement
intérieur en vous assurant de pouvoir lire l’inscription Staywell
de gauche à droite.
Étape 4. En cas de besoin, remettez les encadrements de la
chatière en place sur la porte et servez-vous des vis et des écrous
pour fixer la chatière correctement. Faites attention à ne pas trop
serrer les vis. Recouvrez les trous des vis à l’aide des bouchons
d’obturation.
Étape 5. Pour finir, remettez le verrou à quatre directions sur la
position voulue.
Si vous avez besoin d’aide, veuillez appeler le service clientèle au
00 800 18 18 20 20.
www.staywell.co.uk
Conception déposée. Breveté dans le monde entier.
400-963-26.indd 1 2/27/08 11:35:36 AM
Vervangingsklep
installatie- instructies
Stap 1. Controleer vanaf de binnenkant van de behuizing of het
4-richtingenslot in de stand ‘uit’ staat (in- en uitgaan mogelijk).
Stap 2. Licht de scharnieren op de klep stevig maar voorzichtig
op vanaf de binnenkant van het frame. Misschien zal u het
gemakkelijker vinden om daarvoor het luik voor uw huisdier van
uw luik te verwijderen. In dit geval verwijdert u de afsluitplugs,
zodat de te verwijderen schroeven en moeren bloot komen te
liggen. Na verwijdering zal het binnenframe van uw luik komen
en kan u de klep verwijderen.
Stap 3. Plaats de nieuwe klep in het binnenframe. U moet het
woord ‘Staywell’ kunnen lezen van links naar rechts.
Stap 4. Indien nodig, plaatst u de luikframes voor uw huisdier
terug in het gat in uw luik. Klem stevig terug vast met de
schroeven en moeren. Let op dat de schroeven niet te vast
worden gedraaid. Plaats de afsluitplugs opnieuw over de
schroefgaten.
Stap 5. Plaats tenslotte de 4-richtingensloten in de gewenste
stand.
Voor verdere hulp kan u contact opnemen met de klantendienst:
00 800 18 18 20 20.
www.staywell.co.uk
Gedeponeerd model.Wereldwijd geoctrooieerd.
Radio Systems Corporation • 10427 Electric Ave. • Knoxville, TN 37932 • (865) 777-5404 • www.petsafe.net • 400-963-26
Ersatzklappe
montageanleitung
Schritt 1. Vierwegeschloss von der Innenseite des Hauses aus
entriegeln (Klappe öffnet nach innen und außen).
Schritt 2. Öffnen Sie vorsichtig die Scharniere der Klappe
vom Rahmeninneren. Dazu ist es wahrscheinlich einfacher, die
Haustiertür zuerst von Ihrer Tür zu entfernen. Wenn Sie dies
tun, entfernen Sie die Verschlussstopfen, um die Schrauben
herausdrehen zu können. Sobald diese entfernt wurden, lässt sich
der Innenrahmen von Ihrer Tür abnehmen und die Klappe kann
entfernt werden.
Schritt 3. Setzen Sie die neue Klappe ein und stellen Sie sicher,
dass das Wort Staywell von links nach rechts leserlich ist.
Schritt 4. Falls nötig, positionieren Sie die Rahmen der
Haustiertür in der Öffnung Ihrer Tür neu und bringen Sie die
Schrauben und Muttern zur Befestigung an. Ziehen Sie die
Schrauben nicht zu fest an. Stecken Sie die Verschlussstopfen auf
die Schraubenlöcher.
Schritt 5. Stellen Sie schlussendlich das 4-Wegeschloss nach
Ihren Wünschen ein.
Falls Sie Hilfe benötigen, wenden Sie sich bitte an unseren
Kundendienst: 00 800 18 18 20 20.
www.staywell.co.uk
Geschmacksmuster.Weltweit patentiert.
400-963-26.indd 2 2/27/08 11:35:37 AM