(EN) ENGLISH
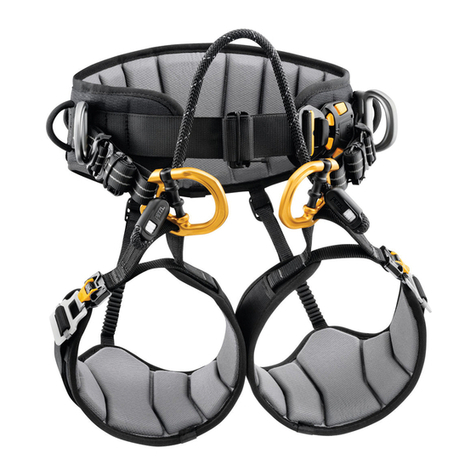
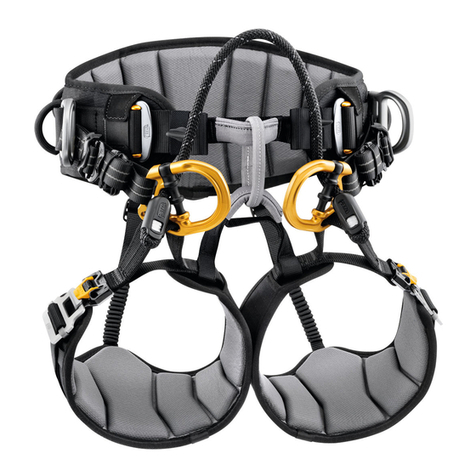
Nomenclature
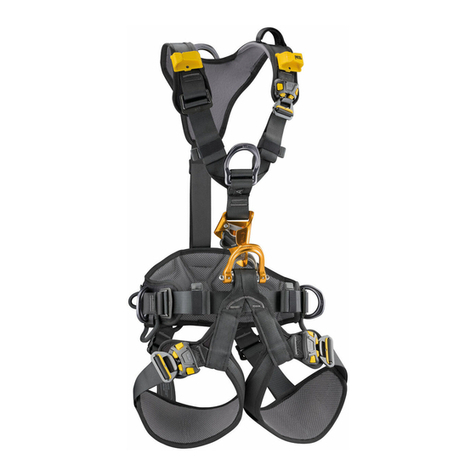
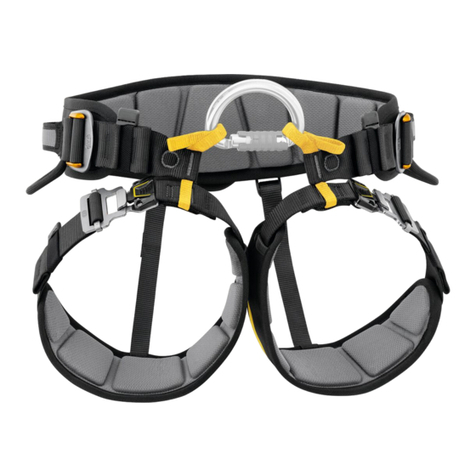
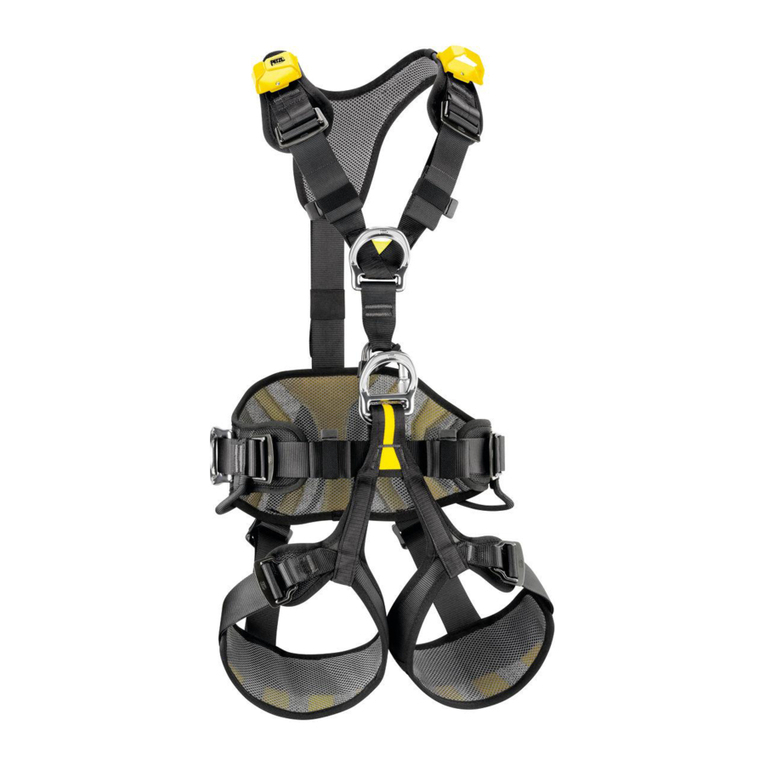
(1) EN 361 back attachment point, (2) EN 361 sternal attachment
point, (3) EN 358, EN 813 ventral attachment point, (4) EN 358 side
belt attachment points, (5) Double-Back adjustment buckles,
(5b) FAST rapid buckles(6) Strap retainer, (7) Gearloop, (8) Tool
loop, (9) Adjustable elastic straps.
Principal materials: polyamide and polyester.
Checking, points to verify
Before each use, check the webbing at the attachment points, the
adjustment bucklesand the safety stitching.
Look forcuts, wearand damage due to use, to heat, and to contact
with chemical productsetc. (check forcut orworn threads).
Check that the DoubleBack and FAST bucklesoperate correctly.
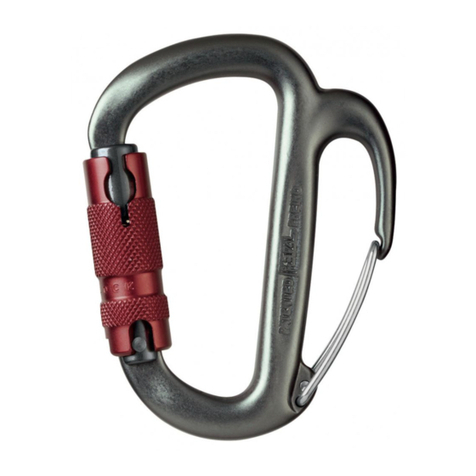
Carabiner: Before each use, check the frame, the hinge and the
locking sleeve. Openthe gate and verify that it closeswhenreleased,
and check forcorrect alignment of the gate and Keylock.
The Keylock slot must not be blocked by foreignmaterials(dirt,
pebble, ice…).
Don’t hesitate to contact PETZL incase of doubt.
Instructions foruse
Check the compatibility of the harness with the othercomponentsof
the fall arrest orwork positioning system (energy absorber, lanyard,
connector).
The anchorpoint forthe system must preferably be sited above the
positionof the user. It must fulfil the requirementsof the standard
EN 795.
Diagram 1. How to put on
Start with the leg loopsopen.
a. Spread the shoulderstrapsapart, hold the harness by the belt and
slip both feet through. Adjust the belt by pulling onthe belt straps.
Tuck the endsof the belt strapsneatly into the retainers.
B. Fastenthe FAST bucklesand adjust the leg loops. Take care that
no foreignbody (such aspebbles, sand, clothing) obstructsthe
operationof the FAST buckles. Check forcorrect locking.
c. Positionthe shoulderstrapsand lock the carabiner.
d. Adjust the shoulderstraps.
Note: priorto use, the usershould move around while wearing the
harness and hang insuspensionwith hisequipment to verify that
the harness fi t sproperly and providesadequate comfort forthe
intended use.
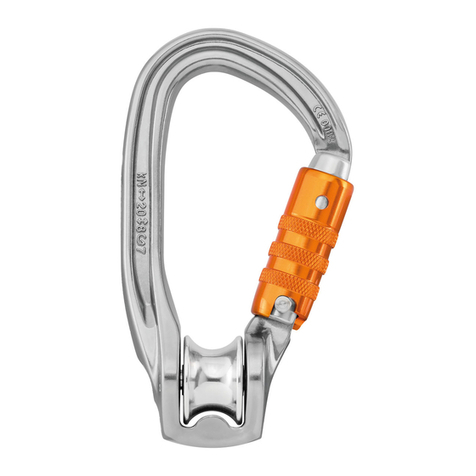
Diagram 2. Manual locking oval carabiner
-Connector(EN 362)
-Locking carabiner(EN 12275) Type B(base).
2A. The carabinermust alwaysbe used with the gate locked. When
the locking sleeve isopen, the red warning mark isvisible. The
strength of a carabinerisgreatly reduced whenthe gate isopen.
2B. The carabinerisstrongest whenit isclosed and loaded along its
majoraxis. Loading inany otherdirectionreducesitsstrength.
Diagram 3. Use forfall arrest
3A. Sternal attachment point.
3B. Dorsal attachment point.
Clearance: distance to fall.
Ensure that the free height underthe userissufficient to avoid
obstaclesinthe event of a fall.
Diagram 4. Use forwork positioning
4A. Ventral (low chest) work positioning.
4B. Lateral work positioning from the belt (there must be a
supporting surface forthe feet). The side ringsmust only be used
forattachment to a work positioning system (maximum height of
fall: 0.5 m) and neverforattachment to a fall arrest system.
Diagram 5. Compatibility:
Attachment points / Connectors
WARNING: the attachment pointsof your harness canproduce a
leverage effect onthe gate of the connector.
Inthe case of a suddentightening of the rope and/oranimpact on
the locking system, combined with anunfavorable positioning of
the carabiner, it ispossible forthe locking ring to break and the gate
to open.
To reduce thisrisk, take care that connectors are positioned
correctly each time that the system isput undertension(lanyard,
descender…).
Check also that connectors used are compatible with the attachment
points(shapes, dimensions…).
Remember: Foryour safety, alwaysget into the habit of doubling
up onsystems, particularly carabiners. Set up a second system asa
back up foryour work positioning system.
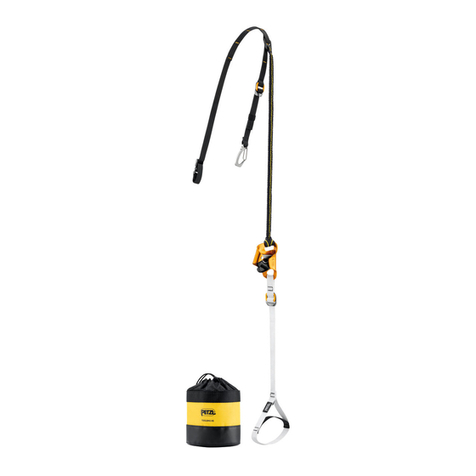
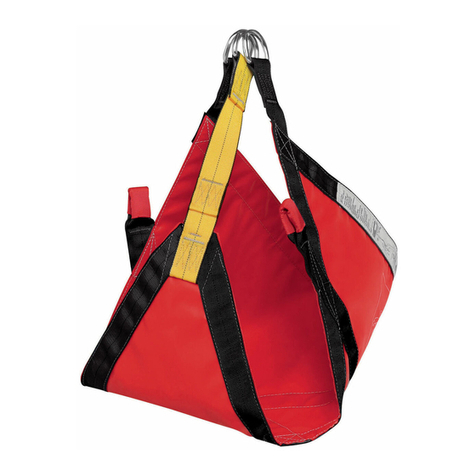
Diagram 6. Accessory
Podium S70
Suspensionseat
(FR) FRANCAIS
Nomenclature
(1) Anneaudorsal EN 361, (2) Anneausternal EN 361, (3) Anneau
ventral EN 358, EN 813, (4) Anneaux latéraux ceinture EN 358,
(5) Bouclesde réglage Double-Back,(5 bis) Bouclesrapides
FAST,(6) Passant, (7) Porte-matériel, (8) Porte-outil, (9) Elastiques
réglables.
Matériaux principaux: polyamide et polyester.
Contrôle, points à vérifier
Vérifiez avant toute utilisationlessanglesauniveaudesanneaux
d’accrochage, desbouclesde réglage et descouturesde sécurité.
Surveillez lescoupures, usureset dommagesdus à l’utilisation, la
chaleur, lesproduitschimiquesetc. (attentionaux filscoupés).
Vérifiez le bonfonctionnement desbouclesDouble Back et FAST.
Mousqueton:
Vérifiez avant toute utilisationle corps, le rivet, la bague de
verrouillage. Vérifiez le bonfonctionnement de fermeture dudoigt et
le bonalignement doigt, Keylock. Le trouduKeylock ne doit pasêtre
encombré (terre, caillou…).
N’hésitez pasà contacterPETZL encasde doute.
Prescriptions d’utilisation
Vérifiez la compatibilité duharnaisavec lesautrescomposantsdu
système d’arrêt deschutesoudusystème de maintienautravail
(absorbeur, longe, connecteur).
L’ancrage dusystème doit être de préférence situé au-dessus de la
positionde l’utilisateur. Il doit répondre aux exigencesde la norme
EN 795.
Schéma 1. Mise en place du harnais
Etat duharnais: sanglesde cuissesouvertes.
a. Ecartez lesbretelles, saisissez le harnaisparla ceinture et enfilez
le parlespieds. Ajustez la ceinture entirant sur lessanglesde
ceinture. Rangez proprement lessanglesdans lespassants.
b. Fermez lesbouclesFAST et ajustez lessanglesde cuisses.
Attentionaux objetsétrangers qui risquent de gênerle
fonctionnement desbouclesrapidesFAST (cailloux, sable,
vêtements…). Vérifiez le bonverrouillage.
c. Positionnez lesbretelles.
Fermez le mousquetonà verrouillage.
d. Ajustez lesbretelles.
Remarque: vous devez effectuerdesmouvementset un test de
suspensionavec votre matériel pour être sûrqu’il soit de la bonne
taille et duniveaude confort nécessaire pour l’usage attendu.
Schéma 2. Mousqueton ovale à verrouillage manuel
- Connecteur EN 362
- Mousquetonà verrouillage EN 12275 Type B (base).
2A. Le mousquetondoit toujours s’utiliserdoigt verrouillé. Lorsque
la bague de verrouillage est ouverte, le témoinrouge est visible.
La résistance d’un mousquetondiminue, si paraccident, le doigt du
mousquetons’ouvre.
2B. Fermé, le mousquetonoffre la résistance maximum dans le sens
de la longueur, toute autre positionréduit sa résistance.
Schéma 3. Utilisation antichute
3A. Anneausternal.
3B. Anneaudorsal.
Tirant d’air: distance de dégagement. S’assurerque la
hauteur libre sous l’utilisateur est suffisante pour qu’il ne heurte pas
d’obstacle encasde chute.
Schéma 4. Utilisation maintien au travail
4A. Maintienventral.
4B. Maintienlatéral de ceinture. Lespiedsdoivent être enappui
pour un maintienconfortable. Cesbouclesdoivent être utilisées
uniquement pour l’accrochage à un système de maintienautravail
(hauteur de chute maximum: 0,5 m) et jamaisà un système d’arrêt
de chute.
Schéma 5. Compatibilité:
Anneaux/Connecteurs
ATTENTION: lesanneaux d’accrochage de votre harnaispeuvent
faire leviersur le doigt duconnecteur.
Lors d’une tensionbrusque de la corde et/oud’un choc sur le
système de verrouillage combiné à une mauvaise positiondu
mousqueton, la bague de verrouillage peut casseret le doigt
s’ouvrir
.
Pour supprimerce risque, veillez aubonpositionnement des
connecteurs lors de chaque mise entensiondusystème (longe,
descendeur…).
Veillez aussi à la compatibilité desconnecteurs avec lesanneaux
(formes, dimensions…).
Rappel: Pour votre sécurité, habituez-vous à toujours doublerles
systèmes, enparticulierlesmousquetons. Installez un deuxième
système pour contre-assurervotre système de maintienautravail.
Schéma 6. Accessoire
PODIUM S70
Sellette de suspension.
(DE) DEUTSCH
Benennung derTeile
(1) EN361 Dorsale Halteöse (Rücken), (2) EN361 Sternale Halteöse
(Brust), (3) EN358, EN813 Zentrale Halteöse (Ventral), (4) EN358
Seitliche Halteösen, (5) DoubleBack-Einstellschnallen, (5b) FAST-
Schnellverschlussschnallen(6) Durchführung fürGurtband,
(7) Materialschlaufen, (8) Werkzeughalterung, (9) Verstellbare
elastische Bänder.
Hauptbestandteile: Polyamid und Polyester.
Kontrolle & zu prüfende Punkte
KontrollierenSie vorjederBenutzung die Gurtbänderim Bereich
derHalteösen, derEinstellschnallenund derSicherheitsn ähte.
AchtenSie auf Einschnitte, Verschleiß und Schädenaufgrund von
Benutzung, Hitze und Kontakt mit Chemikalienusw.
LegenSie dabei besonderesAugenmerk auf durchtrennte oder
abgenutzte Fädenund Nähte.
StellenSie sicher, dass die DoubleBack-Einstellschnallenund FAST-
Schnellverschlussschnallenordnungsgemäß funktionieren.
Karabiner: ÜberprüfenSie vorjedem Gebrauch Körper, Niete und
Verschlussring sowie daseinwandfreie EinrastendesKeylock-
SystemsdesSchnappers.
Die Öffnung desKeylock darf nicht blockiert sein(Schmutz,
Steinchen, Eis…).
WendenSie sich im Zweifelsfall direkt anPETZL.
Gebrauchsanleitung
ÜberprüfenSie, ob derGurt mit denanderenBestandteilendes
AuffangsystemsoderHaltesystemsfürdie Arbeitsplatzpositionierun
g kompatibel ist (Falldämpfer, Verbindungsmittel, Karabiner).
DerAnschlagpunkt desSystemssollte sich möglichst oberhalb der
PositiondesNutzers befinden. Ermuss denAnforderungengemäß
derNorm EN795 entsprechen.
Abbildung 1. Anlegen des Gurtes
Die Beinschlaufensind geöffnet.
a. HaltenSie die Schultergurte auseinander, greifenSie denGurt
am Hüftgurt und schlüpfenSie mit denFüßenhinein. StellenSie
denGurt durch ZiehenandenGurtbändern ein. VerstauenSie die
GurtbänderindendafürvorgesehenenDurchführungen.
b. ZiehenSie die FAST-Schnell-verschlussschnallenfest und
stellenSie die Beinschlaufenein. AchtenSie darauf, dass keine
Fremdkörper(z. B. Steinchen, Sand, Kleidung) die Funktionder
FAST-Verschlussschnalle blockieren. StellenSie sicher, dass die
Schnalle ordnungsgemäß verschlossenist.
c. LegenSie die Schultergurte anund verriegelnSie denKarabiner.
d. StellenSie die Schultergurte ein.
Hinweis: DerNutzersollte vordem Gebrauch die Bewegungsfreiheit
und denKomfort durch einenentsprechendenHängetest
sicherstellen.
Abbildung 2. Karabinermit manuellerVerriegelung - Oval
- Verbindungselement (EN 362)
- Verschlusskarabiner(EN 12275) Typ B (Basismodell).
2A. DerKarabinerdarf nur mit geschlossenem Schnapper
verwendet werden. Ist die Schraube nicht ganz zugedreht oder
offen, bleibt die rote Markierung sichtbar. Die Tragfähigkeit eines
Karabiners verringert sich beträchtlich, wenn derSchnapperdes
Karabiners geöffnet ist.
2B. DerKarabinerbietet bei Belastung inLängsrichtung seine
maximale Tragfähigkeit, wenn ergeschlossenist. Jede andere
Zugrichtung vermindert diese Tragfähigkeit.
Abbildung 3. Verwendung als Auffanggurt
3A. Sternale Halteöse (Brusthöhe)
3B. Dorsale Halteöse (Rückenhöhe).
Abstand: Zum AuffangeneinesSturzes.
Vergewissern Sie sich, dass unterhalb desNutzers ausreichend
Sturzraum vorhandenist.
Abbildung 4. Verwendung bei der
Arbeitsplatzpositionierung
4A. Zentrale Halteöse bei derArbeitsplatzpositionierung (Ventral).
4B. Seitliche Halteösenbei derArbeitsplatzpositionierung (Lateral).
FüreinkomfortablesArbeitensolltendie Füße aneinerOberfläche
abgestützt werdenkönnen. Diese Halteösendürfennur zur
Befestigung aneinem Arbeitsplatz-positionierungssystem (maximale
Fallhöhe: 0,5 m) und niemalsaneinem Auffangsystem verwendet
werden.
Abbildung 5. Kompatibilität: Halteösen und
Verbindungselemente
WARNUNG: Die HalteösenIhresGurteskönnenauf denSchnapper
desVerbindungselements(Karabiner) eine Hebelwirkung ausüben.
Im Falle einesplötzlichenSeilzugsund/oderKrafteinwirkung auf
dasVerschlusssystem bei einerungünstigenPositionierung des
Karabiners kann derVerschlussring brechenund sich derSchnapper
öffnen.
Um diesesRisiko zureduzieren, achtenSie bei jeder
Belastung (Verbindungsmittel, Abseilgerät...) darauf, dass die
Verbindungselemente ordnungsgemäß platziert sind.
StellenSie sicher, dass die verwendetenVerbindungselemente mit
denHalteösenkompatibel sind (Form, Größe…).
Hinweis: GewöhnenSie sich zuIhrerSicherheit an, die Systeme
und vorallem Karabinerdoppelt zusichern. RichtenSie für
ihrArbeitsplatz-positionierungssystem einzweitesSystem als
Rücksicherung ein.
Abbildung 6. Zubehör
PODIUM S70
Sitzbrett zum freienHängen.
5Notice Spécifique NAVAHO COMPLET FAST C71F réf. : FR7271FAS-A
