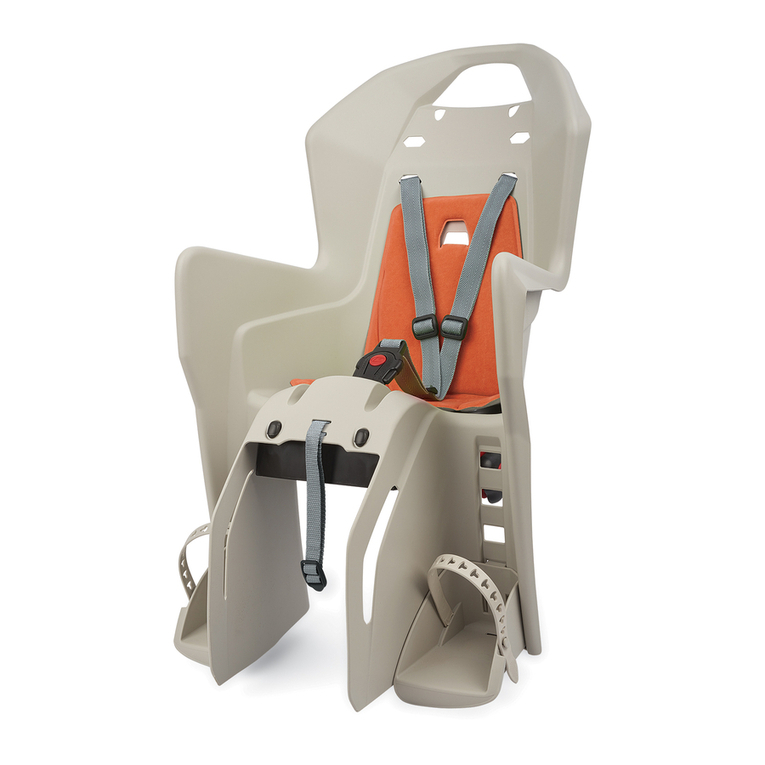
Polisport MOVE User manual

MOUNTING
INSTRUCTIONS
GEBRAUCHSANLEITUNG
REAR CHILD SEAT FOR BICYCLE
FAHRRAD KINDERSITZ
USER MANUAL
WWW.POLISPORT.COM

22#polisportmove#polisportmove
USER
MANUAL
EN 04
FR 07
PT 1 1
DE 14
BG 18
CS 21
DA 25
EL 28
ES 32
FI 35
HR 39
HU 42
IT 46
JP 49
NL 53
NO 56
PL 60
RO 63
RU 67
SK 70
SL 74
SV 77
TR 81
ZH 84
ET 88
LT 91
LV 95
SR 98
UK 102
AR 105
HE 109
FOR SMALL FRAMES & 29ERS
FRAME MOUNTING SYSTEM
FÜR RAHMENMONTAGE
FRAME MOUNTING SYSTEM
FÜR RAHMENMONTAGE
RECLINING FRAME
MOUNTING SYSTEM
FÜR RAHMENMONTAGE MIT
VERSTELLBARER RÜCKENLEHNE
KOOLAH
JOY®
GROOVY®
KOARI
BUBBLY®
MAXI PLUS
GUPPY® MAXI+GROOVY® GROOVY®
KOOLAH
JOY®
BILBY MAXI
BILBY MAXI
KOARI
BUBBLY®
MAXI PLUS
GUPPY® MAXI+

3#polisportmove
REGISTER
YOUR SEAT
+1 YEAR
EXTENDED WARRANTY
register your seat at
WWW.POLISPORT.COM
and get 1 extra warranty year
EN. The reading of instructions manual is mandatory. Carefully follow this
instruction’s user manual for a correct and safe assembly. The reading of the
quick guide is mandatory.
FR. La lecture du mode d’emploi de l’instruction est obligatoire. Suivez
scrupuleusement ce petit guide pour un assemblage sûr et adéquat. La
lecture du guide rapide est obligatoire.
PT. A leitura do manual de instruções do usuário é obrigatória. Deve seguir
atentamente estas instruções de montagem para uma montagem correta e
segura da cadeira. A leitura do guia rápido (Quick Guide) é obrigatória.
DE. Das Lesen der Bedienungsanleitung ist obligatorisch. Befolgen Sie diese
Gebrauchsanweisung sorgfältig, um eine korrekte und sichere Montage zu
gewährleisten. Diese Kurzanleitung durchzulesen ist obligatorisch.
BG. Задължително е да прочетете ръководството за потребителя.
Внимателно прочетете ръководството за безопасно и правилно
монтиране на детското столче. Прочитането на краткото ръководство
е задължително.
CS. Přečtení průvodce uživatele je povinné. Pro správné a bezpečné
sestavení pečlivě dodržujte tento uživatelský návod k použití. Přečtení
stručného průvodce je povinné.
DA. Det er obligatorisk at læse brugsanvisningen. Følg omhyggeligt denne
brugervejledning for en korrekt og sikker montering. Det er obligatorisk at
læse hurtigguiden.
EL. Η ανάγνωση του οδηγού χρηστη είναι υποχρεωτική. Ακολουθήστε
προσεκτικά το παρόν εγχειρίδιο οδηγιών χρήστη για σωστή και ασφαλή
συναρμολόγηση. Η ανάγνωση του σύντομου οδηγού είναι υποχρεωτική.
ES. La lectura del manual de instrucciones es obligatoria. Siga las
indicaciones de este manual de instrucciones para un montaje adecuado y
seguro. Es obligatorio leer la guía de instalación rápida.
FI. Käyttöoppaan lukeminen on pakollista. Noudata huolellisesti tätä
käyttöohjetta oikean ja turvallisen kokoonpanon varmistamiseksi.
Pikaoppaan lukeminen on pakollista.
HR. Čitanje korisničkog priručnika je obvezno. Pažljivo slijedite ovaj korisnički
priručnik za ispravnu i sigurnu montažu. Čitanje kratkog vodiča je obavezno.
HU. A használati kézikönyv elolvasása kötelező. A helyes és biztonságos
összeszereléshez kövesse figyelmesen ezt a használati útmutatót. A gyors
útmutató elolvasása kötelező.
IT. La lettura del manuale d’uso delle istruzioni è obbligatoria. Seguire
attentamente questa manuale per un montaggio corretto e sicuro. È
obbligatoria la lettura della guida rapida.
JP.
NL. Het is verplicht om de gebruikershandleiding te lezen. Volg zorgvuldig
de instructies in deze gebruikershandleiding voor een correcte en veilige
montage. Het is verplicht om de korte handleiding te lezen.
NO. Det er obligatorisk å lese brukerhåndboken. Les håndboken nøye for at
monteringen kan utføres på en korrekt og sikker måte. Det er obligatorisk å
lese hurtigveiledningen.
PL. Przeczytanie instrukcji obsługi jest obowiązkowe.W celu prawidłowego i
bezpiecznego montażu należy dokładnie stosować się do niniejszej instrukcji
obsługi. Przeczytanie skróconej instrukcji jest obowiązkowe.
RO. Citirea manualului de utilizare este obligatorie. Citiți cu atenție acest
manual pentru montarea sigură și corectă a scaunului pentru copii. Citirea
ghidului rapid este obligatorie.
RU. Ознакомление с руководством пользователя является
обязательным. Следуйте инструкциям руководства пользователя
для корректного и безопасного монтажа. Ознакомление с кратким
руководством является обязательным.
SK. Bezpodmienečne si musíte prečítať používateľský návod. Pre správnu
a bezpečnú montáž postupujte dôkladne podľa tohto návodu na použitie.
Bezpodmienečne si musíte prečítať stručný návod.
SL. Branje uporabniškega priročnika je obvezno. Za pravilno in varno
montažo natančno upoštevajte ta navodila za uporabo. Branje kratkega
vodiča je obvezno.
SV. Det är obligatoriskt att läsa bruksanvisningen. Följ denna bruksanvisning
noggrant för en korrekt och säker montering. Det är obligatoriskt att läsa
denna snabbguide.
TR. Kullanim kılavuzunun okunması zorunludur. Doğru ve güvenli bir montaj
için bu kullanım kılavuzuna dikkatli bir şekilde uyunuz. Hızlı başlangıç
kılavuzunun okunması zorunludur.
ZH.
ET. Kasutusjuhendi lugemine on kohustuslik. Õigeks ja ohutuks
paigaldamiseks lugege see kiirjuhend hoolikalt läbi. Kiirjuhendi lugemine
on kohustuslik.
LT. Privaloma perskaityti naudotojo vadovą. Atidžiai laikykitės šio naudotojo
vadovo nurodymų, kad surinktumėte teisingai ir saugiai. Privaloma
perskaityti trumpąjį vadovą.
LV. Lietotāja rokasgrāmata ir jāizlasa obligāti. Lai veiktu pareizu un drošu
uzstādīšanu, rūpīgi ievērojiet šajā rokasgrāmatā sniegtos norādījumus. Šī īsā
ceļveža izlasīšana ir obligāta.
SR. Čitanje uputstva za upotrebu je obavezno. Pažljivo pročitajte uputstvo
za bezbedno i pravilno postavljanje dečjeg sedišta. Čitanje kratkog vodiča
je obavezno.
UK. Обов’язково ознайомтеся з інструкціями з використання. Виконуйте
інструкції посібника з експлуатації для коректного та безпечного
монтажу. Ознайомлення зі скороченим посібником є обов’язковим.
.HE
.AR

44#polisportmove#polisportmove
EN REAR CHILD SEAT FOR BICYCLE
ATTENTION
This product contains small parts like bolts, plastic bags, and small packaging hangers. Keep them out of reach of children to avoid suffocation hazards.
TABLE OF CONTENTS OF PRODUCT
A. MAIN SEAT
A1. REAR SEAT GROOVE
B. RETENTION SYSTEM HARNESS
B1. SAFETY BUCKLE
B2. HEIGHT STRAP ADJUSTERS
B3. CENTRAL STRAP ADJUSTERS
B4. SHOULDER PADDINGS
B5. RETENTION SYSTEM ADJUSTMENT HOLE
C. SAFETY BELT FOR BICYCLE FRAME
C1. SAFETY BELT BUCKLE
C2. SAFETY BELT RETAINER
E. FOOTREST
E1. FOOTREST LEVER
E2. FOOTREST STRAP
E3. FOOTREST PROTECTION
F. CENTER OF GRAVITY
G. CUSHION
H. METALLIC SUPPORT BAR
H1. METALLIC SUPPORT BAR ATTACHMENT
PART
I. FRAME HOLDER
I1. SCREWS M8X45
I2. PLASTIC MOUNTING BLOCK
I3. RELEASE BUTTON
I4. METALLIC MOUNTING PLATE
I5. ALLEN KEY NO. 5
I6. LOCK WASHER M8x16
I7. SAFETY DEVICE INDICATOR
I8. PROTECTIVE RUBBER
J. SUPPORT BAR MOUNTING KIT
J1. SUPPORT BAR MOUNTING PLATE
J2. M8x25 SCREW
J3/J4. WASHER
J5. M8 NUT
K. TRANSPORT NET
L. MECHANISM FOR RECLINING THE SEAT
L1. SAFETY LEVER
L2. LEVER TO RECLINE THE SEAT
L3. HAND KNOB (ONLY FOR BILBY RS)
L4.
KNOB FOR RECLINING (ONLY FOR BILBY RS)
L5. RED SECURITY RING (ONLY FOR BILBY RS)
L5. PLASTIC MOUNTING PLATE (ONLY FOR
BILBY RS)
M.TRACEABILITY INFORMATION
SPECIFIC INSTRUCTIONS FOR MOUNTING
• This child bicycle seat must not be mounted in folding bicycles.
• This child bicycle seat must not be used on EPAC / Pedelecs above 25 km/h
/ 15,5mph.
• This child bicycle seat must not be mounted to bicycles fitted with rear
shock absorbers.
• This child bicycle seat must not be mounted to motorized vehicles such as
mopeds, scooters.
• This child bicycle seat must be assembled on bicycles with round and oval
frames with diameters ranging from Ø28 to Ø40 mm.
• The child bicycle seat must be assembled on bicycles with wheels with
diameters of 26”and 28”.
• If you have a model for Small Frames and 29ers - the child bicycle seat can
be assembled on bicycles with wheels with diameters of 26”and 29”.
• This child bicycle seat is only suitable for carrying children with a maximum
weight of 22 Kg, and a maximum height of 110 cm, (and children with
recommended ages ranging from 9 months to 6 years of age - with the
weight and height as the decisive variable).
• The total weight of the cyclist and the child transported must not exceed
the maximum permitted load permitted for the bicycle. Information on the
maximum load can be found in the operating instructions of the bicycle.You
can also contact the manufacturer for this question.
• This child bicycle seat can be used on EPAC / Pedelecs up to 25 km/h /
15,5 mph.
• The seat may only be mounted on a bicycle suitable for the attachment of
such additional loads. Please consult your bicycle instructions manual.
• The position of the child bicycle seat must be adjusted so that the bicycle
rider does not touch the child bicycle seat with the feet when in motion.
• It’s very important to correctly adhust the seat and its component parts for
optimum comfort and safety of the child. It’s also important that the seat
does not slope forward, so that the child does not tend to slide out of it. It is
also important that the backrest slope backward slightly.
• Check if all parts of the bicycle function correctly with the child bicycle
seat mounted.
• Check the instructions of the bicycle, and If you have any doubts on fitting
the child bicycle seat to your bicycle, please contact your bicycle supplier for
further information.
SPECIFIC INSTRUCTIONS FOR MOUNTING THE SEAT IN THE BICYCLE
1. Cut the plastic straps that hold the holder (I) / metallic support bar (H).
2. Turn the child seat upside down as shown in the image. Use the allen key
(I5) to remove the screws (J2+J4) and disengage and remove the support
bar mounting plate (J1).
2A. If your model has the H1 part: Remove the attachment part (H1) of the
metallic support bar (H) and dispose it in the proper garbage container.
Disengage the metallic support bar (H).
2B. Only for Bilby RS: While simultaneously lift the red security ring (L5),
unscrew the hand knob (L3). Open the plastic mounting plate (L6)
3A. Without Reclining System: Hold the metallic support bar (H) the same
as in the picture and pass it through the opening in the child bicycle seat.
3B. With Reclining System (Guppy RS+, Groovy RS, Bilby RS): Stand the
metallic support bar (H) on top of the reclining system plate and pass it
through the opening of the Mechanism plate (L).
4. To adjust the child bicycle seat according to the bicycle size, set the
metallic support bar (H) into one of the allowed positions to move the seat
backward or forward. At the beginning we suggest placing it on the position
No. 1.The seat shall be installed as close to the saddle as possible.
5A. Insert the support bar mounting plate (J1) on the grooves of the seat (A),
and close it as indicated in the picture. If your model has the (J3) washer,
make sure the (J3) washer is properly placed into the rear groove of the
bicycle seat (A1). Insert the attachment screw (J2), on the back hole of the
support bar mounting plate (J1). Please note that the nut (J5) under the
cushion may become loosen while tighten or loosen the support bar
mounting plate (J1). You need to grab the nut, correctly place it on the seat
groove while totally tighten the full system with the other hand. We
recommend a torque of 5 N.m. By doing so, you will assemble the support
bar mounting plate (J1) and the metallic support bar (H) to the seat (A). This
step is extremely important for child and cyclist safety.
5B. Only for Bilby RS: Close the Plastic Mounting Plate (L6) pushing it down
it as indicated in the picture, so that it sustains the metallic support bar (H).
Place and tighten the knob (L3) firmly until you make sure the security lever
is properly held as shown in the picture. Now the metallic support bar (H) is
securely attached to Mechanism for reclining the seat (L).
6. Clip the footrest protection (E3) onto the child seat (A). Make sure that they
are correctly positioned.This step is extremely important for the child’s safety.

5#polisportmove
7. Remove the screws (I1+I6) on the frame holder (I), with the Allen key no. 5
(I5).
8. The correct positioning of the frame holder (I) is extremely important –
make sure it is positioned in the bicycle frame according to the picture - from
the front and assembled on the seat tube and never assembled on the seat
post. Before placing the frame holder onto the frame, make sure that the
protective rubber (I8) is correctly positioned on front of the plastic mounting
block (I2). Place the main body of the plastic mounting block (I2) on the front
of the bicycle frame, and then place the metallic mounting plate (I4). Note: If
they are cables in this area make sure that they are correctly positioned in the
central groove of the metallic plate, (between the protective rubber (I8) and
the groove of the mounting plate (I4) and are able to move freely). Place the
washer (I6) in the M8 screws (I1), and then screw them on to the frame
holder (I). Notice that the frame holder (I) should be secured but not fully
tightened so that, if necessary, you can adjust the height later according to
the Gravity Center requirements. However, note that it should be tight
enough to make it easier to complete the step of placing the mettalic
support bar (H) and seat.
9. Pull the safety belt for the bicycle frame (C) upwards. Make sure it does not
interfere with mounting the seat to the bicycle.
10. Model A: Place the edges of the metallic support bar (H) at the holes of
the frame holder (I) until you hear a click indicating the lock, and until the 2
green safety device indicators pop up on the front of the mounting block.
The child bicycle seat will only be properly installed when the 2 green safety
device indicators are visible. This step is extremely important for the child’s
safety.
Model B: Fit the edges of the mettalic support bar (H) at the holes of the
frame holder (I) until you hear a click indicating the lock, and until the centre
button (I3) shall be level with the exterior of the hose frame holder (I).
11. Center and adjust the metallic support bar (H) at a height above the rear
wheel, so that later, when you add the weight of the child, the child’s bicycle
seat does not touch the wheel. Note that the metallic support bar (H) should
be positioned at a maximum of 10 cm away from the wheel. Never use this
metallic support bar (H) to carry any other loads than this child seat, as
indicated in this manual.
12. The child seat has a centre of gravity (F) (inscribed on the child seat) that
must be positioned in front of the rear wheel axle. If it is positioned behind
the axle, the distance must not exceed 10 cm. Special care must also be
taken when positioning the child seat to ensure that the cyclist does not
touch the child seat with his feet when cycling. Note: In Germany, according
to the German Traffic Law StVZO, bicycle seats may only be fixed so that 2/3
of the seat depth or the Gravity Center of the seat is located between the
front and rear axle of the bicycle.
13. After adjusting the height and positioning of the seat, hand tighten the
frame holder (I) to ensure that it cannot move. You need to hand tight the
screws diagonally, with the same force and in stages. We recommend a
torque of 10 N.m (Model A) / 8 N.m. (Model B). Make sure that the frame
holder (I) is firmly attached.
14. Start to open the safety belt buckle (C1) and pass it around the bicycle
frame. Adjust the belt it as shown in the picture, under tension. Make sure
that remain loosen belt is not in contact with the wheel, so pass it through
the Safety belt retainer (C2). This step is extremely important for the child’s
safety. This step is extremely important for child and cyclist safety.
15. Only for Guppy RS: Do not exceed the maximum limit of 1kg of weight
supported by the transport net (K). In total the maximum weight of the child
and the objects on the net, can’t exceed the recommended 22kg.
HOW TO SAFELY PLACE AND SECURE THE CHILD ON THE SEAT
16. To safely place the child on the seat you must place the bicycle on flat
and solid ground for maximum bicycle stability. Even if your bicycle offers
robust quick stands, you must always hold the bicycle, while placing/
removing the child.You must carry your child in your lap and safely place him
on the seat. It´s forbidden for the child to climb alone on the bicycle or using
the footrests to reach the seat.
17. To place the child in the seat, first fully extend the retention system
harness (B), sliding all the strap adjusters (B2) - this makes it easier to put
the child in the seat. Then, open the safety buckle (B1) by pressing the
safety buckle button. Seat the child, place the shoulder straps and then
close the safety buckle, adjust the belt length using the strap adjusters, so
that your child is securely restrained. Before starting the journey, always
check that the child is secured and that the belt is snug but not so tight
that it hurts the child.According to the child growth, current height, and
weight, you can adjust the height of the retention system harness (B) on all
the strap adjusters (B2), by pulling up or down the straps until reaching the
desired size.
18. After the final adjustment of the retention system harness (B), check that
the shoulder paddings (B4) – Guppy Maxi+; Bilby Maxi – are not too close to
the child’s neck to avoid hurting them. The paddings should be positioned
slightly above the shoulders, as shown in the picture.
19. You can also adjust the height of the retention system harness (B) by
choosing between the available holes for retention system adjustment (B5).
To adjust it, remove the retention system clip from the current hole and place
it on the best hole according to your child height.
20. Model A: To adjust the height of the footrest (E) to fit your child, release
the footrest (E) from the seat (A) by pressing the two fasteners together and
lift the footrest as indicated in the picture (it may be necessary to apply some
pressure to the fasteners). To reattach the footrests, first engage the top pin,
and push the footrest (E) down to lock the clips into the slot’s holes.
Model B: Adjust the height of the footrest according to the size of the child.
To do this, raise the lever (E1) and slide it up or down for the required height.
After deciding on the correct height, lower the lever (E1) to lock in place.
21. To guarantee your child’s safety, adjust the strap (E2) of the footrest.
Unlock the strap (E2) and adjust it to the child’s foot. Lock it again making
sure the strap does not hurt the child.
ONLY FOR THE RECLINING MODEL - HOW TO RECLINE YOUR SEAT
22. Only for Groovy RS, Guppy RS +:This model has a system (L) that can be
used to adjust the inclination of the seat (A). Two different positions are
available: 10 ° and 20 °.The seat (A) can only be placed in the desired position
when the safety lever is unlocked. To do this, first release the seat belt to the
frame (C), then pull the safety lever (L1), while pulling up on the lever to
recline the seat (L2) - this will enable the system to be unlocked. You can
release the safety lever (L1).
23. While pulling the lever to recline the seat (L2), place the seat in the
desired 10 ° or 20 ° position.When in the desired position, release the lever to
recline the seat (L2) and make sure that the safety lever (L1) is locked again
as it was in the initial position - aligned with the surface of the mechanism
(L). Do not forget to tighten the seat belt (C) again to the frame after tilting
the seat to the desired position.
24. Only for Bilby RS: This child seat has a reclining mechanism (L) that
allows the adjustment of the seat to one sleeping position (20º). To recline
the seat, turn the knob (L3) until you reach the desire position. When you
hear a “click”sound, it means you´ve reached the maximum angle, and that
the seat won´t recline any further.
HOW TO REMOVETHE SEAT FROM THE BICYCLE
25. Detach the safety-belt (C) in order to remove the child bicycle seat.Then press the release button (I3) on the frame holder (I) and at the same time pull the
metallic support bar (H) up and back as shown in the image.

66#polisportmove#polisportmove
Make sure you have followed and fulfilled all the instructions given. When
done so, the child bicycle seat is ready for use.
IT IS MANDATORY TO READ the following chapter on safety
instructions about using your child bicycle seat.
SPECIFIC INSTRUCTIONS FOR USE
• Remove the non-safety-related stickers from the child bicycle seat before
use.
• The rider must be at least 16 years of age.
• Check for any laws and regulations that might be in force in your country,
relating to the carrying of children in seats attached to cycles.
• Carry only children that can sit unaided for a longer period, at least as long
as the intended cycle journey.
• Do not carry a child less than 9 months of age in this child bicycle seat. To
be a passenger, the child must be able to sit up straight with the head held
upright while wearing a bicycle helmet. A doctor should be consulted if the
child’s growth is questionable.
• Make sure that the weight and height of the child do not exceed the
maximum capacity of the seat, and check this at regular intervals. Check the
weight of the child before using the child seat. Under no circumstances
should you use the child bicycle seat to transport a child whose weight is
above the permissible limit.
• Make sure to check from time to time that the weight and height of the
child do not exceed the maximum permissible load of the seat.
• Make sure that it is not possible for any part of the child’s body or clothing
to come into contact with moving parts of the seat or bicycle and check this
as the child grows.
• You must cover any sharp or pointy objects on the bicycle (e.g frayed
cables) that may be reached by the child, in any situation.
• A wheel protector is recommended to prevent the child from inserting its
feet or hands between the spokes. The use of protection underneath the
saddle or the use of a saddle with internal springs is mandatory. Make certain
that the child is not able to hinder the brakes, thus avoiding accidents. These
adjustments should be revised with child´s growth.
• Cover any exposed rear saddle springs.
• When the child bicycle seat is not in use, fasten the waist buckle of the
security harness to prevent the straps from dangling and entering in contact
with some turning part of the bicycle as wheels, brakes, etc. as these may be
a hazard to the cyclist.
• Secure the child into child bicycle seat ensuring that all the safety belts and
straps applied firmly but not so tight as to cause discomfort to the child.
• Check the security of fastners frequently.
•You must ensure that you always use the restraint system, and that the child
is secured in the seat.
• Dress the child in proper clothes according to weather conditions.
• Children in child seats need to be more warmly dressed than riders of cycles
and should be protected from rain.
• Remove the seat when transporting the bicycle by car (outside the car). Air
turbulence might damage the seat or loosen its fastenings or other
suspended elements, which could lead to an accident.
• Accompanying persons should carefully consider stability / balance when
placing the child on the bike in the seat.
• Make sure that children wear a suitable helmet that complies with EN
1078:2012+A1:2012 while riding in the seat. Not wearing a helmet
exponentially increases the risk of death, long-term disability, head trauma,
or other injuries. As bicycle seat manufacturers, we care about the safety of
seat passengers, so we strongly recommend that children wear properly
fitted and fastened bicycle helmets.
•The seat and cushion can get hot if under the sun for a long time. Make sure
that they are not too hot before seating the child.
•This child seat is not suitable for use during sporting activities, or in extreme
conditions as per example: enduro, hard mountain biking, big road holes,
jumps and off-road ways.
• When riding for the first time with the seat fitted - to test ride the cycle in a
safe/quiet environment before riding on the highway.
WARNINGS
WARNING: Do not attach any additional luggage to
the child seat. If you carry extra luggage, the bicycle’s
carrying capacity must not be exceeded, and we
recommend that it be placed at the front of the bike.
WARNING: Do not modify the seat.
WARNING: The cycle could behave differently with
a child in the seat particularly with regarding to
balance, steering and braking.
WARNING: Never leave the cycle parked with a
child in the seat unattended.
WARNING: For any form of crack or if the surface
starts to deconstruct, this indicates that the life of the
seat has been reached and it should be replaced. A
professional shall be contacted in case of doubt.
WARNING: Always check the surface temperature
of the seat before any use.
WARNING: This child seat is not suitable for use
during sporting activities.
WARNING: Always ensure that the head of your
child is supported in reclined position.
WARNING: Additional security devices are always
to be attached.
ATTENTION
Failure to comply with these operating instructions can lead to serious injury or death of the bicycle operator and/or child. Polisport is not liable
for any damage to the product or persons resulting from improper installation, storage, or assembly (non-compliance with assembly instructions),
improper maintenance, misuse or use not in compliance with the technical or use specifications (non-compliance with maintenance and care
instructions), modifications or repairs made by you or a third party. If you have any doubt, please get in contact with us or with your local shop so
that we can assist you to assure you and your child safety while riding with the bicycle seat.

7#polisportmove
WARRANTY
3-YEAR WARRANTY: All mechanical components against manufacturer
defects only.
+ 1 EXTRA WARRANTY YEAR: Register your seat at www.polisport.com
and get one more warranty year.
Important: you must register within 2 months of the date of purchase
to receive the Polisport Extra Year Warranty.
WARRANTY CLAIMS
To obtain warranty service, you must have your original sales receipt. Items
returned without a sales receipt will assume that the warranty begins on the
date of manufacture. All warranties will be void if the product is damaged
due to user crash, abuse, system modification, or used in any way not
intended as described in this operating manual.
To make sure you have all the required information to activate the warranty
you need to keep the information that you have in your Traceability
information label (M). You can also record here the info.
O.F. ___________________ Date ___________________ .
* The specifications and design are subject to change without notice. Please
contact Polisport for any questions.
MAINTENANCE
To keep the child bicycle seat in good working condition and to prevent
accidents we recommend the following:
Regularly check the mounting system of the seat to the bicycle to make sure
it is in perfect condition.
Check all the components to see if they work properly. Do not use the seat if
any of the components are damaged. Damaged components must be
replaced. To replace them you need to visit your local authorized Polisport
dealer to get the correct components for replacement. You can find them on
the website: www.polisport.com.
If you have suffered an accident with your bicycle and safety seat, we advise
you to get a new safety seat. Even if there is no visible damage to the seat.
Clean the seat with soap and water (do not use abrasive, corrosive or toxic
products). Leave it to dry at room temperature.
FR SIÈGE VÉLO ENFANT
ATTENTION
Ce produit contient de petites pieces comme des boulons, des petits crochets d'emballage et des sacs en plastique. Veuillez les conserver hors de portée des
enfants pour éviter tout risque d'étouffement.
INDEX DU PRODUIT
A. SIÈGE PRINCIPAL
A1. FENTE ARRIÈRE DU SIÈGE
B. HARNAIS DE SYSTÈME DE RÉTENTION
B1. BOUCLE DE SÉCURITÉ
B2. AJUSTEURS DE SANGLE DE HAUTEUR
B3. AJUSTEURS DE SANGLE CENTRALE
B4. REMBOURRAGE DES ÉPAULES
B5. ORIFICE D’AJUSTEMENT DE LA HAUTEUR
DU SYSTÈME DE RÉTENTION
C. SANGLE DE SÉCURITÉ DU CADRE DU VÉLO
C1. BOUCLE DE CEINTURE DE SÉCURITÉ
C2. DISPOSITIF RATTRAPEUR DE CEINTURE
DE SÉCURITÉ
E. REPOSE-PIED
E1. MANETTE DE SÉCURITÉ DU REPOSE-PIED
E2. SANGLE DE MAINTIEN DU PIED
E3. PROTECTIONS POUR REPOSE-PIED
F. CENTRE DE GRAVITÉ
G. COUSSIN
H. BARRE DE SUPPORT MÉTALLIQUE
H1. PIÈCE DE FIXATION DE LA BARRE DE
SUPPORT MÉTALLIQUE
I. SUPPORT DE CADRE
I1. VIS M8x45
I2. CORPS DU BLOC DE FIXATION
I3. BOUTON DE DÉBLOCAGE
I4. PLAQUE DE FIXATION MÉTALLIQUE
I5. CLÉ ALLEN N°5
I6. RONDELLE DE VERROUILLAGE M8x16
I7. INDICATEUR DU DISPOSITIF DE SÉCURITÉ
I8. CAOUTCHOUC PROTECTEUR
J. KIT DE MONTAGE DE LA BARRE DE SUPPORT
J1. PLAQUE DE MONTAGE DE LA BARRE DE
SUPPORT
J2. VIS M8x25
J3/J4. RONDELLE
J5. ÉCROU M8
K. FILET DE TRANSPORT
L. MÉCANISME D’INCLINAISON DU SIÈGE
L1. LEVIER DE SÉCURITÉ
L2. LEVIER D’INCLINAISON DU SIÈGE
L3. POIGNÉE DE FIXATION (UNIQUEMENT
POUR BILBY RS)
L4. BOUTON D'INCLINAISON (UNIQUEMENT
POUR BILBY RS)
L5. ANNEAU DE SÉCURITÉ ROUGE
(UNIQUEMENT POUR BILBY RS)
L6. PLAQUE DE MONTAGE EN PLASTIQUE
(UNIQUEMENT POUR BILBY RS)
M.ÉTIQUETTE DE TRAÇABILITÉ DU PRODUIT
INSTRUCTIONS SPÉCIFIQUES DE MONTAGE
• Ce siège enfant de vélo doit être monté sur vélos pliables.
• Ce siège enfant de vélo ne doit pas être utilisé sur EPAC / Pedelecs à
assistance électrique dont la vitesse est supérieure à 25 km/h /15,5 mph.
• Ce siège vélo enfant ne devra pas être monté sur des vélos équipés
d’amortisseurs arrières.
• Ce siège enfant de vélo doit être monté sur des véhicules motorisés tels que
des motos et des scooters.
• Ce siège vélo enfant doit être monté sur des vélos équipés de cadres ovales
ou ronds ayant un diamètre compris entre 28 et 40 mm.
• Le siège peut être monté sur des vélos à roues de diamètres compris entre
26”et 28”.
• Si vous avez un modèle pour Small Frames et 29ers - le siège enfant peut
être monté sur des vélos avec des roues de 26" et 29" de diamètre.
• Ce siège enfant de vélo n’est adapté qu’au transport d’enfant de 22 kg
maximum et de 110 cm de hauteur maximum (et des enfants d’un âge
recommandé entre 9 mois et 6 ans - dont le poids et la hauteur sont les
variables déterminantes).
• Le poids total du cycliste et de l’enfant transporté ne doit pas dépasser

88#polisportmove#polisportmove
INSTRUCTIONS SPÉCIFIQUES DE MONTAGE DU SIÈGE SUR LE VÉLO
1. Couper les bandes en plastique qui retiennent le support (I) / barre de
support métallique (H).
2. Retourner le siège enfant à l’envers comme sur l’image. Utiliser la clé Allen
(I5) pour retirer les vis (J2+J4) et libérer et retirer la plaque de montage de la
barre de support (J1).
2A. Si votre modèle dispose de la pièce H1: Retirer la pièce de fixation
(H1) de la barre de support métallique (H) et la jeter dans le container à
déchets adéquat. Désenclencher la barre de support métallique (H).
2B. Uniquement pour le Bilby RS: out en soulevant l'anneau de sécurité
rouge (L5), dévisser la poignée (L3). Ouvrir la plaque de montage en
plastique (L6).
3A. Sans système d'inclinaison: Saisissez le barre de support métallique (H)
en le tenant comme indiqué sur l’image et passez-le à travers les ouvertures
du siège.
3B. Avec système d'inclinaison (Guppy RS+, Groovy RS, Bilby RS): Placez
la barre de support métallique (H) sur la plaque du système d'inclinaison et
passez-la à travers l'ouverture de la plaque du mécanisme (L).
4. Dans le but d’ajuster le siège vélo enfant à la taille du vélo, fixer le barre de
support métallique (H) sur l’une des positions possibles afin de déplacer le
siège vers l’arrière ou l’avant. Au départ, nous suggérons de le placer sur la
position nº 1. Le siège doit être installé aussi proche que possible de la selle.
5A. Insérer la plaque de montage de la barre de support (J1) dans les
rainures du siège (A) et la fermer comme sur l’image. Si votre modèle dispose
de la rondelle (J3), veuillez vous assurer que celle-ci est correctement placée
dans la rainure arrière du siège de vélo (A1). Insérer la fixation vis (J2) sur
l’orifice arrière de la plaque de montage de la barre de support (J1). Veuillez
noter que l’écrou (J5) sous le coussinet peut se relâcher si vous serrez ou
desserrez la plaque de montage de la barre de support (J1). Vous devez saisir
l’écrou, le placer correctement dans la rainure du siège en serrant totalement
tout le système à l’aide de l’autre main. Nous recommandons l’utilisation
d’un couple de serrage de 5 N.m. En procédant de la sorte, vous assemblerez
la plaque de montage de la barre de support (J1) et la barre de support
métallique (H) au siège (A). Cette étape est extrêmement importante pour
la sécurité du cycliste et de l’enfant.
5B. Uniquement pour le Bilby RS: Fermez la plaque de montage en
plastique (L6) en la poussant vers le bas comme indiqué sur l'image, de
manière à ce qu'elle soutienne la barre de support métallique (H). Placez et
serrez poignée de fixation (L3) jusqu'à ce que vous vous assuriez que le levier
de sécurité est correctement maintenu comme indiqué sur l'image. La barre
de supporte métallique (H) est maintenant solidement fixée au mécanisme
d'inclinaison du siège (L).
6. Emboîtez les protections pour repose-pied (E3) sur le corps du siège (A).
Vérifiez qu’elles sont placées correctement. Cette étape est extrêmement
importante pour la sécurité de l’enfant.
7. Desserrez les vis (I1+I6) du support de cadre (I), à l’aide de la clé Allen n°5
(I5).
8. Le positionnement correct du support de cadre (I) est extrêmement
important - assurez-vous qu'il est positionné dans le cadre de la bicyclette
conformément à l'image - de l'avant et assemblé sur le tube de selle et
jamais assemblé sur la tige de selle. Avant de placer le (I) sur le cadre, vérifiez
que le caoutchouc de protection (I8) est correctement positionné à l’avant
du bloc de fixation (I2). Placer le corps principal du bloc de fixation (I2)
devant le cadre du vélo, et placer ensuite la plaque de fixation métallique (I4).
Note: S’il existe des câbles dans cette zone, vérifiez qu’ils soient correctement
rangés dans la fente centrale de la plaque métallique (entre le caoutchouc de
protection (I7) et la fente de la plaque de fixation (l4) et qu’ils peuvent se
mouvoir librement). Placer la rondelle (l6) dans les vis M8 (l1) et ensuite
vissez-les sur le support de cadre (I). Veuillez noter que le support de cadre (I)
doit être sécurisé mais sans être totalement serré afin que, si nécessaire,
pouvoir ajuster la hauteur plus tard, selon les exigences du Centre de gravité.
Cependant, veuillez noter qu’il doit être suffisamment serré afin de faciliter la
réalisation de l’étape de positionnement de la barre de support métallique
(H) et du siège.
9. Tirer vers le haut la ceinture de sécurité vers le cadre du vélo (C). Veuillez-
vous assurer qu’il n’entrave pas le montage du siège sur le vélo.
10. Modèle A: Placer les bords de la barre de support métallique (H) sur les
ouvertures du support de cadre (l) jusqu’à percevoir un «click», indiquant la
fermeture, et jusqu’à ce que les 2 indicateurs verts du dispositif de sécurité
surgissent devant le bloc de fixation. Le siège vélo enfant ne sera
correctement installé que lorsque les 2 indicateurs verts du dispositif de
sécurité seront visibles. Cette étape est extrêmement importante pour
sécurité de l’enfant.
Modèle B: Adapter les coins de la barre de support métallique (H) sur les
orifices du support de cadre (I) jusqu’à entendre un clic indiquant un
verrouillage et jusqu’à ce que le bouton du centre (I3) soit au niveau de
l’extérieur du support du cadre du tuyau (I).
11. Centraliser et ajuster la barre de support métallique (H) à la hauteur au-
dessus de la roue arrière, afin que, plus tard, lorsque le poids de l’enfant
s’ajoutera, le siège enfant du vélo ne touche pas la roue.Veuillez noter que la
barre de support métallique (H) doit se trouver sur une position maximale de
10 cm de la roue. Ne jamais utiliser cette a barre de support métallique (H)
pour transporter d’autres poids que ce siège enfant, comme indiqué dans ce
manuel.
12. Le siège vélo enfant dispose d’un centre de gravité (F) (inscrit sur le siège
vélo enfant) qui doit être placé devant l’axe de la roue arrière. S’il est placé
derrière l’axe, la distance ne doit pas dépasser 10 cm. Une prudence
particulière s’impose au moment de placer le siège vélo enfant afin de
garantir que le cycliste ne touche pas le siège vélo enfant avec ses pieds en
roulant. Note: En Allemagne, conformément à la législation routière StVZO,
les siège vélo enfant ne peuvent être installés sur le vélo qu’a contition que
les 2/3 de la profondeur du siège ou le centre de gravité du siège se situe(nt)
entre l’axe avant et arrière du vélo.
13. Après avoir ajuster la hauteur et la position du siège, serrez manuellement
le support de cadre (I) afin d’assurer qu’il ne bouge pas. Vous devez
absolument serrer manuellement les vis en diagonale, en employant la
même force et par étapes. Nous recommandons l’utilisation d’un couple de
serrage de 10 N.m (Modèle A) / 8 N.m. (Modèle B). Veuillez-vous assurer que
le support de cadre (I) est bien attaché.
14. Commencez par ouvrir la boucle de ceinture de sécurité (C1) et passez-la
autour du cadre du vélo. Ajustez la ceinture comme sur l’image, sous tension.
Assurez-vous que la ceinture détendue restante ne reste pas en contact avec
la roue ; pour cela passez-la à travers le dispositif de rétention. Cette étape
est extrêmement importante pour la sécurité du cycliste et de l’enfant.
15. Uniquement pour le Guppy RS: Ne pas dépasser le poids limite de 1 kg
supporté par le filet de transport (M). Au total, le poids maximum
comprenant celui de l’enfant ainsi que des objets transportés dans le filet ne
peut pas dépasser le poids recommandé de 22 kg.
la capacité maximale autorisée du vélo. L’information relative à la capacité
maximale peut être trouvée dans les instructions de fonctionnement du
vélo.Vous pourrez également contacter le fabricant sur cette question.
• Ce siège enfant de vélo ne doit pas être utilisé sur EPAC / Pedelecs dont la
vitesse est supérieure à 25 km/h / 15,5 mph.
• Le siège ne pourra être monté que sur un vélo adapté à la fixation d’une
telle charge supplémentaire. Veuillez consulter le manuel d’instructions de
votre vélo ou porte-bagages.
• La position du siège vélo enfant doit être ajustée afin que le conducteur ne
puisse pas le toucher avec les pieds lorsqu’il pédale.
• Il est très important de régler correctement le siège et ses composants
afin d’offrir à l’enfant une sécurité et un confort optimal. Il est également
important que le siège ne soit pas incliné vers l’avant afin d’éviter que
l’enfant ne glisse hors du siège. Il est également important que le dossier soit
légèrement incliné vers l’arrière.
•Vérifiez que tous les éléments du vélo fonctionnent correctement lorsque le
siège vélo enfant est monté.
• Vérifiez les instructions du vélo et en cas de doute sur l’ajustement du siège
vélo de l’enfant à votre vélo, veuillez contacter votre distributeur vélo pour
plus d’information.
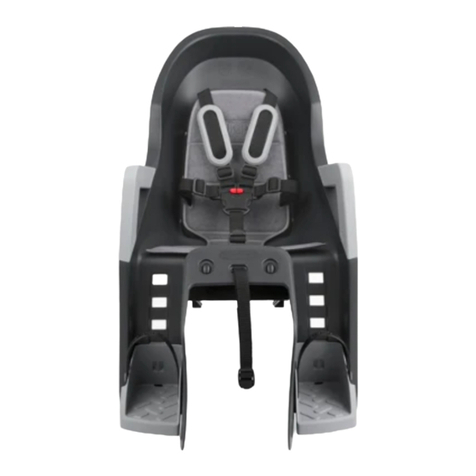
9#polisportmove
SÉCURISER ET PLACER ENTOUTE SÉCURITÉ L'ENFANT SUR LE SIÈGE
16. Pour placer l'enfant en toute sécurité sur le siège, vous devez placer le
vélo sur un sol plat et dur pour une stabilité maximale du vélo. Même si votre
vélo est équipé d’une béquille robuste, vous devez toujours tenir le vélo
lorsque vous placez/retirez l'enfant. Vous devez porter votre enfant sur vos
genoux et le placer en toute sécurité sur le siège. Il est interdit à l'enfant de
monter seul sur le vélo ou d'utiliser les repose-pieds pour atteindre le siège.
17. Pour placer l’enfant sur le siège, veuillez, en premier lieu, détendre
complètement le harnais du système de rétention (B), en glissant tous les
ajusteurs de courroie (B2) - ceci facilite le placement de l’enfant sur le siège.
Ensuite, ouvrir la sangle de sécurité (B1) en appuyant sur le bouton de la
sangle de sécurité. Assoir l’enfant, placer les sangles des épaules, fermer les
sangles de sécurité, ajuster la longueur de la ceinture en utilisant les ajusteurs
afin que l’enfant soit retenu en sécurité. Avant d’initier tout parcours, veuillez
toujours vérifier que l’enfant est sécurisé et que la ceinture est ajustée sans
être trop serrée pour éviter que cela ne blesse l’enfant. Selon la croissance de
l’enfant, les hauteur et poids actuels, vous pouvez ajuster la hauteur du
harnais du système de rétention (B) sur l’ensemble des ajusteurs de sangle
(B2), en remontant ou en reculant les sangles jusqu’à atteindre la hauteur
souhaitée.
18. Après l’ajustement final du harnais du système de rétention (B), veuillez
vérifier que les rembourrages des épaules (B4) – Guppy Maxi+; Bilby Maxi –
ne se trouvent pas trop près du cou de l’enfant afin d’éviter que cela ne le
blesse. Les sangles doivent être positionnées délicatement sur les épaules,
comme sur l'illustration.
19. Vous pouvez également ajuster la hauteur du harnais du système de
rétention (B) en choisissant entre les orifices disponibles pour l’ajustement
du système de rétention (B5). Pour l’ajuster, retirez la pince du système de
rétention de l’orifice actuel et placez-le sur l’orifice le plus adapté selon la
hauteur de votre enfant.
20. Modèle A: Pour ajuster la hauteur des repose-pieds (E) à la taille de
l’enfant, retirez le repose-pied (E) du siège (A) en appuyant simultanément
sur les deux languettes et en levant le repose-pied comme indiqué sur
l’image (il peut s’avérer nécessaire d’exercer une certaine pression). Pour
remettre les repose-pieds, engager l’axe supérieur et pousser le repose-pied
(E) vers le bas afin de bloquer les pinces dans les ouvertures en fente.
Modèle B: Ajustez la hauteur du repose-pied à la taille de l’enfant. Pour ce
faire, remontez le levier (E1) et poussez-le vers le haut ou le bas selon la
hauteur souhaitée. Après avoir obtenu la correcte hauteur, baissez le levier
(E1) et verrouillez la position.
21. Pour garantir la sécurité de votre enfant, ajustez les courroies de maintien
(E2) des repose-pieds. Libérez la courroie (E2) du cran d’arrêt et l’ajustez au pied
de l’enfant; fixez-la de nouveau en vous assurant qu’elle ne blesse pas l’enfant.
COMMENT DÉMONTER VOTRE SIÈGE ENFANT D'UN VÉLO
25. Détacher la ceinture de sécurité (C) afin de retirer le siège enfant du vélo. Appuyer ensuite sur le bouton de déverrouillage (I3) sur le support de cadre (I),
simultanément. Soulever la barre de support métallique (H) et pousser vers l’arrière comme sur l’illustration.
UNIQUEMENT POUR LE MODÈLE INCLINANT - COMMENT INCLINER VOTRE SIÈGE
22. Uniquement pour le Groovy RS, Guppy RS +: Ce modèle dispose d’un
système (L) qui peut être utilisé pour ajuster l’inclinaison du siège (A). Deux
positions différentes sont disponibles : 10º et 20º. Le siège (A) ne pourra être
placé dans la position souhaitée que lorsque le levier de sécurité sera
débloqué. Pour ce faire, relâchez tout d’abord la ceinture du siège du cadre
(C), tirez alors sur le levier de sécurité (L1), tout en tirant le levier vers le haut
pour incliner le siège (L2) - ceci permettra le déverrouillage du système.Vous
pouvez relâcher le levier de sécurité (L1).
23. Tout en tirant le levier pour incliner le siège (L2), placez le siège sur la
position souhaitée de 10º ou 20º. Dès qu’il est dans la position souhaitée,
relâchez le levier pour incliner le siège (L2) et assurez-vous que le levier de
sécurité (L1) est verrouillé de nouveau comme dans la position initiale – aligné
avec la surface du mécanisme (L). N’oubliez pas de serrer de nouveau la
ceinture du siège (C) au cadre, en basculant le siège dans la position souhaitée.
24. Uniquement pour le Bilby RS: Ce siège enfant est équipé d'un
mécanisme d'inclinaison (L) qui permet de régler le siège sur une position de
sommeil (20º). Pour incliner le siège, tournez lepoignée de fixation (L3)
jusqu'à ce que vous atteigniez la position désirée. Lorsque vous entendez un
"clic", cela signifie que vous avez atteint l'angle maximum et que le siège ne
s'inclinera plus.
SPECIFIC INSTRUCTIONS FOR USE
Vérifiez que vous avez bien suivi l’ensemble des instructions. Une fois la
vérification effectuée, le siège velo enfant est prêt à être utilisé.
IL EST IMPÉRATIF DE LIRE le chapitre suivant sur les instructions de
sécurité lors de l’utilisation de votre siège vélo enfant.
INSTRUCTIONS SPÉCIFIQUES D’UTILISATION
• Veillez à protéger tout élément pointu du vélo que l’enfant pourrait toucher
(comme des câbles effilochés).
• Il est recommandé d’installer une protection sur la roue afin d’éviter que
l’enfant ne puisse introduire ses pieds ou ses mains dans les rayons.
L’utilisation d’une protection sous la selle ou d’une selle dotée de ressorts
internes est obligatoire. Assurez-vous que l’enfant n’ait pas accès à la zone
des freins afin d’éviter tout accident. Ces ajustements devront être revus
durant la croissance de l’enfant.
• Couvrez tout ressort arrière et exposé de la selle.
• Lorsque le siège vélo enfant n’est pas utilisé, bouclez la ceinture du
harnais de sécurité afin d’éviter que les sangles se balancent et touchent
des parties en mouvement (roues, freins, etc.) et présentent un danger
pour le cycliste.
• Attachez l’enfant au siège en vous assurant que les ceintures de sécurité et
les sangles sont bien en place et correctement serrées (sans excès toutefois,
afin que l’enfant n’éprouve aucune gêne).
• Veuillez vérifier régulièrement les points d’attaches.
• Toujours utiliser le système et les sangles de retenue de sécurité afin de
garantir la sécurité de l’enfant sur le siège.
• Habillez l’enfant avec des vêtements adéquats selon les conditions
météorologiques.
• Retirer les autocollants non liés à la sécurité du siège de vélo pour enfant
avant de l’utiliser.
• Le conducteur du vélo doit être âgé de 16 ans au moins.
• Vérifiez les lois et règlements en vigueur dans votre pays concernant le
transport d’enfants à vélo.
•Transportez uniquement les enfants pouvant rester assis sans aide, pendant
un long moment, au moins durant la durée du de voyage envisagé.
• N’utilisez pas ce siège vélo enfant pour des enfants âgés de moins de 9
mois. Pour circuler comme passager, l’enfant doit pouvoir s’asseoir bien droit
et la tête haute lorsqu’il porte un casque de protection. Consultez un
médecin si l’enfant présente des problèmes de développement.
• Assurez-vous que le poids et la hauteur de l’enfant ne dépassent pas la
capacité maximale du siège et vérifiez cette information régulièrement.
Vérifiez le poids de l’enfant avant d’utiliser le siège enfant. N’utilisez en aucun
cas le siège vélo enfant pour transporter un enfant dont le poids est
supérieur à la limite permise.
• Vérifiez de temps en temps que le poids et la hauteur de l’enfant ne
dépassent pas les limites admises pour l’usage du siège.
• Assurez-vous que l’enfant n’ait pas accès à la zone des freins afin d’éviter
tout accident. Ces ajustements devront être revus durant la croissance de
l’enfant.

1010#polisportmove#polisportmove
AVERTISSEMENTS
AVERTISSEMENT: N’attachez aucun bagage
additionnel au siège enfant. Si vous transportez un
autre bagage, veillez à ne pas dépasser la capacité
de charge du vélo et nous recommandons qu’il soit
placé à l’avant du vélo.
AVERTISSEMENT: Ne modifiez pas le siège.
AVERTISSEMENT: Le vélo peut répondre de
manière différente en présence d’un enfant sur le
siège, en particulier pour ce qui est de l’équilibre, de
la direction et du freinage.
AVERTISSEMENT: Ne jamais laisser le vélo garé avec
un enfant sur le siège vélo enfant sans surveillance.
AVERTISSEMENT: En cas de fissure ou si la surface
se décompose, cela indique que la durée de vie du
siège est terminée et qu’il doit être remplacé. En cas
de doute, veuillez prendre contact avec un
professionnel.
AVERTISSEMENT: Toujours vérifier la température
de la surface du siège avant son utilisation.
AVERTISSEMENT: Le siège enfant n’est pas adapté
à une utilisation sportive.
AVERTISSEMENT: Veillez systématiquement à ce
que la tête de l’enfant soit appuyée en position
inclinée.
AVERTISSEMENT: Les dispositifs de sécurité
supplémentaires doivent toujours être fixés.
ATTENTION
Le non-respect de ces instructions peut entrainer des blessures graves ou le décès du cycliste et/ou de l’enfant. Polisport n’est pas responsable des
dommages qui pourront survenir au produit ou aux personnes, en conséquence d’installation, rangement ou montage inappropriés, d’entretien
et usage incorrects, ou d’utilisation non conforme aux spécifications techniques ou d’utilisation (non-respect des instructions d’entretien et de
maintenance) ou encore de modifications ou de réparations réalisées par un tiers ou que vous aurez effectuées. En cas de doute, veuillez nous
contacter ou vous diriger à votre commerçant le plus proche afin que nous puissions vous aider pour vous garantir toute la sécurité lors de vos
déplacements avec le siège enfant de vélo.
ENTRETIEN
Pour garantir un bon fonctionnement et éviter les accidents, nous vous
recommandons de:
• Vérifier régulièrement si le système de fixation du siège vélo enfant au vélo
se trouve en bon état.
• Inspecter toutes les pièces en vérifiant leur bon fonctionnement. N’utilisez pas
le siège vélo enfant si l’une des pièces est endommagée. Toute pièce
défectueuse devra être remplacée. Pour tout remplacement, veuillez-vous
rendre chez un revendeur Polisport agréé. Vous serez ainsi en mesure de
trouver toutes les pièces détachées que vous souhaitez remplacer. Vous
pouvez également vous les procurer sur le site Internet www.polisport.com.
• Si vous avez souffert d’un accident avec le vélo mais que le siège vélo enfant
ne semble pas endommagé, nous vous recommandons tout de même de le
remplacer par un nouveau siège.
• Vérifier la propreté du siège vélo enfant ; lorsqu’il est sale, nettoyez-le avec
de l’eau et du savon (n’utilisez pas de produits abrasifs, corrosifs ou toxiques)
et laissez-le sécher à température ambiante.
GARANTIE
GARANTIE 3 ANS: Uniquement pour les composants mécaniques ayant des
défauts de fabrication.
UN AN SUPPLÉMENTAIRE DE GARANTIE: Uniquement pour les
composants mécaniques ayant des défauts de fabrication. Enregistrez votre
siège vélo enfant sur www.polisport.com.
Important : vous devez vous inscrire dans un délai de 2 mois à partie
de la date d’achat pour bénéficier de la Garantie supplémentaire d’un
an Polisport.
DEMANDES DE GARANTIE
Pour bénéficier du service de garantie, vous devez conserver votre facture.
Sans facture, la date de début de garantie des pièces retournées correspondra
à leur date de fabrication. La garantie ne s’appliquera pas en cas de
dommage causé par l’utilisateur, notamment en cas d’accident, d’utilisation
abusive, de modification du système ou d’utilisation non adaptée et
contraire aux recommandations du manuel d’utilisation.
Afin de garantir que vous possédez toute l’information requise pour activer la
garantie, il est nécessaire que vous gardiez l’information dont vous disposez
à travers votre Étiquette de traçabilité du produit (M). Vous pouvez
également garder votre information, ci-dessous.
O.F. ___________________ Date ___________________ .
* Les spécifications et la conception sont susceptibles de subir des
modifications sans avertissement préalable. Pour toute question, veuillez
nous contacter directement.
tant que fabricants de sièges de vélo, nous nous soucions de la sécurité des
passagers des sièges, c'est pourquoi nous recommandons vivement que les
enfants portent des casques de vélo correctement ajustés et attachés.
• Le siège ainsi que le coussinet peuvent être très chauds en cas de longue
exposition solaire ; assurez-vous qu’ils ne soient pas brûlants avant d’asseoir
l’enfant.
• Le siège enfant n’est pas adapté à une utilisation sportive ou dans le cadre
de conditions extrêmes, telles que : enduro, VTT, grands trous sur la route,
sauts et chemins hors route.
• Lors de la première excursion en vélo avec le siège fixé, testez et roulez dans
un environnement sûr et calme avant de vous déplacer sur une voie rapide.
• Les enfants sur les sièges doivent être vêtus plus chaudement que les
cyclistes ; ils doivent également être protégés de la pluie.
• Retirez le siège pour transporter le vélo en voiture (à l’extérieur). La
turbulence aérienne pourrait endommager le siège ou desserrer les fixations
au vélo, pouvant provoquer un accident.
• Les accompagnant doivent soigneusement examiner la stabilité/l’équilibre
au moment de placer l’enfant sur le siège du vélo.
• Assurez-vous que lorsque l’enfant se déplace sur le siège, il porte un casque
adapté qui respecte la norme EN 1078:2012+A1:2012. Le fait de ne pas
porter de casque augmente de façon exponentielle le risque de décès,
d'invalidité à long terme, de traumatisme crânien ou d'autres blessures. En

11#polisportmove
PT CADEIRA TRASEIRA PARA BICICLETA
ATENÇÃO
Este produto contém pequenas peças como parafusos, sacos de plástico, e pequenos suportes de embalagem. Manter fora do alcance das crianças para evitar o
risco de asfixia.
ÍNDICE DO PRODUTO
A. ASSENTO PRINCIPAL
A1. RANHURA DO ASSENTOTRASEIRO
B. SISTEMA DE RETENÇÃO
B1. FIVELA DE SEGURANÇA
B2. PASSADOR VERTICAL
B3. PASSADOR CENTRAL
B4. OMBREIRAS
B5. FURO PARA AJUSTE DO SISTEMA DE
RETENÇÃO
C. CINTO DE SEGURANÇA AO QUADRO DA
BICICLETA
C1. FIVELA DO CINTO DE SEGURANÇA
C2. CINTO DE RETENÇÃO
E. POUSA-PÉS
E1. ALAVANCA DE DESBLOQUEIO DO
POUSA-PÉS
E2. ABRAÇADEIRA DO POUSA-PÉS
E3. PROTEÇÃO DE POUSA-PÉS
F. CENTRO DE GRAVIDADE
G. ESTOFO
H. VARÃO METÁLICO DE SUPORTE
H1. PEÇA DE FIXAÇÃO DA BARRA DE
SUPORTE METÁLICO
I. BLOCO DE FIXAÇÃO AO QUADRO
I1. PARAFUSO M8x45
I2. CORPO DO BLOCO DE FIXAÇÃO
I3. BOTÃO DE DESBLOQUEIO
I4. CHAPA DE FIXAÇÃO METÁLICA
I5. CHAVE DE UMBRACO NRº 5
I6. ANILHA DE PRESSÃO M8x16
I7. INDICADOR DO DISPOSITIVO DE
SEGURANÇA
I8. PROTEÇÃO EM BORRACHA
J.
CONJUNTO DE FIXAÇÃO DO VARÃO DE SUPORTE
J1.
PLACA DE FIXAÇÃO DO VARÃO DE SUPORTE
J2. PARAFUSO M8x25
J3/J4. ANILHA
J5. FÊMEA SEXTAVADA M8
K. REDE PARA TRANSPORTE
L. SISTEMA PARA AJUSTE DE INCLINAÇÃO
L1. ALAVANCA DE SEGURANÇA
L2. ALAVANCA PARA AJUSTE DA
INCLINAÇÃO
L3. MANÍPULO (APENAS PARA O BILBY RS)
L4.
BOTÃO DE RECLINAÇÃO (APENAS PARA O BILBY RS)
L5. ANEL VERMELHO DE SEGURANÇA
(APENAS PARA O BILBY RS)
L6. PLACA DE MONTAGEM EM PLÁSTICO
(APENAS PARA O BILBY RS)
M.RASTREABILIDADE
INSTRUÇÕES DE MONTAGEM ESPECÍFICAS
• A cadeira de bicicleta para crianças não pode ser montada em bicicletas
dobráveis.
• A cadeira de bicicleta para crianças não pode ser utilizada em EPAC /
Pedelecs que atinjam velocidades acima de 25km/h ou 15,5mph.
• Esta cadeira não pode ser montada em bicicletas com amortecedores traseiros.
• Esta cadeira não deve ser aplicada em veículos motorizados tais como
motociclos, scooters ou acima de 25km/h.
• Esta cadeira tem de ser montada em bicicletas com tubos de quadro ovais
e redondos com diâmetros de tubo entre Ø28 e 40mm.
• A cadeira tem de ser montada em bicicletas com diâmetros de rodas 26”
e 28”.
• Se tiver um modelo para Small Frames e 29ers - a cadeira pode ser montada
em bicicletas com rodas com diâmetros de 26" e 29".
• Esta cadeira de bicicleta para crianças é apenas adequada para transportar
crianças com um peso máximo de 22kg e uma altura máxima de 110cm (e
crianças com idades recomendadas entre os 9 meses e os 6 anos, com um
peso e altura dentro dos limites relevantes).
• A cadeira de bicicleta para crianças pode ser utilizada em EPAC / Pedelecs
que atinjam uma velocidade máxima de 25km/h ou 15,5mph.
• O peso do condutor e da criança transportada nunca deve superar a carga
máxima admitida para a sua bicicleta. Verifique o manual de instruções
ou consulte o fabricante para verificar se a sua bicicleta suporta este peso
adicional.
• A cadeira só pode ser aplicada em bicicletas que permitam a aplicação de
tais cargas adicionais. Por favor contacte o distribuidor da bicicleta ou do
porta-bagagens para obter mais informações.
• A posição da cadeira deverá ser regulada de maneira a que o condutor não
toque com os pés na cadeira quando em andamento.
• É muito importante ajustar corretamente o assento e as peças para o
máximo conforto e a segurança da criança. É, também, importante que o
assento não incline para a frente, para que a criança não deslize para fora. É
importante que o encosto incline ligeiramente para trás.
• Verifique se todas as partes da bicicleta funcionam convenientemente com
a cadeira montada.
• Caso tenha dúvidas quanto à possibilidade de instalação da cadeira na
sua bicicleta, recomendamos que obtenha mais informações junto do
distribuidor da bicicleta.
INSTRUÇÕES ESPECÍFICAS DE MONTAGEM DA CADEIRA NA BICICLETA
1. Corte as abraçadeiras plásticas que seguram o bloco de fixação (I) / varão
metálico de suporte (H).
2. Vire a cadeira ao contrário, conforme indicado na imagem. Utilize a chave
Allen (I5) para remover os parafusos (J2+J4), desengate e remova a placa de
fixação do varão de suporte (J1).
2A. Se o seu modelo tiver a peça H1: Retirar a peça de fixação (H1) do
varão metálico de suporte (H) e deitá-la no contentor do lixo adequado.
Desengatar o varão metálico de suporte (H).
2B. Apenas para Bilby RS: Simultaneamente levantar o anel vermelho de segurança
(L5), desaparafusar o manípulo (L3). Abrir a placa de montagem de plástico (L6).
3A. Sem Sistema de Reclinação: Pegue no varão metálico de suporte (H) e
com as partes na posição indicada na imagem, faça passar o varão através
das aberturas da cadeira.
3B. Com Sistema de Reclinação (Guppy RS+, Groovy RS, Bilby RS): Colocar
a barra de suporte metálica (H) em cima da placa do sistema de reclinação e
passá-la através da abertura da placa do sistema de reclinação (L).
4. Para ajustar a cadeira de criança de acordo com o tamanho da bicicleta,
coloque o varão metálico de suporte (H) numa das posições possíveis, para
mover a cadeira para a frente ou para trás. Sugerimos que comece por a
colocar na posição n.º 1. A cadeira deve estar o mais próxima possível do selim.
5A. Insira a placa de fixação do varão de suporte (J1) nas ranhuras da cadeira
(A) e prenda-a conforme indicado na imagem. Se o seu modelo tiver a anilha
(J3), certifique-se de que a anilha (J3) está devidamente colocada na ranhura
traseira da cadeira (A1). Insira o parafuso de fixação (J2) no furo posterior da
placa de fixação do varão de suporte (J1). Tenha em atenção que a porca (J5)
situada debaixo do estofo pode soltar-se ao apertar ou desapertar a placa de
fixação do varão de suporte (J1). É necessário segurar a porca e colocá-la
corretamente na ranhura da cadeira, enquanto simultaneamente aperta o
sistema na sua totalidade com a outra mão. Recomendamos um torque de
5 Nm. Desta forma, irá montar a placa de fixação do varão de suporte (J1) e
o varão metálico de suporte (H) à cadeira (A). Este passo é extremamente
importante para a segurança do ciclista e da criança.

1212#polisportmove#polisportmove
5B. Apenas para o Bilby RS: Fechar a placa de montagem plástica (L6)
empurrando-a para baixo, como indicado na imagem, de modo a sustentar
o varão metálico de suporte (H). Colocar e apertar firmemente o manípulo
(L3) até se certificar de que a alavanca de segurança está devidamente
segura, como se mostra na fotografia. Agora o varão metálico de suporte (H)
está fixada firmemente ao sistema de reclinação do assento (L).
6. Encaixe as proteções do pousa-pés (E3) no assento (A). Certifique-se que
ficam bem colocadas. Este passo é de extrema importância para a segurança
da criança.
7. Remova os parafusos (I1+I6) do bloco de fixação (I), com a chave Allen Nrº
5 (I5).
8. O posicionamento correcto do bloco de fixação do quadro (I) é
extremamente importante - certifique-se de que é posicionado no quadro
da bicicleta de acordo com a imagem - a partir da frente e montado no tubo
do assento e nunca montado no espigão do assento. Antes de colocar o
bloco de fixação no quadro, certifique-se que a borracha protetora (I8) está
devidamente encaixada na parte frontal do corpo do bloco de fixação (I2).
Coloque a peça principal do corpo do bloco de fixação (I2) na parte da frente
do quadro da bicicleta e, em seguida, coloque a placa de fixação metálica
(I4). Nota: Se existirem cabos nesta zona, certifique-se de que estão
devidamente posicionados na ranhura central da placa metálica, (entre a
proteção de borracha (I8) e a ranhura da placa de fixação (I4)), e com
liberdade de movimentos). Coloque a anilha (I6) nos parafusos M8 (I1) e
aperte-os no bloco de fixação (I). Note que o bloco de fixação (I) deve estar
seguro, mas não totalmente apertado para que, se necessário, possa ajustar
a altura mais tarde de acordo com os requisitos do Centro de Gravidade. No
entanto, note que deve estar apertado o suficiente para tornar mais fácil a
etapa de inserir o varão metálico de suporte (H) e a cadeira (A) no bloco.
9. Puxe o cinto de segurança do quadro da bicicleta (C) para cima. Certifique-
se de que este não interfere com a montagem da cadeira na bicicleta.
10. Modelo A: Coloque as extremidades do varão metálico de suporte (H) nos
orifícios do bloco de fixação (I) até ouvir um“click”, que indica que está fixo, e
até que os 2 indicadores verdes de segurança apareçam na parte da frente do
bloco de fixação. A cadeira de criança para bicicleta só estará devidamente
instalada quando os 2 indicadores verdes de segurança estiverem visíveis. Este
passo é de extrema importância para a segurança da criança.
Modelo B: Encaixe as extremidades do varão metálico de suporte (H) nos
orifícios do bloco de fixação (I) até ouvir um clique indicando o bloqueio, e
até ao botão de desbloqueio (I3) estar nivelado com o exterior do bloco de
fixação (I).
11. Centre e ajuste o varão metálico de suporte (H) numa altura acima da
roda traseira, de modo a que quando adicionar o peso da criança, a cadeira
não toque na roda. Deve ter em atenção que o varão metálico de suporte (H)
deve ficar posicionado no máximo 10 cm afastado da roda. Nunca use este
suporte metálico (H) para suportar outras cargas que não esta cadeira, tal
como indicado neste manual.
12. A cadeira apresenta um centro de gravidade (F) (gravado no porta-
bebé), que deve ficar posicionado à frente do eixo da roda traseira. Caso
fique posicionado atrás deste eixo, a distância não pode ser superior a 10 cm.
Terá de ter também especial atenção à posição da cadeira, pois deverá ser
regulada de maneira a que o ciclista não toque com os pés na cadeira
quando em andamento. Nota: Na Alemanha, de acordo com a lei alemã de
tráfego StVZO, as cadeiras de bicicleta só podem ser montadas de modo a
que 2/3 da profundidade da cadeira ou do seu centro de gravidade fiquem
localizados entre o eixo dianteiro e traseiro da bicicleta.
13. Depois de ajustar a altura e o posicionamento da cadeira, aperte
manualmente o bloco de fixação (I) para garantir que não se move. Aperte
manualmente os parafusos na diagonal, com a mesma força e por fases.
Recomendamos um torque de 10 N.m (Modelo A) / 8 N.m. (Modelo B).
Certifique-se que o bloco de fixação (I) está firmemente apertado.
14. Comece por abrir a fivela do cinto de segurança (C1). Ajuste bem o cinto
como demonstrado na imagem. Para que as fivelas soltas não entrem em
contacto com a roda, devem ser presas no cinto de retenção (C2). Este passo
é de extrema importância para a segurança da criança e do ciclista.
15. Apenas para o Guppy RS: Não exceda o limita máximo de 1kg do peso
permitido na rede de transporte (K). No total, o peso -máximo da criança e
dos objetos na rede não pode exceder os 22kg recomendados.
COMO COLOCAR A CRIANÇA EM SEGURANÇA NA CADEIRA E AJUSTAR OS SISTEMAS DE RETENÇÃO
16. Para colocar a criança na cadeira , deve garantir que posiciona a bicicleta
numa superfície plana e em solo firme de modo a garantir a máxima
estabilidade da bicicleta. Mesmo que sua bicicleta tenha descansos robustos,
segure sempre a bicicleta, ao colocar/ retirar a criança. Para colocar a criança
na cadeira, deve pegar nela ao colo e sentá-la na cadeira. É estritamente
proibido que a criança suba sozinha para a bicicleta ou use os apoios para os
pés para trepar e chegar à cadeira.
17. Para colocar a criança na cadeira, primeiro estenda ao máximo o cinto de
segurança (B), fazendo deslizar os passadores (B2) – isto fará com que a
colocação da criança na cadeira seja mais fácil. Depois, abre o cinto de
segurança (B1) pressionando o botão central. Coloque a criança, posicione os
cintos do ombro e depois feche o cinto de segurança, ajustando o
comprimento do cinto e utilizando o sistema ajustável, para que a criança fique
segura. Antes de começar a sua viagem, assegure-se sempre que a criança se
encontra em segurança e que o cinto está suficientemente apertado, mas não
em demasia, ao ponto de a magoar. De acordo com o peso e a altura da criança
pode ajustar o cinto de segurança (B) nos passadores (B2), puxando-os para
cima, ou para baixo, até atingir o tamanho ideal.
18. Depois do ajuste final do cinto de segurança (B), assegure-se que os
estofos dos ombros (B4) – Guppy Maxi+; Bilby Maxi – não estão demasiado
perto do pescoço da criança, evitando assim o contacto direto com o
pescoço. Os cintos devem estar posicionados ligeiramente acima dos
ombros, como demonstrado na figura.
19. Pode ainda ajustar a altura do cinto de segurança (B) escolhendo entre o
furo para ajuste do sistema de retenção (B5). Para ajustá-lo, remova o clip do
sistema de retenção do furo em que está e colocá-lo no furo mais adequado
à altura da criança.
20. Modelo A: Para ajustar a altura do pousa-pés (E) para a altura mais
apropriada ao tamanho da criança, retire o pousa-pés (E) da cadeira (A)
pressionando as patilhas simultaneamente e levante o pousa-pés como
indicado na imagem (poderá ter de aplicar alguma força no aperto das
patilhas). Para voltar a encaixar os pousa-pés, encaixe primeiro o pino
superior, e empurre o pousa-pés (E) para baixo, de modo a encaixar os clips
na ranhura abaixo correspondente.
Modelo B: Ajuste a altura dos pousa-pés de acordo com o tamanho da
criança. Para fazer isso, desbloqueie a alavanca (E1) e deslize-a para cima ou
para baixo até a altura necessária. Depois de ter encontrado a altura ideal,
volte a baixar a alavanca (E1) de forma a bloqueá-la no posição desejada.
21. Para garantir a segurança da criança ajuste a abraçadeira (E2) do pousa-
-pés. Desprenda a abraçadeira (E2) do encaixe, ajuste-a ao pé da criança e
volte a encaixar. Certifique-se que a fivela não se encontra apertada em
demasia para não magoar a criança.
APENAS PARA O MODELO RECLINÁVEL - COMO RECLINAR A SUA CADEIRA
22. Apenas para o Groovy RS, Guppy RS +: Este modelo tem um sistema (L)
que pode ser usado para ajustar a inclinação da cadeira (A). Estão disponíveis
duas posições diferentes: 10 ° e 20 °. A cadeira (A) só pode ser colocada na
posição desejada quando a alavanca de segurança estiver desbloqueada.
Para tal, primeiro alivie o cinto de segurança ao quadro (C), em seguida puxe
a alavanca de segurança (L1), enquanto se puxa para cima da alavanca para
reclinar o banco (L2) - esta operação vai permitir o desbloqueio do sistema.
Pode soltar a alavanca de segurança (L1).
23. Enquanto puxa a alavanca para reclinar a cadeira (L2), coloque a cadeira
na posição desejada de 10 ° ou 20 °. Quando estiver na posição desejada,
solte a alavanca de inclinação (L2) e certifique-se de que a alavanca de
segurança (L1) está novamente travada como estava na posição inicial -
alinhada com a superficie do mecanismo (L). Não se esqueça de ajustar
novamente em tensão o cinto de segurança (C) depois de ter inclinado a
cadeira para a posição desejada.
24. Apenas para o Bilby RS: Esta cadeira de criança tem um sistema de
reclinação (L) que permite o ajuste da cadeira para uma posição de sono
(20º). Para reclinar a cadeira, rode o botão (L3) até alcançar a posição
desejada. Quando ouvir um "clique", significa que atingiu o ângulo máximo,
e que o assento não se vai reclinar mais.

13#polisportmove
COMO REMOVER A SUA CADEIRA DA BICICLETA
25. Retire o cinto de segurança (C) para remover a cadeira. Depois pressione o botão de desbloqueio (I3) do bloco de fixação (I) e ao mesmo tempo. Puxe a
barra metálica de suporte (H) para cima e para trás, conforme a imagem.
Certifique-se que seguiu e cumpriu todas as instruções dadas. Se sim, a sua
cadeira está pronta a ser utilizada.
É OBRIGATÓRIA A LEITURA INTEGRAL do capítulo seguinte relativo a
avisos de segurança sobre a utilização da sua cadeira.
INSTRUÇÕES ESPECÍFICAS DE UTLIZAÇÃO
• Retire os autocolantes não relacionados com a segurança da cadeira de
criança para bicicleta antes de a utilizar.
• O condutor deve ter no mínimo 16 anos de idade.
• Verifique se no país em que utiliza a cadeira existe legislação específica
sobre o transporte de crianças em cadeiras para bicicletas. Se sim, cumpra-a.
• Transporte apenas crianças que conseguem manter-se sentadas, sem
apoio, durante um longo período de tempo (pelo menos, o tempo em que
durar a viagem de bicicleta).
• Nunca transporte crianças com idades inferiores a 9 meses de idade nesta
cadeira. Para poder ser transportada a criança deve conseguir manter-se
sentada, com a cabeça equilibrada sem esforço e com a cabeça protegida
com um capacete de bicicleta. Deve consultar um médico se a criança
apresentar um crescimento questionável.
• Confirme que em nenhuma situação o peso e o tamanho da criança não
excedem a capacidade máxima da cadeira. Para tal verifique o peso e
tamanho da criança regularmente antes de utilizar a cadeira. Em nenhuma
circunstância, deve usar a cadeira para a bicicleta para transportar uma
criança cujo peso esteja acima do limite permitido.
• Verificar de vez em quando se o peso e a altura da criança não excedem a
carga máxima permitida da cadeira.
• Certifique-se de que não é possível que qualquer parte do corpo ou
vestuário da criança entre em contacto com partes móveis da cadeira ou da
bicicleta. Estes ajustes têm de ser revistos com o crescimento da criança.
• Proteja qualquer objecto pontiagudo da estrutura da bicicleta que possa
em qualquer situação ser alcançado pela criança (exemplo: cabos soltos).
• Aconselha-se o uso de uma proteção na roda para evitar que a criança insira
pés e mãos nos raios. É obrigatório o uso de uma proteção por baixo do selim
ou um selim com molas internas e assegurar-se que a criança não acede à
zona dos travões de maneira a prevenir acidentes. Estes ajustes têm de ser
revistos com o crescimento da criança.
• Cubra todas as molas expostas do selim traseiro.
• Aperte todos os cintos mesmo quando não transporta nenhuma criança.
Evitando assim que as fivelas andem a balançar e entrem em contacto com
alguma parte móvel da bicicleta, travões, ou rodas, pois podem causar
acidentes.
• Após colocar a criança na cadeira deve, obrigatoriamente, ajustar de
imediato todos os cintos e abraçadeiras sem, contudo, incomodar ou
magoar a criança.
• Verifique frequentemente a segurança do sistema de retenção.
• Utilize sempre todo o sistema de segurança e de retenção para garantir que
a criança esteja segura na cadeira.
• Aconselha-se vestir a criança com roupa adequada às condições
climatéricas.
• A criança transportada na cadeira deverá estar melhor agasalhada do que
os ciclistas adultos, e protegida devidamente da chuva.
• Retire a cadeira ao transportar a bicicleta de carro (fora do carro). A
turbulência do ar pode danificar a cadeira ou danificar os elementos de
aperto ou outros que estejam suspensos, o que pode causar um acidente.
• Os acompanhantes devem considerar cuidadosamente a estabilidade /
equilíbrio da bicicleta ao colocar a criança na cadeira.
• Certifique-se de que as crianças usam um capacete adequado, que cumpra
a norma EN 1078:2012+A1:2012 enquanto usam a cadeira. O não uso de
capacete aumenta exponencialmente o risco de morte, incapacidade a
longo prazo ou traumatismo craniano entre outros. Como produtores de
porta-bebés para bicicletas, preocupamo-nos com a segurança dos
passageiros dos nossos porta-bebé, e por isso recomendamos vivamente
que as crianças utilizem capacete devidamente ajustado e apertado.
• Verifique a temperatura da cadeira depois de uma longa exposição ao sol,
pois pode estar quente e queimar a criança.
• Esta cadeira de criança não é adequada para uso durante atividades
desportivas em condições extremas e abusivas como por exemplo: Enduro,
Downhill, nem como para ser usada em trilhos fora de estrada íngremes nem
estradas com pavimentos degradados.
• Antes de andar pela primeira vez com a cadeira montada e com a criança -
faça um teste de utilização e ande com a bicicleta e cadeira num ambiente
seguro/tranquilo antes de andar na estrada.
AVISOS
AVISO: Não coloque bagagem adicional na cadeira.
Se necessitar de transportar peso extra, a
capacidade de carga da bicicleta não deve ser
excedida, além de que recomendamos que a
mesma seja colocada na frente da bicicleta.
AVISO: Não modificar a cadeira.
AVISO: Quando a criança está sentada na cadeira, a
bicicleta pode adquirir, parada ou em andamento,
um comportamento diferente, em particular no que
se refere ao equilíbrio, controlo da direção, travagem
e à entrada e saída do condutor da bicicleta.
AVISO: Nunca deixe a bicicleta estacionada com a
criança lá sentada e sem vigilância.
AVISO: Qualquer indício de desgaste, fissura ou
degradação da cadeira, indicam que a vida útil do
produto foi atingida e que a mesma deve ser
substituída por uma nova. Um profissional deve ser
contatado em caso de dúvida.
AVISO: Verifique sempre a temperatura da
superfície da cadeira antes da sua utilização.
AVISO: Esta cadeira de criança não é adequada para
serutilizadaduranteatividadesdesportivasextremas.
AVISO: Assegure-se sempre de que a cabeça da
criança fica apoiada em posição reclinada.
AVISO: Os dispositivos de segurança adicionais
devem estar sempre fixos.

1414#polisportmove#polisportmove
ATENÇÃO
O incumprimento destas instruções de montagem pode provocar lesões graves ou até mesmo a morte do condutor da bicicleta e / ou da criança.
A Polisport não se responsabiliza por qualquer dano material ou pessoal, resultante de instalação, armazenamento ou fixação incorretos (não
cumprimento das instruções de montagem), manutenção indevida, má utilização ou utilização não em conformidade com as especificações
técnicas ou de utilização (não cumprimento com as instruções de manutenção e cuidados a ter), alterações ou reparações feitas por si ou por
terceiros. Em caso de dúvidas, entre em contacto connosco ou com a nossa loja local, para podermos ajudar a garantir a sua segurança e a
segurança da criança enquanto utiliza a cadeira de bicicleta.
MANUTENÇÃO
Para boas condições de funcionamento e para prevenir acidentes
recomendamos o seguinte:
• Verifique regularmente o sistema de fixação da cadeira à bicicleta se
encontra em perfeitas condições.
• Inspecione todos os componentes verificando se trabalham eficazmente e
não use a cadeira se algum dos componentes estiver danificado. As partes
danificadas devem ser sempre substituídas. De modo a substituir estes
componentes deve dirigir-se a uma loja que seja vendedor autorizado
Polisport, de modo a poder obter os componentes indicados. Pode
encontrar os distribuidores no nosso website: www.polisport.com.
• Se tiver sofrido um acidente com a bicicleta, e a cadeira não tiver danos
visíveis, ainda assim recomendamos que troque a cadeira por uma nova.
• Inspecione a limpeza da cadeira e, quando suja, lave-a com água e sabão
(não use abrasivos, corrosivos ou produtos tóxicos), deixando-o secar à
temperatura ambiente.
GARANTIA
GARANTIA DE 3 ANOS: Apenas para componentes mecânicos onde se
encontrem defeitos de fabrico.
+ 1 ANO DE GARANTIA EXTRA: Faça o registo da sua cadeira em
www.polisport.com e obtenha mais um ano de garantia.
Nota Importante: o registo precisa de ser feito no prazo de 2 meses a
partir da data de compra para receber mais um ano extra de garantia.
RECLAMAÇÕES
Para que possa usufruir do nosso serviço de garantia deve guardar o recibo
de compra original durante o período de vigência da mesma. Para todos os
produtos ou componentes apresentados sem recibo de compra, será
considerado que o período de garantia teve início na data de produção do
produto. A cobertura pela garantia será considerada nula se o produto tiver
sido danificado ou destruído devido a qualquer tipo de acidente, mau uso,
modificação do produto, ou utilização indevida do mesmo. Para uma
utilização correta do produto deverá fazer-se a consulta e leitura do manual
de utilização.
Certifique-se de que tem toda a informação necessária para ativar a garantia,
guardando a informação que se encontra no informação de rastreio (M).
Pode registar aqui essa informação.
O.F. ___________________ Data ___________________ .
* As especificações e design podem ser objeto de alterações sem aviso
prévio. Por favor contate a Polisport se tiver alguma questão.
SPEZIFISCHE ANWEISUNGEN FÜR DIE MONTAGE
• Dieser Fahrradkindersitz darf nicht auf Klappfahrräder montiert werden.
• Dieser Fahrradkindersitz darf nicht auf EPAC / Pedelecs mit einer
Geschwindigkeit von mehr als 25 km/h eingesetzt werden.
• Dieser Fahrradkindersitz darf nicht an Fahrrädern montiert werden, die mit
hinteren Stoßdämpfern ausgestattet sind.
• Dieser Kinderfahrradsitz darf nicht an motorisierten Fahrzeugen wie
Mopeds oder Scootern montiert werden.
• Der Kindersitz kann auf Fahrrädern mit runden oder ovalen Rahmen mit
DE FAHRRADKINDERSITZ
WARNUNG
Dieses Produkt enthält Kleinteile wie Bolzen, Plastiktüten und kleine Heftfäden. Bewahren Sie sie außerhalb der Reichweite von Kindern auf, um Erstickungsgefahr zu
vermeiden.
PRODUKTINHALTSVERZEICHNIS
A. KINDERSITZ
A1. RÜCKSITZNUT
B. GURTE DES HALTESYSTEMS
B1. SICHERHEITSSCHNALLE
B2. OBERE GURTEINSTELLER
B3. ZENTRALER GURTEINSTELLER
B4. SCHULTERPOLSTER
B5. LÖCHER FÜR HÖHENVERSTELLUNG DES
HALTESYSTEMS
C. SICHERHEITSGURT FÜR FAHRRADRAHMEN
C1. SICHERHEITSGURTSCHNALLE
C2. SICHERHEITSGURT-HALTERUNG
E. FUßSTÜTZE
E1. SICHERHEITSHEBEL FUR DIE FUßSTÜTZE
E2. SICHERHEITSRIEMEN DER FUßSTÜTZEN
E3. FUßSCHUTZ
F. SCHWERPUNKT
G. SITZPOLSTER
H. METALL-HALTEBÜGEL
H1.
METALLISCHE UNTERSTÜTZUNGSSTANGE
BEIWERK
I. RAHMEN
I1. SCHRAUBEN M8x45
I2. MONTAGEBLOCK AUS KUNSTSTOFF
I3. FREIGABEKNOPF
I4. MONTAGEPLATTE AUS METALL
I5. SECHSKANTSCHLÜSSEL
(INBUSSCHLÜSSEL Nr. 5)
I6. SICHERUNGSSCHEIBE M8x16
I7. SICHERHEITSANZEIGE
I8. SCHUTZGUMMI
J. BEFESTIGUNGSSATZ AUS METALL
J1. MONTAGEPLATTE AUS METALL
J2. SCHRAUBE M8x25
J3/J4. UNTERLEGSCHEIBE
J5. M8 MUTTER
K. TRANSPORTNETZ
L. SYSTEM ZUR NEIGUNGSVERSTELLUNG
L1. SICHERHEITSHEBEL
L2. HEBEL ZUR EINSTELLUNG DER NEIGUN
L3. HANDKNAUF (NUR FÜR BILBY RS)
L4. KNAUF ZUM ZURÜCKLEHNEN (NUR FÜR
BILBY RS)
L5. ROTER SICHERHEITSRING (NUR FÜR
BILBY RS)
L6. BEFESTIGUNGSPLATTE AUS KUNSTSTOFF
(NUR FÜR BILBY RS)
M.INFORMATIONEN ZUR RÜCKVERFOLGBARKEIT

15#polisportmove
SPEZIFISCHE ANWEISUNGEN FÜR DIE MONTAGE DES SITZES AM FAHRRAD
1. Schneiden Sie die Kunststoffbänder durch, die die Halterung (I) halten /
metallbügel (H).
2. Entfernen Sie mit dem Inbusschlüssel (I5) die Schrauben (J2+J4) und
nehmen Sie die Montageplatte aus Metall (J1).
2A. Entfernen Sie das Befestigungsteil der Metallhalterung (J4) und
entsorgen Sie es in einem geeigneten Abfallbehälter. Lösen Sie die
Stützstange (H).
2B. Nur für Bilby RS: Heben Sie den Sicherheitsring (L5) an und schrauben
Sie gleichzeitig den Handknauf (L3) ab. Öffnen Sie die Kunststoff-Halterplatte
(L6).
3A. Ohne Liegesystem: Halten Sie die stabilisierende Metallmanschette (H)
wie abgebildet und führen Sie diese durch die Öffnung im Kindersitz.
3B. Mit Liegesystem (Guppy RS+, Groovy RS, Bilby RS): Stellen Sie die
stabilisierende Metallmanschette (H) oben auf die Verstellsystemplatte und
führen Sie es durch die Öffnung der Mechanismusplatte (L).
4. Um den Kindersitz an die Größe des Fahrrads anzupassen, stellen Sie die
stabilisierende Metallmanschette (H) in eine der verfügbaren Positionen, um
den Sitz nach vorne oder hinten zu schieben. Zu Beginn empfehlen wir,
Position 1 auszuwählen. Der Sitz muss so nah am Sattel wie möglich
angebracht werden.
5A. Legen Sie die Montageplatte fur den Haltebügel (J1) in die Nuten des
Sitzes (A) ein, und schliesen Sie sie wie in der Abbildung gezeigt. Stellen Sie
sicher, dass die Unterlegscheibe J3 in die hintere Aussparung des
Fahrradsitzes A3 passt. Stecken Sie die Befestigungsschraube (J2) in die
hintere Bohrung der Montageplatte (J1) des Haltebügel. Beachten Sie, dass
sich die Mutter (J5) unter dem Kissen lösen kann, wenn Sie die metallische
Montageplatte des Haltebügels (J1) anziehen oder lockern. Sie müssen die
Mutter greifen, sie korrekt auf der Sitznut platzieren, während Sie mit der
anderen Hand das gesamte System festziehen. Wir empfehlen ein
Drehmoment von 5 Nm. Damit montieren Sie die Montageplatte (J1) und
die Metallbügel (H) am Sitz (A). Dieser Schritt ist für die Sicherheit des
Kindes und des Radfahrers äußerst wichtig.
5B. Nur für Bilby RS: Schliessen Sie die Kunststoff-Halterplatte (L6), indem
Sie sie wie im Bild gezeigt nach unten drücken, so dass sie die metallische
Stützstange (H) hält. Ziehen Sie den Knopf (L3) fest, bis Sie sicherstellen, dass
der Sicherheitshebel richtig hält, wie im Bild gezeigt. Nun ist die metallische
Stützstange (H) fest mit der Rücklehne des Sitzes (L) verbunden.
6. Bringen Sie den Fußschutz (E1) am Kindersitz (A) an. Der Schutz muss
richtig positioniert sein. Dieser Schritt ist für die Sicherheit des Kindes sehr
wichtig.
7. Entfernen Sie die Schrauben (I1+I6) mit dem Inbusschlüssel Nr. 5 (I5) aus
der Rahmenhalterung (I).
8. Die korrekte Positionierung des Rahmenhalters (I) ist äußerst wichtig -
stellen Sie sicher, dass er gemäß der Abbildung am Fahrradrahmen
positioniert wird und niemals an der Sattelstütze. Achten Sie dabei auf die
korrekte Ausrichtung in Fahrtrichtung. Bevor Sie die Rahmenhalterung auf
dem Rahmen platzieren, achten Sie darauf, dass das Schutzgummi (I7)
ordnungsgemäß auf dem vorderen Teil des Kunststoffmontageblock (I2)
positioniert ist. Platzieren Sie den Kunststoffmontageblock (I2) auf die
Vorderseite des Fahrradrahmens und platzieren Sie anschließen die
Montageplatte aus Metall (I4). Hinweis: Sollten sich in dem Bereich Kabel
befinden, achten Sie darauf, dass sie richtig in der mittleren Nut der
Metallplatte liegen (zwischen dem Schutzgummi (I7) und der Nut der
Montageplatte (I4)) und dass sie frei liegen, damit sie sich bewegen können.
Platzieren Sie die Sicherungsscheibe (I6) in die M8 Schrauben (I1) und
schrauben Sie sie auf die Rahmenhalterung (I). Beachten Sie, dass die
Rahmen (I) zwar fest, aber nicht vollständig angezogen werden sollte, damit
Sie später bei Bedarf die Höhe entsprechend den Anforderungen zum
Schwerpunkt anpassen können. Beachten Sie jedoch, dass sie fest genug
sein sollte, um den Schritt des Aufsetzens des Metall-Haltebügels (H) und
des Sitzes zu erleichtern.
9. Ziehen Sie den Sicherheitsgurt für den Fahrradrahmen (C) nach oben.
Stellen Sie sicher, dass die Montage des Sattels am Fahrrad nicht behindert
wird.
10. Modell A: Führen Sie die Enden der stabilisierenden Metallmanschette
(H) in die Bohrungen der Rahmenhalterung (I) ein, bis Sie ein Klickgeräusch
hören, an dem Sie erkennen, dass er richtig eingerastet ist und bis die beiden
Sicherheitsanzeigen an der Vorderseite des Montageblocks grün leuchten.
Der Kindersitz ist erst ordnungsgemäß montiert, wenn beide
Sicherheitsanzeigen grün leuchten. Dieser Schritt ist für die Sicherheit des
Kindes sehr wichtig.
Modell B: Setzen Sie die Enden des metallbügel (H) an den Löchern der
Halterung (I) an, bis Sie ein Klicken hören, das die Verriegelung signalisiert,
und bis der mittlere Knopf (I3) mit der Außenseite der Rahmenhalterung (I)
bündig ist.
11. Zentrieren und justieren Sie den metallbügel (H) in einer Höhe über dem
Hinterrad, sodass später, wenn das Gewicht des Kindes hinzukommt, der
Fahrradsitz des Kindes das Rad nicht berührt. Beachten Sie, dass der
Metallbügel (H) in einem Abstand von maximal 10 cm zum Rad positioniert
werden sollte. Verwenden Sie diesen Metallbügel (H) niemals zum Tragen
anderer Lasten als dieses Kindersitzes, wie in dieser Anleitung angegeben.
12. Der Kindersitz hat einen Schwerpunkt (F) (auf dem Kindersitz
angegeben), welcher sich vor der Hinterradachse befinden sollte. Befindet er
sich hinter der Achse, darf der Abstand 10 cm nicht überschreiten. Bei der
Positionierung des Kindersitzes ist außerdem besonders darauf zu achten,
dass der Radfahrer beim Fahren nicht mit den Füßen den Kindersitz berührt.
Hinweis: In Deutschland dürfen Fahrradsitze nach StVZO nur so befestigt
werden, dass sich 2/3 der Sitztiefe bzw. der Schwerpunkt des Sitzes zwischen
Vorder- und Hinterachse des Fahrrades befinden. Der Sitz muss so nah wie
möglich am Sattel angebracht werden.
13. Nach dem Einstellen der Höhe und Positionierung des Sitzes ziehen Sie
die Rahmen (I) handfest an, um sicherzustellen, dass sie nicht verrutschen
können. Ziehen Sie die Schrauben diagonal, mit derselben Kraft und
stufenweise handfest an (M).Wir empfehlen einen 10 Nm (Modell A) / 8 Nm
(Modell B) Drehmomentschlüssel.Vergewissern Sie sich, dass die Rahmen (I)
fest angebracht ist.
14. Öffnen Sie zunächst die Sicherheitsgurtschließe (C1) und führen Sie sie
um den Fahrradrahmen herum. Halten Sie den Gurt unter Spannung und
stellen Sie ihn ein (siehe Abbildung). Achten Sie darauf, dass das lose
Gurtende nicht mit dem Reifen oder den Speichen in Berührung kommt,
nachdem es durch die Sicherheitsgurthalterung (C2) geführt wurde. Dieser
Schritt ist für die Sicherheit des Radfahrers und Kindes äußerst wichtig.
15. Nur für Guppy RS: Stellen Sie sicher, dass Sie das für das Transportnetz
empfohlene Maximalgewicht von 1 kg nicht überschreiten. Insgesamt darf
das Gewicht des Kindes und der im Transportnetz (M) mitgeführten
Gegenstände das empfohlene Maximalgewicht von 22 kg nicht
überschreiten.
Rohrdurchmessern zwischen Ø28 und Ø40 mm angebracht werden.
• Der Fahrradkindersitz darf nur an Fahrrädern mit einem Raddurchmesser
von 26”und 28”Zoll-montiert werden.
•Wenn Sie ein Modell für Small Frames und 29er haben – der Kindersitz kann
auf Fahrrädern mit Rädern mit einem Durchmesser von 26“ und 29“ montiert
werden.
• Dieser Fahrradkindersitz ist nur für den Transport von Kindern mit einem
maximalen Gewicht von 22 kg und einer maximalen Körpergröße von 110
cm geeignet (und Kinder mit einem empfohlenen Alter von 9 Monaten bis 6
Jahren – mit dem Gewicht und der Größe wie oben angegeben).
• Das Gesamtgewicht des Radfahrers samt transportiertem Kind darf die für
das Fahrrad zugelassene Höchstlast nicht überschreiten. Informationen zur
Höchstlast finden Sie in der Gebrauchsanleitung des Fahrrads. Sie können
sich diesbezüglich auch an den Hersteller wenden.
• Dieser Kinderfahrradsitz kann auf EPAC / Pedelecs bis zu einer
Geschwindigkeit von 25 km/h eingesetzt werden.
• Der Sitz darf nur an einem Fahrrad montiert werden, welches für die
Befestigung solcher Zusatzlasten geeignet ist. Bitte beachten Sie die
Bedienungsanleitung Ihres Fahrrads oder Gepäckträgers.
• Die Position des Fahrradkindersitzes muss so eingestellt sein, dass der
Fahrradfahrer während der Fahrt den Fahrradkindersitz nicht mit den Füßen
berührt.
• Es ist sehr wichtig, dass der Sitz und das Zubehör richtig eingestellt werden,
um optimalen Komfort und Sicherheit für das Kind zu gewährleisten. Wichtig
ist auch, dass der Sitz nicht nach vorne geneigt ist, sodass das Kind nicht
herausrutschen kann. Wichtig ist ferner, dass die Rückenlehne leicht nach
hinten geneigt ist.
• Prüfen Sie, ob alleTeile des Fahrrads mit montiertem Kindersitz sachgemäß
funktionieren.
• Beachten Sie die Gebrauchsanweisung des Fahrrads, und wenn Sie Zweifel
an der Montage des Fahrradkindersitzes an Ihrem Fahrrad haben, wenden
Sie sich für weitere Informationen bitte an Ihren Fahrradhändler.

1616#polisportmove#polisportmove
SO PLATZIEREN UND SICHERN SIE DAS KIND IM DER KINDERSITZ
16. Um das Kind sicher in den Sitz zu setzen, müssen Sie das Fahrrad auf einem
ebenen und festen Untergrund abstellen, um eine maximale Stabilität des
Fahrrads zu gewährleisten. Auch wenn Ihr Fahrrad über einen robusten
Ständer verfügt, müssen Sie das Fahrrad immer festhalten, während Sie das
Kind hineinsetzen oder herausnehmen. Sie müssen Ihr Kind auf dem Arm
tragen und es sicher auf den Sitz setzen. Es ist verboten, dass das Kind alleine
auf das Fahrrad klettert oder die Fußstützen benutzt, um den Sitz zu erreichen.
17. Um das Kind in den Sitz zu setzen, ziehen Sie zunächst den Gurt des
Rückhaltesystems (B) so weit wie möglich aus, indem Sie alle Gurtversteller
(B2) verschieben – so lässt sich das Kind leichter in den Sitz setzen. Öffnen Sie
dann die Sicherheitsschließe (B1), indem Sie den Knopf der
Sicherheitsschließe drücken. Setzen Sie das Kind in den Sitz, legen Sie den
Schultergurt an und schließen Sie dann die Sicherheitsschließe. Stellen Sie
die Gurtlänge mit den Gurtverstellern ein, sodass Ihr Kind gesichert ist.
Überprüfen Sie vor Fahrtantritt immer, ob das Kind gesichert ist und ob der
Gurt fest, aber nicht so fest sitzt, dass er das Kind verletzt. Sie können die
Höhe des Haltesystems (B) an allen Gurtverstellern (B2) entsprechend dem
Wachstum, der derzeitigen Größe und dem Gewicht des Kindes einstellen,
indem Sie die Gurtbänder nach oben oder unten ziehen, bis die gewünschte
Größe erreicht ist.
18. Überprüfen Sie nach der endgültigen Einstellung des Gurtes des
Haltesystems (B), dass die Schulterpolster (B4) (Guppy Maxi+; Bilby Maxi)
nicht zu nahe am Hals des Kindes liegen, um Verletzungen zu vermeiden. Die
Gurte sollten etwas oberhalb der Schultern werden, wie in der Abbildung
gezeigt.
19. Sie können auch die Höhe der Gurte des Haltesystems (B) einstellen,
indem Sie die verfügbaren Löcher zur Einstellung des Haltesystems (B5)
auswählen. Entfernen Sie zur Einstellung den Haltesystem-Clip (B4) aus dem
aktuellen Loch und platzieren Sie ihn auf dem besten Loch entsprechend der
Größe Ihres Kindes.
20. Modell A: Um die Höhe der Fußstütze (E) an die Größe Ihres Kindes
anzupassen, lösen Sie die Fußstütze (E) vom Kindesitz (A), indem Sie die
beiden Verschlüsse zusammendrücken und die Fußstütze wie abgebildet
anheben (möglicherweise ist dazu etwas Kraft erforderlich). Um die
Fußstützen wieder einzusetzen, setzen Sie zunächst den oberen Stift ein und
schieben die jeweilige Fußstütze (E) nach unten, damit die Clips in der
entsprechenden unteren Einsparung einrasten.
Modell B: Stellen Sie die Höhe der Fußraste entsprechend der Größe des
Kindes ein. Kippen Sie dazu den Sicherheitshebel für die Fußstütze (E1) nach
oben und verschieben Sie ihn zur Einstellung der gewünschten Höhe nach
oben oder unten. Kippen Sie den Hebel (E1) nach Einstellung der richtigen
Höhe zur Verriegelung nach unten.
21. Um die Sicherheit Ihres Kindes zu gewährleisten, stellen Sie den Gurt (E2)
der Fußstütze ein. Entriegeln Sie den Gurt (E2) und passen Sie ihn an den Fuß
des Kindes an. Verriegeln Sie ihn wieder und achten Sie darauf, dass der Gurt
dem Kind nicht wehtut.
NUR FÜR DAS MODELL MIT VERSTELLBARER RÜCKENLEHNE - SO VERSTELLEN SIE DIE RÜCKENLEHNE
22. Nur für Groovy RS, Guppy RS +: Dieses Modell verfügt über eSystem (L), mit
dem Sie die Neigung Ihres Kindersitzes (A) verstellen können. Hierfür stehen
Ihnen zwei verschiedene Positionen zurVerfügung: 10° und 20°. Der Kindersitz
lässt sich nur in die gewünschte Position bringen, wenn der Sicherheitshebel
(L1) entsperrt ist. Hierfür lösen Sie zunächst den Sicherheitsgurt zur
Befestigung am Fahrradrahmen (C) und lösen anschließend den
Sicherheitshebel (L1), während Sie den Hebel nach oben ziehen, um den Sitz
nach hinten zu neigen (L2). Hiermit bewirken Sie die Entsperrung des Systems.
Sie können den Sicherheitshebel (L1) nun loslassen.
23. Während Sie den Hebel ziehen, um den Sitz nach hinten zu neigen (L2),
bringen Sie den Sitz in die gewünschte Position von 10° oder 20°. Befindet er
sich in der gewünschten Position, lassen Sie den Hebel zu Einstellung der
Neigung (L2) los und stellen Sie sicher, dass der Sicherheitshebel (L1) wieder
blockiert ist und sich in der Ausgangsposition befindet – bündig mit der
Bodenfläche des Mechanismus (L). Vergessen Sie nicht, den Sicherheitsgurt
zur Befestigung am Fahrradrahmen (C) wieder mit der entsprechenden
Spannung zu befestigen, nachdem Sie den Kindersitz in die gewünschte
Position gebracht haben.
24. Nur für Bilby RS: Der Kindersitz verfügt über einen Verstellmechanismus
(L), der es ermöglicht, den Sitz in eine Schlafposition zu verstellen (20º). Um
den Sitz zurückzulehnen, drehen Sie den Knopf (L3), bis Sie die gewünschte
Position erreichen.Wenn Sie ein «Klick»-Geräusch hören, bedeutet dies, dass
Sie den maximalen Winkel erreicht haben und der Sitz sich nicht weiter
zurücklehnt.
WIE MAN DEN SITZ VOM FAHRRAD ABNIMMT
25. Nehmen Sie den Sicherheitsgurt (C) ab, um den Fahrradkindersitz zu entfernen. Drücken Sie dann die Entriegelungstaste (I3) an der Rahmen (I) und ziehen
Sie gleichzeitig den Metall-Haltebügel (H) nach oben und hinten, wie in der Abbildung gezeigt.
Vergewissern Sie sich, dass Sie alle Anweisungen befolgen und erfüllen.
Danach ist der Fahrradkindersitz einsatzbereit.
LESEN SIE UNBEDINGT das folgende Kapitel über Sicherheitshinweise
zur Verwendung Ihres Fahrradkindersitzes.
SPEZIFISCHE ANWEISUNGEN FÜR DEN GEBRAUCH
• Entfernen Sie die nicht sicherheitsrelevanten Aufkleber vor der Nutzung
vom Kindersitz.
• Der Radfahrer muss mindestens 16 Jahre alt sein.
• Informieren Sie sich über die in Ihrem Land geltenden Gesetze und
Vorschriften, für die Beförderung von Kindern in Kinderfahrradsitzen.
• Befördern Sie nur Kinder, die längere Zeit allein sitzen können, mindestens
so lange wie die geplante Radfahrt.
• Transportieren Sie kein Kind unter 9 Monaten in diesem Fahrradkindersitz.
Um als Beifahrer mitfahren zu können, muss das Kind in der Lage sein,
aufrecht zu sitzen und den Kopf aufrecht zu halten, während es einen
Fahrradhelm trägt. Bestehen Zweifel an der Reife des Kindes, sollte ein Arzt
konsultiert werden.
• Stellen Sie sicher, dass das Gewicht und die Größe des Kindes die maximale
Zuladung des Sitzes nicht überschreiten, und überprüfen Sie dies in
regelmäßigen Abständen. Überprüfen Sie das Gewicht des Kindes, bevor Sie
den Kindersitz verwenden. Benutzen Sie den Fahrradkindersitz auf keinen
Fall für die Beförderung eines Kindes, dessen Gewicht über der zulässigen
Grenze liegt.
• Vergewissern Sie sich von Zeit zu Zeit, dass das Gewicht und die Größe des
Kindes die maximal zulässige Höchstbelastung des Sitzes nicht überschreiten.
• Achten Sie darauf, dass keine Körperteile oder Kleidungsstücke des Kindes
mit beweglichen Teilen des Sitzes oder des Fahrrads in Berührung kommen
können, und überprüfen Sie dies stets aus Neue, wenn das Kind wächst.
• Scharfe oder spitze Gegenstände am Fahrrad (z. B. ausgefranste Kabel), die
vom Kind erreicht werden könnten, müssen jederzeit abgedeckt werden.
• Ein Radschutz wird empfohlen, um zu verhindern, dass das Kind mit den
Füßen oder Händen zwischen die Speichen gerät. Bei gefederten Sätteln
muss ein Schutz angebracht werden, es sei denn, die Federn befinden sich
im Inneren des Sattels. Die Verwendung eines Schutzes unter dem Sattel
oder die Verwendung eines gefederten Sattels ist obligatorisch. Stellen Sie
sicher, dass das Kind die Bremsen nicht behindern kann, um Unfälle zu
vermeiden. Diese Einstellungen sollten je nach Wachstum des Kindes
angepasst werden.
• Decken Sie alle freiliegenden hinteren Sattelfedern ab.
• Wenn der Kinderfahrradsitz ohne Kind benutzt wird, schließen Sie das
Gurtschloss des Sicherheitsgurtes, um zu verhindern, dass die Gurte
durchhängen, verloren gehen oder in Kontakt mit beweglichen Teilen des
Fahrrads wie Rädern, Bremsen usw. kommen, da dies eine Gefahr für den
Radfahrer darstellen kann.
• Sichern Sie das Kind im Fahrrad Kindersitz und stellen Sie sicher, dass alle

17#polisportmove
Sicherungsgurte und Riemen zwar fest, jedoch nicht so straff angelegt sind,
dass sie dem Kind Unbehagen bereiten.
• Überprüfen Sie die Sicherheit der Befestigungselemente regelmäßig.
• Verwenden Sie immer sämtliche Sicherheitsrückhaltesysteme und Riemen,
um sicherzustellen, dass das Kind im Sitz gesichert ist.
• Kleiden Sie das Kind den Wetterbedingungen entsprechend.
• Kinder in Kindersitzen sollten wärmer gekleidet sein als Fahrradfahrer und
vor Regen geschützt werden.
• Nehmen Sie den Sitz ab, wenn Sie das Fahrrad mit dem Auto transportieren
(außerhalb des Pkw). Luftturbulenzen könnten den Sitz beschädigen oder
seine Befestigungen oder andere aufgehängte Elemente lösen, was zu
einem Unfall führen könnte.
• Der Fahrer muss die Stabilität bzw. das Gleichgewicht sorgfältig prüfen,
wenn das Kind in den Sitz auf dem Fahrrad gesetzt wird.
• Achten Sie darauf, dass Kinder während der Fahrt im Sitz einen geeigneten
Helm trägt, welcher der Norm EN 1078:2012+A1:2012 entspricht. Das
Nichttragen eines Helms erhöht das Risiko des Todes, einer langfristigen
Behinderung, eines Kopftraumas oder anderer Verletzungen um ein
Vielfaches. Als Hersteller von Fahrradsitzen liegt uns die Sicherheit der
Insassen am Herzen. Deshalb empfehlen wir dringend, dass Kinder
ordnungsgemäß angepasste und befestigte Fahrradhelme tragen.
• Sitz und Kissen können heiß werden, wenn sie längere Zeit der Sonne
ausgesetzt sind. Stellen Sie, bevor Sie das Kind hineinsetzen, sicher, dass
diese nicht zu heiß sind.
• Dieser Kindersitz ist nicht für den Gebrauch bei sportlichen Aktivitäten oder
unter extremen Bedingungen geeignet, wie z.B.: Enduro, Hardtail
Mountainbiking, große Straßenlöcher, Sprünge und Off-Road-Strecken.
• Wenn Sie erstmals mit dem angebrachten Sitz fahren, machen Sie eine
Probefahrt in einer ungefährlichen/ruhigen Umgebung, bevor Sie auf einer
Hauptverkehrsstraße fahren.
ACHTUNG
Die Nichtbeachtung dieser Gebrauchsanweisung kann zu schweren Verletzungen oder zum Tod des Fahrradfahrers und/oder des Kindes führen.
Polisport haftet nicht für Sachschäden am Produkt oder Personenschäden, die sich aus einer unsachgemäßen Anbringung, Lagerung oder
Montage (Nichteinhaltung der Montageanleitung), unsachgemäßen Wartung, unsachgemäßen oder nicht den technischen Spezifikationen
entsprechenden Nutzung (Nichteinhaltung derWartungs- und Pflegeanleitung) bzw. durch von Ihnen oder Dritten vorgenommene Änderungen
oder Reparaturen entstehen. Im Zweifelsfall setzen Sie sich bitte mit uns oder Ihrem Fachhändler vor Ort in Verbindung, damit wir Ihnen helfen
können, Ihre Sicherheit und die Ihres Kindes beim Fahren mit dem Fahrradsitz zu gewährleisten.
WARTUNG
• Um den Fahrrad Kindersitz in einem guten Betriebszustand zu halten und
Unfälle zu vermeiden, empfehlen wir Folgendes:
• Überprüfen Sie regelmäßig das Befestigungssystem des Sitzes am Fahrrad,
um sicherzustellen, dass es sich in einwandfreiem Zustand befindet.
• Überprüfen Sie alle Komponenten auf ihre Funktionstüchtigkeit. Setzen Sie
den Sitz nicht ein, wenn einzelne Komponenten beschädigt sind.
Beschädigte Komponenten müssen ersetzt werden. Um sie zu ersetzen,
sollten Sie Ihren örtlichen Polisport-Vertragshändler, aufsuchen, um die
richtigen Komponenten für den Austausch zu erhalten. Sie finden diesen auf
der Website: www. Polisport.com.
• Sollte sich mit Ihrem Fahrrad und Sicherheitssitz ein Unfall ereignet haben,
empfehlen wir Ihnen, sich einen neuen Sicherheitssitz zu besorgen.Wir raten
dazu, selbst wenn keine sichtbaren Schäden am Sitz vorliegen.
• Reinigen Sie den Sitz mit Wasser und Seife (verwenden Sie keine
scheuernden, ätzenden oder toxischen Produkte). Anschließend bei
Raumtemperatur trocknen lassen.
WARNUNGEN
WARNUNG: Befestigen Sie kein zusätzliches
Gepäck an dem Kindersitz. Wenn Sie zusätzliches
Gepäck mitführen, darf die Tragfähigkeit des
Fahrrads nicht überschritten werden, und wir
empfehlen, dieses vorne am Fahrrad zu platzieren.
WARNUNG: Am Sitz dürfen keine Änderungen
vorgenommen werden.
WARNUNG: Das Fahrverhalten des Fahrrades
könnte mit dem Kind im Sitz anders sein, Speziell in
Bezug auf die Balance, die Lenkung und das
Bremsen.
WARNUNG: Das Fahrrad darf mit Kind im Sitz nie
unbeaufsichtigt gelassen werden.
WARNUNG: Jegliche Art von Rissen, oder wenn die
Oberfläche beginnt sich zu zersetzen, zeigt den
Ablauf der Verwendungsdauer des Sitzes an; der
Sitz sollte dann ausgetauscht werden. Im
Zweifelsfall muss eine sachkundige Person
kontaktiert werden.
WARNUNG: Prüfen Sie vor dem Gebrauch immer
die Oberflächentemperatur des Sitzes.
WARNUNG: Dieser Kindersitz eignet sich nicht für
den Gebrauch bei sportlichen Tätigkeiten.
WARNUNG: Stellen Sie immer sicher, dass der Kopf
Ihres Kindes auch in der zurückgelehnten Position
gestützt wird.
WARNUNG: Zusätzliche Sicherheits-Befestigun-
gen müssen immer angebracht werden.
GARANTIE
3 JAHRE GARANTIE: Auf alle mechanischen Komponenten nur gegen
Herstellerfehler.
+ 1 WEITERES JAHR GARANTIE: Registrieren Sie Ihren Sitz unter
www.Polisport.com, Um ein weiteres Jahr Garantie zu halten.
Wichtig: Sie müssen sich innerhalb von 2 Monaten nach dem
Kaufdatum registrieren, um in den Vorteil des zusätzlichen
Garantiejahrs von Polisport zu kommen.
GARANTIEANSPRÜCHE
Um Garantieleistungen in Anspruch nehmen zu können, müssen Sie den
Original-Kaufbeleg vorlegen. Bei Artikeln, die ohne Kaufbeleg
zurückgeschickt werden, wird davon ausgegangen, dass die Garantie mit
dem Herstellungsdatum beginnt. Jegliche Garantie erlischt, wenn das
Produkt durch einen Unfall, Missbrauch oder eine Systemänderung
beschädigt oder in einer Weise verwendet wird, die nicht der Beschreibung
in dieser Bedienungsanleitung entspricht.
Um sicherzustellen, dass Sie alle erforderlichen Informationen für die
Inanspruchnahme der Garantie haben, sollten Sie die Informationen auf
dem Etikett mit den Rückverfolgbarkeitsinformationen (M) gut aufbewahren.
Sie können diese Information auch hier vermerken.
Best.-Nr ___________________ Datum ___________________ .
* Die technischen Daten und das Design können ohne vorherige Ankündigung
geändert werden. Bei Fragen wenden Sie sich bitte an Polisport.

1818#polisportmove#polisportmove
BG ЗАДНА ДЕТСКА СЕДАЛКА ЗА ВЕЛОСИПЕД
ВНИМАНИЕ
Този продукт съдържа малки "части" като болтове, пластмасови торбички и малки закачалки за опаковки. Дръжте ги далеч от деца, за да избегнете
опасност от задушаване.
СЪДЪРЖАНИЕ НА ПРОДУКТА
A. ОСНОВНА СЕДАЛКА
A1. ЖЛЕБ НА ЗАДНАТА СЕДАЛКА
B. СИСТЕМА ЗА ЗАДЪРЖАНЕ НА СБРУЯТА
B1. ПРЕДПАЗНА ЗАКОПЧАЛКА
B2. РЕГУЛИРАЩИ КАИШКИ ЗА ВИСОЧИНА
B3. ЦЕНТРАЛНИ РЕГУЛИРАЩИ КАИШКИ
B4. ПОДПЛЪНКИ ЗА РАМЕНЕ
B5. ОТВОР ЗА РЕГУЛИРАНЕ НА СИСТЕМАТА
ЗА ЗАДЪРЖАНЕ
C. ОБЕЗОПАСИТЕЛЕН КОЛАН ЗА ПРИСТЯГАНЕ
КЪМ РАМКАТА НА ВЕЛОСИПЕДА
C1. КАТАРАМА НА ПРЕДПАЗНИЯ КОЛАН
C2. ФИКСАТОР НА ПРЕДПАЗНИЯ КОЛАН
E. ПОСТАВКА ЗА КРАКА
E1. ЛОСТ ЗА КРАКА
E2. РЕМЪК ЗА КРАКА
E3.
ЗАЩИТНИ ПРЕГРАДИ НА ПОСТАВКИТЕ ЗА КРАКА
F. ЦЕНТЪР НА ТЕЖЕСТТА
G. ВЪЗГЛАВНИЦА
H. МЕТАЛНА ПОДДЪРЖАЩА ГРЕДА
H1. ЧАСТ ЗА ЗАКРЕПВАНЕ НА МЕТАЛНА
ОПОРНА ПЛАНКА
I. ПОСТАВКА ЗА РАМКАТА
I1. ВИНт M8x45
I2. ПЛАСТМАСОВ МОДУЛ ЗА ФИКСИРАНЕ
I3. БУТОН ЗА ОСВОБОЖДАВАНЕ
I4. МЕТАЛНА ПЛАНКА ЗА ФИКСИРАНЕ
I5. ШЕСТОГРАМЕН КЛЮЧ №5
I6. СТЯГАЩА ШАЙБА M8x16
I7. ИНДИКАТОР НА УСТРОЙСТВОТО ЗА
БЕЗОПАСНОСТ
I8. ПРЕДПАЗНА ГУМА
J. КОМПЛЕКТ ЗА ФИКСИРАНЕ НА
ПОДДЪРЖАЩАТА ГРЕДА
J1. ПЛАНКА ЗА ФИКСИРАНЕ НА
ПОДДЪРЖАЩАТА ГРЕДА
J2. ВИНт M8x25
J3/J4. ШАЙБА
J5. ГАЙКА M8
K. МРЕЖА ЗА ТРАНСПОРТИРАНЕ
L. МЕХАНИЗЪМ ЗА НАКЛАНЯНЕ НА ДЕТСКАТА
СЕДАЛКА
L1. ПРЕДПАЗЕН ЛОСТ
L2.
ЛОСТ ЗА НАКЛАНЯНЕ НА ДЕТСКАТА СЕДАЛКА
L3. РЪЧНО КОПЧЕ (САМО ЗА BILBY RS)
L4.
КОПЧЕ ЗА НАКЛАНЯНЕ (САМО ЗА BILBY RS)
L5. ЧЕРВЕН ПРЪСТЕН ЗА СИГУРНОСТ
(САМО ЗА BILBY RS)
L6. ПЛАСТМАСОВА МОНТАЖНА ПЛОЧА
(САМО ЗА BILBY RS)
M.ИНФОРМАЦИЯ ЗА ПРОСЛЕДЯВАНЕ
СПЕЦИФИЧНИ ИНСТРУКЦИИ ЗА МОНТАЖ
• Тази детска седалка за велосипед не трябва да се монтира в сгъваеми
велосипеди.
• Тази детска седалка за велосипед не трябва да се използва на
велосипеди EPAC / Pedelecs над 25 km/h/ 15,5mph.
• Детската седалка за велосипед не трябва да се монтира на велосипеди
със заден амортисьор.
• Тази детска седалка за велосипед не трябва да се монтира на
моторизирани превозни средства, като мотопеди и скутери.
• Детската седалка се монтира на велосипеди с кръгли и овални рамки с
диаметър от Ø28 до Ø40 мм.
• Детското столче може да бъде монтирано върху велосипед с колела с
диаметър 66 см (26”) и 71 см (28”).
• Ако имате модел за малки рамки и 29-ки - детската седалка може да се
монтира на велосипеди с колела с диаметър 26" и 29".
• Тази детска седалка за велосипед е подходяща само за деца с
максимално тегло 22 kg и максимална височина 110 cm (и деца с
препоръчителна възраст от 9 месеца до 6 години – като теглото и
височината са от решаващо значение).
• Общото тегло на велосипедиста и транспортираното дете не
трябва да надвишава разрешения максимален товар за велосипеда.
Информация за максималния товар може да намерите в ръководството
за експлоатация на велосипеда. Можете също така да се свържете с
производителя по този въпрос.
• Тази детска седалка за велосипед може да се използва на EPAC /
Pedelecs до 25km/h/15,5mph.
• Седалката може да се монтира само на велосипед, подходящ за
закрепване на подобни допълнителни товари. Консултирайте се с
ръководството с инструкции на вашия велосипед или багажник.
• Позицията на седалката трябва да бъде регулирана така, че колоездачът
да не докосва седалката при въртене на педалите.
• Много е важно правилно да нагласите столчето и неговите съставни
части за постигане на оптимален комфорт и безопасност за детето.
Също така е важно столчето да не е наклонено напред, така че да няма
възможност детето да се изхлузи от него. Също така е важно облегалката
да е наклонена леко назад.
• Проверете дали всички части на велосипеда функционират нормално
след монтиране на детската седалка.
• Проверете инструкциите на велосипеда и ако имате някакви съмнения
относно монтирането на детската седалка на велосипеда, моля,
свържете се с доставчика на велосипеда за допълнителна информация.
СПЕЦИФИЧНИ ИНСТРУКЦИИ ЗА МОНТИРАНЕ НА СЕДАЛКАТА ВЪВ ВЕЛОСИПЕДА
1. Разрежете пластмасовите ремъци, задържащи поставката на рамката
(I) / метална поддържаща греда (H).
2. Обърнете детската седалка на обратно, както е показано на
изображението. Използвайте гаечния ключ (I5), за да премахнете
винтовете (J2+J4) и разкачете и отстранете планката за фиксиране на
поддържащата греда (J1).
2A. Ако вашият модел има част H1: Отстранете закрепващата част
(H1) на метална поддържаща греда (H) и я изхвърлете в подходящ
контейнер за отпадъци. Изключете метална поддържаща греда (H).
2B. Само за модел Bilby RS: Като вдигате едновременно червения
предпазен пръстен (L5), отвийте ръчното копче (L3). Отворете
пластмасовата монтажна плоча (L6).
3A. Без система за облягане: Дръжте металната опора (Н), както е
показано на снимката, и я прекарайте през отвора в детската седалка за
велосипед.
3B. Със система за облягане (Guppy RS+, Groovy RS, Bilby RS):
Поставете металната опорна планка (H) върху плочата на системата за
облягане и я прекарайте през отвора на плочата на механизма (L).
4. За да регулирате детската седалка за велосипед според размера на
детето и велосипеда, поставете металната поддържаща греда (H) в една
от позволени позиции, за да придвижите седалката назад или напред. В
началото предлагаме да я поставите на позиция № 1. Детската седалка
трябва да се монтира възможно най-близо до основната седалка.
5A. Вкарайте планката за фиксиране на поддържащата греда (J1) в
жлебовете на седалката (A) и я затворете, както е показано на картината.
Ако вашият модел е оборудван с шайба (J3), уверете се, че шайбата (J3) е
правилно поставена в задния жлеб на велосипедната седалка (A1).
Вкарайте съединителния винт (J2) в задния отвор на планката за
фиксиране на поддържащата греда (J1). Обърнете внимание, че гайката
(J5) под възглавничката може да се разхлаби, докато затягате или
разхлабвате планката за фиксиране на поддържащата греда (J1). Трябва
да хванете гайката, да я поставите правилно в жлеба на седалката,
докато напълно затегнете цялата система с другата ръка. Препоръчваме
въртящ момент на затягане от 5 N.m. По този начин ще монтирате

19#polisportmove
планката за фиксиране на поддържащата греда (J1) и металната
поддържаща греда (H) към седалката (A). Тази стъпка е изключително
важна за безопасността на детето и велосипедиста.
5B. Само за модел Bilby RS: Затворете пластмасовата монтажна плоча
(L6), като я натиснете надолу, както е показано на снимката, така че да
поддържа металната опорна планка (H). Поставете и затегнете здраво
копчето (L3), докато се уверите, че предпазният лост е правилно
задържан, както е показано на снимката. Сега металната опорна греда
(Н) е здраво закрепена към Механизма за накланяне на седалката (L).
6. Закачете защитните прегради на поставките за крака (E1) към детската
седалка (A). Уверете се, че са разположени правилно. Тази стъпка е
изключително важна за безопасността на детето.
7. Отстранете винтовете (I1+ I6) на поставката за рамката (I) с помощта
на предоставения ключ № 5 (I5).
8. Правилното позициониране на държача на рамката (I) е изключително
важно - уверете се, че е позициониран в рамката на велосипеда според
картинката - отпред и монтиран на седалковата тръба и никога не е
монтиран на стойката на седалката. Преди да поставите държача на
рамката върху рамката, се уверете, че защитната гума (I8) е правилно
поставена отпред на пластмасовия монтажен блок (I2). Поставете
основното тяло на пластмасовия монтажен блок (I2) върху предната част
на рамката на велосипеда и след това поставете металната монтажна
пластина (I4). Забележка: Ако на това място има кабели, трябва да се
уверите, че те са правилно позиционирани в централния канал на
металната планка (между защитната гума (I8) и канала на монтажната
планка (I4) и могат да се местят свободно). Поставете шайбата (I6) във
винтовете M8 (I1) и след това ги завийте към поставката за рамката (I).
Обърнете внимание, че държачът на рамката (I) трябва да бъде закрепен,
но не напълно затегнат, за да може, ако е необходимо, да регулирате
височината по-късно в съответствие с изискванията на Gravity Center.
Все пак имайте предвид, че той трябва да е достатъчно стегнат, за да
улесни завършването на етапа на поставяне на металната опорна греда
(H) и седалката.
9. Издърпайте предпазния колан за рамката на велосипеда (C) нагоре.
Уверете се, че той не пречи на монтирането на седалката към велосипеда.
10. Модел A: Поставете краищата на металната опорна планка (H) в
отворите на държача на рамката (I), докато чуете щракване, показващо
заключване, и докато двата зелени индикатора на предпазното
устройство се появят в предната част на монтажния блок. Детската
седалка за велосипед ще бъде правилно монтирана само когато се
виждат 2-те зелени индикатора на предпазното устройство. Тази стъпка
е изключително важна за безопасността на детето и велосипедиста.
Модел B: Поставете ръбовете на металната поддържаща греда (H) в
отворите на поставката за рамката (I), докато чуете щракване, показващо
заключване, и докато централният бутон (I3) не застане на нивото на
външната страна на поставката за рамката (I).
11. Центрирайте и регулирайте металната опора (H) на височина над
задното колело, така че по-късно, когато добавите теглото на детето,
седалката на детето да не докосва колелото. Обърнете внимание, че
металната опорна планка (Н) трябва да бъде разположена на максимум
10 см от колелото. Никога не използвайте тази метална опорна щанга (Н)
за пренасяне на други товари, освен тази детска седалка, както е
посочено в това ръководство.
12. Детското столче е с център на тежестта (F) (обозначено върху
детското столче), като този център трябва да бъде позициониран пред
оста на задното колело. Ако същият бъде позициониран зад оста,
разстоянието не трябва да превишава 10 см. Когато монтирате детското
столче, трябва да сте изключително внимателни, за да гарантирате, че
колоездачът няма да докосне с крак детското столче, докато се движи.
Забележка: В Германия, съгласно германския закон за движение по
пътищата StVZO, детските седалки може да бъдат фиксирани само така,
че 2/3 от дълбочината на седалката или центърът на тежестта на
седалката да е разположен между предната и задната ос на велосипеда.
Детската седалка трябва да се монтира възможно най-близо до
основната седалка.
13. След като регулирате височината и позицията на седалката, затегнете
с ръка държача на рамката (I), за да се уверите, че не може да се движи.
Трябва да затегнете ръчно винтовете по диагонал, с еднаква сила и на
етапи. Препоръчваме ви въртящ момент от 10 N.m (модел А) / 8 N.m
(модел В). Уверете се, че държачът на рамката (I) е здраво закрепен.
14. Започнете да отваряте ключалката на предпазния колан (C1) и я
прекарайте около рамката на велосипеда. Регулирайте колана, както е
показано на снимката, под напрежение. Уверете се, че останалият
разхлабен колан не е в контакт с колелото, затова го прекарайте през
фиксатора на предпазния колан (C2). Тази стъпка е изключително
важна за безопасността на детето и велосипедиста.
15. Само за модел Guppy RS: Не надвишавайте максималния лимит от 1
кг тегло, което се поддържа от мрежата за транспортиране (K).
Максималното тегло на детето и предметите в мрежата не могат да
надвишават препоръчаните 22 кг.
КАК ДА ПОСТАВИТЕ БЕЗОПАСНО И УКРЕПИТЕ ДЕТЕТО В СЕДАЛКАТА
16. За да поставите безопасно детето в седалката, трябва да поставите
велосипеда върху равна и твърда повърхност за максимална стабилност.
Дори ако велосипедът е оборудван със здрава стойка, трябва винаги да
го държите, докато поставяте/изваждате детето. Трябва да носите детето
в скута си и да го поставите безопасно върху седалката. Забранено е
детето да се катери самостоятелно на велосипеда или да използва
поставките за крака, за да достигне седалката.
17. За да поставите детето в седалката, първо удължете докрай сбруята
на системата за задържане (B), като плъзнете всички регулатори на
ремъците (B2) – това улеснява поставянето на детето в седалката. След
това отворете обезопасителната катарама (B1), като натиснете копчето
на обезопасителната катарама. Сложете детето да седне, поставете
ремъците за раменете, след което затворете обезопасителната катарама,
регулирайте дължината на колана чрез регулаторите на ремъка, така че
детето да е надеждно обезопасено. Преди да потеглите, винаги
проверявайте дали детето е обезопасено и дали коланът е плътно
прилепнал, но не толкова затегнат, че да наранява детето. Според
растежа на детето, текущата височина и теглото му можете да регулирате
височината на сбруята на системата за задържане (B) от всички
регулатори на ремъците (B2), като издърпате нагоре или надолу
ремъците, докато достигнете желания размер.
18. След окончателното регулиране на сбруята на системата за
задържане (B) се уверете, че подплънките за раменете (B4) – Guppy
Maxi+; Bilby Maxi – не са твърде близо до врата на детето, за да не го
наранят. Ремъците трябва да бъдат позиционирани малко над раменете,
както е показано на картината.
19. Можете също така да регулирате височината на колана на системата
за задържане (B), като изберете един от наличните отвори за регулиране
на системата за задържане (B5). За да я регулирате, отстранете щипката
на системата за задържане от текущия отвор и я поставете на най-
подходящия отвор според височината на детето ви.
20. Модел A: За да регулирате височината на поставката за крака (E) в
зависимост от височината на детето, освободете поставката за крака (E)
от седалката (А) чрез едновременно натискане на двата фиксатора един
към друг и повдигнете поставката за крака, както е показано във
фигурата (може да е необходимо да се приложи известен натиск). За да
прикрепите отново поставките за крака, първо зацепете горния щифт и
натиснете опората за крака (E) надолу, за да се заключи с клипса в
отворите на слотовете.
Модел B: Регулирайте височината на подложката за крака според
големината на детето. За да направите това, повдигнетелоста (E1), и го
плъзнете нагоре или надолу за достигане на желаната височина. След
като определите правилната височина, спуснете лоста (E1), за да го
заключите на място.
21. За да се гарантира безопасността на вашето дете, регулирайте
ремъка (E2) на поставката за крака. Отключете ремъка (E2) и го
регулирайте в зависимост от краката на детето. Заключете го отново,
като се уверите, че ремъкът не наранява детето.
САМО ЗА МОДЕЛА С НАКЛАНЯНЕ - КАК ДА НАКЛАНЯТЕ СЕДАЛКАТА СИ
22. Само за модел Groovy RS, Guppy RS +: Този модел има система (L),
която може да се използва за регулиране на наклона на детската
седалка (A). На разположение са две позиции: 10° и 20°. Детската седалка
(A) може да бъде поставена в желаното положение само когато
предпазният лост е отключен. За да направите това, първо освободете
предпазния колан към рамката (C), след това издърпайте предпазния
лост (L1), докато дърпате лоста нагоре, за да наклоните седалката (L2) -
това ще позволи системата да бъде отключена. Можете да освободите
предпазния лост (L1).
23. Докато дърпате лоста за накланяне на седалката (L2), поставете
седалката в желаната позиция от 10° или 20°. Когато поставите в желаното
положение, освободете лоста за накланяне на детската седалка (L2) и се

2020#polisportmove#polisportmove
КАК ДА СВАЛИТЕ СЕДАЛКАТА ОТ ВЕЛОСИПЕДА
25. Odpojte bezpečnostní popruh (C) k odstranění zadní dětské autosedačky. Натиснете бутона за освобождаване (I3) на поставката за рамката (I) и
същевременно издърпайте металната поддържаща греда (H) нагоре и назад, както е показано на илюстрацията.
Уверете се, че правилно сте следвали и изпълнили всички дадени
инструкции. Ако е така, то детското столче е готово за ползване. ЗАДЪЛЖИТЕЛНО ТРЯБВА ДА ПРОЧЕТЕТЕ следния раздел по
инструкции за безопасност при използване на детско столче.
СПЕЦИФИЧНИ ИНСТРУКЦИИ ЗА ИЗПОЛЗВАНЕ
• - Отстранете стикерите, които не са свързани с безопасността, от
детската седалка за велосипед преди употреба.
• Kолоездачът трябва да бъде най-малко на 16 години.
• Проверете действащите закони и разпоредби във вашата страна,
свързани с превозване на деца на допълнителни седалки към
велосипеди.
• Превозвайте само деца, които са в състояние самостоятелно да седят
за по-дълъг период от време, поне толкова продължително, колкото
имате намерение да пътувате.
• Hе използвайте седалката за деца по-малки от 9 месеца. За да може
детето да се вози безопасно в тази седалка, то трябва да е способно да
седи изправено и да държи главата си изправена, носейки върху нея
велосипедна каска.
• Уверете се, че теглото и височината на детето не надвишават
максималния капацитет на детската седалка и проверявайте това на
редовни интервали. Проверете теглото на детето, преди да използвате
детската седалка. При никакви обстоятелства не трябва да използвате
детската седалка за велосипед, за да транспортирате дете, чието тегло е
над допустимото.
• Не забравяйте да проверявате от време на време дали теглото и
височината на детето не надвишават максимално допустимото
натоварване на седалката.
• Уверете се, че не е възможно която и да било част от дрехите или
тялото на детето да влезе в контакт с движещите се части на седалката
или велосипеда, като проверявате това в течение на времето с
израстването на детето.
• Трябва да покриете всички остри или стърчащи елементи на
велосипеда (напр протрити кабели), които може да бъдат достигнати от
детето, при всяка ситуация.
• Препоръчва се поставяне на предпазител на колелото, за да се
предотврати попадане на краката или ръцете на детето между спиците.
Използването на предпазител под седалката или на седалка с вътрешни
пружини е задължително. Уверете се, че детето не е в състояние да
възпрепятства спирачките, за да се избягнат инциденти. Тези регулации
трябва да се ревизират с израстването на детето.
• Покрийте всички открити пружини на задното седло.
• Kогато детската седалка не се използва, закопчейте безопасната
закопчалка на обезопасителния колан, за да предотвратите провисване
на ремъците и попадането им във въртящи се части на велосипеда,
напр. колела, спирачки и др, тъй като това може да бъде опасно за
велосипедиста.
• Подсигурете детето в детската седалка като се уверите, че всички
обезопасителни колани и ремъци са опънати, но не толкова стегнати, че
да причиняват дискомфорт на детето.
• Проверявайте често безопасността на закрепващите елементи.
• Винаги използвайте всички системи за обезопасяване и каишки, за да
се уверите, че детето е подсигурено на детската седалка.
• Oбличайте детето с подходящи дрехи според времето.
• Децата в седалките е необходимо да бъдат по-топло облечени от
велосипедистите и мотоциклетистите и трябва да бъдат защитени от
дъжд.
• Свалете седалката при транспортиране на велосипеда с кола (чрез
поставяне отвън на колата). Въздушната турбуленция може да повреди
седалката или да разхлаби прикрепването й към велосипеда, което
може да доведе до инцидент.
• Придружаващите лица трябва внимателно да вземат предвид
стабилността/баланса, когато слагат детето в седалката на велосипеда.
• Гарантирайте, че децата носят подходящ шлем, отговарящ на EN
1078:2012+A1:2012, когато се возят в седалката. Неносенето на каска
увеличава експоненциално риска от смърт, дългосрочна инвалидност,
травма на главата или други наранявания. Като производители на
велосипедни седалки ние се грижим за безопасността на пътниците в
седалките, затова силно препоръчваме децата да носят правилно
монтирани и закрепени велосипедни каски.
• Cедалката и възглавницата може да се нагреят, ако са изложени
продължително време на слънце. Уверете се, че не са прекалено
горещи преди да поставите детето в седалката.
• Тази детска седалка не е подходяща за използване по време на спортни
дейности или при екстремни условия, като например: ендуро, трудно
планинско колоездене, големи дупки на пътя, неравности и пресечени
местности.
• При първо колоездене с монтирана детска седалка изпробвайте
велосипеда в безопасна/ненатоварена среда, преди да го карате по
магистрала.
уверете, че предпазният лост (L1) е заключен отново, както когато е в
първоначалната позиция - изравнен с повърхността на механизма (L). Не
забравяйте да затегнете отново предпазния колан (C) към рамката, след
като наклоните детската седалка до желаната позиция.
24. Само за модел Bilby RS: Тази детска седалка има механизъм за
накланяне (L), който позволява регулиране на седалката в едно
положение за спане (20º). За да наклоните седалката, завъртете копчето
(L3), докато достигнете желаното положение. Когато чуете звук
"щракване", това означава, че сте достигнали максималния ъгъл и че
седалката няма да се накланя повече.
ПРЕДУПРЕЖДЕНИЯ
ПРЕДУПРЕЖДЕНИЕ: Непоставяйтедопълнителен
багаж на седалката. Ако носите допълнителен
багаж, товароподемността на велосипеда не
трябва да се надвишава и препоръчваме да го
поставите в отпред част на велосипеда.
ПРЕДУПРЕЖДЕНИЕ: Не модифицирайте седалката.
ПРЕДУПРЕЖДЕНИЕ: Велосипедът може да се
управлява различно с дете в седалката, особено по
отношение на баланса, завиването и спирането.
ПРЕДУПРЕЖДЕНИЕ: Никога не оставяйте
велосипеда паркиран с дете в седалката, без
наблюдение.
ПРЕДУПРЕЖДЕНИЕ: При всякакъв вид
напуквания или в случай че повърхността
започне да се разрушава, това означава, че
животът на седалката е достигнал своя край и тя
трябва да бъде сменена. В случай на съмнения
трябва да се свържете със специалист.
ПРЕДУПРЕЖДЕНИЕ: Винаги проверявайте
температурата на повърхността на продукта
преди употреба.
ПРЕДУПРЕЖДЕНИЕ: Детската седалка не е
подходяща за употреба при спортна дейност.
Table of contents
Languages:
Other Polisport Bicycle Accessories manuals

Polisport
Polisport Bilby Eco User manual

Polisport
Polisport BILBY User manual

Polisport
Polisport Bubbly Mini User manual

Polisport
Polisport Guppy User manual

Polisport
Polisport MOVE GUPPY MINI RANGE User manual

Polisport
Polisport Child Trailer User manual

Polisport
Polisport JUNIOR BILBY User manual

Polisport
Polisport WALLABY EVOLUTION User manual

Polisport
Polisport BUBBLY MAXI+ User manual

Polisport
Polisport MOVE GUPPY MINI Series User manual