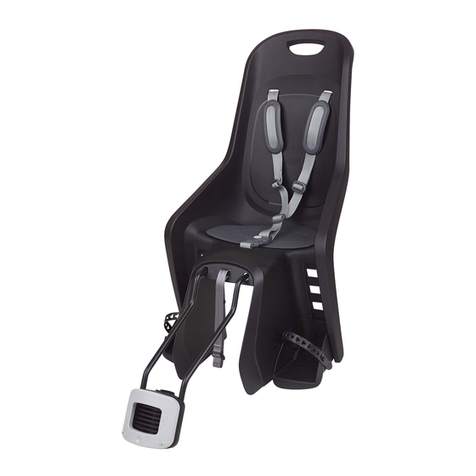
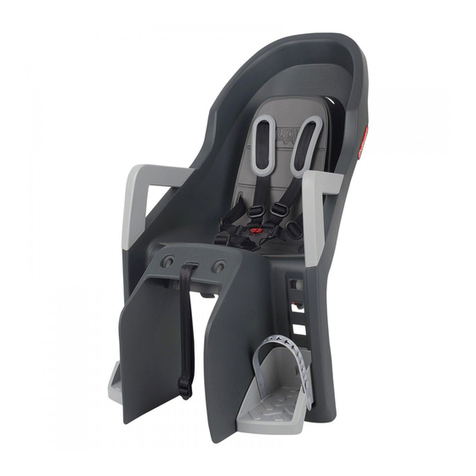
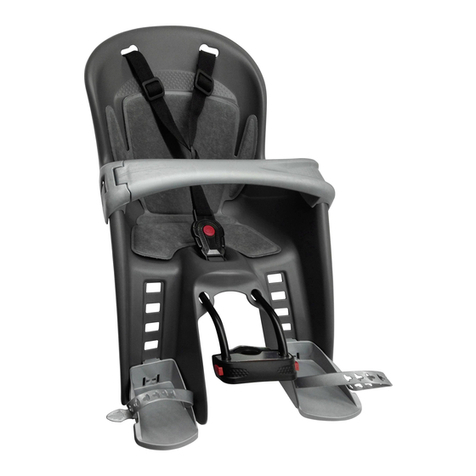
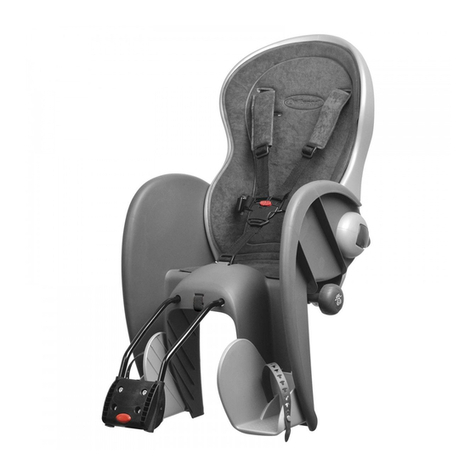
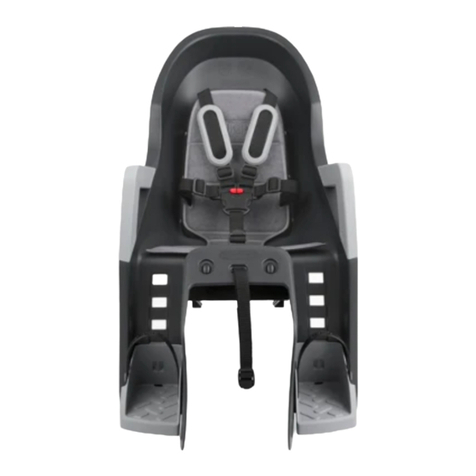
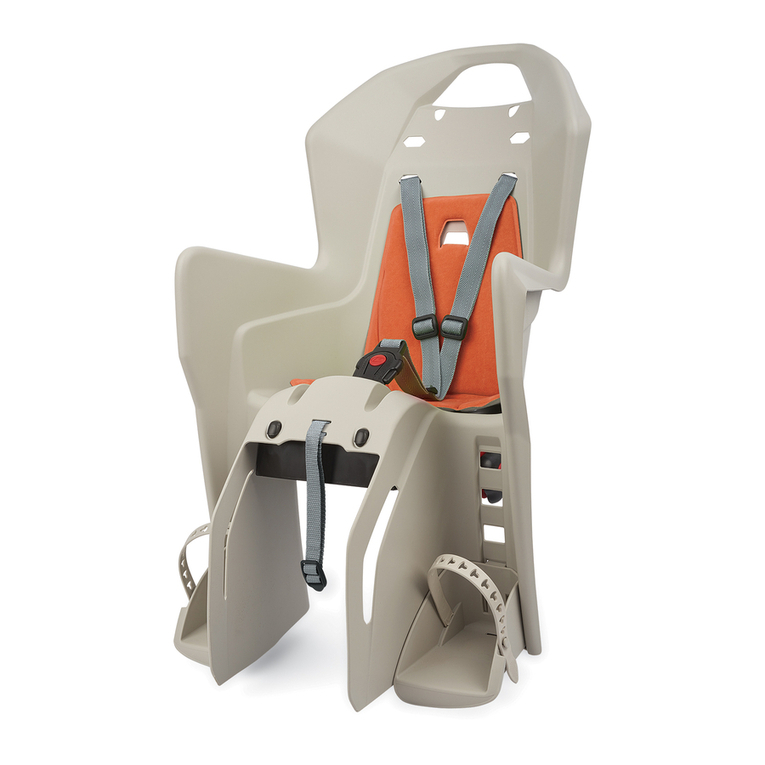
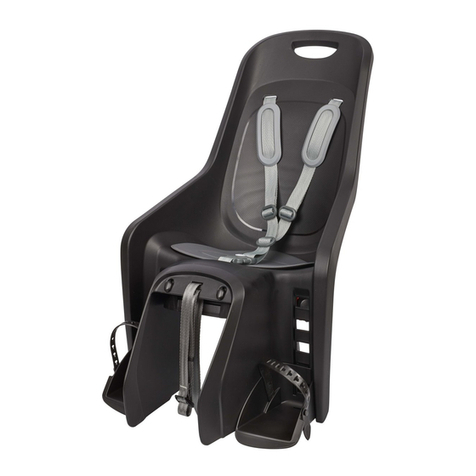
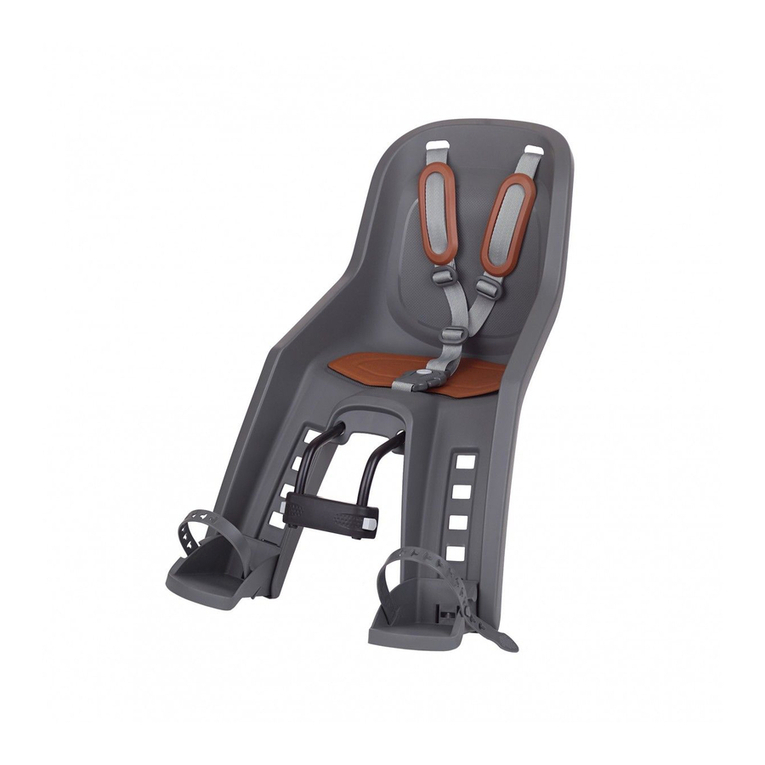
Polisport MOVE GUPPY MINI Series User manual

USER
MANUAL
FRONT HEAD TUBE MOUNTING SYSTEM
BEFESTIGUNG AM STEUERROHR
FRONT BABY SEAT FOR BICYCLE
FAHRRAD KINDERSITZ
WWW.POLISPORT.COM

22#polisportmove#polisportmove
MOUNTING
INSTRUCTIONS
VIDEO
MOUNTING
INSTRUCTIONS
VIDEO
MOUNTING
INSTRUCTIONS
VIDEO
GUPPY®
MINI+
BUBBLY®
MINI EVO
BILBY
JUNIOR
USER
MANUAL
EN 03
FR 06
PT 09
DE 13
BG 16
CS 20
DA 23
EL 26
ES 30
FI 33
HR 36
HU 39
IT 42
JP 45
NL 49
NO 52
PL 55
RO 58
RU 62
SK 65
SL 68
SV 71
TR 74
ZH 80
HE 93
ET 83
LT 86
LV 89
SR 92
UK 95
AR 98
FRONT HEAD TUBE MOUNTING SYSTEM
BEFESTIGUNG AM STEUERROHR
EXTENDED
WARRANTY
register your seat at
WWW.POLISPORT.COM
and get 1 extra
warranty year

3#polisportmove
EN FRONT BABY SEAT FOR BICYCLE
ATTENTION
This product contains small parts like bolts, plastic bags, and small packaging hangers. Keep them out of reach of children to avoid suffocation hazards.
TABLE OF CONTENTS
TABLE OF CONTENTS OF PRODUCT 3
SPECIFIC INSTRUCTIONS FOR MOUNTING 3
How to set the bicycle seat 3
How to set the safety bar (only for Bilby Junior +) 4
How to assemble the holder in the bicycle 4
How to connect the bicycle seat to the holder 4
How to lock your holder 4
HOW TO PLACE AND SECURE THE CHILD INTHE SEAT 4
HOW TO REMOVE THE SEAT FROM THE BICYCLE 4
SPECIFIC INSTRUCTIONS FOR USE 4
WARNINGS 5
MAINTENANCE 5
WARRANTY 6
TABLE OF CONTENTS OF PRODUCT
A. MAIN SEAT
B. RETENTION SYSTEM HARNESS
B1. SAFETY BUCKLE
B2. HEIGHT STRAP ADJUSTERS
B3. CENTRAL STRAP ADJUSTERS
B4. SHOULDER PADDINGS
C. CUSHION
D. FOOTREST
E. FOOTREST STRAP
F. SUPPORT BAR MOUNTING KIT
F1. SUPPORT BAR MOUNTING PLATE
F2. M8 x 16 SCREW
F3. M8 WASHER
F4. M8 NUT
F5. M8 WASHER
G. METALLIC SUPPORT BAR
H. HOLDER
H1. FRONT HOLDER PART
H2. HOLDER MOUNTING PLATE
H3. RELEASE BUTTON
H4. ADAPTER A – Ø22 a Ø30mm
H5. ADAPTER B – Ø30 a Ø40mm
H6. ATTACHMENT SCREWS M10x45
H7. HOLE FOR LOCKING-SCREW
H8. ANTI-THEFT SCREW
I. SAFETY BAR (ONLY FOR BILBY JUNIOR +)
I1+I2. SAFETY BAR CONNECTOR
J. ALLEN KEY
J1. ALLEN KEY Nº 6
J2. ALLEN KEY Nº 8
K. TRACEABILITY INFORMATION
SPECIFIC INSTRUCTIONS FOR MOUNTING
• This child bicycle seat must not be mounted in folding bicycles.
• This child bicycle seat must not be used on speed pedelecs above 25 km/h
/ 15,5 mph.
• This child bicycle seat must not be mounted to bicycles fitted with rear
shock absorbers.
• This child bicycle seat must not be mounted to motorized vehicles such as
mopeds and scooters.
• This child bicycle seat is only suitable for carrying children with a maximum
weight of 15 Kg, and a maximum height of 93cm (and children with
recommended ages ranging from 9 months up to 3 years of age - with the
weight and height as the decisive variables).
• This child bicycle seat must not be mounted in bicycles with triangular,
square or carbon fiber frames.
• This child bicycle seat must be assembled on bicycles with round frames
with diameters ranging from Ø22 to Ø40 mm.
• The child bicycle seat must be assembled on bicycles with wheels with
diameters of 26”, 27,5”, 28 and 29’’.
•This child bicycle seat can be used on EPAC / Pedelecs up to 25 km/h / 15,5 mph.
• The total weight of the cyclist and the child transported must not exceed
the maximum permitted load permitted for the bicycle. Information on the
maximum load can be found in the operating instructions of the bicycle.You
can also contact the manufacturer for this question.
• The seat may only be mounted on a bicycle suitable for the attachment of
such additional loads. Please consult your bicycle instructions manual.
• The position of the child bicycle seat must be adjusted so that the bicycle
rider does not touch the child bicycle seat with the feet when in motion.
• It’s very important to adjust correctly the seat and its component parts for
optimum comfort and safety of the child. It’s also important that the seat
does not slope forward so that the child does not tend to slide out of it. It is
also important that the backrest slope backward slightly.
• Check if all parts of the bicycle function correctly with the child bicycle
seat mounted.
• Check the instructions of the bicycle, and If you have any doubts about
fitting the child bicycle seat to your bicycle, please contact your bicycle
supplier for further information.
HOW TO SET THE BICYCLE SEAT
1. Cut the plastic straps that hold the Holder (H).
2. Turn the child seat upside down as shown in the image. Remove the
metallic support bar (G) from the seat by cutting the straps and pulling it
upwards.
3. Use the allen key (J1) to remove the screws + washer (F2+F3) and
disengage and remove the support bar mounting plate (F1).
4. Pass both ends of the metallic support bar (G) through the openings of the
seat lower part (A). In order to adjust the child bicycle seat according to the
bicycle and child size, set the metallic support bar (G) into one of the allowed
positions to move the seat backward or forward. At the beginning we
suggest placing it on the position No. 1.
5. Insert the support bar mounting plate (F1) on the grooves of the seat (A), and
close it as indicated in the picture. Make sure the washer (F5) is properly placed
into the rear groove of the bicycle seat. Insert the attachment screw+washer
(F2+F3), on the back hole of the support bar mounting plate (F1). Please note
that the nut (F4) under the cushion may become loosen while tighten or loosen
the support bar mounting plate (F1). You need to grab the nut, correctly place it
on the seat groove while totally tighten the full system with the other hand. We

44#polisportmove#polisportmove
HOW TO ASSEMBLE THE HOLDER IN THE BICYCLE
HOW TO CONNECT THE BICYCLE SEAT TO THE HOLDER
HOW TO LOCK YOUR HOLDER (optional)
8. Loosen the screws (H6) from the holder (H), with the allen key (J2) to
remove the holder mounting plate (H2).
9. Remove the adapters (H4) that are already placed originally inside the
holder (H).
10. Check the available height and diameter of the steering tube into which
the holder (H) is to be placed to ensure the correct adapter (H4 or H5) is used.
The letters A, A1, B or B1 are etched onto the backs of the different adapter
sets.
11. Once you have chosen the most suitable adapter set (H4/H5), ensure it is
13. Insert the ends of the metallic support bar (G) into the holes of the holder
(H) while pressing simultaneously the release button (H3). Make sure that the
ends of the metallic support bar (G) will pass through the holder (H) as shown
in the picture. Release the button (H3) and the bicycle seat will be properly
locked in place. After properly installing the bicycle seat please make sure that
14. This will prevent the bicycle seat from being removed from the bicycle. To lock the holder (H) to prevent the seat from being stolen, insert the anti-theft
screw (H8) into the locking hole (H7) and tighten with a Phillips screwdriver (not included).
positioned and inserted correctly inside the holder (H), matching the letters
A and B to the front (H1) and A.1 and B.1 (H2) to the back of the holder.
12. Correctly install the holder (H) into the steering tube, with the release
button (H3) pointing towards the saddle and the word TOP facing up. Hand
tighten the screws (H6) with the Allen Key (J2), joining together both parts of
the holder (H1+H2). Check that both parts of the holder are correctly fitted
together symmetrically. Tighten using the Allen key (J2). We recommend
tightening with a 8 N.m torque. This step is extremely important for
child and cyclist safety.
the holder (H) and the seat (A) are properly centred. Make sure that the screws
are properly handed tighten and that the holder (H) is securely fixed. Try to
move or rotate the bicycle seat to check if the holder (H) is firmly attached. If it´s
properly attached, it will not move. This step is extremely important for the
children and cyclist safety.
HOW TO PLACE AND SECURE THE CHILD IN THE SEAT
15. To safely place the child on the seat you must place the bicycle on flat and
solid ground for maximum bicycle stability. Even if your bicycle offers robust
quick stands, you must always hold the bicycle, while placing/ removing the
child.You must carry your child in your lap and safely place him on the seat. It´s
forbidden for the child to climb alone on the bicycle or using the footrests to
reach the seat.
16.To place the child in the seat, first fully extend the retention system harness
(B), sliding all the strap adjusters (B2, B3) - this makes it easier to put the child in
the seat. Then, open the safety buckle (B1) by pressing the safety buckle
button. Seat the child, place the shoulder and waist straps and then close the
safety buckle, adjust the belt length using the strap adjusters, so that your child
is securely restrained. Before starting the journey, always check that the child is
secured and that the belt is snug but not so tight that it hurts the child.
According to the child growth, current height, and weight, you can adjust the
height of the retention system harness (B) on all the strap adjusters (B2, B3), by
pulling up or down the straps until reaching the desired size.
17. After the final adjustment of the retention system harness (B), check that
the shoulder paddings (B4) – not available on Bilby Junior Evo – are not too
close to the child’s neck to avoid hurting them. The paddings should be
positioned slightly above the shoulders, as shown in the picture.
18. To adjust the height of the footrest (D) to fit your child, release the
footrest (D) from the seat (A) by pressing the two fasteners together and lift
the footrest as indicated in the picture (it may be necessary to apply some
pressure to the fasteners). To reattach the footrests, first engage the top pin,
and push the footrest (D) down to lock the clips into the slot’s holes.
19. To guarantee your child’s safety, adjust the strap (E) of the footrest.
Unlock the strap (E) and adjust it to the child’s foot. Lock it again making sure
the strap does not hurt the child.
recommend a torque of 6 N.m. By doing so, you will assemble the support bar
mounting plate (F1) and the metallic support bar (G) to the seat (A). This step is
extremely important for child and cyclist safety.
HOW TO SET THE SAFETY BAR (ONLY FOR BILBY JUNIOR +)
6. Clip the safety bar (I) in the two safety bar connectors (I1+I2).
7. To open the safety bar, unclip it only from the connector (I2).
HOW TO REMOVETHE SEAT FROM THE BICYCLE
20. If you have chosen to lock the anti-theft holder, you must first remove the anti-theft screw (H8) with the Philips screwdriver (not included) to release the
seat. Press the release button (H3) on the holder (H) and at the same time pull the bicycle seat (A) up and backwards as shown in the image.
Make sure you have followed and fulfilled all the instructions given. When
done so, the child bicycle seat is ready for use.
IT IS MANDATORY TO READ the following chapter on safety
instructions about using your child bicycle seat.
SPECIFIC INSTRUCTIONS FOR USE
• The rider must be at least 16 years of age.
• Check for any laws and regulations that might be in force in your country,
relating to the carrying of children in seats attached to cycles.
• Carry only children that can sit unaided for a longer period, at least as long
as the intended cycle journey.
• Do not carry a child less than 9 months of age in this child bicycle seat. To

5#polisportmove
be a passenger, the child must be able to sit up straight with the head held
upright while wearing a bicycle helmet. A doctor should be consulted if the
child’s growth is questionable.
• Make sure that the weight and height of the child do not exceed the
maximum capacity of the seat, and check this at regular intervals. Check the
weight of the child before using the child seat. Under no circumstances
should you use the child bicycle seat to transport a child whose weight is
above the permissible limit.
• Make sure to check from time to time that the weight and height of the
child do not exceed the maximum permissible load of the seat.
• Make sure that it is not possible for any part of the child’s body or clothing
to come into contact with moving parts of the seat or bicycle and check this
as the child grows.
• You must cover any sharp or pointy objects on the bicycle (e.g frayed
cables) that may be reached by the child, in any situation.
• When the child bicycle seat is not in use, fasten the waist buckle of the
security harness to prevent the straps from dangling and entering in contact
with some turning part of the bicycle as wheels, brakes, etc. as these may be
a hazard to the cyclist.
• Secure the child into child bicycle seat ensuring that all the safety belts and
straps applied firmly but not so tight as to cause discomfort to the child.
• Check the security of fastners frequently.
•You must ensure that you always use the restraint system, and that the child
is secured in the seat.
• Dress the child in proper clothes according to weather conditions.
• Children in child seats need to be more warmly dressed than riders of cycles
and should be protected from rain.
• Remove the seat when transporting the bicycle by car (outside the car). Air
turbulence might damage the seat or loosen its fastenings or other
suspended elements, which could lead to an accident.
• Accompanying persons should carefully consider stability / balance when
placing the child on the bike in the seat.
• Make sure that children wear a suitable helmet that complies with EN 1078
while riding in the seat.
•The seat and cushion can get hot if under the sun for a long time. Make sure
that they are not too hot before seating the child.
•This child seat is not suitable for use during sporting activities, or in extreme
conditions as per example: enduro, hard mountain biking, big road holes,
jumps and off-road ways.
• When riding for the first time with the seat fitted - to test ride the cycle in a
safe/quiet environment before riding on the highway.
• When the steering angle to each side is reduced to less than 45º, change
the type of handlebar.
ATTENTION
Failure to comply with these operating instructions can lead to serious injury or death of the bicycle operator and/or child. Polisport is not liable
for any damage to the product or persons resulting from improper installation, storage, or assembly (non-compliance with assembly instructions),
improper maintenance, misuse or use not in compliance with the technical or use specifications (non-compliance with maintenance and care
instructions), modifications or repairs made by you or a third party. If you have any doubt, please get in contact with us or with your local shop so
that we can assist you in order to assure your and your child safety while riding with the bicycle seat
MAINTENANCE
To keep the child bicycle seat in good working condition and to prevent
accidents we recommend the following:
Regularly check the mounting system of the seat to the bicycle to make sure
it is in perfect condition.
Check all the components to see if they work properly. Do not use the seat if
any of the components are damaged. Damaged components must be
replaced. To replace them you need to visit your local authorized Polisport
dealer to get the correct components for replacement.You can find them on
the website: www.polisport.com.
If you have suffered an accident with your bicycle and safety seat, we
advise you to get a new safety seat. Even if there is no visible damage to
the seat.
Clean the seat with soap and water (do not use abrasive, corrosive or toxic
products). Leave it to dry at room temperature.
WARNINGS
WARNING: Do not attach any additional luggage to
the child seat. If you carry extra luggage, the
bicycle’s carrying capacity must not be exceeded,
and we recommend that it be placed at the back of
the bike.
WARNING: Do not modify the seat.
WARNING: The cycle could behave differently with
a child in the seat particularly with regarding to
balance, steering and braking.
WARNING: Never leave the cycle parked with a
child in the seat unattended.
WARNING: For any form of crack or if the surface
starts to deconstruct, this indicates that the life of
the seat has been reached and it should be
replaced. A professional shall be contacted in case
of doubt.
WARNING: Always check the surface temperature
of the seat before any use.
WARNING: This child seat is not suitable for use
during sporting activities.
WARNING: Always ensure that the head of your
child is supported in reclined position.
WARNING: The movability of the handlebar could
be reduced by the seat.
WARNING: Additional safety devices are always to
be attached.

66#polisportmove#polisportmove
WARRANTY
2-YEAR WARRANTY: All mechanical components against manufacturer
defects only.
+ 1 EXTRA WARRANTY YEAR: Register your seat at www.polisport.com
and get one more warranty year.
Important: you must register within 2 months of the date of purchase
to receive the Polisport Extra Year Warranty.
WARRANTY CLAIMS
To obtain warranty service, you must have your original sales receipt. Items
returned without a sales receipt will assume that the warranty begins on the
date of manufacture. All warranties will be void if the product is damaged
due to user crash, abuse, system modification, or used in any way not
intended as described in this operating manual.
To make sure you have all the required information to activate the warranty
you need to keep the information that you have in your Traceability
information label (K). You can also record here the info.
O.F. ___________________ Date ___________________ .
* The specifications and design are subject to change without notice. Please
contact Polisport for any questions.
FR SIÈGE ENFANT POUR VÉLO
ATTENTION
Ce produit contient de petites pieces comme des boulons, des petits crochets d'emballage et des sacs en plastique. Veuillez les conserver hors de portée des
enfants pour éviter tout risque d'étouffement.
TABLE DES MATIÈRES
INDEX DU PRODUIT 6
INSTRUCTIONS SPÉCIFIQUES DE MONTAGE 6
Fixer le siège vélo 7
Fixer la barre de sécurité (uniquement pour Bilby Junior +) 7
Assembler le support sur le vélo 7
Connecter le siège vélo au support 7
Verrouiller votre support 7
SÉCURISER ET PLACER EN TOUTE SÉCURITÉ L'ENFANT SUR LE SIÈGE 7
COMMENT DÉMONTERVOTRE SIÈGE ENFANT D'UN VÉLO 8
INSTRUCTIONS SPÉCIFIQUES D’UTILISATION 8
AVERTISSEMENTS 8
ENTRETIEN 9
GARANTIE 9
INDEX DU PRODUIT
A. SIÈGE PRINCIPAL
B. HARNAIS DE SYSTÈME DE RÉTENTION
B1. BOUCLE DE SÉCURITÉ
B2. AJUSTEURS DE SANGLE DE HAUTEUR
B3. AJUSTEURS DE SANGLE CENTRALE
B4. REMBOURRAGE DES ÉPAULES
C. COUSSIN
D. REPOSE-PIED
E. SANGLE DE MAINTIEN DU PIED
F. KIT DE MONTAGE DE LA BARRE DE SUPPORT
F1.
PLAQUE DE MONTAGE DE LA BARRE DE SUPPORT
F2. VIS M8x16
F3. RONDELLE M8
F4. ÉCROU M8
F5. RONDELLE M8
G. BARRE DE SUPPORT MÉTALLIQUE
H. SUPPORT
H1. PIÈCE DE SUPPORT AVANT
H2. PLAQUE DE MONTAGE DU SUPPORT
H3. BOUTON DE DÉVERROUILLAGE
H4. ADAPTATEUR A - Ø22 à Ø30mm
H5. ADAPTEUR B – Ø30 a Ø40mm
H6. VIS DE FIXATION M10x45
H7. ORIFICE POUR VIS DE VERROUILLAGE
H8. VIS ANTI-VOL
I. BARRE DE SÉCURITÉ (UNIQUEMENT POUR
BILBY JUNIOR +)
I1+I2.
CONNECTEUR DE LA BARRE DE SÉCURITÉ
J. CLÉ ALLEN
J1. CLÉ ALLEN N.º 6
J2. CLÉ ALLEN N.º 8
K. ÉTIQUETTE DE TRAÇABILITÉ DU PRODUIT
INSTRUCTIONS SPÉCIFIQUES DE MONTAGE
• Ce siège enfant de vélo doit être monté sur vélos pliables.
• Ce siège enfant de vélo ne doit pas être utilisé sur pédales à assistance
électrique dont la vitesse est supérieure à 25 km/h / 15,5 mph.
• Ce siège vélo enfant ne devra pas être monté sur des vélos équipés
d’amortisseurs arrières.
• Ce siège enfant de vélo doit être monté sur des véhicules motorisés tels que
des motos et des scooters.
• Ce siège enfant de vélo n’est adapté qu’au transport d’enfant de 15 kg
maximum et de 93 cm de hauteur maximum (et des enfants d’un âge
recommandé entre 9 mois et 3 ans - dont le poids et la hauteur sont les
variables déterminantes).
• Ce siège vélo enfant ne devra pas être monté sur des vélos équipés de
cadres triangulaires, carrés ou en fibre de carbone.
• Ce porte bébé avant pour vélo doit être assemblé sur vélo ayant un tube
avant de cadre ou rond avec un diamètre compris entre Ø22 et Ø40 mm.
• Le siège peut être monté sur des vélos à roues de diamètres compris entre
of 26”, 27,5”, 28 et 29’’.
• Ce siège enfant de vélo ne doit pas être utilisé sur EPAC / Pedelecs dont la
vitesse est supérieure à 25 km/h / 15,5 mph.
• Le poids total du cycliste et de l’enfant transporté ne doit pas dépasser
la capacité maximale autorisée du vélo. L’information relative à la capacité
maximale peut être trouvée dans les instructions de fonctionnement du
vélo.Vous pourrez également contacter le fabricant sur cette question.
• Le siège ne pourra être monté que sur un vélo adapté à la fixation d’une
telle charge supplémentaire. Veuillez consulter le manuel d’instructions de
votre vélo.

7#polisportmove
FIXER LE SIÈGE VÉLO
ASSEMBLER LE SUPPORT AUVÉLO
CONNECTER LE SIÈGE VÉLO AU SUPPORT
VERROUILLER VOTRE SUPPORT (optionnel)
1. Couper les bandes en plastique qui retiennent le Support (H).
2. Retourner le siège enfant à l’envers comme sur l’image. Retirer la barre de
support métallique (G) du siège en coupant les bandes et les tirer vers le
haut.
3. Utiliser la clé Allen (J1) pour retirer les vis + rondelles (F2+F3) et libérer et
retirer la plaque de montage de la barre de support (F1).
4. Passer les deux extrémités de la barre de support (G) à travers les
ouvertures de la partie inférieure du siège (A). Pour ajuster le siège enfant du
vélo selon la taille du vélo et de l’enfant, fixer la barre de support (G) sur l’une
des positions permises en vue de déplacer le siège vers l’avant et l’arrière. Au
début, nous vous conseillons de le placer sur la position n º 1.
5. Insérer la plaque de montage de la barre de support (F1) dans les rainures du
siège (A) et la fermer comme sur l’image. Assurez-vous que la rondelle (F5) est
correctement placée dans la rainure à l'arrière du siège enfant de vélo. Insérer
8. Dévisser les vis (H6) du support (H) à l’aide d’une clé Allen (J2) pour retirer
la plaque de montage du support (H2).
9. Retirer les adaptateurs (H4) déjà placés à l’origine à l’intérieur du support
(H).
10. Vérifier quelle est la hauteur disponible et le diamètre de la zone du tube
de direction où placer le support (H) pour procéder à la sélection appropriée
des adaptateurs (H4 ou H5) à utiliser. Les différents ensembles d’adaptateurs
sont gravés sur la partie postérieure avec les lettres A, A1, B et B1.
11. Après avoir choisi l’ensemble d’adaptateurs le plus approprié (H4/ H5), se
certifier qu’ils sont bien positionnés et emboités à l’intérieur du support (H),
13. Insérez les extrémités de la barre de support métallique (G) dans les
orifices du support (H) tout en appuyant simultanément sur le bouton de
déverrouillage (H3). Veuillez-vous assurer que les extrémités de la barre de
support métallique (G) passeront à travers le support (H) comme sur l’image.
Relâcher le bouton (H3) et le siège enfant sera verrouillé correctement et ce,
en place. Après avoir correctement installé le siège enfant, veuillez-vous
14. Cette opération évitera que le siège soit retirée du vélo. Pour bloquer le support (H), tout en évitant que le siège ne soit volée, insérer la vis antivol (H8) dans
l’orifice de blocage (H7) et serrer à l’aide d’une clé Philips (non incluse).
la fixation vis+rondelle F2+F3) sur l’orifice arrière de la plaque de montage de
la barre de support (F1). Veuillez noter que l’écrou (F4) sous le coussinet peut se
relâcher si vous serrez ou desserrez la plaque de montage de la barre de
support (F1). Vous devez saisir l’écrou, le placer correctement dans la rainure du
siège en serrant totalement tout le système à l’aide de l’autre main. Nous
recommandons l’utilisation d’un couple de serrage de 6 N.m. En procédant de
la sorte, vous assemblerez la plaque de montage de la barre de support (F1) et
la barre de support métallique (G) au siège (A). Cette étape est extrêmement
importante pour la sécurité du cycliste et de l’enfant.
FIXER LA BARRE DE SÉCURITÉ (UNIQUEMENT POUR BILBY JUNIOR +)
6. Attacher la barre de sécurité (I) sur les deux connecteurs de la barre de
sécurité (I1+I2).
7. Pour ouvrir la barre de sécurité, ne la détacher que du connecteur (I2).
en faisant la correspondance des lettres A et B avec la partie frontale (H1) et
A.1 et B.1 (H2) vers la partie arrière du bloc.
12. Installer correctement le support (H) sur le tube de direction, avec le
bouton de déblocage (H3), orienté vers la selle et avec l’inscription TOP
orientée vers. Serrer manuellement les vis (H6) à l’aide d’une clé Allen (J2), en
unissant ainsi les deux parties du support (H1+H2). Se certifier que les deux
parties du bloc sont correctement emboitées l’une dans l’autre, de manière
symétrique. Réaliser le serrage final à l’aide d’une clé Allen (J2). Pour cela,
nous recommandons un couple de serrage de 8 Nm. Cette étape est
extrêmement importante pour la sécurité du cycliste et de l’enfant.
assurer que le support (H) et le siège (A) sont correctement centrés. Veuillez-
vous assurer que les vis sont correctement serrées à la main et que le support
(H) est sûrement fixé. Essayez de bouger ou de tourner le siège enfant pour
vérifier si le support (H) est fermement attaché. S’il l’est, il ne bougera pas.
Cette étape est extrêmement importante pour la sécurité de l’enfant
et du cycliste.
SÉCURISER ET PLACER ENTOUTE SÉCURITÉ L'ENFANT SUR LE SIÈGE
15. Pour placer l'enfant en toute sécurité sur le siège, vous devez placer le
vélo sur un sol plat et dur pour une stabilité maximale du vélo. Même si votre
vélo est équipé d’une béquille robuste, vous devez toujours tenir le vélo
lorsque vous placez/retirez l'enfant. Vous devez porter votre enfant sur vos
genoux et le placer en toute sécurité sur le siège. Il est interdit à l'enfant de
monter seul sur le vélo ou d'utiliser les repose-pieds pour atteindre le siège.
16. Pour placer l’enfant sur le siège, veuillez, en premier lieu, détendre
complètement le harnais du système de rétention (B), en glissant tous les
ajusteurs de courroie (B2, B3) - ceci facilite le placement de l’enfant sur le
siège. Ensuite, ouvrir la sangle de sécurité (B1) en appuyant sur le bouton de
la sangle de sécurité. Assoir l’enfant, placer les sangles des épaules et de la
ceinture et ensuite, fermer les sangles de sécurité, ajuster la longueur de la
ceinture en utilisant les ajusteurs afin que l’enfant soit retenu en sécurité.
Avant d’initier tout parcours, veuillez toujours vérifier que l’enfant est sécurisé
• La position du siège vélo enfant doit être ajustée afin que le conducteur ne
puisse pas le toucher avec les pieds lorsqu’il pédale.
• Il est très important de régler correctement le siège et ses composants
afin d’offrir à l’enfant une sécurité et un confort optimal. Il est également
important que le siège ne soit pas incliné vers l’avant afin d’éviter que
l’enfant ne glisse hors du siège. Il est également important que le dossier soit
légèrement incliné vers l’arrière.
•Vérifiez que tous les éléments du vélo fonctionnent correctement lorsque le
siège vélo enfant est monté.
• Vérifiez les instructions du vélo et en cas de doute sur l’ajustement du siège
vélo de l’enfant à votre vélo, veuillez contacter votre distributeur vélo pour
plus d’information.

88#polisportmove#polisportmove
et que la ceinture est ajustée sans être trop serrée pour éviter que cela ne
blesse l’enfant. Selon la croissance de l’enfant, les hauteur et poids actuels,
vous pouvez ajuster la hauteur du harnais du système de rétention (B) sur
l’ensemble des ajusteurs de sangle (B2, B3), en remontant ou en reculant les
sangles jusqu’à atteindre la hauteur souhaitée.
17. Après l’ajustement final du harnais du système de rétention (B), veuillez
vérifier que les rembourrages des épaules (B4) – non disponible pour Bilby
Junior Evo – ne se trouvent pas trop près du cou de l’enfant afin d’éviter que
cela ne le blesse. Les sangles doivent être positionnées délicatement sur les
épaules, comme sur l'illustration.
18. Pour ajuster la hauteur des repose-pieds (D) à la taille de l’enfant, retirez
le repose-pied (D) du siège (A) en appuyant simultanément sur les deux
languettes et en levant le repose-pied comme indiqué sur l’image (il peut
s’avérer nécessaire d’exercer une certaine pression). Pour remettre les
repose-pieds, engager l’axe supérieur et pousser le repose-pied (D) vers le
bas afin de bloquer les pinces dans les ouvertures en fente.
19. Pour garantir la sécurité de votre enfant, ajustez les courroies de maintien
(E) des repose-pieds. Libérez la courroie (E) du cran d’arrêt et l’ajustez au pied
de l’enfant; fixez-la de nouveau en vous assurant qu’elle ne blesse pas
l’enfant.
COMMENT DÉMONTER VOTRE SIÈGE ENFANT D'UN VÉLO
INSTRUCTIONS SPÉCIFIQUES D’UTILISATION
20. Si vous choisissez de bloquer le bloc contre les vols, vous devrez tout d’abord retirer la vis de blocage (H8) à l’aide d’une clé Philips (non incluse) afin de
retirer le siège. Appuyer sur le bouton de déverrouillage (H3) sur le support (H) et pousser simultanément le siège du vélo (A) vers le haut et vers l’arrière
comme sur l’image
• Le conducteur du vélo doit être âgé de 16 ans au moins.
• Vérifiez les lois et règlements en vigueur dans votre pays concernant le
transport d’enfants à vélo.
•Transportez uniquement les enfants pouvant rester assis sans aide, pendant
un long moment, au moins durant la durée du de voyage envisagé.
• N’utilisez pas ce siège vélo enfant pour des enfants âgés de moins de
9 mois. Pour circuler comme passager, l’enfant doit pouvoir s’asseoir
bien droit et la tête haute lorsqu’il porte un casque de protection.
Consultez un médecin si l’enfant présente des problèmes de
développement.
• Assurez-vous que le poids et la hauteur de l’enfant ne dépassent pas la
capacité maximale du siège et vérifiez cette information régulièrement.
Vérifiez le poids de l’enfant avant d’utiliser le siège enfant. N’utilisez en aucun
cas le siège vélo enfant pour transporter un enfant dont le poids est
supérieur à la limite permise.
• Vérifiez de temps en temps que le poids et la hauteur de l’enfant ne
dépassent pas les limites admises pour l’usage du siège.
• Assurez-vous que l’enfant n’ait pas accès à la zone des freins afin d’éviter
tout accident. Ces ajustements devront être revus durant la croissance de
l’enfant.
• Veillez à protéger tout élément pointu du vélo que l’enfant pourrait toucher
(comme des câbles effilochés).
• Lorsque le siège vélo enfant n’est pas utilisé, bouclez la ceinture du harnais
de sécurité afin d’éviter que les sangles se balancent et touchent des parties
en mouvement (roues, freins, etc.) et présentent un danger pour le cycliste.
• Attachez l’enfant au siège en vous assurant que les ceintures de sécurité et
les sangles sont bien en place et correctement serrées (sans excès toutefois,
afin que l’enfant n’éprouve aucune gêne).
• Veuillez vérifier régulièrement les points d’attaches.
• Toujours utiliser le système et les sangles de retenue de sécurité afin de
garantir la sécurité de l’enfant sur le siège.
• Habillez l’enfant avec des vêtements adéquats selon les conditions
météorologiques.
• Les enfants sur les sièges doivent être vêtus plus chaudement que les
cyclistes ; ils doivent également être protégés de la pluie.
• Retirez le siège pour transporter le vélo en voiture (à l’extérieur). La
turbulence aérienne pourrait endommager le siège ou desserrer les fixations
au vélo, pouvant provoquer un accident.
• Les accompagnant doivent soigneusement examiner la stabilité/l’équilibre
au moment de placer l’enfant sur le siège du vélo.
• Assurez-vous que lorsque l’enfant se déplace sur le siège, il porte un casque
adapté qui respecte la norme EN 1078.
• Le siège ainsi que le coussinet peuvent être très chauds en cas de longue
exposition solaire ; assurez-vous qu’ils ne soient pas brûlants avant d’asseoir
l’enfant.
• Le siège enfant n’est pas adapté à une utilisation sportive ou dans le cadre
de conditions extrêmes, telles que : enduro, VTT, grands trous sur la route,
sauts et chemins hors route.
• Lors de la première excursion en vélo avec le siège fixé, testez et roulez dans
un environnement sûr et calme avant de vous déplacer sur une voie rapide.
• Lorsque l’angle de direction de chaque côté est réduit à moins de 45º,
changez le type de guidon.
Vérifiez que vous avez bien suivi l’ensemble des instructions. Une fois la
vérification effectuée, le siège velo enfant est prêt à être utilisé.
IL EST IMPÉRATIF DE LIRE le chapitre suivant sur les instructions de
sécurité lors de l’utilisation de votre siège vélo enfant.
AVERTISSEMENTS
AVERTISSEMENT: N’attachez aucun bagage
additionnel au siège enfant. Si vous transportez un
autre bagage, veillez à ne pas dépasser la capacité de
charge du vélo et nous recommandons qu’il soit
placé à l’arrière du vélo.
AVERTISSEMENT: Ne modifiez pas le siège.
AVERTISSEMENT: Le vélo peut répondre de manière
différente en présence d’un enfant sur le siège, en
particulier pour ce qui est de l’équilibre, de la
direction et du freinage.
AVERTISSEMENT: Ne jamais laisser le vélo garé avec
un enfant sur le siège vélo enfant sans surveillance.
AVERTISSEMENT: En cas de fissure ou si la surface se
décompose, cela indique que la durée de vie du siège
est terminée et qu’il doit être remplacé. En cas de
doute, veuillez prendre contact avec un professionnel.

9#polisportmove
ATTENTION
Le non-respect de ces instructions peut entrainer des blessures graves ou le décès du cycliste et/ou de l’enfant. Polisport n’est pas responsable des
dommages qui pourront survenir au produit ou aux personnes, en conséquence d’installation, rangement ou montage inappropriés, d’entretien
et usage incorrects, ou d’utilisation non conforme aux spécifications techniques ou d’utilisation (non-respect des instructions d’entretien et de
maintenance) ou encore de modifications ou de réparations réalisées par un tiers ou que vous aurez effectuées. En cas de doute, veuillez nous
contacter ou vous diriger à votre commerçant le plus proche afin que nous puissions vous aider pour vous garantir toute la sécurité lors de vos
déplacements avec le siège enfant de vélo.
ENTRETIEN
Pour garantir un bon fonctionnement et éviter les accidents, nous vous
recommandons de:
• Vérifier régulièrement si le système de fixation du siège vélo enfant au vélo
se trouve en bon état.
• Inspecter toutes les pièces en vérifiant leur bon fonctionnement. N’utilisez pas
le siège vélo enfant si l’une des pièces est endommagée. Toute pièce
défectueuse devra être remplacée. Pour tout remplacement, veuillez-vous
rendre chez un revendeur Polisport agréé. Vous serez ainsi en mesure de
trouver toutes les pièces détachées que vous souhaitez remplacer. Vous
pouvez également vous les procurer sur le site Internet www.polisport.com.
• Si vous avez souffert d’un accident avec le vélo mais que le siège vélo enfant
ne semble pas endommagé, nous vous recommandons tout de même de le
remplacer par un nouveau siège.
• Vérifier la propreté du siège vélo enfant ; lorsqu’il est sale, nettoyez-le avec
de l’eau et du savon (n’utilisez pas de produits abrasifs, corrosifs ou toxiques)
et laissez-le sécher à température ambiante.
GARANTIE
GARANTIE 2 ANS: Uniquement pour les composants mécaniques ayant des
défauts de fabrication.
UN AN SUPPLÉMENTAIRE DE GARANTIE: Uniquement pour les
composants mécaniques ayant des défauts de fabrication. Enregistrez votre
siège vélo enfant sur www.polisport.com.
Important : vous devez vous inscrire dans un délai de 2 mois à partie
de la date d’achat pour bénéficier de la Garantie supplémentaire d’un
an Polisport.
DEMANDES DE GARANTIE
Pour bénéficier du service de garantie, vous devez conserver votre facture.
Sans facture, la date de début de garantie des pièces retournées correspondra
à leur date de fabrication. La garantie ne s’appliquera pas en cas de
dommage causé par l’utilisateur, notamment en cas d’accident, d’utilisation
abusive, de modification du système ou d’utilisation non adaptée et
contraire aux recommandations du manuel d’utilisation.
Afin de garantir que vous possédez toute l’information requise pour activer la
garantie, il est nécessaire que vous gardiez l’information dont vous disposez
à travers votre Étiquette de traçabilité du produit (K).Vous pouvez également
garder votre information, ci-dessous.
O.F. ___________________ Date ___________________ .
* Les spécifications et la conception sont susceptibles de subir des
modifications sans avertissement préalable. Pour toute question, veuillez
nous contacter directement.
AVERTISSEMENT: Toujours vérifier la température
de la surface du siège avant son utilisation.
AVERTISSEMENT: Le siège enfant n’est pas adapté à
une utilisation sportive.
AVERTISSEMENT: Veillez systématiquement à ce que
la tête de l’enfant soit appuyée en position inclinée.
AVERTISSEMENT: La mobilité du guidon peut être
reduite par le siège.
AVERTISSEMENT: Les dispositifs de sécurité
supplémentaires doivent toujours être fixés.
PT PORTA-BEBÉ FRONTAL PARA BICICLETA
ATENÇÃO
Este produto contém pequenas peças como parafusos, sacos de plástico, e pequenos suportes de embalagem. Manter fora do alcance das crianças para evitar o
risco de asfixia.
ÍNDICE
ÍNDICE DO PRODUTO 10
INSTRUÇÕES DE MONTAGEM ESPECÍFICAS 10
Como montar a cadeira de bicicleta 10
Como montar a barra de segurança (apenas para Bilby Junior +) 10
Como montar o bloco de fixação na bicicleta 10
Como prender a cadeira de bicicleta ao bloco de fixação 11
Como bloquear o bloco de fixação 11
COMO COLOCAR A CRIANÇA EM SEGURANÇA NA CADEIRA E AJUSTAR OS SISTEMAS DE RETENÇÃO
11
COMO REMOVER A SUA CADEIRA DA BICICLETA 11
INSTRUÇÕES ESPECÍFICAS DE UTLIZAÇÃO 11
AVISOS 12
MANUTENÇÃO 12
GARANTIA 12

1010#polisportmove#polisportmove
ÍNDICE DO PRODUTO
A. ASSENTO PRINCIPAL
B. SISTEMA DE RETENÇÃO
B1. FIVELA DE SEGURANÇA
B2. FITAS DE AJUSTE VERTICAL
B3. FITAS DE AJUSTE CENTRAL
B4. OMBREIRAS
C. ESTOFO
D. POUSA-PÉS
E. ABRAÇADEIRA DO POUSA-PÉS
F.
CONJUNTO DE FIXAÇÃO DOVARÃO DE SUPORTE
F1.
PLACA DE FIXAÇÃO DO VARÃO DE SUPORTE
F2. PARAFUSO M8x16
F3. ANILHA DE PRESSÃO M8
F4. FÊMEA SEXTAVADA M8
F5. ANILHA DE PRESSÃO M8
G. VARÃO METÁLICO DE SUPORTE
H. BLOCO DE FIXAÇÃO AO QUADRO
H1. PARTE FRONTAL DO BLOCO DE FIXAÇÃO
H2. PLACA DE FIXAÇÃO DO BLOCO
H3. BOTÃO DE DESBLOQUEIO
H4. ADAPTADOR A – Ø22 a Ø30 mm
H5. ADAPTADOR B – Ø30 a Ø40 mm
H6. PARAFUSOS DE FIXAÇÃO M10x45
H7. FURO DO PARAFUSO DE BLOQUEIO
H8. PARAFUSO ANTI-ROUBO
I. BARRA DE SEGURANÇA (APENAS PARA BILBY
JUNIOR +)
I1+I2.
CONECTOR DA BARRA DE SEGURANÇA
J. CHAVE DE UMBRACO
J1. CHAVE DE UMBRACO Nº 6
J2. CHAVE DE UMBRACO Nº 8
K. INFORMAÇÃO DE RASTREIO
INSTRUÇÕES DE MONTAGEM ESPECÍFICAS
• A cadeira de bicicleta para crianças não pode ser montada em bicicletas
dobráveis.
• A cadeira de bicicleta para crianças não pode ser utilizada em Speed
Pedalecs que atinjam velocidades acima de 25km/h ou 15,5mph.
• Esta cadeira não pode ser montada em bicicletas com amortecedores traseiros.
• Esta cadeira não deve ser aplicado em veículos motorizados tais como
motociclos, scooters.
• Esta cadeira de bicicleta para crianças é apenas adequada para transportar
crianças com um peso máximo de 15kg e uma altura máxima de 93cm (e
crianças com idades recomendadas entre os 9 meses e os 3 anos, com um
peso e altura dentro dos limites relevantes).
• Esta cadeira não pode ser montada em bicicletas com tubos de quadro
triangulares, quadrados e de fibra de carbono.
• Esta cadeira tem de ser montada no tubo frontal de direção do quadro e
em bicicletas cujos esses tubos sejam redondos com diâmetros entre Ø22
e 40mm.
• A cadeira tem de ser montada em bicicletas com diâmetros de rodas entre
26”, 27,5”, 28”e 29”.
• A cadeira de bicicleta para crianças pode ser utilizada em EPAC / Pedelecs
que atinjam uma velocidade máxima de 25km/h ou 15,5mph.
• O peso do condutor e da criança transportada nunca deve superar a carga
máxima admitida para a sua bicicleta. Verifique o manual de instruções ou
consulte o fabricante para verificar se a sua bicicleta suporta este peso adicional.
• A cadeira só pode ser aplicada em bicicletas que permitam a aplicação de
tais cargas adicionais. Consulte o manual de instruções da sua bicicleta.
• A posição da cadeira deverá ser regulada de maneira a que o condutor não
toque com os joelhos na cadeira quando em andamento.
• É muito importante ajustar corretamente o assento e as peças para o
máximo conforto e a segurança da criança. É, também, importante que o
assento não incline para a frente, para que a criança não deslize para fora. É
importante que o encosto incline ligeiramente para trás.
• Verifique se todas as partes da bicicleta funcionam convenientemente com
a cadeira montada.
• Caso tenha dúvidas quanto à possibilidade de instalação da cadeira na
sua bicicleta, recomendamos que obtenha mais informações junto do
distribuidor da bicicleta.
COMO MONTAR A CADEIRA DE BICICLETA
COMO MONTAR O BLOCO DE FIXAÇÃO NA BICICLETA
1. Corte as fitas plásticas que seguram o bloco de fixação (H).
2. Vire a cadeira ao contrário, conforme indicado na imagem. Remova o varão
metálico de suporte (G) da cadeira, cortando as fitas e puxando-o para cima.
3. Utilize a chave Allen (J1) para remover os parafuso + anilha (F2+F3),
desengate e remova a placa de fixação do varão de suporte (F1).
4. Passe ambas as extremidades do varão metálico de suporte (G) pelas
aberturas da parte inferior da cadeira (A). Para ajustar a cadeira de acordo
com a bicicleta e o tamanho da criança, coloque o varão metálico de suporte
(G) numa das posições permitidas para mover a cadeira para a frente ou para
trás. Inicialmente, sugerimos colocá-lo na primeira posição.
5. Insira a placa de fixação do varão de suporte (F1) nas ranhuras da cadeira
(A) e prenda-a conforme indicado na imagem. Certifique-se de que a anilha
(F5) está devidamente colocada na ranhura traseira do assento da bicicleta.
Insira o parafuso de fixação + anilha (F2+F3) no furo posterior da placa de
8. Liberte os parafusos (H6) do bloco de fixação (H) com a chave Allen (J2) para
remover a a parte frontal (H1) e a placa de fixação do bloco (H2).
9. Remova os adaptadores (H4) que estão originalmente colocados dentro
do bloco de fixação (H).
10. Verifique qual a altura disponível e diâmetro da zona do tubo da direção
onde vai colocar o bloco (H) para proceder à correta seleção dos
adaptadores (H4 ou H5) a utilizar. Os diferentes sets de adaptadores estão
gravados na parte posterior com as letras A, A1, B e B1.
11. Depois de ter escolhido o conjunto de adaptadores mais indicado (H4/
H5), certifique-se que ficam convenientemente posicionados e encaixados
fixação do varão de suporte (F1). Tenha em atenção que a porca (F4) situada
debaixo do estofo pode soltar-se ao apertar ou desapertar a placa de fixação
do varão de suporte (F1). É necessário segurar a porca e colocá-la
corretamente na ranhura da cadeira, enquanto simultaneamente aperta o
sistema na sua totalidade com a outra mão. Recomendamos um torque de
6 Nm. Desta forma, irá montar a placa de fixação do varão de suporte (F1) e
o varão metálico de suporte (G) à cadeira (A). Este passo é extremamente
importante para a segurança do ciclista e da criança.
COMO MONTAR A BARRA DE SEGURANÇA (APENAS PARA BILBY JUNIOR +)
6. Prenda a barra de segurança (I) aos dois conectores da barra de segurança
(I1+I2).
7. Para abrir a barra de segurança, solte-a apenas do conector (I2).
dentro do bloco de fixação (H), fazendo corresponder as letras A e B à parte
frontal (H1) e A.1 e B.1 (H2) para a parte traseira do bloco.
12. Instale o bloco de fixação (H) corretamente no tubo da direção, com o
botão de bloqueio (H3), orientado em direção ao selim, e com a gravação
TOP para cima. Aperte os parafusos com a chave allen (J2), unindo assim
ambas partes do bloco de fixação (H1+H2). Certifique-se que as duas partes
do bloco estão corretamente encaixadas uma na outra, de forma simétrica.
Proceda ao aperto final utilizando a chave allen (J2). Para tal recomendamos
um aperto com um torque de 8Nm. Este passo é extremamente
importante para a segurança do ciclista e da criança.
11#polisportmove
COMO PRENDER A CADEIRA DE BICICLETA AO BLOCO DE FIXAÇÃO
COMO BLOQUEAR O BLOCO DE FIXAÇÃO (opcional)
13. Insira as extremidades do varão metálico de suporte (G) nos furos do
bloco de fixação (H), enquanto pressiona simultaneamente o botão de
desbloqueio (H3). Certifique-se de que as extremidades do varão metálico
de suporte (G) passam pelo bloco de fixação (H), conforme indicado na
imagem. Solte o botão (H3) e a cadeira ficará devidamente bloqueada.
Depois de instalar corretamente a cadeira de bicicleta, certifique-se de que o
14. Esta operação irá impedir que a cadeira seja removida da bicicleta. Para bloquear o bloco de fixação (H) evitando assim que a cadeira possa ser roubada,
insira o parafuso anti-roubo (H8) no furo de bloqueio (H7) e aperte com a chave Philips (não incluída).
bloco de fixação (H) e a cadeira (A) estão devidamente centrados. Certifique-
se de que os parafusos estão devidamente apertados e o bloco de fixação (H)
está preso de forma segura.Tente mover ou rodar a cadeira de bicicleta para
confirmar que o bloco de fixação (H) está corretamente instalado. Se estiver
corretamente instalado, não deverá mover-se. Este passo é extremamente
importante para a segurança do ciclista e das crianças.
COMO COLOCAR A CRIANÇA EM SEGURANÇA NA CADEIRA E AJUSTAR OS SISTEMAS DE RETENÇÃO
15. Para colocar a criança na cadeira , deve garantir que posiciona a bicicleta
numa superfície plana e em solo firme de modo a garantir a máxima
estabilidade da bicicleta. Mesmo que sua bicicleta tenha descansos robustos,
segure sempre a bicicleta, ao colocar/ retirar a criança. Para colocar a criança
na cadeira, deve pegar nela ao colo e sentá-la na cadeira. É estritamente
proibido que a criança suba sozinha para a bicicleta ou use os apoios para os
pés para trepar e chegar à cadeira.
16. Para colocar a criança na cadeira, primeiro estenda ao máximo o cinto de
segurança (B), fazendo deslizar os passadores (B2, B3) – isto fará com que a
colocação da criança na cadeira seja mais fácil. Depois, abre o cinto de
segurança (B1) pressionando o botão central. Coloque a criança, posicione
os cintos da cintura (quando aplicável) e do ombro e depois feche o cinto de
segurança, ajustando o comprimento do cinto e utilizando o sistema
ajustável, para que a criança fique segura. Antes de começar a sua viagem,
assegure-se sempre que a criança se encontra em segurança e que o cinto
está suficientemente apertado, mas não em demasia, ao ponto de a magoar.
De acordo com o peso e a altura da criança pode ajustar o cinto de segurança
(B) nos passadores (B2, B3), puxando-os para cima, ou para baixo, até atingir
o tamanho ideal.
17. Depois do ajuste final do cinto de segurança (B), assegure-se que os
estofos dos ombros (B4) – não disponível no Bilby Junior Evo – não estão
demasiado perto do pescoço da criança, evitando assim o contacto direto
com o pescoço. Os cintos devem estar posicionados ligeiramente acima dos
ombros, como demonstrado na figura.
18. Para ajustar a altura do pousa-pés (D) para a altura mais apropriada ao
tamanho da criança, retire o pousa-pés (D) da cadeira (A) pressionando as
patilhas simultaneamente e levante o pousa-pés como indicado na imagem
(poderá ter de aplicar alguma força no aperto das patilhas). Para voltar a encaixar
os pousa-pés, encaixe primeiro o pino superior, e empurre o pousa-pés (D) para
baixo, de modo a encaixar os clips na ranhura abaixo correspondente.
19. Para garantir a segurança da criança ajuste a abraçadeira (E) do pousa-
-pés. Desprenda a abraçadeira (E) do encaixe, ajuste-a ao pé da criança e
volte a encaixar. Certifique-se que a fivela não se encontra apertada em
demasia para não magoar a criança.
COMO REMOVER A SUA CADEIRA DA BICICLETA
INSTRUÇÕES ESPECÍFICAS DE UTLIZAÇÃO
20. Se tiver optado por bloquear o bloco contra roubo, deve primeiro remover o parafuso de bloqueio (H8), com a chave Philips (não incluída) para conseguir
libertar a cadeira. Prima o botão de desbloqueio (H3) do bloco de fixação (H) enquanto puxa simultaneamente a cadeira (A) para cima e para trás, conforme
indicado na imagem.
• O condutor dev• O condutor deve ter no mínimo 16 anos de idade.
• Verifique se no país em que utiliza a cadeira existe legislação específica
sobre o transporte de crianças em cadeiras para bicicletas. Se sim, cumpra-a.
• Transporte apenas crianças que conseguem manter-se sentadas, sem
apoio, durante um longo período de tempo (pelo menos, o tempo em que
durar a viagem de bicicleta).
• Nunca transporte crianças com idades inferiores a 9 meses de idade nesta
cadeira. Para poder ser transportada a criança deve conseguir manter-se
sentada, com a cabeça equilibrada sem esforço e com a cabeça protegida
com um capacete de bicicleta. Deve consultar um médico se a criança
apresentar um crescimento questionável.
• Confirme que em nenhuma situação o peso e o tamanho da criança não
excedem a capacidade máxima da cadeira. Para tal verifique o peso e
tamanho da criança regularmente antes de utilizar a cadeira. Em nenhuma
circunstância, deve usar a cadeira para a bicicleta para transportar uma
criança cujo peso esteja acima do limite permitido.
• Verificar de vez em quando se o peso e a altura da criança não excedem a
carga máxima permitida da cadeira.
• Certifique-se de que não é possível que qualquer parte do corpo ou
vestuário da criança entre em contacto com partes móveis da cadeira ou da
bicicleta. Estes ajustes têm de ser revistos com o crescimento da criança.
• Proteja qualquer objecto pontiagudo da estrutura da bicicleta que possa
em qualquer situação ser alcançado pela criança (exemplo: cabos soltos).
• Aperte todos os cintos mesmo quando não transporta nenhuma criança.
Evitando assim que as fivelas andem a balançar e entrem em contacto com
alguma parte móvel da bicicleta, travões, ou rodas, pois podem causar
acidentes.
• Após colocar a criança na cadeira deve, obrigatoriamente, ajustar de imediato
todos os cintos e abraçadeiras sem, contudo, incomodar ou magoar a criança.
• Verifique frequentemente a segurança do sistema de retenção.
• Utilize sempre todo o sistema de segurança e de retenção para garantir que
a criança esteja segura na cadeira.
• Aconselha-se vestir a criança com roupa adequada às condições climatéricas.
• A criança transportada na cadeira deverá estar melhor agasalhada do que
os ciclistas adultos, e protegida devidamente da chuva.
• Retire a cadeira ao transportar a bicicleta de carro (fora do carro). A
turbulência do ar pode danificar a cadeira ou danificar os elementos de
aperto ou outros que estejam suspensos, o que pode causar um acidente.
Certifique-se que seguiu e cumpriu todas as instruções dadas. Se sim, a sua
cadeira está pronta a ser utilizada.
É OBRIGATÓRIA A LEITURA INTEGRAL do capítulo seguinte relativo a
avisos de segurança sobre a utilização da sua cadeira.

1212#polisportmove#polisportmove
• Os acompanhantes devem considerar cuidadosamente a estabilidade /
equilíbrio da bicicleta ao colocar a criança na cadeira.
• Certifique-se de que as crianças usam um capacete adequado, que cumpra
a norma EN 1078 enquanto usam a cadeira.
• Verifique a temperatura da cadeira depois de uma longa exposição ao sol,
pois pode estar quente e queimar a criança.
• Esta cadeira de criança não é adequada para uso durante atividades
desportivas em condições extremas e abusivas como por exemplo: Enduro,
Downhill, nem como para ser usada em trilhos fora de estrada íngremes nem
estradas com pavimentos degradados.
• Antes de andar pela primeira vez com a cadeira montada e com a criança -
faça um teste de utilização e ande com a bicicleta e cadeira num ambiente
seguro/tranquilo antes de andar na estrada.
• Quando o ângulo de direção para cada lado é reduzido para menos de 45º,
mude o tipo de guiador.
AVISOS
AVISO: Não coloque bagagem adicional na cadeira.
Se necessitar de transportar peso extra, a
capacidade de carga da bicicleta não deve ser
excedida, além de que recomendamos que a
mesma seja colocada na traseira da bicicleta.
AVISO: Não modificar a cadeira.
AVISO: Quando a criança está sentada na cadeira, a
bicicleta pode adquirir, parada ou em andamento,
um comportamento diferente, em particular no que
se refere ao equilíbrio, controlo da direção, travagem
e à entrada e saída do condutor da bicicleta.
AVISO: Nunca deixe a bicicleta estacionada com a
criança lá sentada e sem vigilância.
AVISO: Qualquer indício de desgaste, fissura ou
degradação da cadeira, indicam que a vida útil do
produto foi atingida e que a mesma deve ser
substituída por uma nova. Um profissional deve ser
contatado em caso de dúvida.
AVISO: Verifique sempre a temperatura da
superfície da cadeira antes da sua utilização.
AVISO: Esta cadeira de criança não é adequada
para ser utilizada durante atividades desportivas
extremas.
AVISO: Assegure-se sempre de que a cabeça da
criança fica apoiada em posição reclinada.
AVISO: O movimento do guiador pode ficar
condicionado por causa da cadeira, reduzindo a
manobrabilidade.
AVISO: Os dispositivos de segurança adicionais
devem estar sempre fixos.
ATENÇÃO
O incumprimento destas instruções de montagem pode provocar lesões graves ou até mesmo a morte do condutor da bicicleta e / ou da criança.
A Polisport não se responsabiliza por qualquer dano material ou pessoal, resultante de instalação, armazenamento ou fixação incorretos (não
cumprimento das instruções de montagem), manutenção indevida, má utilização ou utilização não em conformidade com as especificações
técnicas ou de utilização (não cumprimento com as instruções de manutenção e cuidados a ter), alterações ou reparações feitas por si ou por
terceiros. Em caso de dúvidas, entre em contacto connosco ou com a nossa loja local, para podermos ajudar a garantir a sua segurança e a
segurança da criança enquanto utiliza a cadeira de bicicleta.
MANUTENÇÃO
Para boas condições de funcionamento e para prevenir acidentes
recomendamos o seguinte:
• Verifique regularmente o sistema de fixação da cadeira à bicicleta se
encontra em perfeitas condições.
• Inspecione todos os componentes verificando se trabalham eficazmente e
não use a cadeira se algum dos componentes estiver danificado. As partes
danificadas devem ser sempre substituídas. De modo a substituir estes
componentes deve dirigir-se a uma loja que seja vendedor autorizado
Polisport, de modo a poder obter os componentes indicados. Pode
encontrar os distribuidores no nosso website: www.polisport.com.
• Se tiver sofrido um acidente com a bicicleta, e a cadeira não tiver danos
visíveis, ainda assim recomendamos que troque a cadeira por uma nova.
• Inspecione a limpeza da cadeira e, quando suja, lave-a com água e sabão
(não use abrasivos, corrosivos ou produtos tóxicos), deixando-o secar à
temperatura ambiente.
GARANTIA
GARANTIA DE 2 ANOS: Apenas para componentes mecânicos onde se
encontrem defeitos de fabrico.
+ 1 ANO DE GARANTIA EXTRA: Faça o registo da sua cadeira em
www.polisport.com e obtenha mais um ano de garantia.
Nota Importante: o registo precisa de ser feito no prazo de 2 meses a
partir da data de compra para receber mais um ano extra de garantia.
RECLAMAÇÕES
Para que possa usufruir do nosso serviço de garantia deve guardar o recibo
de compra original durante o período de vigência da mesma. Para todos os
produtos ou componentes apresentados sem recibo de compra, será
considerado que o período de garantia teve início na data de produção do
produto. A cobertura pela garantia será considerada nula se o produto tiver
sido danificado ou destruído devido a qualquer tipo de acidente, mau uso,
modificação do produto, ou utilização indevida do mesmo. Para uma
utilização correta do produto deverá fazer-se a consulta e leitura do manual
de utilização.
Certifique-se de que tem toda a informação necessária para ativar a garantia,
guardando a informação que se encontra no informação de rastreio (K). Pode
registar aqui essa informação.
O.F. ___________________ Data ___________________ .
* As especificações e design podem ser objeto de alterações sem aviso
prévio. Por favor contate a Polisport se tiver alguma questão.

13#polisportmove
DE FAHRRAD KINDERSITZ FRONTMONTAGE
INHALTSVERZEICHNIS
PRODUKTINHALTSVERZEICHNIS 13
SPEZIFISCHE ANWEISUNGEN FÜR DIE MONTAGE 13
Allgemeine Anweisungen zum Einstellen des einbaufähigen Fahrrad Kindersitz
13
Wie Sie den Sicherheitsbügel einstellen (nur für Bilby Junior) 14
Wie Sie die Halterung am Fahrrad montieren 14
Wie sie den Fahrrad Kindersitz mit der Halterung verbinden 14
Wie sie Ihre Halterung verriegeln 14
SO PLATZIEREN UND SICHERN SIE DAS KIND IM DER KINDERSITZ 14
WIE MAN DEN SITZ VOM FAHRRAD ABNIMMT 14
SPEZIFISCHE ANWEISUNGEN FÜR DEN GEBRAUCH 15
WARNUNGEN 15
WARTUNG 16
GARANTIE 16
PRODUKTINHALTSVERZEICHNIS
A. KINDERSITZ
B. GURTE DES HALTESYSTEMS
B1. SICHERHEITSSCHNALLE
B2. OBERE GURTEINSTELLER
B3. ZENTRALER GURTEINSTELLER
B4. SCHULTERPOLSTER
C. SITZPOLSTER
D. FUSSSTÜTZEN
E. SICHERHEITSRIEMEN DER FUSSSTÜTZEN
F. MONTAGESATZ FÜR HALTEBÜGEL
F1. MONTAGEPLATTE AUS METALL
F2. SCHRAUBE M8x16
F3. UNTERLEGSCHEIBE M8
F4. MUTTER M8
F5. UNTERLEGSCHEIBE M8
G. METALL-HALTEBÜGEL
H. HALTERUNG
H1. FRONTTRÄGERTEIL
H2. HALTERUNGS-MONTAGEPLATTE
H3. ENTRIEGELUNGSTASTE
H4. ADAPTER A – Ø22 bis Ø30 mm
H5. ADAPTER B – Ø30 bis Ø40 mm
H6. SCHRAUBEN M10x45
H7. LOCH FÜR SICHERUNGSSCHRAUBE
H8. DIEBSTAHLSICHERUNGSSCHRAUBE
I. SICHERHEITSBÜGEL (NUR FÜR BILBY JUNIOR)
I1+I2. SICHERHEITSBÜGELVERBINDER
J. INBUSSCHLÜSSEL
J1. INBUSSCHLÜSSEL NR. 6
J2. INBUSSCHLÜSSEL NR. 8
K. INFORMATIONEN ZUR RÜCKVERFOLGBARKEIT
SPEZIFISCHE ANWEISUNGEN FÜR DIE MONTAGE
• Dieser Fahrradkindersitz darf nicht auf Klappfahrräder montiert werden.
• Dieser Fahrradkindersitz darf nicht auf Speed-Pedelecs mit einer
Geschwindigkeit von mehr als 25 km/h eingesetzt werden.
• Dieser Fahrradkindersitz darf nicht an Fahrrädern montiert werden, die mit
hinteren Stoßdämpfern ausgestattet sind.
• Dieser Kinderfahrradsitz darf nicht an motorisierten Fahrzeugen wie
Mopeds oder Scootern montiert werden.
• Dieser Fahrradkindersitz ist nur für den Transport von Kindern mit einem
maximalen Gewicht von 15 kg und einer maximalen Körpergröße von 93
cm geeignet (und Kinder mit einem empfohlenen Alter von 9 Monaten bis 3
Jahren – mit dem Gewicht und der Größe wie oben angegeben).
• Dieser Kindersitz darf nicht auf Fahrrädern mit quadratischen, dreieckigen
Rohren oder Carbonfaserrahmen angebracht werden.
• Der Kindersitz kann auf Fahrrädern mit runden oder ovalen Rahmen mit
Rohrdurchmessern zwischen Ø22 und Ø40 mm angebracht werden.
• Der Fahrradkindersitz darf nur an Fahrrädern mit einem Raddurchmesser
von 26”, 27.5”, 28”und 29”montiert werden.
• Dieser Kinderfahrradsitz kann auf EPAC / Pedelecs bis zu einer
Geschwindigkeit von 25 km/h eingesetzt werden.
• Das Gesamtgewicht des Radfahrers samt transportiertem Kind darf die für
das Fahrrad zugelassene Höchstlast nicht überschreiten. Informationen zur
Höchstlast finden Sie in der Gebrauchsanleitung des Fahrrads. Sie können
sich diesbezüglich auch an den Hersteller wenden.
• Der Sitz darf nur an einem Fahrrad montiert werden, das für die
Befestigung solcher Zusatzlasten geeignet ist. Bitte konsultieren Sie die
Bedienungsanleitung Ihres Fahrrads.
• Die Position des Fahrradkindersitzes muss so eingestellt sein, dass der
Fahrradfahrer während der Fahrt den Fahrradkindersitz nicht mit den Füßen
berührt.
• Es ist sehr wichtig, dass der Sitz und seine Bestandteile richtig eingestellt
werden, um optimalen Komfort und Sicherheit für das Kind zu gewährleisten.
Wichtig ist auch, dass der Sitz nicht nach vorne geneigt ist, sodass das Kind
nicht herausrutschen kann. Wichtig ist ferner, dass die Rückenlehne leicht
nach hinten geneigt ist.
• Prüfen Sie, ob alleTeile des Fahrrads mit montiertem Kindersitz sachgemäß
funktionieren.
• Beachten Sie die Gebrauchsanweisung des Fahrrads, und wenn Sie Zweifel
an der Montage des Fahrradkindersitzes an Ihrem Fahrrad haben, wenden
Sie sich für weitere Informationen bitte an Ihren Fahrradhändler.
ALLGEMEINE ANWEISUNGEN ZUM EINSTELLEN DES EINBAUFÄHIGEN FRONTKINDERSITZES
1. Schneiden Sie die Kunststoffbänder durch, die die Halterung (H) halten.
2. Drehen Sie den Kindersitz wie abgebildet um. Entfernen Sie die Metall-
Haltebügel (G) vom Sitz, indem Sie die Riemen schneiden, und ziehen Sie sie
nach oben.
3. Entfernen Sie mit dem Inbusschlüssel (J1) die Schrauben und
Unterlegscheibe (F2 und F3) und nehmen Sie die Montageplatte aus Metall
(F1) ab.
4. Führen Sie beide Enden des Metall-Haltebügels (G) durch die Öffnungen
des Sitz (A). Um den Fahrradkindersitz entsprechend der Fahrradgröße
einzustellen, und Kindergröße, stellen Sie den Metall-Haltebügel (G) in eine
der möglichen Positionen, um den Sitz nach hinten oder vorne zu bewegen.
Für den Anfang empfehlen wir Ihnen die Position Nr. 1.
5. Legen Sie die Montageplatte für den Haltebügel (F1) in die Nuten des
Sitzes (A) ein, und schließen Sie sie wie in der Abbildung gezeigt. Achten Sie
darauf, dass die Unterlegscheibe (F5) richtig in der hinteren Öffnung des
Sitzes sitzt. Stecken Sie die Befestigungsschraube und Unterlegscheibe (F2
und F3) in die hintere Bohrung der Montageplatte (F1) des Haltebügels.
Beachten Sie, dass sich die Mutter (F4) unter dem Kissen lösen kann, wenn
Sie die metallische Montageplatte des Haltebügels (F1) anziehen oder
lockern. Sie müssen die Mutter greifen, sie korrekt auf der Sitznut platzieren,
WARNUNG
Dieses Produkt enthält Kleinteile wie Bolzen, Plastiktüten und kleine Heftfäden. Bewahren Sie sie außerhalb der Reichweite von Kindern auf, um Erstickungsgefahr zu
vermeiden.

1414#polisportmove#polisportmove
WIE SIE DIE HALTERUNG AM FAHRRAD MONTIEREN
8. Lösen Sie die Schrauben (H6) von der halterung (H), mit dem
Inbusschlüssel (J2), um die Halterungs-Montageplatte (H2) zu entfernen.
9. Entfernen Sie die Adapter (H4), die sich bereits ursprünglich im Halterung
(H) befanden.
10. Prüfen Sie die verfügbare Höhe und den Durchmesser des Lenkrohrs, in
das der Halterung (H) eingesetzt werden soll, um sicherzustellen, dass der
richtige Adapter (H4/H5) verwendet wird. Die verschiedenen Adaptersätze
sind auf der Rückseite mit den Buchstaben A, A1, B oder B1 gekennzeichnet.
11. Wenn Sie den am besten geeigneten Adaptersatz (H4/H5) ausgewählt
haben, achten Sie darauf, dass er richtig positioniert ist und in die Halterung
(H) past, eingegebene Buchstabenfolge A und B nach FRONTTRÄGERTEIL
(H1) und A.1 + B.1 (H2) nach der Rückseite Halterung (H).
12. Montieren Sie die Halterung (H) korrekt in das Lenkrohr, wobei der
Entriegelungsknopf (H3) in Richtung Sattel zeigen muss. Setzen Sie die
Schrauben (H6) ein und ziehen Sie sie mit dem Inbusschlüssel (J2) fest, um
die beiden Teile des Halterrung (H1 und H2) miteinander zu verbinden.
Prüfen Sie, ob beide Teile der Halterung korrekt und symmetrisch
zusammengefügt sind. Mit dem Inbusschlüssel (J2) festziehen. Wir
empfehlen ein Anzugsdrehmoment von 8 Nm. Dieser Schritt ist für die
Sicherheit des Radfahrers und des Kindes äußerst wichtig.
WIE SIE DEN KINDERSITZ MIT DER HALTERUNG VERBINDEN
13. Stecken Sie die Enden des metall-haltebügel (G) in die Löcher der
Halterung (H) und drücken Sie gleichzeitig den Entriegelungsknopf (H3).
Vergewissern Sie sich, dass die Enden des metall-haltebügel (G) wie in der
Abbildung (2) gezeigt durch die Halterung (H) geführt werden. Lassen Sie
die Taste (H3) los, und der Kindersitz wird ordnungsgemäß eingerastet.
Achten Sie nach dem ordnungsgemäßen Einbau des Kindersitzes darauf,
dass der Halterung (H) und der Sitz (A) richtig zentriert sind. Vergewissern Sie
sich, dass die Schrauben fest angezogen sind und der Halterung (H) sicher
befestigt ist. Versuchen Sie, den Kindersitz zu bewegen oder zu drehen, um
zu prüfen, ob der Halterung (H) fest sitzt. Wenn sie richtig befestigt ist,
bewegt sie sich nicht. Dieser Schritt ist für die Sicherheit des Kindes und
des Radfahrers äußerst wichtig.
WIE SIE IHRE HALTERUNG VERRIEGELN
14. Um die Halterung (H) so zu befestigen, dass ein Diebstahl des Sitzes erschwert wird, müssen Sie die Diebstahlsicherungsschraube (H8) in die Halterung
(H2) einsetzen und festziehen. Dies erfordert die Verwendung des Kreuzschlitzschraubendreher (nicht enthalten).
SO PLATZIEREN UND SICHERN SIE DAS KIND IM DER KINDERSITZ
15. Um das Kind sicher in den Sitz zu setzen, müssen Sie das Fahrrad auf
einem ebenen und festen Untergrund abstellen, um eine maximale
Stabilität des Fahrrads zu gewährleisten. Auch wenn Ihr Fahrrad über einen
robusten Ständer verfügt, müssen Sie das Fahrrad immer festhalten,
während Sie das Kind hineinsetzen oder herausnehmen. Sie müssen Ihr
Kind auf dem Schoß tragen und es sicher auf den Sitz setzen. Es ist
verboten, dass das Kind alleine auf das Fahrrad klettert oder die Fußstützen
benutzt, um den Sitz zu erreichen.
16. Um das Kind in den Sitz zu setzen, ziehen Sie zunächst den Gurt des
Rückhaltesystems (B) so weit wie möglich aus, indem Sie alle Gurtversteller
(B2, B3) verschieben – so lässt sich das Kind leichter in den Sitz setzen.
Öffnen Sie dann die Sicherheitsschließe (B1), indem Sie den Knopf der
Sicherheitsschließe drücken. Setzen Sie das Kind in den Sitz, legen Sie den
Schulter-und denHüftgurt anundschließen Siedanndie Sicherheitsschließe.
Stellen Sie die Gurtlänge mit den Gurtverstellern ein, sodass Ihr Kind
gesichert ist. Überprüfen Sie vor Fahrtantritt immer, ob das Kind gesichert ist
und ob der Gurt fest, aber nicht so fest sitzt, dass er das Kind verletzt.
17. Sie können die Höhe des Gurtes des Haltesystems (B) an allen
Gurtverstellern (B2, B3) entsprechend dem Wachstum, der derzeitigen Größe
und dem Gewicht des Kindes einstellen, indem Sie die Gurtbänder nach
oben oder unten ziehen, bis die gewünschte Größe erreicht ist. Überprüfen
Sie nach der endgültigen Einstellung des Gurtes des Haltesystems (B), dass
die Schulterpolster (B4) (nicht verfügbar für Bilby Junior Evo) nicht zu nahe
am Hals des Kindes liegen, um Verletzungen zu vermeiden. Die Gurte sollten
etwas oberhalb der Schultern werden, wie in der Abbildung gezeigt.
18. Um die Höhe der Fussstütze (D) an die Größe Ihres Kindes anzupassen,
lösen Sie die Fußstütze (D) vom Kindesitz (A), indem Sie die beiden
Verschlüsse zusammendrücken und die Fußstütze wie abgebildet anheben
(möglicherweise ist dazu etwas Kraft erforderlich). Um die Fußstützen
wieder einzusetzen, setzen Sie zunächst den oberen Stift ein und schieben
die jeweilige Fußstütze (D) nach unten, damit die Clips in der entsprechenden
unteren Einsparung einrasten.
19. Um die Sicherheit Ihres Kindes zu gewährleisten, stellen Sie den Gurt (E)
der Fußstütze ein. Entriegeln Sie den Gurt (E) und passen Sie ihn an den Fuß
des Kindes an. Verriegeln Sie ihn wieder und achten Sie darauf, dass der Gurt
dem Kind nicht wehtut.
während Sie mit der anderen Hand das gesamte System festziehen. Wir
empfehlen ein Drehmoment von 6 Nm. Damit montieren Sie die
Montageplatte (F1) und die Metall-Haltebügel (G ) am Sitz (A). Dieser
Schritt ist für die Sicherheit des Kindes und des Radfahrers äußerst
wichtig.
WIE SIE DEN SICHERHEITSBÜGEL EINSTELLEN (NUR FÜR BILBY JUNIOR)
6. Stecken Sie den Sicherheitsbügel (I) in die beiden Sicherheitsbügelan-
schlüsse (I1 und I2).
7. Um den Sicherheitsbügel zu öffnen, klinken Sie ihn nur aus dem Stecker
(I2) aus.
WIE MAN DEN SITZ VOM FAHRRAD ABNIMMT
20. Wenn Sie sich entschieden haben, den Block gegen Diebstahl zu verriegeln, müssen Sie zuerst die Sicherungsschraube (H8) mit dem
Kreuzschlitzschraubendreher (nicht enthalten) entfernen, um den Sitz zu lösen. Drücken Sie die Entriegelungstaste (H3) an der Halterung (H) und ziehen Sie
gleichzeitig den metallischen Haltebügel (G), wie im Bild gezeigt, nach oben und hinten.
Vergewissern Sie sich, dass Sie alle Anweisungen befolgen und erfüllen.
Danach ist der Fahrradkindersitz einsatzbereit.
LESEN SIE UNBEDINGT das folgende Kapitel über Sicherheitshinweise
zur Verwendung Ihres Fahrradkindersitzes.

15#polisportmove
WARNUNGEN
WARNUNG: Befestigen Sie kein zusätzliches Gepäck
am Kindersitz. Wenn Sie zusätzliches Gepäck
mitführen, darf die Tragfähigkeit des Fahrrads nicht
überschritten werden, und wir empfehlen, dieses
rückseite am Fahrrad zu platzieren.
WARNUNG: Nehmen Sie am Sitz keine
Veränderungen vor.
WARNUNG: Das Fahrrad könnte sich mit einem
Kind auf dem Sitz anders als gewohnt verhalten,
insbesondere in Bezug auf Gleichgewicht, Lenkung
und Bremsen.
WARNUNG: Stellen Sie das Fahrrad mit einem Kind
auf dem Sitz niemals unbeaufsichtigt ab.
WARNUNG: Der Sitz darf nicht verwendet werden,
wenn irgendeinTeil defekt ist.
WARNUNG: Bei jeder Art von Rissen oder wenn die
Oberfläche anfängt, sich zu zersetzen, ist dies ein
Zeichendafür, dassdie Lebensdauer desSitzeserreicht
ist und er ersetzt werden sollte. Im Zweifelsfall sollte
ein Fachmann hinzugezogen werden.
WARNUNG: Prüfen Sie vor jederVerwendung jeder
Benutzung die Oberflächentemperatur des Sitzes.
WARNUNG: Dieser Kindersitz eignet sich nicht für
die Verwendung bei sportlichen Aktivitäten.
WARNUNG: Achten Sie immer darauf, dass der
Kopf Ihres Kindes in zurückgelehnter Position
gestützt wird.
WARNUNG: Bei Verwendung eines Kindersitzes
auf der Vorderseite des Fahrrads wird die
Lenkerbewegung eingeschränkt. Beachten Sie
diese Tatsache, bevor sie losfahren.
WARNUNG: Zusätzliche Sicherheitsvorrichtungen
müssen immer angebracht werden.
ACHTUNG
Die Nichtbeachtung dieser Gebrauchsanweisung kann zu schweren Verletzungen oder zum Tod des Fahrradfahrers und/oder des Kindes führen.
Polisport haftet nicht für Sachschäden am Produkt oder Personenschäden, die sich aus einer unsachgemäßen Anbringung, Lagerung oder
Montage (Nichteinhaltung der Montageanleitung), unsachgemäßen Wartung, unsachgemäßen oder nicht den technischen Spezifikationen
entsprechenden Nutzung (Nichteinhaltung der Wartungs- und Pflegeanleitung) oder aus Änderungen oder Reparaturen, die durch Sie oder von
einem Dritten vorgenommen werden, ergeben.
SPEZIFISCHE ANWEISUNGEN FÜR DEN GEBRAUCH
• Der Radfahrer muss mindestens 16 Jahre alt sein.
• Informieren Sie sich über die in Ihrem Land geltenden Gesetze und
Vorschriften für die Beförderung von Kindern auf Kindersitzen, die an
Fahrrädern angebracht sind.
• Befördern Sie nur Kinder, die längere Zeit allein sitzen können, mindestens
so lange wie die geplante Radfahrt.
• Transportieren Sie kein Kind unter 9 Monaten in diesem Fahrradkindersitz.
Um als Beifahrer mitfahren zu können, muss das Kind in der Lage sein,
aufrecht zu sitzen und den Kopf aufrecht zu halten, während es einen
Fahrradhelm trägt. Bestehen Zweifel an der Reife des Kindes, sollte ein Arzt
konsultiert werden.
• Stellen Sie sich, dass das Gewicht und die Größe des Kindes die maximale
Zuladung des Sitzes nicht überschreiten, und überprüfen Sie dies in
regelmäßigen Abständen. Überprüfen Sie das Gewicht des Kindes, bevor Sie
den Kindersitz verwenden. Benutzen Sie den Fahrradkindersitz auf keinen
Fall für die Beförderung eines Kindes, dessen Gewicht über der zulässigen
Grenze liegt.
• Vergewissern Sie sich von Zeit zu Zeit, dass das Gewicht und die Größe des
Kindes die maximal zulässige Höchstbelastung des Sitzes nicht
überschreiten.
• Achten Sie darauf, dass keine Körperteile oder Kleidungsstücke des Kindes mit
beweglichen Teilen des Sitzes oder des Fahrrads in Berührung kommen
können, und überprüfen Sie dies stets aus Neue, wenn das Kind wächst.
• Scharfe oder spitze Gegenstände am Fahrrad (z. B. ausgefranste Kabel), die
vom Kind erreicht werden könnten, müssen jederzeit abgedeckt werden.
•Wenn der Fahrradkindersitz nicht benutzt wird, schließen Sie die Gurtschnalle
des Sicherheitsgurtes, um zu verhindern, dass die Gurte durchhängen und mit
drehendenTeilen des Fahrrads wie Rädern, Bremsen usw. in Kontakt kommen,
was zu Unfällen oder Schäden führen könnte.
• Sichern Sie das Kind im Fahrrad Kindersitz und stellen Sie sicher, dass alle
Sicherungsgurte und Riemen zwar fest, jedoch nicht so straff angelegt sind,
dass sie dem Kind Unbehagen bereiten.
• Überprüfen Sie die Sicherheit der Befestigungselemente regelmäßig.
• Verwenden Sie immer sämtliche Sicherheitsrückhaltesysteme und Riemen,
um sicherzustellen, dass das Kind im Sitz gesichert ist.
• Kleiden Sie das Kind den Wetterbedingungen entsprechend.
• Kinder in Kindersitzen sollten wärmer gekleidet sein als Fahrradfahrer und
vor Regen geschützt werden.
• Nehmen Sie den Sitz ab, wenn Sie das Fahrrad mit dem Auto transportieren
(außerhalb des Pkw). Luftturbulenzen könnten den Sitz beschädigen oder
seine Befestigungen oder andere aufgehängte Elemente lösen, was zu
einem Unfall führen könnte.
• Die Begleitpersonen sollten sorgfältig auf die Stabilität/das Gleichgewicht
achten, wenn sie das Kind auf dem Fahrrad in den Sitz setzen.
• Stellen Sie sicher, dass Kinder während der Fahrt im Sitz einen geeigneten
Helm tragen, der der Norm EN 1078 entspricht.
• Sitz und Kissen können heiß werden, wenn sie längere Zeit der Sonne
ausgesetzt sind. Stellen Sie, bevor Sie das Kind hineinsetzen, sicher, dass
diese nicht zu heiß sind.
• Dieser Kindersitz ist nicht für den Gebrauch bei sportlichen Aktivitäten oder
unter extremen Bedingungen geeignet, wie z.B.: Enduro, hartes
Mountainbiking, große Straßenlöcher, Sprünge und Off-Road-Strecken.
• Wenn Sie erstmals mit dem angebrachten Sitz fahren, machen Sie eine
Probefahrt in einer ungefährlichen/ruhigen Umgebung, bevor Sie auf einer
Hauptverkehrsstraße fahren.
• Bei übermäßiger Beeinträchtigung des Lenkwinkels (Winkel von unter 45º
pro Seite) muss ein anderer Lenkertyp verwendet werden.

1616#polisportmove#polisportmove
WARTUNG
• Um den Kinderfahrradsitz in einem guten Betriebszustand zu halten und
Unfälle zu vermeiden, empfehlen wir Folgendes:
• Überprüfen Sie regelmäßig das Befestigungssystem des Sitzes am Fahrrad,
um sicherzustellen, dass er sich in einwandfreiem Zustand befindet.
Überprüfen Sie alle Komponenten auf ihre Funktionstüchtigkeit. Setzen Sie
den Sitz nicht ein, wenn einzelne Komponenten beschädigt sind.
Beschädigte Komponenten müssen ersetzt werden. Um sie zu ersetzen,
sollten Sie Ihren örtlichen Polisport-Vertragshändler aufsuchen, um die
richtigen Komponenten für den Austausch zu erhalten. Sie finden diesen auf
der Website: www. Polisport.com.
• Sollte sich mit Ihrem Fahrrad und Sicherheitssitz ein Unfall ereignet haben,
empfehlen wir Ihnen, einen neuen Sicherheitssitz zu erwerben. Wir raten
dazu, selbst wenn keine sichtbaren Schäden am Sitz vorliegen.
• Reinigen Sie den Sitz mit Wasser und Seife (verwenden Sie keine
scheuernden, ätzenden oder toxischen Produkte). Anschließend bei
Raumtemperatur trocknen lassen.
GARANTIE
2 JAHRE GARANTIE: auf alle mechanischen Komponenten nur gegen
Herstellerfehler.
+ 1 WEITERES JAHR GARANTIE: Registrieren Sie Ihren Sitz auf
www.Polisport.com, Um ein weiteres Jahr Garantie zu halten.
Wichtig: Sie müssen sich innerhalb von 2 Monaten nach dem
Kaufdatum registrieren, um die Polisport -Extra-Jahr-Garantie zu
erhalten.
GARANTIEANSPRÜCHE
Um Garantieleistungen in Anspruch nehmen zu können, müssen Sie den
Original-Kaufbeleg vorlegen. Bei Artikeln, die ohne Kaufbeleg
zurückgeschickt werden, wird davon ausgegangen, dass die Garantie mit
dem Herstellungsdatum beginnt. Jegliche Garantie erlischt, wenn das
Produkt durch einen Unfall, Missbrauch oder eine Systemänderung
beschädigt oder in einer Weise verwendet wird, die nicht der Beschreibung
in dieser Bedienungsanleitung entspricht.
Um sicherzustellen, dass Sie alle erforderlichen Informationen für die
Inanspruchnahme der Garantie haben, sollten Sie die Informationen auf
dem Etikett mit den Rückverfolgbarkeitsinformationen (K) gut aufbewahren.
Sie können diese Information auch hier vermerken.
Best.-Nr ___________________ Datum ___________________ .
* Die technischen Daten und das Design können ohne vorherige
Ankündigung geändert werden. Bei Fragen wenden Sie sich bitte an
Polisport.
BG ПРЕДНА ДЕТСКА СЕДАЛКА ЗА ВЕЛОСИПЕД
ВНИМАНИЕ
Този продукт съдържа малки "части" като болтове, пластмасови торбички и малки закачалки за опаковки. Дръжте ги далеч от деца, за да избегнете
опасност от задушаване.
СЪДЪРЖАНИЕ
СЪДЪРЖАНИЕ НА ПРОДУКТА 16
СПЕЦИФИЧНИ ИНСТРУКЦИИ ЗА МОНТАЖ 17
Как да поставите седалката за велосипед 17
Как да поставите предпазната преграда (само за Bilby Junior +) 17
Как да сглобите поставката във велосипеда 17
Как да свържете седалката за велосипед с поставката 17
Как да заключите модула за монтаж 18
КАК ДА ПОСТАВИТЕ БЕЗОПАСНО И УКРЕПИТЕ ДЕТЕТО В СЕДАЛКАТА
18
КАК ДА СВАЛИТЕ СЕДАЛКАТА ОТ ВЕЛОСИПЕДА 18
СПЕЦИФИЧНИ ИНСТРУКЦИИ ЗА ИЗПОЛЗВАНЕ 18
ПРЕДУПРЕЖДЕНИЯ 19
ПОДДРЪЖКА 19
ГАРАНЦИЯ 19
СЪДЪРЖАНИЕ НА ПРОДУКТА
A. ОСНОВНА СЕДАЛКА
B. СИСТЕМА ЗА ЗАДЪРЖАНЕ НА СБРУЯТА
B1. ПРЕДПАЗНА ЗАКОПЧАЛКА
B2. РЕГУЛИРАЩИ КАИШКИ ЗА ВИСОЧИНА
B3. ЦЕНТРАЛНИ РЕГУЛИРАЩИ КАИШКИ
B4. ПОДПЛЪНКИ ЗА РАМЕНЕ
C. ВЪЗГЛАВНИЦА
D. ПОСТАВКА ЗА КРАКА
E. РЕМЪК ЗА КРАКА
F. КОМПЛЕКТ ЗА ФИКСИРАНЕ НА
ПОДДЪРЖАЩАТА ГРЕДА
F1. ПЛАНКА ЗА ФИКСИРАНЕ НА
ПОДДЪРЖАЩАТА ГРЕДА
F2. ВИНт M8x16
F3. ШАЙБА M8
F4. ГАЙКА M8
F5. ШАЙБА M8
G. МЕТАЛНА ПОДДЪРЖАЩА ГРЕДА
H. ДЪРЖАЧ
H1. ПРЕДНА ЧАСТ НА ПОСТАВКАТА
H2.
ПЛАНКА ЗА ФИКСИРАНЕ НА ПОСТАВКАТА
H3. БУТОН ЗА ОСВОБОЖДАВАНЕ
H4. АДАПТЕР A – Ø22 до Ø30 mm
H5. АДАПТЕР B – Ø30 до Ø40 mm
H6. СЪЕДИНИТЕЛНИ ВИНТОВЕ M10 x 45
H7. ОТВОР ЗА ФИКСИРАЩ ВИНТ
H8. ВИНТ ПРОТИВ КРАЖБА
I.
ПРЕДПАЗНА ПРЕГРАДА (САМО ЗА BILBY JUNIOR +)
I1+I2.
КОНЕКТОР ЗА ПРЕДПАЗНА ПРЕГРАДА
J. ШЕСТОГРАМЕН КЛЮЧ
J1. ШЕСТОГРАМЕН КЛЮЧ № 6
J2. ШЕСТОГРАМЕН КЛЮЧ № 8
K. ИНФОРМАЦИЯ ЗА ПРОСЛЕДЯВАНЕ

17#polisportmove
СПЕЦИФИЧНИ ИНСТРУКЦИИ ЗА МОНТАЖ
• Тази детска седалка за велосипед не трябва да се монтира в сгъваеми
велосипеди.
• Тази детска седалка за велосипед не трябва да се използва на
велосипеди Speed Pedalec над 25 km/h/ 15,5mph.
• Детската седалка за велосипед не трябва да се монтира на велосипеди
със заден амортисьор.
• Тази детска седалка за велосипед не трябва да се монтира на
моторизирани превозни средства, като мотопеди и скутери.
• Тази детска седалка за велосипед е подходяща само за деца с
максимално тегло 15 kg и максимална височина 93 cm (и деца с
препоръчителна възраст от 9 месеца до 3 години – като теглото и
височината са от решаващо значение).
• Детската седалка не трябва да се монтира на велосипеди с триъгълна,
квадратна или карбонова рамка.
• Тази детска седалка за велосипед трябва да се монтира на велосипеди с
кръгла кормилна тръба на рамката с диаметър от Ø22 до Ø40 мм.
• Детското столче може да бъде монтирано върху велосипед с колела
с диаметър 66 см (26”), 69,85 см (27,5”), 71,12 см (28”) и 73,66 см (29”).
• Тази детска седалка за велосипед може да се използва на EPAC /
Pedelecs до 25km/h/15,5mph.
• Общото тегло на велосипедиста и транспортираното дете не
трябва да надвишава разрешения максимален товар за велосипеда.
Информация за максималния товар може да намерите в ръководството
за експлоатация на велосипеда. Можете също така да се свържете с
производителя по този въпрос.
• Седалката може да се монтира само на велосипед, подходящ за
закрепване на подобни допълнителни товари. Консултирайте се с
ръководството с инструкции на вашия велосипед.
• Позицията на седалката трябва да бъде регулирана така, че колоездачът
да не докосва седалката при въртене на педалите.
• Много е важно правилно да нагласите столчето и неговите съставни
части за постигане на оптимален комфорт и безопасност за детето.
Също така е важно столчето да не е наклонено напред, така че да няма
възможност детето да се изхлузи от него. Също така е важно облегалката
да е наклонена леко назад.
• Проверете дали всички части на велосипеда функционират нормално
след монтиране на детската седалка.
• Проверете инструкциите на велосипеда и ако имате някакви съмнения
относно монтирането на детската седалка на велосипеда, моля,
свържете се с доставчика на велосипеда за допълнителна информация.
КАК ДА ПОСТАВИТЕ СЕДАЛКАТА ЗА ВЕЛОСИПЕД
КАК ДА СГЛОБИТЕ ПОСТАВКАТА ВЪВ ВЕЛОСИПЕДА
КАК ДА СВЪРЖЕТЕ СЕДАЛКАТА ЗА ВЕЛОСИПЕД С ПОСТАВКАТА
1. Срежете пластмасовите ремъци, които държат поставката (H).
2. Обърнете детската седалка на обратно, както е показано на
изображението. Свалете металната поддържаща греда (G) от седалката,
като срежете ремъците и я изтеглите нагоре.
3. Използвайте гаечния ключ (J1), за да премахнете винтовете + шайбите
(F2+F3) и разкачете и отстранете планката за фиксиране на
поддържащата греда (F1).
4. Прокарайте двата края на металната поддържаща греда (G) през
отворите на долната част на седалката (A). За да регулирате детската
седалка за велосипед според размера на детето и велосипеда, поставете
металната поддържаща греда (G) в една от позволени позиции, за да
придвижите седалката назад или напред. В началото предлагаме да я
поставите на позиция № 1.
5. Вкарайте планката за фиксиране на поддържащата греда (F1) в
жлебовете на седалката (A) и я затворете, както е показано на картината.
Уверете се, че шайбата (F5) е поставена правилно в задния жлеб на
велосипедната седалка. Вкарайте съединителния винт + шайбата
8. Разхлабете винтовете (H6) от държача (H) с гаечния ключ (J2), за да
отстраните предната част на държача (H1) и задната монтажна планка на
държача (H2).
9. Премахнете адаптерите (H4), които са поставени фабрично в
поставката (H).
10. Проверете наличните височина и диаметър на тръбата на
кормилната колонка, в която ще поставяте поставката (H), за да се
уверите, че е използван правилният адаптер (H4 или H5). Буквите A, A1,
B и B1 са гравирани на гърба на различните комплекти с адаптери.
11. След като изберете най-подходящия комплект с адаптер (H4/H5), се
13. Вкарайте краищата на металната поддържаща греда (G) в отворите
на поставката (H), докато същевременно натискате бутона за
освобождаване (H3). Уверете се, че краищата на металната
поддържаща греда (G) ще преминат през поставката (H), както е
показано на картината. Освободете бутона (H3) и седалката на
велосипеда ще бъде правилно заключена на място. След правилното
монтиране на седалката за велосипед се уверете, че държачът (H) и
(F2+F3) в задния отвор на планката за фиксиране на поддържащата
греда (F1). Обърнете внимание, че гайката (F4) под възглавничката може
да се разхлаби, докато затягате или разхлабвате планката за фиксиране
на поддържащата греда (F1). Трябва да хванете гайката, да я поставите
правилно в жлеба на седалката, докато напълно затегнете цялата
система с другата ръка. Препоръчваме въртящ момент на затягане от 6
N.m. По този начин ще монтирате планката за фиксиране на
поддържащата греда (F1) и металната поддържаща греда (G) към
седалката (A). Тази стъпка е изключително важна за безопасността
на детето и велосипедиста.
КАК ДА ПОСТАВИТЕ ПРЕДПАЗНАТА ПРЕГРАДА (САМО ЗА BILBY JUNIOR +)
6. Закачете предпазната преграда (I) в двата конектора на предпазната
преграда (I1+I2).
7. За да отворите предпазната преграда, я разкачете само от конектора
(I2).
уверете, че е позициониран и вкаран правилно в държача (H), като
напаснете буквите A и B отпред (H1) и A.1 и B.1 (H2) отзад на модула.
12. Монтирайте внимателно държача (H) в тръбата на кормилната
колонка, при което бутонът за освобождаване (H3) да сочи към седлото
и думата„TOP“ да е обърната нагоре. Затегнете на ръка винтовете (H6) с
гаечния ключ (J2), като съберете заедно двете части на държача
(H1+H2). Уверете се, че двете части на поставката са правилно поставени
симетрично заедно. Затегнете с гаечния ключ (J2). Препоръчваме
затягане с въртящ момент 8Nm. Тази стъпка е изключително важна
за безопасността на детето и велосипедиста.
седалката (A) са центрирани правилно. Уверете се, че винтовете са
правилно затегнати на ръка и че държачът (H) е здраво закрепен.
Опитайте се да преместите или завъртите седалката за велосипед, за
да проверите дали модулът за фиксиране (H) е здраво закрепен. Ако е
правилно закрепен, тя няма да се движи. Тази стъпка е
изключително важна за безопасността на детето и
велосипедиста.

1818#polisportmove#polisportmove
КАК ДА ЗАКЛЮЧИТЕ МОДУЛА ЗА МОНТАЖ (по желание)
14. Това ще попречи на премахването на стола от велосипеда. За да заключите държача (H) с цел предотвратяване на кражба на стола, поставете
винта против кражба (H8) в заключващия отвор (H7) и затегнете с отвертка Phillips (не е включена).
КАК ДА ПОСТАВИТЕ БЕЗОПАСНО И УКРЕПИТЕ ДЕТЕТО В СЕДАЛКАТА
15. За да поставите безопасно детето в седалката, трябва да поставите
велосипеда върху равна и твърда повърхност за максимална стабилност.
Дори ако велосипедът е оборудван със здрава стойка, трябва винаги да
го държите, докато поставяте/изваждате детето. Трябва да носите детето
в скута си и да го поставите безопасно върху седалката. Забранено е
детето да се катери самостоятелно на велосипеда или да използва
поставките за крака, за да достигне.
16. За да поставите детето в седалката, първо удължете докрай сбруята
на системата за задържане (B), като плъзнете всички регулатори на
ремъците (B2, B3) – това улеснява поставянето на детето в седалката.
След това отворете обезопасителната катарама (B1), като натиснете
копчето на обезопасителната катарама. Сложете детето да седне,
поставете ремъците за раменете и кръста, след което затворете
обезопасителната катарама, регулирайте дължината на колана чрез
регулаторите на ремъка, така че детето да е надеждно обезопасено.
Преди да потеглите, винаги проверявайте дали детето е обезопасено и
дали коланът е плътно прилепнал, но не толкова затегнат, че да наранява
детето. Според растежа на детето, текущата височина и теглото му
можете да регулирате височината на сбруята на системата за задържане
(B) от всички регулатори на ремъците (B2, B3), като издърпате нагоре
или надолу ремъците, докато достигнете желания размер.
17. След окончателното регулиране на сбруята на системата за
задържане (B) се уверете, че подплънките за раменете (B4) – не са
налични при Bilby Junior Evo – не са твърде близо до врата на детето, за
да не го наранят. Ремъците трябва да бъдат позиционирани малко над
раменете, както е показано на картината.
18. За да регулирате височината на поставката за крака (D) в зависимост
от височината на детето, освободете поставката за крака (D) от седалката
(А) чрез едновременно натискане на двата фиксатора един към друг и
повдигнете поставката за крака, както е показано във фигурата (може да
е необходимо да се приложи известен натиск). За да прикрепите отново
поставките за крака, първо зацепете горния щифт и натиснете опората
за крака (D) надолу, за да се заключи с клипса в отворите на слотовете.
19. За да се гарантира безопасността на вашето дете, регулирайте
ремъка (E) на поставката за крака. Отключете ремъка (E) и го регулирайте
в зависимост от краката на детето. Заключете го отново, като се уверите,
че ремъкът не наранява детето.
КАК ДА СВАЛИТЕ СЕДАЛКАТА ОТ ВЕЛОСИПЕДА
СПЕЦИФИЧНИ ИНСТРУКЦИИ ЗА ИЗПОЛЗВАНЕ
20.Ако сте избрали да заключите блокировката против кражба, трябва първо да свалите винта против кражба (H8) с отвертка Philips, за да освободите
седалката. Натиснете бутона за освобождаване (H3) на поставката (H) и същевременно издърпайте нагоре и назад седалката за велосипед (A), както
е показано на изображението.
• Kолоездачът трябва да бъде най-малко на 16 години.
• Проверете действащите закони и разпоредби във вашата страна,
свързани с превозване на деца на допълнителни седалки към
велосипеди.
• Превозвайте само деца, които са в състояние самостоятелно да седят
за по-дълъг период от време, поне толкова продължително, колкото
имате намерение да пътувате.
• Hе използвайте седалката за деца по-малки от 9 месеца. За да може
детето да се вози безопасно в тази седалка, то трябва да е способно да
седи изправено и да държи главата си изправена, носейки върху нея
велосипедна каска.
• Уверете се, че теглото и височината на детето не надвишават
максималния капацитет на детската седалка и проверявайте това на
редовни интервали. Проверете теглото на детето, преди да използвате
детската седалка. При никакви обстоятелства не трябва да използвате
детската седалка за велосипед, за да транспортирате дете, чието тегло е
над допустимото.
• Не забравяйте да проверявате от време на време дали теглото и
височината на детето не надвишават максимално допустимото
натоварване на седалката.
• Уверете се, че не е възможно която и да било част от дрехите или
тялото на детето да влезе в контакт с движещите се части на седалката
или велосипеда, като проверявате това в течение на времето с
израстването на детето.
• Трябва да покриете всички остри или стърчащи елементи на
велосипеда (напр протрити кабели), които може да бъдат достигнати от
детето, при всяка ситуация.
• Kогато детската седалка не се използва, закопчейте безопасната
закопчалка на обезопасителния колан, за да предотвратите провисване
на ремъците и попадането им във въртящи се части на велосипеда,
напр. колела, спирачки и др, тъй като това може да бъде опасно за
велосипедиста.
• Подсигурете детето в детската седалка като се уверите, че всички
обезопасителни колани и ремъци са опънати, но не толкова стегнати, че
да причиняват дискомфорт на детето.
• Проверявайте често безопасността на закрепващите елементи.
• Винаги използвайте всички системи за обезопасяване и каишки, за да
се уверите, че детето е подсигурено на детската седалка.
• Oбличайте детето с подходящи дрехи според времето.
• Децата в седалките е необходимо да бъдат по-топло облечени от
велосипедистите и мотоциклетистите и трябва да бъдат защитени от дъжд.
• Свалете седалката при транспортиране на велосипеда с кола (чрез
поставяне отвън на колата). Въздушната турбуленция може да повреди
седалката или да разхлаби прикрепването й към велосипеда, което
може да доведе до инцидент.
• Придружаващите лица трябва внимателно да вземат предвид
стабилността/баланса, когато слагат детето в седалката на велосипеда.
• Гарантирайте, че децата носят подходящ шлем, отговарящ на EN 1078,
когато се возят в седалката.
• Cедалката и възглавницата може да се нагреят, ако са изложени
продължително време на слънце. Уверете се, че не са прекалено
горещи преди да поставите детето в седалката.
• Тази детска седалка не е подходяща за използване по време на спортни
дейности или при екстремни условия, като например: ендуро, трудно
планинско колоездене, големи дупки на пътя, неравности и пресечени
местности.
• При първо колоездене с монтирана детска седалка изпробвайте велосипеда
в безопасна/ненатоварена среда, преди да го карате по магистрала.
• Когато ъгълът на завиване от всяка страна е намален до по-малко от
45º, променете типа на ръкохватката.
Уверете се, че правилно сте следвали и изпълнили всички дадени
инструкции. Ако е така, то детското столче е готово за ползване.
ЗАДЪЛЖИТЕЛНО ТРЯБВА ДА ПРОЧЕТЕТЕ следния раздел по
инструкции за безопасност при използване на детско столче.

19#polisportmove
ПРЕДУПРЕЖДЕНИЯ
ПРЕДУПРЕЖДЕНИЕ: Не поставяйте
допълнителен багаж на седалката. Ако носите
допълнителен багаж, товароподемността на
велосипеда не трябва да се надвишава и
препоръчваме да го поставите в задната част на
велосипеда.
ПРЕДУПРЕЖДЕНИЕ: Не модифицирайте
седалката.
ПРЕДУПРЕЖДЕНИЕ: Велосипедът може да се
управлява различно с дете в седалката, особено
по отношение на баланса, завиването и
спирането.
ПРЕДУПРЕЖДЕНИЕ: Никога не оставяйте
велосипеда паркиран с дете в седалката, без
наблюдение.
ПРЕДУПРЕЖДЕНИЕ: При всякакъв вид
напуквания или в случай че повърхността
започне да се разрушава, това означава, че
животът на седалката е достигнал своя край и тя
трябва да бъде сменена. В случай на съмнения
трябва да се свържете със специалист.
ПРЕДУПРЕЖДЕНИЕ: Винаги проверявайте
температурата на повърхността на продукта
преди употреба.
ПРЕДУПРЕЖДЕНИЕ: Детската седалка не е
подходяща за употреба при спортна дейност.
ПРЕДУПРЕЖДЕНИЕ: Винаги гарантирайте, че
главата на детето ви има опора дори и в
наклонена позиция.
ПРЕДУПРЕЖДЕНИЕ: Подвижността на
кормилото може да бъде намалена от седалката.
ПРЕДУПРЕЖДЕНИЕ: Допълнителни
приспособления за безопасност трябва винаги
да бъдат закрепяни.
ВНИМАНИЕ
Неспазването на тези инструкции за работа може да доведе до сериозни наранявания или смърт на велосипедиста и/или детето. 2.
Polisport не носи отговорност за щети по продукта или лица, които са резултат от неправилно монтиране, съхранение или монтаж
(неспазване на инструкциите за монтаж), неправилна поддръжка, неправилна употреба или употреба, която не е извършена съгласно
техническите спецификации или спецификациите за употреба (неспазване на инструкциите за поддръжка и грижа), модификации или
поправки, извършени от вас или от трета страна. Ако имате някакви съмнения, се свържете с нас или с местния магазин, за да можем да
ви съдействаме и да гарантираме безопасността на вас и детето ви, докато карате със седалката за велосипед.
ПОДДРЪЖКА
За да запазите детската седалка в добро състояние и да предотвратите
инциденти, ние ви препоръчваме следното:
• Проверявайте регулярно системата за фиксиране на седалката към
велосипеда, за да се уверите, че е в перфектно състояние.
• Проверявайте всички компоненти, за да видите дали работят правилно.
Не използвайте седалката, ако някои от компонентите са повредени.
Повредените компоненти трябва да бъдат сменени. За да замените
отделни части, трябва да отидете в магазин за велосипеди, който е и
оторизиран дистрибутор на „Polisport“, за да получите правилните
компоненти за замяната. Може да ги намерите на интернет страницата:
www.polisport.com
• Ако сте претърпели злополука с велосипеда и детската седалка, ви
съветваме да закупите нова детска седалка. Дори ако няма никакви
видими повреди по седалката.
• Почиствайте седалката със сапун и вода (не използвайте абразивни,
корозивни или токсични продукти).
ГАРАНЦИЯ
2 ГОДИНИ ГАРАНЦИЯ: За всички механични компоненти само при
производствени дефекти.
+ 1 ДОПЪЛНИТЕЛНА ГОДИНА ГАРАНЦИЯ: Регистрирайте се на
www.polisport.com и ВЗЕМЕТЕ още една година гаранция.
Важно: трябва да се регистрирате в рамките на 2 месеца от датата
на покупката, за да получите допълнителна гаранция от още една
година на Polisport.
ГАРАНЦИОННИ ПРЕТЕНЦИИ
За да получите гаранционно обслужване, трябва да имате оригинална
касова бележка. При артикули, върнати без касова бележка, се счита, че
гаранцията е започнала да тече от датата на производство. Всички
гаранции ще са невалидни, ако продуктът е повреден поради удар от
ползвателя, злоупотреба, промени в системата, или използване не по
предназначение, не както е описано в ръководството за употреба.
За да се уверите, че имате цялата необходима информация, за да
активирате гаранцията, трябва да пазите информацията, която имате във
вашия етикет с информация за проследяване (K). Можете също така да
запишете тази информация тук.
O.F. ___________________ Дата ___________________ .
* Дизайнът и спецификацията могат да бъдат променяни без
уведомление. Моля, свържете се с Polisport, ако имате някакви въпроси.

2020#polisportmove#polisportmove
CS PŘEDNÍ DĚTSKÁ SEDAČKA NA JÍZDNÍ KOLO
UPOZORNĚNÍ
Tento výrobek obsahuje malé části, jako jsou šrouby, plastové sáčky a malé závěsy na obaly
. Balicí materiál uchovávejte mimo dosah dětí, abyste předešli riziku udušení.
OBSAH
OBSAH BALENÍ 20
ZVLÁŠTNÍ POKYNY PRO MONTÁŽ 20
Jak nastavit cyklosedačku 20
Jak nastavit bezpečnostní tyč (pouze pro Bilby Junior +) 21
Jak sestavit držák na jízdním kole 21
Jak připevnit cyklosedačku do držáku 21
Jak zamknout držák 21
JAK BEZPEČNĚ USADIT DÍTĚ DO SEDAČKY 21
JAK SUNDAT CYKLOSEDAČKU Z JÍZDNÍHO KOLA 21
ZVLÁŠTNÍ POKYNY PRO POUŽITÍ 22
VAROVÁNÍ 22
ÚDRŽBA 22
ZÁRUKA 23
OBSAH BALENÍ
A. HLAVNÍ SEDAČKA
B. POSTROJ ZÁDRŽNÉHO SYSTÉMU
B1. BEZPEČNOSTNÍ SPONA
B2. SEŘIZOVAČ VÝŠKOVÉHO POPRUHU
B3. SEŘIZOVAČ STŘEDOVÉHO POPRUHU
B4. POLSTROVÁNÍ NA RAMENOU
C. POLSTROVÁNÍ
D. OPĚRKA NOHY
E. ŘEMINEK OPĚRKY NOHY
F. SADA PRO PŘICHYCENÍ PODPŮRNÉ TYČE
F1.
DESTIČKA PRO PŘICHYCENÍ PODPŮRNÉ TYČE
F2. ŠROUB M8x16
F3. PODLOŽKA M8
F4. MATICE M8
F5. PODLOŽKA M8
G. KOVOVÁ PODPŮRNÁ TYČ
H. DRŽÁK
H1. PŘEDNÍ ČÁST DRŽÁKU
H2. DESTIČKA PRO PŘICHYCENÍ DRŽÁKU
H3. ROZPÍNACÍ TLAČÍTKO
H4. ADAPTÉR A – Ø22 až Ø30 mm
H5. ADAPTÉR B – Ø30 až Ø40 mm
H6. ŠROUBY PRO PŘICHYCENÍ M10x45
H7. DÍRA PRO ZAJIŠŤOVACÍ ŠROUB
H8. ŠROUB PROTI KRÁDEŽI
I. BEZPEČNOSTNÍ TYČ (POUZE PRO FOR BILBY
JUNIOR +)
I1+I2.
SPOJOVACÍ ČLÁNEK BEZPEČNOSTNÍ TYČE
J. IMBUSOVÝ KLÍČ
J1. IMBUSOVÝ KLÍČ Č. 6
J2. IMBUSOVÝ KLÍČ Č. 8
K. INFORMACE O DOHLEDATELNOSTI
ZVLÁŠTNÍ POKYNY PRO MONTÁŽ
• Tato dětská cyklosedačka nesmí být montována na skládací kola.
• Tato dětská cyklosedačka nesmí být užívána na elektrokolech a rychlých
elektrokolech při rychlostech nad 25 km/h / 15,5 mph.
• Tato dětská cyklosedačka nesmí být instalována na kolo se zadními tlumiči.
• Tato dětská cyklosedačka nesmí být montována na motorová vozidla, jako
jsou mopedy a skútry.
• Tato dětská cyklosedačka je vhodná pouze pro převoz dětí o maximální
hmotnosti 15 kg a o maximální výšce 93 cm (doporučený věk dětí je 9
měsíců až 3 roky, přičemž váha a výška dítěte jsou rozhodujícími faktory).
• Tato dětská cyklosedačka nesmí být instalována na kolo s hranatým nebo
trojúhelníkový rámem nebo rámem z uhlíkového vlákna.
• Tato dětská cyklosedačka je určena na kola s kulatou a trubkou rámu o
průměru 22 až 40 mm.
• Dětskou sedačku lze namontovat na jízdní kola o průměru kol of 26”, 27,5”,
28 a 29’’.
• Tato dětská cyklosedačka může být užívána na EPAC / Pedelecs do 25 km/h
/ 15,5 mph.
• Celková hmotnost cyklisty a přepravovaného dítěte nesmí překročit
maximální dovolenou užitnou hmotnost jízdního kola. Informace o
maximální užitné hmotnosti jízdního kola najdete vnávodu použití jízdního
kola a nebo můžete kontaktovat výrobce/dovozce jízdního kola.
• Sedačka může být uchycena pouze na jízdní kolo, které je uzpůsobeno pro
její uchycení. Zkontrolujte prosím údaje v příručce pro vaše jízdní kolo.
• Rovněž zkontrolujte umístění sedačky, při šlapání nesmíte kopat do sedačky.
• Je velmi důležité správně nastavit sedačku a její komponenty k zajištění
optimálního pohodlí dítěte. Je rovněž důležité, aby se sedačka nenakláněla
dopředu a dítě z ní nevyklouzávalo. Je rovněž důležité, aby bylo zadní
opěradlo nakloněno mírně dozadu.
• Před jízdou vždy zkontrolujte funkčnost Vašeho kola a rovněž upevnění a
nastavení sedačky.
• Zkontrolujte návod použití jízdního kola a jestliže máte jakékoliv
pochybnosti ohledně uchycení dětské sedačky na jízdní kolo, kontaktujte
výrobce/dovozce jízdního kola.
JAK NASTAVIT CYKLOSEDAČKU
1. Uřízněte plastové popruhy, které drží Držák (H).
2. Otočte dětskou sedačku vzhůru nohama, jak je naznačeno na obrázku.
Odstraňte kovovou podpůrnou tyč (G) ze sedačky tím, že přeříznete popruhy
a zatáhnete nahoru.
3. Použijte inbusový klíč (J1) k odstranění šroubů + podložek (F2+F3) a
rozpojte a vyjměte destičku pro přichycení podpůrné tyče (F1).
4. Provlečte oba konce kovové podpůrné tyče (G) skrze díry ve spodní části
sedadla (A). Pro úpravu dětské sedačky podle velikosti jízdního kola a dítěte,
nastavte kovovou podpůrnou tyč (G) do jedné ze povolených pozic, abyste
mohli posouvat sedačku dopředu a dozadu. Pro začátek doporučujeme
použít pozici č. 1.
5. Vložte destičku pro uchycení podpůrné tyče (F1) do drážek sedadla
This manual suits for next models
12
Table of contents
Languages:
Other Polisport Bicycle Accessories manuals

Polisport
Polisport WALLABY EVOLUTION User manual

Polisport
Polisport MOVE GUPPY MINI RANGE User manual

Polisport
Polisport Bubbly Maxi User manual

Polisport
Polisport Guppy Maxi+ User manual

Polisport
Polisport Guppy User manual

Polisport
Polisport JUNIOR BILBY User manual

Polisport
Polisport BUBBLY MAXI+ User manual

Polisport
Polisport Guppy Maxi User manual

Polisport
Polisport BILBY User manual

Polisport
Polisport Child Trailer User manual