Quick Start Guide CMQT-5100C
This Quick Start Guide is an overview. Users are asked
to review the enre manual for detailed instrucons
Included Hardware:
• Carrying pouch.
• CoachMic transmier (QT-5100C)
• Micro USB charging cable
Users Also Need:
• Q5X Gateway (remote control)
• Handheld MicCommander (QG-H2) or
• Network Gateway (QG-N3)
• Analog receiver
• Microphone (1-pin Lemo connector)
• Bring the transmier out of storage mode (minimal
baery draw) and into standby mode (detectable but
the UHF radio is o) using either method below:
• Hold the ON/OFF buon unl the status LED changes
from ashing rapidly to slowly, or
• Plug and unplug a powered micro USB charging cable
into the side of the transmier.
• Connect the 1-pin Lemo microphone.
• Install the antenna on the top. (NEVER power the
unit without the antenna in place.)
• Power the Gateway as instructed in its manual.
• Turn on the unit by pressing the power buon.
• The screen on the Gateway displays the serial
number of paired transmiers.
• Press the <MENU> buon to either scan for
transmiers or add the serial number found on the
PlayerMic antenna.
Adjust:
• Set the funcons in the two transmier menus of the
Gateway. Screen one includes frequency, power on/
o, baery level, mic mute/live and mic oset.
• Screen two includes: transmier name, group, RF
power, 2.4GHz channel, storage and reboot.
:
8 hours @ 2/10mW 4 hours @ 20mW
Dimensions:
65.5mm x 42mm x 18.5mm
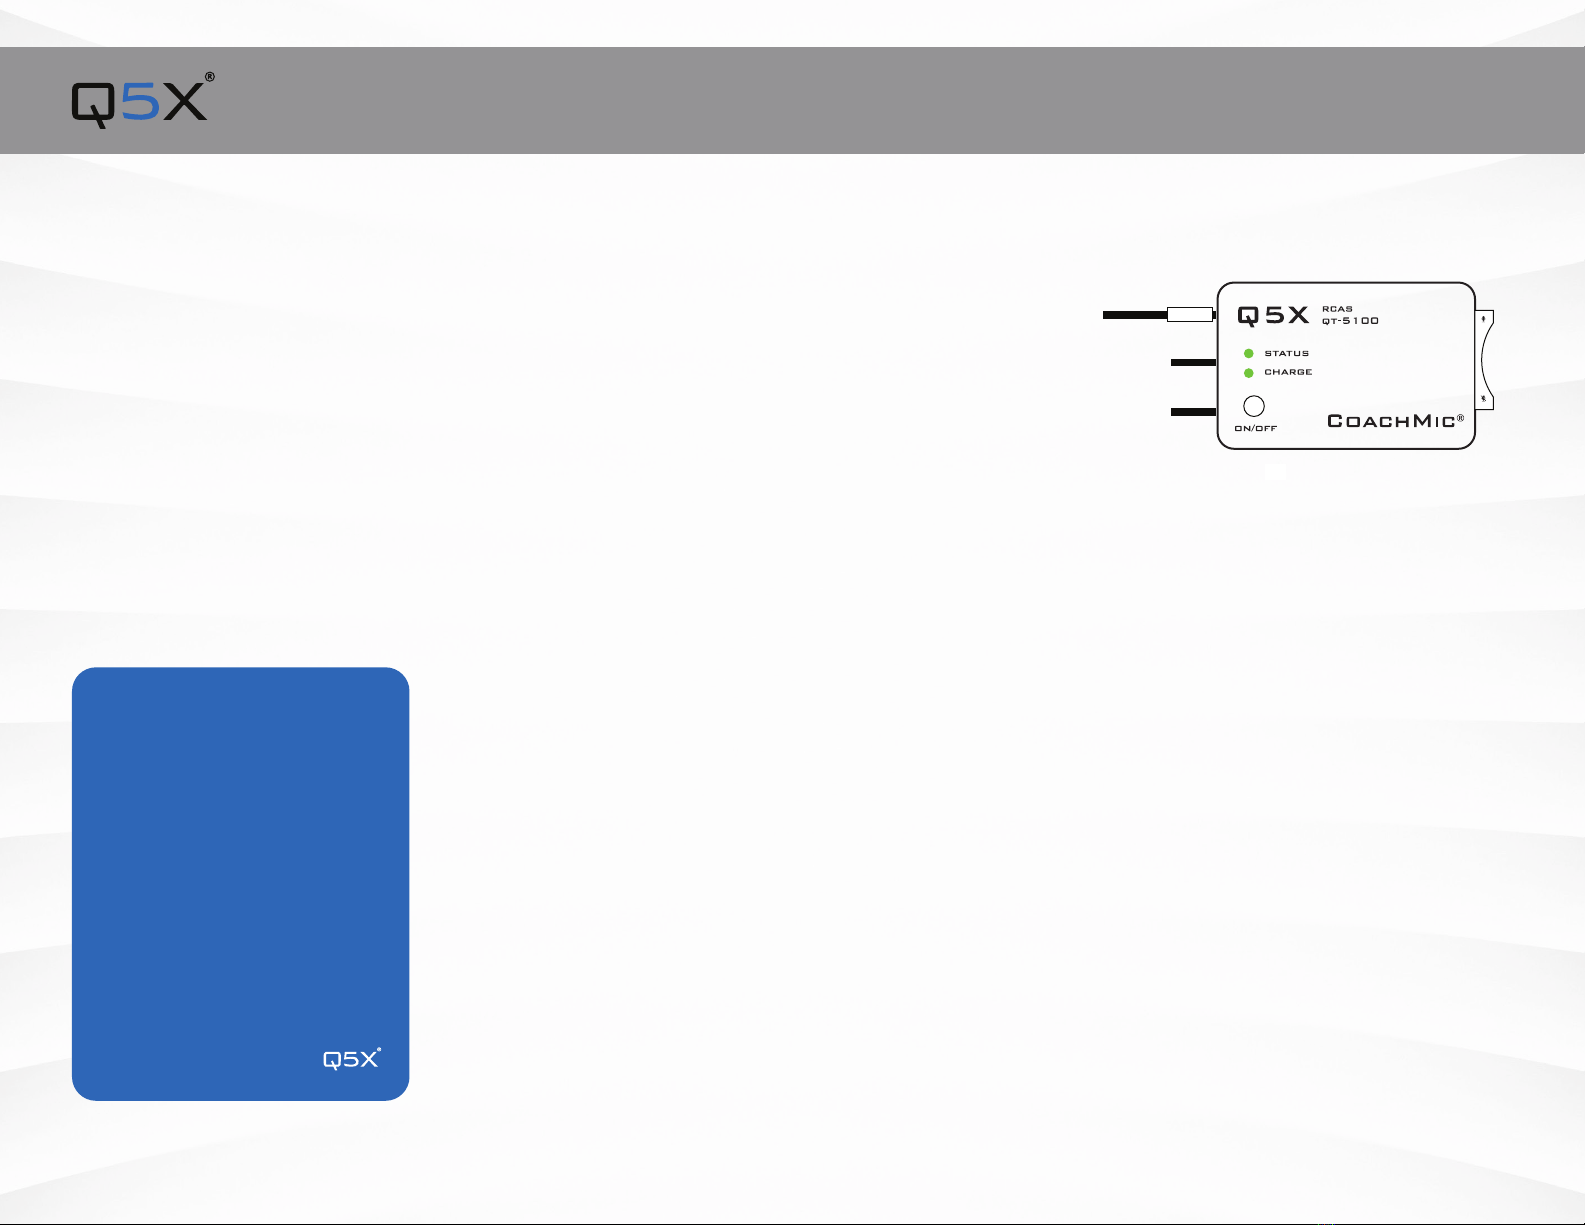
Hardware Diagram:
Key:
1. 2.4 G antenna: For the RCAS control channel.
2. Audio input: Connects to a waterproof
microphone with a 6-pin Lemo connector.
3. UHF antenna: For RF signal transmission.
4. Serial number: The unique number for RCAS ID
and control is on the back of the AquaMic.
5. N/A
6. Status: See manual for details on LED
paerns and colours.
7. Charge: Red = charging, green = charged
and ashing red/green = error.
8. Charging port: AquaMic charges through the
same connector as the audio input using the
charge dongle.
9. On: There is no manual power
control buon on the AquaMic to maintain the
waterproof seal.
10. Belt clip holes: Allows vercal and horizontal
placement.
3
2
1
11
4
7
6
9
81
10
10
When using the CoachMic, the
belt clips can be congured
to wear the transmier
horizontally on the le or right
side of the body, or vercally in
a pocket.
The mute funcon can be
controlled by either the
integrated rocker switch or
wirelessly by the Gateway.


