INSTRUCTIONS
GOTCHA®PLUS INSTALLATION
RAB Lighting is committed to creating high-quality, affordable, well-designed and energy-efficient LED lighting and controls that make it easy for electricians to install
and
end
users
to
save
energy
.
W
e’
d
love
to
hear
your
comments.
Please
call
the
Marketing
Depar
tment
at
888-RAB-1000
or
email:
[email protected]LIGHTS DO NOT TURN OFF
1. Make sure sensor is not aimed at something that would
move or change temperature such as waving branches,
water, air conditioners, windows or heating vents - even on
neighboring property. You can test for infrared sources in the
area by placing a box or bag over the sensor. Put sensor into
Test Mode. After the initial 60 seconds of the lights being on,
lights should stay off. Wave your hand inside the bag in front
of sensor. Lights should go on and then time out. If sensor
operates properly when covered, check items 2-6.
2. Make sure sensor is mounted firmly and does not move even
slightly when touched. If it moves, tighten all screws.
3. Make sure that Sensor is not mounted on an unstable object
such as a tree or a pole that will move in the wind.
4. Was sensor wired hot? If so, circuitry may have been damaged.
5. Make sure sensor is not aimed within 30 feet of a road.
6. Make sure heat from lights is not triggering sensor. Make sure
the sensor is below and as far as possible away from lights.
7. Make sure sensor is not in initial 60 sec warm up period.
Warm up period will activate every time power is turned
off and re-applied to sensor.
LIGHTS DO NOT TURN ON
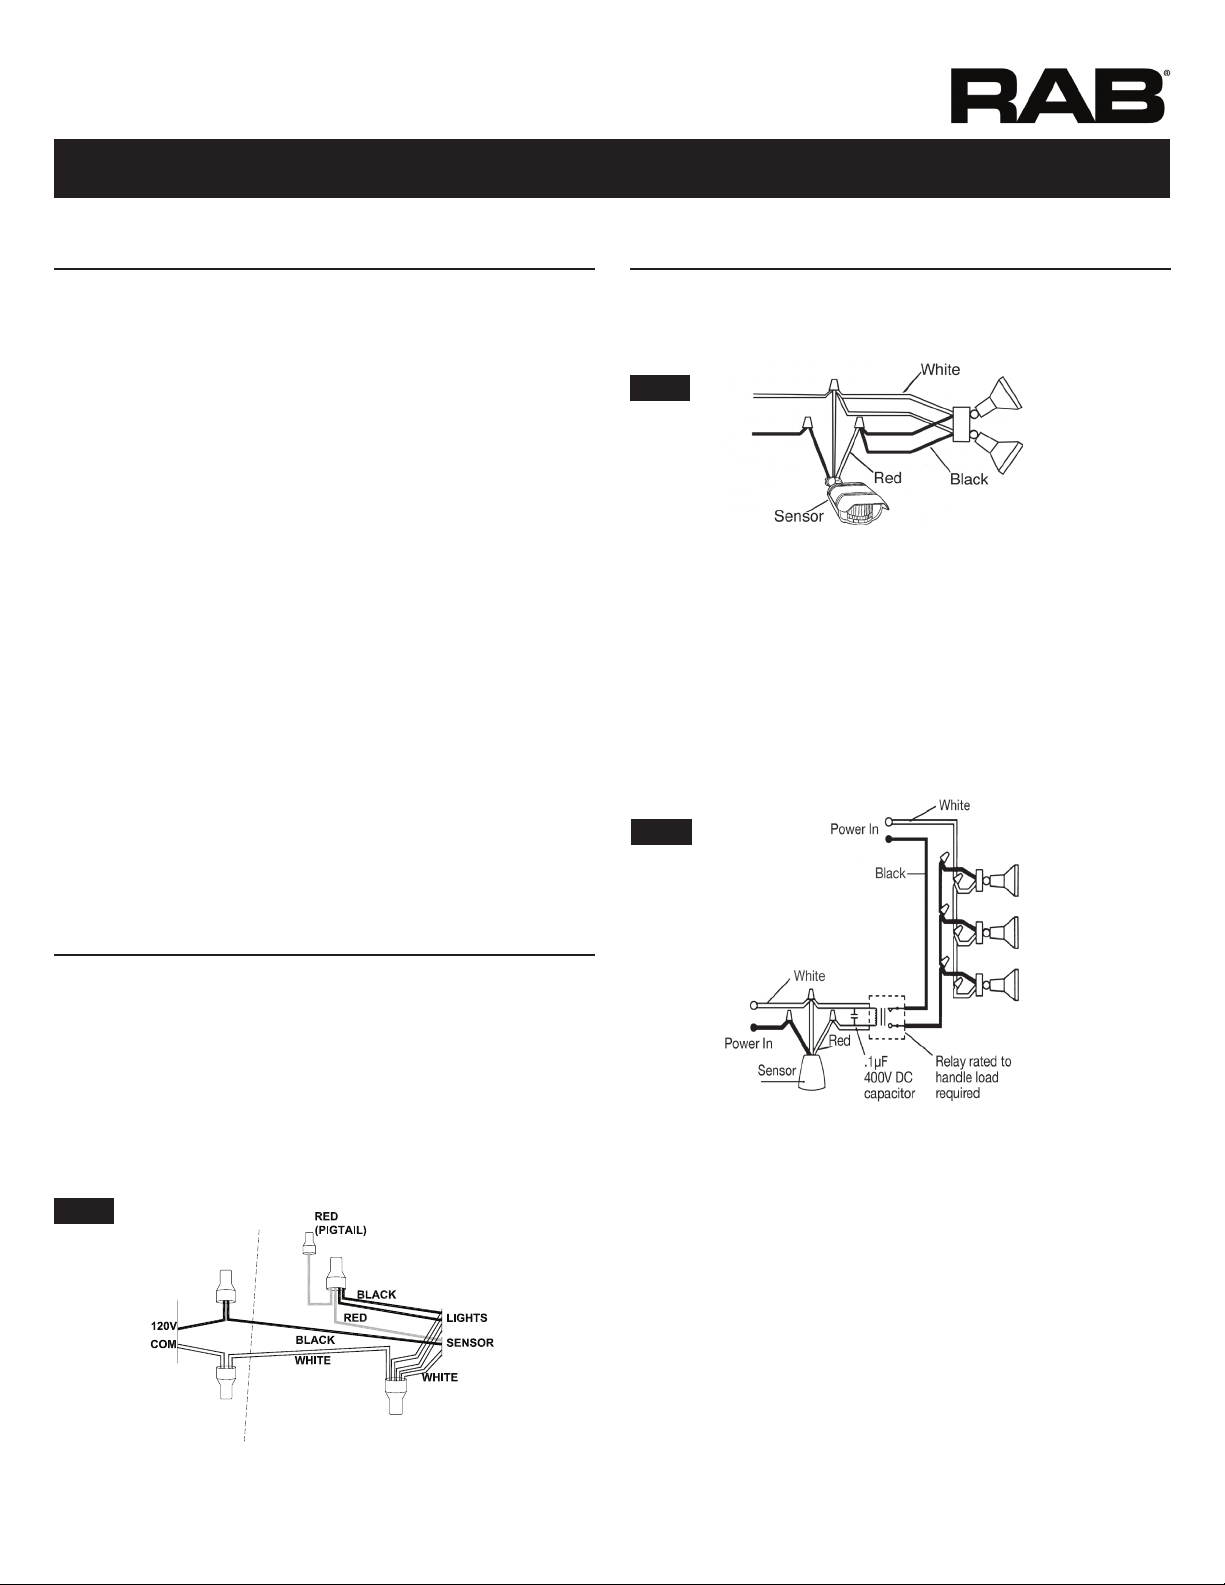
1. Check that lamps and fixtures work. Compare wiring to the
Wiring Diagram in this manual. Check that the power is on.
2. Check that lights from other sources, such as adjacent porch
lights, garden lights, streetlights or lights from inside the house
are not in the sensor’s view. See #1 under “Lights Turn Off
Too Quickly”.
3. Was sensor wired hot? If so, circuitry may have been damaged.
4. If sensor is painted, make sure there is no paint on the lens and
that the lens paint mask is removed.
5. Check that time adjustment control is not set past 15 min mark.
RANGE APPEARS LIMITED
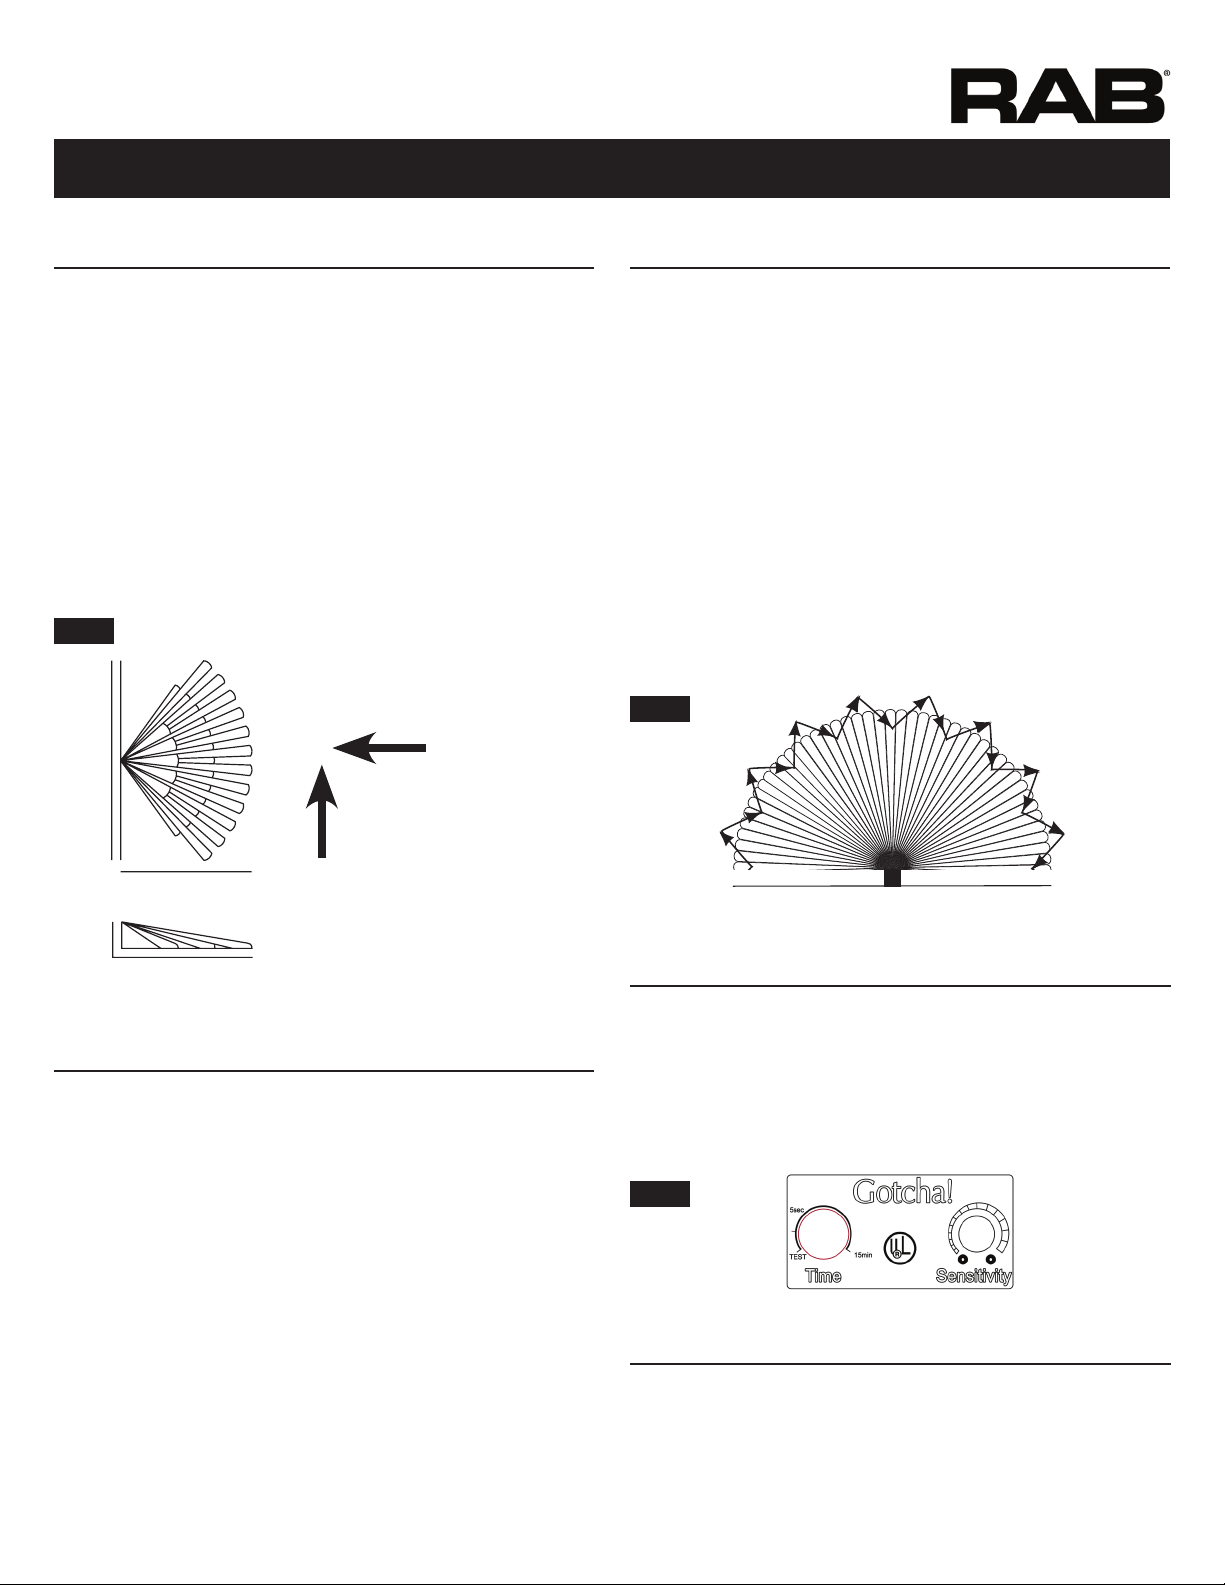
1. Check that the sensor is level from side to side and pointed at
the area you desire. If unit is tilted, part of the Detection Zone
may be high in the air over people’s heads.
2. Check that the sensor is not mounted too high. If mounted
above 20 feet, much of the usable range will be lost.
3. If sensor is painted, make sure there is no paint on the lens and
that the lens paint mask is removed.
LIGHTS TURN OFF TOO QUICKLY
1. Make sure the Time Control is not set to test mode or set to
the minimum setting which would be 5 seconds. Change time
setting on knob on bottom of the sensor.
TROUBLESHOOTING
5
Branches blowing may
activate sensor
Solution: Position sensor exactly level from side to side.
Solution: Mounting at 8’ to 10’allows maximum range.
40'
20'
8’-10’
50'
Problem: Sensor is triggered by
unwanted movement or heat source.
Solution: Tilt sensor or mask lens
in the direction of the source.
Move sensor or source.
Problem: Passing cars activate sensor.
Solution: A 20’ safety zone between the sensor and road is
recommended to avoid activation from passing cars. You may
tilt sensor to not aim in the direction of the street or mask top of
sensor lens to reduce range.