ReChargx RX022 User manual

TonerRellKits.com RechargX™RX022
Mon-Fri8am-5pmET©1995-2011ReChargX™,EmptyX,TonerRellKitsandTonerRellKits.com,theTonerRellKitslogo,the 2011.05.20
800.527.3712or352.343.7533ReChargX™andEmptyXlogosaretrademarksownedbyTonerRellkits,LLC.Allrightsreserved. Page1of7
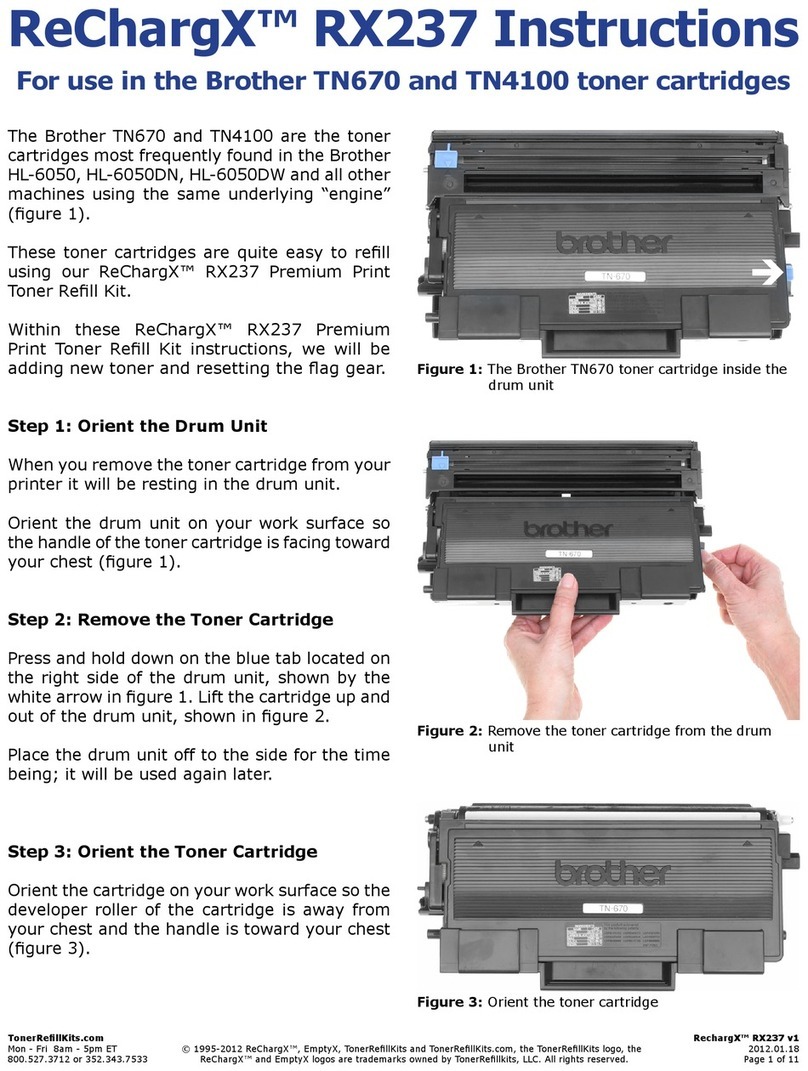
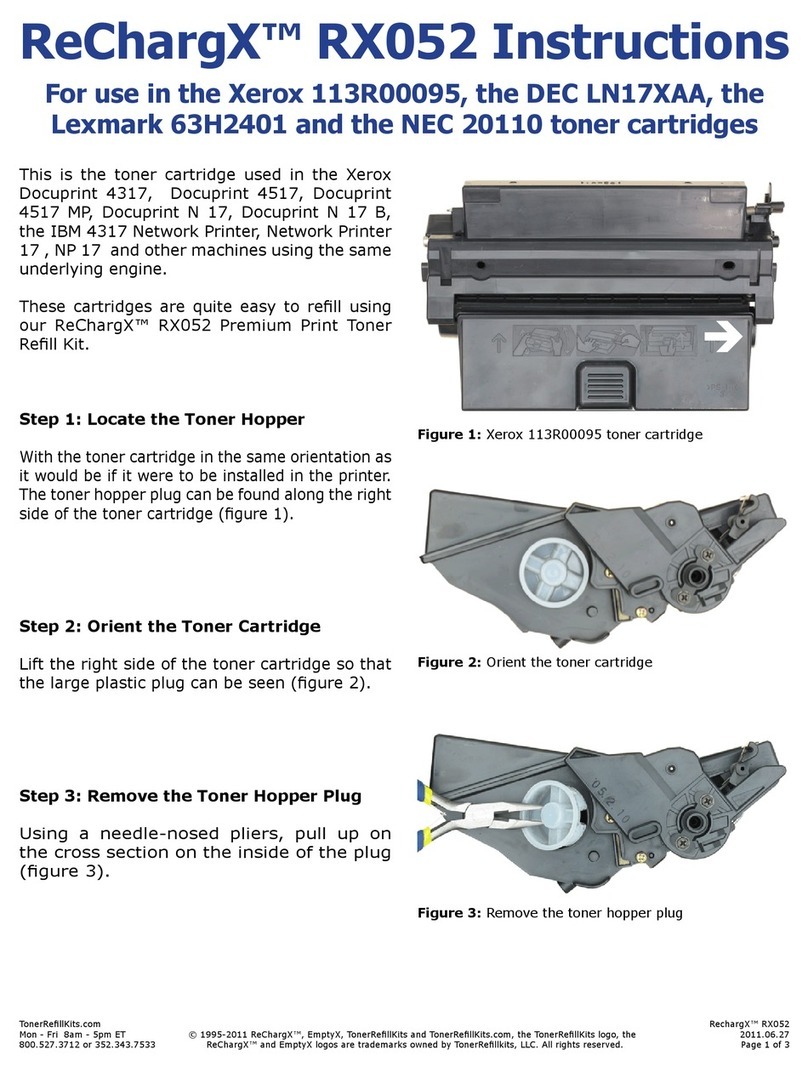
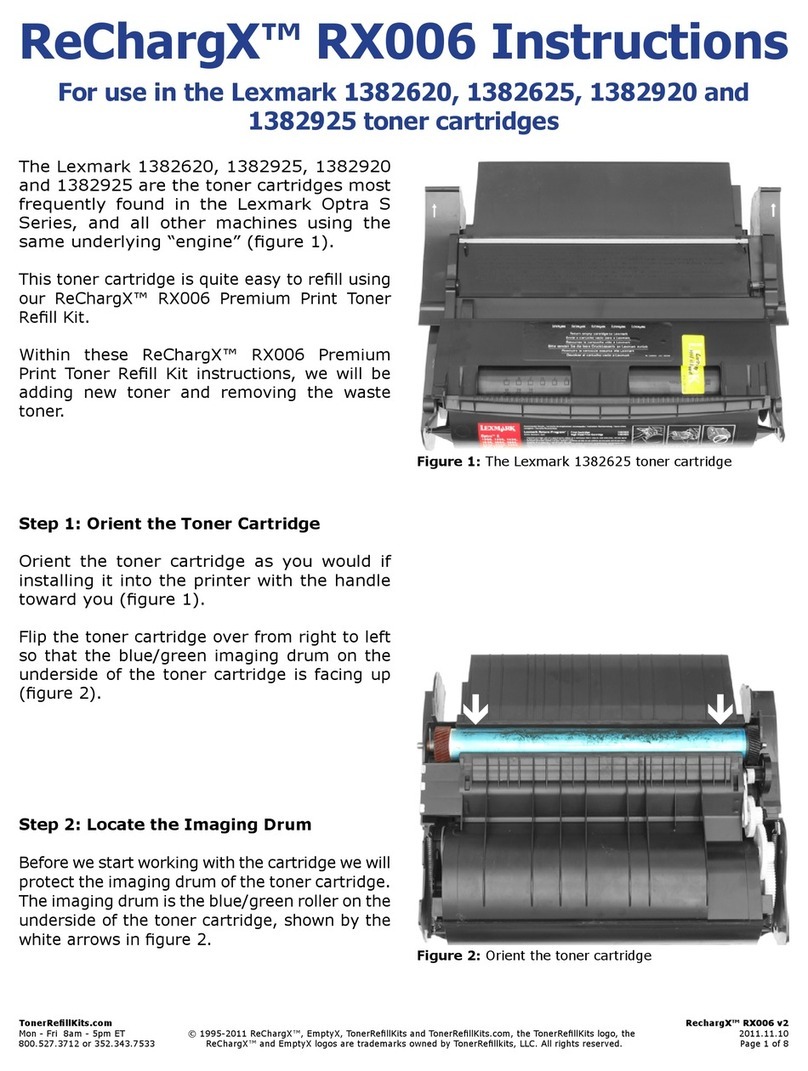
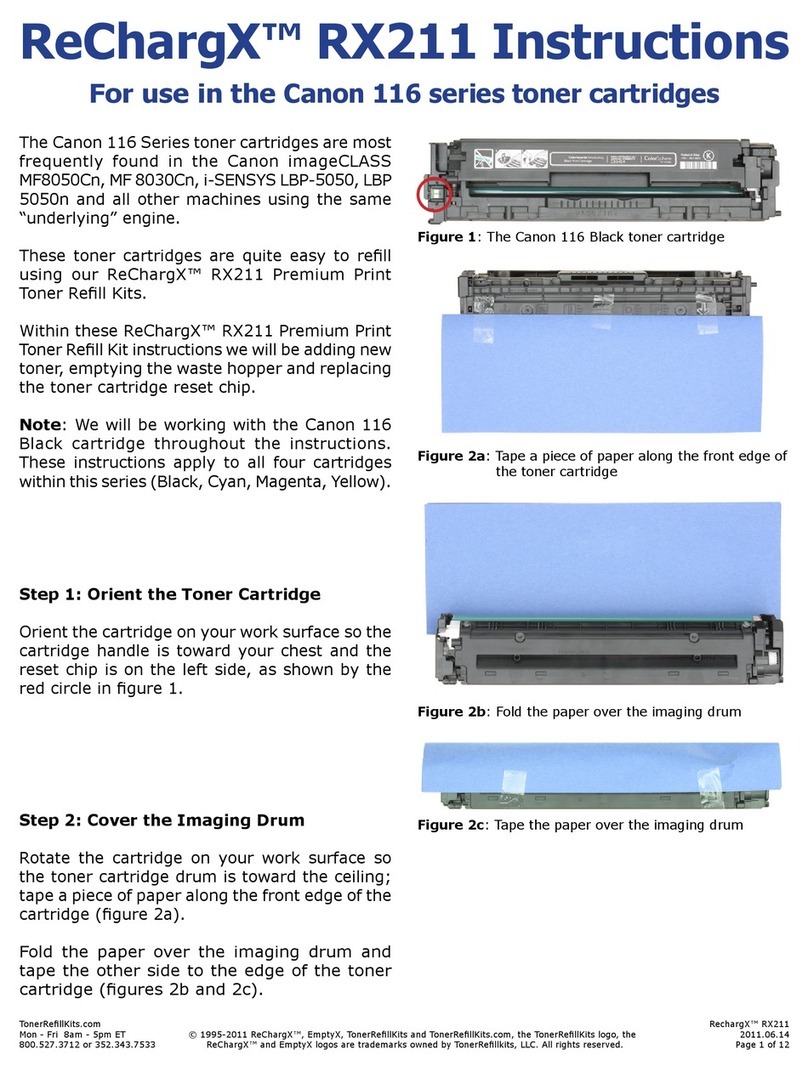
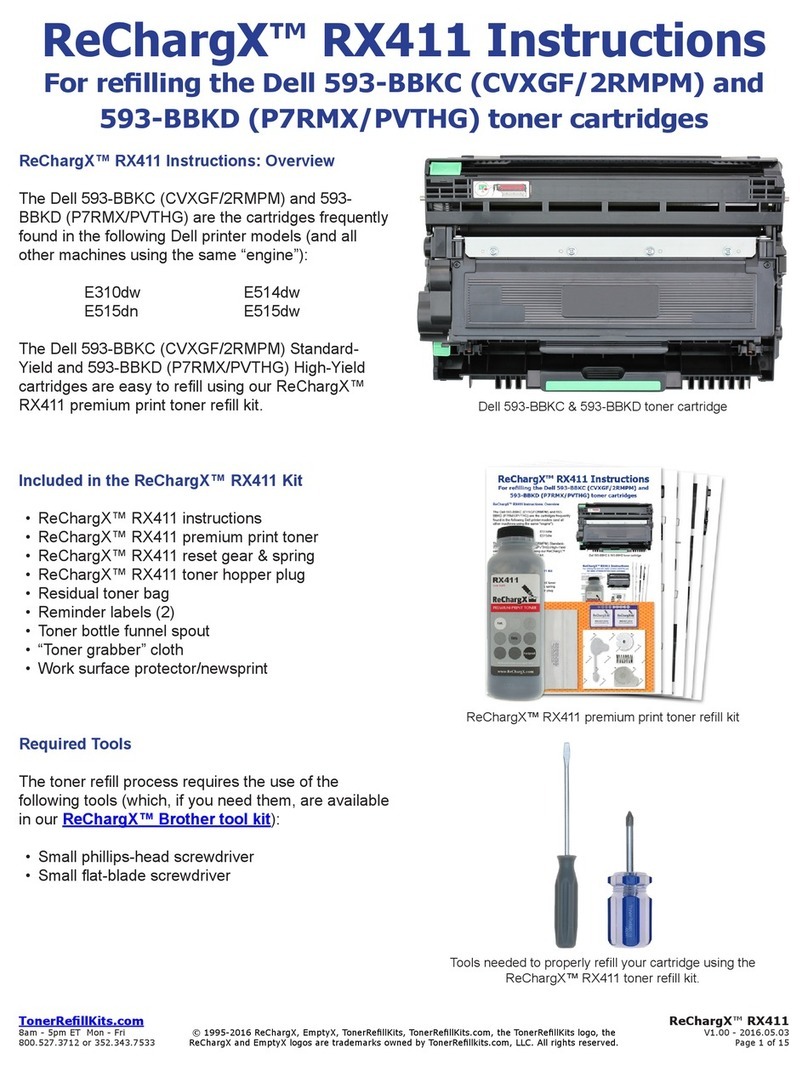
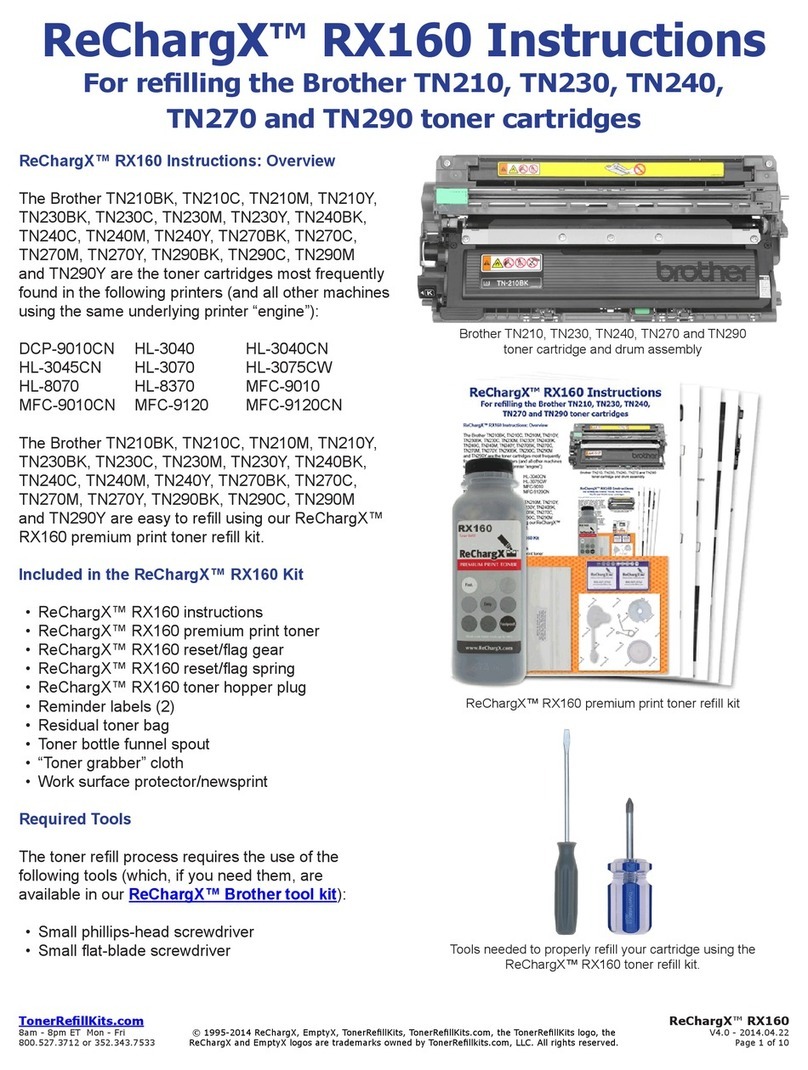
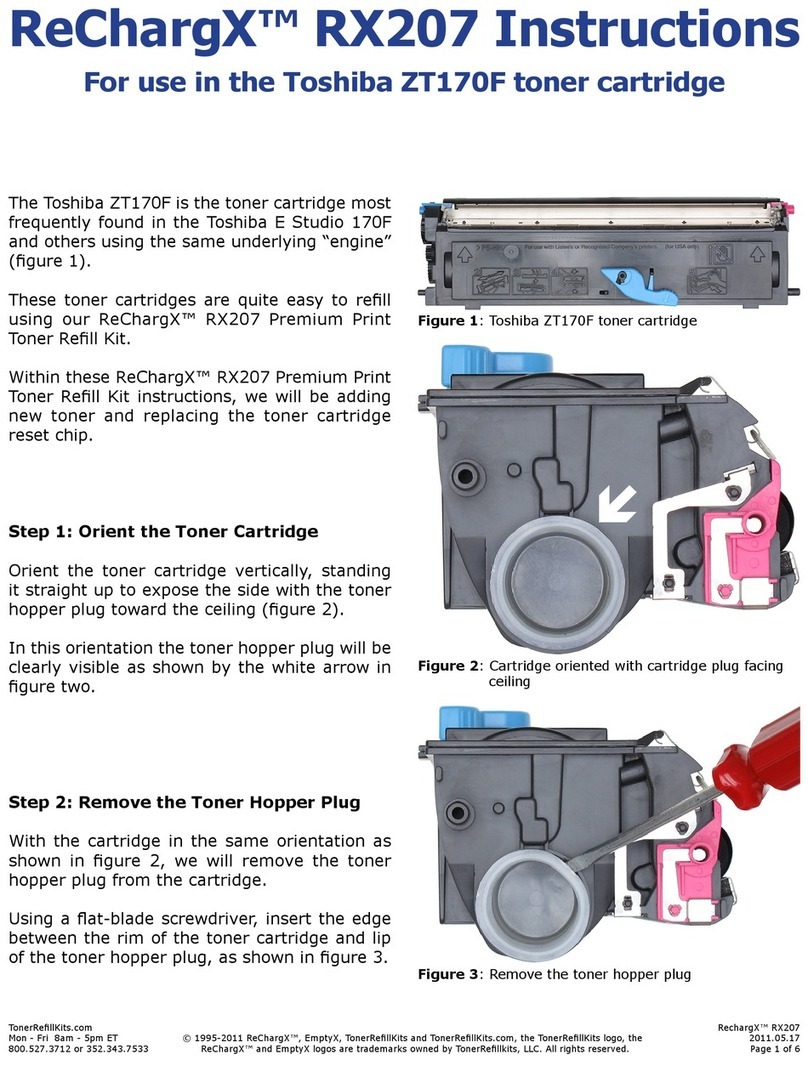
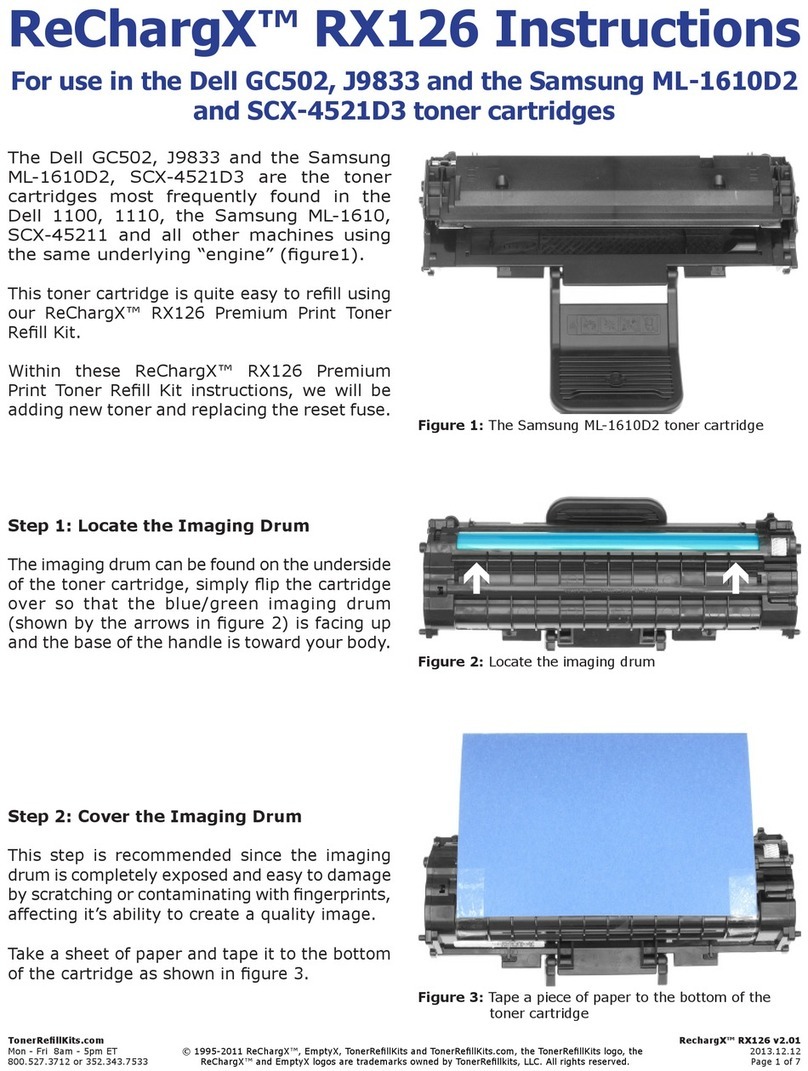
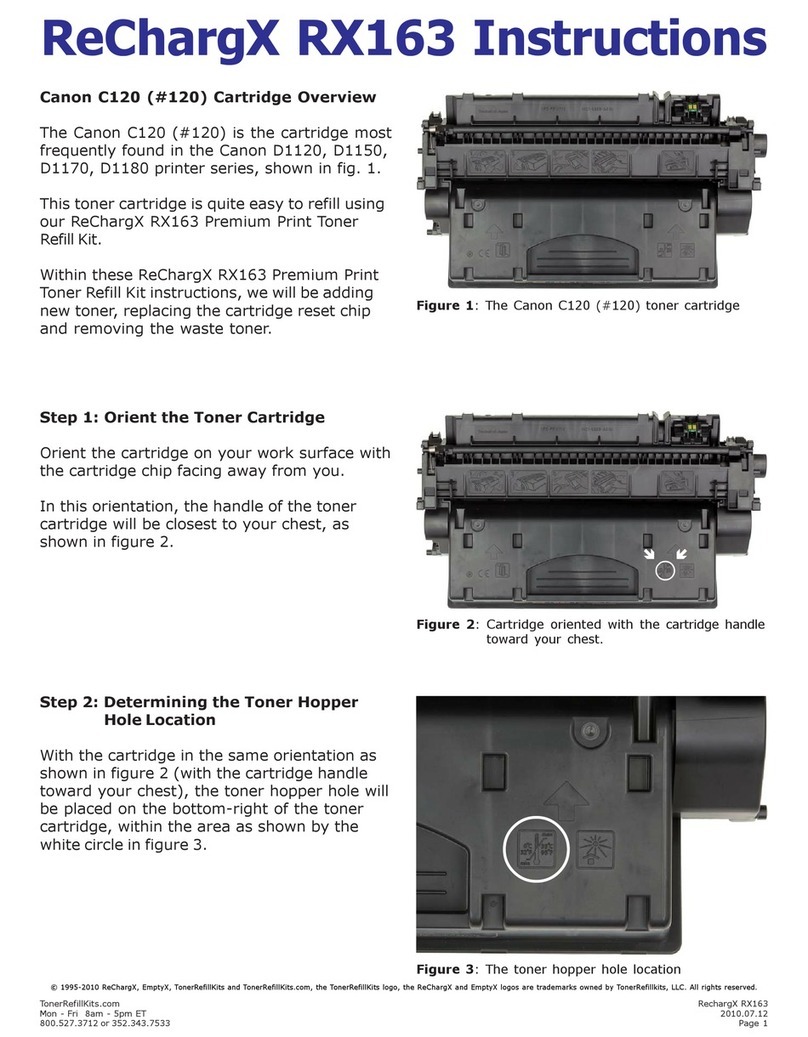
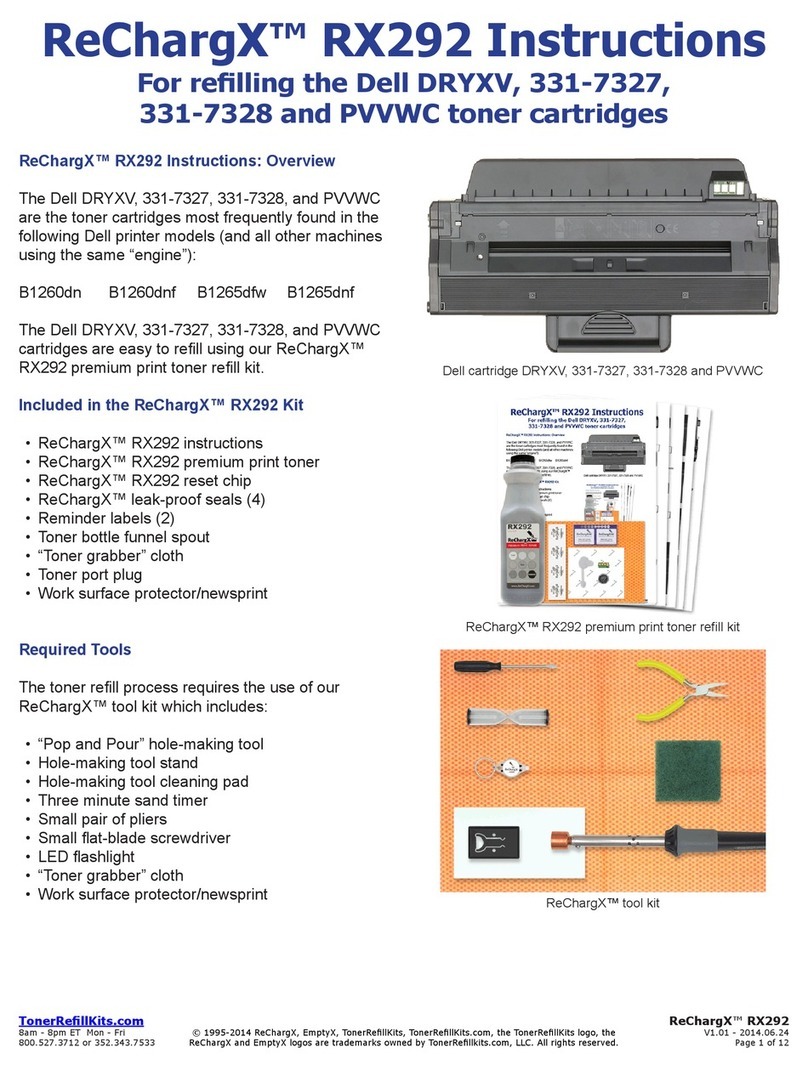
TheCanonE16/E20/E32/E40arethetonercar-
tridgesmostfrequentlyfoundintheCanonPC
140,210,230,300,430,530,710,730,740
andothers,asshowningure1.
These toner cartridges are quite easy to rell
using our ReChargX™ RX022 Premium Print
TonerRellKit.
WithintheseReChargX™RX022PremiumPrint
Toner Rell Kit instructions, we will be adding
newtonerandremovingthewastetoner.
Step 1: Orient the Toner Cartridge
Orient the cartridge handle to the right side,
oppositefromthesideofthecartridgewiththe
engravedarrow.
Inthisorientationthetextonthecartridgewill
berightsideup,asshowningure2.
Thewhitecircleindicateswhere we willbe
placing the toner hopper hole; explained
furtherinstep2.
Step 2: Determining the Toner Hopper
Hole Location
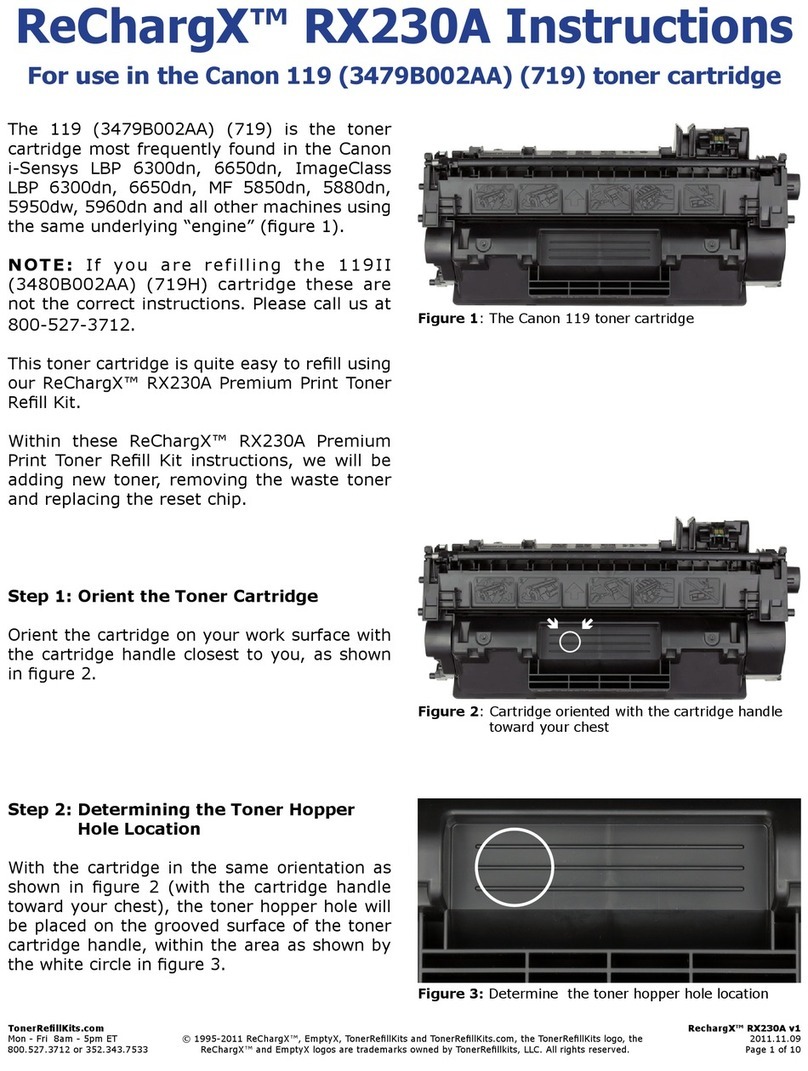
Withthecartridgeinthesameorientationas
shown in gure 2, we will create the toner
hopperholeontheleftofthecartridgeonthe
smallindent,shownbythewhitecircle(g3).
These four cartridges, while they contain
differentamountsoftonerwhentheyleave
theCanonfactory,actuallyallhavethesame
capacitywithinthetonerhopper.
TheamountoftonerprovidedintheReChargX™
RX022TonerRellKitwillgiveyoutheamount
equaltotheCanonE40high-yieldtonercartridge,
nomatterwhichtypeofcartridgeyoustartwith.
ReChargX™ RX022 Instructions
For use in the Canon E16, E20, E32, E40 toner cartridges
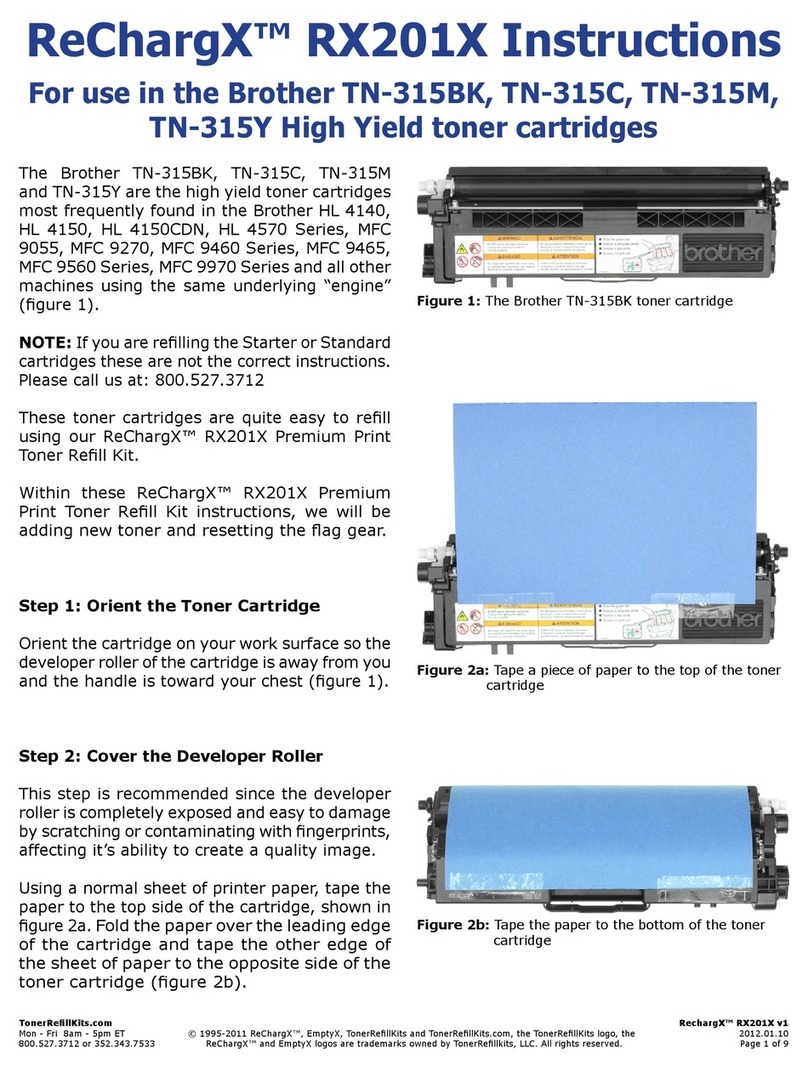
Figure 1:CanonE16/E20/E32/E40tonercartridge
Figure 2:Cartridgeorientedwiththecartridgehandle
towardyourrightside
Figure 3:Thetonerhopperholelocation
TonerRellKits.com RechargX™RX022
Mon-Fri8am-5pmET©1995-2011ReChargX™,EmptyX,TonerRellKitsandTonerRellKits.com,theTonerRellKitslogo,the 2011.05.20
800.527.3712or352.343.7533ReChargX™andEmptyXlogosaretrademarksownedbyTonerRellkits,LLC.Allrightsreserved. Page2of7
Step 3: Plug in the Hole-Making Tool
Pluginthehole-makingtoolincludedwiththe
ReChargX™ToolKit.
Waitthefull3minutes(asindicatedusingthe
sandtimer).Allowingthetooltoheatupfor3
minutes will ensure the tool is hot enough to
penetratethecartridgemoreeasily(gure4).
Step 4: Creating the Toner Hopper Hole
HoldtheReChargXhole-makingtooldirectlyover
thelocationfortheholeandpressthecopper
hole-makingbitagainst the cartridgeallowing
theheatofthetooltocreatethetonerhopper
hole.
Letthetooldotheworkwithaminimalamount
ofpressure,asshowningure5.
Note:Oncethecoppertipofthehole-making
tool slowly penetrates the top of the toner
cartridge, immediately withdraw the tool and
unplugitfromthewall.
Step 5: Remove the Excess Plastic From
the Hole-Making Tool
Using the tip of the at-blade screwdriver,
includedintheReChargX™ToolKit,remove
thesmallpieceofplasticfromthecoppertip
ofthehole-makingtool,asshowningure6.
Thissmallpieceofplasticbecomesimpossible
toremoveonceitbecomescoldandhardensto
thecoppertipofthehole-makingtool.
Figure 4:Waitforthehole-makingtooltoheatup
Figure 5:Createthetonerhopperhole
Figure 6:Removetheexcessplasticpiece

TonerRellKits.com RechargX™RX022
Mon-Fri8am-5pmET©1995-2011ReChargX™,EmptyX,TonerRellKitsandTonerRellKits.com,theTonerRellKitslogo,the 2011.05.20
800.527.3712or352.343.7533ReChargX™andEmptyXlogosaretrademarksownedbyTonerRellkits,LLC.Allrightsreserved. Page3of7
Step 6: Add ReChargX™ RX022 Premium
Print Toner to the Toner Hopper
Now we will ll the toner hopper with the
ReChargX™RX022PremiumPrinttoner.
Toensurethetonerowsfreelyfromthebottle
duringlling,makecertainthecapisscrewed
tightlyonthebottle,thengentlyrock/shakethe
bottletofreeupthetonerthatmayhavesettled
duringshipping.
Next,removetheoriginalcapfromthebottleand
replaceitwiththeplasticdispenserspoutfrom
theReChargX™RX022TonerRellKit.
To make the adding of the toner to the toner
hopperaseasyanddust-freeaspossible,tiltthe
endofthecartridgewiththeholeinitupata
45degreeangleandslowlyanglethedispenser
spoutonthebottleoftonertomeetupwiththe
hole,asshowningure7.
Tiltingthebottleupalittlemorewillstartthe
tonerowingintothetonerhopper.
Note:If atanypointthe tonerstopsowing,
simply stand the bottle upright to loosen the
tonerandstartthepouringprocessoveragain
(resisttemptationtosqueezethebottleasitwill
makeaspillormessmorelikely).
Fillthehopperuntilitappearstobefulloruntil
itappearstonernolongerowseasilyintothe
hopper(anytonerleftinthebottlecaneasily
beadded inthe future after youhavedone a
considerableamountofprinting).
Figure 7:FillthetonerhopperwithReChargX™RX022
PremiumPrintToner

TonerRellKits.com RechargX™RX022
Mon-Fri8am-5pmET©1995-2011ReChargX™,EmptyX,TonerRellKitsandTonerRellKits.com,theTonerRellKitslogo,the 2011.05.20
800.527.3712or352.343.7533ReChargX™andEmptyXlogosaretrademarksownedbyTonerRellkits,LLC.Allrightsreserved. Page4of7
Step 7: Clean the Area Around the Toner
Hopper Hole Before Sealing
Unfoldtheyellow/orange“tonergrabber”cloth
fromtheReChargX™RX022PremiumPrintToner
RellKitandstretchitalongbothdimensions(it
willstretchconsiderablyinonedimensionand
nottheother).
Stretchingtheyellow/orangetonergrabbercloth
activatesthetonerretainingsubstancethatis
embeddedwithinthecloth.
You will use this cloth to clean the outside of
thetonerhopperholetoensuretheReChargX™
leak-proofsealwillbeappliedcompletelytothe
cartridgeasshowningure8.
(Note:Onlyusethetonergrabberclothonthe
exteriorofthetonercartridgearoundthetoner
hopperholearea.Donotusetheclothtoclean
anyoftheinternalcomponentsorthecartridge
imagingdrum.)
Step 8: Remove the ReChargX™ Seal from
the Protective Backing
Remove the protective backing from the
ReChargX™ leak-proof seal included in the
ReChargX™RX022TonerRellKit(gure9).
Step 9: Seal the Toner Hopper Hole with
the ReChargX™ Leak-Proof Seal
Lowerthesealaroundthetonerhopperhole.
Press rmly around the entire seal to ensure
thesealsecurelystickstothetonercartridge,
asshowningure10.
Figure 8:Cleantheareaaroundthetonerhopperhole
beforesealing
Figure 9:RemovingtheReChargX™leak-proofseal
fromtheprotectivebacking
Figure 10:TonerhopperwithReChargX™sealinplace

TonerRellKits.com RechargX™RX022
Mon-Fri8am-5pmET©1995-2011ReChargX™,EmptyX,TonerRellKitsandTonerRellKits.com,theTonerRellKitslogo,the 2011.05.20
800.527.3712or352.343.7533ReChargX™andEmptyXlogosaretrademarksownedbyTonerRellkits,LLC.Allrightsreserved. Page5of7
Step 10: Orient the Toner Cartridge
Orient the toner cartridge so the top of the
cartridgeislayingontheworksurfaceandthe
undersideisfacingupward,showning11.
Step 11: Waste Hopper Hole Location
The waste hopper hole will be placed on the
bottom-left of the toner cartridge, below the
ribbed ridge and on top of the small indent,
shownbythewhitecircleingure12.
Step 12: Plug in the Hole-Making Tool
Pluginthehole-makingtoolincludedwiththe
ReChargX™ToolKit.
Waitthefull3minutes(asindicatedusingthe
sandtimer).Allowingthetooltoheatupfor3
minutes will ensure the tool is hot enough to
penetratethecartridgemoreeasily,asshown
ingure13.
Step 13: Create the Waste Hopper Hole
HoldtheReChargX™hole-makingtooldirectly
over the location for the hole and press the
copper hole-making bit against the cartridge
allowingtheheatofthetooltocreatethehole
(there is no need to use excessive force, let
thetooldotheworkwithaminimalamountof
pressure),asshowningure14.
Note:Oncethecoppertipofthehole-makingtool
slowlypenetratesthetopofthetonercartridge,
immediately withdraw the tool and unplug it
fromthewall.
Figure 11:Cartridgeorientedwithundersideexposed
Figure 12:Thewastehopperlocation
Figure 13:Waitforthehole-makingtooltoheatup
Figure 14:Createthewastehopperhole

TonerRellKits.com RechargX™RX022
Mon-Fri8am-5pmET©1995-2011ReChargX™,EmptyX,TonerRellKitsandTonerRellKits.com,theTonerRellKitslogo,the 2011.05.20
800.527.3712or352.343.7533ReChargX™andEmptyXlogosaretrademarksownedbyTonerRellkits,LLC.Allrightsreserved. Page6of7
Step 14: Remove the Excess Plastic From
the Hole-Making Tool
Using the tip of the at-blade screwdriver,
includedintheReChargXToolKit,removethe
smallpieceofplasticfromthecoppertipof
thehole-makingtool,asshowningure15.
Thissmallpieceofplasticisimpossibletoremove
onceitbecomescoldandhardenstothecopper
tipofthehole-makingtool.
Step 15: Empty the Waste Toner Hopper
Nowwewillremovethewastetonerfromthe
tonercartridge.
Note: This toner cannot be used again as
paper, dust, hair, staples and other small
itemscanaccumulateinthewastehopper.
Holding the cartridge over the newsprint,
included in the ReChargX™ RX022 Rell Kit,
carefullypouroutanywastetoner,asshown
ingure16.
If the waste toner stops owing, stand the
cartridgeupagainandthenre-lowerthehole
overthepaper(gentlytappingalongtheside
ofthetonercartridgehelpstokeepthetoner
owingaswell).
Note:Thereisnoneedtoattempttoremove
everylastbitofwastetonerfromthehopper,
justthatwhichcomesouteasily.
Step 16: Clean the Area Around the
Waste Hopper Hole
Afterthewastetonerhasbeenremovedfrom
thewastehopper,usetheyellow/orangetoner
grabberclothtocleanaroundthewastehopper
hole,asshowningure17,sotheReChargX™
leak-proofsealwilladheretothecartridgebody
ascompletelyaspossible.
Figure 15:Removetheexcessplasticpiece
Figure 16:Emptythewastetoner
Figure 17:Cleanthewastehopperhole

TonerRellKits.com RechargX™RX022
Mon-Fri8am-5pmET©1995-2011ReChargX™,EmptyX,TonerRellKitsandTonerRellKits.com,theTonerRellKitslogo,the 2011.05.20
800.527.3712or352.343.7533ReChargX™andEmptyXlogosaretrademarksownedbyTonerRellkits,LLC.Allrightsreserved. Page7of7
Step 17: Remove the ReChargX™ Seal
from the Protective Backing
Remove the protective backing from the
ReChargX™ leak-proof seal included in the
ReChargX™RX022TonerRellKit(gure18).
Step 18: Apply the Leak-Proof Seal
Lowerthesealaroundthewastehopperholeand
slipitslightlyunderneaththelipoftheribbed
edge.
Press rmly around the entire seal to ensure
thesealsecurelystickstothetonercartridge,
asshowningure19.
Completion
Congratulations!You havesuccessfully relled
your Canon E16/E20/E32/E40 toner cartridge
andemptiedthewastehopper.
Enjoyyoursavings.
-EndofReChargX™RX022Instructions-
Technical Support
Tofurther help yourReChargX™RX022Toner
Rell procedure, we are always ready, willing
andhappytoansweranyofyourquestionsor
commentsviatechnicalsupport.
Please contact us at 352.343.7533 or
800.527.3712M-F8am-5pmET.
Additionally, you may also chat with us using
LiveHelponourwebsite(M-F8am-5pmET)or
submitatechnicalsupportticketat
www.TonerRellKits.com/Tech_Support.php
Figure 18:RemovetheReChargX™leak-proofseal
fromtheprotectivebacking
Figure 19:Wastehopperholesealedwiththe
ReChargX™leak-proofseal
Table of contents
Other ReChargx Printer Accessories manuals

ReChargx
ReChargx RX163 User manual

ReChargx
ReChargx RX207 User manual

ReChargx
ReChargx RX237 User manual

ReChargx
ReChargx RX211 User manual

ReChargx
ReChargx RX006 User manual

ReChargx
ReChargx RX230X User manual

ReChargx
ReChargx RX052 User manual

ReChargx
ReChargx RX292 User manual

ReChargx
ReChargx RX230A User manual

ReChargx
ReChargx RX411 User manual