TonerRellKits.com ReChargX™RX160
8am - 8pm ET Mon - Fri © 1995-2014 ReChargX, EmptyX, TonerRellKits, TonerRellKits.com, the TonerRellKits logo, the V4.0 - 2014.04.22
800.527.3712 or 352.343.7533 ReChargX and EmptyX logos are trademarks owned by TonerRellkits.com, LLC. All rights reserved. Page 1 of 10
ReChargX™ RX160 Instructions
For relling the Brother TN210, TN230, TN240,
TN270 and TN290 toner cartridges
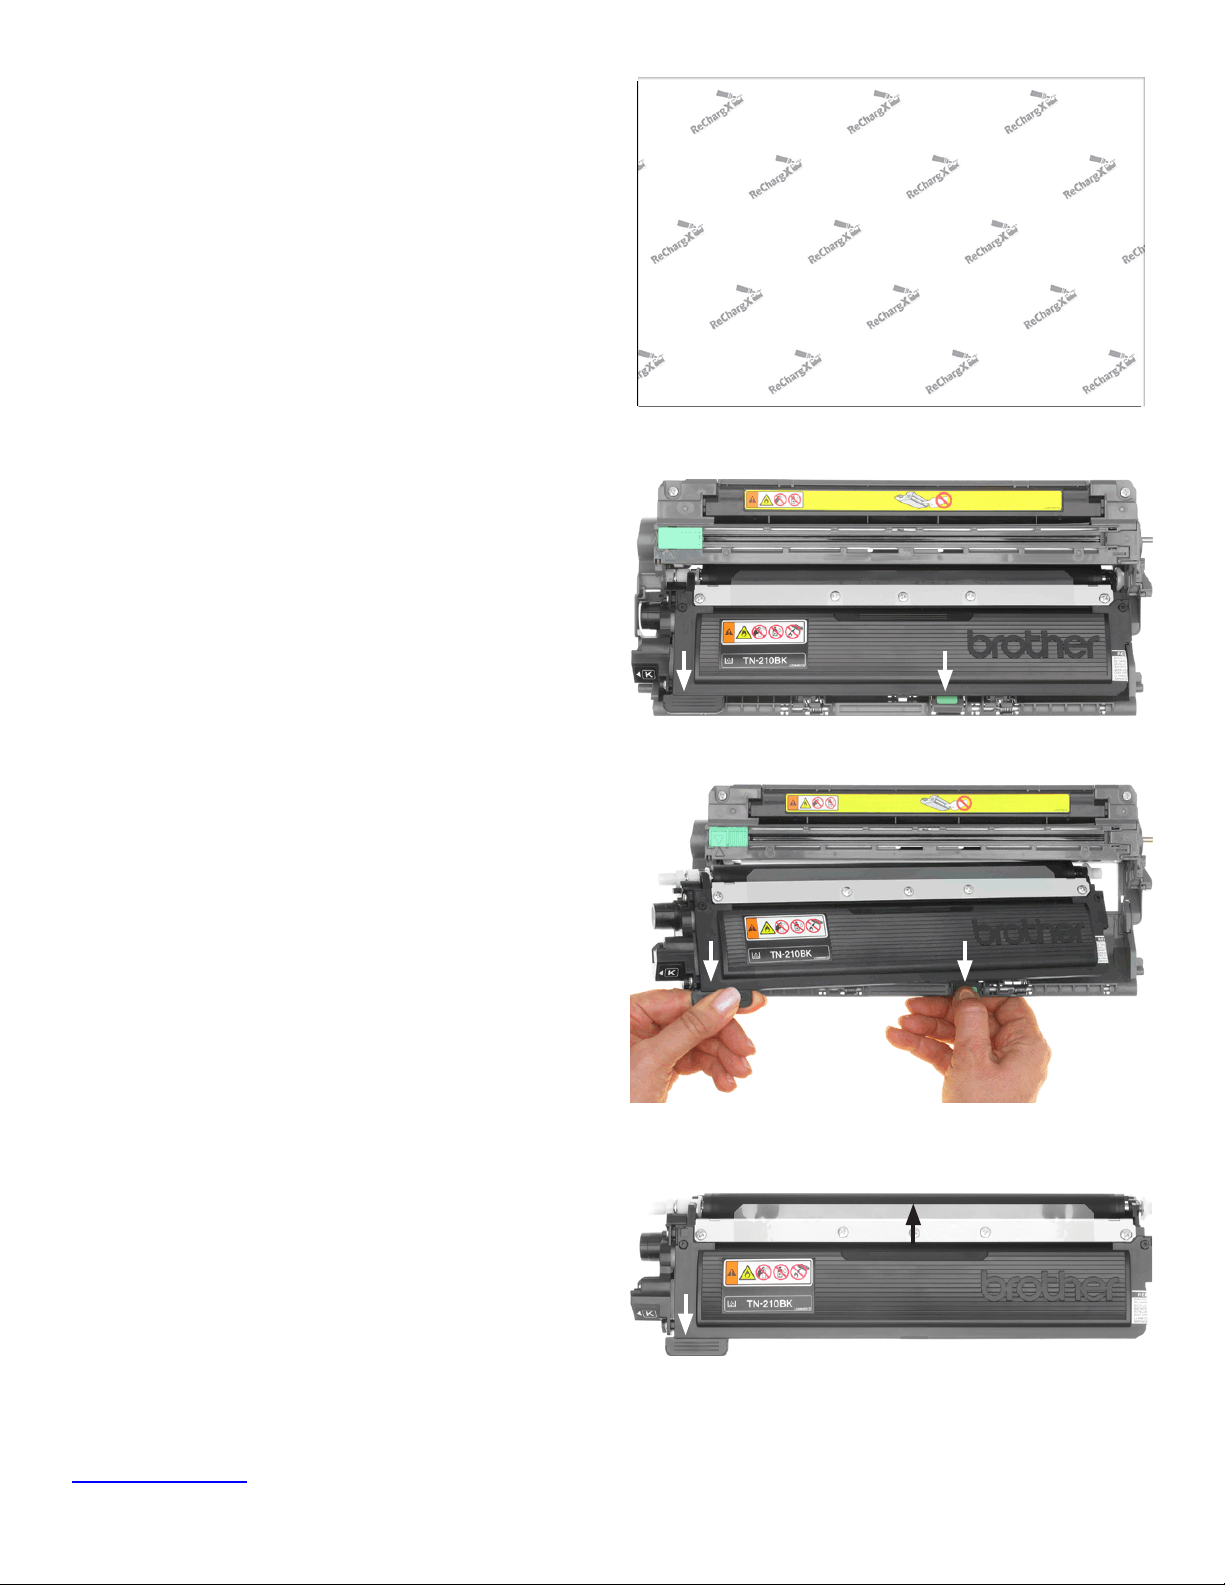
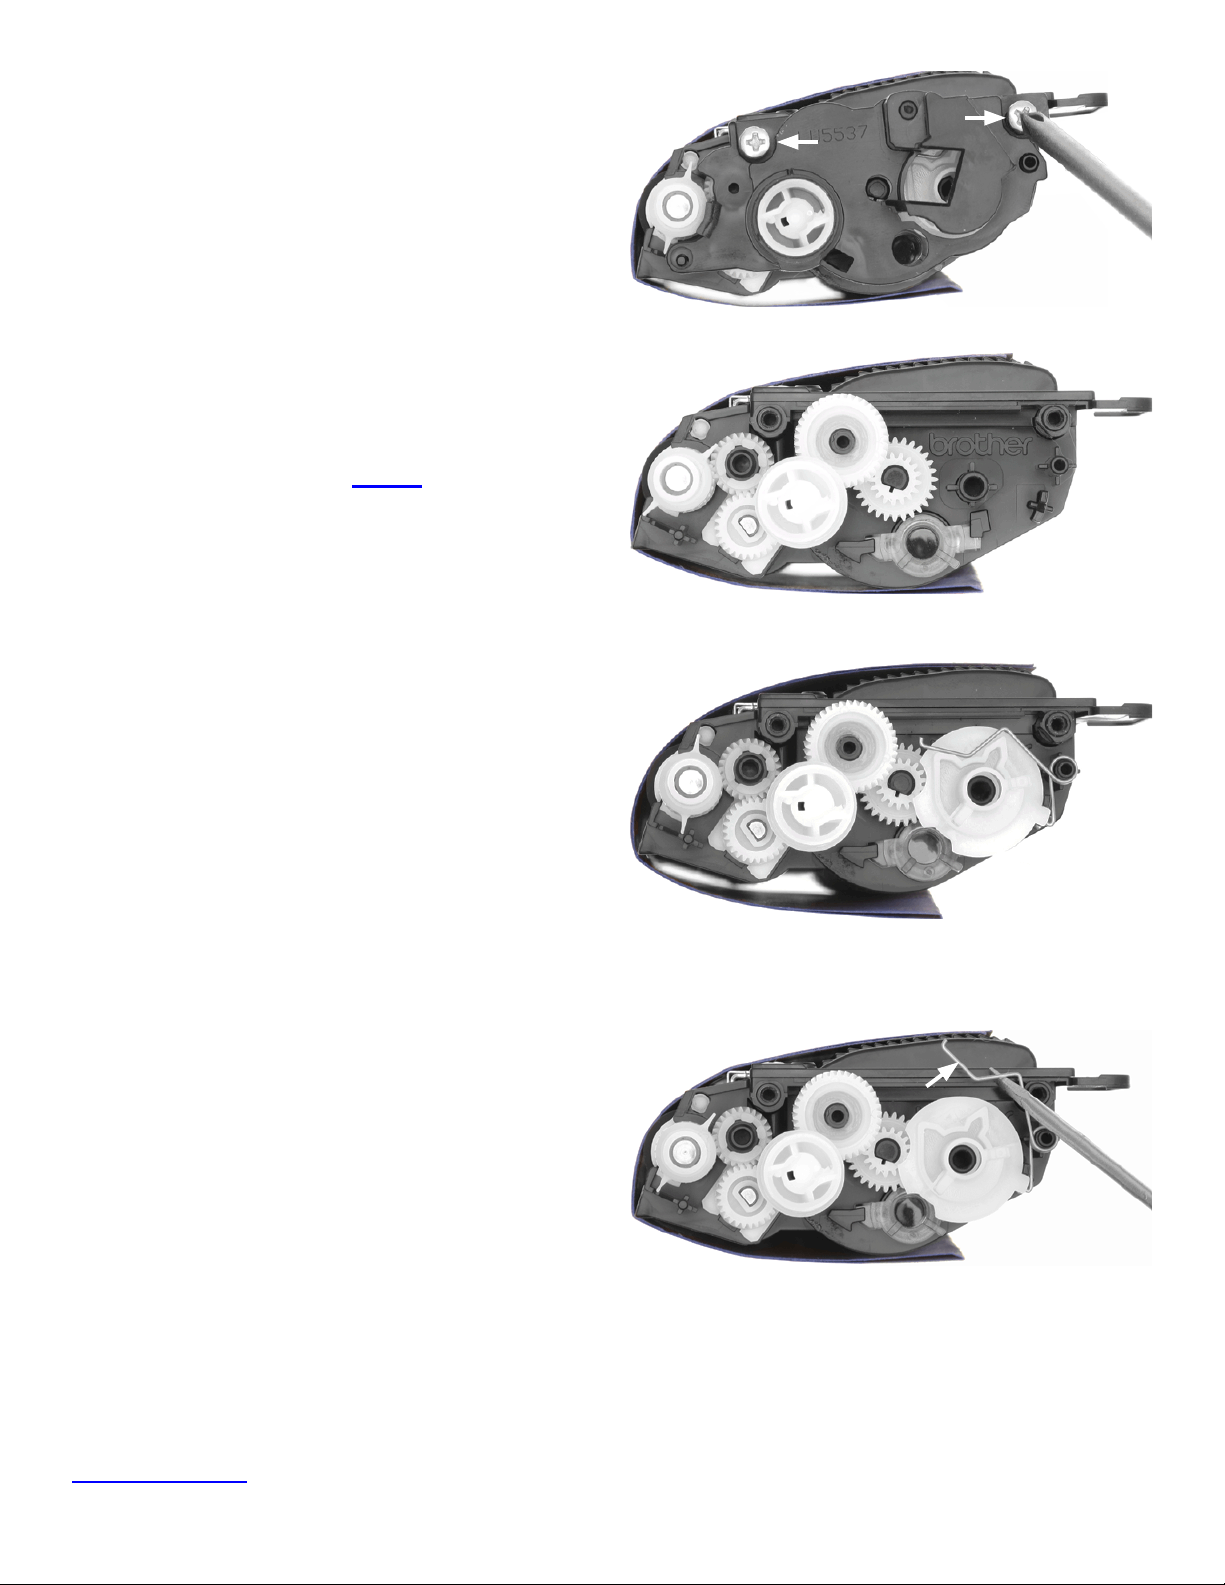
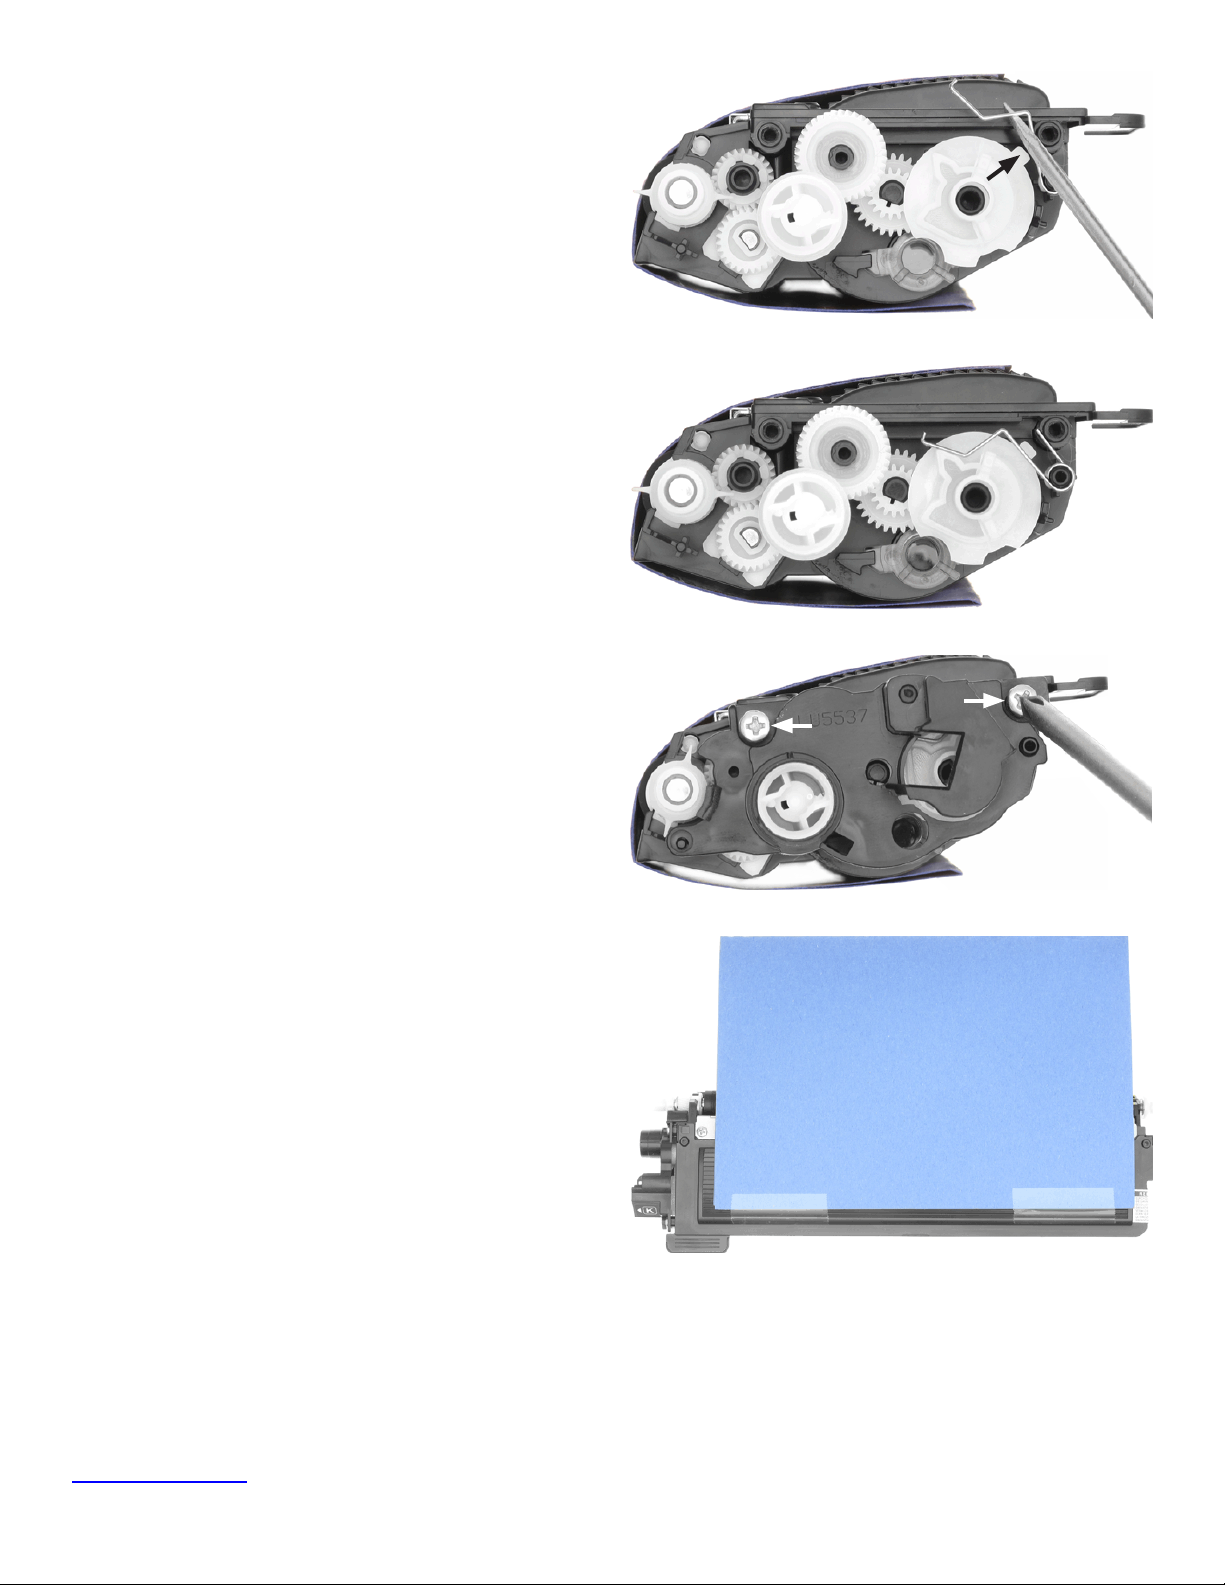
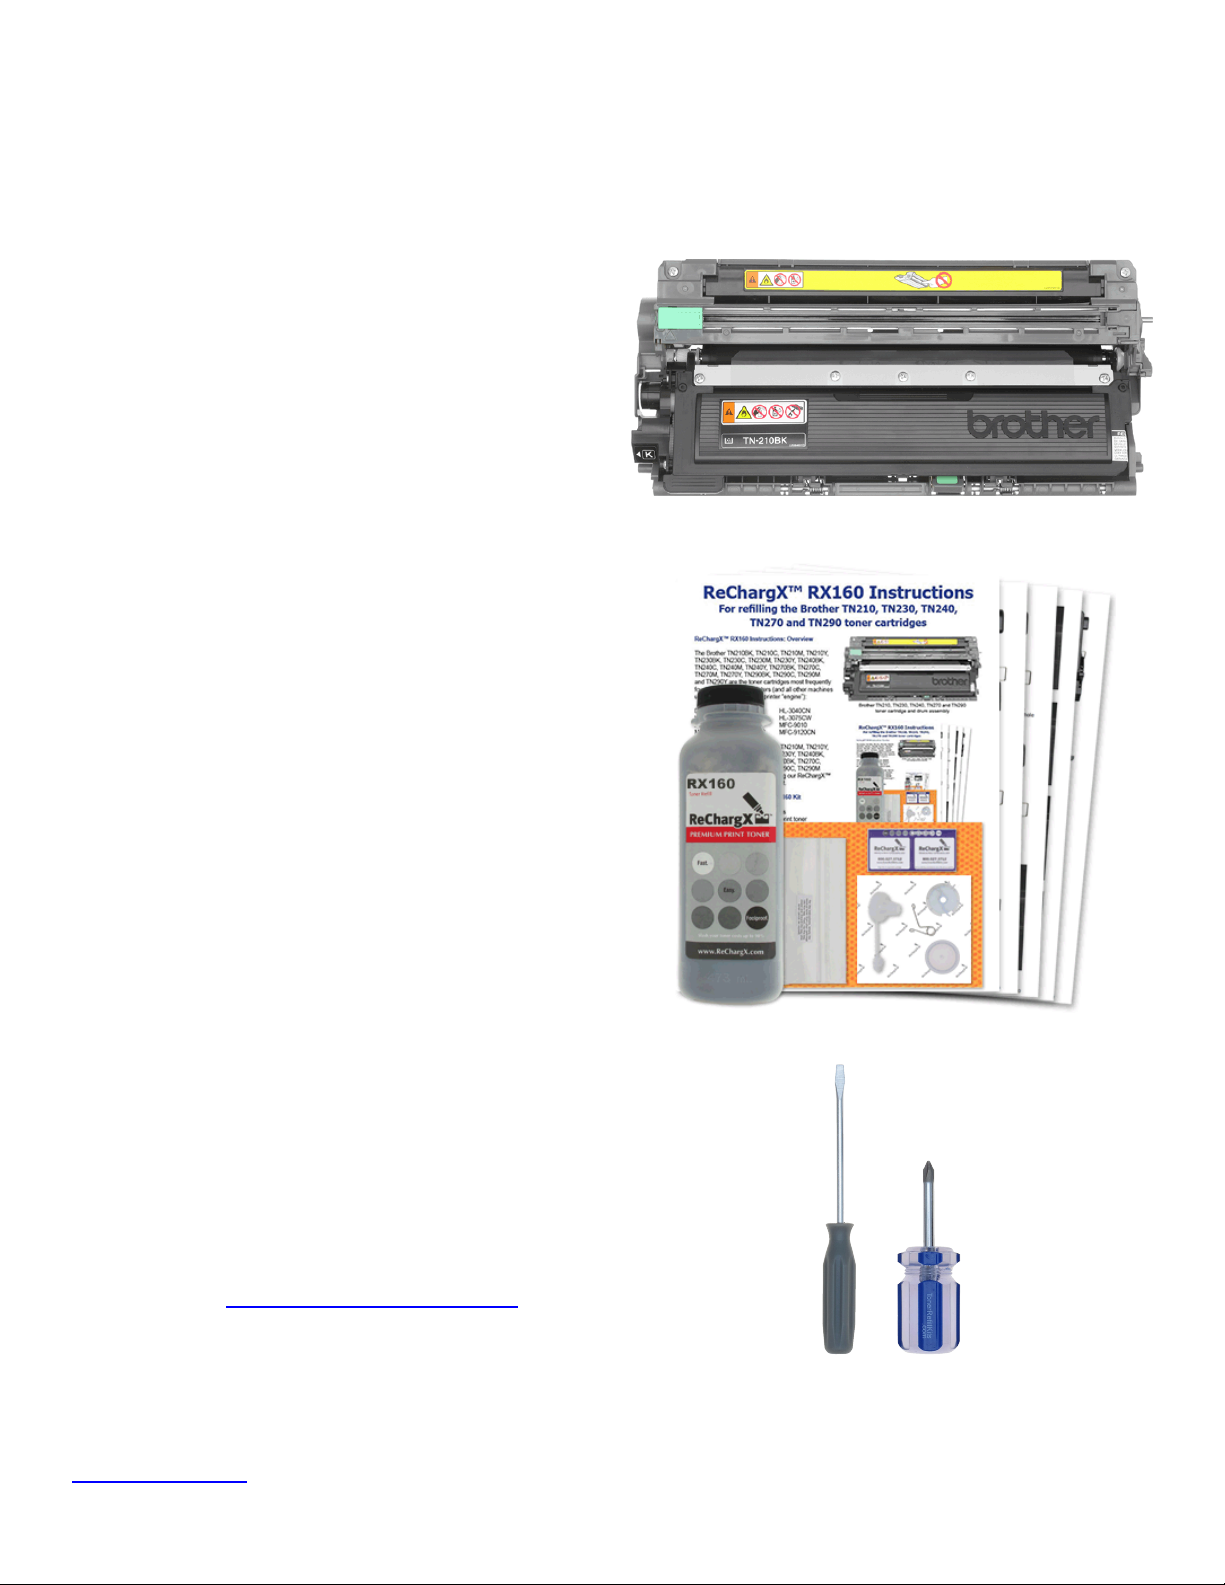
Brother TN210, TN230, TN240, TN270 and TN290
toner cartridge and drum assembly
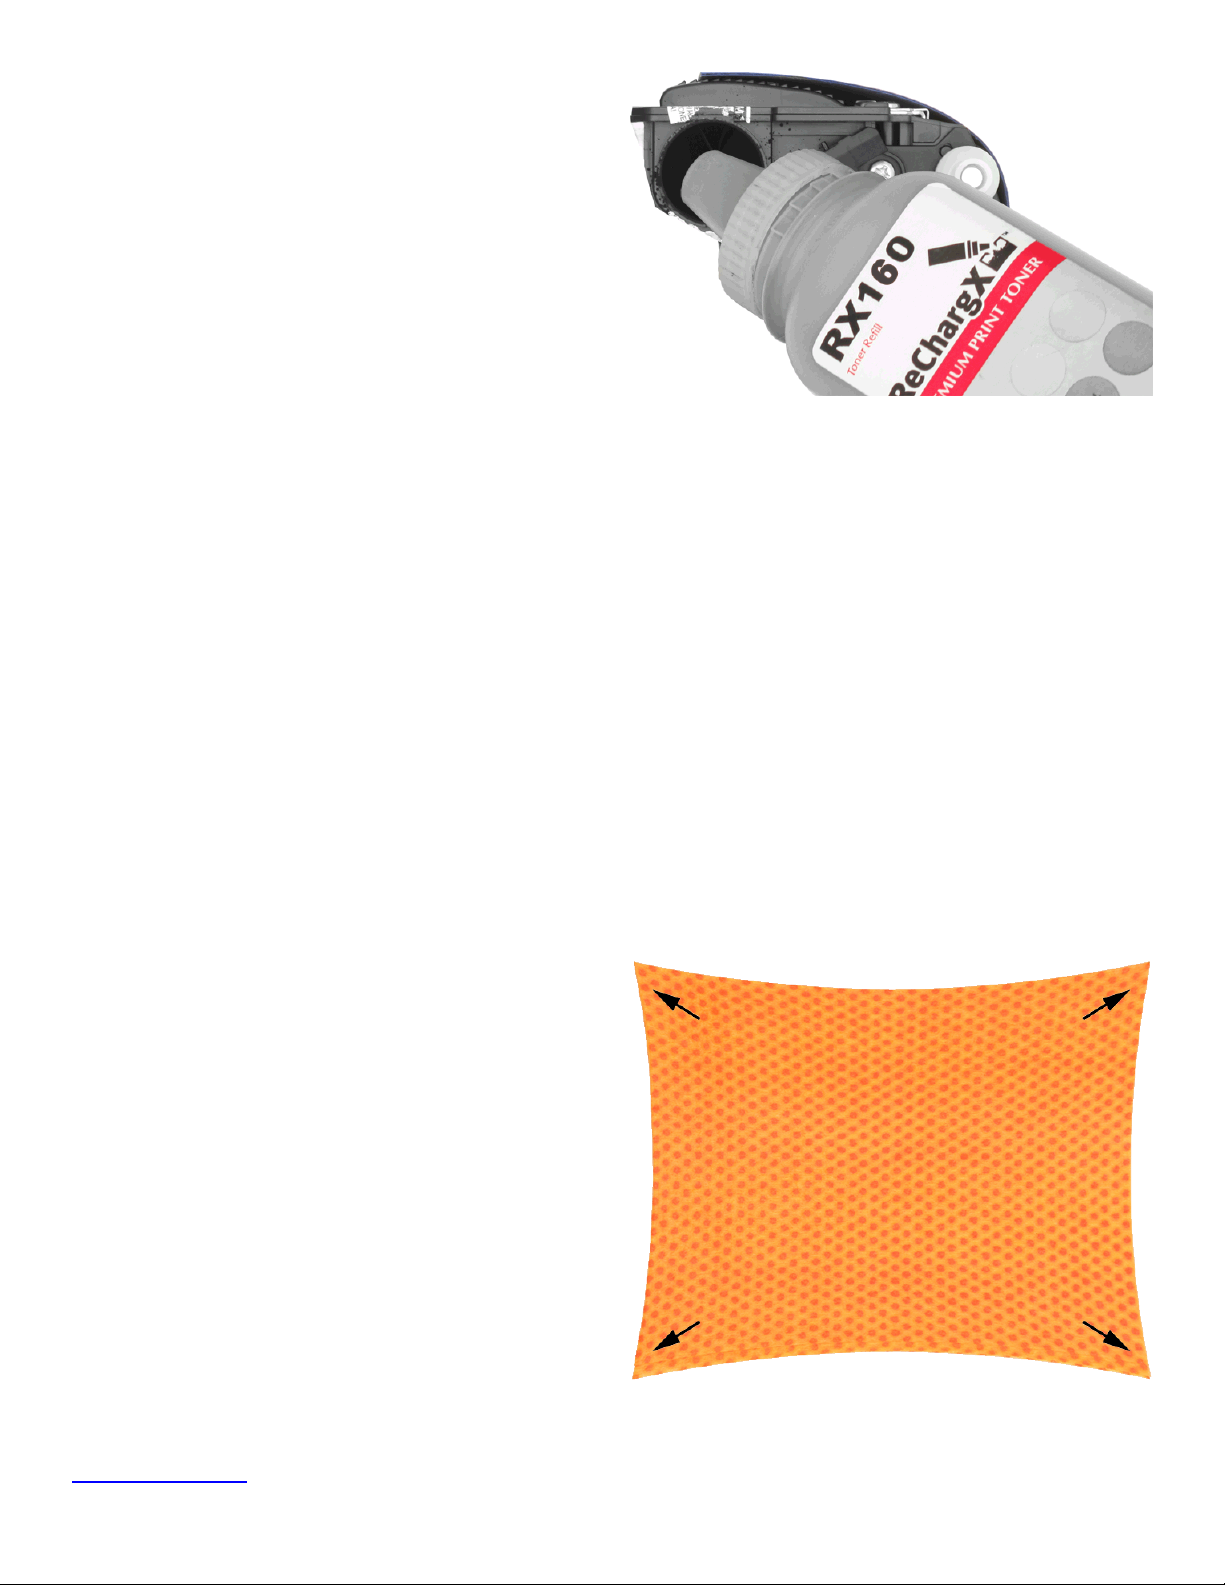
ReChargX™ RX160 premium print toner rell kit
Tools needed to properly rell your cartridge using the
ReChargX™ RX160 toner rell kit.
ReChargX™ RX160 Instructions: Overview
The Brother TN210BK, TN210C, TN210M, TN210Y,
TN230BK, TN230C, TN230M, TN230Y, TN240BK,
TN240C, TN240M, TN240Y, TN270BK, TN270C,
TN270M, TN270Y, TN290BK, TN290C, TN290M
and TN290Y are the toner cartridges most frequently
found in the following printers (and all other
machines
using the same underlying printer “engine”):
DCP-9010CN HL-3040 HL-3040CN
HL-3045CN HL-3070 HL-3075CW
HL-8070 HL-8370 MFC-9010
MFC-9010CN MFC-9120 MFC-9120CN
The Brother TN210BK, TN210C, TN210M, TN210Y,
TN230BK, TN230C, TN230M, TN230Y, TN240BK,
TN240C, TN240M, TN240Y, TN270BK, TN270C,
TN270M, TN270Y, TN290BK, TN290C, TN290M
and TN290Y are easy to rell using our ReChargX™
RX160 premium print toner rell kit.
Included in the ReChargX™ RX160 Kit
• ReChargX™ RX160 instructions
• ReChargX™ RX160 premium print toner
• ReChargX™ RX160 reset/ag gear
• ReChargX™ RX160 reset/ag spring
• ReChargX™ RX160 toner hopper plug
• Reminder labels (2)
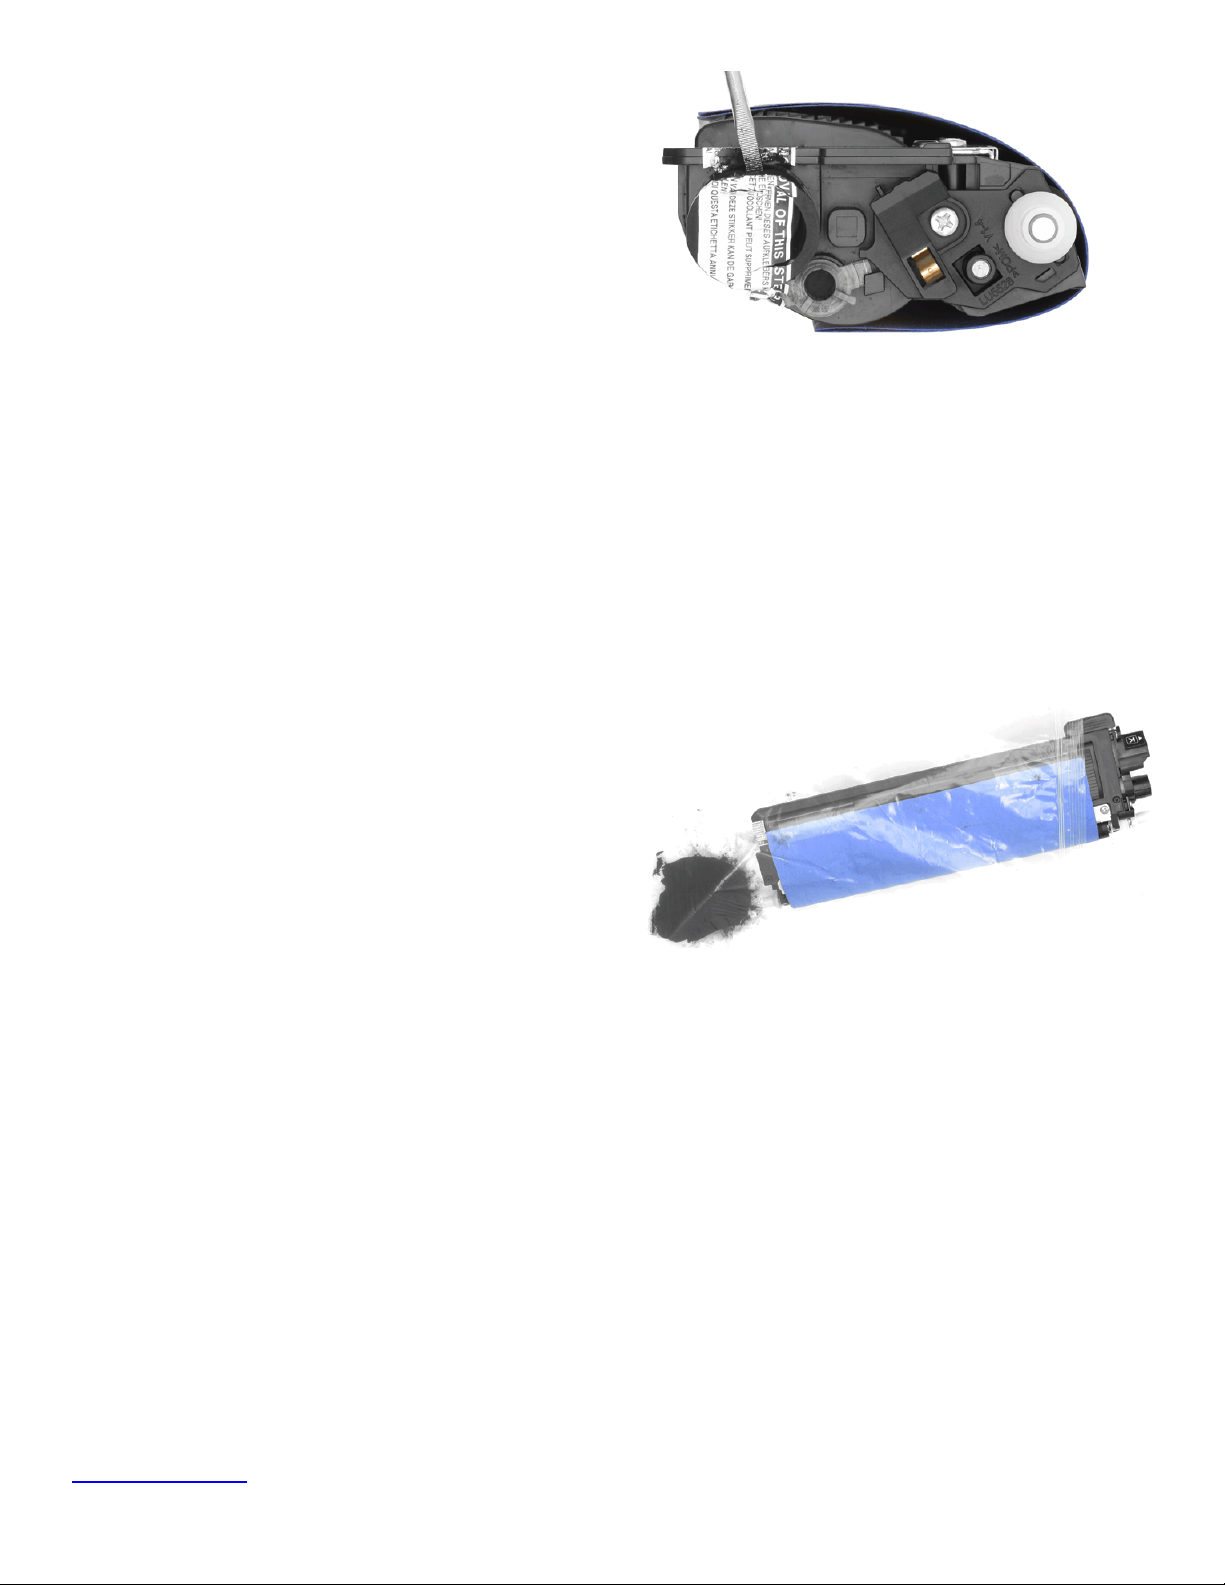
• Residual toner bag
• Toner bottle funnel spout
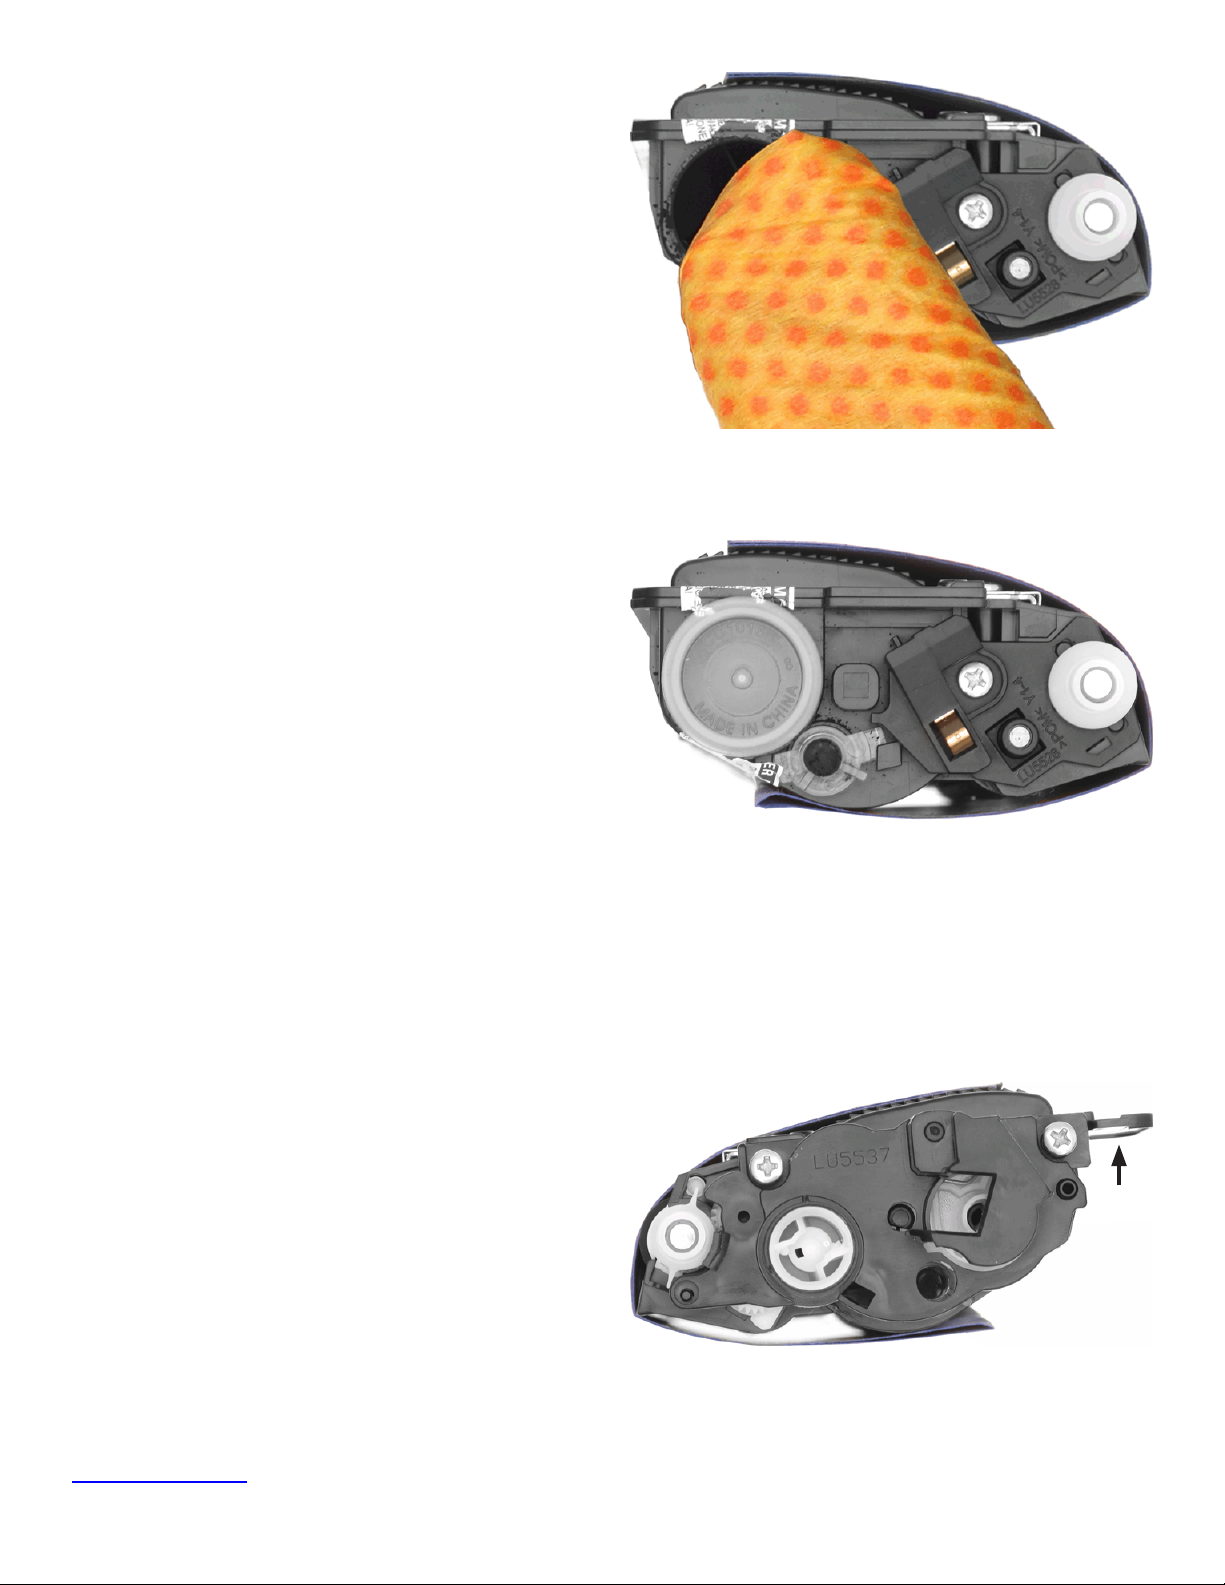
• “Toner grabber” cloth
• Work surface protector/newsprint
Required Tools
The toner rell process requires the use of the
following tools (which, if you need them, are
available in our ReChargX™ Brother tool kit):
• Small phillips-head screwdriver
• Small at-blade screwdriver