Reer 50080 User manual

Instruction manual
Projector baby monitor
Item no: 50080

Table of Contents
Scope of delivery . . . . . . . . . . . . . . . . . . . . . . . . . . 1
General information . . . . . . . . . . . . . . . . . . . . . . . . 2
Technical data and functions . . . . . . . . . . . . . . . . . . . . 2
General safety instructions . . . . . . . . . . . . . . . . . . . . . 3
Safety instructions regarding installation . . . . . . . . . . . . . . 4
Description of babyphone . . . . . . . . . . . . . . . . . . . . . 5
•Description of babyphone
•Baby unit/transmitter
•Menu and Symbols
Putting into operation . . . . . . . . . . . . . . . . . . . . . . . . 6
Functional options . . . . . . . . . . . . . . . . . . . . . . . . . 7
•Baby unit
•Coupling
•Parent unit
Troubleshooting . . . . . . . . . . . . . . . . . . . . . . . . . . 11
Warranty . . . . . . . . . . . . . . . . . . . . . . . . . . . . . .12
Notes on environmental protection . . . . . . . . . . . . . . . . .13

1
Scope of delivery
A: Baby unit/transmitter
B: Parent unit/receiver
C: Stand for parent unit
D: USB power supply
E: 2x USB cable
F: Instruction manual
D
C
E F
B
A

2
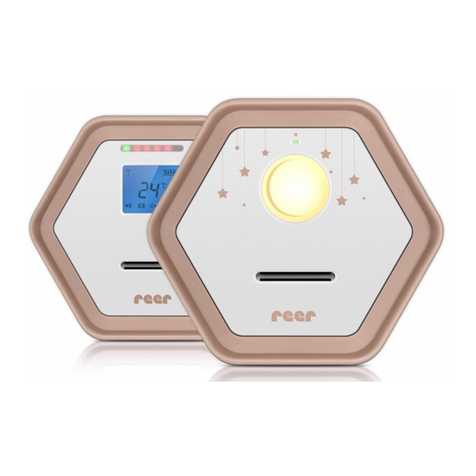
Projector baby monitor
Congratulations on your decision to purchase a new reer projector baby
monitor. The projector baby monitor consists of a parent unit with intercom
function and a baby unit with integrated star projector and lullaby feature.
Your new projector baby monitor uses a highly sensitive microphone to
provide you with clear and reliable feed of any sounds your baby makes. It
uses modern FHSS technology to ensure interference-free transmission and
guarantee a secure and private connection.
Suitable for both stationary and mobile use thanks to optional battery operation.
We’re confident you’ll enjoy the quality of our product for many years to come.
Please take a few minutes to carefully read through the safety instructions.
Safe operation of the reer projector baby monitor can only be guaranteed if
all guidelines listed here are followed. Please keep the instruction manual
in a safe place for future reference.
Technical data and functions
Technology Digital, FHSS, 865 MHz
Frequency 865 MHz
Transmitter baby unit Power supply with mains adapter
DC 5V 600mA or optional 3x 1.5V
AAA batteries (not included)
Receiver parent unit Power supply with mains adapter
DC 5V 600mA or optional built-in
3.7V 750mAh Li-ion battery/rechar-
geable (built into device)
Range Up to 650 m
Maximum battery life (in stand-
by mode)
Baby unit: Up to 22 hours
Parent unit: Up to 57 hours
Working temperature -10°C to +50°C

3
General safety instructions
!Check the unit for visible damage before each use. If you detect any
damage, do not use the unit.
!Only use the supplied chargers and mains adapters.
!Make sure that the operating voltage of the power outlet matches that
of the mains adapter.
!Check - especially when travelling abroad - that the local mains voltage
matches the voltage specified on the units and/or mains adapters.
!Except for the battery compartment cover, never open the units or mains
adapters, as there is a risk of electric shock.
!If a unit does not work correctly, please do NOT try to fix the problem
yourself. Please contact your dealer with any problems.
!Avoid bringing the battery and/or electrical connection contacts on the
units into contact with metal objects.
!This product is not a toy! Do not allow children to play with the unit.
!This baby monitor was designed exclusively for monitoring your baby.
!It may neither be regarded as a substitute for parental supervision nor
as a medical device.
Safety instructions regarding installation
•Always place the baby unit out of your child´s reach (minimum distance:
1 meter).
•Never place the baby monitor inside the crib, cot or playpen.
•The power lead must be secured out of the reach of children to avoid any
risk of strangulation. Do not use extension cables.
•To ensure optimal transmission, the units must be kept upright at all
times and placed in an elevated position.
•DO NOT place the receiver in the vicinity of radio transceivers or mic-
rowaves. Radiant emissions from these devices can significantly affect
radio reception.
•Do not use the units near water or in humid places. Do not submerge the
units in water. Do not rinse the units under running water.
•Do not cover the baby monitor with towels, clothes or blankets.
•Avoid extreme heat and direct sunlight

4
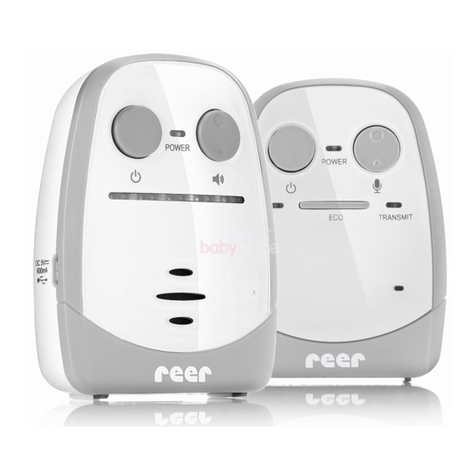
Device description
Parent unit / receiver
1. Down navigation key
2. Lullaby playback button
3. Microphone
4. Up navigation key
5. Micro USB charging connector
6. Settings button
7. Speaker
8. Intercom button
9. On/off/vibrate rotary switch
1 62 73 84 95

5
Baby unit/transmitter
Menu and symbols
10
D
E
F
C B A KL IJ
H
G
11 12 13
18
17
16
1514
A: Power indicator: green light – on
blinking green light – battery low
red – battery is charging
10. On/off switch
11. Microphone
12. Micro USB input for power supply
unit
13. Speaker
14. “+” key louder
15. “-” key quieter
16. Indicator light/low battery
indicator
17. Transmission indicator
18. Feed alarm button

6
Start-up
1. Fully charge the parent unit battery.
2. Powering the baby unit
B: Feed alarm active
C: Room temperature at location of baby unit
D: Temperature alarm activated
E: Eco mode
F: Sound level indicator
G: Weak battery in baby unit
H: Projection light on
I: VOX projection light
J: Loudspeaker muted
K: Lullaby playing
L: Baby unit out of range
Power indicator lights up red while battery is charging and CH appears
briefly on display.
Once the battery is fully charged, after approx. 4 hours, the power
indicator goes out or lights up green when the device is switched on.
After recharging, you can leave the AC adapter connected without risk
of damaging the built-in battery.

7
Functional options:
Baby unit
1. When switched on, the operating indicator (16) is constantly lit in
green. When the battery charge is low, the indicator light starts flashing
and the symbol lights up on the screen of the parent unit.
2. The transmission indicator (17) lights up red whenever the baby unit
is transmitting. The unit goes into standby mode a few seconds after
it stops registering any sound, and the indicator light stops glowing.
3. Microphone sensitivity can be adjusted to 5 levels using the up and
down keys (14+15). The transmission indicator flashes between 1 and
5 times, indicating the selected level.
3. Place the baby unit on a stable table.
4. Switch it on by activating the power switch.
5. Switch the parent unit on by turning the rotary switch [9] to “I” or
Kamera VOX Modus Alarm S chlaflieder EinstellungBewegungLichtZoom 2x
The
power indicator [A] is now constantly lit in green. In
Kamera VOX Modus Alarm S chlaflieder EinstellungBewegungLichtZoom 2x
- mode you are
alerted with a vibration as soon as the device records any noise, while
in “I” mode there is no vibration.
6. The devices are coupled in the factory to ensure they are ready for im-
mediate use, so you can monitor the baby unit from the loudspeaker
right away. Should this not be the case, please proceed with the steps
outlined below under Coupling.
a) Battery operation::
Open the battery compartment after removing the locking screw.
Insert 3 AAA batteries, making sure the polarity is correct.
b) Mains operation:
You can operate the baby unit via the mains adapter while batteries
are inserted. To do so, connect the baby unit to the power socket using
the power adapter provided.

8
4. You can also adjust the volume of the music or intercom function using
the up and down keys (14+15). To do so, activate the corresponding
function before setting the desired volume. As long as playback/inter-
com is/are deactivated, the two navigation buttons adjust microphone
sensitivity only.
5. The projector can be controlled from the parent unit. You can choose
between continuous operation, power off or operation in VOX mode.
In VOX mode, the projection starts when the microphone registers any
sound and automatically shuts off a few seconds after no more sound
is detected. You can use either a ceiling or wall for projection. To ensure
stability when projecting onto a wall, fold out the stand of the baby
unit. The best projection quality is obtained at a distance of approx. 1
meter from the projection surface.
6. To start the feed alarm countdown, press button (18). The correspon-
ding icon will then flash on the parent unit’s screen. Once the set time
has elapsed, an alarm sounds and a timer message appears on the
screen. Please note that a change in the alarm time is not automati-
cally accepted by pressing the button on the baby unit. To accept the
change, press the button on the baby unit again.
7. The baby unit’s inbuilt temperature sensor measures the ambient tem-
perature, which is then shown on the parent unit’s display. The sensor
works error-free in the range between -19°C and +50°C. In the case
of a rapid change of temperature, it may take a few minutes for the
sensor to adapt and display the correct temperature. If the local tem-
perature is out of this range or the baby unit is out of service, - - is
displayed on the screen.
Coupling
1. Press and hold the settings button (6) on the parent unit.
2. Now turn the rotary switch [9] to switch on the unit. Release the set-
tings button (6) after you hear a beep. The screen now shows the
flashing symbols “p” and “1”.
3. Switch the baby unit on by moving the power switch while holding
down the “+” button (14). Release the “+” button once the transmis-
sion indicator is lit up. The transmission indicator will then flash.
9
4. Now press the feed alarm button (18). The baby unit’s transmission
indicator is now constantly lit – the “p” symbol on the parental unit’s
display will no longer flash if the pairing is successful.
5. Switch off both units.
6. Now switch the two units back on – and the baby monitor is ready
for use.
7. If there is still no connection, repeat steps 1-6.
Parent unit
1. If the parent unit does not receive any signal from the baby unit while
switched on, its screen switches off automatically after 20 seconds to
save energy, with the exception of the power indicator.
2. The power indicator lights up green during operation, flashes green
when weak and lights up red during charging.
3. To enter the settings mode, press and hold the settings button (6) for
about 2 seconds. To save your entry and move to the next menu item
in the sequence, press the settings button again.
a) Projector
Use the arrow buttons to select whether to switch the projection on,
off or to VOX mode. In VOX mode, projection only takes place when the
baby unit registers sound.
b) Eco mode
Select using the arrow keys
ON: The baby unit does not emit any signal while in standby mode.
(Caution: The out of range alarm is deactivated in this mode.)
OFF: If the parent unit is no longer receiving any signal from the baby
unit, an alarm sounds and the icon appears on the screen
c) Upper temperature limit
Using the arrow keys, you can set the upper temperature limit between
+10°C and +50°C. If the temperature rises above this, an alarm sounds.

10
d.) Lower temperature limit
Using the arrow keys, you can set the lower limit between -9°C and
+20°C. If the temperature falls below this, an alarm sounds.
e.) Feed alarm
Under this menu item, you can set a timer alarm to remind you to e.g.
regularly feed your child. You can choose an interval of between 1 and
8 hours at half-hourly increments. When a set alarm is triggered, an
alarm sounds and 00 flashes on the display.
4. In order to prevent any unpleasant noises (feedback) from being emit-
ted by the loudspeaker, ensure there is sufficient distance between the
parent unit and baby unit.
5. To change the volume, press one of the arrow keys. The temperature
display will then briefly fade, and the display will show the volume
level instead, from 0 (mute) to 5 (loud).
6. IIn vibration mode, the parent unit vibrates when receiving sound from
the baby unit. This function is useful if parents are in a noisy environ-
ment or do not want to disturb their environment with an acoustic
alarm. Using vibration mode can significantly shorten battery life.
7. If the parent unit is unable to connect to the baby unit for more than
30 seconds, an acoustic alarm sounds, the symbol flashes on the
screen and the temperature display shows - -. This alarm is not trig-
gered if the low-emission mode (ECO) is activated, or if the baby unit
is switched off or disconnected from the power supply (e.g. batteries
empty, no mains adapter connected).
8. If the ambient temperature of the baby unit falls outside the set range,
an alarm sounds, the symbol lights red (exceeded) or white (be-
low) and the temperature indicator starts flashing.
9. The playback of 6 different lullabies can be controlled via the parent
unit. Press the key briefly and use the arrow keys to select the
desired song. To stop playback, press the button again. Once play-
back has started, the music plays for 20 minutes before switching off
automatically so as not to disturb your baby. If your child begins to cry,
after 15 seconds the music will turn on again and play for 20 minutes.
The intercom function can still be used during playback. It is possible
that your child’s crying will not picked up by the microphone during
music playback. We therefore strongly recommend you interrupt play-
back regularly in order to check on your child’s activity.

11
10. Youcanalsousetheintercomfunctiontospeaktoyourchildandcalmthem
down. Press and hold the intercom button (8) and speak into the micro-
phone (3). To end the intercom, simply release the key (8) again. It is also
possible to use the intercom function while the baby unit is transmitting.
To check your child’s activity, briefly press the intercom button (8). The
baby unit will then transmit for a period of 10 seconds even if your
child is not active.
11. The confirmation key emits a beeping sound each time any of the 13-
16 keys are pressed.
12. To mute the alarm, briefly press buttons 8, 6, 4 or 1. The alarm icon will
continue to be displayed until the alarm has ended.
Troubleshooting:
Problem Possible cause Action
No transmission from
baby unit
•Microphone sensiti-
vity is too low
•No power supply to
baby unit
•Adjust sensitivity in
menu
•Check power supply,
replace batteries if
necessary
Permanent trans-
mission
•Microphone sensiti-
vity is too high
•Adjust sensitivity in
menu
Constant range alarm •Baby unit is
switched off or
no power supply
available
•Distance between
units is too great
•Coupling is faulty or
no longer available
•Switch on baby
unit or test power
supply
•Reduce distance
between units
•Recouple the de-
vices
Constant temperature
alarm
•The minimum &
maximum tempe-
rature limit values
are too close to the
current recorded
temperature
•Set limit values to
within approx. 5° of
the current measu-
red temperature

12
Problem Possible cause Action
Constant low battery
indicator
•Parent unit’s batte-
ries/rechargeable
battery are empty
•Charge the parent
unit using the char-
ging cable supplied
•Replace the bat-
teries in the baby
unit or connect the
mains adapter
Battery/rechargeable
battery runs out too
quickly
•Projection and
music playback are
constantly activated
•Vibration mode is
activated
•Switch off projection
and music playback
or switch to VOX
•Switch off vibration
mode
Range too small •Too much signal in-
terference between
units
•Baby unit battery
empty
•Reposition baby and
parent units
•Change battery in
baby unit
No connection
between the units
•Coupling error •Recouple the de-
vices
Warranty
Please retain your receipt, the user manual and item number. Warranty
claims or claims from promises of guarantee must be processed by the dealer.
The technical specification, information and characteristics of the product
described herein have been compiled to the best of our knowledge and
belief and are correct at the time of printing. Any information provided by
reer should be correct and authoritative. Nevertheless, reer does not accept
liability for potential errors in this document and reserves the right to make
changes to the product design and/or specifications without prior notice.
Reproduction and disclosure of information contained in this copyrightprotected
document, in any form or by any means - graphical, electronic or mechanical
by photocopying, recording on tape or storage in a data retrieval system
(even in part), require prior written consent from reer.

At the end of its life, this product must not be disposed of as
normal domestic waste, but should be recycled at a collection
point for electrical appliances. Please see the relevant symbol
on the product, in the user manual and packaging. Materials
can be recycled as specified. Do not put used batteries into
household waste. Instead they should be disposed of as hazardous waste
or with a battery collection station provided by the dealer. An important
contribution to the protection of the environment can be made by reusing
the unit, recycling its components or otherwise reusing old appliances. Please
contact your local council to find out more about an appropriate disposal centre.
Note on environmental protection

reer GmbH
Muehlstr. 41 • 71229 Leonberg • Germany
www.reer.de
Rev. 014619
Operation permitted in the following countries:
DE, CH, AT, IT, FR, BE, NL, ES, LU, GR, HU, CZ, SI, PL, CY, DK, FI, IS, LI, LT, NO,
RO, SE, SK, TR
reer GmbH hereby declares that the projector baby monitor radio system
(item no.: 50080) complies with Directive 2014/53/EU. The full text of the EU
Declaration of Conformity can be found at the following website:
http://www.reer.de
Table of contents
Other Reer Baby Monitor manuals

Reer
Reer IP BabyCam Move User manual

Reer
Reer BABYPHON NEO 1200 User manual

Reer
Reer Nova User manual

Reer
Reer 3004 BABYPHON MIDI User manual

Reer
Reer 5006 SCOPI User manual

Reer
Reer 50010 User manual

Reer
Reer 50040 User manual

Reer
Reer 8006 User manual

Reer
Reer BeeConnect Plus 50120 User manual

Reer
Reer 50070 User manual

Reer
Reer Babyphone Rigi 400 User manual

Reer
Reer BABYPHON AURIGA User manual

Reer
Reer 5006 SCOPI User manual

Reer
Reer 5006 SCOPI User manual

Reer
Reer BabyCam XL User manual

Reer
Reer Rigi Digital User manual

Reer
Reer Cosmo 50150 User manual

Reer
Reer Baby Cam L User manual

Reer
Reer 5006 SCOPI User manual

Reer
Reer 5006 SCOPI User manual