ESES
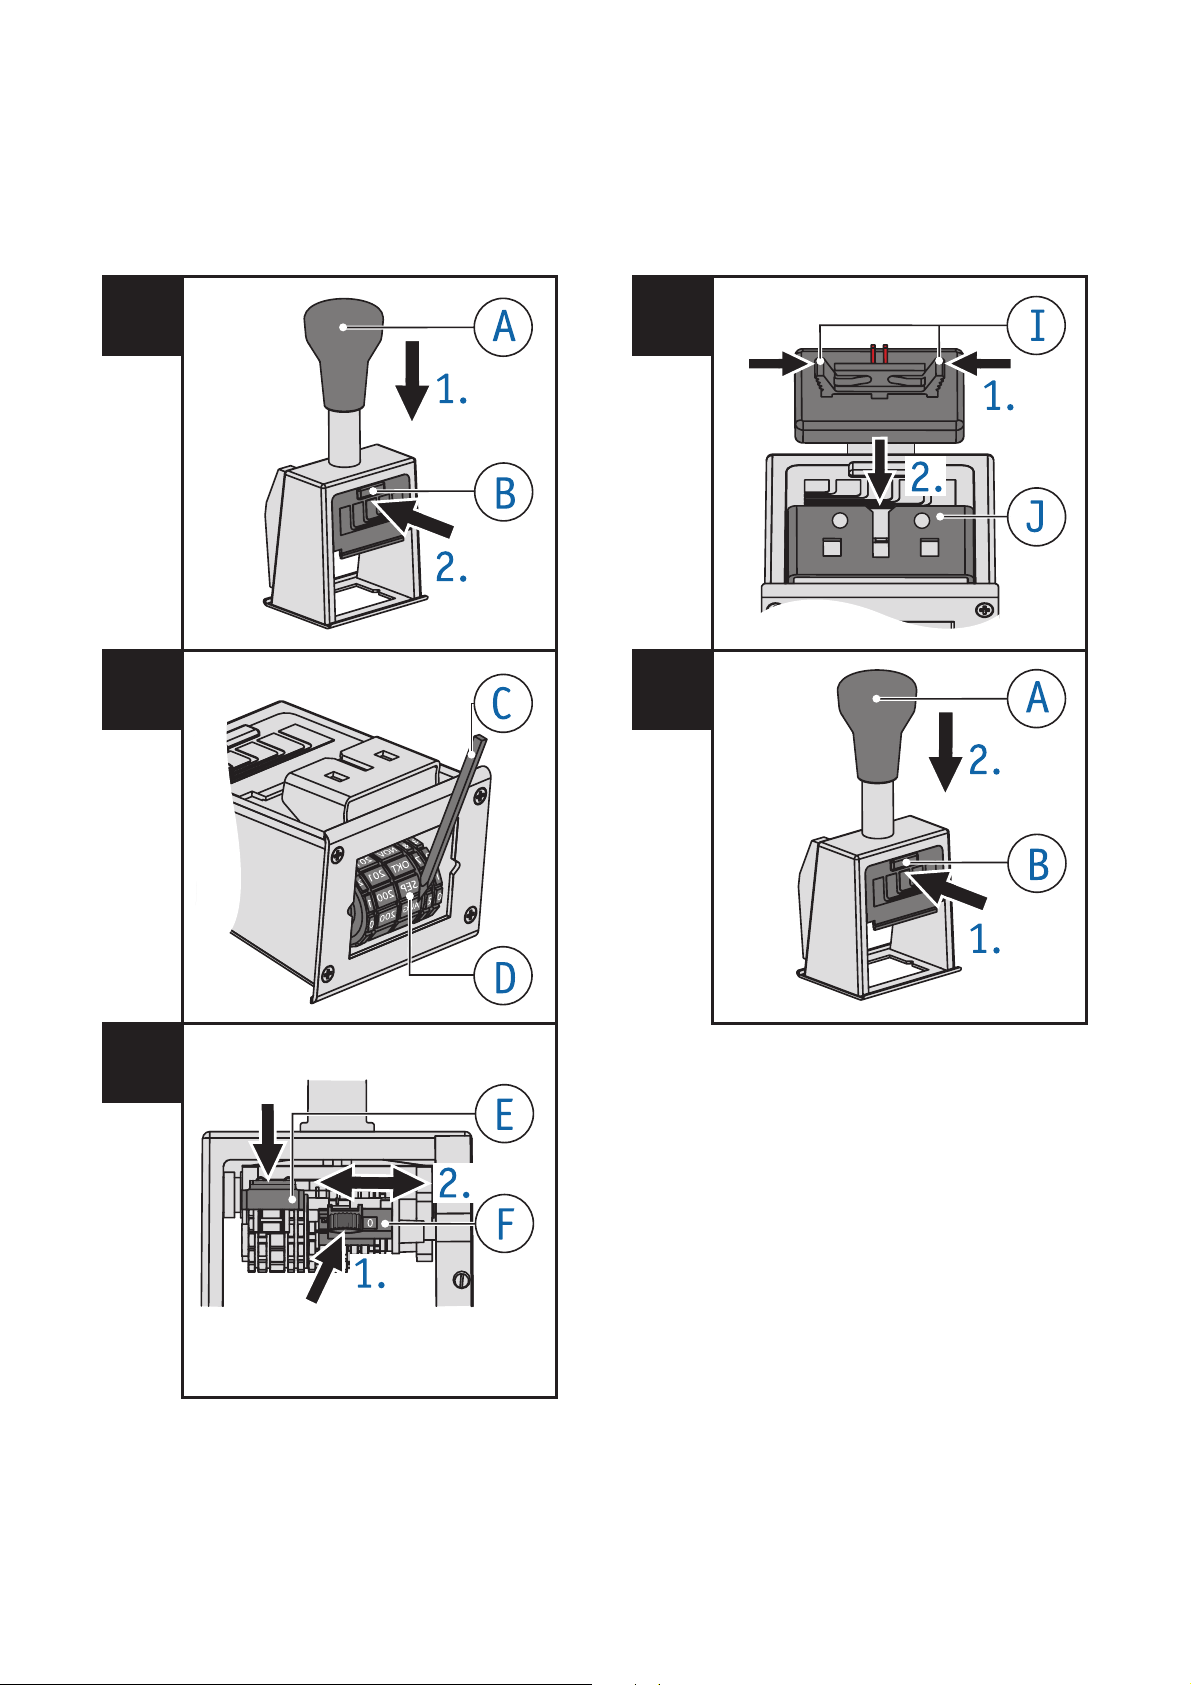
Ajuste de las ruedas de números
Fig. 1+2+3
Presionar el mango hasta el fondo como si
fuera a marcar y mantenerlo así.
Presionar el botón de bloqueo .
Liberar el mango que retrocederá quedando
el aparato bloqueado en la segunda posición
de bloqueo.
Ajustar las ruedas de números usando el
punzón .
Para desactivar el bloqueo o volver a la
posición inicial, presione el mango.
Para ajustar las ruedas de la fecha, sólo tiene
que pulsar una vez la tecla de cambio .
(No es aplicable a los modelos sólo numerador
N53a y N65a.)
Cambio de la almohadilla de tinta
Fig. 1+4
Nota: Por favor, utilice sólo tinta de impresión con
base de aceite.
¡Manipular con cuidado para evitar ensuciarse con
la tinta!
Presionar el mango hasta el fondo como si
fuera a marcar y mantenerlo así.
Presionar el botón de bloqueo .
Liberar el mango que retrocederá quedando
el aparato bloqueado en la segunda posición
de bloqueo.
El porta-almohadillas ha quedado abierto listo
para retirar la almohadilla gastada e introducir
la nueva.
Desembalar cuidadosamente la almohadilla de
tinta.
Presionar las patillas de encaje de la
almohadilla y retirarla.
Insertar la almohadilla de tinta nueva en la
guía del porta-almohadillas hasta el tope.
Para desactivar el bloqueo o volver a la
posición inicial, presione el mango.
Ajustar el número de repeticiones Fig. 3
Repeticiones
0Marca siempre el mismo número.
1Para marcar números consecutivos.
2Marca dos veces el mismo número y luego
cambia.
etc.
Presionar la palanca de repeticiones y
colocarla sobre la repetición deseada.
Posición de reposo Fig. 5
¡La posición de reposo evita que la almohadilla de
tinta se deforme por contacto constante con el
texto!
Presionar el botón de bloqueo .
Al mismo tiempo que se presiona el mango
hasta que quede bloqueado en la primera
posición de bloqueo que evita que la
almohadilla de tinta esté en contacto con
el texto.
Para desactivar el bloqueo o volver a la
posición inicial, presione el mango.