The Reliable Automatic Sprinkler Co., Inc.
(800) 431-1588 Sales Offices
(800) 848-6051 Sales Fax
(914) 829-2042 Corporate Offices
www.reliablesprinkler.com Internet Address
Manufactured by
Recycled
Paper
Revision lines indicate updated or new data.
EG. Printed in U.S.A 05/12 P/N 9999970014
The equipment presented in this bulletin is to be installed in accordance with the latest published Standards of the National Fire Protection Association, Factory
Mutual Research Corporation, or other similar organizations and also with the provisions of governmental codes or ordinances whenever applicable.
Productsmanufactured and distributed by Reliable have been protecting life and property for over 90 years, and are installed and serviced by the most highly
qualified and reputable sprinkler contractors located throughout the United States, Canada and foreign countries.
Installation
Do not install The Concealer®in ceilings which have posi-
tive pressure in the space in the space above.
After a 25/8inch diameter hole is cut in the ceiling, the sprin-
kler is to be installed with the Model G4 Wrench. The wrench
has drive tangs which insert into cup slots. When installing
a sprinkler the wrench is first positioned into the sprinkler/
cup assembly until the wrench tangs engage drive slots in
the top of the cup (there are two sets of mating drive slots in
the cup). The sprinkler is then tightened into the pipe fitting.
When inserting or removing the wrench from the sprinkler/
cup assembly care should be taken to prevent damage to
the sprinkler. DO NOT WRENCH ON ANY OTHER PART OF
THE SPRINKLER/CUP ASSEMBLY.
The adjustable inlet versions are similar to the standard
Model G4 except that an addition 1” (25mm) of adjustment is
provided by means of a telescoping inlet section that threads
in or out of a stationary coupling reducer (either 1 male or 1
female) as shown in Fig. 2 or Fig. 3. These sprinklers must be
installed before the ceiling is in place, by wrenching on only
the coupling reducer hex flats. After the ceiling has been in-
stalled with holes for the sprinkler, each telescoping inlet sec-
tion is to be adjusted with the G4 Wrench. Install the cover
plate assembly by hand turning it clockwise until it is tight
against the ceiling.
Maintenance
The Model G4 Concealer®should be inspected quarterly
and the sprinkler system maintained in accordance with
NFPA 25. Do not clean sprinklers with soap and water, am-
monia or any other cleaning fluids. Remove any sprinkler that
has been painted (other than factory applied) or damaged in
any way. A stock of spare sprinklers should be maintained
Temperature Ratings
Classification Sprinkler Cover Plate Max. Ambient
Temp.
Ordinary 135°F/57°C 135°F/57°C 100°F/38°C
Ordinary 165°F/74°C 135°F/57°C 100°F/38°C
Ordinary 165°F/74°C 165°F/74°C 150°F/66°C
Intermediate 212°F/100°C 165°F/74°C 150°F/66°C
Installation Data
Sprinkler
Inlet
Total
Adjustment
Nominal
Orifice
Nominal
K Factor Thread Approvals
Sprinkler
Identification
Number (SIN)
US Metric
Non–Adjustable ½” (13mm) ½” (15mm) 5.6 80 ½” NPT (R½) 1,2,3 R2115
Non–Adjustable ½” (13mm) 7
/
16”(11mm) 4.2 60 ½” NPT (R½) 1,2,3 R2113
Non–Adjustable ½” (13mm) 3
/
8” (10mm) 2.8 40 ½” NPT (R½) 1,2,3 R2111
Adjustable 1½” (38mm) ½” (15mm) 5.6 80 1” NPT Male or Female 1,2,3 R2118
Adjustable 1½” (38mm) 7
/
16” (11mm) 4.2 60 1” NPT Male or Female 1,2,3 R2113
Adjustable 1½” (38mm) 3
/
8” (10mm) 2.8 40 1” NPT Male or Female 1,2,3 R2112
Cover Plate Finishes(1)
Standard Finishes
Chrome
White Paint
Special Application
Finishes(2)
Bright Brass
Finished Bronze
Black Plating
Black Paint
Off White
Satin Chrome
(1) Other finishes and colors
are available on special
order. Consult factory for
details. Coverplate custom
paint is semi-gloss, unless
specified otherwise.
(2) For the perforated style
coverplate, consult factory
for availability on these
and other custom finishes.
Note: Paint or any other coat-
ings applied over the factory
finish will void all approvals
and warranties.
Installation Wrench
Model G4 Sprinkler Wrench
to allow quick replacement of
damaged or operated sprin-
klers. Prior to installation, sprin-
klers should be maintained in
the original cartons and pack-
aging to minimize the potential
for damage to sprinklers that
would cause improper opera-
tion or non-operation.
Ordering Information
1. Sprinkler Model
2. Temperature Rating
3. Nominal Orifice
4. Flat Cover Plate Finish
5. Inlet Type
Note: Unless otherwise specified,
the 165°F (74°C) sprinkler will
be provided with the 165°F
(74°C) cover.
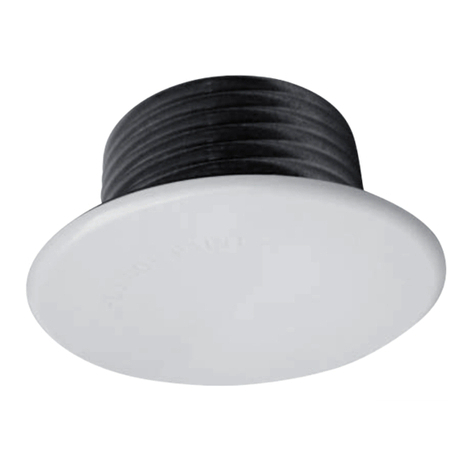
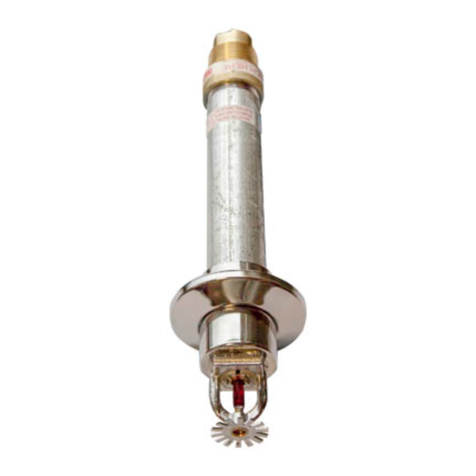
Fig. 1 - ½” NPT (R½) Non-Adjustable Inlet Fig. 2 - 1” NPT Male-Adjustable Inlet Fig. 3 - 1” NPT Female-Adjustable Inlet
