manuals.online logo
Brands
  1. Home
  2. •
  3. Brands
  4. •
  5. San Jamar
  6. •
  7. Dispenser
  8. •
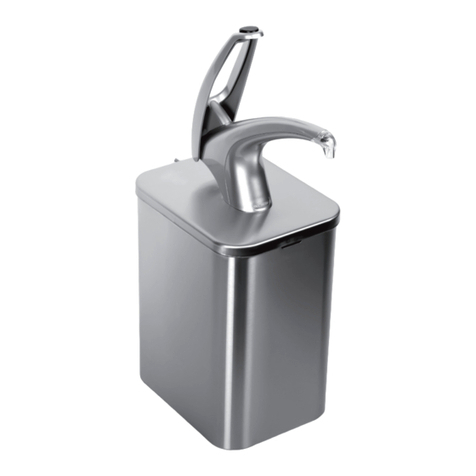
  9. San Jamar Rely Hybrid User manual

San Jamar Rely Hybrid User manual

Rely®Hybrid
Soap Dispenser
San Jamar
555 Koopman Lane
Elkhorn, Wisconsin 53121
USA
T: +1.262.723.6133
F:
+1.262.723.4204
[email protected]
www.sanjamar.com
Canada
15252 32nd Avenue
Suite 309
Surrey, BC V3S 0R7
CANADA
T: +1.262.723.6133
F: +1.262.723.4204
canada@sanjamar.com
Europe
Schoorstraat 26a, bus 1
2220 Heist op-den Berg
BELGIUM
T: +32 15 22 81 40
F: +32 15 22 81 48
emea@sanjamar.com
México
Av. Paseo de la Reforma No. 350 - 10
Col. Juarez
Deleg. Cuauhtemoc, CP 06600
MEXICO, D.F.
T: +52 (55) 3626 0772
mexico@sanjamar.com
© Cop
yright San Jamar, Inc. 2016 103414
INSTALACIÓN DE LAS BATERÍAS
1. Retire la llave de la parte posterior del dispenser. Introduzca la llave en la ranura ubicada en la parte superior del dispenser y tire de la tapa hacia usted para obtener acceso
al módulo. La tapa está montada en la parte inferior del dispenser.
1a. En el dispenser sin llave,libere el bloqueo del botón y tire de la tapa hacia usted para obtener acceso al módulo.La tapa está montada en la parte inferior del dispenser.
2. Retire la tapa de la batería ubicada en el lado derecho del módulo e introduzca cuatro baterías alcalinas tipo C* (no incluidas). Asegúrese de colocar las baterías en el
compartimiento con la orientación correcta como se muestra en el diagrama del compartimiento.Vuelva a colocar la tapa.
*No use pilas recargables. No mezcle diferentes tipos de pilas.No mezcle pilas nuevas y usadas.
3. El dispensador se encenderá automáticamente una vez que estén colocadas las pilas. Verá un parpadeo rápido del LED blanco seguido inmediatamente de un parpadeo
del LED verde, que indica que la unidad funciona.
4. Cuando las pilas se gastan para el funcionamiento del dispenser,el LED blanco ilumina el ícono "Push" (Empujar) para usar la unidad en modo manual (ver abajo) e indica
que se deben reemplazar las pilas. NOTA: Reemplace la bomba cuando cambie las pilas.Bomba de espuma,X102522F,bomba de loción, X102523L.
5. Remueva las pilas gastadas del dispositivo y elimínelas de forma segura. Si el dispositivo se guarda sin usar durante un tiempo prolongado, remueva las pilas.
1. Eldispenserdebemontarsea12pulgadas(30.5cm)encimadelaencimera,lavabouotrasupercie.Siunobjetopermaneceenelrangodelsensordurantemásde10
segundos, los LED blanco y verde comenzarán a parpadear y no se dispensará jabón después de la dosis inicial. Retire el objeto y la unidad funcionará con normalidad.
2. Pararetirarelensamblajeparaelfrasco,levantelapalancaqueestájuntoalinterruptordedosicaciónytirelabombahaciausted.Estoledaráaccesoalosoriciosde
montaje que están en la parte trasera del dispenser.
3. Monte el dispenser a la pared con los accesorios de montaje correspondientes para la composición de su pared. NOTA: Los accesorios para el montaje no se
suministran.
EXCLUSIÓN DE RESPONSABILIDAD: Elusodejabónconelementosabrasivoscausaráqueeldispensertengaltracionesoeventualmentefalle.SanJamarnoseresponsabilizaporelusodeunjabónincorrectoquecauseque
el dispenser falle o se tapone. Use jabón líquido o en loción en el SH900 y jabón de espuma en el SHF900.
MONTAJE DEL DISPENSER
1. Una vez que se montó el dispenser a la pared, coloque el ensamblaje para el frasco nuevamente en la unidad. Retire la tapa de la parte superior del ensamblaje y rellene
con el jabón líquido que desee.
2. Vuelva a colocar y cierre la tapa.
3. El dispenser ahora está listo para usar.
ADVERTIR:
• Las instrucciones se ofrecen para la utilización segura del despachador. (EN 60335-2-23/A11)
• Este dispositivo puede ser usado por niños de 8 años o mayores y por personas con capacidades físicas, sensoriales o mentales reducidas, al
igual que por personas sin experiencia o conocimiento previo si se les da supervisión o instrucción adecuada concerniente al uso seguro del
dispositivo, y comprenden los peligros que supone. No deje que los niños jueguen con el dispositivo. La limpieza
y mantenimiento del dispositivo no debe ser realizada por niños sin supervisión.
• Estas instrucciones también están disponibles en www.sanjamar.com.
RELLENO
ACTIVACIÓN DEL DISPENSER
Electrónico:
1. Para activar el dispenser en modo electrónico, coloque la mano debajo de la parte inferior del dispenser. Si se necesita más de una dosis, retire la mano y vuelva a colocarla
debajo del dispenser.
2. No haga corto circuito con los terminales del suministro. 3. Mantenga limpia la lente infrarroja.
Manual:
1. Para activar el dispenser en modo manual, empuje la parte inferior central de la tapa.
Indicadores LED:
LED verde intermitente (cada 3 segundos): modo de espera para ser usado
LED verde constante: dispenser en uso
Icono rojo intermitente en la cubierta: deben reemplazarse las pilas
LED blanco intermitente y luego verde: algo estuvo en el campo del sensor por
más de 10 segundos
Posiciones del interruptor de dosicación: (ver foto abajo)
FULL - posición superior: provee una dosis completa (1,0 ml) de jabón
del dispensador
OFF - posición central: apagado
HALF - posición inferior: provee media dosis (0,5 ml) de jabón del dispensador
BATTERY INSTALLATION
1. Remove the key from the back of the dispenser. Insert the key into the slot located at the top of the dispenser and pull the cover towards you to gain access to the module.
The cover is hinged at the bottom of the dispenser.
1a. If this is the keyless dispenser, depress the push button lock and pull the cover towards you to gain access to the module.The cover is hinged at the bottom of the
dispenser.
2. Remove the battery cover located on the right side of the module and insert four C-cell alkaline batteries* (not included) making sure to
place batteries in the compartment in the proper orientation as show by the diagram in the battery compartment. Replace the battery cover.
*Rechargeable batteries are not to be used. Do not use different types of batteries. New and used batteries are not to be mixed.
3. Thedispenserwillturn“on”automaticallyoncebatteriesareinstalled.YouwillgetaquickashofthewhiteLED followed immediately with a
ashofthegreenLEDindicatingtheunitisfunctional.
4. When the batteries become too low for the dispenser to function, the white LED illuminates the “Push” icon for the unit to be used in manual
mode (see below) and indicates that the batteries need to be replaced. NOTE: Replace pump when changing batteries. Foam pump,
X102522F, Lotion Pump, X102523L.
5. Exhausted batteries are to be removed from the appliance and safely disposed of. If the appliance is to be stored unused for a long period, remove the batteries.
1. The dispenser should be mounted 12 inches (30.5 cm) above the counter-top,sink or other surface. If an object remains in the sensing range for more than 10 seconds,
the white and green LED will begin blinking and no soap will be dispensed after the initial dose. Remove the object and unit will operate normally.
2. Remove the bottle assembly by lifting up on the lever next to the dosage switch and pulling the pump towards you.This will give you access to
the mounting holes on the back of the dispenser.
3. Mount the dispenser to the wall using the proper mounting hardware for your particular wall composition. NOTE: Mounting hardware not provided.
DISCLAIMER:Soapcontainingscrubbersorabrasiveswillcausethedispensertoleakoreventuallyfail.SanJamarisnotresponsibleforincorrectsoapusethatleadstofaultydispenseroperation
or clogging. Use Liquid/Lotion soap in the SH900 and Foam soap in the SHF900.
MOUNTING DISPENSER
1. Oncethedispenserhasbeenmountedtothewall,placethebottleassemblybackintotheunit.Removethecapfromthetopoftheassemblyandllwithyourchoice of
bulk soap.
2. Replace the cap and close the cover.
3. The dispenser is now ready for use.
FILLING
DISPENSER ACTIVATION
Electronic:
1. To activate dispenser in electronic mode, place hand under bottom of dispenser. If more than one dose is needed, remove hand and then replace hand under dispenser.
2. The supply terminals are not to be short-circuited. 3. Keep the IR lens clean
Manual:
1. To activate dispenser in manual mode; push the bottom, center of the cover.
LED Indicators
Battery
Cover
INSTALLATION DES PILES
1. Retirezlaclédel'arrièredudistributeur.Insérezlaclédanslafentesituéeenhautdudistributeurettirezlecouvercleversvousand'accéderaumodule.Lecouvercleest
articulé dans la partie inférieure du distributeur.
 1a.S'ils'agitdudistributeursansclé,enfoncezlebouton-poussoirettirezlecouvercleversvousand'accéderaumodule.Lecouvercleestarticulédanslapartie
inférieure du distributeur.
2. Retirez le couvercle des piles situé sur le côté droit du module et insérez quatre piles alcalines C-cellulaires* (non incluses) en veillant à placer les piles dans le
compartiment dans le bon sens, comme le montre le schéma dans le compartiment des piles. Replacez le couvercle des piles.
*Ne pas utiliser de batteries rechargeables. Ne pas utiliser différents types de batteries. Ne pas mélanger des batteries neuves et usagées.
3. Ledistributeurs'activeraautomatiquementunefoislespilesinstallées.YouwillgetaquickashofthewhiteLEDfollowedimmediatelywithaashofthegreenLED
indicating the unit is functional.
4. Lorsque les piles sont trop faibles pour que le distributeur ne fonctionne, le voyant blanc illuminera l'icône « Pousser » pour que l'unité soit utilisée en mode manuel
(voir ci-dessous) et indique que les piles doivent être remplacées. REMARQUE : Remplacer la pompe lorsque vous changez les piles.Pompe à mousse,
X102522F, pompe à lotion,X102523L.
5. Lesbatteriesenndeviedoiventêtreretiréesdel’appareiletéliminéesentoutesécurité.Sil’appareildoitêtreentreposésansêtreutilisépendantunelonguepériode,
veuillez retirer les batteries.
1. Le distributeur doit être monté 12 pouces (30,5 cm) au-dessus du comptoir, de l'évier ou de toute autre surface. Si un objet reste dans la zone de détection pendant plus
de 10 secondes, le voyant blanc et vert se mettra à clignoter et aucun savon ne sera distribué après la dose initiale. Retirez l'objet et l'appareil fonctionnera normalement.
2. Retirez l'assemblage du distributeur de la bouteille en soulevant le levier à côté du bouton de dosage et en tirant la pompe vers vous. Cela vous donnera accès aux trous
de montage à l'arrière du distributeur.
3. Montez le distributeur au mur en utilisant le matériel de montage approprié pour la composition particulière de votre mur. REMARQUE : le matériel de montage
n'est pas fourni.
AVERTISSEMENT:Lessavonsquicontiennentdesparticulesetdesabrasifspeuventcauserunefuiteaudistributeur,etàtermel’endommager.SanJamarnepeutpasêtretenupourresponsableencasd’utilisationdesavon
entraînant un dysfonctionnement ou une obstruction du distributeur.Utilisez un savon liquide ou lotion dans le SH900 et un savon mousse dans le SHF900.
MONTER LE DISTRIBUTEUR
1. Une fois que le distributeur est bien monté sur le mur, placez l'assemblage de la bouteille dans l'appareil. Retirez le bouchon du haut de l'assemblage et remplissez avec
votre choix de savon en vrac.
2. Replacez le bouchon et fermez le couvercle.
3. Le distributeur est maintenant prêt à l'emploi.
REMPLISSAGE
ACTIVATION DU DISTRIBUTEUR
Électronique :
1. Pour activer le distributeur en mode électronique, placez la main sous le fond du distributeur. Si plus d'une dose est nécessaire, retirez la main et puis replacez la main
sous le distributeur.
2. Lesbornesd’alimentationnedoiventpasêtrecourt-circuitées. 3. Veuillez maintenir la lentille infrarouge propre.
Manuel :
1. Pour activer le distributeur en mode manuel; poussez sur le fond, au centre du couvercle.
Voyants lumineux:
CAUTION:
• Instructions are provided for safe use of the dispenser. (EN 60335-2-23/A11)
• This appliance can be used by children aged from 8 years and above and persons with reduced physical, sensory and mental capabilities or lack of
experience and knowledge if they have been given supervision or instruction concerning use of the appliance in a safe way and understand the
hazards involved. Children shall not play with the appliance. Cleaning and user maintenance shall not be made by children without supervision.
• These instructions are also available at www.sanjamar.com.
AVERTIR:
• Les instructions sont fournies pour assurer une utilisation sécuritaire du distributeur. (EN 60335-2-23/A11)
• Cet appareil peut être utilisé par des enfants âgés de 8 ans et plus, ainsi que par des personnes présentant des capacités physiques, sensorielles
oumentalesréduites,sansexpérienceouauxcompétencesinsufsantes,àconditiond’êtresuperviseroudebénécierd’uneformationsur
l’utilisationdel’appareildemanièresécuriséeetdecomprendrelesrisquesinhérents.Lesenfantsnedoiventpasjoueravecl’appareil.Le
nettoyageetl’entretienparl’utilisateurnepeuventpasêtreeffectuésparlesenfantssanssupervision.
• Ces instructions sont également disponibles sur www.sanjamar.com.
Blinking green LED (every 3 sec): standby mode waiting to be used
Solid green LED: dispenser is in use
Flashing red icon on cover: batteries need to be replaced
Flashing white then green LED:somethingisinthesensoreldforlonger
than 10 sec
FULL - Upper position: provides a full dose (1.0 ml) of soap from the dispenser
OFF - Center position: power off
HALF - Lower position: provides a half dose (0.5 ml) of soap from the dispenser
Dosage Switch Positions: (see photo below)
Voyant clignotant vert (toutes les 3 secondes): moded’attented’utilisation
Voyant vert: le distributeur est en utilisation
Voyant rouge clignotant sur le couvercle: les piles doivent être remplacées
Voyant clignotant vert et blanc: quelque chose se trouve dans le champ de détection
pendant plus de 10 secondes
FULL - Position haute : pour une dose complète (1,0 ml) de savon du distributeur
OFF - Position centrée : fermé
HALF - Position basse : pour une demie dose (0,5 ml) de savon du distributeur
Positions des boutons de dosage : (voir la photo ci-dessous)

This manual suits for next models

1

Other San Jamar Dispenser manuals

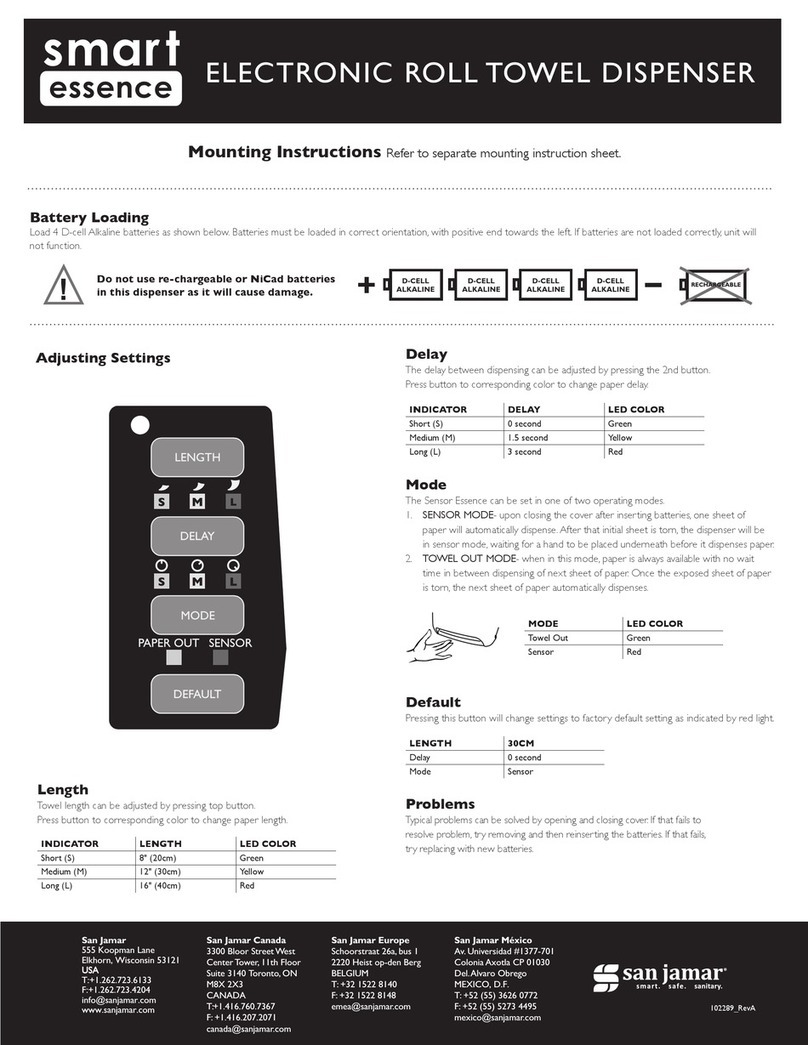
San Jamar FRONTLINE User manual

San Jamar

San Jamar FRONTLINE User manual

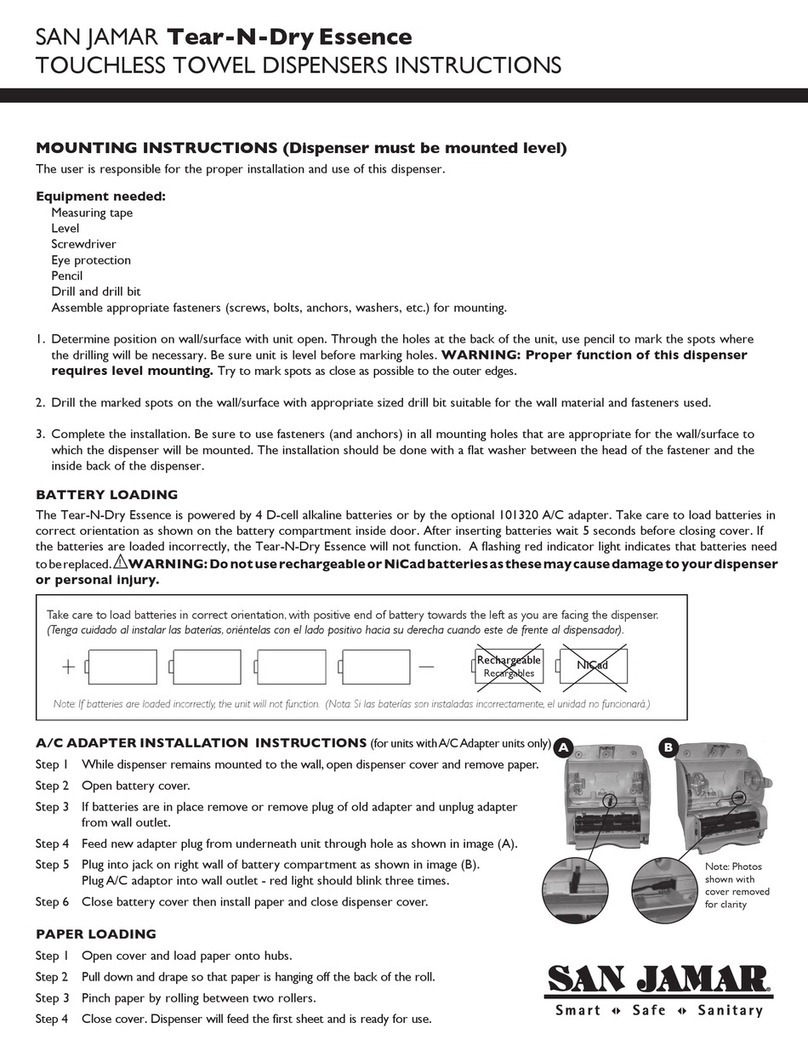
San Jamar Tear-N-Dry Essence User manual

San Jamar

San Jamar Tear-N-Dry Essence User manual

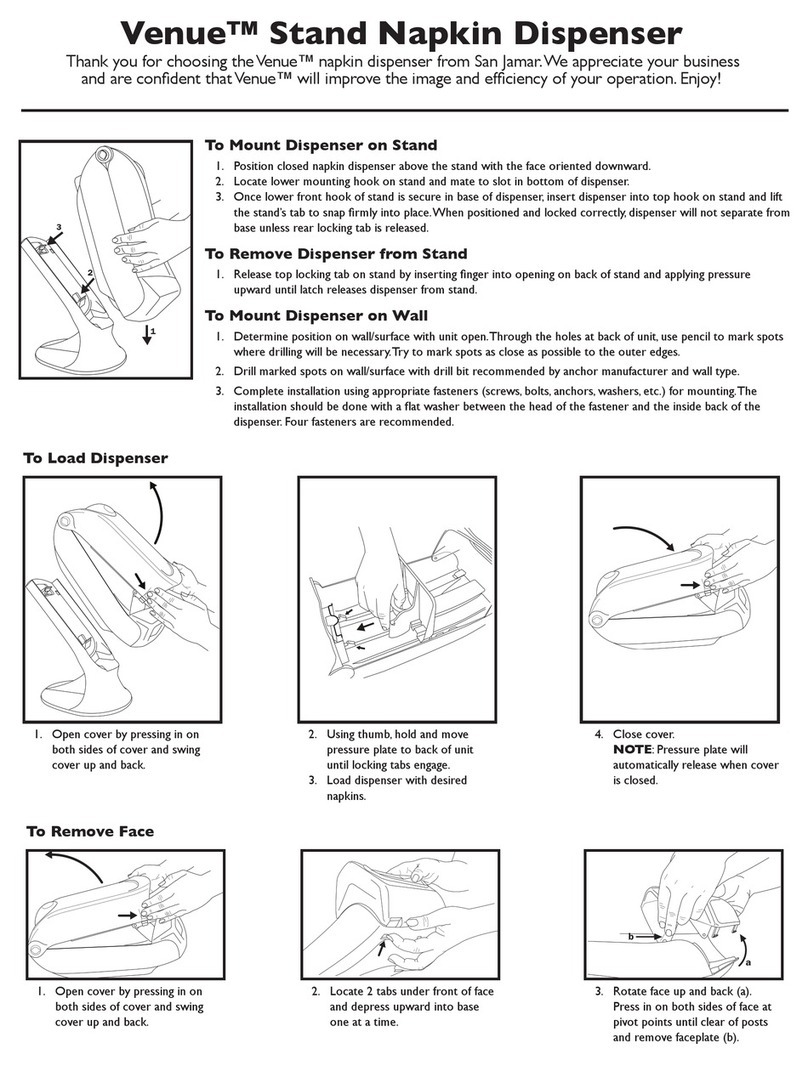
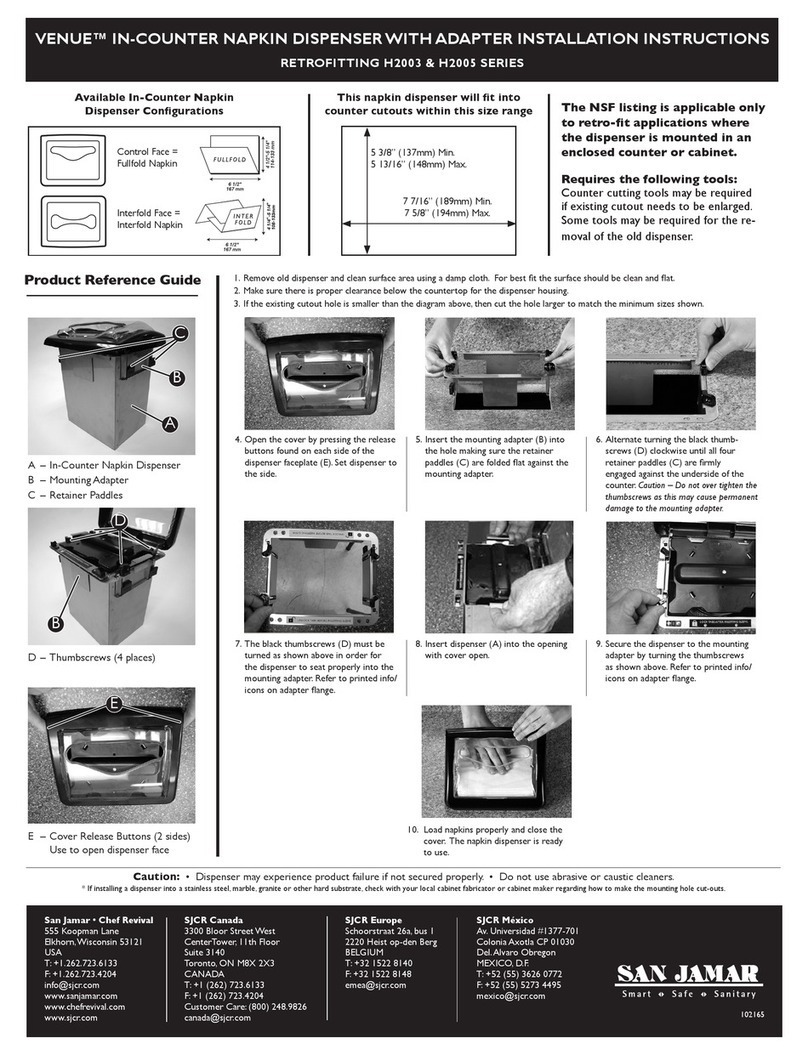
San Jamar Venue User manual

San Jamar

San Jamar Venue User manual

San Jamar EZ-Fit Service manual

San Jamar

San Jamar EZ-Fit Service manual

San Jamar Venue User manual

San Jamar

San Jamar Venue User manual

San Jamar Arriba TWIST Solaire User manual

San Jamar

San Jamar Arriba TWIST Solaire User manual

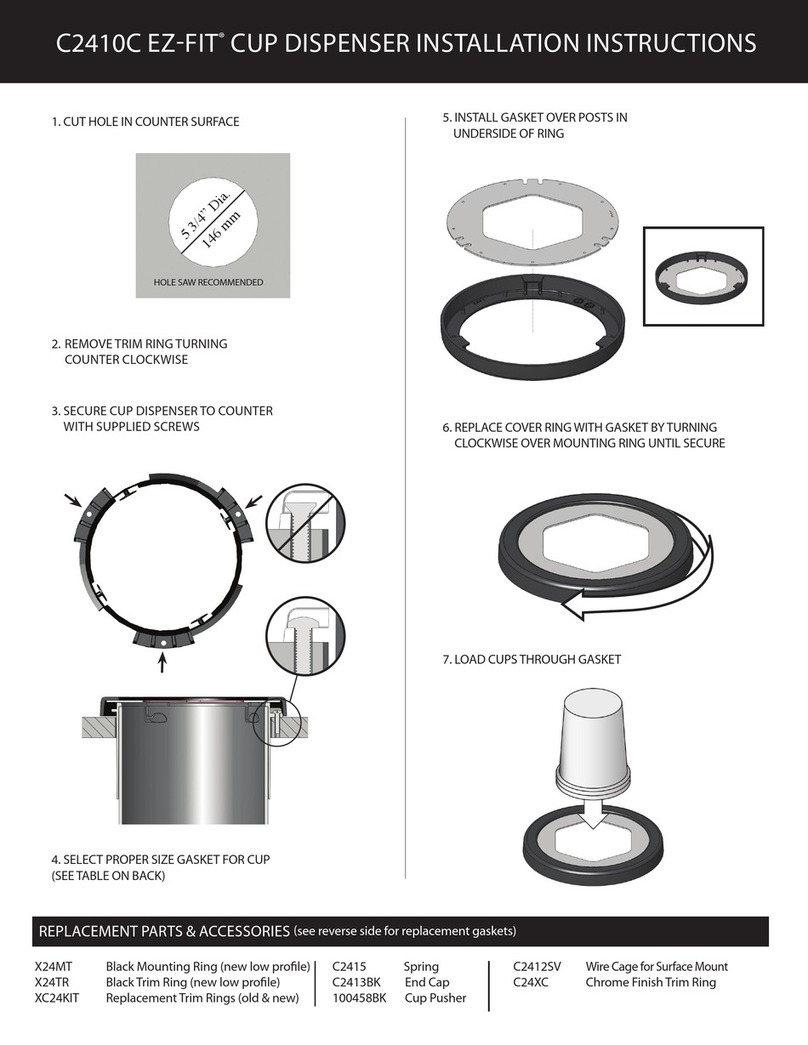
San Jamar C2410C User manual

San Jamar

San Jamar C2410C User manual

San Jamar Smart Essence T8400TBK User manual

San Jamar

San Jamar Smart Essence T8400TBK User manual

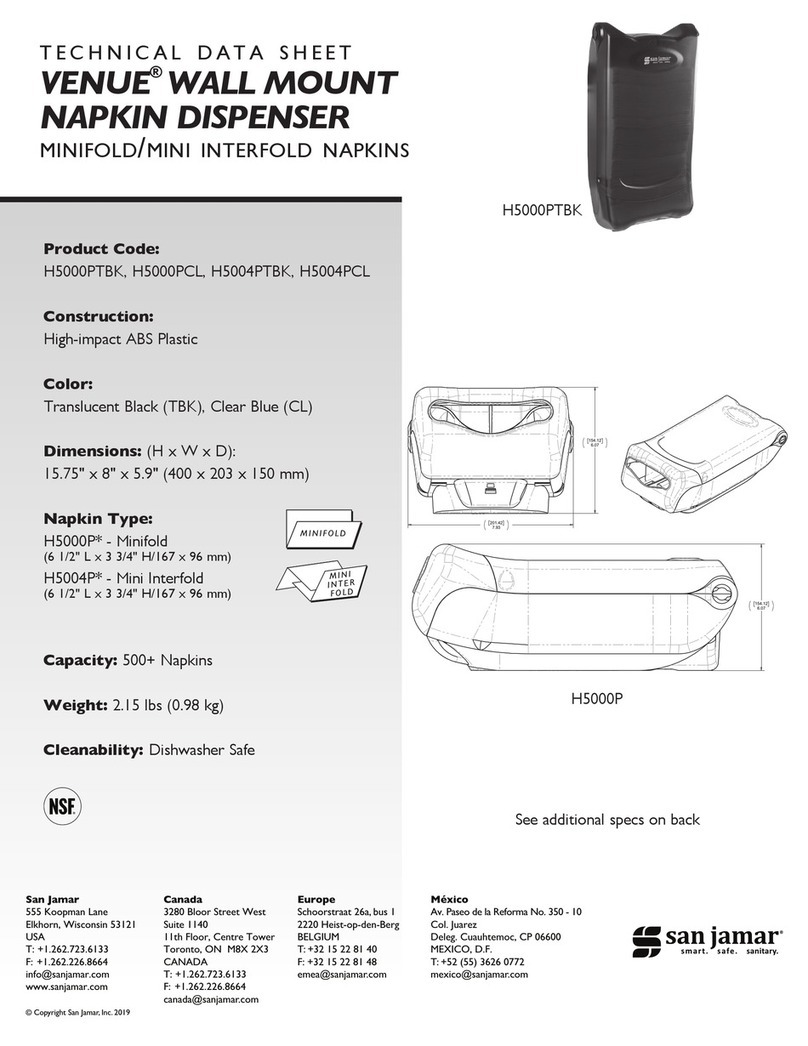
San Jamar VENUE H5000PTBK Instruction Manual

San Jamar

San Jamar VENUE H5000PTBK Instruction Manual

San Jamar SN30 User manual

San Jamar

San Jamar SN30 User manual

San Jamar C3400C User manual

San Jamar

San Jamar C3400C User manual

San Jamar Tear-N-Dry Essence User manual

San Jamar

San Jamar Tear-N-Dry Essence User manual

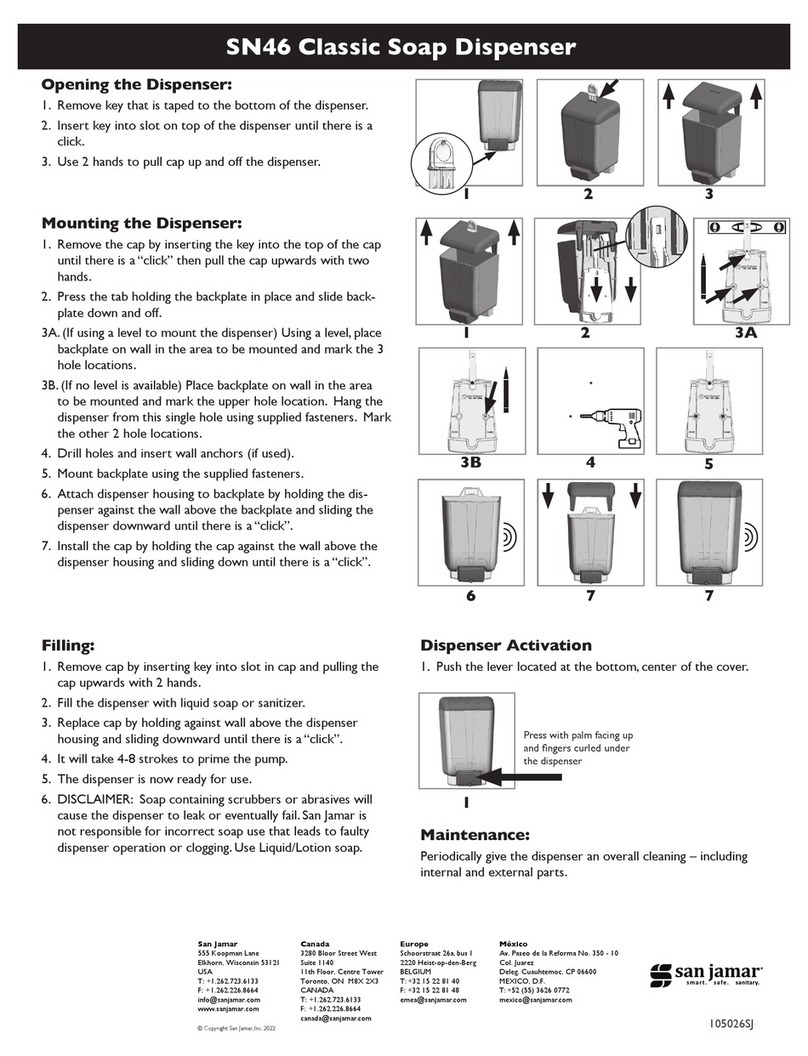
San Jamar SN46 User manual

San Jamar

San Jamar SN46 User manual

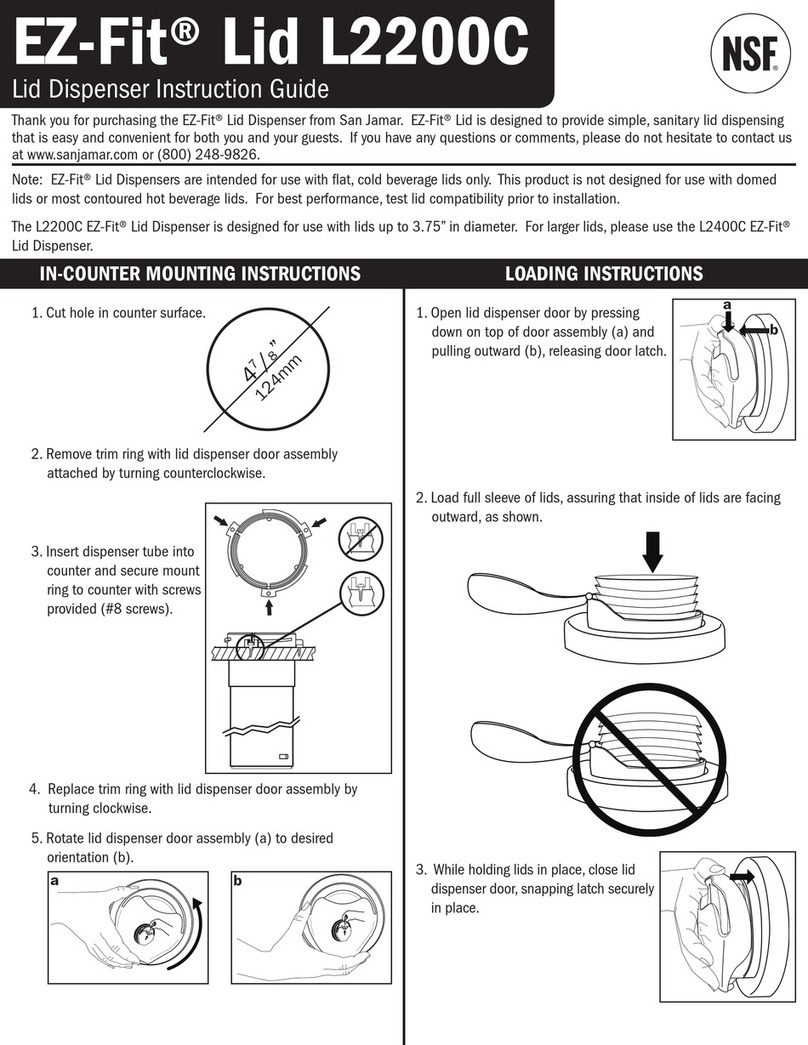
San Jamar EZ-Fit Lid L2200C Manual

San Jamar

San Jamar EZ-Fit Lid L2200C Manual

San Jamar VENUE H2003 Series User manual

San Jamar

San Jamar VENUE H2003 Series User manual

San Jamar TEAR-N-DRY User manual

San Jamar

San Jamar TEAR-N-DRY User manual

Popular Dispenser manuals by other brands

Nordson Ultimus V operating manual

Nordson

Nordson Ultimus V operating manual

Salter Brecknell APD-100 User instructions

Salter Brecknell

Salter Brecknell APD-100 User instructions

Labelmate LD-100-U-SS manual

Labelmate

Labelmate LD-100-U-SS manual

Animo WKS user manual

Animo

Animo WKS user manual

Veneer Tape Dispenser instructions

Veneer

Veneer Tape Dispenser instructions

Bennett CNG Series installation manual

Bennett

Bennett CNG Series installation manual

Westomatic Primo Compact Install, Clean & Fill

Westomatic

Westomatic Primo Compact Install, Clean & Fill

Bobrick B-828 Instructions for installation

Bobrick

Bobrick B-828 Instructions for installation

Franke KEMWSBF instructions

Franke

Franke KEMWSBF instructions

Cecilware GB1M-IT user manual

Cecilware

Cecilware GB1M-IT user manual

Bravetti APD803B owner's manual

Bravetti

Bravetti APD803B owner's manual

rosseto EZ-SERV EZ533 instructions

rosseto

rosseto EZ-SERV EZ533 instructions

FILTRENA H2O My Dispenser Installation, use and maintenance handbook

FILTRENA

FILTRENA H2O My Dispenser Installation, use and maintenance handbook

Hydro AccuDose 3874GBA-2 Quick user guide

Hydro

Hydro AccuDose 3874GBA-2 Quick user guide

Server Mix-N-Serve 05550 manual

Server

Server Mix-N-Serve 05550 manual

Bobrick Designer B-840 troubleshooting guide

Bobrick

Bobrick Designer B-840 troubleshooting guide

DEMA Super Sink Series Installation and setup guide

DEMA

DEMA Super Sink Series Installation and setup guide

Coopers of Stortford H173 Instructions for use

Coopers of Stortford

Coopers of Stortford H173 Instructions for use

manuals.online logo
manuals.online logoBrands
  • About & Mission
  • Contact us
  • Privacy Policy
  • Terms and Conditions

Copyright 2025 Manuals.Online. All Rights Reserved.