manuals.online logo
Brands
  1. Home
  2. •
  3. Brands
  4. •
  5. Sauder
  6. •
  7. Indoor Furnishing
  8. •
  9. Sauder 419409 User manual

Sauder 419409 User manual

NOTE: THIS INSTRUCTION
BOOKLET CONTAINS IMPORTANT
SAFETY INFORMATION.
PLEASE READ AND KEEP FOR
FUTURE REFERENCE.
English pg 1-22
Français pg 23-25
Español pg 26-28
Lot # 375632 09/14/15
Purchased: __________________
Be sure to give us a ring before
making any returns. 1-800-523-3987
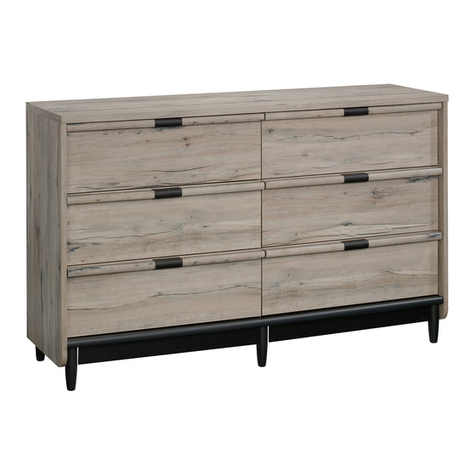
Dresser
419409
Need help? Visit Sauder.com to view video assembly tips or chat with a live rep.
Prefer the phone? Call 1-800-523-3987.
Share your journey!
sauder.com
Yes, you still have to
dress yourself.
Table of Contents Assembly Tools Required
2-3
4
5-22
23-25
26-28
29-30
31
Part Identification
Hardware Identification
Assembly Steps
Français
Español
Safety
Warranty
Hammer
Not actual size
No. 2 Phillips Screwdriver
Tip Shown Actual Size
Skip the power trip.
This time.
419409 www.sauder.com/servicesPage 2
Part Identification
åWhile not all parts are labeled, some of the parts will have a label or an inked letter on the edge
to help distinguish similar parts from each other. Use this part identification to help identify similar parts.
A RIGHT END (1)
B LEFT END (1)
C UPRIGHT (1)
D TOP (1)
E BOTTOM (1)
F BACK (1)
M65 DRAWER BRACE (6)
H FRONT LEG (2)
I BACK LEG (2)
J UPPER RIGHT DRAWER FRONT (1)
K UPPER LEFT DRAWER FRONT (1)
LLOWER RIGHT DRAWER FRONT (2)
M LOWER LEFT DRAWER FRONT (2)
N FRONT MOLDING (1)
O BOTTOM MOLDING (1)
P FOOT (2)
D50 LOWER RIGHT DRAWER SIDE (4)
D51 LOWER LEFT DRAWER SIDE (4)
D166 UPPER DRAWER BACK (2)
D167 LOWER DRAWER BACK (4)
D212 UPPER RIGHT DRAWER SIDE (2)
D213 UPPER LEFT DRAWER SIDE (2)
D975 DRAWER BOTTOM (6)
Part Identification Now you know
our ABCs.
419409www.sauder.com/services Page 3
D975
D212
D50
D51
D166
D213
D167
D975
A
B
C
D
E
F
H
I
J
L
N
O
P
D212
D166
D213
D975
K
D975
D50
D51
D167
M
P
H
I
M65
M65
M65
M65
Hardware Identification
åScrews are shown actual size. You may receive extra hardware with your unit.
419409 www.sauder.com/servicesPage 4
DRAWER FRONT
BRACKET - 2
8G
DRAWER FRONT
BRACKET - 4
9G
5E CORNER CAP - 1
5L WARNING LABEL - 1
(Refer to the last step for proper
location and application)
WARNING
Serious or fatal crushing injuries can occur
from furniture tip-over. To help prevent
tip-over:
• Place heaviest items in the lowest drawers.
• Unless specifically designed to accommodate, do not
set TVs or other heavy objects on top of this product.
• Never allow children to climb or hang on drawers,
doors, or shelves.
• Never open more than one drawer at a time.
• If equipped with a drawer interlock system, do not
defeat or remove it.
Use of tip-over restraints may only reduce, but not
eliminate, the risk of tip-over.
This is a permanent label. Do not attempt to remove!
04/10 332296
6E FOOT BRACKET - 1
SAFETY BRACKET - 1
1G METAL BRACKET - 3
4G
BLACK 9/16" LARGE HEAD SCREW - 36
1S
WASHER - 12
10I
BLACK 2-1/4" FLAT HEAD SCREW - 7
26S
10F TWIST-LOCK®
FASTENER - 10
SILVER 1/4" MACHINE SCREW - 12
61S
3S GOLD 5/16" FLAT HEAD SCREW - 48
CAM SCREW - 12
8F
WOOD DOWEL - 2
15F
NAIL - 39
1N
HIDDEN CAM - 12
1F
PULL - 6
98K
BLACK 1-15/16" FLAT HEAD SCREW - 2
113S
40DA UNIVERSAL CABINET RAIL - 12 40DC DRAWER RIGHT - 6 40DD DRAWER LEFT - 6
30S BLACK 1-9/16" FLAT HEAD SCREW - 30
Step 1 Look for this icon. It means a
video assembly tip is available at
www.sauder.com/services/tips
å Assemble your unit on a carpeted floor or on the empty
carton to avoid scratching your unit or the floor.
å To begin assembly, push a SAUDER TWIST-LOCK®
FASTENER (10F) into the large holes in the ENDS (A and B)
and UPRIGHT (C).
å Repeat this step for the BOTTOM (E).
419409www.sauder.com/services Page 5
(10 used)
10F
Do not tighten the TWIST-LOCK® FASTENERS in this step.
A
B
C
Step
å Push twelve HIDDEN CAMS (1F) into the ENDS (A and B)
and DRAWER BRACES (M65).
Step 2
419409 www.sauder.com/servicesPage 6
A
B
Arrow
The arrow in the HIDDEN
CAM must point toward the
hole in the edge of the board.
Hole
Just think. The sooner
you do this, the sooner
you do something else.
Surface with
TWIST-LOCK®
FASTENERS
Surface with
TWIST-LOCK®
FASTENERS
Arrow
1F (12 used)
1F
Arrow
1F
Arrow
M65
M65 M65
M65
M65
M65
Step
419409www.sauder.com/services Page 7
Step 3
å Turn twelve CAM SCREWS (8F) into the FRONT LEGS (H)
and DRAWER FRONTS (J, K, L, and M).
8F
(12 used)
J
L
K
M
H
H
M
L
Step 4
å Insert two WOOD DOWELS (15F) into the indicated holes
in the FRONT LEGS (H).
å Fasten the FRONT LEGS (H) to the ENDS (A and B).
Tighten six HIDDEN CAMS.
å NOTE: Be sure the WOOD DOWELS in the LEGS insert
into the ENDS.
419409 www.sauder.com/servicesPage 8
A
B
H
H
Surface with
TWIST-LOCK®
FASTENERS
Surface with
TWIST-LOCK®
FASTENERS
These surfaces should be even.
1
2
15F
15F
å Fasten the BACK LEGS (I) to the ENDS (A and B). Use six
BLACK 2-1/4" FLAT HEAD SCREWS (26S).
Step 5
419409www.sauder.com/services Page 9
A
B
I
I
Surface with
TWIST-LOCK®
FASTENERS
Surface with
TWIST-LOCK®
FASTENERS
These surfaces should be even.
BLACK 2-1/4" FLAT HEAD SCREW
(6 used in this step)
26S
Step 6
419409 www.sauder.com/servicesPage 10
1
2
3
4
1
2
34
1
2
34
1
2
34
GOLD 5/16" FLAT HEAD SCREW
(12 used in this step)
3S
A
B
Surface with
TWIST-LOCK®
FASTENERS
Surface with
TWIST-LOCK®
FASTENERS
å Fasten the UNIVERSAL CABINET RAILS* (40DA) to the
ENDS (A and B). Use twelve GOLD 5/16" FLAT HEAD
SCREWS (3S) through holes #1 and #4.
å *patent pending glide system
Glide end
Glide end
1
2
3
4
1
2
3
4
Step 7
419409www.sauder.com/services Page 11
1
2
3
4
1
2
3
4
1
2
3
4
1
2
3
4
1
2
1
2
Surface with
TWIST-LOCK®
FASTENERS
C
GOLD 5/16" FLAT HEAD SCREW
(12 used in this step)
3S
å Fasten the UNIVERSAL CABINET RAILS* (40DA) to
the UPRIGHT (C). Use twelve GOLD 5/16" FLAT HEAD
SCREWS (3S) through holes #1 and #4.
å *patent pending glide system
Glide end
Step 8
419409 www.sauder.com/servicesPage 12
å Fasten the LEFT END (B) to the TOP (D). Tighten two
TWIST-LOCK® FASTENERS.
How to use the SAUDER TWIST-LOCK®FASTENER
1. Insert the dowel end of the FASTENER into the hole of the
adjoining part.
NOTE: The dowel end of the FASTENER must remain fully
inserted in the hole of the adjoining part while locking
the FASTENER.
2. Tighten the FASTENER with a Phillips screwdriver as tight
as possible.
Dowel end
B
Surface with
TWIST-LOCK®
FASTENERS
HD
Surface
with holes
Finished edge
Do not stand the unit upright without the
BACK fastened. The unit may collapse.
Caution
å Fasten the UPRIGHT (C) to the TOP (D). Tighten two
TWIST-LOCK® FASTENERS.
Step 9
419409www.sauder.com/services Page 13
D
C
Finished edge
Don't worry. It isn't
Rome. This can be built
in a day.
Surface with
TWIST-LOCK®
FASTENERS
Step 10
å Fasten the BOTTOM (E) to the LEFT END (B). Tighten two
TWIST-LOCK® FASTENERS.
å Fasten the BOTTOM (E) to the UPRIGHT (C). Use two
BLACK 1-15/16" FLAT HEAD SCREWS (113S).
å Slide the BOTTOM MOLDING* (O) onto the notched edge
of the BOTTOM (E).
å *U.S. Patent No. 5,499,886
419409 www.sauder.com/servicesPage 14
C
E
O
Notched edge
Surface with
TWIST-LOCK®
FASTENERS
B
BLACK 1-15/16" FLAT HEAD SCREW
(2 used in this step)
113S
å Fasten the RIGHT END (A) to the TOP (D) and BOTTOM (E).
Tighten four TWIST-LOCK® FASTENERS.
å Fasten the METAL BRACKETS (4G) to the ENDS (A and B) and
UPRIGHT (C). Use three BLACK 9/16" LARGE HEAD SCREWS (1S).
å Fasten the FRONT MOLDING (N) to the ENDS (A and B) and
UPRIGHT (C). Use three BLACK 9/16" LARGE HEAD SCREWS (1S)
through the BRACKETS and into the MOLDING.
Step 11
419409www.sauder.com/services Page 15
4G
4G
N
C
B
A
Surface without
TWIST-LOCK®
FASTENERS
H
E
D
BLACK 9/16" LARGE HEAD SCREW
(6 used in this step)
1S
Step 12
å Carefully turn your unit over onto its front edges. Unfold
the BACK (F) and lay it over your unit.
å Make equal margins along all four edges of the BACK (F).
Push on opposite corners of your unit if needed to make
it "square".
å Fasten the BACK (F) to your unit using the NAILS (1N).
å NOTE: Be sure to tap NAILS into the holes that line up
over the UPRIGHT (C).
419409 www.sauder.com/servicesPage 16
These holes must line up
over the UPRIGHT (C).
NAIL
(39 used in this step)
1N
F
Do not stand the unit upright without the
BACK fastened. The unit may collapse.
Caution
å Fasten the FOOT BRACKET (6E) to the BOTTOM (E). Use
three BLACK 9/16" LARGE HEAD SCREWS (1S).
å Slide the FEET (P) onto the FOOT BRACKET (6E).
å Slide the CORNER CAP (5E) onto the FEET (P).
å Turn two BLACK 9/16" LARGE HEAD SCREWS (1S) into
the short slots of the FOOT BRACKET (6E).
Step 13
419409www.sauder.com/services Page 17
E
P
P6E
5E
6E
Completed foot support
BLACK 9/16" LARGE HEAD SCREW
(5 used in this step)
1S
1S
Step 14
419409 www.sauder.com/servicesPage 18
å Fasten the LOWER DRAWER SIDES (D50 and D51) to the
LOWER DRAWER BACK (D167). Use four BLACK 1-9/16"
FLAT HEAD SCREWS (30S).
å Slide the DRAWER BOTTOM (D975) into the grooves in
the LOWER DRAWER SIDES and LOWER DRAWER BACK.
å Repeat this step for the other drawers.
Groove
Finished
surface
With the palm of
your hand, tap the
DRAWER BOTTOM
into the grooves.
Be sure the DRAWER
BOTTOM inserts into the
DRAWER BACK groove.
D975
D50
D51
D167
D50
D51
D167
VIEW THE T-SLOT BOX VIDEO
BLACK 1-9/16" FLAT HEAD SCREW
(24 used in this step)
30S
Step 15
419409www.sauder.com/services Page 19
D975
D50
D51
D167
L
å Pull the DRAWER FRONT BRACKETS (9G) apart and slide them into the
grooves in the LOWER DRAWER SIDES (D50 and D51). You may need to
gently tap them in with a hammer.
å NOTE: The DRAWER FRONT BRACKETS are marked "RH" and "LH" for
easy identification.
å Fasten the LOWER RIGHT DRAWER FRONT (L) to the DRAWER FRONT
BRACKETS (9G). Use four BLACK 9/16" LARGE HEAD SCREWS (1S).
å Repeat this step for the other drawers.
å NOTE: You will use the DRAWER FRONT BRACKETS (8G) for the
upper drawers.
BLACK 9/16" LARGE HEAD SCREW
(24 used in this step)
1S
Push down
9G
VIEW THE T-SLOT BOX VIDEO
Step 16
å Flip the drawer over and fasten the DRAWER BRACE (M65)
to the LOWER RIGHT DRAWER FRONT (L). Tighten the
HIDDEN CAM.
å Fasten the DRAWER BRACE (M65) to the LOWER
DRAWER BACK (D167). Use one BLACK 1-9/16" FLAT
HEAD SCREW (30S).
å Repeat this step for the other drawers.
419409 www.sauder.com/servicesPage 20
D167
L
1
2
M65
VIEW THE T-SLOT BOX VIDEO
BLACK 1-9/16" FLAT HEAD SCREW
(6 used in this step)
30S

Other Sauder Indoor Furnishing manuals
Sauder Office Port Series User manual

Sauder

Sauder Office Port Series User manual

Sauder 423032 User manual

Sauder

Sauder 423032 User manual

Sauder Cliff ord Place Credenza 429507 User manual

Sauder

Sauder Cliff ord Place Credenza 429507 User manual

Sauder 416519 User manual

Sauder

Sauder 416519 User manual

Sauder Palladia 411861 User manual

Sauder

Sauder Palladia 411861 User manual

Sauder 423731 User manual

Sauder

Sauder 423731 User manual

Sauder Aspen Post 427022 User manual

Sauder

Sauder Aspen Post 427022 User manual

Sauder August Hill 426133 User manual

Sauder

Sauder August Hill 426133 User manual

Sauder 414435 User manual

Sauder

Sauder 414435 User manual

Sauder 413043 User manual

Sauder

Sauder 413043 User manual

Sauder Avenue Eight 416513 User manual

Sauder

Sauder Avenue Eight 416513 User manual

Sauder Harbor View 158002 User manual

Sauder

Sauder Harbor View 158002 User manual

Sauder Pogo 414433 User manual

Sauder

Sauder Pogo 414433 User manual

Sauder Pinwheel 421886 User manual

Sauder

Sauder Pinwheel 421886 User manual

Sauder Beginnings 415544 User manual

Sauder

Sauder Beginnings 415544 User manual

Sauder Summit Station 425015 User manual

Sauder

Sauder Summit Station 425015 User manual

Sauder Canal Street 420494 User manual

Sauder

Sauder Canal Street 420494 User manual

Sauder Office Works Affirm 427450 User manual

Sauder

Sauder Office Works Affirm 427450 User manual

Sauder OFFICE WORKS AFFIRM 427438 User manual

Sauder

Sauder OFFICE WORKS AFFIRM 427438 User manual

Sauder OfficeWorks AFFIRM 426277 User manual

Sauder

Sauder OfficeWorks AFFIRM 426277 User manual

Sauder Rollingwood 431439 User manual

Sauder

Sauder Rollingwood 431439 User manual

Sauder Shoal Creek Armoire User manual
Sauder

Sauder Shoal Creek Armoire User manual

Sauder Credenza 420723 User manual

Sauder

Sauder Credenza 420723 User manual

Sauder Shoal Creek 412093 User manual

Sauder

Sauder Shoal Creek 412093 User manual

Popular Indoor Furnishing manuals by other brands

Home Decorators Collection BF-21015 Use and care guide

Home Decorators Collection

Home Decorators Collection BF-21015 Use and care guide

Rauch 72000.0250 Assembly instructions

Rauch

Rauch 72000.0250 Assembly instructions

Seconique Furniture Salvador Lamp Table Assembly instructions

Seconique Furniture

Seconique Furniture Salvador Lamp Table Assembly instructions

Next BRONX T45954 Assembly instructions

Next

Next BRONX T45954 Assembly instructions

HULALA HOME DKHN0066-1 manual

HULALA HOME

HULALA HOME DKHN0066-1 manual

BCP SKY3353 instruction manual

BCP

BCP SKY3353 instruction manual

Hay SILHOUETTE instruction manual

Hay

Hay SILHOUETTE instruction manual

Criterion AIR1500 Assembly & instruction manual

Criterion

Criterion AIR1500 Assembly & instruction manual

GFW Loire Assembly instructions

GFW

GFW Loire Assembly instructions

Diagone 046 manual

Diagone

Diagone 046 manual

Canvas CTI1513565 instruction manual

Canvas

Canvas CTI1513565 instruction manual

Forte Calasetta CQST231 Assembling Instruction

Forte

Forte Calasetta CQST231 Assembling Instruction

ECOPOSTURAL S5664 instructions

ECOPOSTURAL

ECOPOSTURAL S5664 instructions

Monarch I 2598 Assembly instruction

Monarch

Monarch I 2598 Assembly instruction

Next ANDERSON A48172 Assembly instructions

Next

Next ANDERSON A48172 Assembly instructions

Unfinished Furniture of Wilmington BD-2038 Assembly instructions

Unfinished Furniture of Wilmington

Unfinished Furniture of Wilmington BD-2038 Assembly instructions

Madeleine Home MH-TB-812 Assembly instructions

Madeleine Home

Madeleine Home MH-TB-812 Assembly instructions

Steelcase c:scape quick guide

Steelcase

Steelcase c:scape quick guide

manuals.online logo
manuals.online logoBrands
  • About & Mission
  • Contact us
  • Privacy Policy
  • Terms and Conditions

Copyright 2025 Manuals.Online. All Rights Reserved.