manuals.online logo
Brands
  1. Home
  2. •
  3. Brands
  4. •
  5. Sauder
  6. •
  7. Indoor Furnishing
  8. •
  9. Sauder 109848 User manual

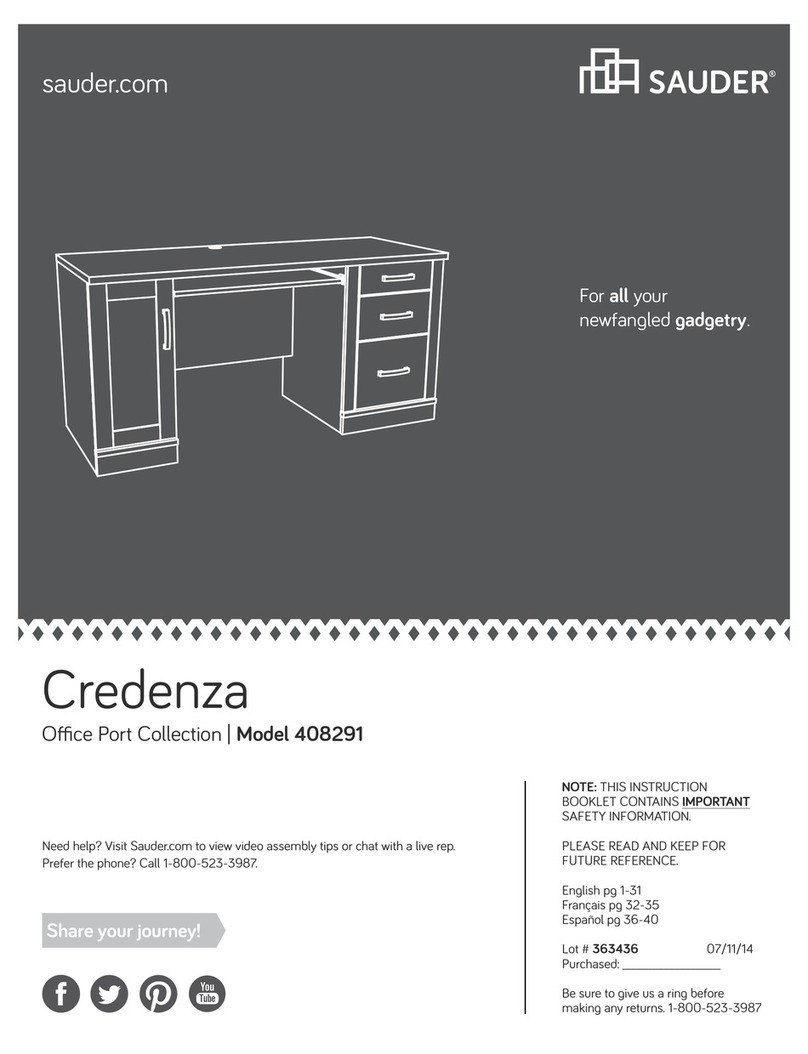
Sauder 109848 User manual

Need help? Visit Sauder.com to view video assembly tips or chat with a live rep.
Prefer the phone? Call 1-800-523-3987.
Share your journey!
sauder.com
Go all Wall Street
on everyone.
NOTE: THIS INSTRUCTION
BOOKLET CONTAINS IMPORTANT
SAFETY INFORMATION.
PLEASE READ AND KEEP FOR
FUTURE REFERENCE.
English pg 1-39
Français pg 40-45
Español pg 46-52
Lot # 372723 06/01/15
Purchased: __________________
Be sure to give us a ring before
making any returns. 1-800-523-3987
48" Return Kit
Heritage Hill Collection | 109848
Table of Contents Assembly Tools Required
Part Identification
Hardware Identification
Assembly Steps
Français
Español
Safety
Warranty
Hammer
Not actual size
No. 2 Phillips Screwdriver
Tip Shown Actual Size
Skip the power trip.
This time.
3
4
5-39
40-45
46-52
53-54
55
109848 www.sauder.com/servicesPage 2
Part Identification
åWhile not all parts are labeled, some of the parts will have a label or an inked letter on the edge
to help distinguish similar parts from each other. Use this part identification to help identify similar parts.
Now you know
our ABCs.
A OUTER END (1)
B INNER END (1)
C TOP (1)
D MODESTY PANEL (1)
E BOTTOM (1)
F RIGHT MOLDING (1)
G LEFT MOLDING (1)
H SHORT MOLDING (1)
I END MOLDING (2)
J LONG SKIRT (2)
K SHORT SKIRT (1)
L KEYBOARD SHELF (1)
M SLIDING SHELF (1)
109848www.sauder.com/services Page 3
A
B
C
D
E
F
G
H
I
I
J
J
K
K
L
M
Hardware Identification
åScrews are shown actual size. You may receive extra hardware with your unit.
WASHER - 8
W
METAL BRACKET - 2
V
BLACK 9/16" LARGE HEAD SCREW - 40
CC
SILVER 1-1/8" FLAT HEAD SCREW - 12
EE BLACK 7/8" LARGE HEAD SCREW - 4
BB
BLACK 1-7/8" FLAT HEAD SCREW - 6
Y
RTWIST-LOCK®FASTENER - 7
BLACK 9/16" WAFER HEAD SCREW - 2
DD
FINISHING
WASHER - 3
X
(EXTENSION SET SHOWN SEPARATED)
KEYBOARD RAIL - 2
NKEYBOARD SLIDE - 2
O
SUPPORT BRACKET - 1
Q
SHELF GLIDE - 2
P
CORD MANAGER - 2
SCONNECTOR PLATE - 2
T
FOOT - 2
U
BROWN 1-1/2" FLAT HEAD SCREW - 3
14S
109848 www.sauder.com/servicesPage 4
Step 1 Look for this icon. It means a
video assembly tip is available at
www.sauder.com/services/tips
å Assemble your unit on a carpeted floor or on the empty
carton to avoid scratching your unit or the floor.
å NOTE: You must assemble the 109843 Executive Desk first.
å Fasten the RIGHT MOLDING (F), LEFT MOLDING (G), and
SHORT MOLDING (H) to the TOP (C). Use twelve SILVER
1-1/8" FLAT HEAD SCREWS (EE).
å NOTE: Do not overtighten the SCREWS into the TOP.
109848www.sauder.com/services Page 5
C
FG
H
Unfinished surface
Finished surface
Finished surface
Finished surface
SILVER 1-1/8" FLAT HEAD SCREW
(12 used for the MOLDINGS)
EE
Do not overtighten
the SCREWS (EE).
å Fasten two SHELF GLIDES (P) to the KEYBOARD SHELF (L). Use
eight BLACK 9/16" LARGE HEAD SCREWS (CC) and eight
FLAT WASHERS (W).
å Separate the KEYBOARD SLIDES (O) from the KEYBOARD
RAILS (N). To do this, fully extend the KEYBOARD SLIDE and
push the metal release in and pull the SLIDE from the RAIL so
you have two separate parts. Be prepared, the parts are greasy.
å Fasten two KEYBOARD SLIDES (O) to the KEYBOARD SHELF (L).
Use four BLACK 7/8" LARGE HEAD SCREWS (BB).
Step 2
109848 www.sauder.com/servicesPage 6
BLACK 9/16" LARGE HEAD SCREW
(8 used for the SHELF GLIDES)
CC
N
O
O
O
P
P
W
L
Open end
Open end
Unfinished edge
Push the release lever in and pull the SLIDE from the RAIL.
BLACK 7/8" LARGE HEAD SCREW
(4 used for the KEYBOARD SLIDES)
BB
Remember:
Righty tighty.
Lefty loosey.
(8 used)
å The diagram shows the 109843 Executive Desk.
å If the keyboard shelf and drawers have already been
inserted into the 109843 Executive Desk, remove them at
this time.
Step 3
109848www.sauder.com/services Page 7
109843
Executive Desk
å You have the choice of assembling this unit four ways:
å 1. If attaching the 109848 Return Kit to the right side of
the 109843 Executive Desk (with or without the 109872
U-Shape Connector Kit), continue with step 5.
å 2. If attaching the 109848 Return Kit to the left side of
the 109843 Executive Desk (with or without the 109872
U-Shape Connector Kit), go to step 20 now.
Step 4
109848 www.sauder.com/servicesPage 8
RETURN KIT(S) ON RIGHT
(continue with step 5)
RETURN KIT(S) ON LEFT
(go to step 20 now)
109843
Executive
Desk
109843
Executive
Desk
109843
Executive
Desk
109843
Executive
Desk
109872 U-Shape
Connector Kit
109872 U-Shape
Connector Kit
109848
Return Kit
109848
Return Kit
109848
Return Kit 109848
Return Kit
å If the 109843 Executive Desk has only been partially
assembled, go to step 7 now. If the 109843 Executive
Desk has already been completely assembled, continue
with this step.
å Position the 109843 Desk on its Top as shown.
å Carefully remove the entire pedestal assembly from the
right side of the Desk. To do so, remove the two screws
that attach the Right Upright to the Modesty Panel and
loosen the four Twist-Lock® Fasteners in the Right End
and Right Upright by turning the screw in each Fastener
about 1/2 turn counter-clockwise. Then, pull the pedestal
assembly o of the Top as shown.
å NOTE: Save these screws and set the pedestal assembly
o to the side.
Step 5
109848www.sauder.com/services Page 9
1. Remove these screws.
109843
Right Upright
RETURN KIT(S) ON RIGHT
109843
Right
End
109843
Modesty
Panel
109843 Top
å Carefully remove the Modesty Panel from the 109843
Executive Desk. To do so, remove the two screws that attach
the Left Upright to the Modesty Panel and loosen the two
Twist-Lock® Fasteners in the Modesty Panel by turning the
screw in each Fastener about 1/2 turn counter-clockwise.
Then, pull the Modesty Panel o of the Top.
å Now, remove the Short Molding and Extension Block from
the Desk. To do so, remove the three screws from the Short
Molding and the two screws from the Extension Block.
å NOTE: Save the screws and set the Modesty Panel, Short
Molding, and Extension Block o to the side.
Step 6
109848 www.sauder.com/servicesPage 10
109843
Extension Block
109843 Short
Molding
1. Remove these screws.
RETURN KIT(S) ON RIGHT
109843
Left
Upright
109843
Modesty
Panel
109843 Top
Step 7
109848www.sauder.com/services Page 11
Do not tighten the TWIST-LOCK® FASTENERS in this step.
(5 used)
R
å To begin assembly, push a SAUDER TWIST-LOCK®
FASTENER (R) into the indicated holes in the ENDS (A
and B) and MODESTY PANEL (D).
These holes must be here.
This hole must be here.
RETURN KIT(S) ON RIGHT
A
B
D
Insert TWIST-LOCK®
FASTENERS into the
indicated holes only.
å Fasten the MODESTY PANEL (D) to the 109843 Top as
shown. Tighten the TWIST-LOCK® FASTENERS in the
MODESTY PANEL.
å NOTE: If you pushed TWIST-LOCK® FASTENERS into
the wrong holes in the MODESTY PANEL, pull the
FASTENERS back out of the holes and insert them into
the proper holes. Pull at the front and back edges, slowly
working the FASTENERS out of the holes.
å Fasten the 109843 Left Upright to the MODESTY
PANEL (D). Use the two 1-7/8" FLAT HEAD SCREWS you
removed in step 5 through the inside of the Left Upright
and into the edge of the MODESTY PANEL.
Step 8
109848 www.sauder.com/servicesPage 12
How to use the SAUDER TWIST-LOCK®FASTENER
1. Insert the dowel end of the FASTENER into the hole of the
adjoining part.
NOTE: The dowel end of the FASTENER must remain fully
inserted in the hole of the adjoining part while locking
the FASTENER.
2. Tighten the FASTENER with a Phillips screwdriver as tight
as possible.
D
Surface with TWIST-LOCK® FASTENERS
BLACK 1-7/8" FLAT HEAD SCREW
(2 used in this step, removed in step 5)
RETURN KIT(S) ON RIGHT
109843 Top
109843
Left
Upright
å Insert the TWIST-LOCK® FASTENER on the INNER END (B)
into the 109843 Front Molding, then fasten the INNER END
to the MODESTY PANEL (D). Use the two BLACK 1-7/8"
FLAT HEAD SCREWS you removed in step 6.
å Tighten the TWIST-LOCK® FASTENER in the INNER END (B).
Step 9
109848www.sauder.com/services Page 13
BLACK 1-7/8" FLAT HEAD SCREW
(2 used in this step, removed in step 6)
RETURN KIT(S) ON RIGHT
B
D
109843 Front Molding
Unfinished
surface
å Fasten the OUTER END (A) to the 109843 Short Molding.
Tighten the TWIST-LOCK® FASTENERS in the OUTER END.
Step 10
109848 www.sauder.com/servicesPage 14
RETURN KIT(S) ON RIGHT
This hole must be here.
Finished
surface
Unfinished surface
A
109843 Short
Molding
å Fasten the 109843 Short Molding to the 109843 Top.
Use three of the 1-1/8" screws you removed in step 6.
å NOTE: Line up the corners of the MOLDINGS before
tightening the SCREWS.
å IMPORTANT: Do not overtighten the SCREWS. The heads
of the SCREWS should be even with the surface of the
MOLDING.
Step 11
109848www.sauder.com/services Page 15
RETURN KIT(S) ON RIGHT
Finished surface
A
109843 Short Molding
109843 Top
SILVER 1-1/8" FLAT HEAD SCREW
(3 used in this step, removed in step 6)
Don't worry. It isn't
Rome. This can be built
in a day.
å Slide a patented* END MOLDING (I) onto both notched
edges of the OUTER END (A) and INNER END (B)
Carefully slide both MOLDINGS until they are against
the MOLDINGS on the Top.
å Fasten two CORD MANAGERS (S) to the MODESTY
PANEL (D). Use two BLACK 9/16" LARGE
HEAD SCREWS (CC).
å * U.S. Pat. No. 5,499,886
Step 12
109848 www.sauder.com/servicesPage 16
A
B
D
I
I
BLACK 9/16" LARGE HEAD SCREW
(2 used in this step)
CC
S
Slide the END MOLDING (I)
onto the notched edge.
RETURN KIT(S) ON RIGHT
å Fasten the BOTTOM (E) to the OUTER END (A)
and INNER END (B). Use four BLACK 1-7/8" FLAT
HEAD SCREWS (Y).
Step 13
109848www.sauder.com/services Page 17
A
B
E
This hole must be here.
BLACK 1-7/8" FLAT HEAD SCREW
(4 used in this step)
Y
Unfinished surface
RETURN KIT(S) ON RIGHT
å Fasten a METAL BRACKET (V) to each LONG SKIRT (J).
Use a BLACK 9/16" LARGE HEAD SCREW (CC).
å NOTE: Be sure the BRACKETS are even with the edges of
the LONG SKIRTS (J).
Step 14
109848 www.sauder.com/servicesPage 18
J
J
BLACK 9/16" LARGE HEAD SCREW
(2 used in this step)
CC
V
RETURN KIT(S) ON RIGHT
å Slide two FEET (U) into the grooves in the LONG SKIRTS (J)
and SHORT SKIRTS (K). You may need to gently tap them
in with your hammer.
å Fasten the FEET (U) to the BOTTOM (E). Use a BLACK
9/16" WAFER HEAD SCREW (DD).
å NOTE: Start both SCREWS a few turns before tightening
either of them.
å Fasten the METAL BRACKETS on the LONG SKIRTS (J) to
the BOTTOM (E). Use two BLACK 9/16" LARGE
HEAD SCREWS (CC).
å Stand your unit upright.
Step 15
109848www.sauder.com/services Page 19
BLACK 9/16" LARGE HEAD SCREW
(2 used for the METAL BRACKETS)
CC
E
J
J
K
U
U
K
BLACK 9/16" WAFER HEAD SCREW
(2 used for the FEET)
DD
RETURN KIT(S) ON RIGHT
å Fasten the 109843 Extension Block to the TOP (C). Use
two of the 1-1/8" screws you removed in step 6.
å Fasten the 109843 Right End and Right Upright to the
LEFT MOLDING (G), SHORT MOLDING (H), and 109843
Extension Block. Tighten the Twist-Lock® Fasteners in the
Right End and Right Upright.
Step 16
109848 www.sauder.com/servicesPage 20
RETURN KIT(S) ON RIGHT
109843
Extension
Block
109843
Right End
Surface with more holes
H
109843
Right
Upright
F
G
SILVER 1-1/8" FLAT HEAD SCREW
(2 used in this step, removed in step 6)
C

Other Sauder Indoor Furnishing manuals
Sauder Tremont Row 427970 User manual

Sauder

Sauder Tremont Row 427970 User manual

Sauder 423399 User manual

Sauder

Sauder 423399 User manual

Sauder Harvey Park 420284 User manual

Sauder

Sauder Harvey Park 420284 User manual

Sauder Edge Water 419100 User manual

Sauder

Sauder Edge Water 419100 User manual

Sauder Harvey Park 420869 User manual

Sauder

Sauder Harvey Park 420869 User manual

Sauder 101702 User manual

Sauder

Sauder 101702 User manual

Sauder Coral Cape 423808 User manual

Sauder

Sauder Coral Cape 423808 User manual

Sauder WoodTrac closets 359540 User manual

Sauder

Sauder WoodTrac closets 359540 User manual

Sauder 414675 User manual

Sauder

Sauder 414675 User manual

Sauder Costa 420654 User manual

Sauder

Sauder Costa 420654 User manual

Sauder 401291 User manual

Sauder

Sauder 401291 User manual

Sauder Carson Forge 412920 User manual

Sauder

Sauder Carson Forge 412920 User manual

Sauder 412885 User manual

Sauder

Sauder 412885 User manual

Sauder 413854 User manual

Sauder

Sauder 413854 User manual

Sauder East Canyon Series User manual

Sauder

Sauder East Canyon Series User manual

Sauder Costa 428193 User manual

Sauder

Sauder Costa 428193 User manual

Sauder Dakota Pass 418268 User manual

Sauder

Sauder Dakota Pass 418268 User manual

Sauder August Hill 433851 User manual

Sauder

Sauder August Hill 433851 User manual

Sauder Carson Forge Technology Pier 412923 User manual

Sauder

Sauder Carson Forge Technology Pier 412923 User manual

Sauder Steel River 427654 User manual

Sauder

Sauder Steel River 427654 User manual

Sauder 416821 User manual

Sauder

Sauder 416821 User manual

Sauder Beginnings 414291 User manual

Sauder

Sauder Beginnings 414291 User manual

Sauder Palladia 411835 User manual

Sauder

Sauder Palladia 411835 User manual

Sauder Boulevard Cafe 422420 User manual

Sauder

Sauder Boulevard Cafe 422420 User manual

Popular Indoor Furnishing manuals by other brands

KITALY Genio 2821 8733 Assembly instructions

KITALY

KITALY Genio 2821 8733 Assembly instructions

LDI Safco Jurni JN CNFGL Series instructions

LDI

LDI Safco Jurni JN CNFGL Series instructions

Grandinroad Helena 178331 quick start guide

Grandinroad

Grandinroad Helena 178331 quick start guide

Songmics OBG24 instruction manual

Songmics

Songmics OBG24 instruction manual

modway EEI-3741 quick start guide

modway

modway EEI-3741 quick start guide

RSI ESTATE ESM1570GRY Assembly/installation instructions

RSI

RSI ESTATE ESM1570GRY Assembly/installation instructions

Emagra X5 Assembly instructions

Emagra

Emagra X5 Assembly instructions

BLACK RED WHITE STYLIUS B169-REG1W2S quick start guide

BLACK RED WHITE

BLACK RED WHITE STYLIUS B169-REG1W2S quick start guide

Perma Easy Fit instruction manual

Perma

Perma Easy Fit instruction manual

Office Star AVE SIX MALTA MAL26 quick start guide

Office Star

Office Star AVE SIX MALTA MAL26 quick start guide

Cooper Lighting METALUX WRAPAROUND OAK TRIM ENDS/SIDES... specification

Cooper Lighting

Cooper Lighting METALUX WRAPAROUND OAK TRIM ENDS/SIDES... specification

New Classic Furniture FLYNN UC2177-25-PBK Assembly instructions

New Classic Furniture

New Classic Furniture FLYNN UC2177-25-PBK Assembly instructions

Vari 401920 quick start guide

Vari

Vari 401920 quick start guide

Eureka Ergonomic ERK-CV-26B user guide

Eureka Ergonomic

Eureka Ergonomic ERK-CV-26B user guide

ACME Keva 97768 Assembly instructions

ACME

ACME Keva 97768 Assembly instructions

OVE SIERRA 36 manual

OVE

OVE SIERRA 36 manual

Jysk ENGHAVE 4705620 manual

Jysk

Jysk ENGHAVE 4705620 manual

Furniture Values International aspenhome I221-370C Assembly instructions

Furniture Values International

Furniture Values International aspenhome I221-370C Assembly instructions

manuals.online logo
manuals.online logoBrands
  • About & Mission
  • Contact us
  • Privacy Policy
  • Terms and Conditions

Copyright 2025 Manuals.Online. All Rights Reserved.