manuals.online logo
Brands
  1. Home
  2. •
  3. Brands
  4. •
  5. Sauder
  6. •
  7. Indoor Furnishing
  8. •
  9. Sauder Palladia 412116 User manual

Sauder Palladia 412116 User manual

NOTE: THIS INSTRUCTION
BOOKLET CONTAINS IMPORTANT
SAFETY INFORMATION.
PLEASE READ AND KEEP FOR
FUTURE REFERENCE.
English pg 1-28
Français pg 29-32
Español pg 33-36
Lot # 364789 08/28/14
Purchased: __________________
Be sure to give us a ring before
making any returns. 1-800-523-3987
Need help? Visit Sauder.com to view video assembly tips or chat with a live rep.
Prefer the phone? Call 1-800-523-3987.
Share your journey!
sauder.com
Sit and surf.
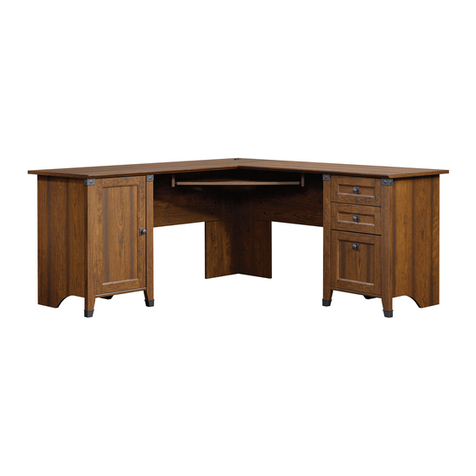
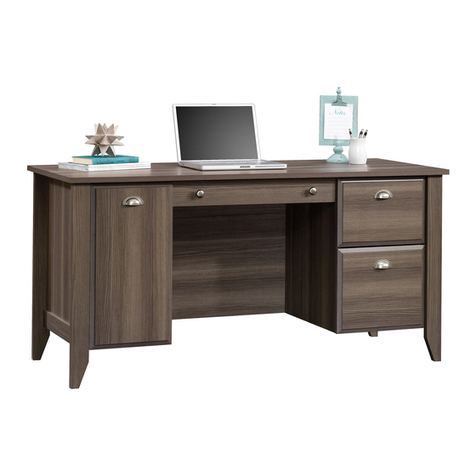
Computer Desk
Palladia Collection | Model 412116
Table of Contents Assembly Tools Required
3-4
5-6
7-28
29-32
33-36
37-38
39
Part Identification
Hardware Identification
Assembly Steps
Français
Español
Safety
Warranty
Hammer
Not actual size
No. 2 Phillips Screwdriver
Tip Shown Actual Size
Skip the power trip.
This time.
412116 www.sauder.com/servicesPage 2
Part Identification
åWhile not all parts are labeled, some of the parts will have a label or an inked letter on the edge
to help distinguish similar parts from each other. Use this part identification to help identify similar parts.
A RIGHT END (1)
B LEFT END (1)
C SMALL RIGHT END (1)
D LARGE UPRIGHT (1)
E SMALL UPRIGHT (1)
F LEFT UPRIGHT (1)
G TOP (1)
H BOTTOM (1)
I MODESTY PANEL (1)
J BRACE (1)
K BASE (1)
AA END MOLDING (3)
BB BOTTOM MOLDING (1)
CC UPPER PLINTH (3)
DD LOWER PLINTH (3)
EE SMALL BACK (1)
FF LARGE BACK (1)
GG HALF DISK (3)
Now you know
our ABCs.
412116www.sauder.com/services Page 3
A
B
C
DE
F
G
H
I
J
K
AA
CC
DD
EE
FF
AA
AA
BB
DD
CC
CC
DD
GG
GG
GG
Part Identification
åWhile not all parts are labeled, some of the parts will have a label or an inked letter on the edge
to help distinguish similar parts from each other. Use this part identification to help identify similar parts.
L KEYBOARD FRONT (1)
M KEYBOARD BACK (1)
N KEYBOARD SIDE (2)
O KEYBOARD SHELF (1)
P DRAWER FRONT (1)
T LARGE DRAWER FRONT (1)
W SMALL DRAWER FRONT (1)
D34 SMALL RIGHT DRAWER SIDE (1)
D35 SMALL LEFT DRAWER SIDE (1)
D74 SMALL DRAWER BACK (1)
D78 LARGE DRAWER BACK (1)
D86 DRAWER BACK (1)
D212 RIGHT DRAWER SIDE (1)
D213 LEFT DRAWER SIDE (1)
D260 LARGE RIGHT DRAWER SIDE (1)
D263 LARGE LEFT DRAWER SIDE (1)
D707 DRAWER BOTTOM (2)
D716 SMALL DRAWER BOTTOM (1)
Now you know
our ABCs.
412116 www.sauder.com/servicesPage 4
L
M
N
O
P
T
W
N
D213
D707
D86
D78
D263
D716
D35 D74
D34
D212
D707
D260
Hardware Identification
åScrews are shown actual size. You may receive extra hardware with your unit.
412116www.sauder.com/services Page 5
EXTENSION RAIL - 2
HH EXTENSION SLIDE - 2
II FILE ROD - 2
KK
ANGLE
BRACKET - 15
VV METAL
BRACKET - 4
WW
BRACKET - 3
XX HINGE - 2
YY KNOB - 5
ZZ DRAWER FRONT
BRACKET - 1
AAA
LARGE DRAWER
FRONT BRACKET - 2
BBB SMALL DRAWER
FRONT BRACKET - 1
CCC
40CB CABINET LEFT - 2
40CA CABINET RIGHT - 2 40CC DRAWER RIGHT - 2 40CD DRAWER LEFT - 2
35AW CABINET RIGHT - 1 35AZ DRAWER LEFT - 1
35AY DRAWER RIGHT - 1
35AX CABINET LEFT - 1
HIDDEN
CAM - 16
TT2 CAM
DOWEL - 16
UU2
FILE GLIDE - 2
JJ
30S BLACK 1-9/16" FLAT HEAD SCREW - 12
Hardware Identification
åScrews are shown actual size. You may receive extra hardware with your unit.
412116 www.sauder.com/servicesPage 6
DDD BLACK 1-7/8" FLAT HEAD SCREW - 8 EEE BROWN 1-1/2" FLAT HEAD SCREW - 6
FFF BLACK 1-1/4" FLAT HEAD SCREW - 4 GGG SMALL BLACK 1-1/4" FLAT HEAD SCREW - 2
III SMALL BROWN 1" FLAT HEAD SCREW - 4
HHH BROWN 1" FLAT HEAD SCREW - 7
MMM SILVER 5/8" FLAT HEAD SCREW - 4 NNN BLACK 9/16" LARGE HEAD SCREW - 54
OOO SILVER 9/16" LARGE HEAD SCREW - 2 PPP SILVER 1/2" MACHINE SCREW - 2
QQQ GOLD 5/16" FLAT HEAD SCREW - 28 RRR NAIL - 33
JJJ GOLD 1" MACHINE SCREW - 1 LLL BLACK 7/8" MACHINE SCREW - 2
Step 1 Look for this icon. It means a
video assembly tip is available at
www.sauder.com/services/tips
å Assemble your unit on a carpeted floor or on the empty
carton to avoid scratching your unit or the floor.
å Push sixteen HIDDEN CAMS (TT2) into the
ENDS (A, B, and C), UPRIGHTS (D, E, and F), and
BOTTOM (H). Then, insert the metal end of a CAM
DOWEL (UU2) into each HIDDEN CAM.
412116www.sauder.com/services Page 7
A
B
C
D
E
F
H
Arrow
(16 used)
Arrow
Insert the metal end of the CAM
DOWEL into the HIDDEN CAM.
Arrow
Do not tighten the HIDDEN CAMS in this step.
TT2
UU2
TT2
UU2
Scan this QR code or go to this address:
http://qr.sauder.com/?ID=1584
to watch a video on how to assemble your unit.
Step 2
å Separate the EXTENSION SLIDES (II) from the
EXTENSION RAILS (HH) as shown in the upper diagram
below. Be prepared, the parts are greasy.
å Fasten two EXTENSION RAILS (HH) to the SMALL RIGHT
END (C) and SMALL UPRIGHT (E). Use four GOLD 5/16"
FLAT HEAD SCREWS (QQQ).
å NOTE: For each EXTENSION RAIL, turn a SCREW into
the hole shown in the enlarged diagram. Then, slide the
innercartridge of the EXTENSION RAIL out to find the
other hole that lines up with the hole in the END. Turn a
SCREW into this hole.
412116 www.sauder.com/servicesPage 8
Push the black lever in and pull the SLIDE from the RAIL.
II HH
C
E
HH
HH
Finished edge
Open end
Finished edge
Open end
Surface with
HIDDEN CAMS Surface with
HIDDEN CAMS
GOLD 5/16" FLAT HEAD SCREW
(4 used in this step)
QQQ
Remember:
Righty tighty.
Lefty loosey.
å Fasten the CABINET RIGHTS (40CA) and CABINET
LEFTS (40CB) to the SMALL RIGHT END (C) and
SMALL UPRIGHT (E). Use eight GOLD 5/16" FLAT HEAD
SCREWS (QQQ) through holes #1 and #3.
Step 3
412116www.sauder.com/services Page 9
C
E
1
2
34
43
2
1
1
2
34
43
2
1
GOLD 5/16" FLAT HEAD SCREW
(8 used in this step)
QQQ
Finished edge
Finished edge
Roller end
Roller end
Step 4
å Fasten the CABINET RIGHT (35AW) and CABINET LEFT (35AX)
to the UPRIGHTS (D and F). Use four GOLD 5/16" FLAT
HEAD SCREWS (QQQ).
412116 www.sauder.com/servicesPage 10
D
F
Surface with
HIDDEN CAMS
Surface with
HIDDEN CAMS
Roller end
Roller end
These holes must be here.
GOLD 5/16" FLAT HEAD SCREW
(4 used in this step)
QQQ
å Fasten fifteen ANGLE BRACKETS (VV) to the
ENDS (A and B) and LARGE UPRIGHT (D). Use fifteen
BLACK 9/16" LARGE HEAD SCREWS (NNN).
å NOTE: Be sure the edges of the ANGLE BRACKETS are
even with the edges of the ENDS and UPRIGHT.
å Fasten the END MOLDINGS (AA) and UPPER
PLINTHS (CC) to the ENDS (A and B) and LARGE
UPRIGHT (D). Use fifteen BLACK 9/16" LARGE
HEAD SCREWS (NNN).
Step 5
412116www.sauder.com/services Page 11
A
B
D
AA
CC
AA
CC
AA CC
VV
VV
These edges
should be even.
Curved edge
Curved edge
Curved edge
These edges
should be even.
These edges
should be even.
Surface without
HIDDEN CAMS
Surface with
HIDDEN CAMS
Surface with
HIDDEN CAMS
(15 used)
BLACK 9/16" LARGE HEAD SCREW
(30 used in this step)
NNN
Step 6
å Fasten the HALF DISKS (GG) to the LOWER PLINTHS (DD).
Use three BROWN 1" FLAT HEAD SCREWS (HHH).
å Fasten three BRACKETS (XX) to the LEFT END (B) and
LEFT UPRIGHT (F). Use three BLACK 9/16" LARGE
HEAD SCREWS (NNN).
å Fasten a LOWER PLINTH (DD) to the LEFT END (B). Use two
BLACK 9/16" LARGE HEAD SCREWS (NNN).
412116 www.sauder.com/servicesPage 12
F
B
DD
DD
DD
GG
GG
GG
XX
DD
GG
Use bottom hole
XX
Be sure the END MOLDING is
centered on the HALF DISK (GG).
The larger hole
should be facing up.
Surface without
HIDDEN CAMS
Surface with
HIDDEN CAMS
BLACK 9/16" LARGE HEAD SCREW
(5 used for the BRACKETS)
NNN
BROWN 1" FLAT HEAD SCREW
(3 used for the HALF DISKS)
HHH
å Fasten the ENDS (A and B) to the TOP (G). Tighten four
HIDDEN CAMS.
Step 7
412116www.sauder.com/services Page 13
G
A
B
AA
AA
Rounded edge
Start Tighten
Arrow
Minimum
190 degrees
Caution
Risk of damage or
injury. HIDDEN CAMS
must be completely
tightened. HIDDEN
CAMS that are not
completely tightened
may loosen, and parts
may separate. To
completely tighten:
Arrow
Maximum
210 degrees
Do not stand the unit upright without the
BACK fastened. The unit may collapse.
Caution
Surface
with holes
Step 8
å Fasten the SMALL RIGHT END (C) and SMALL UPRIGHT (E)
to the TOP (G). Tighten four HIDDEN CAMS.
412116 www.sauder.com/servicesPage 14
G
C
E
Finished edge
Arrow
Minimum
190 degrees
Maximum
210 degrees
å Fasten the MODESTY PANEL (I) to the LARGE UPRIGHT (D)
and LEFT UPRIGHT (F). Use four BLACK 1-7/8" FLAT
HEAD SCREWS (DDD).
Step 9
412116www.sauder.com/services Page 15
D
F
I
AA
Finished edge
Finished edge
BLACK 1-7/8" FLAT HEAD SCREW
(4 used in this step)
DDD
Surface with
HIDDEN CAMS
Surface without
HIDDEN CAMS
Step 10
å Fasten the UPRIGHTS (D and F) to the TOP (G). Tighten
four HIDDEN CAMS.
å Fasten the LEFT UPRIGHT (F) to the LOWER PLINTH (DD).
Use a BLACK 9/16" LARGE HEAD SCREW (NNN) through
the BRACKET and into the PLINTH.
412116 www.sauder.com/servicesPage 16
D
F
G
AA
I
DD
Arrow
Minimum
190 degrees
Maximum
210 degrees
BLACK 9/16" LARGE HEAD SCREW
(1 used in this step)
NNN
Finished edge
å Fasten the BOTTOM (H) to the RIGHT END (A) and LARGE
UPRIGHT (D). Tighten four HIDDEN CAMS.
å Fasten the BOTTOM (H) to the SMALL RIGHT END (C) and
SMALL UPRIGHT (E). Use four BLACK 1-7/8" FLAT
HEAD SCREWS (DDD).
å Fasten four METAL BRACKETS (WW) to the BRACE (J). Use
four BLACK 9/16" LARGE HEAD SCREWS (NNN).
å NOTE: Be sure the BRACKETS are even with the edges of
the BRACE.
å Fasten the BRACE (J) to the RIGHT END (A), LARGE
UPRIGHT (D), and BOTTOM (H). Use four BLACK 9/16"
LARGE HEAD SCREWS (NNN).
Step 11
412116www.sauder.com/services Page 17
C
H
D
A
J
J
WW
WW
WW
E
These holes
must be here.
BLACK 9/16" LARGE HEAD SCREW
(8 used in this step)
NNN
Arrow
Minimum
190 degrees
Maximum
210 degrees
BLACK 1-7/8" FLAT HEAD SCREW
(4 used in this step)
DDD
Surface
with
HIDDEN
CAMS
Step 12
å Fasten the LOWER PLINTHS (DD) to the BRACE (J). Use four
BLACK 1-1/4" FLAT HEAD SCREWS (FFF).
å Fasten the BASE (K) and BOTTOM MOLDING (BB) to the
BRACE (J). Use four BROWN 1" FLAT HEAD SCREWS (HHH).
412116 www.sauder.com/servicesPage 18
J
BB DD
DD K
Be sure the END MOLDING is
centered against the HALF DISK
on the LOWER PLINTH (DD).
Flat end
BROWN 1" FLAT HEAD SCREW
(4 used for the BOTTOM MOLDING)
HHH
BLACK 1-1/4" FLAT HEAD SCREW
(4 used for the LOWER PLINTHS)
FFF
Don't worry. It isn't
Rome. This can be built
in a day.
å Carefully turn your unit over onto its front edges. Lay the
BACKS (EE and FF) over your unit.
å Make equal margins along the bottom and both side
edges of the BACKS (EE and FF). Push on opposite
corners of your unit if needed to make it "square".
å Fasten the BACK (EE and FF) to your unit using
the NAILS (RRR).
Step 13
412116www.sauder.com/services Page 19
EE
FF
Finished surface
Finished surface
Edge without holes NAIL
(33 used in this step)
RRR
Do not stand the unit upright without the
BACK fastened. The unit may collapse.
Caution
Step 14
å Fasten the KEYBOARD SIDES (N) to the KEYBOARD SHELF (O).
Use four BROWN 1-1/2" FLAT HEAD SCREWS (EEE).
å Fasten the KEYBOARD SIDES (N) to the KEYBOARD BACK (M).
Use two BROWN 1-1/2" FLAT HEAD SCREWS (EEE).
å Fasten the KEYBOARD BACK (M) to the KEYBOARD SHELF (O).
Use two SMALL BLACK 1-1/4" FLAT HEAD SCREWS (GGG).
412116 www.sauder.com/servicesPage 20
M
N
O
N
This surface should be the
same finish as this surface.
Long finished edge
Finished surface
BROWN 1-1/2" FLAT HEAD SCREW
(6 used in this step)
EEE
SMALL BLACK 1-1/4" FLAT HEAD SCREW
(2 used in this step)
GGG

Other Sauder Indoor Furnishing manuals
Sauder Heritage Hill 109872 User manual

Sauder

Sauder Heritage Hill 109872 User manual

Sauder Armoire 419451 User manual

Sauder

Sauder Armoire 419451 User manual

Sauder Briarbrook 430070 User manual

Sauder

Sauder Briarbrook 430070 User manual

Sauder 414724 User manual

Sauder

Sauder 414724 User manual

Sauder Boulevard Cafe 421957 User manual

Sauder

Sauder Boulevard Cafe 421957 User manual

Sauder Shoal Creek 418658 User manual

Sauder

Sauder Shoal Creek 418658 User manual

Sauder 401294 User manual

Sauder

Sauder 401294 User manual

Sauder Summit Station 427287 User manual

Sauder

Sauder Summit Station 427287 User manual

Sauder Worksense MASON PEAK 427835 User manual

Sauder

Sauder Worksense MASON PEAK 427835 User manual

Sauder OfficeWorks AFFIRM 427414 User manual

Sauder

Sauder OfficeWorks AFFIRM 427414 User manual

Sauder Shoal Creek 411203 User manual

Sauder

Sauder Shoal Creek 411203 User manual

Sauder 424273 User manual

Sauder

Sauder 424273 User manual

Sauder 101702 User manual

Sauder

Sauder 101702 User manual

Sauder Moderna 5427968 User manual

Sauder

Sauder Moderna 5427968 User manual

Sauder STEADFAST 402932 User manual

Sauder

Sauder STEADFAST 402932 User manual

Sauder Office Port Series User manual

Sauder

Sauder Office Port Series User manual

Sauder Steel River 423976 User manual

Sauder

Sauder Steel River 423976 User manual

Sauder 411615 User manual

Sauder

Sauder 411615 User manual

Sauder 419321 User manual

Sauder

Sauder 419321 User manual

Sauder 109872 User manual

Sauder

Sauder 109872 User manual

Sauder Cannery Bridge 431315 User manual

Sauder

Sauder Cannery Bridge 431315 User manual

Sauder Hudson 427873 User manual

Sauder

Sauder Hudson 427873 User manual

Sauder OfficeWorks AFFIRM 427427 User manual

Sauder

Sauder OfficeWorks AFFIRM 427427 User manual

Sauder Viabella 420870 User manual

Sauder

Sauder Viabella 420870 User manual

Popular Indoor Furnishing manuals by other brands

Mocka Betti Bobbin Tallboy Assembly instructions

Mocka

Mocka Betti Bobbin Tallboy Assembly instructions

Bestar 93631-1139 Assembly instructions

Bestar

Bestar 93631-1139 Assembly instructions

INDA A03750 Mounting instructions

INDA

INDA A03750 Mounting instructions

Broyhill A222020602 Assembly instructions

Broyhill

Broyhill A222020602 Assembly instructions

Safavieh Furniture Louisa SFV2506A manual

Safavieh Furniture

Safavieh Furniture Louisa SFV2506A manual

STACKHAUS Show Hand Corner Deluxe user manual

STACKHAUS

STACKHAUS Show Hand Corner Deluxe user manual

Kid-Man 01-8604 user manual

Kid-Man

Kid-Man 01-8604 user manual

GMI CBL-5464-8.M quick start guide

GMI

GMI CBL-5464-8.M quick start guide

Modus Furniture BRIGHTON LOW-PROFILE BED Assembly instructions

Modus Furniture

Modus Furniture BRIGHTON LOW-PROFILE BED Assembly instructions

Julian Bowen FAR001 Assembly instructions

Julian Bowen

Julian Bowen FAR001 Assembly instructions

East West Furniture Marion BMNTDNA Assembly instructions

East West Furniture

East West Furniture Marion BMNTDNA Assembly instructions

Leggett & Platt S-cape owner's manual

Leggett & Platt

Leggett & Platt S-cape owner's manual

Flexispot 1388 Assembly guide

Flexispot

Flexispot 1388 Assembly guide

Kingsbury 71495120 user manual

Kingsbury

Kingsbury 71495120 user manual

Forte KALOMIRA KLRK231 Assembling Instruction

Forte

Forte KALOMIRA KLRK231 Assembling Instruction

Germania GW-Event 0267 Assembly instruction

Germania

Germania GW-Event 0267 Assembly instruction

Home Decorators Collection STOCKHAM 19043-VS61-CG Assembly instructions

Home Decorators Collection

Home Decorators Collection STOCKHAM 19043-VS61-CG Assembly instructions

2K Furniture Designs C07 Assembly instructions

2K Furniture Designs

2K Furniture Designs C07 Assembly instructions

manuals.online logo
manuals.online logoBrands
  • About & Mission
  • Contact us
  • Privacy Policy
  • Terms and Conditions

Copyright 2025 Manuals.Online. All Rights Reserved.