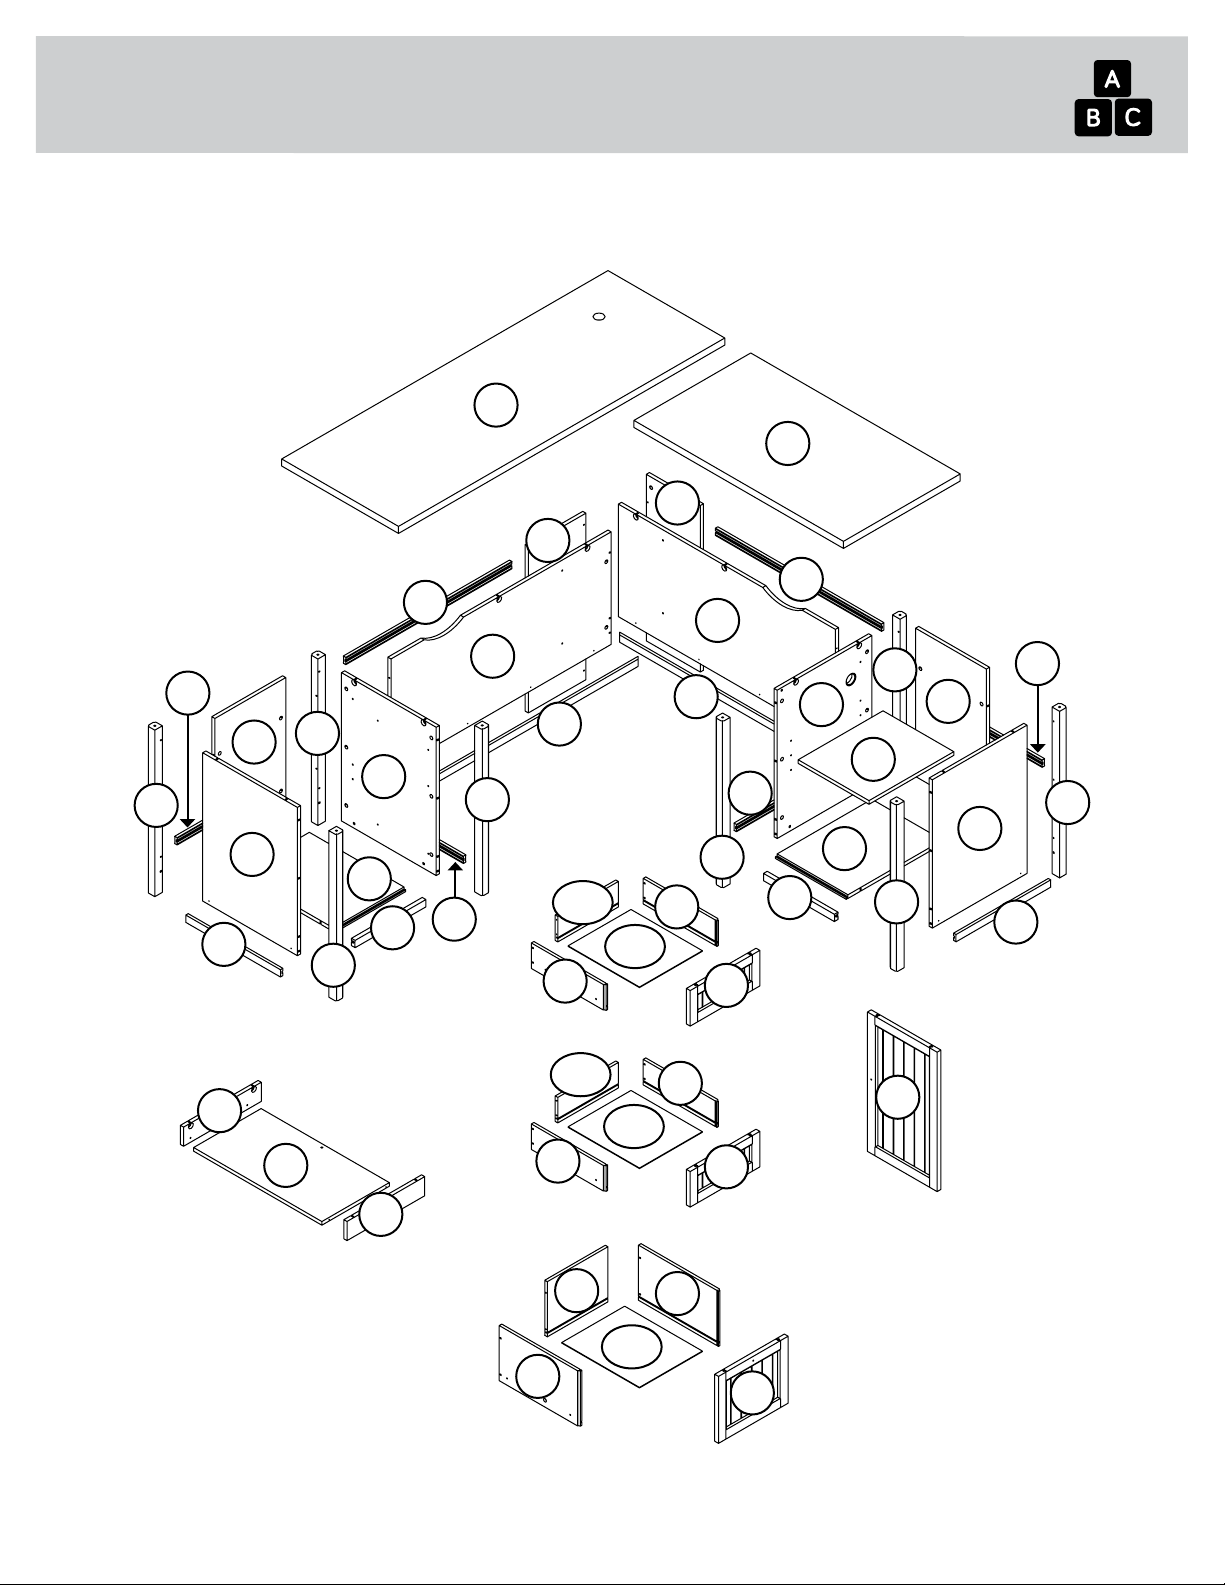
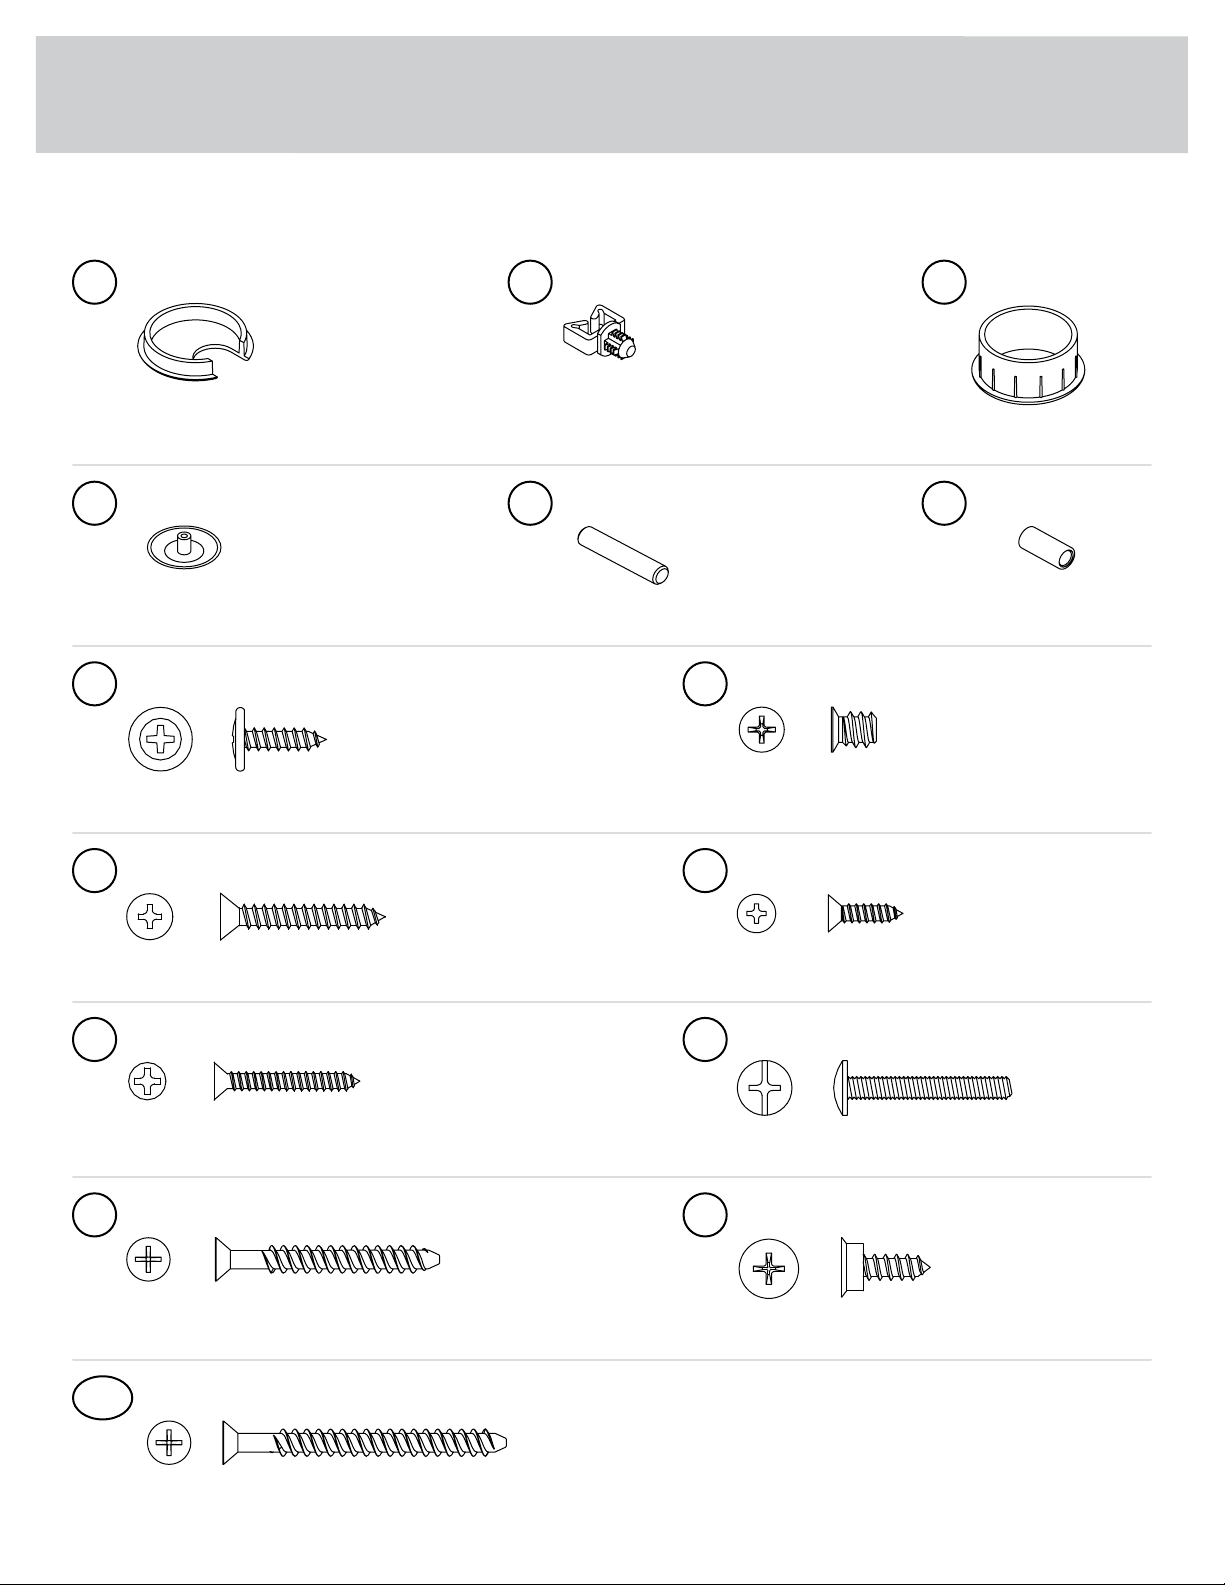
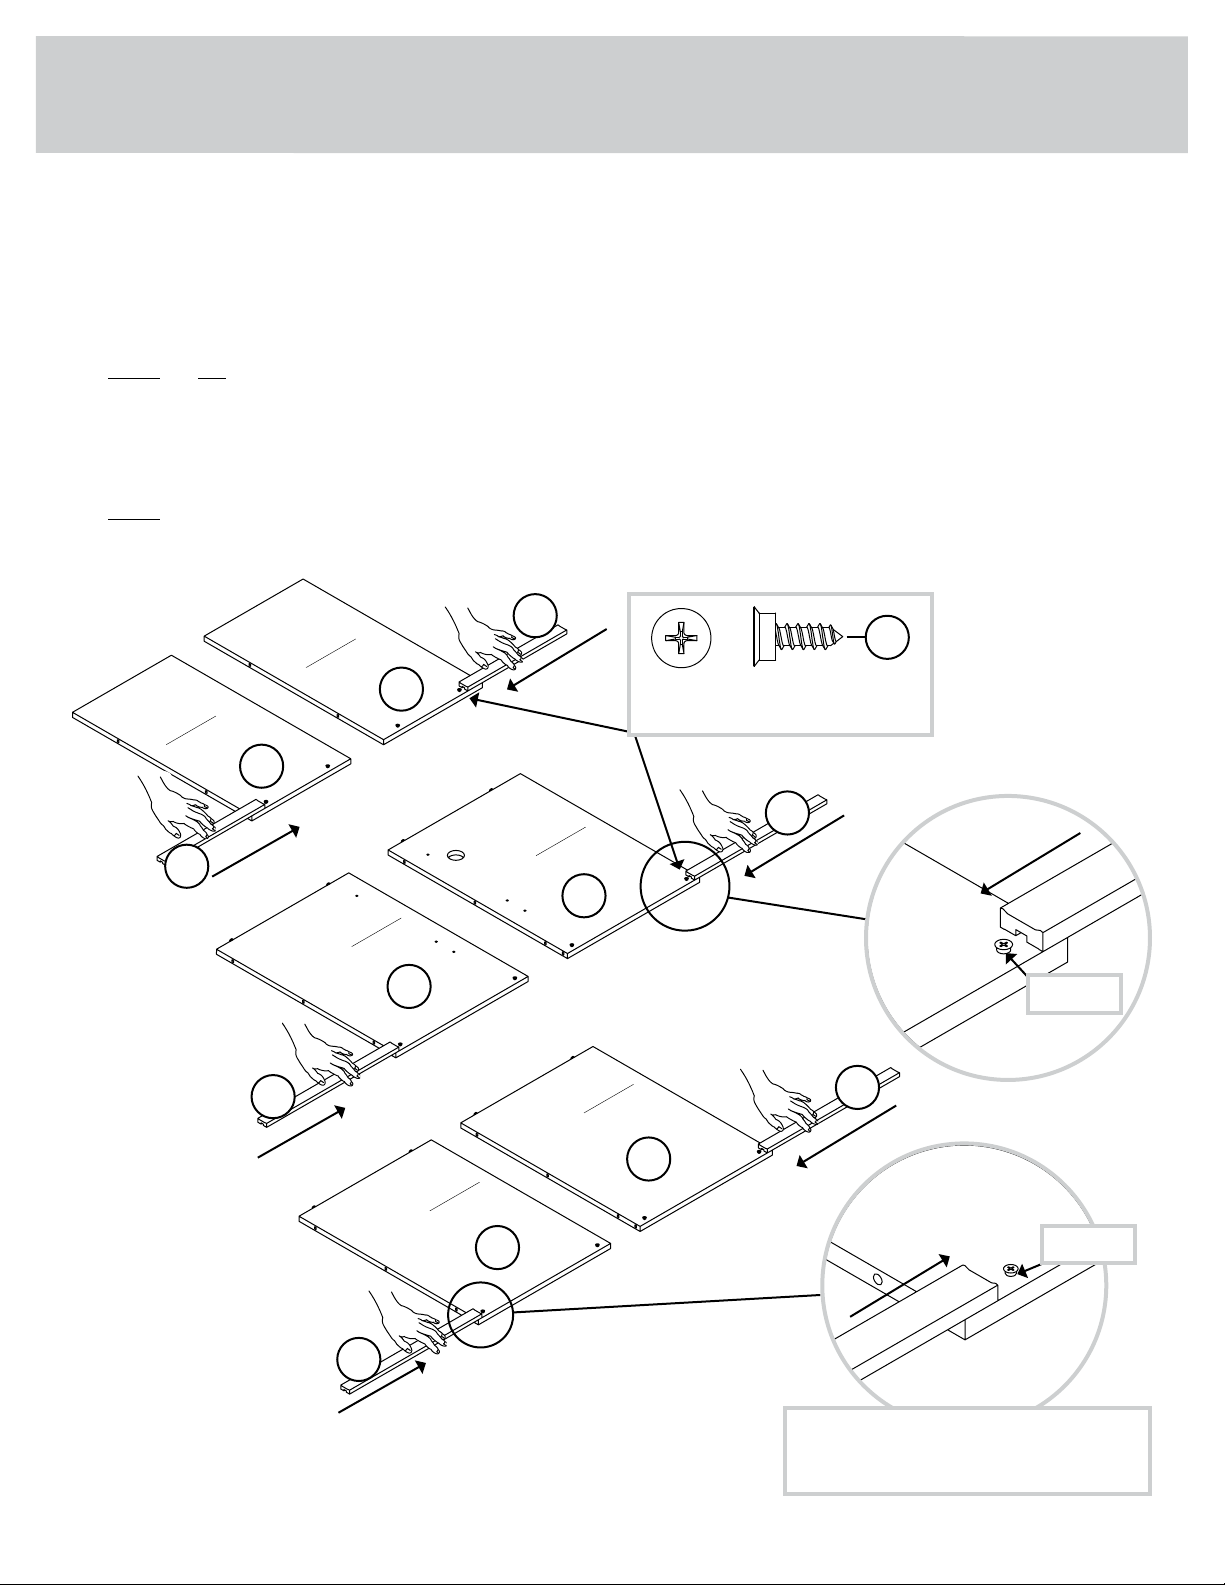
Sauder Costa 428728 User manual
Other Sauder Indoor Furnishing manuals

Sauder
Sauder 402159 User manual

Sauder
Sauder Carson Forge Series User manual

Sauder
Sauder 416821 User manual

Sauder
Sauder Barrister Lane 414729 User manual

Sauder
Sauder Office Port 408294 User manual

Sauder
Sauder Transit 414417 User manual

Sauder
Sauder Steel River 427549 User manual

Sauder
Sauder Portage Park 427478 User manual

Sauder
Sauder Radial 426023 User manual

Sauder
Sauder project 62 User manual

Sauder
Sauder 412720 User manual

Sauder
Sauder Tremont Row 427971 User manual

Sauder
Sauder Harvey Park Lateral File 426510 User manual

Sauder
Sauder Shoal Creek 411201 User manual

Sauder
Sauder 426932 User manual

Sauder
Sauder Shoal Creek 411222 User manual

Sauder
Sauder Clifford Place 433360 User manual

Sauder
Sauder DESIGNER'S IMAGE 430621 User manual

Sauder
Sauder Englewood 426918 User manual

Sauder
Sauder 101785 User manual


Popular Indoor Furnishing manuals by other brands

Regency
Regency LWMS3015 Assembly instructions

Furniture of America
Furniture of America CM7751C Assembly instructions

Safavieh Furniture
Safavieh Furniture Estella CNS5731 manual

PLACES OF STYLE
PLACES OF STYLE Ovalfuss Assembly instruction

Trasman
Trasman 1138 Bo1 Assembly manual

Costway
Costway JV10856 manual