manuals.online logo
Brands
  1. Home
  2. •
  3. Brands
  4. •
  5. Sauder
  6. •
  7. Indoor Furnishing
  8. •
  9. Sauder Portage Park 427478 User manual

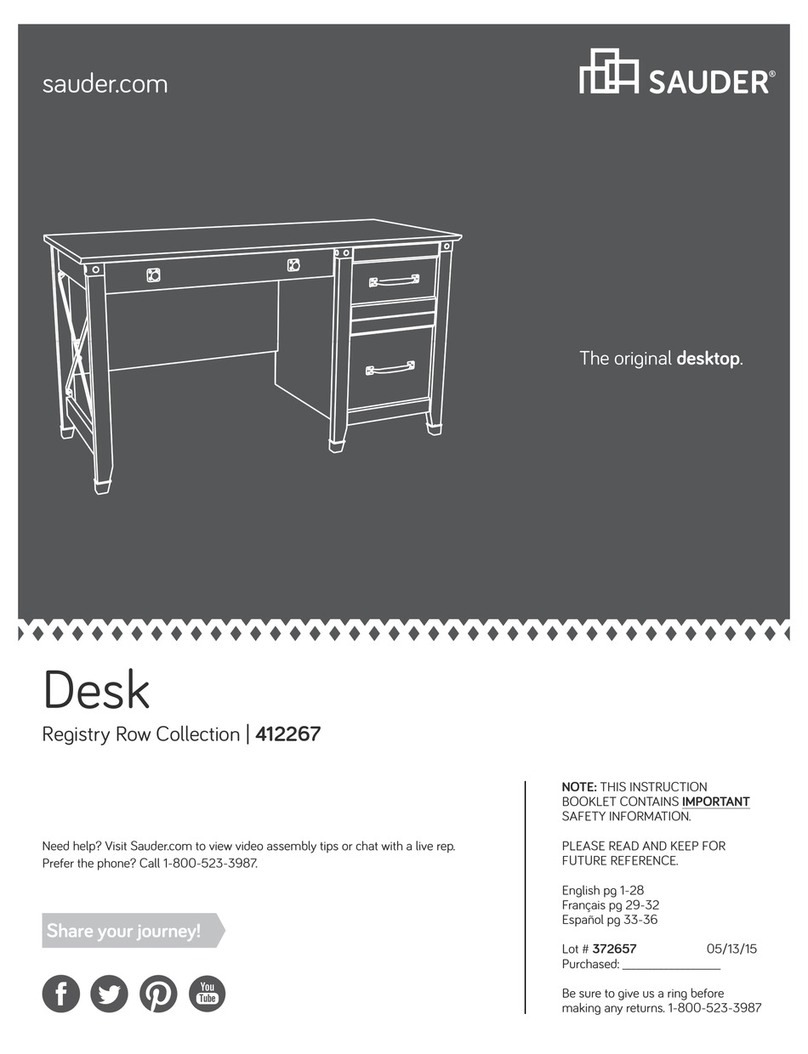
Sauder Portage Park 427478 User manual

sauder.com
NOTE: THIS INSTRUCTION
BOOKLET CONTAINS IMPORTANT
SAFETY INFORMATION.
PLEASE READ AND KEEP FOR
FUTURE REFERENCE.
sauder.com
CONTACT US FIRST
BEFORE MAKING ANY RETURNS TO THE STORE.
sauder.com
CONTACT US FIRST
BEFORE MAKING ANY RETURNS TO THE RETAILER.
Visit sauder.com/service to order replacement parts, view video assembly tips, or chat with a live rep.
Prefer the phone? Give us a ring at 1-800-445-1527.
Customer Service is available Monday-Friday - 9 a.m. to 5:30 p.m. EST (except holidays)
Sauder.com
Share your journey!
English pg 1-32
Français pg 33-36
Español pg 37-40
Lot # 560521 01/22/21
Purchased: __________________
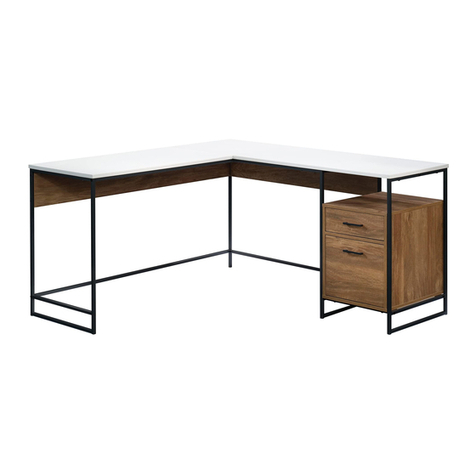
L-Desk
Portage Park Collection | Model 427478
Sit and surf.
Part Identification
Hardware Identification
Hardware Usage Guide
Assembly Steps
Français
Español
Safety
Warranty
No. 2 Phillips Screwdriver
Tip Shown Actual Size
Table of Contents Assembly Tools Required
2-3
4-5
6
7-32
33-36
37-40
41-42
43
Page 2 www.sauder.com/service 427478
Part Identification
åWhile not all parts are labeled, some of the parts will have a label or an inked letter on the edge
to help distinguish similar parts from each other. Use this part identification to help identify similar parts.
A LARGE TOP (1)
B LEFT LEG (1)
C RIGHT LEG (1)
D LEG PANEL (2)
E MODESTY PANEL (1)
F LONG BRACE (2)
G SMALL TOP (1)
H LEFT END (1)
J RIGHT END (1)
K SHELF (1)
L BOTTOM (1)
N SMALL BACK (1)
O LARGE BACK (1)
P FOOT (2)
Q SKIRT (2)
R SMALL DRAWER FRONT (1)
S SMALL LEFT DRAWER SIDE (1)
T SMALL RIGHT DRAWER SIDE (1)
U SMALL DRAWER BACK (1)
V SMALL DRAWER BOTTOM (1)
X SMALL DRAWER BRACE (1)
Y LARGE DRAWER FRONT (1)
Z LARGE LEFT DRAWER SIDE (1)
AA LARGE RIGHT DRAWER SIDE (1)
BB LARGE DRAWER BACK (1)
CC DRAWER BRACE (1)
DD LARGE DRAWER BOTTOM (1)
EE LARGE DRAWER BRACE (1)
FF CONNECTOR (1)
Part Identification Now you know
our ABCs.
Page 3www.sauder.com/service427478
A
B
C
D
E
F
G
H
J
K
L
N
O
P
Q
R
S
T
U
V
X
Y
Z
AA
BB CC
DD
EE
FF
D
F
P
Q
Hardware Identification
åScrews are shown actual size. You may receive extra hardware with your unit.
WOOD DOWEL - 6
9
CAM SCREW - 29
7HIDDEN CAM - 29
8BRACKET - 8
10
APPLIQUE CARD - 5
13
L-WRENCH - 1
12
GROMMET WITH
CAP - 2
11
(EXTENSION SET SHOWN SEPARATED)
1EXTENSION RAIL - 4 2EXTENSION SLIDE - 4 3LONG FILE
GLIDE - 2
PULL - 2
6
SHORT FILE
GLIDE - 2
4 5 FILE BAR - 2
Page 4 www.sauder.com/service 427478
Hardware Identification
åScrews are shown actual size. You may receive extra hardware with your unit.
1/2" PAN HEAD SCREW - 16
20
11/16" MACHINE SCREW - 4
18
1-3/8" PAN HEAD SCREW - 24
15
1/2" HEX HEAD SCREW - 12
21
1-9/16" HEX HEAD SCREW - 4
14
1/2" FLAT HEAD SCREW - 24
19
1" HEX HEAD SCREW - 10
16
Page 5www.sauder.com/service427478
1-9/16" TAPERED MACHINE SCREW - 4
17
Hardware Usage Guide
HOW TO USE A HIDDEN CAM & CAM SCREW OR CAM DOWEL
NOTE: Various CAM SCREWS or a CAM DOWEL may be used.
Cam Screws Cam Dowel
Turn the CAM SCREW or
gently tap the CAM DOWEL
until the shoulder is against
the surface of the part.
1.
Hidden Cam
Arrow
Push a HIDDEN CAM into
the part. The arrow in the
HIDDEN CAM must point
toward the hole in the
edge of the board.
Hole
2.
3.
1
2
Insert the CAM SCREW or CAM DOWEL into the
HIDDEN CAM. Tighten the HIDDEN CAM.
Page 6 www.sauder.com/service 427478
Step 1 Look for this icon. It means a video assembly tip is
available at www.sauder.com/service/tips
Find the numbered video or scan the QR code.
å Assemble your unit on a carpeted floor or on the empty
carton to avoid scratching your unit or the floor.
å Push four HIDDEN CAMS (8) into the ENDS (H and J).
å Turn twelve CAM SCREWS (7) into the exact holes shown
in the ENDS (H and J).
Page 7www.sauder.com/service427478
H
J
Arrow
8
7
(12 used)
1
Step 2
Page 8 www.sauder.com/service 427478
7
21
å Separate the EXTENSION SLIDES (2) from the EXTENSION RAILS (1) as shown in the upper diagram
below. Be prepared, the parts are greasy.
å Fasten the EXTENSION RAILS (1) to the ENDS (H and J). Use twelve 1/2" FLAT HEAD SCREWS (19)
through the exact holes shown.
å NOTE: For each EXTENSION RAIL, turn a SCREW into the 1st hole shown in the enlarged diagram.
Then, slide the inner cartridge of the EXTENSION RAIL in to find the other holes that line up with the
holes in the END. Turn a SCREW into each hole.
å NOTE: The EXTENSION SLIDES will be used later for the DRAWERS.
Slide the black lever in and pull the SLIDE from the RAIL.
1st
11st
J
H11st
Open end
1/2" FLAT HEAD SCREW
(12 used in this step)
19
1
1
Open end
1st
1st
å Push eight HIDDEN CAMS (8) into the BACKS (N and O).
å Fasten the BACKS (N and O) to the LEFT END (H).
Tighten four HIDDEN CAMS.
Step 3
Page 9www.sauder.com/service427478
Arrow
8
8
Arrow
1
O
N
H
Surface with
HIDDEN CAMS
Surface with
HIDDEN CAMS
Curved edge
O
N
å Push four HIDDEN CAMS (8) into the SHELF (K).
å Fasten the SHELF (K) to the LEFT END (H). Tighten two
HIDDEN CAMS.
Step 4
Page 10 www.sauder.com/service 427478
Arrow
8
8
Arrow
K
K
H
Surface with
HIDDEN CAMS
1
Finished edge
å Fasten the RIGHT END (J) to the SHELF (K) and
BACKS (N and O). Tighten six HIDDEN CAMS.
Step 5
Page 11www.sauder.com/service427478
1
K
J
O
N
å Carefully turn the assembly onto the top edges as shown.
å Insert two WOOD DOWELS (9) into the ENDS (H and J).
å Fasten the BOTTOM (L) to the ENDS (H and J). Use four
1-3/8" PAN HEAD SCREWS (15).
å NOTE: You should start each SCREW a few turns before
completely tightening any of them.
å NOTE: Be sure the WOOD DOWELS in the ENDS insert
into the BOTTOM.
Step 6
Page 12 www.sauder.com/service 427478
9
9
H
J
L
1-3/8" PAN HEAD SCREW
(4 used in this step)
15
Surface with more holes
Step 7
Page 13www.sauder.com/service427478
å Fasten the SKIRTS (Q) to the FEET (P). Tighten four 1/2" HEX
HEAD SCREWS (21) using the L-WRENCH (12).
12
1/2" HEX HEAD SCREW
(4 used in this step)
21
The holes in the
SKIRTS should
face each other.
Q
P
Q
P
The hole must be
closer to this edge.
å Fasten the FEET (P) to the BOTTOM (L). Tighten four 1-9/16"
HEX HEAD SCREWS (14) using the L-WRENCH (12).
å NOTE: You should start each SCREW a few turns before
completely tightening any of them.
Step 8
Page 14 www.sauder.com/service 427478
12
L
P
P
1-9/16" HEX HEAD SCREW
(4 used in this step)
14
å Fasten the BRACKETS (10) to the LEGS (B and C) exactly
as shown. Use eight 1/2" PAN HEAD SCREWS (20).
Step 9
Page 15www.sauder.com/service427478
B
C
10
10
1/2" PAN HEAD SCREW
(8 used in this step)
20
(8 used)
å Fasten one of the LONG BRACES (F) to the LEGS (B and C). Tighten
four 1/2" HEX HEAD SCREWS (21) using the L-WRENCH (12).
Step 10
Page 16 www.sauder.com/service 427478
12
B
C
F
1/2" HEX HEAD SCREW
(4 used in this step)
21
å Turn three CAM SCREWS (7) into the LARGE TOP (A).
å NOTE: You should start each SCREW a few turns before
completely tightening any of them.
å Fasten the LONG BRACE (F) to the LARGE TOP (A). Use
three 1-3/8" PAN HEAD SCREWS (15).
å Fasten the LEGS (B and C) to the LARGE TOP (A).
Tighten four 1-9/16" TAPERED MACHINE SCREWS (17)
using the L-WRENCH (12).
Step 11
Page 17www.sauder.com/service427478
1
7
B
C
F
A
The large hole
must be here.
12
1-3/8" PAN HEAD SCREW
(3 used for the BRACE)
15
1-9/16" TAPERED MACHINE SCREW
(4 used for the LEGS)
17
å Push three HIDDEN CAMS (8) into the MODESTY PANEL (E).
å Fasten the MODESTY PANEL (E) to the LARGE TOP (A).
Tighten three HIDDEN CAMS.
Step 12
Page 18 www.sauder.com/service 427478
Arrow
8
1
A
E
E
E
Surface without HIDDEN CAMS
å Fasten the remaining LONG BRACE (F) to the MODESTY
PANEL (E). Use three 1-3/8" PAN HEAD SCREWS (15).
å NOTE: You should start each SCREW a few turns before
completely tightening any of them.
Step 13
Page 19www.sauder.com/service427478
1-3/8" PAN HEAD SCREW
(3 used in this step)
15
E
F
å Fasten the LONG BRACE (F) to the LEGS (B and C).
Tighten four 1/2" HEX HEAD SCREWS (21) using
the L-WRENCH (12).
å NOTE: You should start each SCREW a few turns
before completely tightening any of them.
Step 14
Page 20 www.sauder.com/service 427478
12
1/2" HEX HEAD SCREW
(4 used in this step)
21
B
C
F

Other Sauder Indoor Furnishing manuals

Sauder HomePlus 422428 User manual

Sauder

Sauder HomePlus 422428 User manual

Sauder 411614 User manual

Sauder

Sauder 411614 User manual

Sauder Worksense BERGEN CIRCLE 426459 User manual

Sauder

Sauder Worksense BERGEN CIRCLE 426459 User manual

Sauder 415465 User manual

Sauder

Sauder 415465 User manual

Sauder SmartCenter Edge Water 413092 User manual

Sauder

Sauder SmartCenter Edge Water 413092 User manual

Sauder DESIGNER'S IMAGE 430616 User manual

Sauder

Sauder DESIGNER'S IMAGE 430616 User manual

Sauder Parklane 419152 User manual

Sauder

Sauder Parklane 419152 User manual

Sauder OFFICE WORKS AFFIRM 427438 User manual

Sauder

Sauder OFFICE WORKS AFFIRM 427438 User manual

Sauder Harbor View 158015 User manual

Sauder

Sauder Harbor View 158015 User manual

Sauder Cottage Road 416039 User manual

Sauder

Sauder Cottage Road 416039 User manual

Sauder North Avenue 422313 User manual

Sauder

Sauder North Avenue 422313 User manual

Sauder Parklane Series User manual

Sauder

Sauder Parklane Series User manual

Sauder WHISKER User manual

Sauder

Sauder WHISKER User manual

Sauder Soft Modern 415138 User manual

Sauder

Sauder Soft Modern 415138 User manual

Sauder Harvey Park 420288 User manual

Sauder

Sauder Harvey Park 420288 User manual

Sauder Harvey Park 421933 Installation and operation manual

Sauder

Sauder Harvey Park 421933 Installation and operation manual

Sauder Portage Park 426281 User manual

Sauder

Sauder Portage Park 426281 User manual

Sauder HomePlus Collection 411967 User manual

Sauder

Sauder HomePlus Collection 411967 User manual

Sauder DESIGNER'S IMAGE 430621 User manual

Sauder

Sauder DESIGNER'S IMAGE 430621 User manual

Sauder Boulevard Cafe 420650 User manual

Sauder

Sauder Boulevard Cafe 420650 User manual

Sauder Corner Entertainment Credenza 403818 User manual

Sauder

Sauder Corner Entertainment Credenza 403818 User manual

Sauder Worksense BERGEN CIRCLE 426289 User manual

Sauder

Sauder Worksense BERGEN CIRCLE 426289 User manual

Sauder Parklane 423107 User manual

Sauder

Sauder Parklane 423107 User manual

Sauder Costa 428724 User manual

Sauder

Sauder Costa 428724 User manual

Popular Indoor Furnishing manuals by other brands

KITALY Genio 2821 8733 Assembly instructions

KITALY

KITALY Genio 2821 8733 Assembly instructions

LDI Safco Jurni JN CNFGL Series instructions

LDI

LDI Safco Jurni JN CNFGL Series instructions

Grandinroad Helena 178331 quick start guide

Grandinroad

Grandinroad Helena 178331 quick start guide

Songmics OBG24 instruction manual

Songmics

Songmics OBG24 instruction manual

modway EEI-3741 quick start guide

modway

modway EEI-3741 quick start guide

RSI ESTATE ESM1570GRY Assembly/installation instructions

RSI

RSI ESTATE ESM1570GRY Assembly/installation instructions

Emagra X5 Assembly instructions

Emagra

Emagra X5 Assembly instructions

BLACK RED WHITE STYLIUS B169-REG1W2S quick start guide

BLACK RED WHITE

BLACK RED WHITE STYLIUS B169-REG1W2S quick start guide

Perma Easy Fit instruction manual

Perma

Perma Easy Fit instruction manual

Office Star AVE SIX MALTA MAL26 quick start guide

Office Star

Office Star AVE SIX MALTA MAL26 quick start guide

Cooper Lighting METALUX WRAPAROUND OAK TRIM ENDS/SIDES... specification

Cooper Lighting

Cooper Lighting METALUX WRAPAROUND OAK TRIM ENDS/SIDES... specification

New Classic Furniture FLYNN UC2177-25-PBK Assembly instructions

New Classic Furniture

New Classic Furniture FLYNN UC2177-25-PBK Assembly instructions

Vari 401920 quick start guide

Vari

Vari 401920 quick start guide

Eureka Ergonomic ERK-CV-26B user guide

Eureka Ergonomic

Eureka Ergonomic ERK-CV-26B user guide

ACME Keva 97768 Assembly instructions

ACME

ACME Keva 97768 Assembly instructions

OVE SIERRA 36 manual

OVE

OVE SIERRA 36 manual

Jysk ENGHAVE 4705620 manual

Jysk

Jysk ENGHAVE 4705620 manual

Furniture Values International aspenhome I221-370C Assembly instructions

Furniture Values International

Furniture Values International aspenhome I221-370C Assembly instructions

manuals.online logo
manuals.online logoBrands
  • About & Mission
  • Contact us
  • Privacy Policy
  • Terms and Conditions

Copyright 2025 Manuals.Online. All Rights Reserved.