manuals.online logo
Brands
  1. Home
  2. •
  3. Brands
  4. •
  5. Savant
  6. •
  7. Control Unit
  8. •
  9. Savant ITP-E8000 Series User manual

Savant ITP-E8000 Series User manual

Savant® Touch 8 inch Control Screen - White or Black (ITP-E8000x)
Quick Reference Guide
For Product Info
ITP-E8000x | 009-1522-02 | 170816
45 Perseverance Way, Hyannis, MA 02601!
Copyright © 2017 Savant Systems, LLC
1
of
2!
Savant.com | 508.683.2500
Box Contents
(1) Savant 8.0 inch In-Wall Touch Screen
(1) Installation Kit
(1) Installation Template
(1) Mounting Bracket (For standard 2-gang electrical box)
(4) Mounting Bracket Screws (6-32 x 1 in.)
(1) Quick Reference Guide (this document)
Specifications
Environmental
Temperature
32° to 104° F (0° to 40°C)
Humidity
10% to 90% RH (non-condensing)
Dimensions and Weight (Product)
Viewing Image
(IPS)
8.0 in (203.0 mm)
Resolution
1280 x 800 | 16.7M colors
Height
5.84 in (148.4 mm)
Width
8.80 in (223.5 mm)
Depth (overall)
1.43 in (36.3 mm)
Depth
(mounting)
0.62 in (15.8 mm)
Weight
0.95 lb (0.44 kg)
Standards
Ethernet
10/100/1000 Gigabit Ethernet Adapter
Power
PoE
802.3at compliant
Power
Consumption
Average 5.14W
Maximum 6.76W
Regulatory
Safety and
Emissions
FCC Part 15
Class B
CE
WEEE
RoHs
Compliant
Minimum Supported Release
Savant OS
da Vinci 8.5
Network Requirements
Savant requires the use of business class/commercial grade network
equipment throughout the network to ensure the reliability of
communication between devices. These higher quality components
also allow for more accurate troubleshooting when needed.
Connect all Savant devices to the same local area network (LAN) or
subnet as the Host. Savant recommends not implementing any type
of traffic or packet shaping in your network topology for the Savant
devices as this may interfere with performance.
Network Changes
If the IP Address range in your network has changed, Savant
recommends the following steps to refresh any IP connection and
ensure that the display is communicating with the network correctly.
Reboot the device for the Settings Menu.
Navigate from the Home Screen Rooms > > Reboot
Proximity
Sensor
Sensor (proximity) mounted in front panel
will wake up the display when movement is
detected in front of display.
Micro USB
Not Used
Embedded
Speaker
For future use
Mounting
Slots
Align the mounting frame hooks and press
down to seat.
Alternate
Power Input
Not Used
Link LED
Solid Orange - Link is established.
Off – No link established
Link Activity
LED
Green Blinking - Indicates data activity.
Off – No Activity
Ethernet
8-pin RJ-45 port:
-!10/100/1000 Base-T auto-negotiating
port with link and activity LEDs
-!PoE – 802.3at compliant
Captive
Screws
Once mounting frame hooks are seated,
secure the touch panel to the bracket using
the two captive screws.
Embedded
Microphone
For future use
Network Configuration
To ensure that the IP Address will not change due to a power outage,
a static IP Address or DHCP reservation should be configured. Savant
recommends using DHCP reservation within the router. By using this
method, IP Addresses for all devices can be managed from a single
UI avoiding the need to access devices individually.
Setting DHCP reservation varies from router to router. Refer to the
documentation for the router to configure DHCP reservation.
A
B
C
D
E
F
G
H
I
J
ITP-E8000x | 009-1522-02 | 170816!
45 Perseverance Way, Hyannis, MA 02601!
Copyright © 2017 Savant Systems, LLC
2
of
2!
Savant.com | 508.683.2500
Supported Orientations
Landscape – The touch panel needs to be installed with the
proximity sensor on the right side of the installed unit.
Portrait – The touch panel needs to be installed with the proximity
sensor on the top of the installed unit.
Mount the Bracket
The Savant In-Wall Touch Screen is designed to be mounted using
either a standard 2-gang electrical box or low voltage 2-gang
bracket.
1.!Mount a 2-gang standard electrical box or low voltage bracket
to an existing wall. Recommended height to center of box is
between 57 and 65 inches (145 – 165 cm) above a finished floor.
NOTE: If the Touch Panel is going to be installed Portrait the
electrical box or bracket will need to be rotated 90°.
2.!Secure the mounting bracket to the electrical box/bracket using
the four 6-32 x 1 inch screws provided. Position the touch panel
mounting tabs facing outward. See image below.
Make Connections
Connect a Cat 5e/6/7 Ethernet cable (T568A, T568B) to the RJ-45
LAN/PoE port on rear of touch panel. See image below.
Important Information!
-!The touch screen is powered through the Ethernet cable. An
802.3at compliant PoE network router is required to power
the display.
-!If a PoE network router is not available, a PoE network
injector can be used.
Secure Panel to Bracket
Once cables are connected to rear of touch panel, the panel can be
secured to the mounting bracket installed earlier.
1.!Loosen the captive screws on the bottom of the touch panel a
few turns to allow the panel to slide into the mounting bracket.
2.!Align the mounting frame hooks with the mounting slots.
3.!Gently pull down the unit to seat the mounting frame hooks.
4.!Tighten the two captive screws to secure the touch panel to the
mounting bracket.
Apply Power
The ITP-E8000 is powered through the Cat 5e/6/7 Ethernet cable.
Plug the opposite end of Ethernet cable into the network router (PoE
enabled). Connecting the Ethernet cable will power-on the touch
panel and an IP Address automatically gets assigned through DHCP.
Once the touch panel is powered and an IP address is assigned, it
can be added to a RacePoint Blueprint configuration. Refer to the
Savant In-Wall Touch Screen Deployment Guide (009-1475-xx)
available on the Savant Customer Community.
Regulatory
15.19. This device complies with part 15 of the FCC Rules. Operation is subject to the
following two conditions: (1) This device may not cause harmful interference, and (2)
this device must accept any interference received, including interferences that may
cause undesired operation.
15.21. The changes or modifications not expressly approved by the party responsible for
compliance could void the user's authority to operate the equipment.
15.105. This equipment has been tested and found to comply with the limits for CLASS
B digital device, pursuant to Part 15 of FCC Rules. These limits are designed to provide
reasonable protection against harmful interference when the equipment is operated in
a residential environment. This equipment generates, uses and can radiate radio
frequency energy and, if not installed and used in accordance with the instructions, may
cause harmful interference to radio communications, However there is no guarantee
that interference will not occur in a particular installation, If this equipment does cause
harmful interference to radio or television reception, which can be determined by
turning the equipment off and on, the user is encouraged to try to correct the
interference by one or more of the following measures:
- Reorient or relocate the receiving circuit different from that to which receiver is
connected.
- Increase the separation between the equipment and the receiver.
- Consult the dealer or experienced radio/TV technician for help.
IC Regulations
RSS-Gen 7.1.3. This device complies with Industry Canada license-exempt RSS
standard(s). Operation is subject to the following two conditions: (1) This device may
not cause interference, and (2) This device must accept any interference, including
interference that may cause undesired operation of the device.
RSS-21- Annexe 9: A 9.4. Le présent appareil est conforme aux CNR d'Industrie Canada
applicables aux appareils radio exempts de licence. L'exploitation est autorisée aux deux
conditions suivantes: (1) l'appareil ne doit pas produire de brouillage, et (2) l'utilisateur
de l'appareil doit accepter tout brouillage radioélectrique subi, même si le brouillage est
susceptible d'en compromettre le fonctionnement.
Additional Information
-!Savant In-Wall Touch Screen Deployment Guide (009-1475-xx)
This manual suits for next models

1

Other Savant Control Unit manuals

Savant SAV-LMP-0300 User manual

Savant

Savant SAV-LMP-0300 User manual

Savant SSC-P008 User manual

Savant

Savant SSC-P008 User manual

Savant CLI-10K4IN-00 User manual

Savant

Savant CLI-10K4IN-00 User manual

Savant IP Audio 125 with Savant Music 2.0 User manual

Savant

Savant IP Audio 125 with Savant Music 2.0 User manual

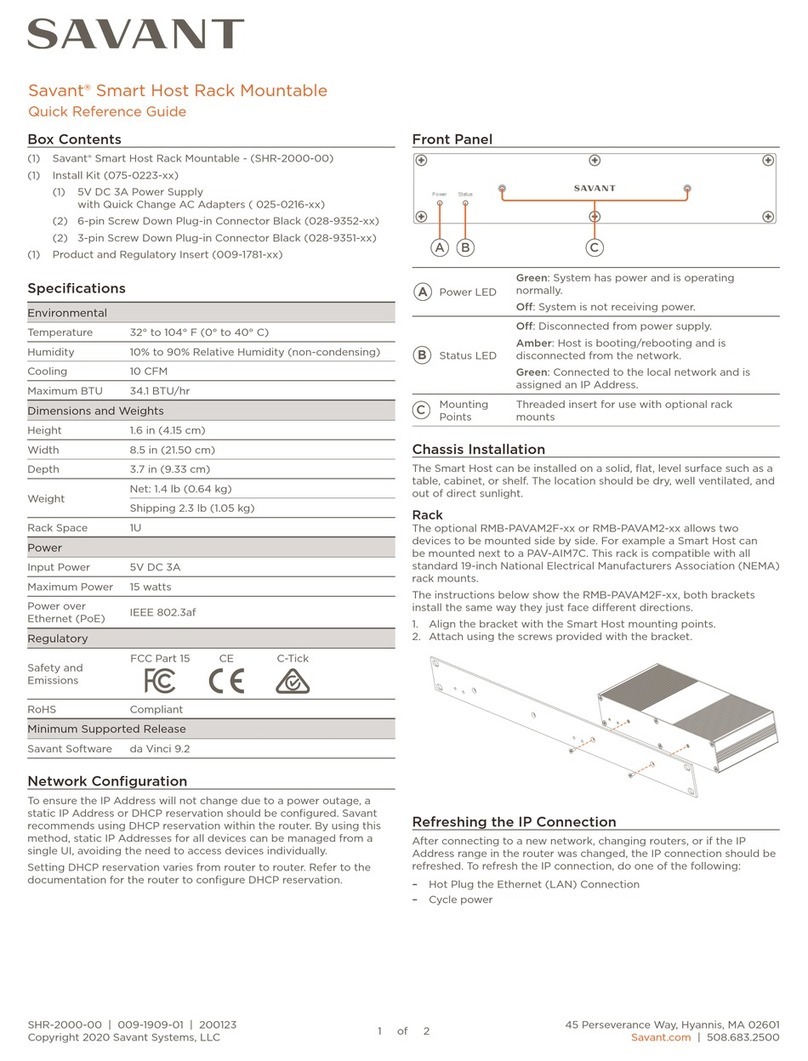
Savant Smart Host Rack Mountable User manual

Savant

Savant Smart Host Rack Mountable User manual

Savant SmartView VOM-SV02 User manual

Savant

Savant SmartView VOM-SV02 User manual

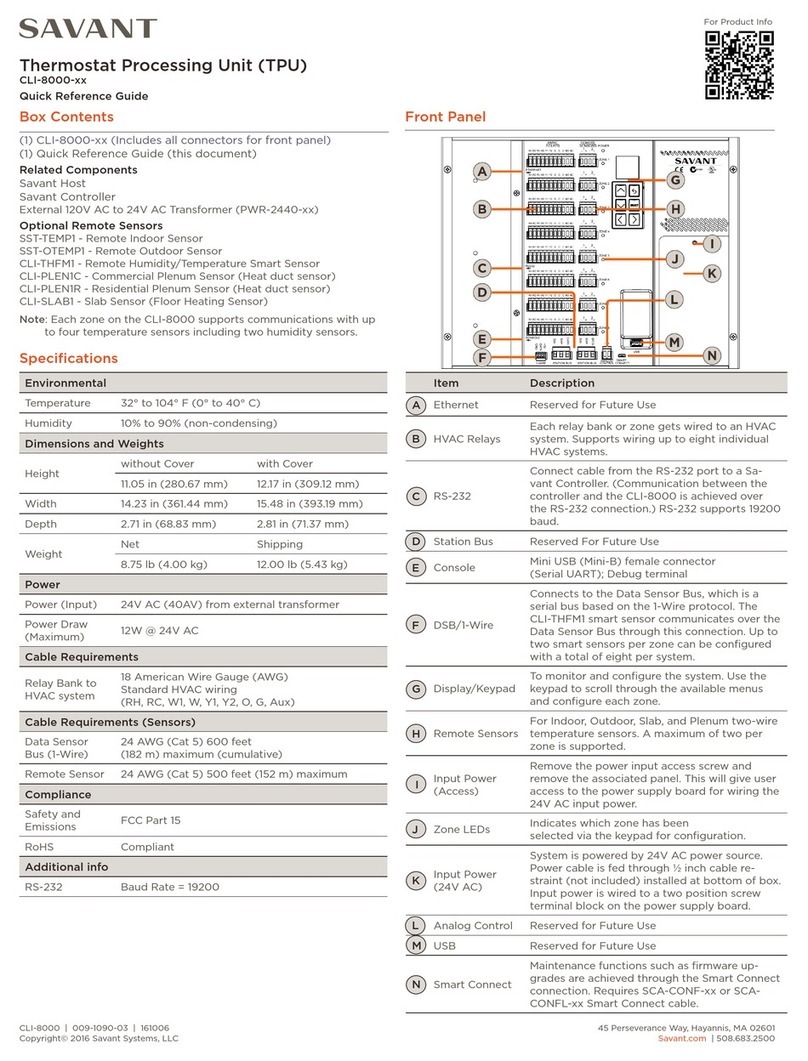
Savant CLI-8000 Series User manual

Savant

Savant CLI-8000 Series User manual

Savant CLI-1WIRE2 User manual

Savant

Savant CLI-1WIRE2 User manual

Savant VOM-VP02H User manual

Savant

Savant VOM-VP02H User manual

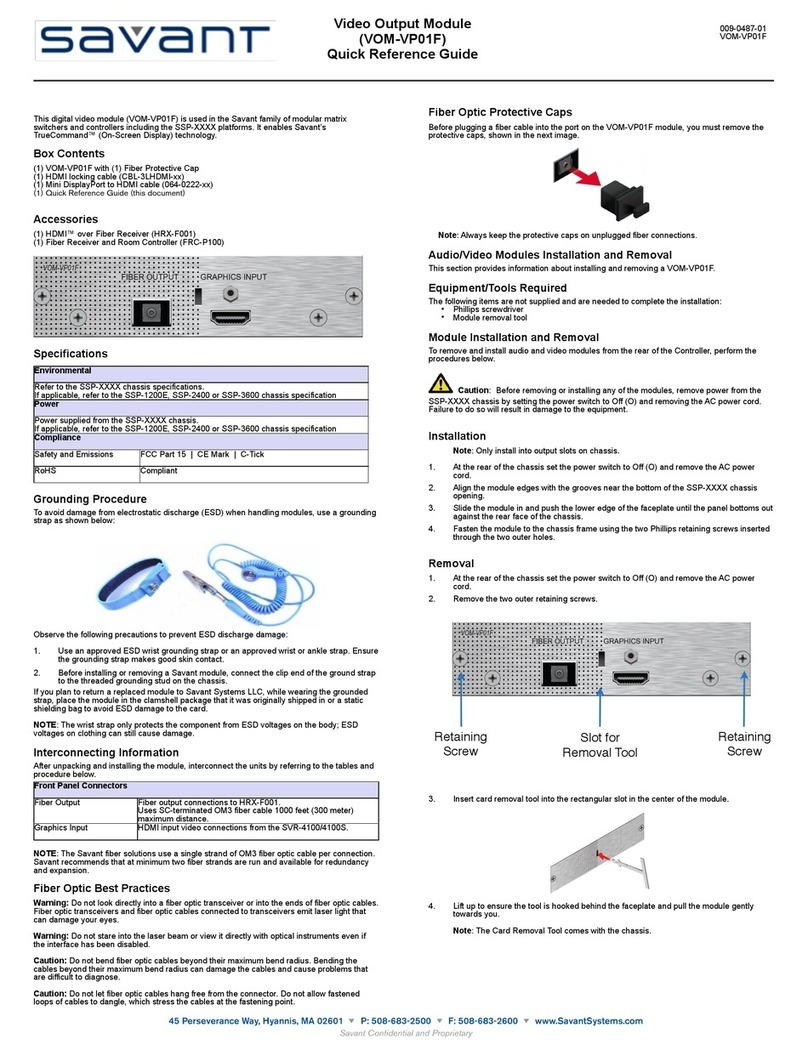
Savant VOM-VP01F User manual

Savant

Savant VOM-VP01F User manual

Savant Pro Host User manual

Savant

Savant Pro Host User manual

Savant Pro Host SVR-5200S-00 User manual

Savant

Savant Pro Host SVR-5200S-00 User manual

Savant CLI-PTAC1K1 User manual

Savant

Savant CLI-PTAC1K1 User manual

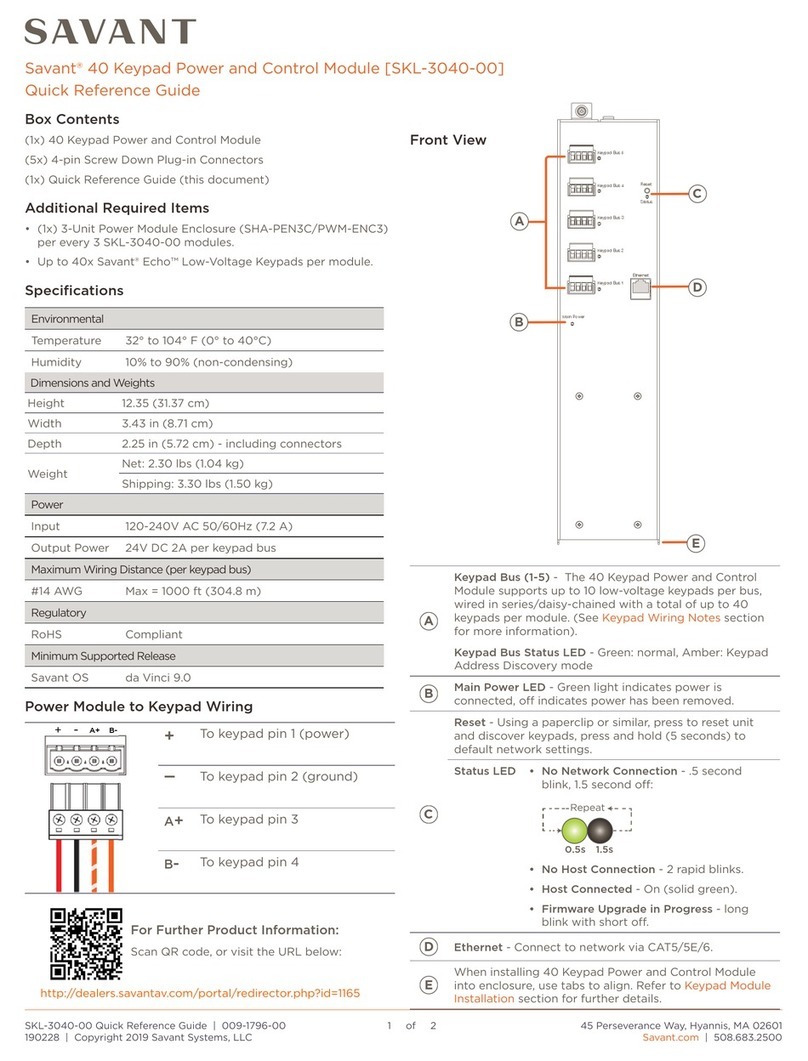
Savant SKL-3040-00 User manual

Savant

Savant SKL-3040-00 User manual

Savant Pro Host User manual

Savant

Savant Pro Host User manual

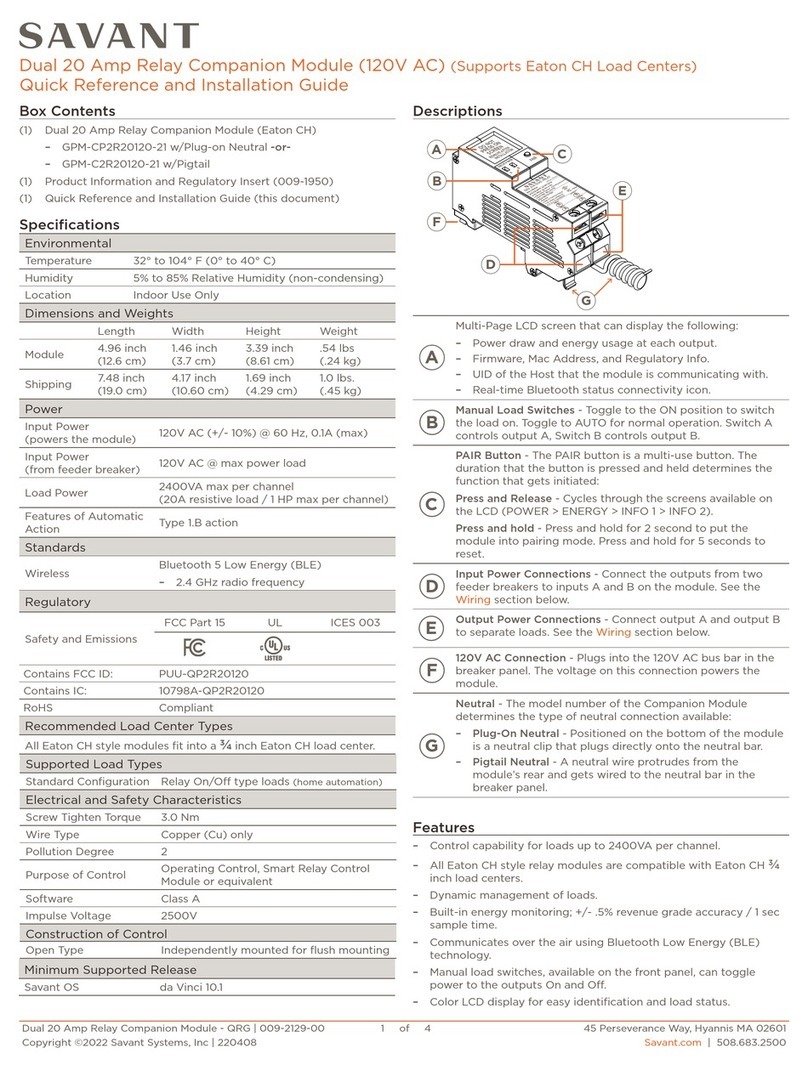
Savant GPM-CP2R20120-21 User manual

Savant

Savant GPM-CP2R20120-21 User manual

Savant SKL-3040-00 User manual

Savant

Savant SKL-3040-00 User manual

Savant SKL-3040-00 User manual

Savant

Savant SKL-3040-00 User manual

Popular Control Unit manuals by other brands

Krom Schroder VGP10 operating instructions

Krom Schroder

Krom Schroder VGP10 operating instructions

Keyautomation 14A Instructions and warnings for installation and use

Keyautomation

Keyautomation 14A Instructions and warnings for installation and use

SimTech SIMCom SIM7100-PCIE Hardware design

SimTech

SimTech SIMCom SIM7100-PCIE Hardware design

red lion DA 4G LTE CAT4 installation guide

red lion

red lion DA 4G LTE CAT4 installation guide

Hi-P HIP-10RV Maintenance instructions

Hi-P

Hi-P HIP-10RV Maintenance instructions

Plast-O-Matic EASYMT Series instructions

Plast-O-Matic

Plast-O-Matic EASYMT Series instructions

Ublox SARA-N210 System integration manual

Ublox

Ublox SARA-N210 System integration manual

Timeguard TS800B operating instructions

Timeguard

Timeguard TS800B operating instructions

Delta TECK 81T2 -WHSHWA Series quick start guide

Delta

Delta TECK 81T2 -WHSHWA Series quick start guide

Ublox MAX-M10M Integration manual

Ublox

Ublox MAX-M10M Integration manual

KEBCO COMBIVERT H6 Series Instructions for use

KEBCO

KEBCO COMBIVERT H6 Series Instructions for use

GSM Activate AD4IN1V8 manual

GSM Activate

GSM Activate AD4IN1V8 manual

Fire-Lite M301 installation instructions

Fire-Lite

Fire-Lite M301 installation instructions

EVTV GEVCU Operation manual

EVTV

EVTV GEVCU Operation manual

Quectel BG96 AT Command manual

Quectel

Quectel BG96 AT Command manual

Opal-RT OP5511 user manual

Opal-RT

Opal-RT OP5511 user manual

Siemens SIMATIC S7 Equipment manual

Siemens

Siemens SIMATIC S7 Equipment manual

RF-Star BM-ND04C manual

RF-Star

RF-Star BM-ND04C manual

manuals.online logo
manuals.online logoBrands
  • About & Mission
  • Contact us
  • Privacy Policy
  • Terms and Conditions

Copyright 2025 Manuals.Online. All Rights Reserved.