manuals.online logo
Brands
  1. Home
  2. •
  3. Brands
  4. •
  5. Savant
  6. •
  7. Control Unit
  8. •
  9. Savant SKL-3040-00 User manual

Savant SKL-3040-00 User manual

SKL-3040-00 Quick Reference Guide | 009-1796-01 1 of 2 45 Perseverance Way, Hyannis MA 02601
Copyright © 2020 Savant Systems, LLC | 200331 Savant.com | 508.683.2500
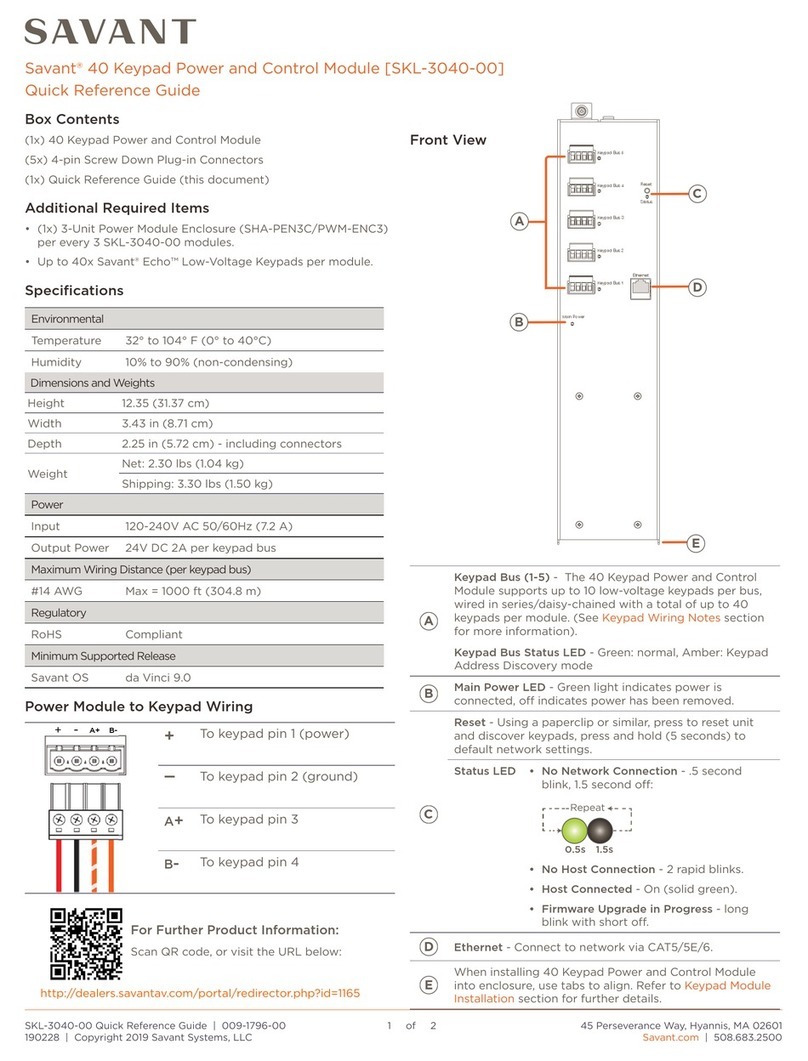
Savant® 40 Keypad Power and Control Module [SKL-3040-00]
Quick Reference Guide
Front View
Main Power
Keypad Bus 1
Keypad Bus 2
Keypad Bus 3
Ethernet
Keypad Bus 4
Keypad Bus 5
Reset
Status
A
B
C
D
E
F
Box Contents
Additional Required Items
Specifications
(1) 40 Keypad Power and Control Module (SKL-3040-XX)
(5) 4-pin Screw Down Plug-in Connectors (028-0834-xx)
(1) Power Supply to 120V AC Cable (064-0420-xx)
(1) ½inch nylon bushing for ½inch knockouts (015-0216-xx)
(1) Product Regulatory Statement
–SHA-PENC3 Power Module Enclosure (legacy model number)
–PWM-PENC3 Power Module Enclosure
–Up to 40 Savant®ECHO™ Low-Voltage Keypads per Module.
Environmental
Temperature 32° to 104° F (0° to 40° C)
Humidity 10% to 80% Relative Humidity (non-condensing)
Dimensions and Weights
Height 12.35 inch (31.37 cm)
Width 3.43 inch (8.71 cm)
Depth 2.25 in (5.72 cm)
Weight Net: 2.30 lbs (1.04 kg)
Shipping: 3.30 lbs (1.50 kg)
Maximum Wiring Distance (per keypad bus)
#14 AWG Max = 1000 feet (304.8 m)
Power
Input 120 - 240V AC, 50/60 Hz (7.2A)
Output 24V DC - (2A) per keypad bus
Regulatory
RoHS Compliant
Minimum Supported Release
Savant OS da Vinci 9.0
A
Keypad Bus - Each Keypad Bus connection (1-5) supports
daisy-chaining up to 10 keypads with a maximum of 40 per
SKL-3040 power module. Wiring information is available in
the Low Voltage Keypad Deployment Guide located on the
Savant Community.
B
Keypad Status LED - The state of the keypads bus is
displayed on the LED associated with each connection.
Indicates one of two states:
During the keypad discovery process, no
keypads were detected on the keypad bus.
-- OR --
The SKL-3040 is in bootloader mode which
takes place just after power is applied, or
when a module is reset.
During the keypad discovery process, at
least one keypad was detected on the
keypad bus.
.5s.5s
REPEAT
After resetting the SKL-3040 module, the
LED repeatedly blinks green then orange
until it detects a keypad on the bus.
C
Reset Button - Press and release the reset button to start
the keypad discovery process. Each time a keypad is either
added to a keypad bus or an existing keypad is replaced,
the reset button must be pressed to restart the discovery
process.
D
Module Status LED - Indicator LED for the various states
the SKL-3040 can get into. The states are shown below
Module is connected to a network and
communicating with a Savant Host.
.5s 2s
REPEAT
Module is not connected to a
network.
.5s2s
REPEAT
Firmware update is in process.
.5s .5s 2s
REPEAT
Module is connected to a network but
not communicating with the Savant
Host.
EEthernet - Connect to a network via Cat 5/5e/6.
F
Main Power LED - Indicates whether power is applied to the
module.
Green = Power Applied.
O = No Power.
SKL-3040-00 Quick Reference Guide | 009-1796-01 2 of 2 45 Perseverance Way, Hyannis MA 02601
Copyright © 2020 Savant Systems, LLC | 200331 Savant.com | 508.683.2500
Prepping Module Enclosure for Wiring
Before continuing, verify the PWM-PENC3 module enclosure is
mounted securely to an existing wall or similar. If not, instructions for
mounting are available in the Quick Reference Guide for the PWM-
PENC3 enclosure (009-1946-xx). The steps below describe how to
gain access to the compartment where the module wiring will be
completed.
1. Remove power at the circuit breaker.
2. Remove the lid from enclosure if lid is installed.
3. Turn the captive screw on the AC compartment panel
counterclockwise (CCW) until the screw pops up.
4. Slide the cover up and out away from the enclosure. Put aside.
5. Remove the two WAGO 6-position push connectors that were
shipped in the AC compartment. Set connectors aside.
6. Remove one of the electrical knockouts at the bottom of the
enclosure and install a ½inch electrical cable clamp.
7. Remove the electrical knockout from Module Slot 1 and install
the supplied ½inch nylon insulating bushing in its place. When
installing more than one module, repeat steps 6 and 7 for the
remaining module slots.
Keypad Module Installation
1. Remove the keypad module(s) and corresponding 120/240V
AC cable(s) from shipping box.
2. Flip keypad module over so the power supply is accessible.
3. Plug the supplied 120/240V AC cable into the 2 pin connector
located on the bottom edge of the Keypad Module's power
supply board. The connector is keyed to aid installation. See
diagram below:
Keypad Module Power Supply
Neutral (White)
Hot (Black)
Green (Gnd)
4. Position the Keypad Module over the electrical knockout
previously removed, and insert the wires from the module
through the insulated bushing.
5. Slide the tabs on the bottom of the Keypad Module into the
slots to the left and right of the electrical knockout hole.
6. To secure the Keypad Module to enclosure, turn the captive
screw on top of module clockwise (CW).
7. Repeat steps 1 - 7 and install any additional modules into slots
2 and 3 of the enclosure.
Once all Keypad Modules are mounted in the enclosure, connect
the white (neutral), black (hot), and green (ground) wires from each
module to a 120/240V AC circuit. Follow instructions below.
1. Verify the 120/240V AC feed from circuit breaker is o.
2. Strip approximately 10 inches of the outer jacketing from the
electrical cable and insert the wires through the electrical
clamp installed in a previous section. Tighten clamp.
HELPFUL! For the next few steps, refer to the diagram below.
3. Using the 6-position WAGO connector mounted to the green
ground wire screwed to the enclosure, connect all ground wires
together.
4. Using one of the WAGO 6-position push connectors included
with the enclosure, connect all the neutral wires together.
5. Using the remaining WAGO 6-position push connectors
included with the enclosure, connect all the hot wires together.
6. Insert all wires into the AC compartment, and reinstall AC
compartment cover.
7. Apply power by switching the breaker at the circuit breaker box
to the On position.
Wire Modules to AC Power
Module
Slot 1
Module
Slot 2
Module
Slot 3
BUSHING
GND
ON PS
GND
ON PS
GND
ON PS
WAG O
CONNECTORS
BUSHING BUSHING
FROM 15 AMP BREAKER
GND
Module
Slot 1
Slide up and
then out
Module
Slot 2
Module
Slot 3
4
3
6
7
ELECTRIC SHOCK! The 120/240V AC source power poses an
electrical shock hazard that has the potential to cause serious injury to
installers and end users.
IMPORTANT!
–A licensed electrician is required to make AC electrical
connections. Isolate and turn o power at the main breaker
panel prior to installing any electrical devices.
–For supply, neutral, and ground connections, use only #14 AWG
or larger solid copper wire.
Keypad Bus Wiring Information
The next step is to connect each of the low voltage keypads to the
Keypad Bus. The bullets below will help when planning the number of
keypads to wire to each bus.
–Each Keypad Power Module Controller supports up to 40
keypads. Max total wiring distance is 1000 ft.
–When connecting between 1 and 10 keypads to a single keypad
bus, the maximum cable distance is 1000 feet.
–Keypads sharing a bus are wired in series (daisy-chained). Star
configurations are not supported.
For information on how to wire the keypads and add the complete
system into a Blueprint configuration, see the Low Voltage Lighting
Deployment Guide available on the Savant Customer Community.
Other Savant Control Unit manuals

Savant CLI-PTAC1K1 User manual

Savant

Savant CLI-PTAC1K1 User manual

Savant IP Audio 125 with Savant Music 2.0 User manual

Savant

Savant IP Audio 125 with Savant Music 2.0 User manual

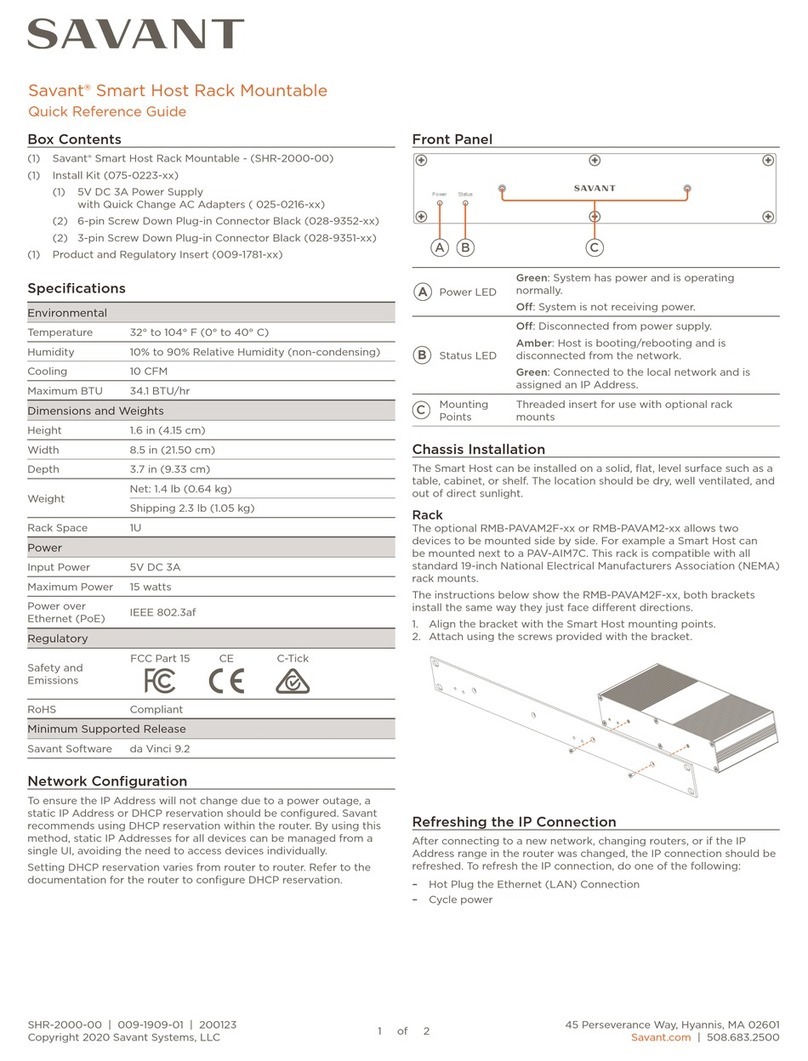
Savant Smart Host Rack Mountable User manual

Savant

Savant Smart Host Rack Mountable User manual

Savant Pro Host SVR-5200S-00 User manual

Savant

Savant Pro Host SVR-5200S-00 User manual

Savant GPM-CP2R20120-21 User manual

Savant

Savant GPM-CP2R20120-21 User manual

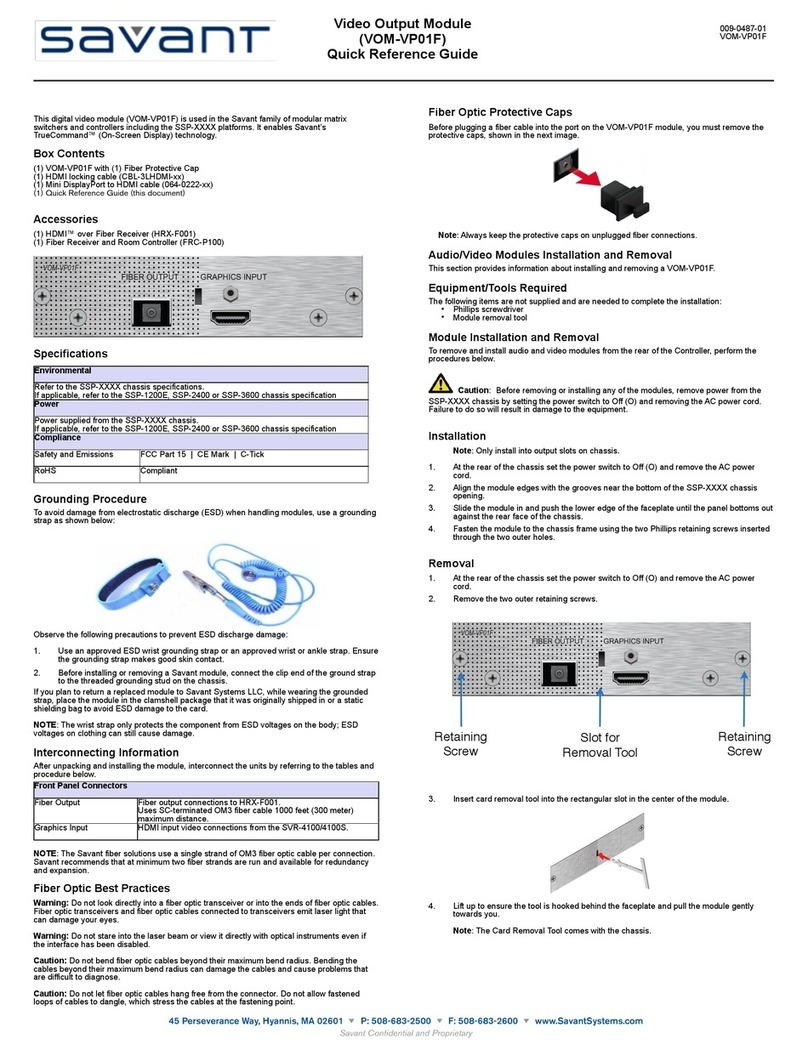
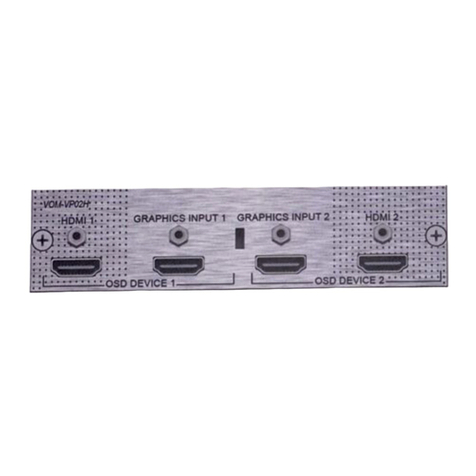
Savant VOM-VP02H User manual

Savant

Savant VOM-VP02H User manual

Savant SSC-P008 User manual

Savant

Savant SSC-P008 User manual

Savant CLI-1WIRE2 User manual

Savant

Savant CLI-1WIRE2 User manual

Savant Pro Host User manual

Savant

Savant Pro Host User manual

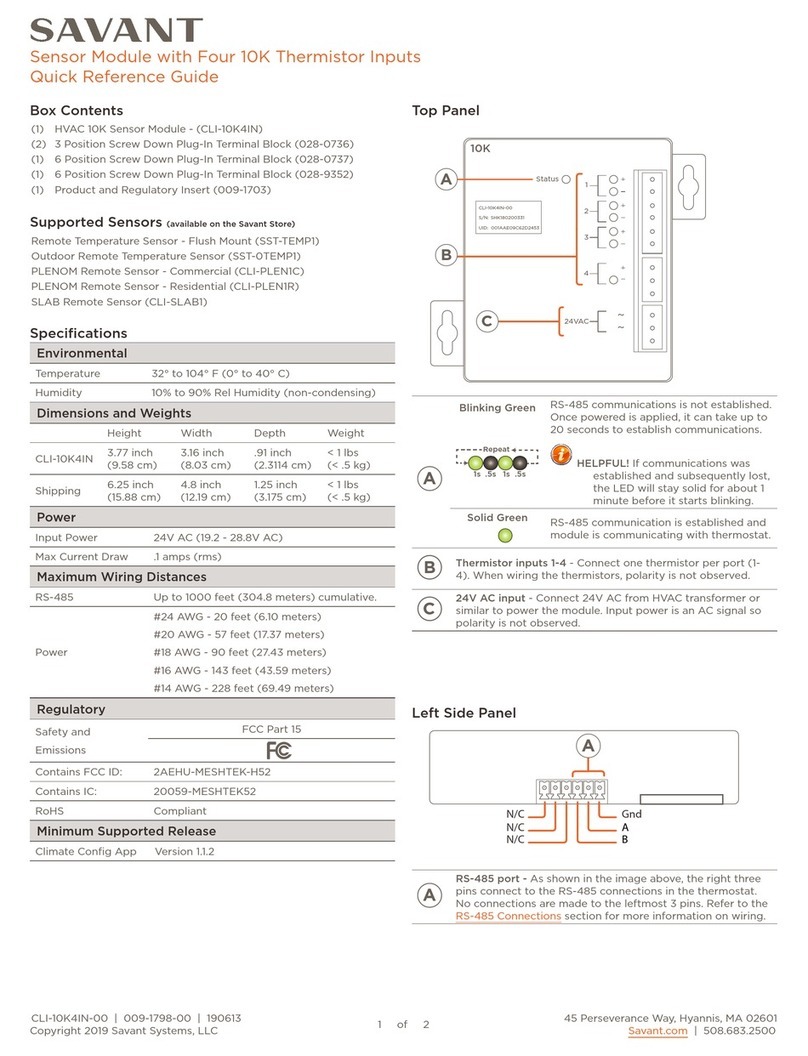
Savant CLI-10K4IN-00 User manual

Savant

Savant CLI-10K4IN-00 User manual

Savant ITP-E8000 Series User manual

Savant

Savant ITP-E8000 Series User manual

Savant VOM-VP01F User manual

Savant

Savant VOM-VP01F User manual

Savant SmartView VOM-SV02 User manual

Savant

Savant SmartView VOM-SV02 User manual

Savant SKL-3040-00 User manual

Savant

Savant SKL-3040-00 User manual

Savant CLI-8000 Series User manual

Savant

Savant CLI-8000 Series User manual

Savant SAV-LMP-0300 User manual

Savant

Savant SAV-LMP-0300 User manual

Savant SKL-3040-00 User manual

Savant

Savant SKL-3040-00 User manual

Savant Pro Host User manual

Savant

Savant Pro Host User manual

Popular Control Unit manuals by other brands

Ampac GasRelease 2980-0001 installation guide

Ampac

Ampac GasRelease 2980-0001 installation guide

Vimar by-me Eikon Evo 21509 quick start guide

Vimar

Vimar by-me Eikon Evo 21509 quick start guide

Sanhua SBV Series instructions

Sanhua

Sanhua SBV Series instructions

Wildeboer BV92 Series manual

Wildeboer

Wildeboer BV92 Series manual

Siemens LMV37.4 Series Basic documentation

Siemens

Siemens LMV37.4 Series Basic documentation

ITOH DENKI POWER MOLLER PLUS SOG user manual

ITOH DENKI

ITOH DENKI POWER MOLLER PLUS SOG user manual

Loewe SL 150 installation instructions

Loewe

Loewe SL 150 installation instructions

Easy ELC12 Series user manual

Easy

Easy ELC12 Series user manual

Sun Oracle Sun Blade 6000 Product notes

Sun Oracle

Sun Oracle Sun Blade 6000 Product notes

ION Ion SYST0101CW owner's manual

ION

ION Ion SYST0101CW owner's manual

Mitsubishi Electric A1SJ71AP23Q user manual

Mitsubishi Electric

Mitsubishi Electric A1SJ71AP23Q user manual

Turbonetics Evolution Wastegate 10780 Installation instructions manual

Turbonetics

Turbonetics Evolution Wastegate 10780 Installation instructions manual

Watts FEBCO 850 Small Series manual

Watts

Watts FEBCO 850 Small Series manual

Next HC660 HYDROCLEAN installation instructions

Next

Next HC660 HYDROCLEAN installation instructions

ECHOMAX RTE Installation and operation

ECHOMAX

ECHOMAX RTE Installation and operation

Wilo Control SC-L Installation and operating instructions

Wilo

Wilo Control SC-L Installation and operating instructions

Emerson Keystone EPI2 Installation, operation and maintenance manual

Emerson

Emerson Keystone EPI2 Installation, operation and maintenance manual

Keysight M9131A Startup guide

Keysight

Keysight M9131A Startup guide

manuals.online logo
manuals.online logoBrands
  • About & Mission
  • Contact us
  • Privacy Policy
  • Terms and Conditions

Copyright 2025 Manuals.Online. All Rights Reserved.