Thank you for purchasing this light fitting.
Please read the instructions carefully before use to ensure safe and satisfactory operation of this product.
Please retain these instructions for future reference.
You have correctly identified the wires.
The connections are tight.
No loose strands have been left out of the connection block.
Warning
Specication Wiring
Layout
Check That
• Planthedesiredlayoutofthisfittingcarefully,ensuringthecableswillreachthedistancebetweenthejunction
box and the light fitting.
• Avoidlocatinganycablesinpositionsthatwouldcauseahazard.Positioncablesandoutdoorratedjunction
boxes(notsupplied)awayfromareaswheretheymaybeatriskfrombeingcut,trappedordamaged.
• WerecommendthatyouuseH05RN-Fspecificationcable(notsupplied)whichisanoutdoorgrade,rubber
sheathedcable.Themainssupplycablemusthaveaminimumcrosssectionalareaof1.0mm²
• Cablesmustbeprotectedusingsuitableconduitorplastictrunking.
Havingcorrectlyidentifiedthewiringfromyourexistinglightfitting,pullthewirethroughtheholeandconnectto
the connection block inside the product in the following way:
This is a Class 1 product and must be earthed.
Please read these instructions carefully before commencing any work.
This fitting must be fitted to a suitable track that has been properly installed.
Install in accordance with IEE Wiring regulations and current Building Regulations.
To prevent electrocution switch off at mains supply before installing or maintaining this fitting. Ensure other persons
cannotrestoretheelectricalsupplywithoutyourknowledge.Ifyouareinanydoubt,pleaseconsultaqualified
electrician.
This light fitting should be connected to a fused circuit.
Always ensure that you always use the correct wattage lamp to match the control gear. Use of incorrect lamp will
damage the lamp and the control gear. Do not operate with a failed bulb or without a bulb as this may damage the
unit.
Whenchangingabulb,alwaysswitchoffatthemainsandallowtheoldbulbtocooldownbeforehandling.
Aswithallmetalhalidefixtures,theunitmustbeallowedtocooldownafterswitchingoffbeforethelampisable
tore-ignite
Dispose of used bulbs carefully and responsibly.
This product is not suitable for dimming.
This product is rated at IP67.
This product is not suitable for location in or near a marine environment.
The entire unit gets hot whilst on for a period of time.
Voltage: 240V50Hza.c. PleasenotethisproductisdualIPrated.
Lamp: 70WG12(HCIT) ThecableglandisIP67howeverallothersealsare
IPrating: 65&67 IP65ratedandarenotsuitablefortotalimmersion.
280mm
295mm
235mm Dia
220mm Dia
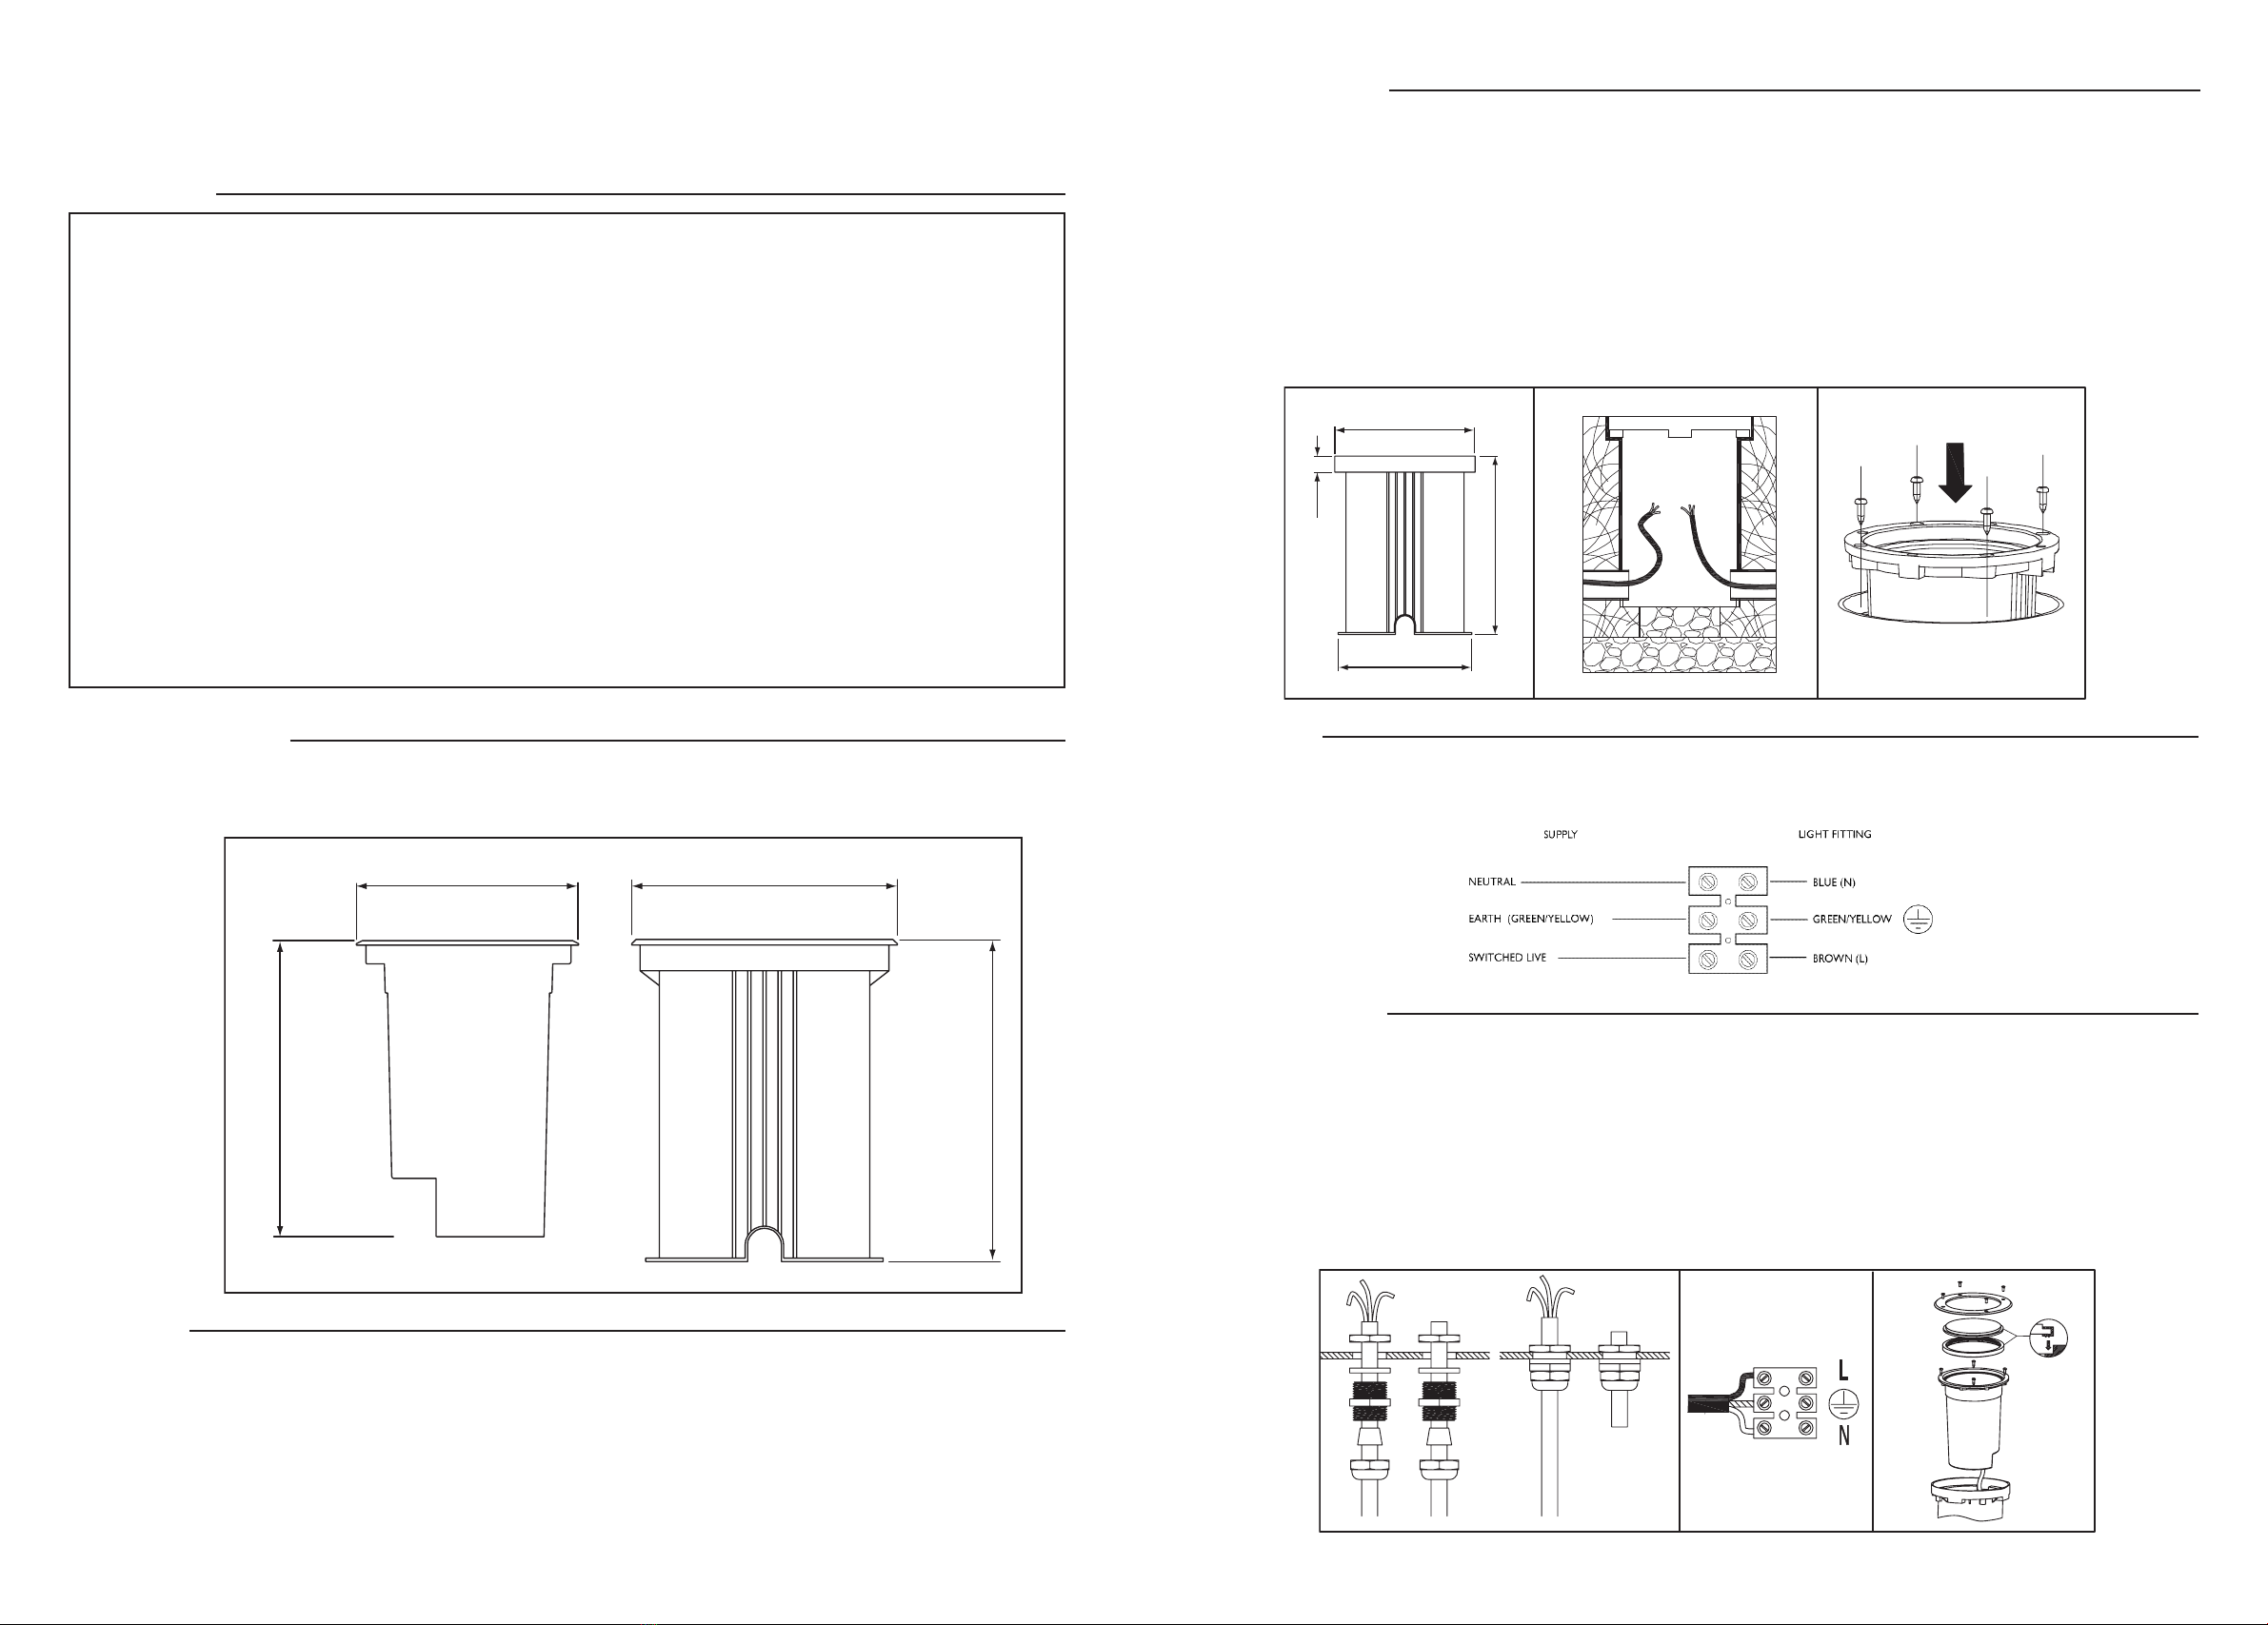
Installation
Existing fittings must be completely removed before installation of a new product. Before removing the existing
fitting,carefully note the position of each set of wires.
1. Undo the four allen screws holding the bezel and glass shade in place. Set aside.
2. Undo the four self tapping screws holding the cast fitting to the plastic housing. Separate the casting from the
housing by pulling gently. Set the cast fitting aside.
1. The product must be mounted in the supplied housing. It should not be directly installed in the soil.
2. FormaTshapedcutouttofitthehousinginto.ThedimensionsofthehousingaregivenbelowinFig.1.Ensure
thatthecounterboreatthetopisusedtoholdthehousinginposition.Ensurethatthereisadequatedrainage
below the product.
3. Positiontheconduitorplastictrunkingatthegroovesinthesideofthehousing(SeeFig.2).
4. Ensurethatthecablesarenotsnagged.Screwthefittingtothehousing(SeeFig.3).
2.1. 3.
25mm
220mm
285mm
210mm
4. 5. 6.
5. The product can also loop through to another fitting.Punch out the hole for the second gland and fit into
placeinplace.Ensurethatthewireisfittedcorrectlyinthecentreofthegland.Re-assemblethegland,butdo
not tighten yet (SeeFig.4).
6. Connect the loop supply wires to the product terminal block as shown. Ensure that you have correctly
identifiedthewires,thattheconnectionsaretightandnoloosestrandshavebeenleftoutoftheconnection
block.


