SCAN 46 User manual

SCAN 46
INSTRUCTIONS FOR
INSTALLATION AND USE
MONTERINGSVEJLEDNING
med brugs- og fyringsanvisning
Indhold:
Generelle råd og anvisninger . . . . . . . . . .2-3
Reklamationsret
Type- og miljøgodkendelse
Udpakning
Tilbehør til din pejs
Montering af kakler og fedtsten
Kvalitetskontrol
Anmeldelsespligt
Skorstenstjek
Skorstensløsninger
Bærende underlag
Brændbar eller ikke brændbar væg
Gulvplade
Varmefordeling
Justerskrue
Typeskilt
Produktionsnr.
Servicepakke
Monteringsvejledning. . . . . . . . . . . . . . . . .4-7
Tilslutning til eksisterende/muret skorsten
Tilslutning topafgang til stålskorsten
Forbrændingsluft udefra
Brugs- og fyringsanvisning . . . . . . . . . . . 8-10
Vedligeholdelse af pejseovnen
Håndtering af brændsel
Optænding og fyring
Fejlsøgning . . . . . . . . . . . . . . . . . . . . . . . . 11
SCAN 3
BRUGSANVISNING
TildenneBrugsanvisninghørerogsåen
generelMonteringsvejledning.Udgave03.03-DK
MONTERINGSVEJLEDNING
medbr
ugs-ogfyringsanvisning
Indhold:
Generellerådoganvisninger..........2-3
Reklamationsret
Type-ogmiljøgodkendelse
Udpakning
Tilbehørtildinpejs
Monteringafkaklerogfedtsten
Kvalitetskontrol
Anmeldelsespligt
Skorstenstjek
Skorstensløsninger
Bærendeunderlag
Brændbarellerikkebrændbarvæg
Gulvplade
Varmefordeling
Selvlukkendelåge
Justerskrue
Typeskilt
Produktionsnr.
Servicepakke
Monteringsvejledning.................4-7
Tilslutningtileksisterende/muretskorsten
Tilslutningtopafgangtilstålskorsten
Forbrændingsluftudefra
Brugs-ogfyringsanvisning...........8-10
Vedligeholdelseafpejseovnen
Håndteringafbrændsel
Optændingogfyring
Fejlsøgning........................11
Tildennemonteringsvejledninghørerogsåen
separatbrugsanvisningfordenenkeltepejs.
Udgave02/03-DK
Til dennemonteringsvejledning hørerogsåen
separatbrugsanvisning fordenenkelte pejs.
Udgave 02/03 - DK
Edition 10.04 - GB
This manual is accompanied by a
pamphlet with General Instructions
for Installation.
Approved according to DIN 18891
Clean combustion
The SCAN 46 uses the "CB technique" (Clean-Burn) to
ensure an optimally clean combustion. The extra combu-
stion air is preheated and led into the combustion chamber
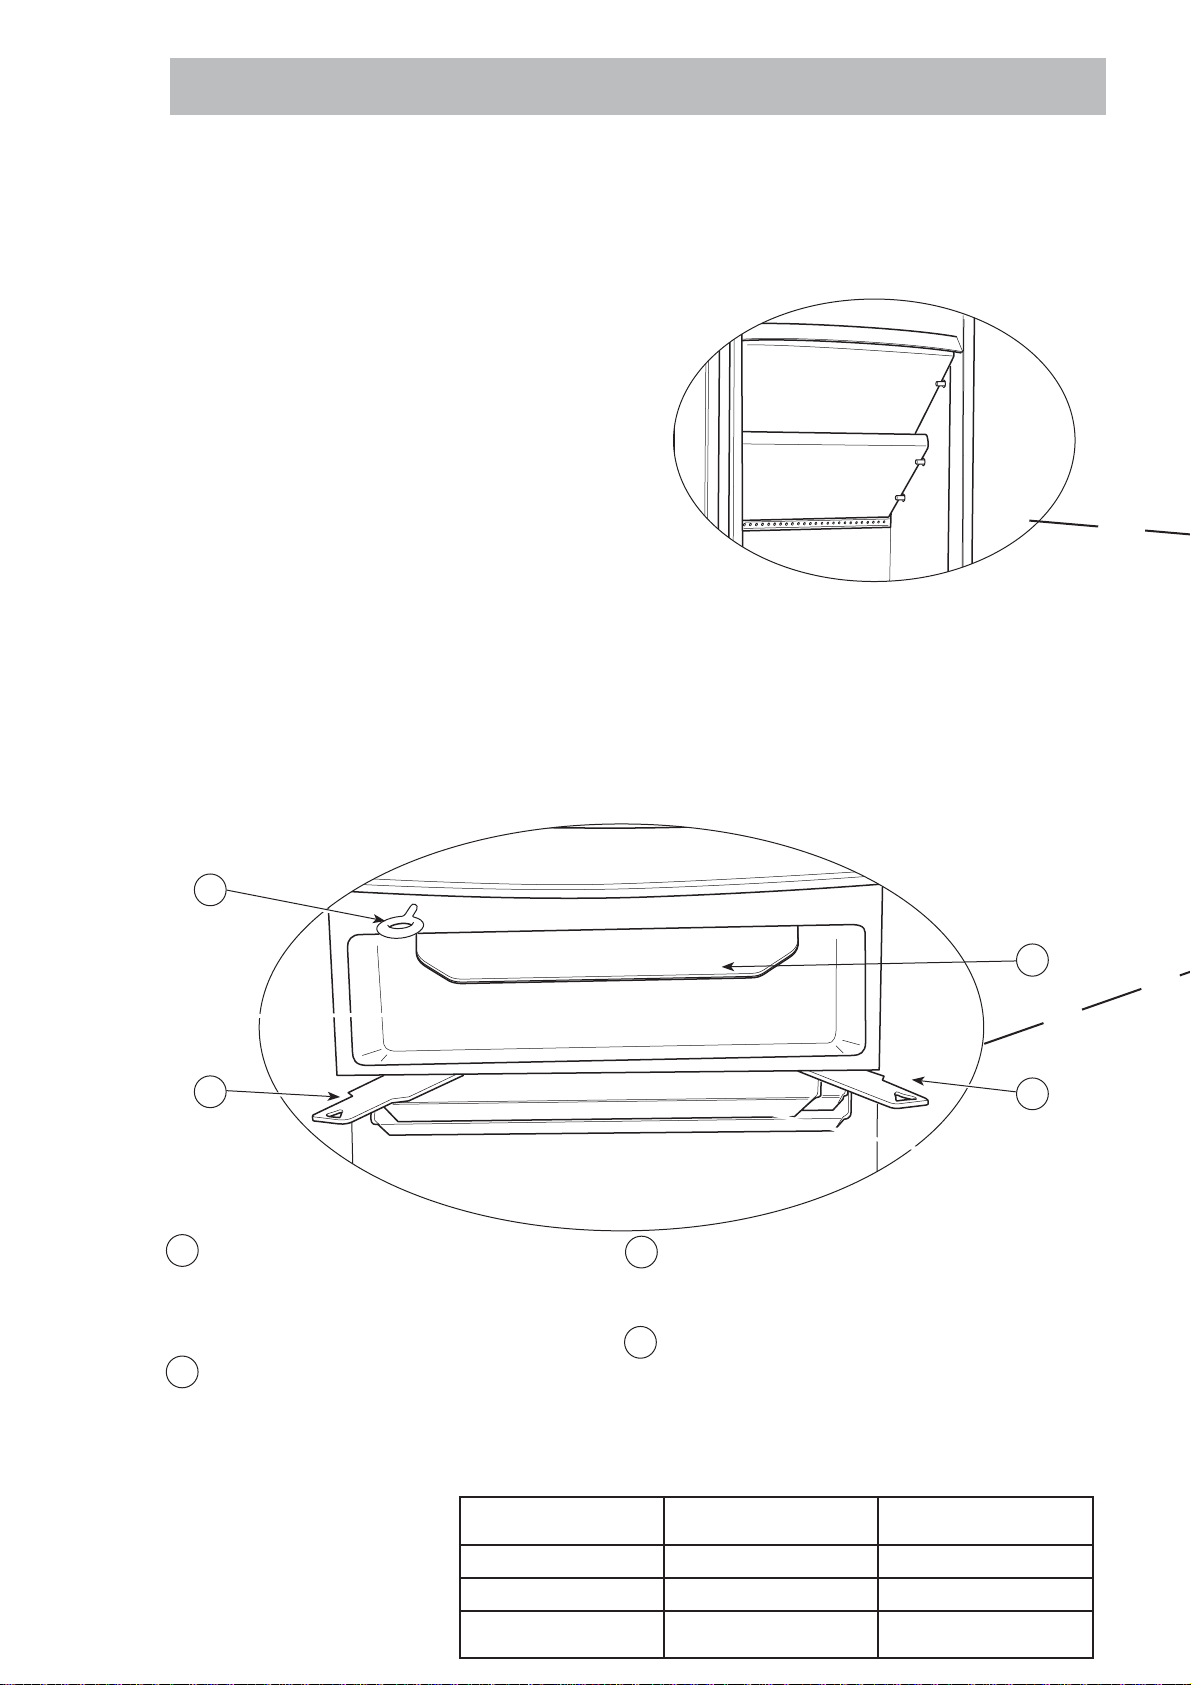
close to the ceramic smoke deflector. Ceramic smoke deflectors
Lift up the lower ceramic smoke deflector, pull out
the pins in the lateral combustion chamber plates,
and remove the deflector. The upper deflector is
removed in the same way.
You have chosen a product from one of Europe's leading
manufacturers of wood-burning stoves. We are convinced
that your stove will be to your full satisfaction and give you
many hours of pleasure if you follow the advice and instruc-
tions of this manual.
PleasereadthismanualaswellastheGeneral Instructions
for Installation before beginning the installation.
Congratulations on your new SCAN stove!
2
4
1
3
1 Ashtray. When you open the door, you have access to
the ashtray, which is placed below the combustion cham-
ber.Attention! Be careful when you empty ashes from the
stove. There may be embers left for up to 24 hours after
the stove was last used.
2 Handle for shaking grate. The stove is equipped with a
shaking grate. When you activate the grate handle, the
ashes from the combustion chamber are emptied into the
ashtray.
3 Regulation for primary air. Push the button sideways.
Left position is closed and right position is open. The
primary air is used when lighting and refuelling the stove.
It should always be closed during continuous firing.
4 Regulation for combustion air. Push the button side-
ways. Left position is closed and right position is open.
The air is used for combustion and regulates the output
of the stove.
SCAN 46
The ashtray, shaking grate, and primary air should always
be closed during continuous firing.
Wood / briquettes Fuel kg/h (beechwood
max. 20% humidity)
SCAN 46 1,6 kg
Combustion air % 100
Primary air % 25
Adjustment of the air

Adjustment of the handle
The handle can be loosened and adjusted at the
lower closing hook with a hexagon spanner.
Accessories
For this model you can have the following accessories:
Handle
The handle is elegantly integrated on the moulding
below the door. Pull out the handle to open.
Self-closing door (BA 1)
The door is prepared with a self-closing function at the factory.
If you tighten the spring with the hexagon spanner, the door
will close automatically when you let go of it.
• Special elbow with wall sleeve and cover ring
for SCAN 46 with revolving base (see separate
instructions)
• Special adaptor for steel chimney for SCAN 46
with revolving base (see separate instructions)
SCAN 46
SCAN 46 with revolving base
Mounting with elbow:
See separate instructions delivered with the stove.
Mounting with direct connection to steel chimney:
Should only be done in accordance with the instructions from
an authorised SCAN dealer. See separate instructions delive-
red with the stove.
The warranty is invalid if the above is not followed.
Please do not forget to remove the foil
before the first firing!
Data for calculation of the chimney
Stove
model
SCAN
Connecting
adaptor
mm
1
Density of
flue gas
flow
g/s
2
Flue gas
tempera-
ture
oC
3
Minimum
draft
Pa
4
Density of
flue gas
flow
g/s
5
Flue gas
temperature
oC
6
Minimum
draft
Pa
7
0,8
Minimum
draft
Pa
46 150 - - - 5 310 14 11
With closed doorsWith open doors
Column 2 and 5 show the flue gas temperature in the connecting adaptor
Column 3 and 6 show the lowest/minimum draft in Pa by rated value
Column 7 shows the lowest/minimum draft in Pa by 0.8 x rated value

Krog Iversen & Co. A/S - DK-5492 Vissenbjerg
174 1056
444 446
926
Warranty conditions
All SCAN wood-burning stoves and inserts are made of first-class material and
are subject to a strict quality control before they leave the factory. However, if
an error should occur, we back all SCAN wood-burning stoves and inserts with
an extensive, five-year limited warranty.
See also the General Instructions for Installation delivered with your stove
for more details.
Technical info
Rated output: 5 kW
Min./max.: 2 - 7 kW
Weight: 94 kg
Connection piece, diameter: int. 135mm / ext. 148mm
* To the middle of the rear
outlet (only SCAN 46 with
firm base)
Distances to flammable materials
(mm)
Production number
Write the production number of your
stove here so that you have it at
hand in case you need to contact
us.
*
Wall: Corner:
SCAN 46
40o
500
200
800
800
500
800
230
230
40o
40o
40o
45o
A = middle position
B = extreme left position
C = extreme right position
SCAN 46 with revolving base, should only be turned when cold!
AA
B
B
C
C
Radiation area
800
200
150 500
Base plate
SCAN 46 with firm base
SCAN 46 with revolving base
Other SCAN Wood Stove manuals


Popular Wood Stove manuals by other brands


RAIS
RAIS attika NEXO 100 GAS installation guide

WoodPro
WoodPro WS-TS-1500 owner's manual

Contura
Contura C 586W installation instructions

Palazzetti
Palazzetti EVA GENERAL INFORMATION - WARNINGS - INSTALLATION - MAINTENANCE

Lopi
Lopi 1250 Republic owner's manual

Panadero
Panadero CAPRI 3V Usage and maintenance instructions