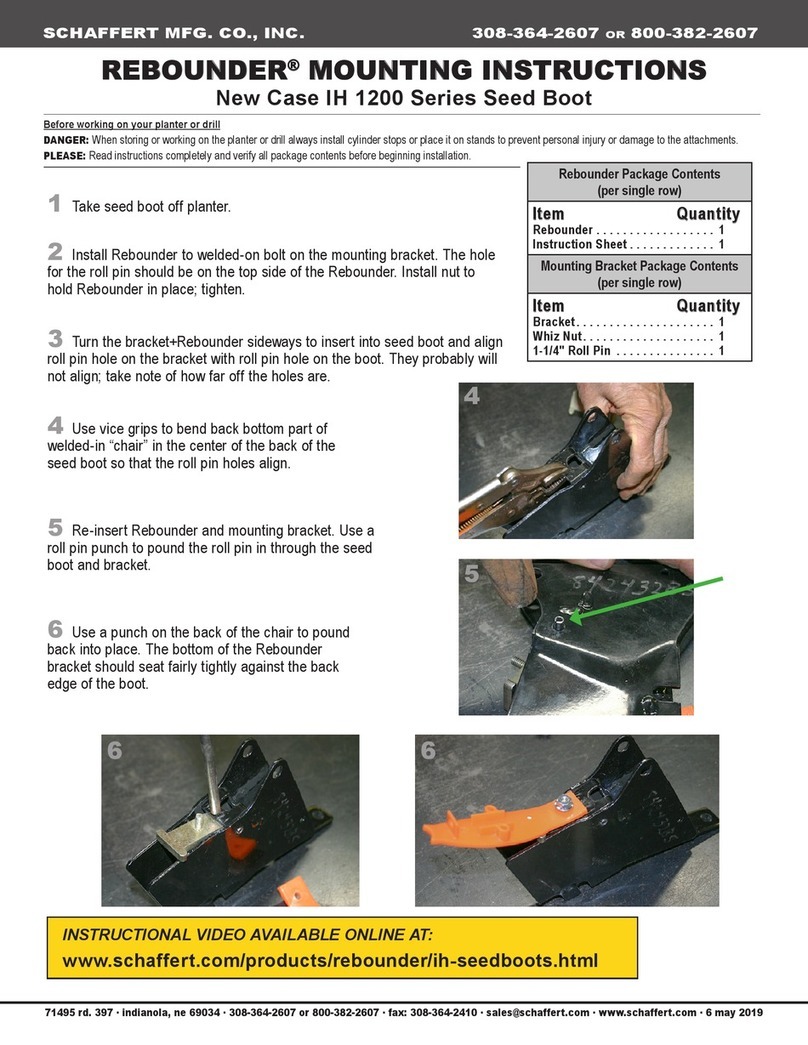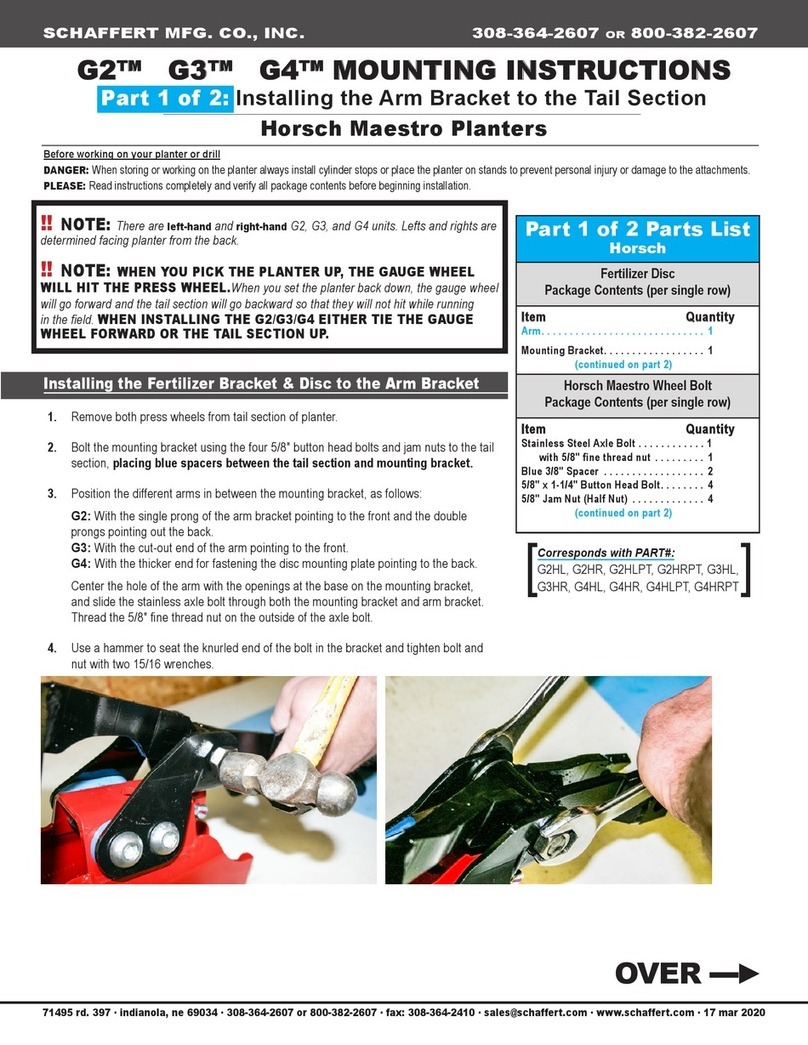
FURROW V CLOSER MOUNTING INSTRUCTIONS
A/C 78-79 Air Planters
SCHAFFERT MFG. CO., INC. 308-364-2607 OR 800-382-2607
71495 rd. 397 ∙ indianola, ne 69034 ∙ 308-364-2607 or 800-382-2607 ∙ fax: 308-364-2410 ∙ sales@schaffert.com ∙ www.schaffert.com ∙ 7 apr 2017
Before working on your planter or drill
DANGER:
When storing or working on the planter always install cylinder stops or place the planter on stands to prevent personal injury or damage to the attachments.
PLEASE:
Read instructions completely and verify all package contents before beginning installation
71495 rd. 397 @indianola, ne 69034 @phone: 800-382-2607 @fax: 308-364-2410 @ info@schaffert.com @www.schaffert.com
SCHAFFERT MFG. CO. INC. - phone: 800-382-2607 - fax: 308-364-2410
FURROW V CLOSER MOUNTING INSTRUCTIONS
A/C 78-79 Air Planters
(Read Instructions Completely before Beginning Installation)
Before working on your planter or drill
DANGER: when storing or working on the planter always install cylinder stops or place the planter on stands to prevent personal injury or damage to the
attachments. Do not allow planter to rest on poly FVC discs as they can warp
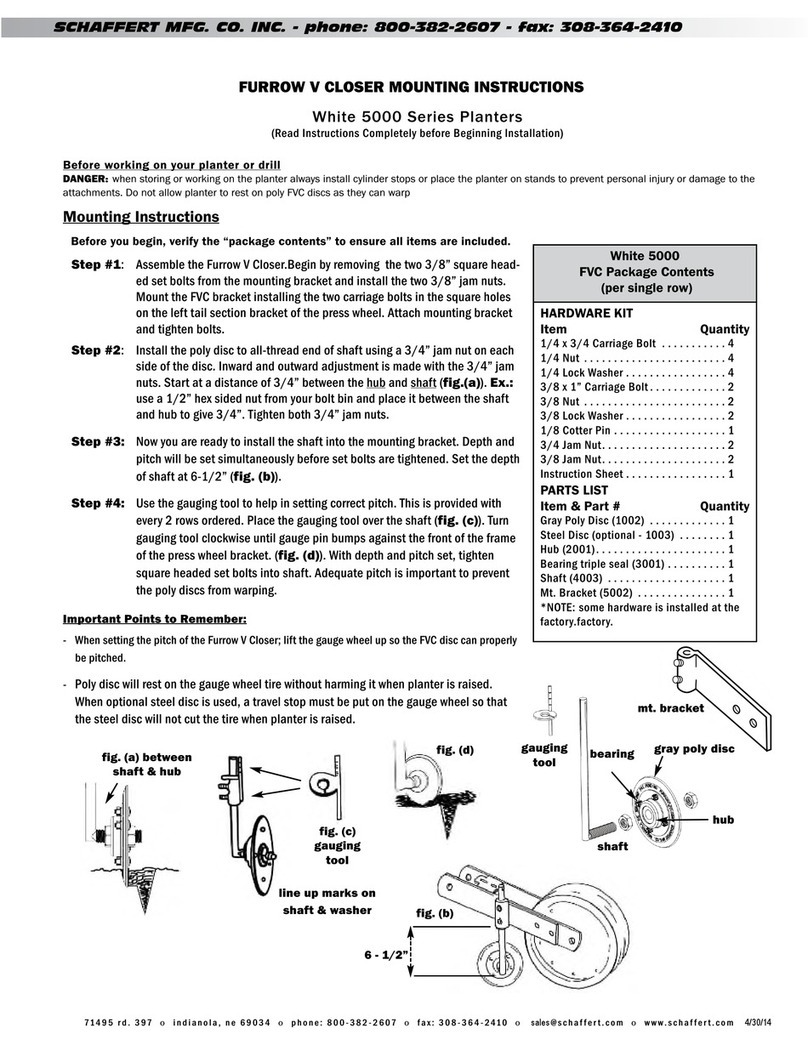
Mounting Instructions
Before you begin, verify the “package contents” to ensure all items are included.
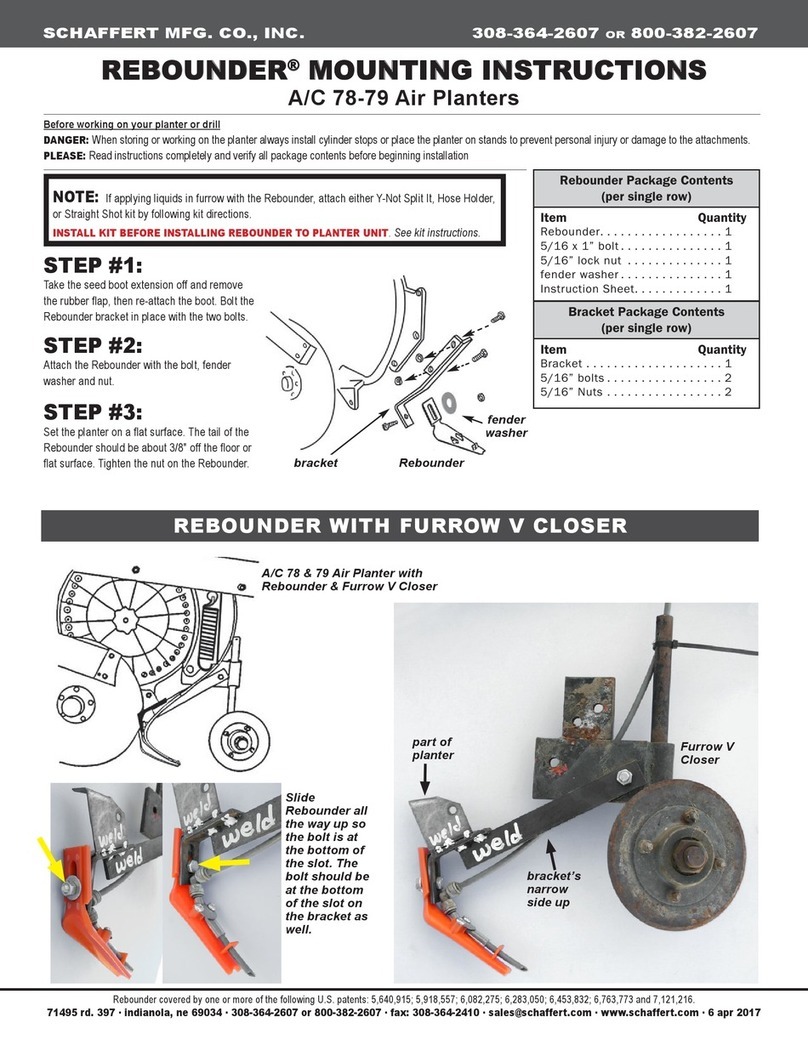
Step #1:Mount the FVC bracket to the planter unit using two 3/8” x 1-1/2” nuts and bolts (fig. (a)).
Step #2: assemble the disc to shaft with two 3/4” jam nuts so the disc is approxi-
mately 1-3/4” from the shaft. The bearing needs to be toward the outside
(fig. (b)).
Step #3: position the shaft into the mounting bracket so that there is approximately 1”
pitch out on the front of the disc (fig. (c)). Set the disc (with the planter in the
soil) to a depth of 1/2” (3/4” max.) (fig. (d)). Tighten the set screws making
minor adjustments to the Furrow V Closer while in the field. This will depend
on the planting depth, speed
and conditions. Re-check
and tighten all nuts, bolts,
and set screws.
fig. (a)
mounting
bracket
fig. (b)
approximately
1-3/4”
A/C 78-79 Air Planters
FVC Package Contents
(per single row)
HARDWARE KIT
Item Quantity
3/8” x 1-1/2” bolts . . . . . . . . . . . . . . . 2
3/4 jam nuts . . . . . . . . . . . . . . . . . . . . 2
Instruction Sheet . . . . . . . . . . . . . . . . . 1
PARTS LIST
Item & Part # Quantity
*NOTE: some hardware is installed at the
factory.
Important Points to Remember:
- When setting the pitch of the Furrow V Closer;
lift the gauge wheel up so the FVC disc can
properly be pitched. Gauge wheel tire will
rest on FVC disc and will not hurt it.
fig. (c) pitch adjustment
fig. (c) pitch
fig. (d)
Remove original press wheel and
replace with Furrow V Closer


