manuals.online logo
Brands
  1. Home
  2. •
  3. Brands
  4. •
  5. Schell
  6. •
  7. Plumbing Product
  8. •
  9. Schell 01 230 06 99 User manual

Schell 01 230 06 99 User manual

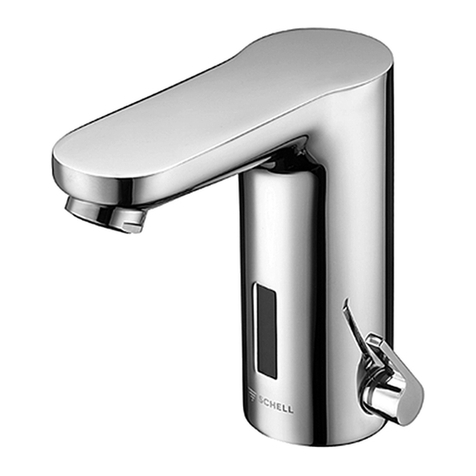
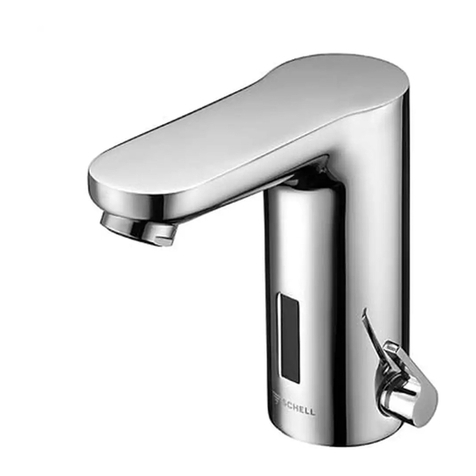
SCHELL Waschtisch-Armatur CELIS E
Made in Germany
DMontageanleitung
Elektronische Waschtisch-Armatur
Batteriebetrieb / Netzbetrieb
• Mit Stagnationsspülung 24 h
nach letzter Benutzung
• Mit Reinigungsstop 30 s
Batteriebetrieb, Art.-Nr.:
HD-K, 01 230 06 99 / HD-M, 01 229 06 99
Netzbetrieb, Steckerausführung, Art.-Nr.:
HD-K, 01 231 06 99 / 01 244 06 99
HD-M, 01 232 06 99 / 01 245 06 99
OMontagevoorschriften
Elektronische wastafelkraan
Batterij- / Netbedrijf
• Met stagnatiespoeling 24 h
na laatste gebruik
• Met reinigingsstop 30 s
Batterijbedrijf, Art.-nr.:
HD-K, 01 230 06 99 / HD-M, 01 229 06 99
Netbedrijf stekkeruitvoering, Art.-nr.:
HD-K, 01 231 06 99 / 01 244 06 99
HD-M, 01 232 06 99 / 01 245 06 99
FInstructions de montage
Robinet de lavabo électronique
Utilisation sur piles / réseau
• Avec rinçage stagnation 24 heures après la
dernière utilisation
• Avec programme de nettoyage de 30
secondes
Fonctionnement sur piles, Réf.:
HD-K, 01 230 06 99 / HD-M, 01 229 06 99
Fonctionnement sur secteur : modèle avec
connecteur, Réf.:
HD-K, 01 231 06 99 / 01 244 06 99
HD-M, 01 232 06 99 / 01 245 06 99
GAssembly instructions
Electronic wash basin fitting
Battery/mains operated
• with stagnation flush 24 h after the last use
• with a 30 s cleaning stop
Battery operation, Item No.:
HP-C, 01 230 06 99 / HP-M, 01 229 06 99
(high pressure cold water)
Mains operation plug version, Item No.:
HP-C, 01 231 06 99 / 01 244 06 99
HP-M, 01 232 06 99 / 01 245 06 99
(high pressure hot amd cold water)
E
P
b
Q
D
O
F
G
D O F G
EPbQ
HU
1 - 12
13 - 24
25 - 36
RO
I
R
HU
I
Installationshinweise / Installatiespecificaties / Spécifications
d’installation / Installation instructions
D
Die Montage und Installation darf nur durch einen konzessionierten Fachbetrieb, gemäß EN 806-1 (DIN
1988-200, VDI/DVGW 6023) erfolgen.
Bei der Planung und Einrichtung von Sanitäranlagen sind die entsprechenden örtlichen, nationalen und
internationalen Normen und Vorschriften zu beachten.
Es gelten die SCHELL “Allgemeinen Installationsbedingungen” unter www.schell.eu
O
De montage en installatie mag alleen gebeuren door een geconcessioneerd vakbedrijf, conform
EN 806-1 (DIN 1988-200, VDI/DVGW 6023).
Bij de planning en inrichting van sanitaire installaties moeten de geldende plaatselijke, nationale en
internationale normen en voorschriften in acht worden genomen.
De “Algemene installatievoorwaarden” van SCHELL onder www.schell.eu gelden.
F
Le montage et l’installation ne peuvent être effectués que par un spécialiste agréé, conformément
à la norme EN 806-1 (DIN 1988-200, VDI/DVGW 6023). Les normes et prescriptions locales, nationales
et internationales doivent être respectées lors de la planification et de l’aménagement d’installations
sanitaires. Les « conditions générales d’installation » reprises à l’adresse www.schell.eu.
G
Assembly and installation may only be carried out by a licensed professional company, according to
EN 806-1 (DIN 1988-200, VDI/DVGW 6023). When planning and setting up sanitary facilities,
observe the corresponding local, national and international standards and regulations. The SCHELL
“General installation conditions” at www.schell.eu apply.
Maße / Afmetingen /
Dimensions / Measurements Zubehör / Toebehoren / Accessoire /
Accessory
D O F G
Diebstahlsicherer Strahlreger, Art.-Nr.: 02 121 06 99
Diefstal beveiligde straalregelaar, Art.-nr. 02 121 06 99
Système de réglage du jet anitvol, Réf. 02 121 06 99
Flow regulator, theft safe, Item No. 02 121 06 99
2
1
2
Installationshinweise / Installatiespecificaties / Spécifications
d’installation / Installation instructions
HD-M
HD-K
O
1 Type HD-K: voorverwarmd water ≤ 35 °C
2 Type HD-M: waterinlaat ≤ 70 °C
(kortstondig < 5 min.)
Niet geschikt voor hydraulisch gestuurde
doorstroomverwarmers.
Voor batterijbedrijf:
Batterijvak niet aanbrengen in het zichtbereik.
Voor netbedrijf:
Contactdoos zo plaatsen, dat hij binnen het
beschermde bereik blijft en niet in het zicht-
bereik ligt (zie bijlage nr 90 302 60 00).
Stagnatieschakeling om de 24 h
inschakelbaar, Programma
3 en 4 (z. pag. 7)
3
D
1 Typ HD-K: Vorgewärmtes Wasser ≤ 35 °C
2 Typ HD-M: Wassereintritt ≤ 70 °C (kurzzeitig < 5 min.)
Für hydraulische Durchlauferhitzer nicht geeignet.
Für Batteriebetrieb:
Batteriefach nicht im Sichtbereich anbringen
Für Netzbetrieb:
Steckdose so setzen, dass der Schutzbereich eingehalten
wird und nicht im Sichtbereich liegt (siehe Beiblatt
90 302 60 00).
Stagnationsschaltung alle 24 h
zuschaltbar, Programm 3 und 4
(siehe Seite 7)
F
1 Type HD-K: eau préchauffée ≤ 35 °C
2 Type HD-M: arrivée d’eau ≤ 70 °C
(court terme < 5 min.)
Ne convient pas aux boilers à écoulement libre.
Fonctionnement sur piles:
Ne pas placer le compartiment à piles dans le
champ de vision.
Fonctionnement sur réseau:
Placer la prise de manière à conserver la zone
protégée et en dehors du champ de vision
(cf. fiche n° 90 302 60 00).
Rinçage de stagnation possible toutes
les 24 heures.
Programmes 3 et 4 (cf. pg. 7)
G
1 Type HP-C: Preheated water ≤ 35 °C
2 Type HP-M: Water inlet ≤ 70 °C
(short time < 5 min.)
Not suitable for hydraulic water heaters.
For battery operation:
Do not attach the battery compartment where
it is visible.
For mains operation:
Position the socket in such a way that the safety
distance is maintained and so it is not visible (see
supplementary sheet No. 90 302 60 00).
Stagnation switch can be set to
every 24 h.
Programs 3 and 4 (cf. pg. 7)
D
O
F
G
19
1
2 3
4
Montage / Montage / Montage / Mounting
D
1 Armatur montieren.
2 Leitung spülen, Eckventil sperren.
3 ggf. Filter-Eckventil montieren
(Typ HD-M mit RV).
4 Vorfilter montieren (HD-M).
O
1 Kraan monteren.
2 Leiding spoelen, hoekregelkran sluiten.
3 Evt. hoekregelkraan met filter
monteren (type HD-M met
terugslagklep).
4 Voorfilter monteren (HD-M).
F
1 Monter le robinet.
2 Rincer la conduite, fermer le robinet
d’ équerre.
3 Le cas échéant, monter le robinet
d’équerre à filtre (type HD-M avec RV).
4 Monter le préfiltre (HD-M).
G
1 Instal the fitting.
2 Flush the pipe, lock the angle valve.
3 If necessary install angle valve with
filter (type HP-M with BP).
4 Install pre-filter (HP-M).
4
1 2a
7
Inbetriebnahme, Batteriewechsel /
Ingebruikname, Batterijvervanging
D
1 Batteriebetrieb: Batteriefach an Wasch-
tischbefestigung montieren bzw. an die
Wand anschrauben. Kabel aufrollen und
mit Kabelbinder sichern, Steckverbindung
herstellen.
2a Netzbetrieb (230 V, 50 Hz):
Steckernetzteilkabel aufrollen und mit
Kabelbinder sichern, Steckverbindung
herstellen.
2b Unterputz-Netzteil (230 U) montieren.
3 Eckventil öffen.
4 Automatischer Reichweitenabgleich auf
Keramiktyp.
5 Funktionskontrolle durchführen
Wasserfluss so lange, wie Hände im Aktiv-
bereich. Automatischer Stopp nach 60 sec.
6 Mischwassertemperatur einstellen.
evtl. Verbrühgefahr,
ggf. Eckventil-Thermostat einbauen
7 Batteriewechsel:
Diode blinkt bei niedriger Batterieladung,
Batterie wechseln, Alkalibatterie LR61, 9 V
oder Lithiumbatterie CR-P2, 6 V (bauseits).
O
1 Batterijbedrijf: Batterijvak monteren aan
de wastafelbevestiging resp. aan de muur
schroeven. Kabel oprollen en beveiligen
met kabelbinder, steekverbinding maken.
2a Netbedrijf (230 V, 50 Hz):
Kabel vanb de voedingseenheid oprollen
en beveiligen met kabelbinder, steekver-
binding maken.
2b Inbouwgedeelte (230U) monteren.
3 Hoekregelkran openen.
4 Automat. compensatie van de actieradius
op karamisch type.
5 Functiecontrole uitvoeren
waterstroom zo lang, als handen in het
actieve bereik. Automatische stop na 60 sec.
6 Mengwatertemperatuur instellen.
evt. verbrandingsgevaar,
evt. thermostaat voor hoekregel-
kran inbouwen.
7 Batterijvervanging:
Diode knippert bij lage batterijlading,
batterij vervangen, alkalibatterij LR61, 9 V
of lithiumbatterij CR-P2, 6 V (op de plaats
van installatie).
3
45
6
5
D
O
F
G
2b
Mise en service, Changement des piles /
Start up, change of battery
F
1 Fonctionnement sur piles:
Monter le compartiment à piles sur la
fixation au lavabo ou le visser au mur
Enrouler le câble et le fixer au moyen d’un
serre-câbles, puis le raccorder.
2a Fonctionnement sur piles (230 V, 50 Hz):
Enrouler le câble du bloc d’alimentation
et le fixer au moyen d’un serre- câbles,
puis le raccorder.
2b Installer le transfo à encastrer (230U).
3 Ouvrir le robinet d’équerre.
4 Réglage automatique de la portée en
fonction du type de céramique.
5 Procéder au contrôle de fonctionnement
l’écoulement d’eau doit se poursuivre tant
que les mains se trouvent dans la zone
active. Arrêt automatique après 60 secondes.
6 Régler la température de l’eau mitigée.
Il peut exister un risque de brûlures;
le cas échéant, monter un thermos-
tat sur le robinet d’équerre.
7 Changement des piles:
La diode clignote lorsque le niveau des piles
est faible; remplacer les piles: piles alcalines
LR61, 9 V ou piles au lithium CP-P2, 6 V
(à prévoir par le client).
G
1 Battery operation:
Install the battery compartment on the
wash basin fixture or screw it to the wall
Roll up the cable and secure with a cable
binder, plug in.
2a Mains operation (230 V, 50 Hz):
Roll up the power adapter cable and
secure with a cable binder, plug in.
2b Install concealed power supply unit (230U).
3 Open angle valve.
4 Auto. distance control on ceramic ty-
pe.
5 Check function; water should flow as long
as hands are in the active range. Automatic
stop after 60 sec.
6 Set mixed water temperature.
Poss. scald hazard, if necessary
install angle valve thermostat
7 Change the battery: Diode flashes when the
battery charge is low, change battery, alkali
battery LR61, 9 V or lithium battery CP-P2,
6 V (provided by customer).
6
1 2a
7
3
45
6
2b
Programmeinstellung / Programminstelling /
Programation / Programme adjustment
Programmeinstellungen / Programmainstellingen
Signal
signaal
max.
Laufzeit
max.
looptijd
Reinigungs-
stopp
reinigingsstop
Justierung
Reichweite
afstelling
actieradius
*
**
***
****
60 s
60 s
60 s
60 s
–
–
ja
ja
lang**
kurz/kort***
lang**
kurz/kort***
24h Stagnati-
onsspülung*
stagnatiespoeling
24 h*
–
–
20 s
20 s
D
Einstellungen programmieren
1 Stromversorgung trennen, min 10 sec.
Stromversorgung wieder herstellen
Nach erfolgtem Selbsttest/Kalibrierung
*** blinken, automatischer Beginn des
Einstellmodus (7s).
2 Hand ca. 2 cm vor Sensor halten
Programmierung nach Tabelle bei
gewünschtem Programm (*-****)
Hand entfernen.
3 Schnelles Signal *** Ende Einstellmodus.
O
Instellingen programmeren
1 Stroomtoevoer onderbreken, min. 10 sec.
Stroomtoevoer weer herstellen.
Na zelftest/kalibrering
*** knipperen, automatisch begin van de
instelmodus (7s).
2 Hand ca. 2 cm voor de sensor houden,
programmering volgens tabel, bij gewenst
programma (*-****) hand wegnemen.
3 Snel signaal*** einde instelmodus.
F
Programmer les réglages
1 Débrancher l’alimentation en courant
pendant min. 10 sec.
Rétablir l’alimentation en courant.
Une fois le test automatique / le calibrage
effectué avec succès
*** clignote et le mode de réglage
s’enclenche automatiquement (7 sec.).
2 Placer les mains à env. 2 cm du détecteur.
Procéder à la programmation en fonction
du tableau; retirer les mains une fois le
programme souhaité sélectionné (*-****).
3 *** clignote rapidement. Ceci indique la fin
du mode de réglage.
G
Programming the settings
1 Disconnect from the power, min. 10 sec.
Reconnect to the power.
After successful self-test/calibration
*** flashing, automatic start of setting
mode (7 s).
2 Hold hand approx. 2 cm in front of sensor,
program according to table, remove hand
at the program you want (*-****).
3 Rapid signal *** end of setting mode.
1 2
3
* nach letzter Nutzung / na laatste gebruik
7
D
O
F
G
F G
Programmations / Program settings
Signal durée de
fonctionne-
ment max.
max. run-
ning time
programme de
nettoyage
cleaning stop
réglage de
la portée
adjust
range
*
**
***
****
60 s
60 s
60 s
60 s
–
–
oui/yes
oui/yes
long**
court/short***
long**
court/short***
rinçage stagnation
toutes les 24 h*
24 h stagnation
flush*
–
–
20 s
20 s
* après la dernière utilisation / after last use
D O
O
1 Elektrische module met stekker en
bevestigingsschroeven (01 518 00 99)
2 Sensorvenster met nanobekleding en
kleefstrip (77623 00 99)
3 Patroon-magneetklep (01 451 00 99)
4 Verzonken schroef behuizing (71 506 00 99)
5 Temperatuurregelaar, compleet met acti-
veringshendel en schroeven (01 521 06 99)
6 Batterijmodule met alkalibatterijen
(01 519 00 99)
7 Voedingseenheid 230 V (01 313 00 99)
8 Inbouwtransfo (01 312 00 99)
9 Voorfilter
F
1 Module électrique avec connecteur et vis
de fixation (01 518 00 99)
2 Regard du détecteur avec revêtement Nano
et bandes adhésives (77 623 00 99)
3 Electrovanne à cartouche (01 451 00 99)
4 Vis à tête conique du boîtier (71 506 00 99)
5 Réglage de température, complet avec levier
et vis (01 521 06 99)
6 Module à piles avec piles alcalines
(01 519 00 99)
7 Bloc d’alimentation 230 V (01 313 00 99)
8 Transfo à encastrer (01 312 00 99)
9 Préfiltre
G
1 E-module with plug and fastening screws
(01 518 00 99)
2 Sensor window with nano coating and
adhesive strip (77 623 00 99)
3 Cartridge solenoid valve (01 451 00 99)
4 Countersunk screw for casing (71 506 00 99)
5 Temperature controller, complete with
operating lever and screws (01 521 06 99)
6 Battery module with alkali batteries
(01 519 00 99)
7 Power adapter 230 V (01 313 00 99)
8 Concealed transformer (01 312 00 99)
9 Pre-filter
Ersatzteile / Wisselstukken /
Pièces de rechange / Replacement parts
8
D
1 E-Modul mit Stecker und Befestigungsschrauben
(01 518 00 99)
2 Sensorfenster mit Nanobeschichtung und
Klebestreifen (77 623 00 99)
3 Kartuschen-Magnetventil (01 451 00 99)
4 Senkschraube Gehäuse (71 506 00 99)
5 Temperaturregler, komplett mit Betätigungshebel
und Schrauben (01 521 06 99)
6 Batteriemodul mit Alkali-Batterien (01 519 00 99)
7 Steckernetzteil (01 313 00 99)
8 Unterputznetzteil (01 312 00 99)
9 Vorfilter
Reinigungsstop (Programm 3/4) / Reiningingsstop (programma 3/4) /
D’entretien (programme (3/4) / Cleaning mode (programme 3/4)
3 4
1 2
Service
5 6
1DEinstellungen programmieren
1 Reinigungsstopp einschalten, 30 sec.
Reinigungsstopp aktiv (zuschaltbar, Programm 3 und 4)
OInstellingen programmeren
1 Reinigingsstop inschakelen, 30 sec. reinigingsstop
actief (inschakelbaar, programma 3 en 4).
FProgrammer les réglages
1 Enclencher le programme de nettoyage,
programme de nettoyage actif pendant 30 sec. (programmable,
programmes 3 et 4)
G Programming the settings
1 Turn on cleaning stop, 30 sec. cleaning stop active
(selectable, programms 3 and 4)
D
Einstellungen programmieren
1/2 GgF. Vorfilter/Filtereckventil reini-
gen.
3 Eckventil schließen.
4 Armaturengehäuse entfernen.
5 Magnetventil herausdrehen.
6 Magnetvenil unter Wasser reinigen.
O
Instellingen programmeren
1/2 Evt. voorfilter/hoekregelkraan met filter
reinigen.
3 Hoekregelkraan sluiten.
4 Kraanbehuizing verwijderen.
5 Magneetklep eruit draaien.
6 Magneetklep reinigen onder water.
F
Programmer les réglages
1/2 Le cas échéant, nettoyer le préfiltre /
le robinet d’équerre à filtre.
3 Fermer le robinet d’équerre.
4 Retirer le corps du robinet.
5 Dévisser l’électrovanne.
6 Nettoyer l’électrovanne à l’eau claire.
G
Programming the settings
1/2 If nec. clean pre-filter/angle valve with
filter.
3 Close angle valve.
4 Remove fitting casing.
5 Rotate solenoid valve out of its fitting.
6 Clean solenoid valve under water.
9
D
O
F
G
Fehleranalyse / Foutanalyse / Analyse des défaillances /
Error analysis
D
Störung/Anzeige Maßnahme/Ursache Abbildung
Kein Wasser Sensorfenster verkratzt S. 8, Abb. 2
Reinigungsstopp aktiviert S. 9, Abb. 1
Batterie wechseln S. 5, Abb. 7
Magnetventil defekt S. 8, Abb. 3
E-Modul defekt S. 8, Abb. 1
Diode blinkt Batterie wechseln S. 5, Abb. 7
Wasserstrom unzureichend Filter an EV reinigen S. 9, Abb. 1/2
Wasserstrom unzureichend Magnetventil reinigen S. 9, Abb. 6
O
Defect/indicatie Oorzaak/oplossing Afbeelding
Geen water Krassen op sensorvenster p. 8, afb. 2
Reinigingsstop. geactiveerd p. 9, afb. 1
Batterij vervangen p. 5, afb. 7
Magneetklep defect p. 8, afb. 3
Elektrische module defect p. 8, afb. 1
Diode knippert Batterij vervangen p. 5, afb. 7
Waterstroom onvoldoende Filter op terugslagklep reinigen p. 9, afb. 1/2
Waterstroom onvoldoende Magneetventiel reinigen p. 9, afb. 6
F
Problème/indication Cause/solution Illustration
Pas d’eau La fenêtre du senseur est abimée pg. 8, ill. 2
Progr. d’entretien activé pg. 9, ill. 1
Remplacer les piles pg. 6, ill. 7
Electrovanne défectueuse pg. 8, ill. 3
Module électrique défectueux pg. 8, ill. 1
La diode clignote Remplacer les piles pg. 6, ill. 7
Débit d’eau insuffisant Nettoyer le filtre sur le clapet anti-retour pg. 9, ill. 1/2
Débit d’eau insuffisant Nettoyer la vanne magnétique pg. 9, ill. 6
G
Malfunction/Display Measurement/Cause Figure
No water Sensor window scratched Page 8, fig. 2
Cleaning stop activated Page 9, fig. 1
Replace battery Page 6, fig. 7
Solenoid valve defective Page 8, fig. 3
E-module defective Page 8, fig. 1
Diode blinking Replace battery Page 6, fig. 7
Water flow insufficient Clean filter at angle valve Page 9, fig. 1/2
Water flow insufficient Clean solenoid valve Page 9, fig. 6
10
Pflegehinweise / Reinigingsinstructies /
Instructions pour le nettoyage / Maintenance tips
D
Pflegehinweise: Zur Reinigung nur milde, seifenhaltige Reinigungsmittel verwenden. Keine kratzenden,
scheuernden, alkohol-, ammoniak-, salzsäure-, phosphorsäure- oder essigsäurehaltigen Reinigungs-
oder Desinfektionsmittel benutzen.
Keine Reinigung mit Hochdruck- und Dampfstrahlgeräten!
O
Reinigingsinstructies: Gebruik bij het reinigen enkel milde, zeephoudende producten. Gebruik geen
krassende, schurende, alcohol-, ammoniak-, zoutzuur-, fosforzuur- of azijnzuurhoudende reinigings- of
desinfecterende middelen.
Gebruik nooit hogedruk- of stoomreinigers!
F
Instructions pour le nettoyage: N’utilisez que des produits doux et savonneux pour le nettoyage.
N’utilisez pas de détergents ou de désinfectants abrasifs ou contenant de l’alcool, de l’ammoniac,
de l’acide chlorhydrique, de l’acide phosphorique ou de l’acide acétique.
N’utilisez jamais de nettoyeurs haute pression ou à vapeur !
G
Maintenance tips: For cleaning, use only mild cleaning products containing soap. Do not use any
cleaning or disinfecting products that are abrasive or scouring or which contain alcohol, ammonia,
hydrochloric acid, phosphoric acid or acetic acid.
Do not clean with high-pressure or steam jet devices!
11
D
O
F
G
Made in Germany
SCHELL GmbH & Co. KG
Armaturentechnologie
Raiffeisenstraße 31
57462 Olpe
Germany
Telefon +49 (0) 27 61 / 8 92-0
Telefax +49 (0) 27 61 / 8 92-199
[email protected]
www.schell.eu
90 303 88 00 A - 05/14
Made in Germany
EPbQ13 - 24
Grifería de lavabo CELIS E de SCHELL
EInstrucciones de montaje
Grifería electrónica de lavabo
Funcionamiento a pilas o con suministro de
red
• Con aclarado por inactividad a las 24 h
de la última utilización
• Con parada de limpieza a los 30 s
Funcionamiento con pilas, N° de artículo
HD-K, 25 01 230 06 / HD-M, 25 01 229 06
Modelo enchufable con fuente de
alimentación, N° de artículo
HD-K, 25 01 231 06 / 25 01 244 06
HD-M, 25 01 232 06 / 25 01 245 06
PInstruções de montagem
Torneira de lavatório electrónica
Funcionamento a bateria/rede eléctrica
• Com enxaguamento de estagnação 24 h
após última utilização
• Com paragem de limpeza 30 s
Funcionamento a bateria, Ref.:
HD-K, 01 230 06 99 / HD-M, 01 229 06 99
Versão com conector para funcionamento
com rede eléctrica, Ref.:
HD-K, 01 231 06 99 / 01 244 06 99
HD-M, 01 232 06 99 / 01 245 06 99
bNávod na montáž
Elekronická baterie na umyvadlo
Zdroj el. baterie / sít’
• Vyplachování stojaté vody 24 h po
posledním použití
• S vypínáním čištění 30 s
Provoz na el. baterie, V‹rob. č.:
HD-K, 01 230 06 99 / HD-M, 01 229 06 99
Provedení se zapojením do sítě,V‹rob. č.:
HD-K, 01 231 06 99 / 01 244 06 99
HD-M, 01 232 06 99 / 01 245 06 99
QInstrukcja montażu
Elektroniczna bateria umywalkowa
Zasilanie bateryjne / sieciowe
• Funkcja samoczynnego spłukiwania 24 h od
ostatniego użycia
• Funkcja zatrzymania wody na 30 s
Zasilanie bateryjne, Nr kat.:
HD-K, 01 230 06 99 / HD-M, 01 229 06 99
Zasilanie sieciowe wersja z wtykiem, Nr kat.:
HD-K, 01 231 06 99 / 01 244 06 99
HD-M, 01 232 06 99 / 01 245 06 99
E
P
b
Q
Instrucciones de montaje / Instruções de instalação /
Montážní pokyny / Wskazówki dotyczące instalacji
E
El montaje y la instalación competen exclusivamente a una empresa de instalación sanitaria autorizada y
deben realizarse conforme a la norma EN 806-1 (DIN 1988-200, VDI/DVGW 6023).
En el momento de planificar e instalar los saneamientos se deben observar las normas y disposiciones
locales, nacionales e internacionales vigentes.
Son aplicables las “Condiciones generales de instalación” de SCHELL que figuran en www.schell.eu.
P
A montagem e instalação só podem ser efectuadas por uma empresa concessionária devidamente
especializada, segundo EN 806-1 (DIN 1988-200, VDI/DVGW 6023).
Durante o planeamento e a instalação de equipamentos sanitários devem ser respeitadas as respectivas
normas e prescrições locais e internacionais em vigor.
São válidas as “Condições gerais de instalação” SCHELL, em www.schell.eu.
b
Montáž a zapojení smí b‹t provedeny pouze odbornou firmou s povolením, podle
EN 806-1 (DIN 1988-200, VDI/DVGW 6023). Při plánování a instalaci sanitárních zařízení je nezbytné
dodržovat příslušné místní, národní a mezinárodní normy a předpisy. Platí “Všeobecné podmínky por
instalaci” vydané firmou SCHELL, které naleznete na adrese www.schell.eu.
Q
Montaż i instalacja wyłącznie przez autoryzowanych monterów, zgodnie z EN 1717 (DIN 1988 część 4).
W zakresie planowania i wykonawstwa instalacji sanitarnych obowiązują odpowiednie krajowe i
międzynarodowe normy i przepisy. Obowiązują “Ogólne warunki instalacji” SCHELL dostępne pod
adresem: www.schell.eu.
Dimensiones / Dimensões / Rozměry /
Wymiary
Zubehör / Toebehoren / Accessoire /
Accessory
E P b Q
Accesorio - regulador de chorro con sistema antirrobo,
N° de artículo 25 02 121 06
Acessório, reguladores de jacto anti-roubo,
Referência 02 121 06 99
Příslušenství regulátor průtoku zajištén‹ proti
krádeži, V‹rob. č. 02 121 06 99
Akcesoria wandaloodporny regulator strumienia,
Nr kat. 02 121 06 99
14
1
2
Instrucciones de montaje / Instruções de instalação /
Montážní pokyny / Wskazówki dotyczące instalacji
HD-M
HD-K
P
1 tipo HD-K: água pré-aquecida ≤ 35 °C
2 tipo HD-M: entrada de água ≤ 70 °C
(temporariamente < 5 min.)
Inadequado para esquentadores de água
hidráulicos.
Para funcionamento a bateria: não montar o
compartimento da bateria num local visível.
Para funcionamento com rede eléctrica:
instalar a tomada de modo a cumprir a área
de protecção e fora do campo de visão (ver
folha anexa n. ° 90 302 60 00).
Sistema de estagnacao activável
todas as 24 h.
Programa 3 e 4 (v. P. 19)
E
1 Tipo HD-K: Agua precalentada ≤ 35 °C
2 Tipo HD-M: Toma de agua ≤ 70 °C
(a corto plazo < 5 min.)
No apto para calentadores hidráulicos de
paso continuo.
Para funcionamiento a pilas: El compartimento
de las pilas no se debe instalar a la vista.
Para el funcionamiento com suministro de
red: Coloque la toma de corriente respetando
la zona de seguridad y en un lugar que no
esté a la vista (véase la hoja adjunta n° 90 302 60 00).
Se puede activar la conmutación
por inactividad cada 24 h.
Programa 3 y 4 (véase la pág. 19)
b
1 Typ HD-K: Předehřátá voda ≤ 35 °C
2 Typ HD-M: Privod vody ≤ 70 °C
(během krátké doby < 5 min.)
Není vhodné pro hydraulické průtokové ohřívače.
Při provozu na el. baterie:
Úlo•n‹ prostor pro baterie instalujte mimo dosah
viditelnosti.
PÏi pÏipojení do sítě:
Zásuvku umístěte mimo dosah viditelnosti a tak,
aby byla dodržena bezpečnostní vzdálenost
(viz. příloha č. 90 302 60 00).
Spínání pro vyplachování stojaté vody
lze nastavit na interval po 24 h.
Program 3 a 4 (viz. Str. 19)
Q
1 Typ HD-K: woda podgrzana ≤ 35 °C
2 Typ HD-M: woda doprowadzana ≤ 70 °C
(krótkotrwale < 5 min.)
Nie stosować z hydraulicznymi podgrzewaczami
przep¯ywowymi.
W przypadku zasilania bateryjnego:
kieszeni baterii nie umieszczać na widoku.
W przypadku zasilania sieciowego:
Gniazdko umieścić tak, by zachować bezpieczną
odległość i nie znajdowało się na widoku (patrz
załącznik techniczny nr 90 302 60 00).
Funkcja somoczynnego spłukiwania
co 24 h, włączana.
Program 3 i 4 (zob. str. 19)
15
E
P
b
Q
19
1
2 3
4
Montaje / Montagem / Montáž / Montaż
E
1 Montar la grifería.
2 Aclarar la tubería, cerrar la válvula
angular.
3 Montar, si se aplica, la válvula angular
con filtro (tipo HD-M con válvula de
retención).
4 Montar el filtro previo (HD-M).
P
1 Montar a torneira.
2 Enxaguar tubagem, fechar válvula de
ângulo.
3Montar event. válvula de ângulo de
filtração (tipo HD-M com válvula de
retenção.
4 Montar pré-filtro (HD-M).
b
1 Montáž baterie.
2 Vypláchnutí vedení, uzavření rohového
ventilu.
3 popř. montáž rohového ventilu s filtrem
(Typ HD-M s RV).
4 Montáž předfiltru (HD-M).
Q
1 Zamontować baterię.
2 Przepłukać przewód zamknąć zawór
kątowy.
3 W razie potrzeby zamontować zawór
kątowy z filtrem (typ HP-M z RV).
4 Zamontować filtr (HD-M).
16
E
P
b
Q
Puesta en servicio, cambio de pila /
Colocação em funcionamento, Substituição da bateria
E
1 Funcionamiento a pilas: Monte el
compartimento de las pilas en la fijación
del lavabo o atorníllelo a la pared. Desenrolle
el cable y asegúrelo con sujetacables. Establezca
la conexión por enchufe.
2a Funcionamiento con fuente de
alimentación (230 V, 50 Hz):
Desenrolle el cable de la fuente de
alimentación y asegúrelo con sujetacables.
Establezca la conexión por enchufe.
2b Montar la fuente de alimentación
empotrade (230U).
3 Abra la válvula angular.
4 Comparación automática de alcance
según el tipo cerámico.
5 Efectue el control de funcionamiento. El agua
debe correr mientras las manos se encuentren en
la zona activa. Parada automática a los 60 seg.
6 Ajuste la temperatura del agua mezclada.
Puede haber peligro de escaldamiento,
en caso necesario instale un termostato
de válvula angular.
7 Cambio de pila: El diodo lanza destellos cuando la
pila tiene un nivel de carga bajo; cambie entonces
la pila, pila de litio CP-P2, 6 V (a cargo del cliente).
P
1 Funcionamento a bateria: Montar o
compartimento da bateria na fixação do
lavatório ou aparafusar à parede. Enroscar
o cabo e fixar com braçadeira e estabelecer
a ligação de encaixe.
2a Funcionamento com rede eléctrica (230 V, 50 Hz):
Enrolar o cabo da fonte de alimentação d
conector e fixar com braçadeira e estabelecer a
ligação de encaixe.
2bMontar a fonte de alimentação embutida (230U).
3 Abrir a válvula de ângulo.
4 Uniformização. automática do raio de acção
no tipo de loiça.
5 Efectuar controlo de funcionamento; fluxo de
água activo enquanto as mãos estiverem no raio
de acção. Paragem automática após 60 seg.
6 Ajustar temperatura de mistura.
Event. risco de queimaduras; event.
montar termóstato na válvula de ângulo.
7Substituição da bateria: Díodo pisca com baixa
carga da bateria, substituir bateria, bateria
alcaline LR61, 9 V ou de lítio CP-P2, 6 V (por
parte da empresa construtora).
17
1 2a
7
3
45
6
2b
Uvedení do provozu, v‹měna el. baterií /
Uruchomienie, wymiana baterii
b
1 Provoz na el. baterie:
Prostor na ukládání el. baterií přimontujte k
umyvadlu resp. přišroubujte na zed’.
Odviňte kabel a zajistěte kabelovou páskou,
zástrčku spojte se zdrojem.
2a Provoz s připojením do sítě: (230 V, 50 Hz)
Odviňte kabel se zástrčkou a zajistěte
kabelovou páskou, zástrčku připojte k síti.
2b Namontovat podomítkov‹ si∫ov‹ zdroj (230U).
3 Otevřete rohov‹ ventil.
4 Automat. PÏizpůsobení dosahu typu
keramiky.
5 Proved’te funkční kontrolu voda protéká po
dobu, kdy jsou ruce umístěny v aktivním
prostoru. Automatické zastavení po 60
vterinách.
6 Nastavení teploty vody.
Příp. nebezpečí opaření, popř.
přimontovat rohov‹ ventil s
termostatem.
7 V‹měna el. baterií: Dioda bliká pokud je
stav el. baterie kritick‹, vyměÊte baterii,
alkalická baterie LR61, 9 V nebo lithiová
baterie CP P2, 6 V (zajistí klient).
Q
1 Zasilanie bateryjne:
Kieszeń baterii zamontować do uchwytu
umywalki lub przykręcić do ściany.
Zwinąć kabel i zabezpieczyć opaską
kablową, podłączyć wtyk.
2a Zasilanie sieciowe: (230 V, 50 Hz)
Zwinąć kabel zasilacza i zabezpieczyć
opaską kablową, podłączyć wtyk.
2b Montaº zasilacza podtynkowego (230U).
3 Otworzyć zawór kątowy.
4 Automat. dopasowanie zasięgu do typu
umywalki.
5 Przeprowadzić kontrolę działania Woda
powinna płynąć do momentu trzymania
dłoni w strefie zasięgu czujnika.
Automatyczne wyłączenie po 60 sekundach.
6 Ustawić temperaturę wody zmieszanej.
W przypadku niebezpiecze‚stwa
poparzenia zainstalować zawór
kątowy z termostatem
7 Wymiana baterii:
Migająca dioda oznacza niski stan
naładowania baterii, wymienić baterię,
stosować baterie alkaliczne LR61, 9 V lub
litowe CP-P2, 6 V (zapewnia użytkownik).
18
1 2a
7
3
45
6
2b
E
Programación de los ajustes
1 Seccionar el suministro eléctrico, 10 seg.
como mín. Establecer de nuevo la
alimentación eléctrica.
Una vez realizada la autocomprobación/
calibración *** lanza destellos, comienza
automáticamente el modo de ajuste (7 s).
2 Mantenga la mano aprox. 2 cm delante
del sensor. Programe según la tabla y
cuando encuentre el programma deseado
(*-****) retire la mano.
Hand entfernen.
3 Señal rápida *** Fin de modo de ajuste.
P
Programar ajustes
1 Desconectar da alimentação eléctrica, mín.
10 seg. Restabelecer alimentação eléctrica.
Após realização do autodiagnóstico/calibração
*** piscam; início automático do modo de
ajuste (7 s).
2 Manter a mão cerca de 2 cm à frente do
sensor; programação segundo tabela; remover
a mão assim que ajustar o programa pretendido
(*-****).
3 Sinal rápido*** fim do modo de ajuste.
b
Programovat nastavení
1 Odpojte od zdroje el. proudu, min. 10 vteřin.
Zdroj opět připojit.
Po ukončení automatického testu / kalibraci
*** blikání, automaticky se spustí režim pro
nastavování (7 s).
2 Podržte ruku ca. 2 cm pÏed čidlem
naprogramování proved’te podle tabulky, u
požadovaného programu ruku odejměte
(*-****).
3 Rychl‹ signál *** Konec re•imu nastavování.
Q
Programowanie ustawień
1 Odłączyć zasilanie na min. 10 sekund.
Ponownie podłączyć zasilanie.
Po pomyślnym autoteście/kalibracji
migają ***, automatyczne przejście do trybu
programowania (7 s).
2Przytrzymać dłoń w odległości ok. 2 cm od
czujnika. Programowanie przebiega zgodnie z
tabelą, przy pożądanym programie (*-****)
odsunąć dłoń.
3 Szybkie wskazanie *** oznacza zakończenie
trybu programowania.
E
P
b
Q
Ajuste del programa / Ajuste do programa /
Ustawienie programu / Nastavení programu
1 2
3
19
Ajustes de programación / Ajustes do programa
Señal
Sinal
Tempo max.
de funcio-
namiento
Tempo máx.
de funciona-
mento
Parada de
limpieza
Paragem de
limpeza
Ajuste del
alcance
Ajuste do raio
de acção
*
**
***
****
60 s
60 s
60 s
60 s
–
–
sí / sim
sí / sim
largo /
comprdo**
corto/curto***
largo /
comprdo**
corto/curto***
Aclarado de inacti-
vidad de 24 h*
24 h enxaguamen-
to de estagnação*
–
–
20 s
20 s
* después de la última utilización / * após a última utilização
b Q
Nastavení programu / Ustawienie programu
Signál
Wskazanie
max. délka
sepnutí
Maks. czas
włàczenia
Zastavení ⁄iÛtflní
Zatrzymanie
wody
Nastavení
dosahu
Zasięg
*
**
***
****
60 s
60 s
60 s
60 s
–
–
ano/tak
ano/tak
dlouhé/duży**
krátké/mały***
dlouhé/duży**
krátké/mały***
Vyplachování
stojaté vody po
24 h*
Samoczynne
spłukiwanie co 24 h*
–
–
20 s
20 s
* posledním pou•ití / od ostatniego użycia
EP
P
1 Módulo E com conector e parafusos de
fixação (01 518 00 99)
2 Janela de sensor com namorevestimento e
fitas adesivas (77623 00 99)
3 Válvula magnética de cartucho
(01 451 00 99)
4 Parafuso de cabeça escariada, carcaça
(71 506 00 99)
5 Regulador da temperatura, completo com
alavanca e parafusos (01 521 06 99)
6 Módulo da bateria com baterias alcalinas
(01 519 00 99)
7 Fonte de alimentação (01 313 00 99)
8 Fonte de alimentação embutida
(01 312 00 99)
9 Pré-filtro
b
1 E modul obsahující zástrčku a upevÊovací
Ûroub (01 518 00 99)
2 Okno čidla s nano-povlakem a lepící
páskou (77 623 00 99)
3 Vestavn‹ magnetick‹ ventil (01 451 00 99)
4 Zápustn‹Ûroub krytu (71 506 00 99)
5 Regulátor teploty, kompletní včetně zapínací
páčky a Ûroubů (01 521 06 99)
6 Modul baterie s alkalickou baterií
(01 519 00 99)
7 Sít’ov‹ zdroj se zástrčkou (01 313 00 99)
8 Podomítkov‹ si∫ovy zdroj (01 312 00 99)
9Předfiltr
Q
1 Moduł elektroniczny z wtykiem i śrubami
mocującymi (01 518 00 99)
2 Okienko czujnika z nanopowłoką i paskiem
przylepnym (77 623 00 99)
3 Zawór elektromagnetyczny (01 451 00 99)
4Śruba z łbem stożkowym do obudowy
(71 506 00 99)
5 Regulator temperatury w komplecie z
dªwigienkÅi ∑rubami (01 521 06 99)
6 Moduł baterii z bateriami alkalicznymi
(01 519 00 99)
7 Zasilacz (01 313 00 99)
8 Zasilacz podtynkowy (01 312 00 99)
9 Filtr
Piezas de repuesto / Peças sobressalentes /
Náhradní díly / Części zamienne
20
E
1 Módulo eléc. con conector y tornillos de
fijación (25 01 518 00)
2 Ventana sensora con revestimiento de
nanopartículas y tiras adhesivas (25 77 623 00)
3 Válvula solenoide de cartucho (25 01 451 00)
4 Tornillo avellanado carcasa (25 71 506 00)
5 Regulador de temperatura, completo con
palanca de accionamiento y tornillos (25 01 521 06)
6 Módulo de pila con pilas alcalinas (25 01 519 00)
7 Fuente de alimentación enchufable (25 01 313 00)
8 Fuente de alimentación empotrada (25 01 312 00)
9 Filtro previo

Other manuals for 01 230 06 99

1

This manual suits for next models

11

Other Schell Plumbing Product manuals

Schell Masterbox WBW-E-M User manual

Schell

Schell Masterbox WBW-E-M User manual

Schell WALIS E 01 950 06 99 User manual

Schell

Schell WALIS E 01 950 06 99 User manual

Schell LINUS 02 162 06 99 User manual

Schell

Schell LINUS 02 162 06 99 User manual

Schell LINUS D-C-T User manual

Schell

Schell LINUS D-C-T User manual

Schell EDITION E 02 806 06 99 Instruction manual

Schell

Schell EDITION E 02 806 06 99 Instruction manual

Schell 01 230 06 99 User manual

Schell

Schell 01 230 06 99 User manual

Schell COMFORT 01 846 06 99 Operating instructions

Schell

Schell COMFORT 01 846 06 99 Operating instructions

Schell PURIS 01 360 06 99 User manual

Schell

Schell PURIS 01 360 06 99 User manual

Schell PURIS E 01 200 06 99 HD-K User manual

Schell

Schell PURIS E 01 200 06 99 HD-K User manual

Schell Dual flush User manual

Schell

Schell Dual flush User manual

Schell WBD-E-V 01 822 00 99 User manual

Schell

Schell WBD-E-V 01 822 00 99 User manual

Schell TIPUS P Instruction manual

Schell

Schell TIPUS P Instruction manual

Schell SCHELLOMAT 02 202 06 99 Operating instructions

Schell

Schell SCHELLOMAT 02 202 06 99 Operating instructions

Schell POLAR II 03 995 03 99 Manual

Schell

Schell POLAR II 03 995 03 99 Manual

Schell LINUS Masterbox WB-SC-M User manual

Schell

Schell LINUS Masterbox WB-SC-M User manual

Schell GRANDIS E 00 242 06 99 User manual

Schell

Schell GRANDIS E 00 242 06 99 User manual

Schell POLAR II 03 998 03 99 Manual

Schell

Schell POLAR II 03 998 03 99 Manual

Schell XERIS E small HD-K Operating instructions

Schell

Schell XERIS E small HD-K Operating instructions

Schell WC COMPACT II 01 194 00 99 Instruction manual

Schell

Schell WC COMPACT II 01 194 00 99 Instruction manual

Schell POLAR 03 979 06 99 Manual

Schell

Schell POLAR 03 979 06 99 Manual

Schell COMPACT HF 01 165 00 99 Instruction manual
Schell

Schell COMPACT HF 01 165 00 99 Instruction manual

Schell CELIS 01 271 06 99 Instruction manual

Schell

Schell CELIS 01 271 06 99 Instruction manual

Schell PETIT 02 122 06 99 Guide

Schell

Schell PETIT 02 122 06 99 Guide
Schell XERIS SC 02 258 06 99 User manual

Schell

Schell XERIS SC 02 258 06 99 User manual

Popular Plumbing Product manuals by other brands

Franke HDTX0013 Installation and operating instructions

Franke

Franke HDTX0013 Installation and operating instructions

Perrin & Rowe HOUSE OF ROHL 1005N instruction manual

Perrin & Rowe

Perrin & Rowe HOUSE OF ROHL 1005N instruction manual

JADO Oriental 893 installation guide

JADO

JADO Oriental 893 installation guide

Columbia Products Sani-Lav 725F operating manual

Columbia Products

Columbia Products Sani-Lav 725F operating manual

Hans Grohe M525-H170 73861000 Instructions for use/assembly instructions

Hans Grohe

Hans Grohe M525-H170 73861000 Instructions for use/assembly instructions

BK RESOURCES MSHS-48W1 Assembly instructions

BK RESOURCES

BK RESOURCES MSHS-48W1 Assembly instructions

Moen Brushed Nickel S41705BN Replacement parts

Moen

Moen Brushed Nickel S41705BN Replacement parts

Glacier bay HDQFP3C0001SP Installation and care guide

Glacier bay

Glacier bay HDQFP3C0001SP Installation and care guide

Oras Safira Series Installation and maintenance guide

Oras

Oras Safira Series Installation and maintenance guide

Mirabelle PROVINCETOWN Series installation instructions

Mirabelle

Mirabelle PROVINCETOWN Series installation instructions

aquabrass xround NX7512 installation guide

aquabrass

aquabrass xround NX7512 installation guide

Sanela SLP 02NB Instructions for use

Sanela

Sanela SLP 02NB Instructions for use

Grohe 36 264 manual

Grohe

Grohe 36 264 manual

Hans Grohe Mondial 15750 Series manual

Hans Grohe

Hans Grohe Mondial 15750 Series manual

Hans Grohe Talis M54 72806 Series Assembly instructions

Hans Grohe

Hans Grohe Talis M54 72806 Series Assembly instructions

Symmons Origins S-243-LAM Series Installation and service instructions

Symmons

Symmons Origins S-243-LAM Series Installation and service instructions

Elkay Ella LK7721PSS installation instructions

Elkay

Elkay Ella LK7721PSS installation instructions

Hans Grohe Raindance S 100 AIR 3-Jet Instructions for use/assembly instructions

Hans Grohe

Hans Grohe Raindance S 100 AIR 3-Jet Instructions for use/assembly instructions

manuals.online logo
manuals.online logoBrands
  • About & Mission
  • Contact us
  • Privacy Policy
  • Terms and Conditions

Copyright 2025 Manuals.Online. All Rights Reserved.