manuals.online logo
Brands
  1. Home
  2. •
  3. Brands
  4. •
  5. Schell
  6. •
  7. Plumbing Product
  8. •
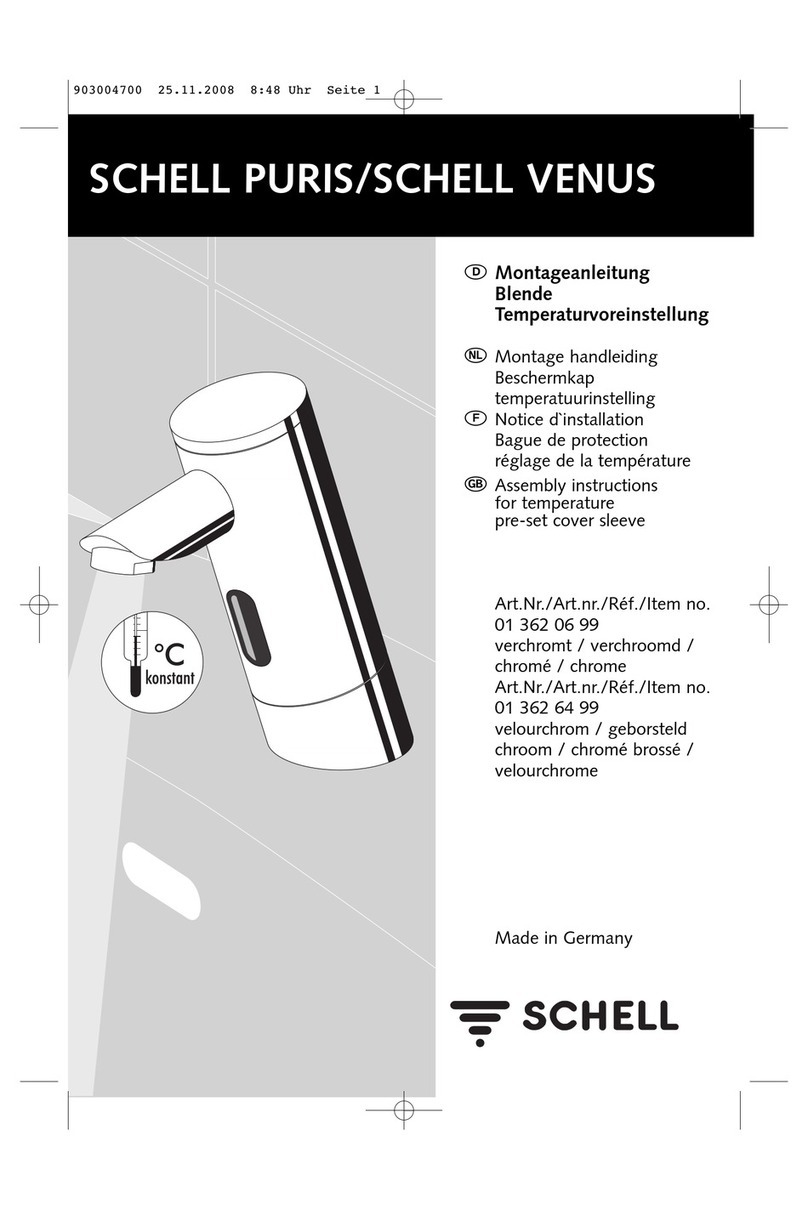
  9. Schell PURIS E 01 200 06 99 HD-K User manual

Schell PURIS E 01 200 06 99 HD-K User manual

DMontageanleitung
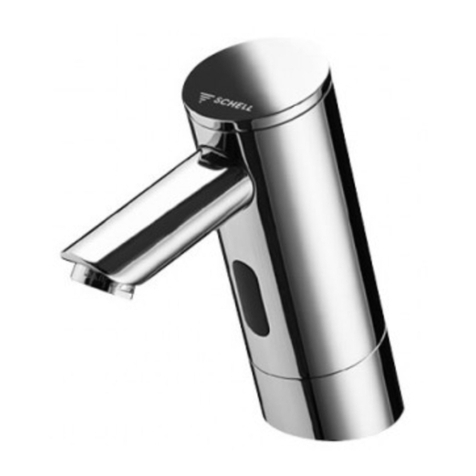
Elektronische Waschtisch-Armatur
• mit Dauerfluss (5 min)
• mit Stagnationsspülung 24 h
nach letzter Benutzung
Art.-Nr.
01 200 06 99 / 01 200 77 99 / 01 225 06 99
HD-K (Hochdruck-Kaltwasser)
01 201 06 99 / 01 201 77 99 / 01 226 06 99
HD-M (Hochdruck-Mischwasser)
01 202 06 99 / 01 202 77 99
ND-M (Niederdruck-Mischwasser)
OMontagevoorschriften
Elektronische wastafelkraan
• met permanente spoeling (5 min.)
• met stagnatiespoeling 24 u na het
laatste gebruik
Art. Nr.
01 200 06 99 / 01 200 77 99 / 01 225 06 99
HD-K (Voor koud water)
01 201 06 99 / 01 201 77 99 / 01 226 06 99
HD-M (Voor gemengd water)
01 202 06 99 / 01 202 77 99
ND-M (Voor gemengd water) Lage druktoestellen
FInstructions de montage
Robinet électronique pour lavabo
• Avec édoulement permanent (5 min.)
• Avec rinçage stagnation 24 h après le
dernier emploi
Réf.
01 200 06 99 / 01 200 77 99 / 01 225 06 99
HD-K (Pour eau froide)
01 201 06 99 / 01 201 77 99 / 01 225 06 99
HD-M (Pour eau mitigée)
01 202 06 99 / 01 202 77 99
ND-M (Pour eau mitigée) Appareils à basse pression
GAssembly instructions
Electronic wash basin fitting
• with permanent flow (5 minutes)
• wirh stagnation flow 24 h after last use
Item no.
01 200 06 99 / 01 200 77 99 / 01 225 06 99
HP-C (high pressure cold water)
01 201 06 99 / 01 201 77 99 / 01 226 06 99
HP-M (high pressure hot amd cold water)
01 202 06 99 / 01 202 77 99
LP-M (low pressure hot and cold water)
SCHELL Waschtisch-Armatur PURIS E
Made in Germany
RZ_903024900.qxd 20.06.2007 15:41 Uhr Seite 1
– 2 –
1
2
3
Maße, Afmetingen, Dimensions, Measurements
D
Abb.
Typ HD-K*: Vorgewärmtes Wasser ≤ 35 °C 1
Typ HD-M*: Warmwassereintritt ≤70 °C 2
• TW/TWW Rückflußverhinderer montieren
• Hydraulische Durchlauferhitzer nicht geeignet
Typ ND-M*: Speichertermperatur ≤70 °C 3
• Beim Aufheizen tritt Tropfwasser aus.
• Anschlußleitungen nicht knicken
• Am Eckventil Durchlaufbegrenzer montieren
• Wasserauslaß nicht begrenzen
O
Afb.
Type HD-K*: voorverwarmd water ≤35 °C 1
Type HD-M*: warmwatertoevoer ≤70 °C 2
• Terugslagklep monteren
• Niet geschikt voor boiler met vrije uitloop
Type ND-M*: opslagtemperatuur ≤70 °C 3
• Bij het opwarmen ontstaat druipwater
• Aansluitleidingen niet knikken
• Debietbeperker op hoekregelkraan monteren
• Wateruitlaat niet beperken
F
Fig.
Type HD-K*: eau préchauffée ≤35 °C 1
Type HD-M*: arrivée d’eau chaude ≤70 °C 2
• Montage du clapet anti-retour
• Ne convient pas pour boiler à écoulement libre
Type ND-M*: température d’eau
maximum ≤70 °C 3
• Lors du réchauffement, écoulement par le bec
• Ne pas plier les flexibles de raccord
• Monter le limiteur de débit sur le robinet
équerre
• Ne pas limiter l’écoulement de l’eau
G
Fig.
HP-C type*: pre-heated water ≤35 °C 1
HP-M type*: hot water entry ≤70 °C 2
• install TW/TWW backflow preventer
• hydraulic flow-through heater not suitable
LP-M type*: storage container
temperature ≤70 °C 3
• drops of water emerge during heat-up
• do not kink connection lines
• install a flow-through limiter at the
angle stop valve
• do not limit water flow
D*HD-K: Hochdruck-Kaltwasser
*HD-M: Hochdruck-Mischwasser
*ND-M: Niederdruck-Mischwasser (offene Warmwasserspeicher)
O*HD-K: koud water onder normale druk
*HD-M: mengwater onder normale druk
*ND-M: mengwater met lagedrukboiler (open warmwaterboiler)
F*HD-K: eau froide sous pression courante
*HD-M: eau mitigée sous pression courante
*ND-M: eau mitigée pour boiler basse pression (chauffe-eau à
écoulement libre)
G*HP-C: high-pressure cold water
*HP-M: high-pressure hot and cold water
*LP-M: low-pressure hot and cold water (open hot water tank)
RZ_903024900.qxd 20.06.2007 15:41 Uhr Seite 2
– 3–
1
3
2
45
Montage, Montage, Montage, Mounting
D
Abb.
Eckventil sperren 1
Ggf. Filtereckventil montieren 2
Armatur montieren 3
Bei Edelstahlspülen „Dreifuß“
verwenden.
Typ ND-M
Durchflußbegrenzer montieren 4
Typ HD-M
RV montieren 5
O
Afb.
Hoekregelkraan dichtdraaien 1
Indien nodig filterkraan met
terugslagklep monteren 2
Kraan monteren: 3
Gebruik een „verstevigingssteun“
voor een wastafel in edelstaal
Type ND-M 4
Debietbegrenzer monteren
Type HD-M 5
Terugslagklep monteren
F
Fig.
Fermer le robinet équerre 1
Si nécessaire monter un robinet
à filtre avec clapet anti-retour 2
Montage du robinet: 3
Utilisez un «support de renforcement»
pour un lavabo en acier affiné
Type ND-M 4
Montage du limiteur de débit
Type HD-M 5
Montage du clapet anti-retour
G
Fig.
Block angle stop valve 1
Install angle valve with filter
and backflow preventer if necessary 2
Install fitting 3
In cases of stainless steel basins,
use „three-foot“ model.
LP-M type
Install through-flow limiter 4
HP-M type
Install backflow preventer 5
RZ_903024900.qxd 20.06.2007 15:41 Uhr Seite 3
– 4–
12
34
5
Inbetriebnahme / Ingebruikstelling / Batterie vervangen / Start up
Batteriewechsel / Mise en service / Remplacement de la batterie / Change of battery
OAfb.
• 9 V alkalinebatterij plaatsen,
polariteit vrij 1
• Automatische afstelling van de reikwijd
te volgens type porselein
(2 x*** , ca. 30 s) 2
Opgelet: De handen niet binnen het
bereik van de kraan houden, anders
wordt de programma-instelling (zie blz. 5)
geactiveerd. Batterijdeksel vastschroeven.
• Hoekregelkraan opendraaien 3
• Functietest uitvoeren 4
• Temperatuur van het mengwater
instellen 5
• Batterij vervangen 6
Diode knippert als de batterij bijna leeg is
FFig.
• Installation de la pile 9 V alcaline,
polarité sans importance 1
• Réglage automatique de la distance
de détection selon le type de porcelaine 2
(2 x*** , ca. 30 s)
Attention: Ne pas tenir les mains dans le
champ de détection du robinet, autrement
vous activez les paramètres de program-
mation (voir page 5). Fixer le couvercle de
la batterie.
• Ouvrir le robinet équerre 3
• Effectuer un test de fonctionnement 4
• Réglage de la température
de l’eau mitigée 5
• Remplacement de la batterie 6
La diode clignote lorsque la pile est
presque épuisée.
GFig.
• Insert 9V alkali battery;
polarity does not matter 1
• Automatic distance control on
ceramic type (2 x*** , appr. 30 s) 2
Important: Please don’t put your hand
in the close-up range as programme ad-
justment is carried out otherwise! (see
page 5). Battery cover to be screwed up
tight.
• Open stop angle valve 3
• Function monitoring 4
• Set hot and cold water temperature 5
• Change of battery 6
Diode flashes when battery is low
Change battery
6
DAbb.
• 9 V Alkalibatterie beliebig polig
einsetzen 1
• Automat. Reichweitenabgleich
auf Keramiktyp (2 x*** , ca. 30 s) 2
Hinweis: Hand in dieser Zeit nicht in den
Nahbereich halten, das sonst Programm
einstellungen erfolgen! (s. S. 5) Batterie
deckel fest verschrauben.
• Eckventil öffnen 3
• Funktionskontrolle 4
• Mischwasser-Temperatur einstellen 5
• Batteriewechsel 6
Diode blinkt bei niedriger Batterieladung
Batterie wechseln
RZ_903024900.qxd 20.06.2007 15:41 Uhr Seite 4
– 5 –
1
3
Programmeinstellung / Programminstelling /
Programation / Programme adjustment
Programmeinstellungen
Signal max.
Laufzeit
Reinigungs-
stopp
Nachlauf-
zeit
Justierung
Reichweite
*
**
***
****
*****
60 s
60 s
120 s
120 s
60 s
–
–
x
x
–
1 s
1 s
2 s
2 s
1 s
8 - 16 cm
8 - 10 cm
8 - 16 cm
8 - 10 cm
8 - 16 cm
Programmainstellingen, signaal, max. looptijd, reinigingsstop, nalooptijd, instelling reikwijdte, permanente spoeling, stagnatiespoeling 24 h
Programmation, signal, durée d’écoulement max., programme de nettoyage, durée d’arreˆt d’écoulement, réglage de la distance
de détection, écoulement permanent, rinçage stagnation 24 h
Program adjustments, signal, max. running time, cleaning stop, run-after-time, adjustment of distance, Permanent flow, 24 h Stagnation flow
= Standardeinstellung, standaardinstelling, réglage standard, standard setting
*siehe Seite 8 / zie bladzijde 8 / voir page 8 / see page 8
2
O
F
G
Dauer-
fluss*
24h Stagnati-
onsspülung
–
–
–
–
5 min
–
–
–
–
20 s
3 x
4
2 x
5
3 x
DAbb.
Einstellungen programmieren
Batterie einsetzen 1
Anzeige Diode
• Schnelles Signal *** Beginn Einstellmodus 2
• Programmierung nach Tabelle, bei gewünschtem
Programm (
*–*****
)
Hand entfernen 3
• Schnelles Signal**Korrekturen ggfs. möglich 4
• Schnelles Signal*** Ende Einstellmodus 5
OAfb.
Instellingen programmeren
Batterij plaatsen 1
Indicatie diode
• Snel signaal *** begin instellmodus 2
• Programmering volgens tabel bij gewenst programma
(
*–*****
)
hand wegnemen 3
• Snel signaal**evtl. correctie mogelijk 4
• Snel signaal*** einde instelmodus 5
FFig.
Programmation des réglages
Introduire la pile 1
Indication de la diode
• Signal rapide *** début mode de programmation 2
• Programmation selon tableau programme désiré
(
*–*****
)
retirer la main 3
• Signal rapide**possibilité de corriger si nécessaire 4
• Signal rapide*** fin mode de programmation 5
GFig.
Programm adjustments
Insert battery 1
Diode indication
• Rapid signal *** Start of control mode 2
• Programing acc. to chart, at requested programm
(
*–*****
)
Remove hand 3
• Rapid signal**Corrections possible – if necessary 4
• Rapid signal*** End of control mode 5
RZ_903024900.qxd 20.06.2007 15:41 Uhr Seite 5
– 6 –
Service, Service, Service, Service
D
O
F
G
D
Störung/Anzeige Maßnahme/Ursache Abbildung
Kein Wasser Sensorfenster verkratzt
Reinigungsstopp aktiviert S. 8, Abb. 2
Batterie wechseln S. 5, Abb. 6
Diode blinkt Batterie wechseln S. 4, Abb. 1-6
Wasserstrom unzureichend Filter an EV reinigen S. 7, Abb. 2/3
Wasserstrom unzureichend Magnetventil reinigen S. 6, Abb. 1-4
O
Defect/indicatie Oorzaak/oplossing Zie
Geen water Krassen op sensorvenster
Onderhoudsprogr. geactiveerd p. 8, afb. 2
Batterij vervangen p. 5, afb. 6
Diode knippert Batterij vervangen p. 4, Abb. 1-6
Waterstroom onvoldoende Filter op terugslagklep reinigen p. 7, afb. 2/3
Waterstroom onvoldoende Magneetventiel reinigen p. 6, afb. 1-4
F
Problème/indication Cause/solution Voir
Pas d’eau La fenêtre du senseur est abimée
Progr. d’entretien activé p. 8, fig. 2
Remplacer la pile p. 5, fig. 6
La diode clignote Remplacer la pile p. 4, Abb. 1-6
Débit d’eau insuffisant Nettoyer le filtre sur le clapet anti-retour p. 7, fig. 2/3
Débit d’eau insuffisant Nettoyer la vanne magnétique p. 6, fig. 1-4
G
Malfunction/Display Measurement/Cause Illustration
No water Display window scratched
Cleaning mode activated Page 8, fig. 2
Replace battery Page 5, fig. 6
Diode blinking Replace battery Page 4, Abb. 1-6
Water flow insufficient Clean filter at angle stop valve Page 7, fig. 2/3
Water flow insufficient Clean solenoid valve Page 6, fig. 1-4
1234
Eckventil schließen! Ggf. Magnetventil unter Wasser reinigen (3).
Hoekregelkraan dichtdraaien! Indien nodig magneetventiel onder stromend water reinigen (3).
Fermer le robinet d’équerre! Si nécessaire, nettoyer la vanne magnétique à l’eau (3).
Close angle valve! Where necessary, clean solenoid valve with running water (3).
RZ_903024900.qxd 20.06.2007 15:41 Uhr Seite 6
– 7 –
Ersatzteile / Wisselstukken /
Pièces de rechange / Replacement parts
D
1 Batteriefachdeckel (Ms)
2 9 V-Alkalibatterie (Bauseits)
3 02 105 06 99 Strahlregler
02 121 06 99 Strahlregler, diebstahlsicher
4 Mantel Kaltw. (Ms)
5 Mantel Mischw. (Ms)
6 Zugstangenablauf-Garnitur (Ms)
(Zubehör)
7 E-Modul
8 Magnetventil 6 V
9 Temperaturregler (Hochdruck-
Mischwasser), komplett (Ms)
10 Vorfilter mit Rückflußverhinderer
11
Durchflußbegrenzer (nur für ND-M)
O
1. Deksel batterijvak (messing)
2. 9 V alkalinebatterij (aanschaffing door klant)
3 02 105 06 99 schuimer
02 121 06 99 schuimer, anti-diefstal
4. Behuizing koud water (messing)
5. Behuizing mengwater (messing)
6. Automatische lediging met
ledigingsklep (toebehoren)
7. E-module
8. Magneetventiel 6 V
9. Temperatuurregelaar (mengwater
onder normale druk), volledig
(messing)
10. Voorfilter met terugslagklep
11. Debietbegrenzer
(alleen voor ND-M)
F
1. Couvercle du compartiment
à pile (laiton)
2. Pile alcaline 9 V (acquisition par le client)
3 02 105 06 99 mousseur
02 121 06 99 mousseur, anti-vol
4. Bague avec réglage eau
froide (laiton)
5. Bague avec réglage chaud-froid (lai-
ton)
6. Vidange automatique avec
soupape de vidange (accessoire)
7. Module électronique
8. Vanne magnétique 6V
9. Réglage de température (eau mitigée
pression normale), complet (laiton)
10. Préfiltre avec clapet anti-retour
11. Limiteur de débit
(uniquement pour ND-M)
G
1. Battery compartment lid (brass)
2. 9 V alkali battery (provided by the client)
3 02 105 06 99 Output flow regulator
02 121 06 99 Output flow regulator, theft
proof
4. Cover cold water (brass)
5. Cover hot and cold water (brass)
6. Tension rod drain fitting (brass), (accessory)
7. Electricity module
8. Solenoid valve 6 V
9. Temperature regulator (high pressure,
mixed water), complete (brass)
10. Preliminary filter with backflow pre-
venter
11. Flow-through limiter (only for LP-M)
Ggf. Vorfilter/Filtereckventil reinigen
Indien nodig voorfilter/filterhoekkraan reinigen
Si nécessaire nettoyer le préfiltre / le robinet équerre à filtre
Where necessary, clean preliminary filter/
filter angle stop valve
01 362 06 99
01 362 64 99
01 360 06 99
01 360 64 99
01 381 06 99(HD-M)
28 511 06 99
28 512 06 99
01 451 00 99
01 450 00 99
1
23
D
O
F
G
RZ_903024900.qxd 20.06.2007 15:41 Uhr Seite 7
– 8 –
12
Reinigungsstop (Programm 3/4) / Reiningingsstop (programma 3/4) /
D’entretien (programme (3/4) / Cleaning mode (programme 3/4)
DAbb.
Reinigungsstopp aktivieren = 3 min. 1
Reinigungsstopp deaktivieren
(innerhalb 3 min) 2
OAfb.
Activatie onderhoudsprogr. = 3 min. 1
Desactivatie onderhoudsprogr.
(binnen 3 min.) 2
FFig.
Activation progr. d’entretien = 3 min. 1
Desactivation progr. d’entretien
(endéans 3 min.) 2
GFig.
Activate cleaning mode = 3 min. 1
Deactivate cleaning mode
(within 3 min) 2
12
Dauerfluss - 5 min, Stagnationsspülung (Programm 5) / Permanente spoeling - 5 min., Stagnatiespoeling
(Programma 5) / Ecoulement - 5 min., Rin
çage stagnation (programme 5) /
Permanent flow - 5 minu-
tes, stagnation flow (programme 5)
OAfb.
Permanente spoeling activeren = 5 min 1
Permanente spoeling desactiveren
(binnen 5 min.) 2
Deze spoelfunctie biedt de mogelijkheid om
technische maatregelen te treffen tegen legionelle
proliferatie, DVGW W 551“
Bij hoge temperturen (thermische desinfectie)
bestaat er verbandingsgevaar!
• 24 u stagnatiespoeling na laatste gebruik:
zekerstellen dat de afvoer steeds vrij is.
FFig.
Activation de l’écoulement permanent = 5 min 1
Désactivation de l’écoulement permanent
(endéans les 5 min.) 2
Cette fonction permet de prendre des mesures
techniques contre la prolifération de la légio
nellose, DVGW W 551“
Hautes températures (choc thermique):
attention danger de brûlures!
• rinçage stagnation 24 h:
garantir que l’évacuation d’eau soit libre.
GFig.
Activate permanent flow = 5 min 1
Deactivate permanent flow (within 5 minutes) 2
Function permanent flow enables the „technical
measures for avoiding the growth of legionella,
DVGW W 551“
In case of high temperatures (thermal dis-
infection) there is the dange of scalding!
• 24 h stagnation flow after last use, water
drain has to be assured.
DAbb.
Dauerfluss auslösen = 5 min 1
Dauerfluss deaktivieren (innerhalb 5 min) 2
Funktion Dauerfluss ermöglicht die „Technische
Maßnahmen zur Vermeidung des Legionellen-
wachstums, DVGW W 551“
Bei hohen Temperaturen (Thermische
Desinfektion) Verbrühungsgefahr!
• 24 h Stagnationsspülung nach letzter
Nutzung, Abfluss des Wassers muss sicher
gestellt sein.
RZ_903024900.qxd 20.06.2007 15:41 Uhr Seite 8
Pflegehinweise / Reinigingsinstructies /
Instructions pour le nettoyage / Maintenance tips
D
Pflegehinweise: Zur Reinigung nur milde, seifenhaltige Reinigungsmittel verwenden. Keine kratzenden,
scheuernden, alkohol-, ammoniak-, salzsäure-, phosphorsäure- oder essigsäurehaltigen Reinigungs- oder
Desinfektionsmittel benutzen.
Keine Reinigung mit Hochdruck- und Dampfstrahlgeräten!
O
Reinigingsinstructies: Gebruik bij het reinigen enkel milde, zeephoudende producten. Gebruik geen
krassende, schurende, alcohol-, ammoniak-, zoutzuur-, fosforzuur- of azijnzuurhoudende reinigings- of
desinfecterende middelen.
Gebruik nooit hogedruk- of stoomreinigers!
F
Instructions pour le nettoyage: N’utilisez que des produits doux et savonneux pour le nettoyage.
N’utilisez pas de détergents ou de désinfectants abrasifs ou contenant de l’alcool, de l’ammoniac,
de l’acide chlorhydrique, de l’acide phosphorique ou de l’acide acétique.
N’utilisez jamais de nettoyeurs haute pression ou à vapeur !
G
Maintenance tips: For cleaning, use only mild cleaning products containing soap. Do not use any
cleaning or disinfecting products that are abrasive or scouring or which contain alcohol, ammonia,
hydrochloric acid, phosphoric acid or acetic acid.
Do not clean with high-pressure or steam jet devices!
– 9 –
RZ_903024900.qxd 20.06.2007 15:41 Uhr Seite 9
SCHELL GmbH & Co. KG
Armaturentechnologie
Postfach 18 40, D-57448 Olpe
Tel.: 0 27 61 / 8 92-0
Fax: 0 27 61 / 8 92-1 99
[email protected]
www.schell-armaturen.de
90 302 49 00
RZ_903024900.qxd 20.06.2007 15:41 Uhr Seite 10

This manual suits for next models

7

Other Schell Plumbing Product manuals

Schell 01 181 06 99 User manual

Schell

Schell 01 181 06 99 User manual

Schell XERIS SC 02 258 06 99 User manual

Schell

Schell XERIS SC 02 258 06 99 User manual

Schell CELIS E 01 264 06 99 User manual

Schell

Schell CELIS E 01 264 06 99 User manual

Schell WBD-E-V 01 822 00 99 User manual

Schell

Schell WBD-E-V 01 822 00 99 User manual

Schell PURIS 01 362 06 99 User manual

Schell

Schell PURIS 01 362 06 99 User manual

Schell CELIS 01 271 06 99 Instruction manual

Schell

Schell CELIS 01 271 06 99 Instruction manual

Schell WC COMPACT II 01 194 00 99 Instruction manual

Schell

Schell WC COMPACT II 01 194 00 99 Instruction manual

Schell XERIS E small HD-K Operating instructions

Schell

Schell XERIS E small HD-K Operating instructions

Schell 01 230 06 99 User manual

Schell

Schell 01 230 06 99 User manual

Schell PETIT 02 122 06 99 Guide

Schell

Schell PETIT 02 122 06 99 Guide

Schell EDITION 02 800 06 99 Instruction manual
Schell

Schell EDITION 02 800 06 99 Instruction manual

Schell PURIS E HD-K User manual

Schell

Schell PURIS E HD-K User manual

Schell SCHELLOMAT BASIC 02 476 06 99 Operating instructions

Schell

Schell SCHELLOMAT BASIC 02 476 06 99 Operating instructions

Schell Masterbox WBW-E-M User manual

Schell

Schell Masterbox WBW-E-M User manual

Schell LINUS Masterbox WBW-E-M User manual

Schell

Schell LINUS Masterbox WBW-E-M User manual

Schell WBD-SC-M User manual

Schell

Schell WBD-SC-M User manual

Schell LINUS Masterbox WB-SC-M User manual

Schell

Schell LINUS Masterbox WB-SC-M User manual

Schell 01 230 06 99 User manual

Schell

Schell 01 230 06 99 User manual

Schell POLAR II 03 995 03 99 Manual

Schell

Schell POLAR II 03 995 03 99 Manual

Schell LINUS 02 162 06 99 User manual
Schell

Schell LINUS 02 162 06 99 User manual

Schell EDITION E 02 806 06 99 Instruction manual

Schell

Schell EDITION E 02 806 06 99 Instruction manual

Schell LINUS D-C-T User manual

Schell

Schell LINUS D-C-T User manual
Schell COMPACT 01 158 06 99 Guide

Schell

Schell COMPACT 01 158 06 99 Guide
Schell WALIS E 01 950 06 99 User manual
Schell

Schell WALIS E 01 950 06 99 User manual

Popular Plumbing Product manuals by other brands

Grohe Allure F-digital 36 345 manual

Grohe

Grohe Allure F-digital 36 345 manual

Sterling Plumbing Shower Receptor and Wall Surround 72260100 Specification sheet

Sterling Plumbing

Sterling Plumbing Shower Receptor and Wall Surround 72260100 Specification sheet

Haws 1109FR Installation, operation & maintenance instructions

Haws

Haws 1109FR Installation, operation & maintenance instructions

Restoration Hardware EATON THERMO SHOWER KIT installation instructions

Restoration Hardware

Restoration Hardware EATON THERMO SHOWER KIT installation instructions

enware Wellbeing Livia LIV80WSET Installation and maintenance instructions

enware

enware Wellbeing Livia LIV80WSET Installation and maintenance instructions

Kohler K-11797T installation instructions

Kohler

Kohler K-11797T installation instructions

Moen L2368EP installation guide

Moen

Moen L2368EP installation guide

Riobel VY360C-EM installation guide

Riobel

Riobel VY360C-EM installation guide

Franke AQUA741 Installation and operating instructions

Franke

Franke AQUA741 Installation and operating instructions

Isenberg 250.1170 installation manual

Isenberg

Isenberg 250.1170 installation manual

VITRA Vitrus 770-5770-01 Installaton guide

VITRA

VITRA Vitrus 770-5770-01 Installaton guide

Spectrum Brands Pfister Park Avenue R89-XFE Quick installation guide

Spectrum Brands

Spectrum Brands Pfister Park Avenue R89-XFE Quick installation guide

ETAL COMITE 1 installation manual

ETAL

ETAL COMITE 1 installation manual

Brizo 8GA-ADD-240 instructions

Brizo

Brizo 8GA-ADD-240 instructions

Hans Grohe Logis 71074000 Instructions for use/assembly instructions

Hans Grohe

Hans Grohe Logis 71074000 Instructions for use/assembly instructions

Bradley S45-1986 Installation

Bradley

Bradley S45-1986 Installation

PELHAM & WHITE PWS230-B quick start guide

PELHAM & WHITE

PELHAM & WHITE PWS230-B quick start guide

Gessi Rettangolo T 20401 manual

Gessi

Gessi Rettangolo T 20401 manual

manuals.online logo
manuals.online logoBrands
  • About & Mission
  • Contact us
  • Privacy Policy
  • Terms and Conditions

Copyright 2025 Manuals.Online. All Rights Reserved.