manuals.online logo
Brands
  1. Home
  2. •
  3. Brands
  4. •
  5. Schell
  6. •
  7. Plumbing Product
  8. •
  9. Schell COMPACT INFRA 230 V 01 121 06 99 Guide

Schell COMPACT INFRA 230 V 01 121 06 99 Guide

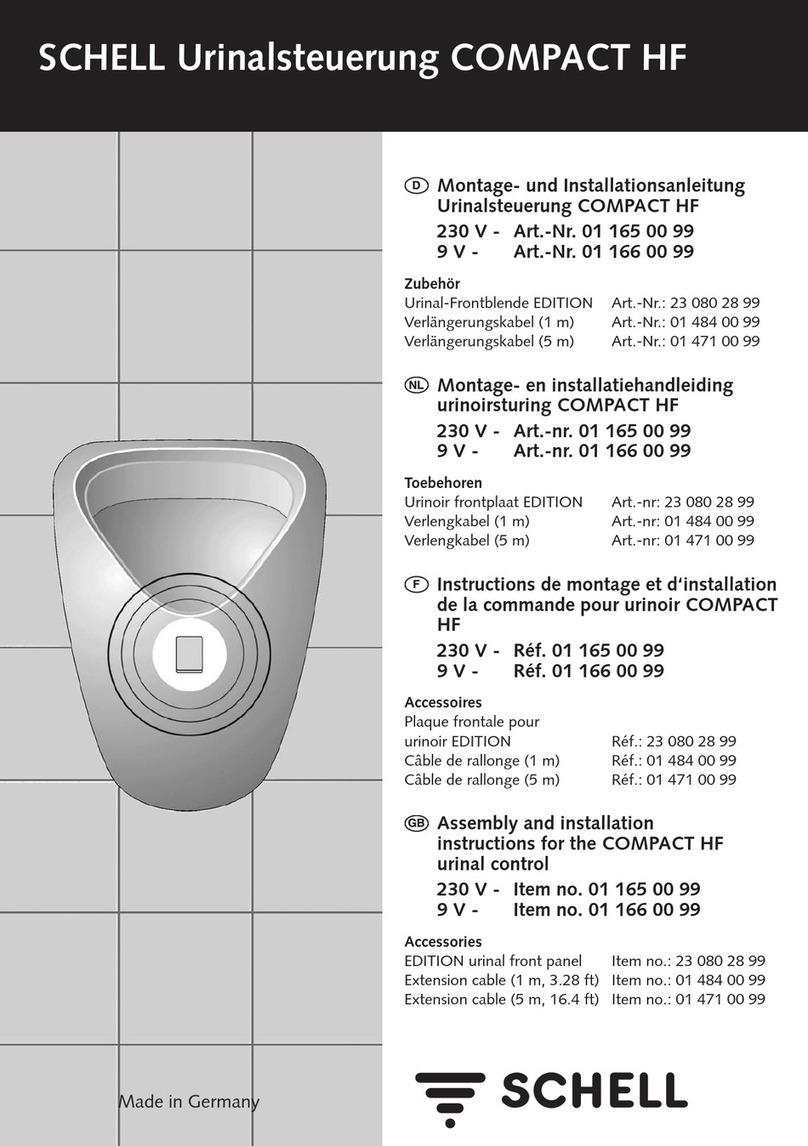
SCHELL COMPACT
Montage- und
Installationsanleitung
INFRA 230V und Batterie 9V
Fertigbauset
Montage- en
installatiehandleiding
INFRA 230 V en 9 V batterij
Afwerkingsset
Notice de montage et d’utilisation
INFRA 230 V et pile 9 V
Set de finition
Mounting and installation
instructions
INFRA 230 V and battery 9 V
finishing set
INFRA 230 V
Art.-Nr. / Art. nr. / Réf. / Item no.
01 121 06 99
verchromt / verchroomd /
chromé / chrome
Art.-Nr. / Art. nr. / Réf. / Item no.
01 121 28 99
Edelstahl / roestvrij staal /
acier inoxydable / stainless steel
INFRA Batterie 9 V
Art.-Nr. / Art. nr. / Réf. / Item no.
01 123 06 99
verchromt / verchroomd /
chromé / chrome
Art.-Nr. / Art. nr. / Réf. / Item no.
01 123 28 99
Edelstahl / roestvrij staal /
acier inoxydable / stainless steel
Made in Germany
– 2 –
Technische Daten, Technische gegevens,
Données techniques, Technical data

Technische Daten:
Betriebsspannung: 230 V/50 Hz (INFRA 230 V)
9 V Alkali bei INFRA möglich
Magnetventil: 6 V
Mindestfließdruck: 0,5 – 5 bar
Berechnungsdurchfluß: 0,3 l/s
Spülstrom: nach DIN 3265, 0,3 – 0,7 l/s
Wasseranschluß: 1/2” IG
Geräuschklasse: Klasse II, DIN 4109

Technische gegevens:
Netspanning: 230 V/50 Hz (INFRA 230 V)
9 V alkalinebatterij mogelijk bij INFRA
Magneetventiel: 6 V
Werkdruk: 0,5 – 5 bar
Berekeningsdebiet: 0,3 l/s
Debiet: volgens DIN 3265: 0,3 – 0,7 l/s
Wateraansluiting: 1/2“ Binnendraad
Geruisklasse: klasse II, DIN 4109

Données techniques:
Tension du réseau: 230 V/50 Hz (INFRA 230 V)
Pile alkaline 9 V disponible pour INFRA
Vanne magnétique: 6 V
Pression dynamique: 0,5 – 5 bar
Débit nominal: 0,3 l/s
Débit: suivant DIN 3265: 0,3 – 0,7 l/s
Raccordement: 1/2“ F
Classe sonore: classe II (DIN 4109)

Technical data:
Solenoid valve: 6 V
Minimum flow pressure: 0.5 – 5 bar
Calculated flow rate: 0.3 l/s
Flush volume: in accordance with DIN 3265, 0.3 – 0.7 l/s
Water supply: 1/2“ IG
Noise class: class II, DIN 4109

Sanitär-Installation: Dimensionierung des Wasseranschlusses nach DIN 1988 / EN 1717.
Elektro-Installation: Unter Beachtung der VDE 0100 oder vergleichbarer nationaler Vorschriften
Netzzuleitung über einen zweipoligen Hauptschalter mit mind. 3 mm Kontaktöffnung, Sicherung max. 6 A.

Sanitaire installatie: Dimensioneren van de wateraansluiting volgens DIN 1988 / EN 1717.
Elektrische installatie: Respecteer altijd de VDE 0100 of vergelijkbare nationale voorschriften.
Voeding via een bipolaire hoofdschakelaar met een contactopening van minimum 3 mm. Zekering maximum 6 A.

Installation sanitaire: Dimensionnez le raccordement suivant DIN 1988 / EN 1717.
Installation électrique: Respectez toujours la norme VDE 0100 ou les prescriptions nationales équivalentes.
Alimentation via un interrupteur principal bipolaire avec un orifice de contact d’au moins 3 mm. Fusible maximum 6 A.

Sanitary installation: dimensioning of the water supply in accordance with DIN 1988 / EN 1717.
Electric installation: in accordance with VDE 0100 or comparable national regulations, mains connection via
a double pole main switch with at least 3 mm of contact gap, fuse max. 6 A.

Montage und Installation nur durch
konzessionierte Fachbetriebe

De montage en installatie mag alleen uitgevo-
erd worden door de professionele installateur.

Le montage et l’installation doivent être effec-
tués par un installateur professionnel.

Mounting and installation only by licensed
plumbing businesses

Mindestabstände Infrarotspüler

Minimale afstanden infraroodspoeler

Distances minimales pour rinçage infrarouge

Minimum spaces for the infrared flush valve unit
Funktion, Werking, Fonctionnement, Function
– 3–

Mindestverweilzeit Hauptspülung Hygienespülung
230 V 4 s 2 – 10 s 24 h
9 V 7 – 10 s 2 – 10 s 24 h

Temporisatie Hoofdspoeling Hygiënische
spoeling
230 V 4 sec. 2 – 10 sec. 24 u
9 V 7 – 10 sec. 2 – 10 sec. 24 u

Temporisation Rinçage Rinçage
principal hygiénique
230 V 4 sec. 2 – 10 sec. 24 h
9 V 7 – 10 sec. 2 – 10 sec. 24 h

Minimum time spent Main flush Hygienic flush
230 V 4 sec. 2 – 10 sec. 24 h
9 V 7 – 10 sec. 2 – 10 sec. 24 h
Montage INFRA 230 V, Montage INFRA 230 V,
Montage INFRA 230 V, Assembly of INFRA 230 V
– 4–

Abb.
Leitung spülen 1
Magnetventil einsetzen 2
Netzteil einsetzen 3
Netzstecker einstecken 4
Stecker Netzteil einstecken 5
Stecker Magnetventil einstecken 6

Afb.
Leiding spoelen 1
Magneetventiel monteren 2
Transformator plaatsen 3
Netstekker aansluiten 4
Stekker transformator aansluiten 5
Stekker magneetventiel aansluiten 6

Fig.
Rincez la conduite. 1
Installez la vanne magnétique. 2
Installez le transformateur. 3
Branchez la prise du réseau. 4
Branchez la prise du
transformateur. 5
Branchez la prise de la vanne
magnétique. 6

Fig.
Flush pipe 1
Insert solenoid valve 2
Insert power pack 3
Plug in mains plug 4
Plug in power pack plug 5
Plug in solenoid valve plug 6
12
34
56
– 5–

Abb.
Elektronikmodul
anschrauben 1
Vorabsperrung öffnen 2
Netzspannung einschalten 3
Ggf. Spülzeit einstellen (1)
(Tabelle S. 10) 4
Diode leuchtet nach Inbetrieb-
nahme 1 min. bei Reflexion (2). 5
Frontplatte aufsetzen
(Funktionsprüfung durchführen S. 3)
6

Afb.
Elektronische module vastschroeven 1
Regelstopkraan opendraaien 2
Netspanning aanschakelen 3
Indien nodig spoeltijd instellen (1)
(tabel p. 10) 4
Diode brandt na ingebruikneming
1 min. door de weerkaatsing (2) 5
Frontplaat bevestigen
(functietest uitvoeren, p.3) 6

Fig.
Vissez le module électronique. 1
Ouvrez le robinet d’arrêt. 2
Mettez sous tension. 3
Si nécessaire, réglez le temps de
rinçage (tableau p. 10). (1) 4
Après la mise en service,
la diode reste allumée pendant
1 min. s’il y a une réflexion (2). 5
Fixez la plaque de finition (faites
le test de fonctionnement, p.3). 6

Fig.
Screw on electronic module 1
Open preliminary cock valve 2
Switch on power supply 3
Adjust duration of flush if required (1)
(table p. 10) 4
Diode lights up for 1 min. on
reflection after initial operation (2). 5
Attach frontplate
(carry out functionality test p. 3) 6
Inbetriebnahme INFRA 230 V, Ingebruikneming INFRA 230 V,
Mise en service INFRA 230 V, Putting the INFRA 230 V into operation
12
34
5
1
6
2
Montage INFRA Batterie, Montage INFRA -batterij,
Montage pile INFRA, Assembly of INFRA battery

Abb.
Leitung spülen 1
Magnetventil einsetzen 2
Batteriefach einschrauben 3
Batteriestecker einstecken 4
Stecker Magnetventil einstecken 5
Elektronikrahmen aufsetzen 6

Afb.
Leiding spoelen 1
Magneetventiel monteren 2
Batterijvak vastschroeven 3
Batterijstekker aansluiten 4
Stekker magneetventiel aansluiten 5
Frame van de elektronische
module bevestigen 6

Fig.
Rincez la conduite. 1
Installez la vanne magnétique. 2
Vissez le compartiment à pile. 3
Branchez la prise de la pile. 4
Branchez la prise de la vanne
magnétique. 5
Fixez le cadre du module
électronique. 6

Fig.
Flush pipe 1
Insert solenoid valve 2
Screw in battery compartment 3
Plug in battery plug 4
Plug in solenoid valve plug 5
Attach electronics frame 6
– 6–
12
34
56
Inbetriebnahme INFRA Batterie, Ingebruikneming INFRA-batterij,
Mise en service de la pile INFRA, Putting the INFRA battery into operation
– 7 –
Abb.
Vorabsperrung öffnen 1
9 V-Alkalibatterie einsetzen 2
Frontplatte aufsetzen
(Funktionstest durchführen – S. 3) 3
Ggf. Spülzeit einstellen (1)
(Tabelle S. 10) 4
Diode leuchtet nach Inbetrieb-
nahme 1 min. bei Reflexion (2) 5
Diode blinkt bei
niedrigem Batteriestand (2) 6
Afb.
Regelstopkraan opendraaien 1
9 V alkalinebatterij plaatsen 2
Frontplaat bevestigen
(functietest uitvoeren, p. 3) 3
Spoeltijd instellen (1) indien nodig (p. 10)
4
Diode brandt na ingebruik-
neming 1 min. (weerkaatsing) (2) 5
Diode knippert wanneer de
batterij bijna leeg is (2) 6
Fig.
Ouvrez le robinet d’arrêt. 1
Installez la pile alkaline 9 V. 2
Fixez la plaque de finition
(faites le test de fonctionnement, p. 3). 3
Si nécessaire, réglez le temps
de rinçage (p. 10). (1) 4
Après la mise en service,
la diode reste allumée pendant
1 min. (s’il y a une réflexion) (2). 5
La diode clignote lorsque la
pile est presque épuisée (2). 6
Fig.
Open preliminary cock valve 1
Insert 9 V alkaline battery 2
Attach frontplate
(carry out functionality test p. 3) 3
Adjust duration of flush (1) if required
(table p. 10) 4
Diode lights up for 1 min.
Reflection (2) 5
Diode flashes
if battery is low (2) 6
12
34
56
2
2
1
– 8 –
Batteriewechsel INFRA, INFRA batterij vervangen,
Remplacer la pile INFRA, INFRA battery change

Abb.
Diode blinkt bei
niedrigem Batteriestand (2) 1
Frontplatte abnehmen 2
9 V Alkalibatterie tauschen 3

Afb.
Diode knippert wanneer
de batterij bijna leeg is (2) 1
Frontplaat verwijderen 2
9 V alkalinebatterij vervangen 3

Fig.
La diode clignote lorsque
la pile est presque épuisée (2). 1
Enlevez la plaque de finition 2
Remplacez la pile alkaline 9 V. 3

Fig.
Diode flashes if battery 1
is low (2)
Remove frontplate 2
Exchange 9 V alkaline battery 3
12
3
2
– 9–
Hinweise Inbetriebnahme, Tips voor ingebruikneming,
Avis pour la mise en service, Instructions for putting into operation

Funktion: Spült nicht Maßnahme Hinweis
INFRA 230 V
Vorabsperrung geschlossen Öffnen S. 5, Abb. 2
Kein Strom (Diode leuchtet nicht) Sicherung einschalten S. 5, Abb. 3
Sensorfenster verklebt, verkratzt Reinigen, Auswechseln S. 5, Abb. 6
INFRA Batterie
Vorabsperrung geschlossen Öffnen S. 7, Abb. 1
Batterie leer Batterie wechseln S. 8, Abb. 1 – 3
Sensorfenster verklebt, verkratzt Reinigen, Auswechseln S. 7, Abb. 3

Werking: spoelt niet Maatregel Zie
INFRA 230 V
Regelstopkraan afgesloten Opendraaien p. 5, afb. 2
Geen stroom (diode brandt niet) Zekering aanschakelen p. 5, afb. 3
Vuil of krassen op het sensorvenster Reinigen, vervangen p. 5, afb. 6
INFRA-batterij
Regelstopkraan afgesloten Opendraaien p. 7 afb. 1
Batterij leeg Batterij vervangen p. 8, afb. 1 – 3
Vuil of krassen op het sensorvenster Reinigen, vervangen p. 7, afb. 3

Fonctionnement: ne rince pas Remède Voir
INFRA 230 V
Le robinet d’arrêt est fermé. Ouvrez-le. p. 5, fig. 2
Hors tension (la diode n’est pas allumée) Mettez sous tension. p. 5, fig. 3
Fenêtre du détecteur sale ou rayée Nettoyez, remplacez. p. 5, fig. 6
INFRA à pile
Le robinet d’arrêt est fermé. Ouvrez-le. p. 7, fig. 1
La pile est épuisée. Remplacez la pile. p. 8, fig. 1-3
Fenêtre du détecteur sale ou rayée Nettoyez, remplacez. p. 7, fig. 3

Function: not flushing Measure Instructions
INFRA 230 V
Preliminary cock valve closed Open p. 5, fig. 2
No power (diode not lighting) Switch on fuse p. 5, fig. 3
Sensor window soiled, scratched Clean, replace p. 5, fig. 6
INFRA battery
Preliminary cock valve closed Open p. 7, fig. 1
Discharged battery Replace battery p. 8, fig. 1 – 3
Sensor window soiled, scratched Clean, replace p. 7, fig. 3

Reichweite einstellen (3)

Bereik instellen (3)

Ajustez la portée (3).

Adjusting the range (3)
3
– 10 –
Servicehinweise, Onderhoudsvoorschriften,
Prescriptions d’entretien, Service instructions

Abb.
Vorabsperrung schließen 1
Magnetventil ausschrauben 2
Filter abspülen, ggf. mit weicher
Bürste reinigen 3

Afb.
Regelstopkraan sluiten 1
Magneetventiel losdraaien 2
Filter afspoelen, indien nodig
met een zachte borstel reinigen 3

Fig.
Fermez le robinet d’arrêt. 1
Dévissez la vanne magnétique. 2
Rincez le filtre, nettoyez-le si
nécessaire à l’aide d’une brosse douce. 3

Fig.
Close preliminary cock valve 1
Remove solenoid valve 2
Rinse filter, clean with soft brush
if necessary 3

Wassersparen: Spülzeit je nach Fließdruck und Spülmenge einstellen.

Water besparen: spoeltijd instellen naar gelang de werkdruk en het spoelvolume van uw urinoir

Economiser de l’eau: Régler le temps de rinçage compte tenu de la pression et du volume
de rinçage nécessaire pour votre urinoir.

Water conservation: Set duration of flush based on the flow pressure and flow volume.
p (bar)
V (l) 1,0 2,0 3,0 4,0 5,0
2,0 5,5 s 4,0 s 3,0 s 2,5 s 2,5 s
2,5 6,5 s 4,5 s 4,0 s 3,5 s 3,0 s
3,0 7,0 s 5,5 s 4,5 s 4,0 s 4,0 s
3,5 9,0 s 6,5 s 5,5 s 4,5 s 4,0 s
4,0 10,0 s 7,5 s 6,0 s 5,5 s 5,0 s
12
3
– 11 –
Ersatzteile und Zubehör, Wisselstukken en toebehoren, Pièces
de rechange et accessoires, Replacement parts and accessories

1 Magnetventil
2 Kartusche VERONA Urinal
3 Netzteil
4 Netzstecker
5 Batteriefach ohne Batterie
6 Montagerahmen mit Elektronikmodul
7 Infrarot-Frontplatte, verchromt
Pos. Art.-Nr.
1 01 451 00 99
2 29 416 00 99
3 01 454 00 99
4 01 319 00 99
5 01 455 00 99
6 01 453 00 99
7 23 014 06 99

1 Magneetventiel
2 Patroon VERONA urinoir
3 Transformator
4 Netstekker
5 Batterijvak zonder batterij
6 Montageframe met elektronische module
7 Infraroodfrontplaat, verchroomd

1 Vanne magnétique
2 Cartouche pour urinoir VERONA
3 Transformateur
4 Prise de réseau
5 Compartiment à pile sans pile
6 Cadre de montage avec module
électronique
7 Plaque de finition infrarouge, chromé

1 Solenoid valve
2 Cartridge VERONA urinal
3 Power pack
4 Mains plug
5 Battery compartment without battery
6 Mounting frame with electronic module
7 Infrared frontplate, chrome
1
2
3
4
4
5
6
7
Pflegehinweise, Reinigingsvoorschriften,
Prescriptions de nettoyage, Care instructions
– 12 –

Pflegehinweise:
Zur Reinigung nur milde, seifenhaltige Reinigungsmittel verwenden.
Keine kratzenden, scheuernden, alkohol-, ammoniak-, salzsäure-,
phosphorsäure- oder essigsäurehaltigen Reinigungs- oder Desinfektions-
mittel benutzen.
Keine Reinigung mit Dampfstrahlgeräten!

Reinigingsinstructies:
Gebruik bij het reinigen enkel milde, zeephoudende producten.
Gebruik geen krassende, schurende, alcohol-, ammoniak-, zoutzuur-,
fosforzuur- of azijnzuurhoudende reinigings- of desinfecterende middelen.
Gebruik nooit stoomreinigers!

Instructions de nettoyage:
N’utilisez pour le nettoyage que des produits doux à base de savon.
N’utilisez pas de détergents abrasifs, contenant de l’alcool, de l’ammoniac,
de l’acide chlorhydrique, de l’acide phosphorique ou de l’acide acétique,
ni de désinfectants. N’utilisez jamais de nettoyeurs vapeur!

Care instructions:
use mild detergents only.
Do not use scratchy or abrasive detergents or disinfectants or ones
containing alcohol, ammonia, hydrochloric acid, phosphoric acid or
acetic acid. No steam jet cleaning!
90 300 26.00 a
SCHELL GmbH & Co. KG
Armaturentechnologie
Postfach 18 40, D-57448 Olpe
Tel.: 0 27 61/8 92-0, Fax: 0 27 61/8 92-1 99
eMail:
[email protected]
Internet:
www.schell-armaturen.de

This manual suits for next models

3

Other Schell Plumbing Product manuals

Schell WALIS E 01 950 06 99 User manual

Schell

Schell WALIS E 01 950 06 99 User manual

Schell TIPUS P Instruction manual

Schell

Schell TIPUS P Instruction manual

Schell PURIS E 01 200 06 99 HD-K User manual

Schell

Schell PURIS E 01 200 06 99 HD-K User manual

Schell CELIS E HD-K User manual

Schell

Schell CELIS E HD-K User manual

Schell POLAR 03 979 06 99 Manual

Schell

Schell POLAR 03 979 06 99 Manual

Schell WBD-SC-M User manual

Schell

Schell WBD-SC-M User manual

Schell LINUS Masterbox WB-SC-M User manual

Schell

Schell LINUS Masterbox WB-SC-M User manual

Schell Masterbox WBW-E-M User manual

Schell

Schell Masterbox WBW-E-M User manual

Schell 01 181 06 99 User manual

Schell

Schell 01 181 06 99 User manual

Schell XERIS E small HD-K Operating instructions

Schell

Schell XERIS E small HD-K Operating instructions

Schell WC COMPACT II 01 194 00 99 Instruction manual

Schell

Schell WC COMPACT II 01 194 00 99 Instruction manual

Schell POLAR II 03 995 03 99 Manual

Schell

Schell POLAR II 03 995 03 99 Manual

Schell LINUS Masterbox WBW-E-M User manual

Schell

Schell LINUS Masterbox WBW-E-M User manual

Schell EDITION E 01 546 28 99 User manual

Schell

Schell EDITION E 01 546 28 99 User manual

Schell COMPACT INFRA Batterie 9 V 01 123 06 99 Guide

Schell

Schell COMPACT INFRA Batterie 9 V 01 123 06 99 Guide

Schell CELIS E 01 264 06 99 User manual

Schell

Schell CELIS E 01 264 06 99 User manual

Schell PURIS 01 362 06 99 User manual

Schell

Schell PURIS 01 362 06 99 User manual

Schell 01 230 06 99 User manual

Schell

Schell 01 230 06 99 User manual

Schell LINUS 02 162 06 99 User manual

Schell

Schell LINUS 02 162 06 99 User manual

Schell 01 230 06 99 User manual

Schell

Schell 01 230 06 99 User manual

Schell LINUS D-C-T User manual

Schell

Schell LINUS D-C-T User manual

Schell SCHELLOMAT 02 202 06 99 Operating instructions

Schell

Schell SCHELLOMAT 02 202 06 99 Operating instructions

Schell COMPACT 03 230 00 99 User manual

Schell

Schell COMPACT 03 230 00 99 User manual

Schell COMFORT 01 846 06 99 Operating instructions

Schell

Schell COMFORT 01 846 06 99 Operating instructions

Popular Plumbing Product manuals by other brands

American Standard CORNICE 0611 INSTALLATION INSTRUCTIONS CARE AND MAINTENANCE

American Standard

American Standard CORNICE 0611 INSTALLATION INSTRUCTIONS CARE AND MAINTENANCE

Stella ISOMIX IS3294 installation instructions

Stella

Stella ISOMIX IS3294 installation instructions

Englefield Hi Flow Waste installation instructions

Englefield

Englefield Hi Flow Waste installation instructions

baliv WT-220 instructions

baliv

baliv WT-220 instructions

T&S PRE-RINSE UNIT B-0113 Installation and maintenance instructions

T&S

T&S PRE-RINSE UNIT B-0113 Installation and maintenance instructions

baliv WT-400 manual

baliv

baliv WT-400 manual

Sunlighten Signature II Assembly instructions

Sunlighten

Sunlighten Signature II Assembly instructions

Moen T2701 Series manual

Moen

Moen T2701 Series manual

Blanco Contemporary Kitchen Faucet 157-097 Specifications

Blanco

Blanco Contemporary Kitchen Faucet 157-097 Specifications

Hans Grohe Metris Select M71 240 1jet 14857 Series Instructions for use/assembly instructions

Hans Grohe

Hans Grohe Metris Select M71 240 1jet 14857 Series Instructions for use/assembly instructions

Hans Grohe FixFit Porter E Series Instructions for use/assembly instructions

Hans Grohe

Hans Grohe FixFit Porter E Series Instructions for use/assembly instructions

Geberit HS50 installation manual

Geberit

Geberit HS50 installation manual

Hans Grohe Picta 13714000 Instructions for use

Hans Grohe

Hans Grohe Picta 13714000 Instructions for use

Kohler K-7127 installation guide

Kohler

Kohler K-7127 installation guide

BELLOSTA ELITE 9021 Installation instruction

BELLOSTA

BELLOSTA ELITE 9021 Installation instruction

Moen S1311 Series Specification sheet

Moen

Moen S1311 Series Specification sheet

Heritage Bathrooms Dawlish TDCC04 Installation instructions and user guide

Heritage Bathrooms

Heritage Bathrooms Dawlish TDCC04 Installation instructions and user guide

Kohler K-349 Installation and care guide

Kohler

Kohler K-349 Installation and care guide

manuals.online logo
manuals.online logoBrands
  • About & Mission
  • Contact us
  • Privacy Policy
  • Terms and Conditions

Copyright 2025 Manuals.Online. All Rights Reserved.