manuals.online logo
Brands
  1. Home
  2. •
  3. Brands
  4. •
  5. Screen Technics
  6. •
  7. Projection Screen
  8. •
  9. Screen Technics CINEMATECH User manual

Screen Technics CINEMATECH User manual

I
N
A
U
S
T
R
A
L
I
A
P
R
O
U
D
L
Y
B
U
I
L
T
1
Continued Over.../
INSTRUCTIONS - CINEMATECH Chain Drive Projection Screen
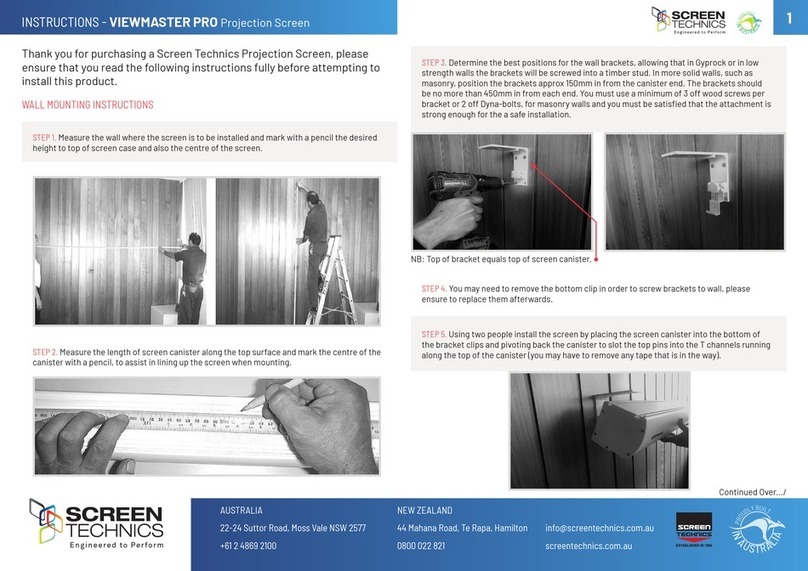
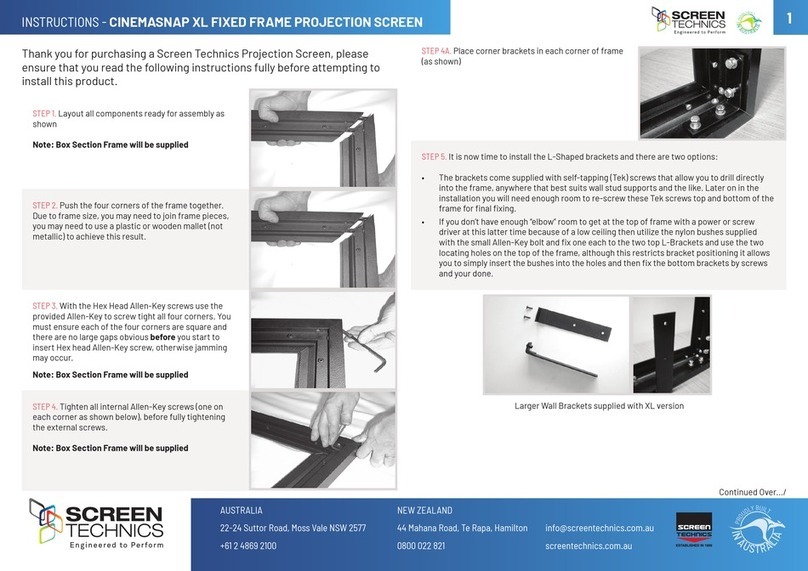
STEP 1. Measure the wall where the screen is to be installed and mark with a pencil the desired
height to top of screen case and also the centre of the screen.
STEP 4. You may need to remove the bottom clip in order to screw brackets to wall, please
ensure to replace them afterwards.
STEP 5. Using two people install the screen by placing the screen canister into the bottom of
the bracket clips and pivoting back the canister to slot the top pins into the T channels running
along the top of the canister (you may have to remove any tape that is in the way).
STEP 3. Determine the best positions for the wall brackets, allowing that in Gyprock or in low
strength walls the brackets will be screwed into a timber stud. In more solid walls, such as
masonry, position the brackets approx 150mm in from the canister end. The brackets should
be no more than 450mm in from each end. You must use a minimum of 3 off wood screws per
bracket or 2 off Dyna-bolts, for masonry walls and you must be satised that the attachment is
strong enough for the a safe installation.
Thank you for purchasing a Screen Technics Projection Screen, please
ensure that you read the following instructions fully before attempting to
install this product.
WALL MOUNTING INSTRUCTIONS

-�  SCREEn
TECHnlCS
CINEMAPRO Hanging Type Projection Screen


 
       

 

    
          
         
       
                

STEP 2. Measure the length of screen canister along the top surface and mark the centre of the
canister with a pencil, to assist in lining up the screen when mounting.
NB: Top of bracket equals top of screen canister.
Please note: The CinemaTech screen comes standard with 300mm top black leader above the image
area to assist in mounting the canister high out of the way, to achieve the best possible lay-at
results (at surface quality) you should utilise all of the leader.
It is possible to use less leader than supplied but poorer lay-at will result from this decision.
info@screentechnics.com.au
screentechnics.com.au
AUSTRALIA
22-24 Suttor Road, Moss Vale NSW 2577
+61 2 4869 2100
NEW ZEALAND
44 Mahana Road, Te Rapa, Hamilton
0800 022 821
I
N
A
U
S
T
R
A
L
I
A
P
R
O
U
D
L
Y
B
U
I
L
T
ESTABLISHED IN 1990
I
N
A
U
S
T
R
A
L
I
A
P
R
O
U
D
L
Y
B
U
I
L
T
2
INSTRUCTIONS - CINEMATECH Chain Drive Projection Screen
STEP 6. Holding screen in position tighten up Allen screw at each end and check that the top
pins have hooked into the T section of the screen canister.
• Ensure that the screen is free to descend and that any adhesive tape that has been placed
bottom of the screen (to stop movement during transport) has been fully removed.
• When installed, the opening in the canister should be down and at the back of the canister.
This will put the chain drive on the left-hand side of the screen, as viewed by the audience.
(Unless ordered otherwise).
• Cleaning of the screen is best achieved by rst dusting the surface with a feather duster,
then to remove any stubborn marks, use a small amount of mild detergent and warm water
on a clean white lint free cloth. Do not use a saturated cloth, as this may leave a watermark,
only a damp one. It is most important that you only treat the actual mark by this process
and not the entire surface.
Should you have any questions regarding the installation of our projection screens please call
our technical sales desk on +61 2 4869 2100 for assistance.
Please follow these instructions to ensure trouble free operation;
CEILING MOUNT INSTRUCTIONS
Below is a photo showing a side view using the brackets for ceiling xing, you would follow the
instructions for the wall mounting system, with the only difference being the screen is mounted
hard against the ceiling. It is important that adequate support is supplied by the ceiling
structure to support the screen and to ensure a safe installation. Never rely just on the Gyprock
for attachment.
STEP 7. Ensure projection screen case is
latched into the bracket as shown.
STEP 8. Once the screen is installed remove
the black tape from the bottom of the canister
(this tape is to prevent screen damage during
transport or installation) to free the screen for
operation.
WARNING - PLEASE READ
STEP 9. Note: due to legislative changes the
CinemaTech is now supplied with a wall cleat
so that when the screen is not in use the
chain can be tied off to prevent children from
becoming entangled with the chain - the
installation of this cleat is mandatory and
should be positioned at least 1600mm above
oor level.

Other Screen Technics Projection Screen manuals

Screen Technics CinemaSnap Series User manual

Screen Technics

Screen Technics CinemaSnap Series User manual

Screen Technics ELECTRICINEMA A User manual

Screen Technics

Screen Technics ELECTRICINEMA A User manual

Screen Technics CINEMAPRO User manual

Screen Technics

Screen Technics CINEMAPRO User manual

Screen Technics ELECTRICINEMA User manual

Screen Technics

Screen Technics ELECTRICINEMA User manual

Screen Technics ELECTRICINEMA User manual

Screen Technics

Screen Technics ELECTRICINEMA User manual

Screen Technics CINEMASNAP 235 User manual

Screen Technics

Screen Technics CINEMASNAP 235 User manual

Screen Technics MASTERFIT IP User manual

Screen Technics

Screen Technics MASTERFIT IP User manual

Screen Technics TRAPDOOR User manual

Screen Technics

Screen Technics TRAPDOOR User manual

Screen Technics ViewMaster Pro User manual

Screen Technics

Screen Technics ViewMaster Pro User manual

Screen Technics CINEMASNAP XL User manual

Screen Technics

Screen Technics CINEMASNAP XL User manual

Screen Technics ELECTRICINEMA User manual

Screen Technics

Screen Technics ELECTRICINEMA User manual

Screen Technics ELECTRICINEMA User manual

Screen Technics

Screen Technics ELECTRICINEMA User manual

Screen Technics ELECTRICINEMA 235 Guide

Screen Technics

Screen Technics ELECTRICINEMA 235 Guide

Screen Technics ELECTRICINEMA A User manual

Screen Technics

Screen Technics ELECTRICINEMA A User manual

Screen Technics ELECTRICINEMA 235 User manual

Screen Technics

Screen Technics ELECTRICINEMA 235 User manual

Popular Projection Screen manuals by other brands

TL Elektronic INTEGRA EMS TL-6760 Configuration manual

TL Elektronic

TL Elektronic INTEGRA EMS TL-6760 Configuration manual

Draper Silhouette V series Installation and operating instructions

Draper

Draper Silhouette V series Installation and operating instructions

Elite Screens Tripod Portable Series user guide

Elite Screens

Elite Screens Tripod Portable Series user guide

Harman Kardon HKTS3 owner's manual

Harman Kardon

Harman Kardon HKTS3 owner's manual

Kogan KAMTRTGRNSA user guide

Kogan

Kogan KAMTRTGRNSA user guide

Da-Lite TENSIONED LARGE COSMOPOLITAN ELECTROL Instruction book

Da-Lite

Da-Lite TENSIONED LARGE COSMOPOLITAN ELECTROL Instruction book

golmar GB2 Nexa Modular quick guide

golmar

golmar GB2 Nexa Modular quick guide

Elite Screens YARD MASTER MANUAL SERIES user guide

Elite Screens

Elite Screens YARD MASTER MANUAL SERIES user guide

Jasic EVO 2.0 EM-200CT Fitting instructions

Jasic

Jasic EVO 2.0 EM-200CT Fitting instructions

Dragonfly Acoustiweave DF-SL-160-MW Assembly/installation instructions

Dragonfly

Dragonfly Acoustiweave DF-SL-160-MW Assembly/installation instructions

DMT Fast-Setup Screen Pro manual

DMT

DMT Fast-Setup Screen Pro manual

California Sunbounce SUNBOUNCE-PRO operating instructions

California Sunbounce

California Sunbounce SUNBOUNCE-PRO operating instructions

Optoma Optoma EP550 user manual

Optoma

Optoma Optoma EP550 user manual

Optoma Ultimate Big Screen Brochure & specs

Optoma

Optoma Ultimate Big Screen Brochure & specs

Strong MDI Monarch installation manual

Strong MDI

Strong MDI Monarch installation manual

Euroscreen LEONARDO FR14 installation manual

Euroscreen

Euroscreen LEONARDO FR14 installation manual

Grandview SkyShow Series user manual

Grandview

Grandview SkyShow Series user manual

Screen Int CANALETTO ELASTIC installation manual

Screen Int

Screen Int CANALETTO ELASTIC installation manual

manuals.online logo
manuals.online logoBrands
  • About & Mission
  • Contact us
  • Privacy Policy
  • Terms and Conditions

Copyright 2025 Manuals.Online. All Rights Reserved.