manuals.online logo
Brands
  1. Home
  2. •
  3. Brands
  4. •
  5. SEA
  6. •
  7. Control Unit
  8. •
  9. SEA 23001157 User manual

SEA 23001157 User manual

GB English
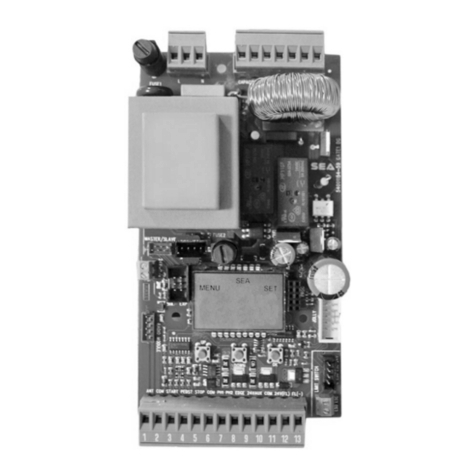
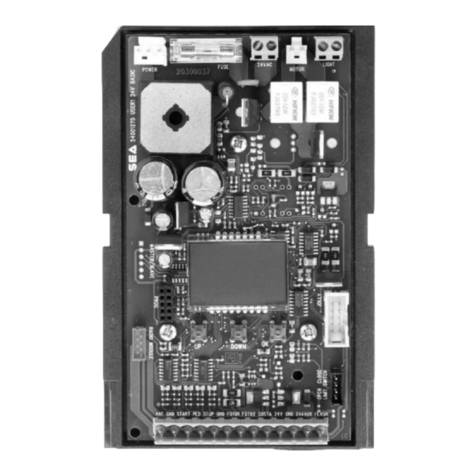
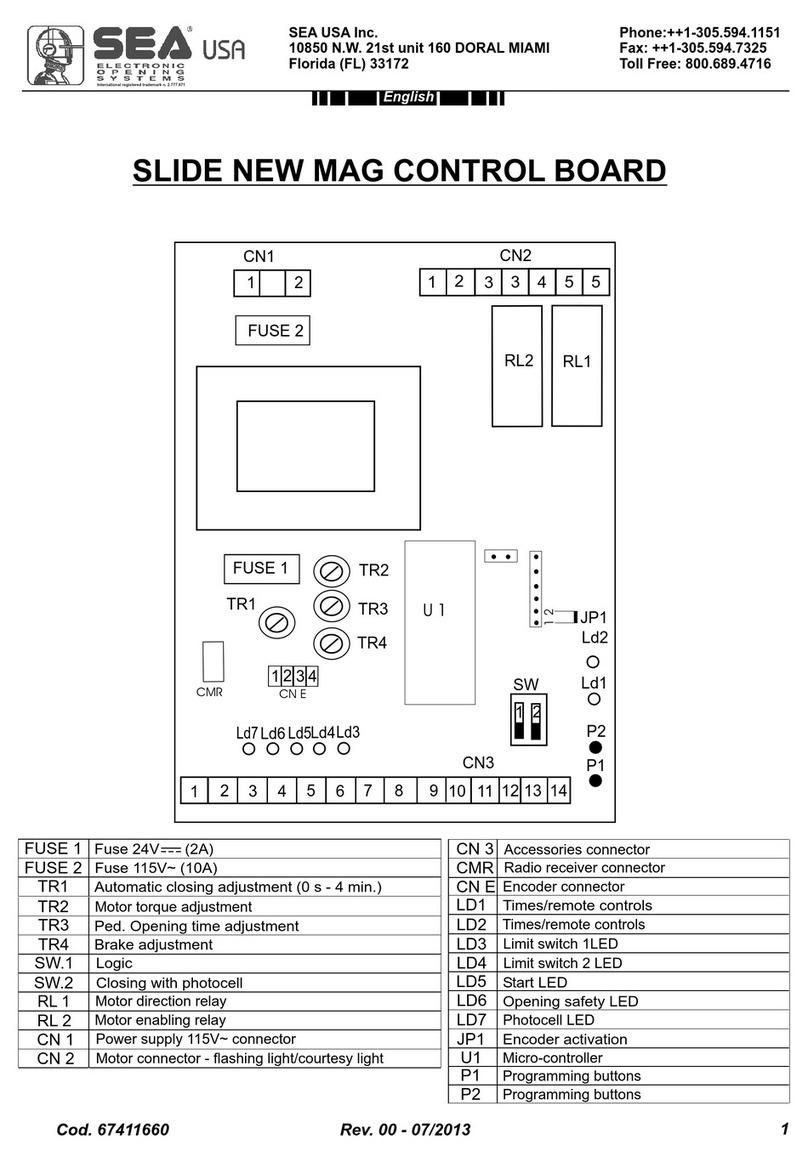
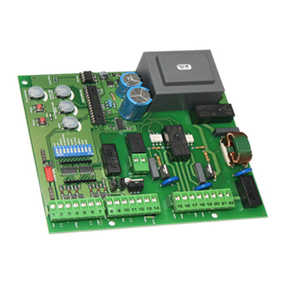
GATE 1 24V DC
AMMETER
CONTROL UNIT
CN5 = Batterycharger connector (see last page)
CN6 = Radio receiver connector
Rv1 = Motor speed regulation
Rv2 = Slow down speed regulation
Rv3 = Anti-crushing sensitivity regulation
P1 = Working time memorizing push button/start
DIP = Dip switch for functions setting
F1 = Power supply and motor fuse (15A) Saturn-10A Taurus
F2 = Accessories fuse (2A)
RL1 - RL2 = Relay motor direction
U1 = Microcontroller
67410618
http://www.seateam.com
e-mail:[email protected] (Uff. Comm.le)
[email protected] (Uff. Tecnico)
SEA S.r.l.
DIREZIONE E STABILIMENTO:
Zona industriale 64020 S.ATTO Teramo - (ITALY)
Tel. 0861 588341 r.a. Fax 0861 588344
Sistemi Elettronici
di Apertura Porte e Cancelli
International registered trademark n. 804888
®
RL1RL1
RL2RL2
CN1CN1
CN3CN3
F2F2
Rv1Rv1
Rv2Rv2
Rv3Rv3
P1P1
U1U1
DIPDIP
LED1
D3LE
LED4
D5
LE
LD
6
E
LED8
D9LE
1 2 3 4 5 6 7 8 9 10
1 2 3 4 5 6
1 2 3 4
CN4CN4
F1F1
CN5CN5
CN6CN6
CGNDCGND
5 6
(23001157)
LED1 = Photocell
LED2 = Stop
LED3 = Start
LED4 =
LED5 =
LED6 = Pedestrian or Timer
LED8 = Power supply
LED9 = Programming
CN1 = Transformer motor connector
CN3 = Inputs/outputs 24V connector
CN4 = Flashing lamps 24V connector
CGND=
Limit switch in opening
Limit switch in closing
Earth connector
11/52
LED2
Rev. 09 - 12/2009
Intelligent Security & Fire Ltd.
English
http://www.seateam.com
e-mail:[email protected] (Uff. Comm.le)
[email protected] (Uff. Tecnico)
SEA S.r.l.
DIREZIONE E STABILIMENTO:
Zona industriale 64020 S.ATTO Teramo - (ITALY)
Tel. 0861 588341 r.a. Fax 0861 588344
Sistemi Elettronici
di Apertura Porte e Cancelli
International registered trademark n. 804888
®
ARRANGEMENTS
Read attentively the installation manual as it gives important indications concerning safety, installation, use
and maintenance.
Installation, maintenance, reparation, controls and eventual putting out of function of the product must be
executed by qualified staff only.
For the security of people it is important to follow with attention all the advises and instructions in
this manual.Awrong installation or a wrong use of the product can cause sever damages to people.
The max. length of the power supply cable between control unit and motors is 10m, use cables with
2
2,5 mm section.
Use wirings with double insulated cables (cables with sheath) up to the immediate proximities of the
terminals especially for the power supply cable (230V ).
The control unit must not be used by people (including children) whose physical, sensory or mental ability is
reduced, or with lack of experience or knowledge, unless they are guarded or have been instructed on how
to use the control unit by a person respondsible for their safety. Children must be guarded to make sure that
they don't play with the control unit.
Foresee on the power supply net of the automation a device that assures the complete omnipolar
disconnection from the net, with a distance of opening of the contacts on each pole of at least 3mm. Those
devices of disconnection have to be foreseen on the power supply net accordingly to the rules of installation,
and they have to be directly connected to the power supply terminals.
It is necessary to keep in adequate distance (at least 2.5 mm in the air) the low tension conductors (230V )
from the very low tension conductors (SELV) or to use a suitable sheath of at least 1 mm which supplies an
additional insulation.
Make sure that during installation the power supply and interconnection cables cannot come into contact
with pointed or sharp extremities.
Dispose of the package materials (plastics, carton, polistirene, etc.) respecting the laws in order. Keep nylon
and polistirene bags out of the reach of children.
Save these instructions for further information attaching them to the technical documents.
This product has been projected and built exclusively for the use described in this instruciton manual.
Uses not indicated in this manual could damage the product and be source of danger.
SEA declines all responsibility for improper or different use from the one for which it has been planed and
described in the present manual.
Don't install the product in explosive atmospheres.
SEA declines all responsibility for the non-observance of the good technique in the construction of closings
(doors, gates, etc.), as well as for the deformations which could occure during the use.
Remove the power supply before any intervention on the installation. Disconnect also possible battery
buffers if present.
~
~
12/52
67410618 Rev. 09 - 12/2009
Intelligent Security & Fire Ltd.
Make sure that the earth installation has been correctly made: connect all the metallic parts of the closing
(doors, gates, etc.) and all the components of the installation provided with earth terminals.
Apply all the safety devices (photocells, sensitive edges, etc.) which are necessary to protect the area from
dangers of crushing, conveying, cutting.
SEA declines all responsibility for safety and for the correct functioning of the automation if parts of other
producers are used.
Use only original parts for any maintenance or reparation.
Do not modify the parts of the automation if not explicitly authorized by SEA.
Instruct the user of the installation on the applied command systems and how to manually open the gate in
case of emergency.
What is not explicitly contained in these instructions is not permitted.
English
http://www.seateam.com
e-mail:[email protected] (Uff. Comm.le)
[email protected] (Uff. Tecnico)
SEA S.r.l.
DIREZIONE E STABILIMENTO:
Zona industriale 64020 S.ATTO Teramo - (ITALY)
Tel. 0861 588341 r.a. Fax 0861 588344
Sistemi Elettronici
di Apertura Porte e Cancelli
International registered trademark n. 804888
®
13/52
67410618 Rev. 09 - 12/2009
Intelligent Security & Fire Ltd.
1 2 3 4 5 6 7 8 9 10
2 V
4
e ar
P destrian St t
o l
Ph toce l
AS T R T
CN3
CONNECTIONS
Working Logics
Safety Reverser
Closing with Photocell
Pre-flashing
Motor direction
1122334455667788
ONON
ON= Working function
DIP
1 2 3 4 5 6
m
Warning a p
L
2 V 3W max4
CN4
0V
ON
C MMO
OPST
me
Ti r/
O N
CMMO
Fahn Lmp
lsig a
241 W x
V 5ma
Photocell in Opening
fTrans ormer
22V~
Litstch1
mi wi
Heavy Gate / Light Gate
English
14/52
http://www.seateam.com
e-mail:[email protected] (Uff. Comm.le)
[email protected] (Uff. Tecnico)
SEA S.r.l.
DIREZIONE E STABILIMENTO:
Zona industriale 64020 S.ATTO Teramo - (ITALY)
Tel. 0861 588341 r.a. Fax 0861 588344
67410618
Li ttch2
mi swi
1 2 3 4
CN1
M
5 6
24V
ot S
F o ync
~
Sistemi Elettronici
di Apertura Porte e Cancelli
International registered trademark n. 804888
®
Note: the Photo Sync is a 24V~ connection to feed the syncronized photocells.
CGNDCGND
Courtesy lamp
24V 15W max
Rev. 09 - 12/2009
Intelligent Security & Fire Ltd.
1 2 1 2 1 2 1 2
LOGIC WITH STEPBY STEPCOMMANDS TYPE 1
The repeated start executes the following sequence: open-stop-close-stop-open-stop-
close
SETTING OF WORKING LOGICS
AUTOMATIC LOGIC (automatic closing)
The start executs only an opening when it’s closed, in opening it stops and at the following
start impulse it closes, during pause a start impulse closes immediately, in closing it re-
opens. After the pausing time it re-closes automatically.
CONDOMINIUM LOGIC (automatic closing)
The start only opens when the automation is closed, in opening it’s not accepted, in pause
it’s not accepted (the counting of the set time continues), in closing it opens again.
After the pausing time it re-closes automatically.
OTHER FUNCTIONS
ONON
LOGIC WITH STEPBY STEPCOMMANDS TYPE 2
The repeated start executes the following sequence: open-stop-close- open-stop-close-
......
INTERVENTION OF THE SAFETY REVERSER IN CLOSING
OFF: It re-opens again and if there is the automatic closing is programmed after the pause
time it closes. If, after two attempts, the closing has not been completed, the sliding door
stays opened and waits for commands.
ON: It re-opens and waits for commands.(Not usable with condominium logic as a start
impulse during pause is not accepted).
3
PHOTOCELL IN OPENING
OFF: Photocell only in closing, in case of signal interruption the movement is reversed.
ON: Photocells activ in both opening and closing, in case of obscuration in opening the
movement will be interrupted and the gate continues to open when the photocells are free
again, while in closing the mouvement is inverted only when the photocells are free.
4
5HEAVY GATE/ LIGHT GATE
OFF: Administration of a light gate of up to 400 Kg (
).
ON: Administration of a heavy gate with weight over 400 kg (
).
Furthermore:
OFF: Pedestrian opening time 12 sec. and anti-squeezing less sensible. (On light gates it is
recommended to set on OFF).
ON: Pedestrian opening time 14 sec. and anti-squeezing more sensible. (On heavy gates it is
recommended to set on ON).
Taurus 400 24V or Saturn 600 with less
than 400 Kg weight
Saturn 24V 1500 or Saturn 600
with over 400 Kg weight
6
67410618
ONON
ONON
ONON
ONON
English
15/52
http://www.seateam.com
e-mail:[email protected] (Uff. Comm.le)
[email protected] (Uff. Tecnico)
SEA S.r.l.
DIREZIONE E STABILIMENTO:
Zona industriale 64020 S.ATTO Teramo - (ITALY)
Tel. 0861 588341 r.a. Fax 0861 588344
Sistemi Elettronici
di Apertura Porte e Cancelli
International registered trademark n. 804888
®
CLOSING FUNCTIONAFTER THE INTERVENTION OF THE PHOTOCELL
ON: If a pause time is programmed it will be reduced to 3 seconds when the photocells are
interrupted in opening or in pause (only in condominium logic).
Nota1:The pedestrian opening works like the other functioning logics.
Nota2:Astart (totally open), in pedestrian opening, causes the complete opening of the gate.
Rev. 09 - 12/2009
Intelligent Security & Fire Ltd.
PRE-FLASHING
OFF: The flashing lamp activates simultaneously with the motor start.
ON: Pre-flashing which anticipates every movement of 3 sec. except of the reversing, due to
the intervention of the safeties.
7
8
INPUTS/OUTPUTS DESCRIPTION
PHOTOCELL (N.C.)
Input N.C., When the signal is interrupted during closing the gate re-opens immediately.
With DIP 4 on ON the intervention of the photocells causes the interruption of the movement also in opening
and re-open immediately after their disengagement.
STOP (N.C.)
START (N.O.)
Input to command the automation in accordance with DIP1 and 2
IMPORTANT NOTICE:All the N.C. contacts which are not used must be linked with the common.
FLASHING LAMP:
WARNING LAMP:
Follows the same logic of the flashing lamp
Stops the automation whenever it is pressed.
Astart impuls resets the movement.
During the opening phase, it flashes once a second; during the closing phase, it flashes twice a second.
When the automation is opened and in automatic logic, the flashing lamp stays on during the whole pause
time.
If DIP 7 is set on ON a pre-flashing of 3 seconds will be executed before the door starts to move.
TIMER / PEDESTRIAN (to be used as clock input)
Ashort impuls causes the pedestrian opening, a closed contact with clock causes the opening with timer.
COURTESY LIGHT:
Remains turned on during the whole movement of the motors.
ONON
ONON
English
1) PEDESTRIAN OPENING (N.O.)
Opens for more or less one meter in accordance to the set logic, automatic or condominium. After the set
pausing time, it re-closes automatically.
2) TIMER (N.O.) (to be used as clock input)
Input only for opening. Activated in Automatic and Condominium Logics it does
not close until it is not disengaged.
16/52
http://www.seateam.com
e-mail:[email protected] (Uff. Comm.le)
[email protected] (Uff. Tecnico)
SEA S.r.l.
DIREZIONE E STABILIMENTO:
Zona industriale 64020 S.ATTO Teramo - (ITALY)
Tel. 0861 588341 r.a. Fax 0861 588344
67410618
Sistemi Elettronici
di Apertura Porte e Cancelli
International registered trademark n. 804888
®
MOTOR DIRECTION
Motor limit switch in closing in clockwise direction.
Motor limit switch in closing in anticlockwise direction.
Rev. 09 - 12/2009
Intelligent Security & Fire Ltd.
SETTINGS
Rv1
Rv2
Rv3
MOTOR SPEED REGULATION
Trimmer turned completely anti-clockwise = minimum speed
Trimmer turned completely clockwise = maximum speed
ATTENTION: Pay very much attention, when adjusting the maximum slowdown speed,
as it must be apropriated to the mechanical structure of the gate on which the
automation is installed and respect the security laws in force.
SLOW DOWN SPEED REGULATION
Trimmer turned completely anti-clockwise = minimum speed
Trimmer turned completely clockwise = maximum speed
ATTENTION: Pay very much attention, when adjusting the maximum slowdown speed,
as it must be apropriated to the mechanical structure of the gate on which the
automation is installed and respect the security laws in force.
REGULATION OF INTERVENTION THRESHOLD OF THE ANTI-CRUSHING DETECTOR
Trimmer turned completely anti-clockwise = maximum sensitivity (minimum thrust in case of
obstacle).
Trimmer turned completely clockwise = minimum sensitivity (maximum thrust in case of
obstacle).
After two consecutive interventions of the anti-crushing detector, even if in automatic logic, the
automation rests opened waiting for commands.
Adjust the sensitivity according to the security laws in force.
NOTICE: The setting of Trimmers and Dip Switches are read when the automation stops.
Do not hold the slowdown speed on the minimum with ammeter sensitivity on the minimum.
P1P1
English
http://www.seateam.com
e-mail:[email protected] (Uff. Comm.le)
[email protected] (Uff. Tecnico)
SEA S.r.l.
DIREZIONE E STABILIMENTO:
Zona industriale 64020 S.ATTO Teramo - (ITALY)
Tel. 0861 588341 r.a. Fax 0861 588344
67410618
Sistemi Elettronici
di Apertura Porte e Cancelli
International registered trademark n. 804888
®
17/52
After having checked the right sliding of the gate and the electric connexions on the imputs/outputs, execute
the following procedures:
1.Release the gate and put it manually in closing.
2.Restore the mechanical stop and manually move the gate until the lock has mechanically re-engagement.
3. Power supply the control unit keeping pressed P1 for 3 sec. until the motor starts in closing or in opening.
4. During closing /opening phase push P1 at the point where you want to fix the beginning of the slowdown.
5. At the end of the opening/closing phase the calculation of the pausing time will begin, now attend the
desired pausing time and press pushbutton P1 again (every flash of the programming led corresponds to
more or less 1 sec. of pausing time).
6. Now the closing/opening will be executed, during this phase push P1 again at the point where you want
to fix the beginning of the slowdown in closing/opening.
7. Now the gate will reach the limit switch of closing/opening and will automatically finish the learning.
If at the end of the selflearning the gate is open instead of closed set DIP8 on ON.
Note: If you want to exclude the slowdown skip the phases 4 and 6 during programming.
Keep pressed while power suppling the control unit to start the selfprogramming procedure.
Make sure that the gate during programming phase correctly reaches both limit switches. If
this does not happen, increase the slowdown speed and/or decrease the ammeter
sensitivity and repeat the self-programming starting from point 3.
SELF-PROGRAMMING PROCEDURE OF THE CONTROL UNIT
Rev. 09 - 12/2009
Intelligent Security & Fire Ltd.
CONNECTION OF BATTERIES AND BATTERYCHARGER CARD (OPTIONAL)
GATE 1 24V CONTROL UNIT
BATTERYCHARGER
CARD
+
-
12V
2Ah min.
Battery 1
12V
2Ah min.
Battery 2
+
-
+
-
http://www.seateam.com
e-mail:[email protected] (Uff. Comm.le)
[email protected] (Uff. Tecnico)
English
SEA S.r.l.
DIREZIONE E STABILIMENTO:
Zona industriale 64020 S.ATTO Teramo - (ITALY)
Tel. 0861 588341 r.a. Fax 0861 588344
67410618
Sistemi Elettronici
di Apertura Porte e Cancelli
International registered trademark n. 804888
®
1 2 3 4 5 6 7 8 9 10
1 2 3 4 5 6
1 2 3 4
CN5CN5
5 6
CGNDCGND
18/52
Rev. 09 - 12/2009
Intelligent Security & Fire Ltd.
http://www.seateam.com
e-mail:[email protected] (Uff. Comm.le)
[email protected] (Uff. Tecnico)
English
SEA S.r.l.
DIREZIONE E STABILIMENTO:
Zona industriale 64020 S.ATTO Teramo - (ITALY)
Tel. 0861 588341 r.a. Fax 0861 588344
Sistemi Elettronici
di Apertura Porte e Cancelli
International registered trademark n. 804888
®
RL1RL1
RL2RL2
CN1CN1
CN3CN3
F2F2
Rv1Rv1
Rv2Rv2
Rv3Rv3
P1P1
U1U1
DIPDIP
EDL 1
DL E 3
LED4
ED
L 5
EDL 6
LED8
LED9
1 2 3 4 5 6 7 8 9 10
1 2 3 4 5 6
1 2 3 4
CN4CN4
F1F1
CN5CN5
CN6CN6
CGNDCGND
5 6
Filter
CN3CN3
1 2 3 4 5 6 7 8 9 10
CN1CN1
1 2 3 4 5 6
Ferrite
24V~
Brown
GY
Blue
230V~ o 115V~
Brown
Blue
Brown
GY
Blue
Black
Transformer
KIT FILTER
19/52
67410618 Rev. 09 - 12/2009
Intelligent Security & Fire Ltd.
SAFETY PRECAUTIONS
All electrical installation work should conform to current regulations.
A16A- 0,030Adifferential switch must be incorporated into the source of the gate main electrical supply and
the entire system must be properly earth bonded.
Remember to separate mains (230/115 V) carrying cables from low voltage control cables.
SPARE PARTS
To obtain spare parts contact:
SEAs.r.l. ZONAInd.le, 64020 S.ATTO Teramo Italia
INTENDED USE
The electronic control unit GATE 1 24V AMMETER has been planned to be used exclusively as a control
device for sliding gates, swing gates, garage-doors, folding doors, barriers.
SAFETYAND ENVIRONMENTAL COMPATIBILITY
We recommend not to spoil the environment with product and circuit packing material.
STORAGE
When being transported this product must be properly packaged and handled with care.
MAINTENANCEAND OUT OF SERVICE
The decommission and maintenance of this unit must only be carried out by specialised and authorised
personnel.
LIMIT OF GUARANTEE
The GATE 1 24V AMMETER electronic control unit is guaranteed for a period of 24 months. The guarantee
period starts from the date stamp printed on the unit. The GATE 1 24V AMMETER guarantee will be void if
the unit has been incorrectly installed, not used for the purpose intended, tampered with or modified in any
way. The validity of this guarantee only extends to the original purchaser of the unit.
NOTE: THE MANUFACTURER CAN NOT BE DEEMED RESPONSIBLE FOR ANY DAMAGE OR
INJURY CAUSED BYIMPROPER USE OF THIS PRODUCT.
SEAreserves the right to do changes or variations that may be necessary to its products with no obligation to
notice.
STORAGE TEMPERATURES
Tmin Tmax Humiditymin Humiditymax
-40 °C +85 °C 5% no condensation 90% no condensation
English
http://www.seateam.com
e-mail:[email protected] (Uff. Comm.le)
[email protected] (Uff. Tecnico)
SEA S.r.l.
DIREZIONE E STABILIMENTO:
Zona industriale 64020 S.ATTO Teramo - (ITALY)
Tel. 0861 588341 r.a. Fax 0861 588344
67410618
CORRECT DISPOSAL OF THIS PRODUCT (WASTE ELECTRICAL & ELECTRONIC
EQUIPMENT) - EUROPE ONLY
(Applicable in the European Union and other European countries with separate collection systems)
This marking shown on the product or its literature, indicates that it should not be disposed with other
household wastes at the end of its working life. To prevent possible harm to the environment or
human health from uncontrolled waste disposal, please separate this from other types of wastes and
recycle it responsibly to promote the sustainable reuse of material resources.
Household users should contact either the retailer where they purchased this product, or their local
government office, for details of where and how they can take this item for environmentally safe
recycling.
Sistemi Elettronici
di Apertura Porte e Cancelli
International registered trademark n. 804888
®
20/52
Rev. 09 - 12/2009
Intelligent Security & Fire Ltd.

Other SEA Control Unit manuals

SEA GATE 1 DG R1 User manual

SEA

SEA GATE 1 DG R1 User manual

SEA GATE 1 DG R2BF User manual

SEA

SEA GATE 1 DG R2BF User manual

SEA SWING 2 User manual

SEA

SEA SWING 2 User manual

SEA GATE 2 User manual

SEA

SEA GATE 2 User manual

SEA GATE 2 - 24V PLUS User manual

SEA

SEA GATE 2 - 24V PLUS User manual

SEA USER 1 - 24v DG R1 User manual

SEA

SEA USER 1 - 24v DG R1 User manual

SEA GATE 1 DG R2BF User manual

SEA

SEA GATE 1 DG R2BF User manual

SEA USER 2 24V DG ALL IN User manual

SEA

SEA USER 2 24V DG ALL IN User manual

SEA SLIDE DG R2F User manual

SEA

SEA SLIDE DG R2F User manual

SEA Orion User manual

SEA

SEA Orion User manual

SEA GATE 2 User manual

SEA

SEA GATE 2 User manual

SEA SLIDE NEW MAG User manual

SEA

SEA SLIDE NEW MAG User manual

SEA GATE 2 DG R1B User manual

SEA

SEA GATE 2 DG R1B User manual

SEA GATE 1 DG R1 User manual

SEA

SEA GATE 1 DG R1 User manual

SEA UNIGATE 1I User manual

SEA

SEA UNIGATE 1I User manual

SEA PRE-GATE User manual

SEA

SEA PRE-GATE User manual

SEA USER 1 - 24v DG R1 User manual

SEA

SEA USER 1 - 24v DG R1 User manual

SEA 9521 User manual

SEA

SEA 9521 User manual

SEA SWING 2 DG R2F User manual

SEA

SEA SWING 2 DG R2F User manual

SEA GATE 1 DG R2BF User manual

SEA

SEA GATE 1 DG R2BF User manual

SEA USER 2 24V DG R1B ALL-IN User manual

SEA

SEA USER 2 24V DG R1B ALL-IN User manual

SEA USER 1-24V User manual

SEA

SEA USER 1-24V User manual

SEA GATE 2 DG R1B User manual

SEA

SEA GATE 2 DG R1B User manual

SEA CUBE R. NW User manual

SEA

SEA CUBE R. NW User manual

Popular Control Unit manuals by other brands

ABB 500 Series Builder's guide

ABB

ABB 500 Series Builder's guide

Honeywell VISTA user guide

Honeywell

Honeywell VISTA user guide

YOKOGAWA F3LR02-0N user manual

YOKOGAWA

YOKOGAWA F3LR02-0N user manual

VIPA SLIO FM 050-1BB00 manual

VIPA

VIPA SLIO FM 050-1BB00 manual

Harman AKG AMM 10 User instructions

Harman

Harman AKG AMM 10 User instructions

Grundfos AR Installation and operating instructions, supplement

Grundfos

Grundfos AR Installation and operating instructions, supplement

Allen-Bradley 160-RS1 user manual

Allen-Bradley

Allen-Bradley 160-RS1 user manual

DoorHan DCUH-1 manual

DoorHan

DoorHan DCUH-1 manual

AMCI 3502 manual

AMCI

AMCI 3502 manual

Nordson EFD 754V-SS installation guide

Nordson EFD

Nordson EFD 754V-SS installation guide

KONTRONIK POWERJAZZ Operation manual

KONTRONIK

KONTRONIK POWERJAZZ Operation manual

Tews Technologies TPMC118-SW-95 user manual

Tews Technologies

Tews Technologies TPMC118-SW-95 user manual

Armstrong Emech F3 Installation, operation & maintenance manual

Armstrong

Armstrong Emech F3 Installation, operation & maintenance manual

DAB DCONNECT BOX2 Instruction for installation and maintenance

DAB

DAB DCONNECT BOX2 Instruction for installation and maintenance

Exodraft EBC22 Instructions for fitting, installation and operation

Exodraft

Exodraft EBC22 Instructions for fitting, installation and operation

ARRI ERM-2400 user manual

ARRI

ARRI ERM-2400 user manual

Savio K6002 operating manual

Savio

Savio K6002 operating manual

Dasan TMS3.0 installation manual

Dasan

Dasan TMS3.0 installation manual

manuals.online logo
manuals.online logoBrands
  • About & Mission
  • Contact us
  • Privacy Policy
  • Terms and Conditions

Copyright 2025 Manuals.Online. All Rights Reserved.